Vertex
Overview
Vertex is an end-to-end tax software solution that automates tax compliance for businesses of any size and type. The software manages tax operations for your business including tax determination and application, data insights, and much more.
You can integrate your Chargebee site with Vertex to automate tax application for your Chargebee invoices and credit notes. You can sync your invoices and credit notes to Vertex and generate reports.
Note:
To avoid unnecessary API calls to the tax system for zero-value invoices, and to optimize your usage and reduce associated fees. Reach out to support@chargebee.com for assistance.
Important
- We recommend that you test the integration on your Chargebee TEST site before configuring it on the LIVE site.
- Chargebee currently integrates with the Vertex REST APIs v2, a standard version that supports O Series Cloud(OSC), Vertex On-demand(VOD), as well as On-Premise.
Supported Countries
The Vertex application, and consequently the Chargebee-Vertex integration, is available to users in the United States (US), Canada (CA), the European Union (EU), Australia (AU), India (IN), Singapore (SG), and the United Kingdom (GB). You can contact support and raise a request with us for other countries.
Note:
Chargebee is Personal Identifiable Information (PII) compliant and requires the tax providers to be PII compliant as well. Chargebee shares your confidential PII data with Vertex for tax calculation.
Sync Overview
The following data is synced between Vertex and Chargebee for tax automation on your Chargebee invoices and credit notes:
- Invoices and Credit notes are synced from Chargebee to Vertex as Transactions.
- Tax rates are synced from Vertex to Chargebee.
Prerequisites
Before integrating your Chargebee site with Vertex, ensure that the following prerequisites are verified on respective applications:
Chargebee
-
Organization Address: The organization address that is configured in your Chargebee site is used as the origin address for tax calculation by Vertex. Ensure that your organization address in Chargebee is added and up-to-date. You can verify and update your organization address on your Chargebee site by navigating to Settings > Configure Chargebee > Business Profile.
-
Customers' Address for Tax determination:
- For physical goods, Chargebee uses your customers' shipping addresses to calculate tax. If the shipping address is unavailable, the billing address is used.
- For digital goods, Chargebee uses your customers' billing address to calculate tax.
Note:
- If you're using Hosted Pages, ensure you set up the following:
- Navigate to Settings > Configure Chargebee > Checkout & Portal > Fields and enable the Shipping/Billing Address fields.
- Mark the fields as mandatory in the hosted pages.
Vertex
- Sign up and set up your Vertex Account. Refer to Vertex User guide to learn about setting up your account.
- Tax Payers: You must configure your Tax Rates and Jurisdictions in your Vertex account to capture what you want to tax and where, based on your nexus.
- Vertex O Series Cloud Client Credentials: You must retrieve the client credentials from your Vertex account to connect the two applications. If you are using a Vertex Cloud account, follow these steps below to retrieve Client Credentials for Chargebee:
- Login to your Vertex account.
- Click Settings > View all Credentials > Create a Credential.
- On the Create a Credential page, select the REST API for O Series Calculation under API this credential will map to, specify the Partition that this credential will map to, add a description and click Save the Credential.
- Copy the Client Id and Client Secret that gets displayed and store them safely for later use.
- Copy your Vertex Company Code by navigating to My Enterprise > Tax Payers > Code.
- Vertex On-demand Client Credentials: If you are using a Vertex On-demand account, follow the steps below to retrieve Client Credentials for Chargebee:
- Login to your Vertex account.
- Click System > Security > Client Credentials > Add.
- On the Add Client Credential page, specify a Service Account Name, Credential expiry, and Token expiry details and click Save.
- Copy the Client Id and Client Secret that gets displayed and store them safely for later use.
- Copy your Vertex Company Code by navigating to My Enterprise > Tax Payers > Code.
- Connector URL: For On-demand and On-premise Vertex account, your connector URL will be of this pattern - https://clientname.ondemand.vertexinc.com. For example, if the client name is Acme, the URL will be https://acme.ondemand.vertexinc.com.
Note:
Contact the tech lead within your organization or your tech support from Vertex for assistance with retrieving the above details from your Vertex account.
Configuration
Following are the steps to integrate Vertex account with your Chargebee site:
- Connect Vertex account with Chargebee site
- Configure Tax Codes for your Plans and Addons
- Configure Customer Tax Exemptions
- Validate addresses for existing customers
- Enable Vertex as mode of tax calculation for taxable region - United States
Connecting Vertex Account with Chargebee Site
Once the Vertex app is enabled on your Chargebee site following your request, follow the steps below to connect the applications:
-
Login to your Chargebee site and click Apps > Go to Marketplace > Vertex.
-
On the Vertex configuration page, click Get Started if you already have an Vertex account, or click Sign up to create a new account and continue.
-
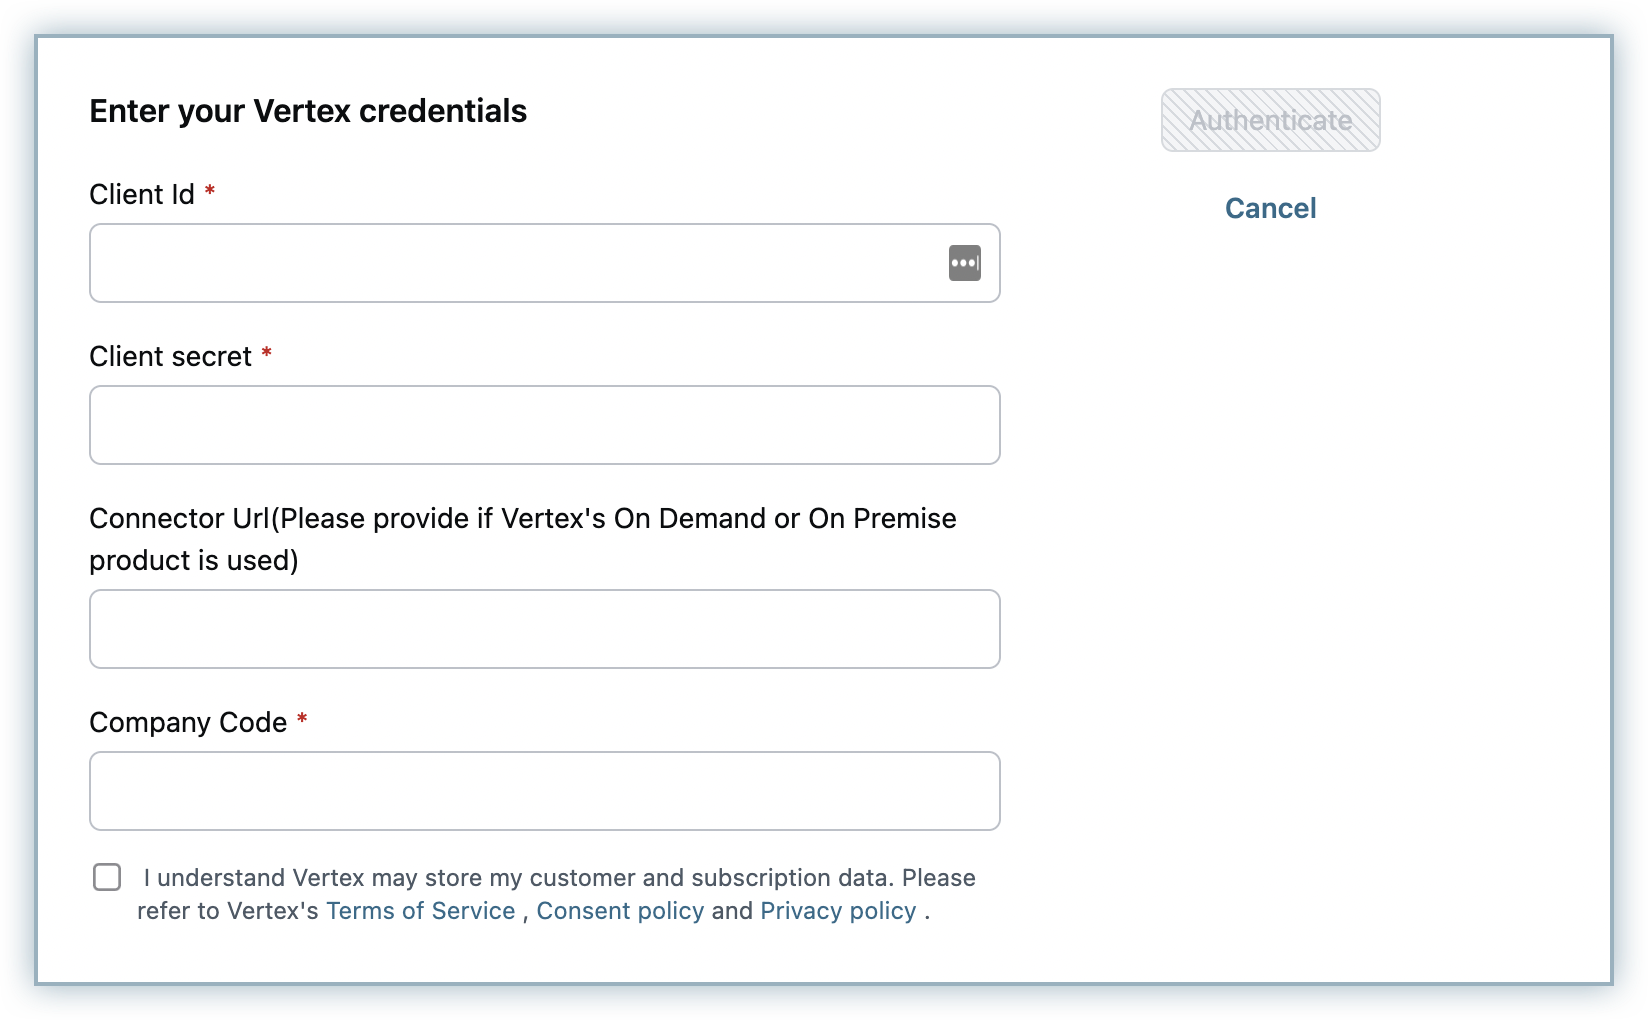
Enter your Vertex credentials by specifying the Client ID, Client Secret, Connector URL, and Company Code that you retrieved from Vertex for Chargebee. Click the "I understand Vertex.." checkbox for affirmation and click Authenticate.
-
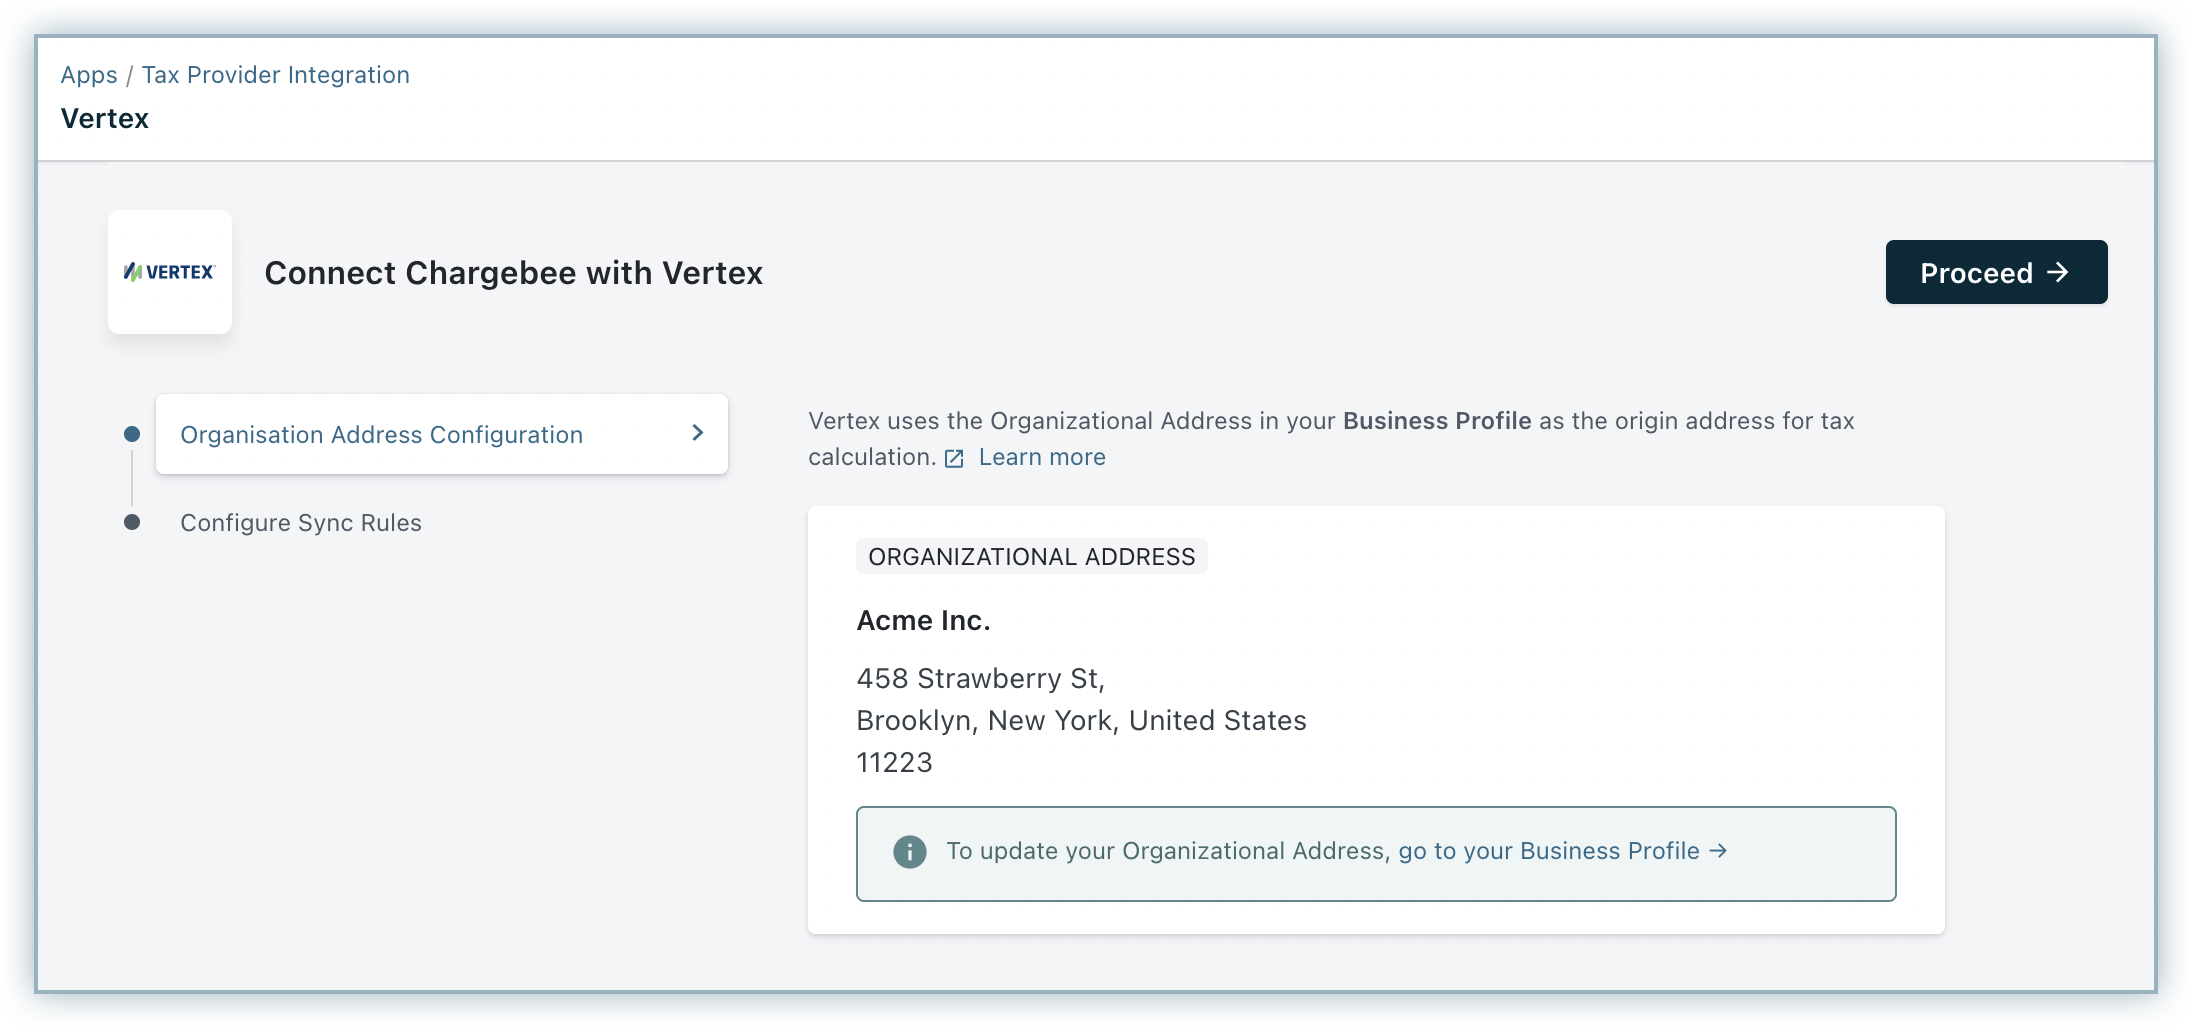
Enter or confirm your organization address. Chargebee auto-populates the address that is specified in your settings, you can change this if required or click Proceed.
-
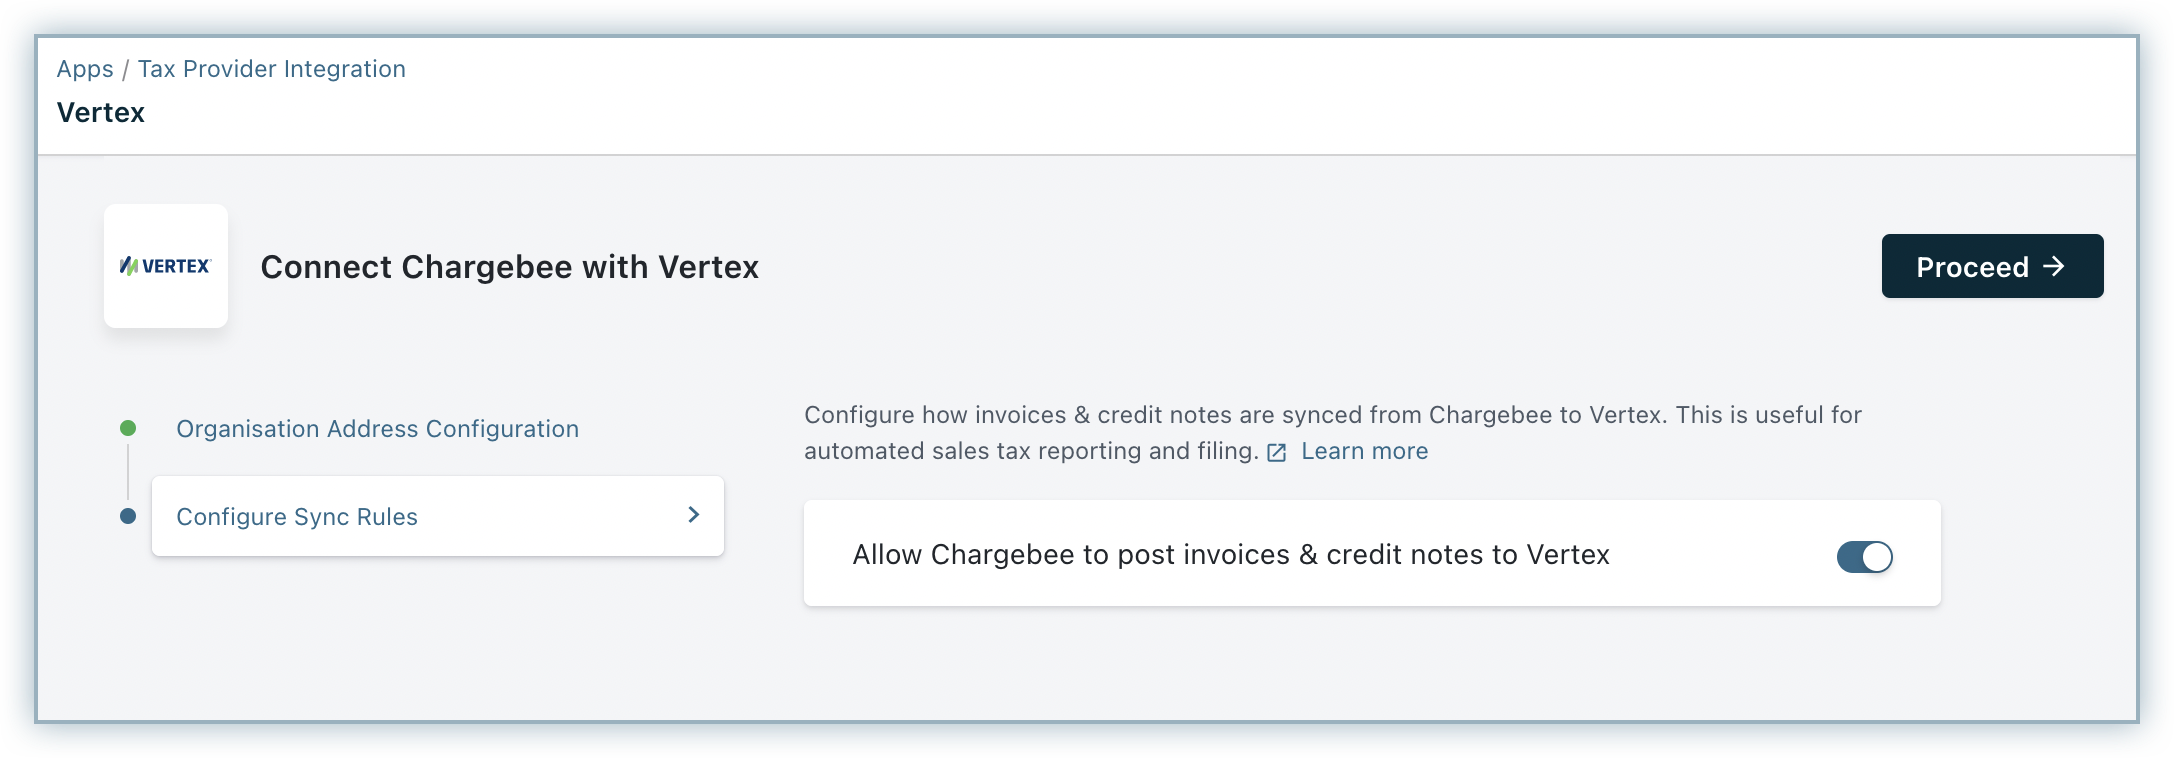
In Configure Sync Rules, enable the Allow Chargebee to post invoices & credit notes to Vertex toggle to allow Chargebee to sync invoices and credit notes to Vertex.
-
Click Proceed.
The Vertex account is successfully connected with your Chargebee site.
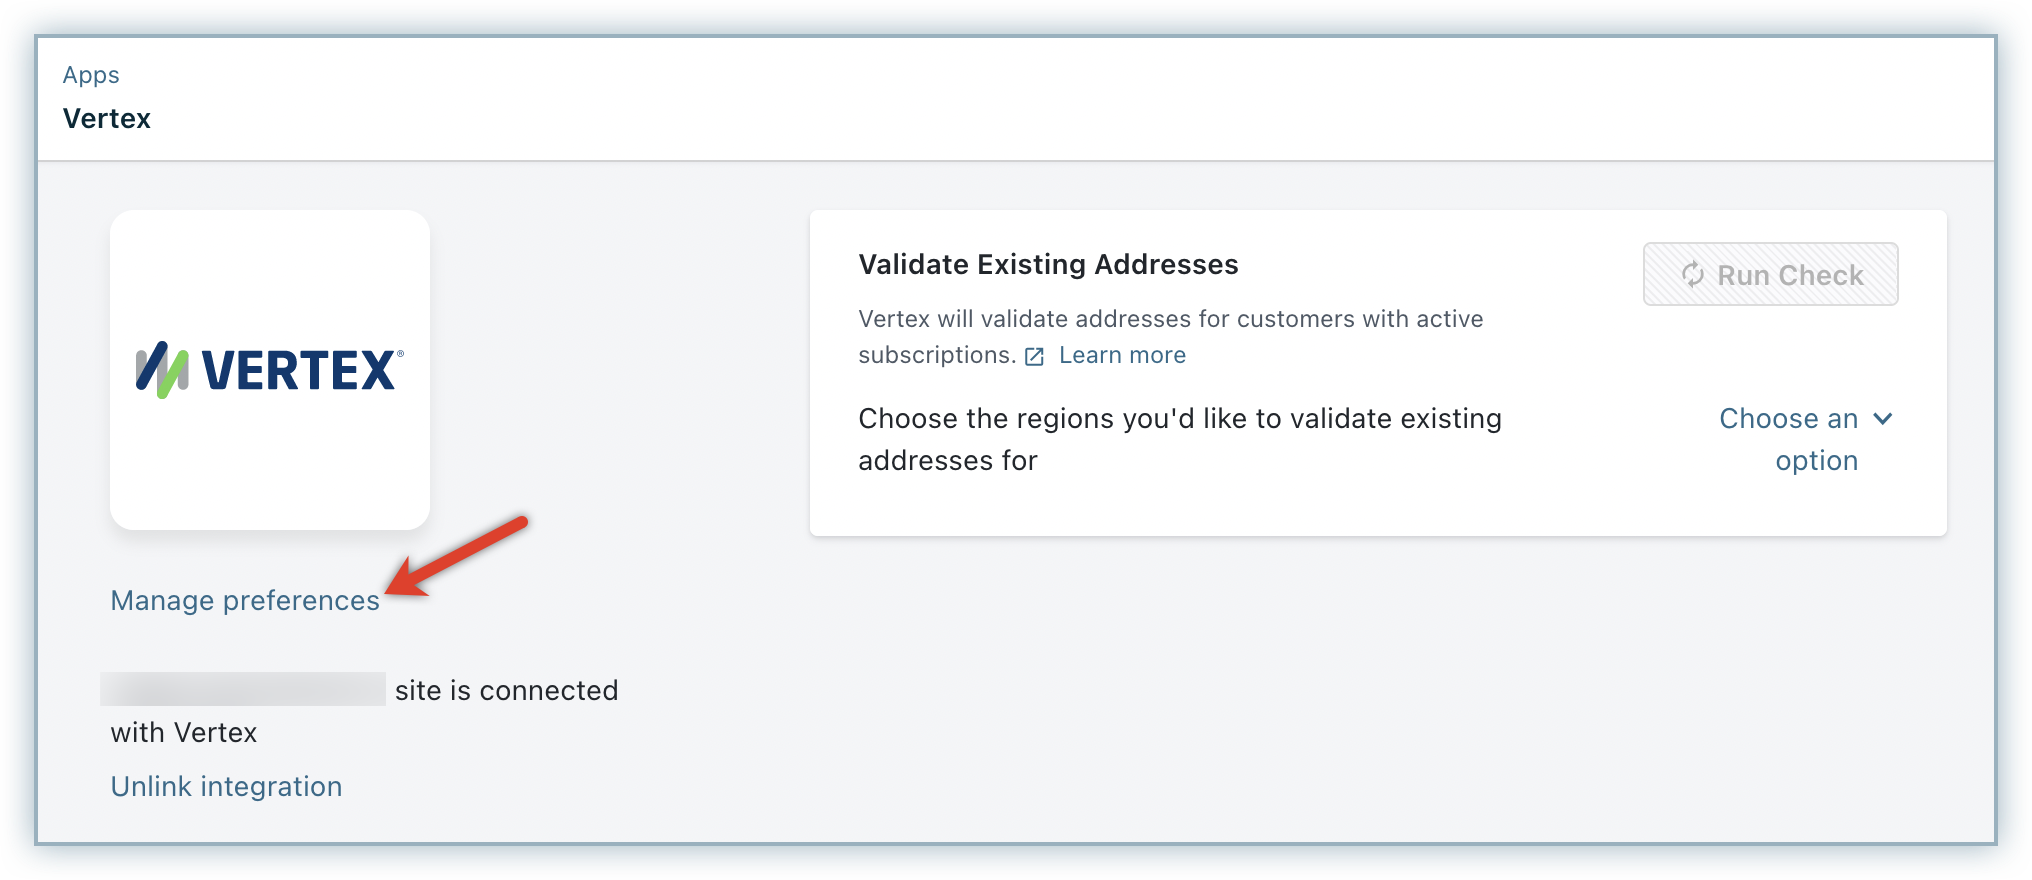
You can make changes to the integration preferences at any point of time by clicking Apps > Apps Connected > Vertex > Manage > Manage Preferences.
Note:
Note that if invalid company code credentials are provided, taxes will still be applied to an exempt product in invoice. This is because we do not have control over the third-party company code validation and hence authentication will not fail at the integration page.
Configuring Tax Codes for your Plans and Addons
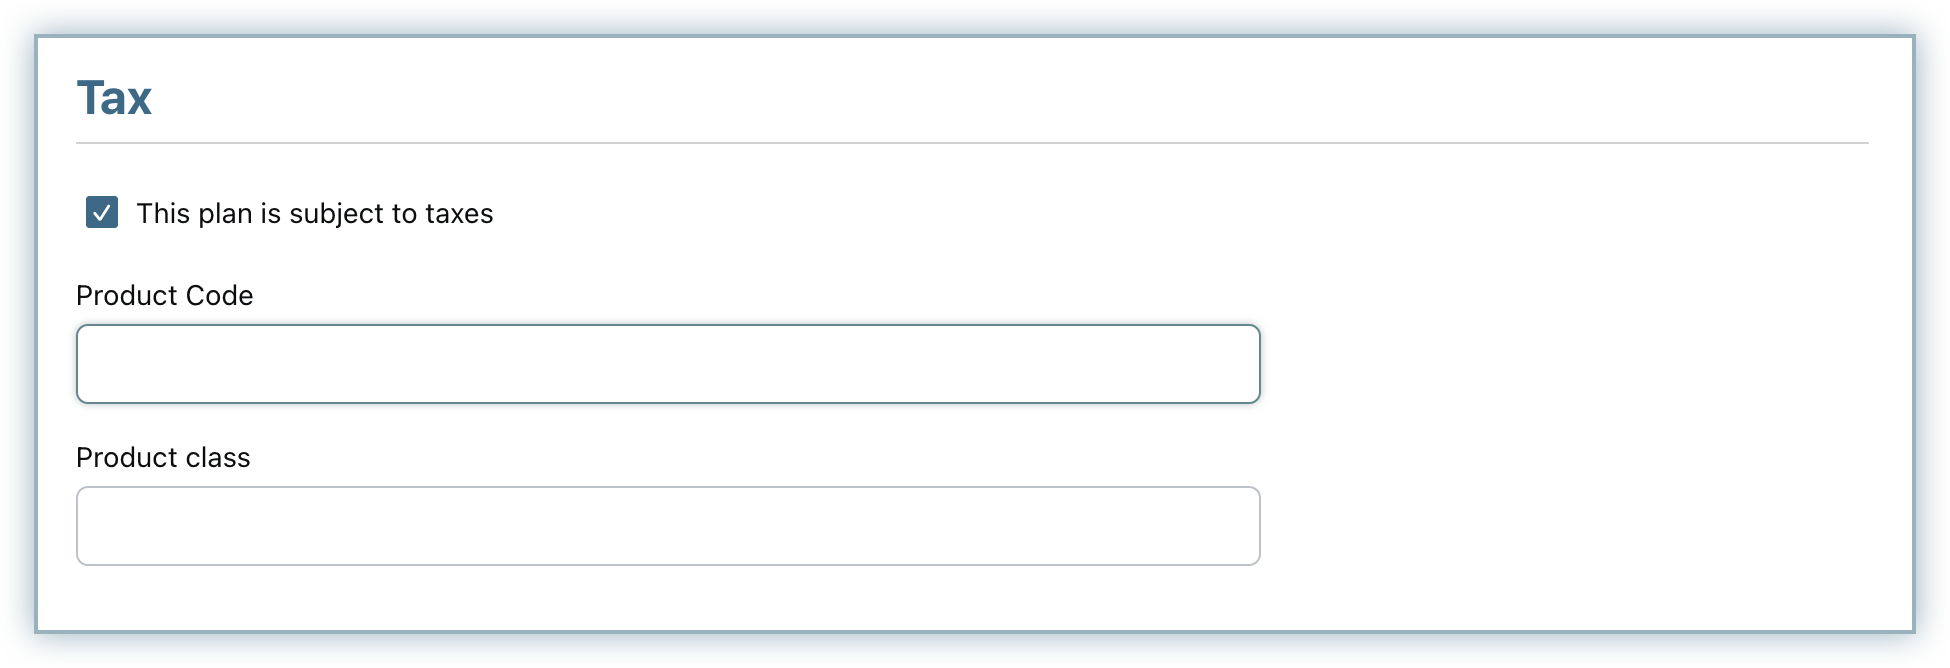
Vertex uses a Product Code and Product Class to determine the tax rate for each product. Taxable, nontaxable, and partially taxable products are automatically differentiated using these product codes and classes.
After configuring Vertex for your Chargebee site, the Vertex Product Code and Product Class fields are displayed for Plans, Addons, and Charges Price Points. You can add the corresponding codes.
Configuring Customer Tax Exemptions
If you'd like a particular customer to be exempted from tax, you can configure the exemption while creating the customer in Chargebee by:
- Enabling the option This customer is exempted from tax payment on the customer details page.
- Specify the Customer Code and Customer Class fields to map the exemption reasons.
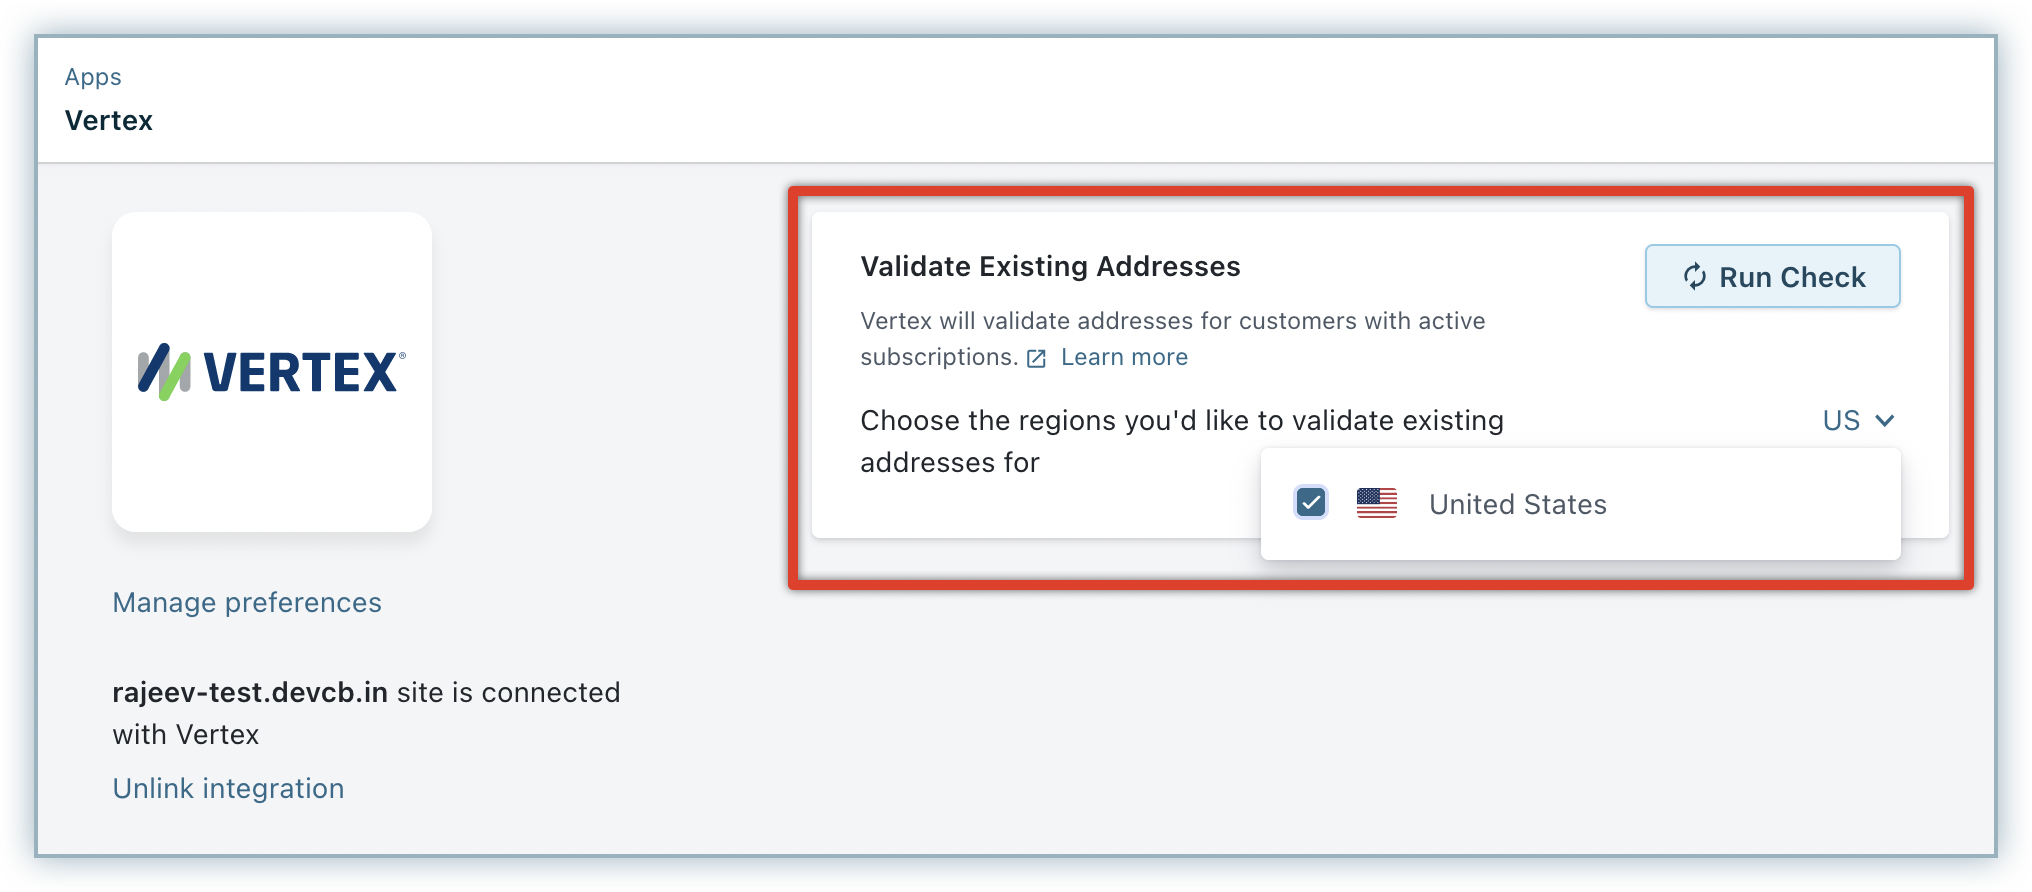
Validating Addresses for Existing Customers
The Chargebee-Vertex integration validates the taxable address for all new customers who subscribe with your service after enabling Vertex. For customers who have signed up before enabling Vertex, Chargebee will cancel their subscriptions during renewal if tax cannot be determined. Subscriptions on the verge of cancellation can be determined using the Validate Existing Addresses feature that allows you to view and fix invalid addresses.
Under Validate Existing Addresses, select your taxable region - United States from the drop-down, and click Run Check.
During the first check that is run after the integration is configured, all the existing subscriptions' taxable addresses gets validated. Subsequent address validations will check only the addresses that are added after prior validation and not all the addresses. You can look for any possible address errors and have them fixed.
Note:
Note that validating addresses is not a full address validation but a taxability check.
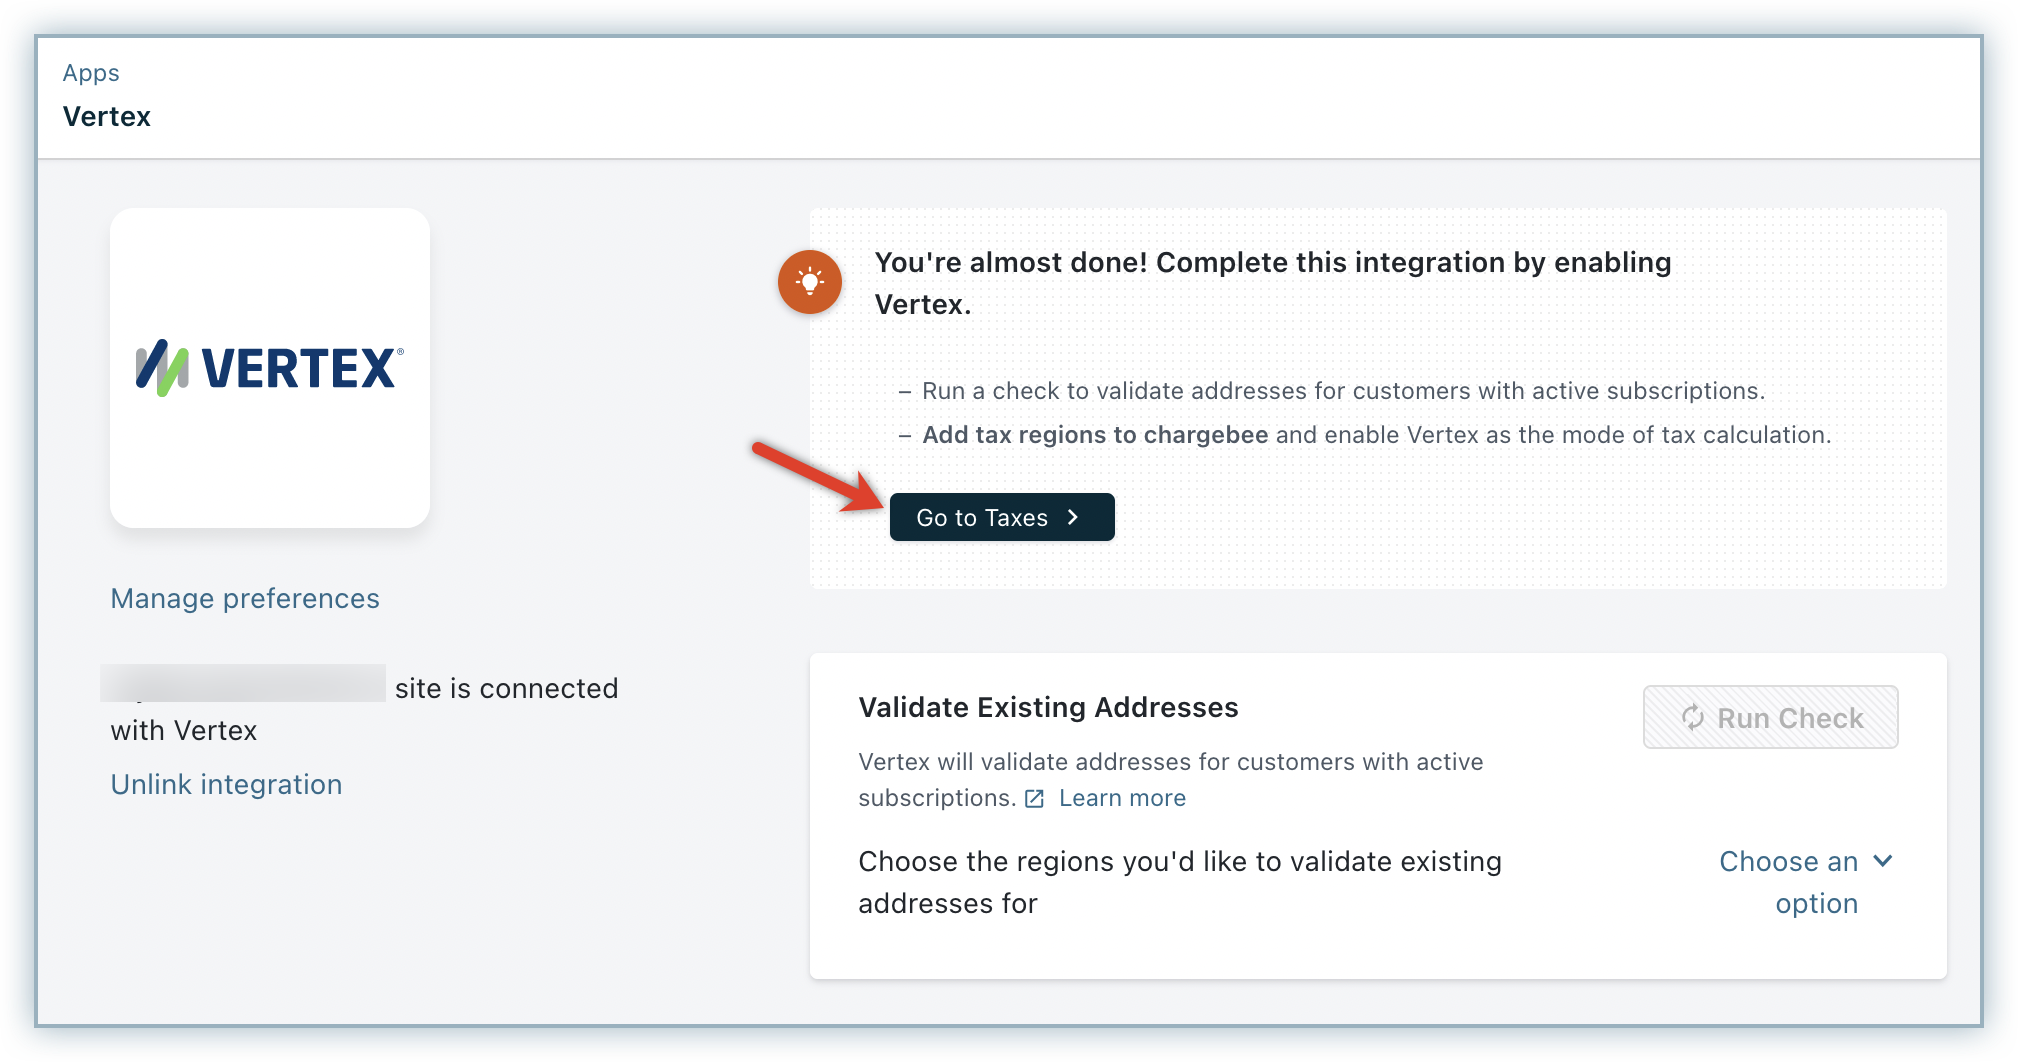
Enabling Vertex for Tax Calculation for Taxable Regions/United States
This is a crucial step of this integration. Unless you execute this step, Vertex will not be used for automatic tax calculation in Chargebee. After connecting the Vertex account with your Chargebee site, click Go to Taxes on the Vertex app page.
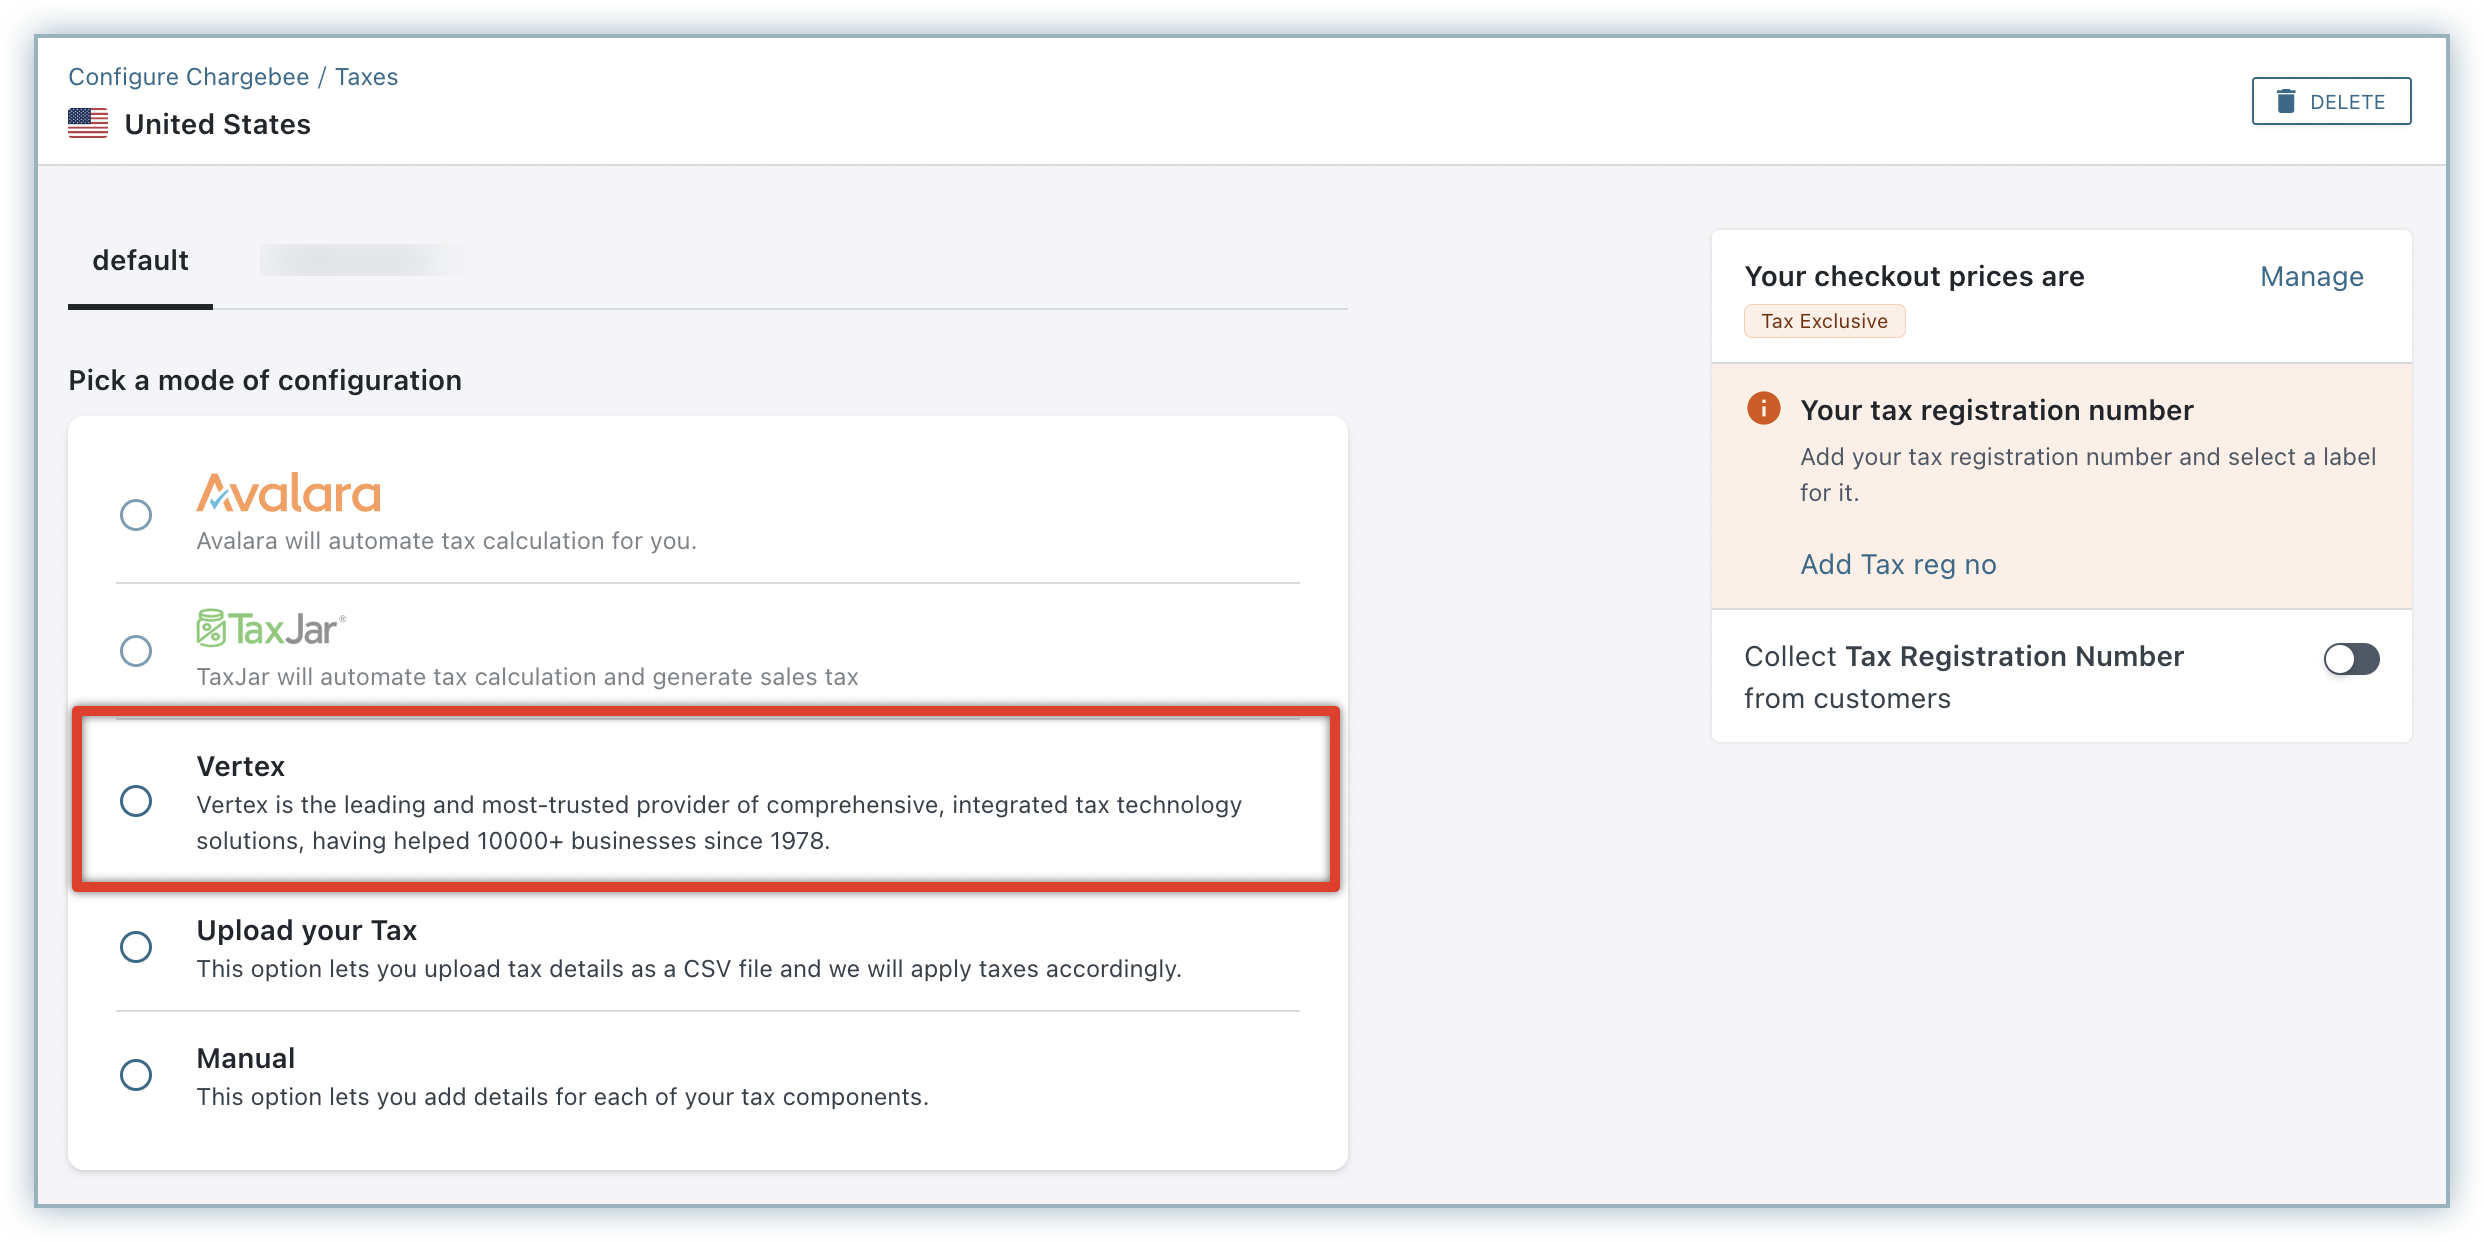
Alternatively, you can click Settings > Configure Chargebee > Taxes.
Go to the taxable region - United States and select Vertex as your preferred mode of tax calculation.
Unlinking Integration
To unlink the Vertex integration from your Chargebee site, follow these steps:
- Click Settings > Configure Chargebee > Taxes and switch from Vertex to your preferred mode of tax calculation for United States, by clicking Change.
- Navigate to Apps > Apps Connected > Vertex > Manage, and click Unlink integration.
Limitations
- Multi-entity feature is not supported by the Chargebee-Vertex integration currently.
- The tax rates sent from Vertex to Chargebee are rounded off to two decimal places. This could lead to a slight variation in the tax rates and consequently - cent mismatch in the total invoice amount between the two applications.
- Full address validation is not currently available.
Was this article helpful?