Vertex Validator
Overview
Vertex Validator integration with Chargebee provides merchants with powerful software to validate Tax registration numbers worldwide. By seamlessly integrating this feature, Chargebee enables merchants to verify the authenticity and validity of VAT numbers for their customers. While this feature is currently in beta, it represents a significant step forward in simplifying tax compliance processes for Chargebee users.
Note
This feature is in beta. For Tax registration number validation, request access to enable it on your Chargebee site.
Note
To avoid unnecessary API calls to the tax system for zero-value invoices, and to optimize your usage and reduce associated fees request access.
Supported Countries
Chargebee's integration now offers real-time validation, synchronized with the supported sources on Vertex Validator. To understand the countries supported for this functionality, kindly refer to this link. Pay special attention to countries marked under Database in the Validation Type column.
Prerequisites
Before integrating your Chargebee site with Vertex Validator, please ensure that the following prerequisites are verified on respective applications. Additionally, a license from Vertex Validator must be purchased.
Chargebee
Customer Tax Registration Number To begin collecting tax registration numbers from your customers, ensure that you have enabled the configurations to collect tax registration numbers on the tax configuration page. You can do this via two available options
-
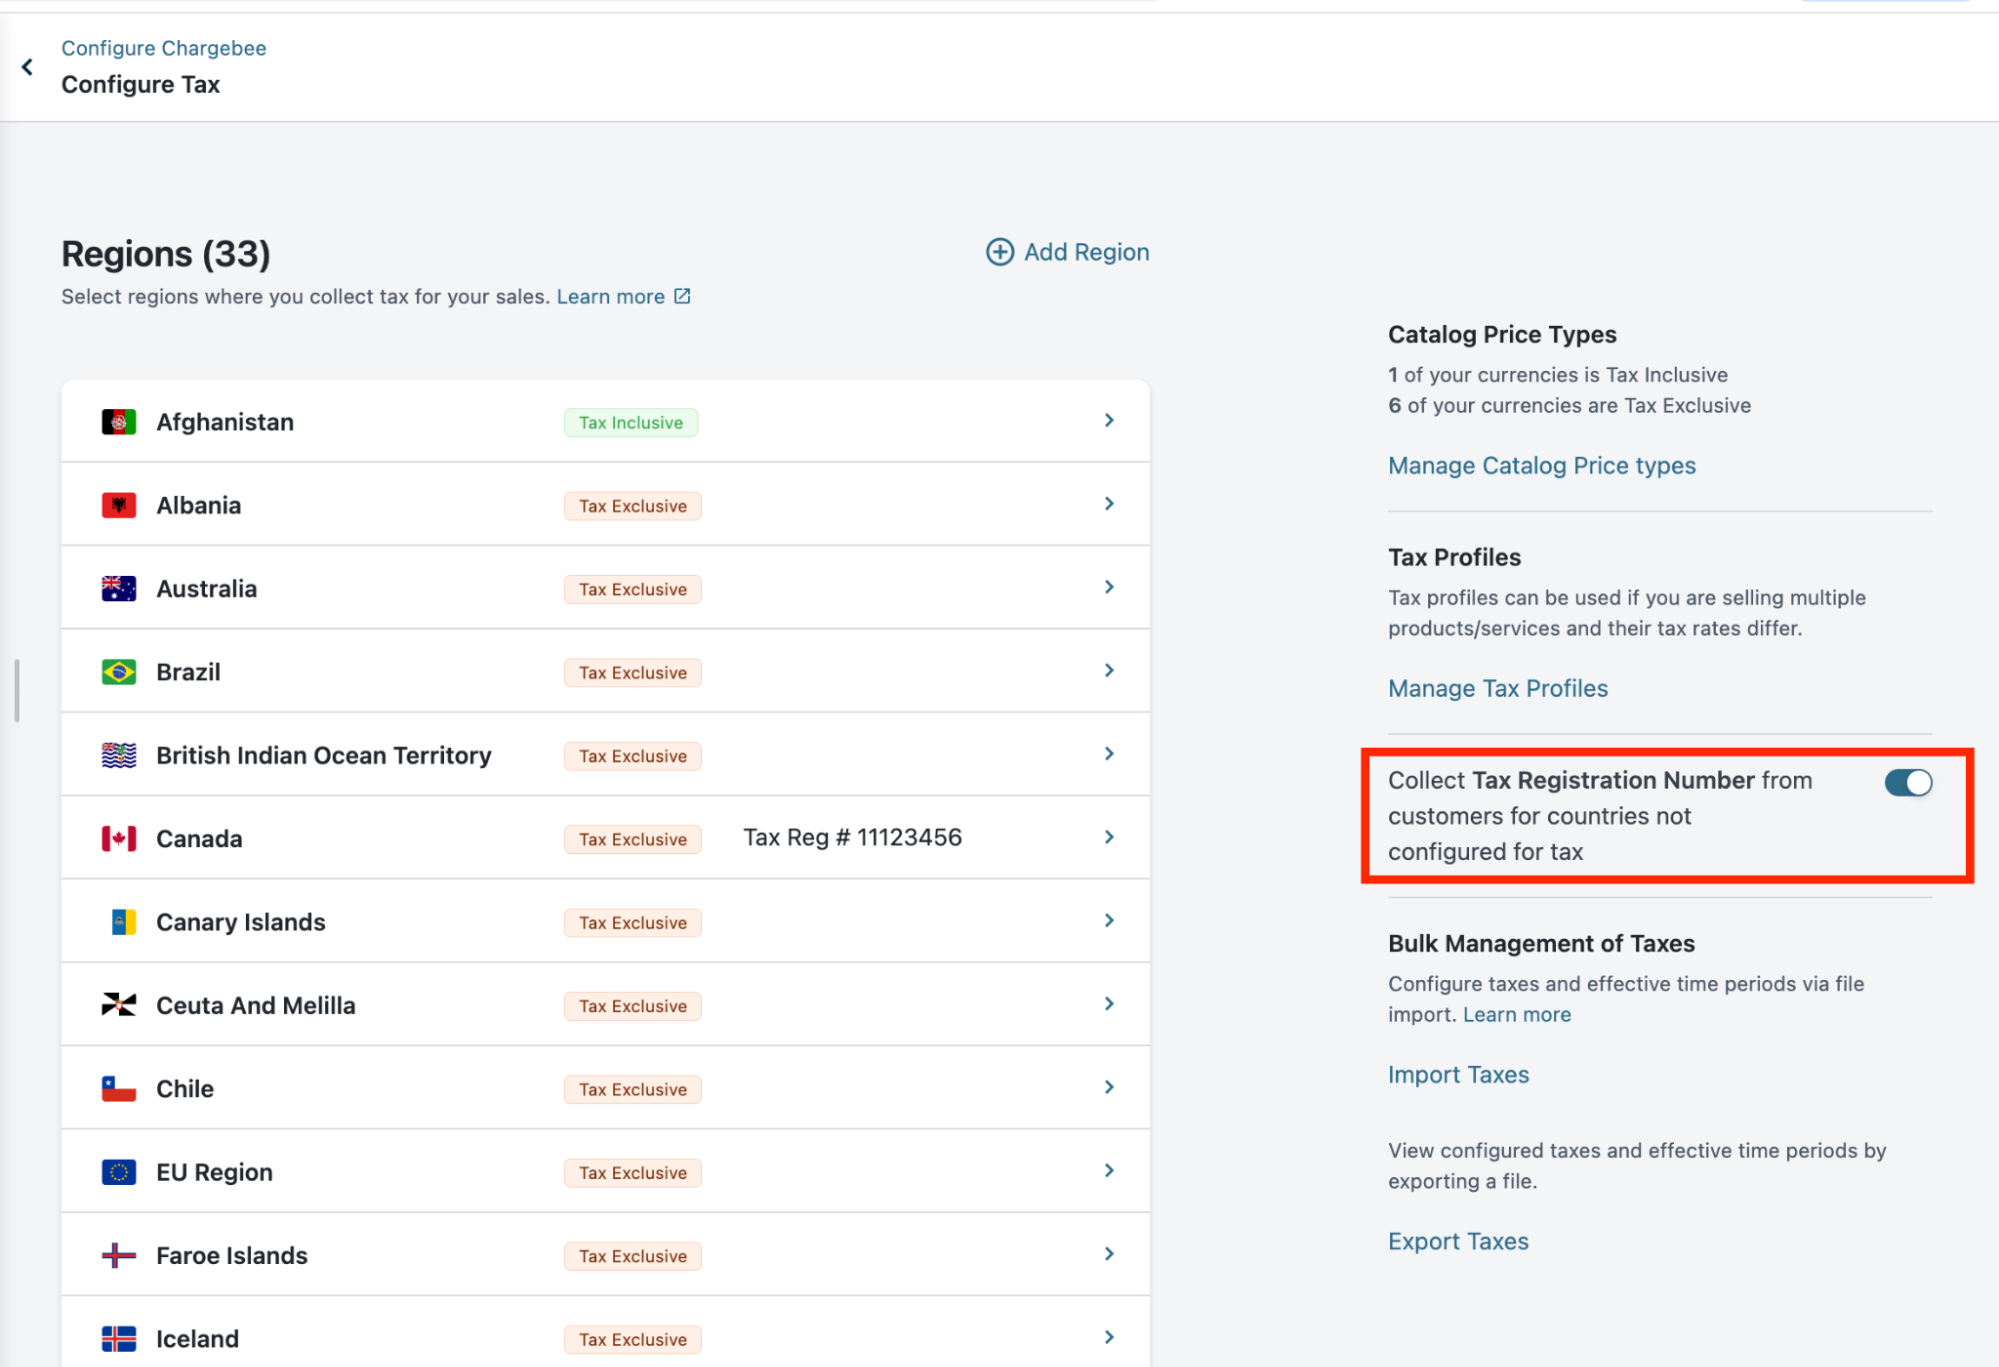
Collect tax registration number from customers not configured for taxes on the configure tax page. This enables you to gather Tax IDs in regions where you haven't configured any taxes yet. Navigate to Settings > Configure Chargebee > Taxes to enable the option Collect tax registration number from customer for countries not configured for tax.
-
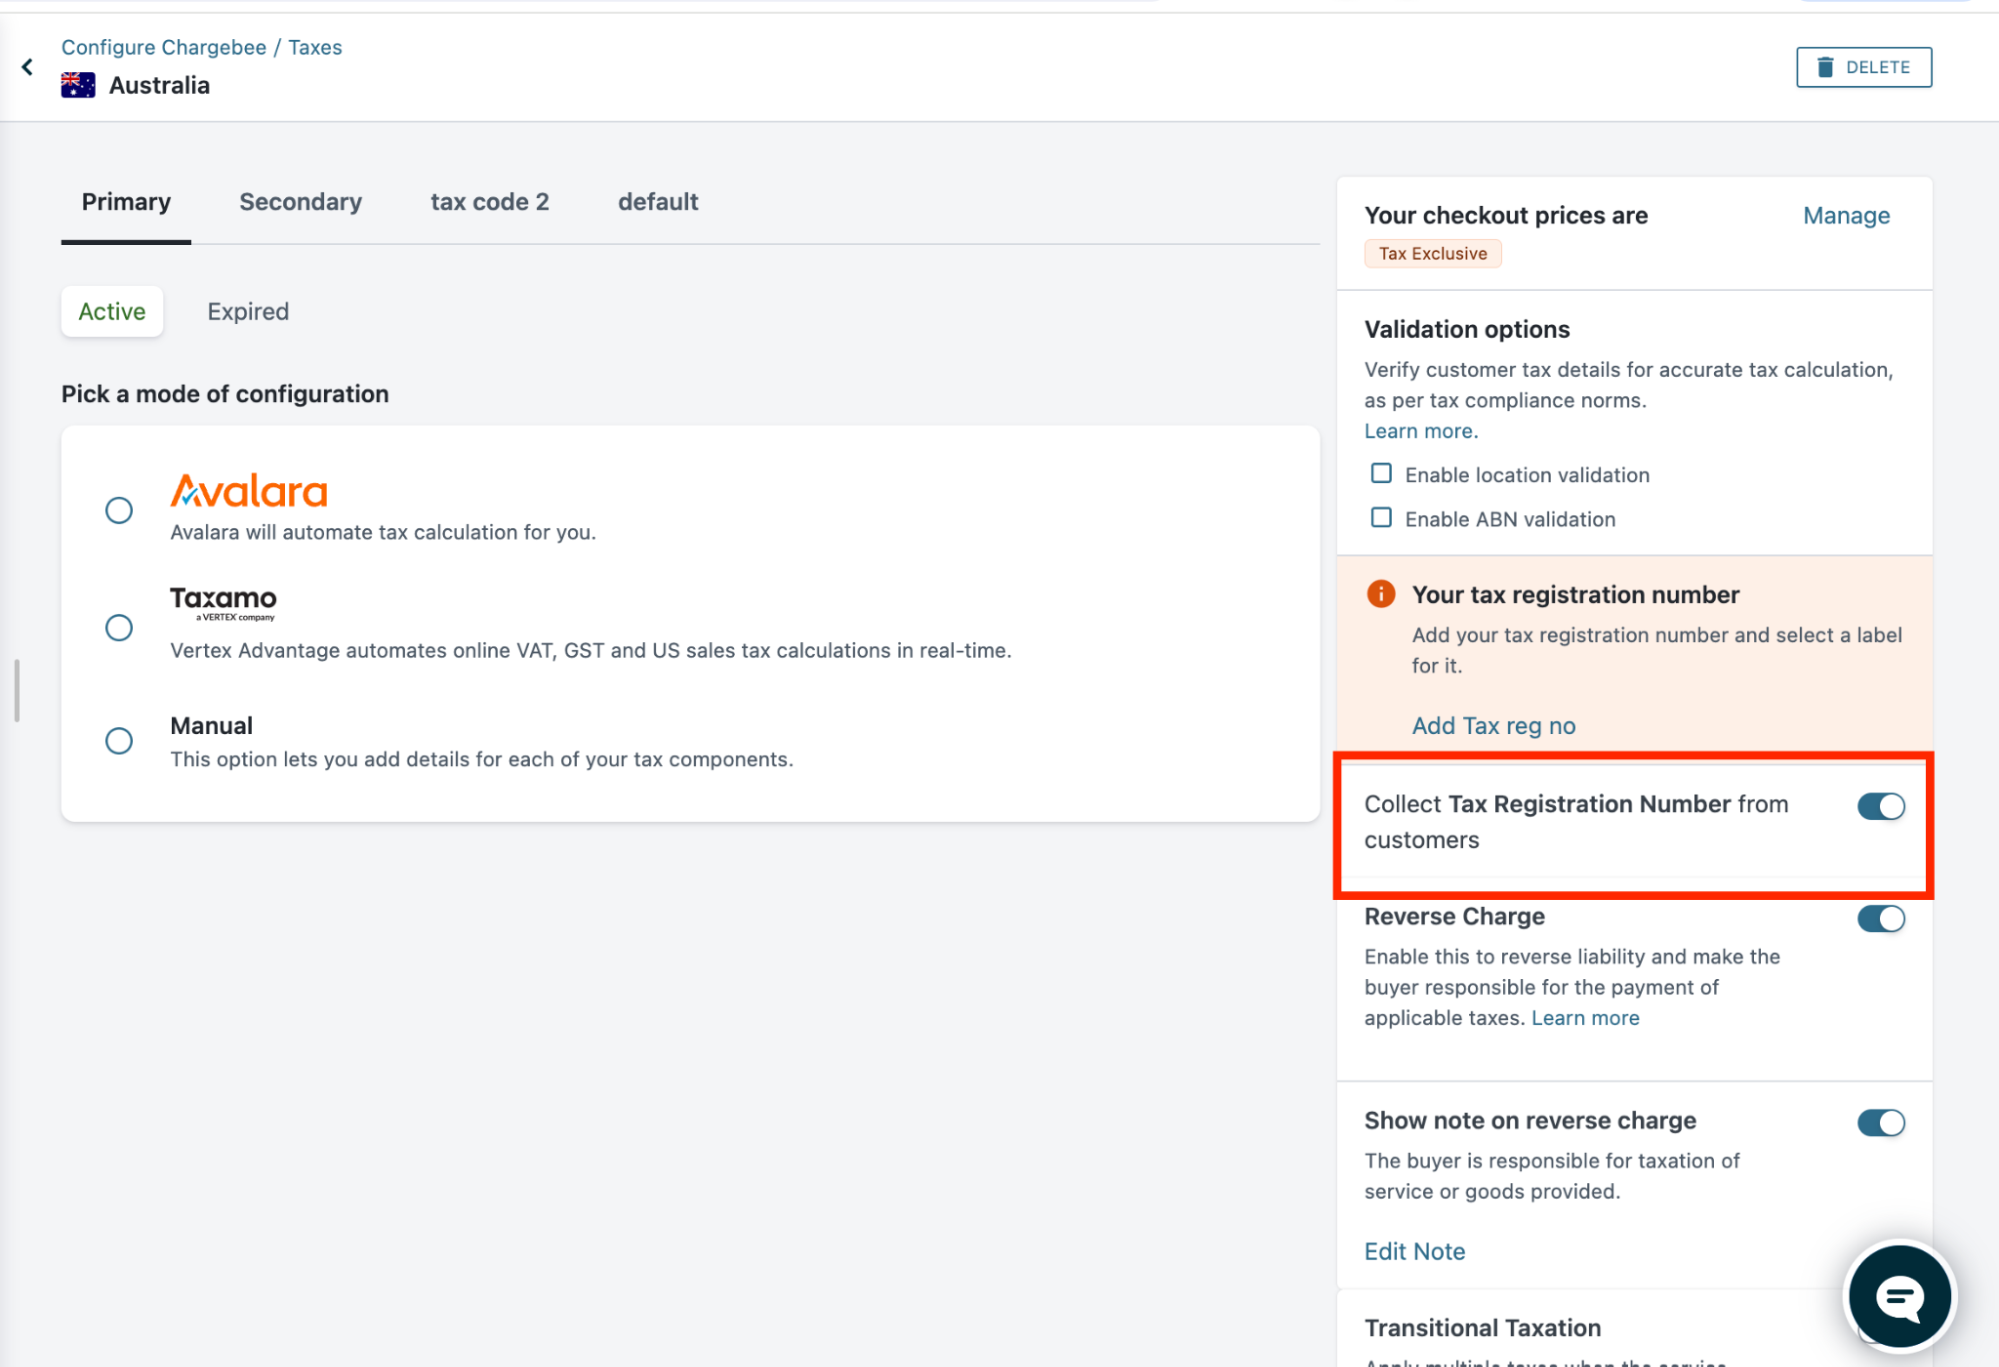
Collect tax registration number from customer on the respective region tax setup page. Navigate to Settings > Configure Chargebee > Taxes > Click on the region> Enable Collect tax registration numbers from customers
-
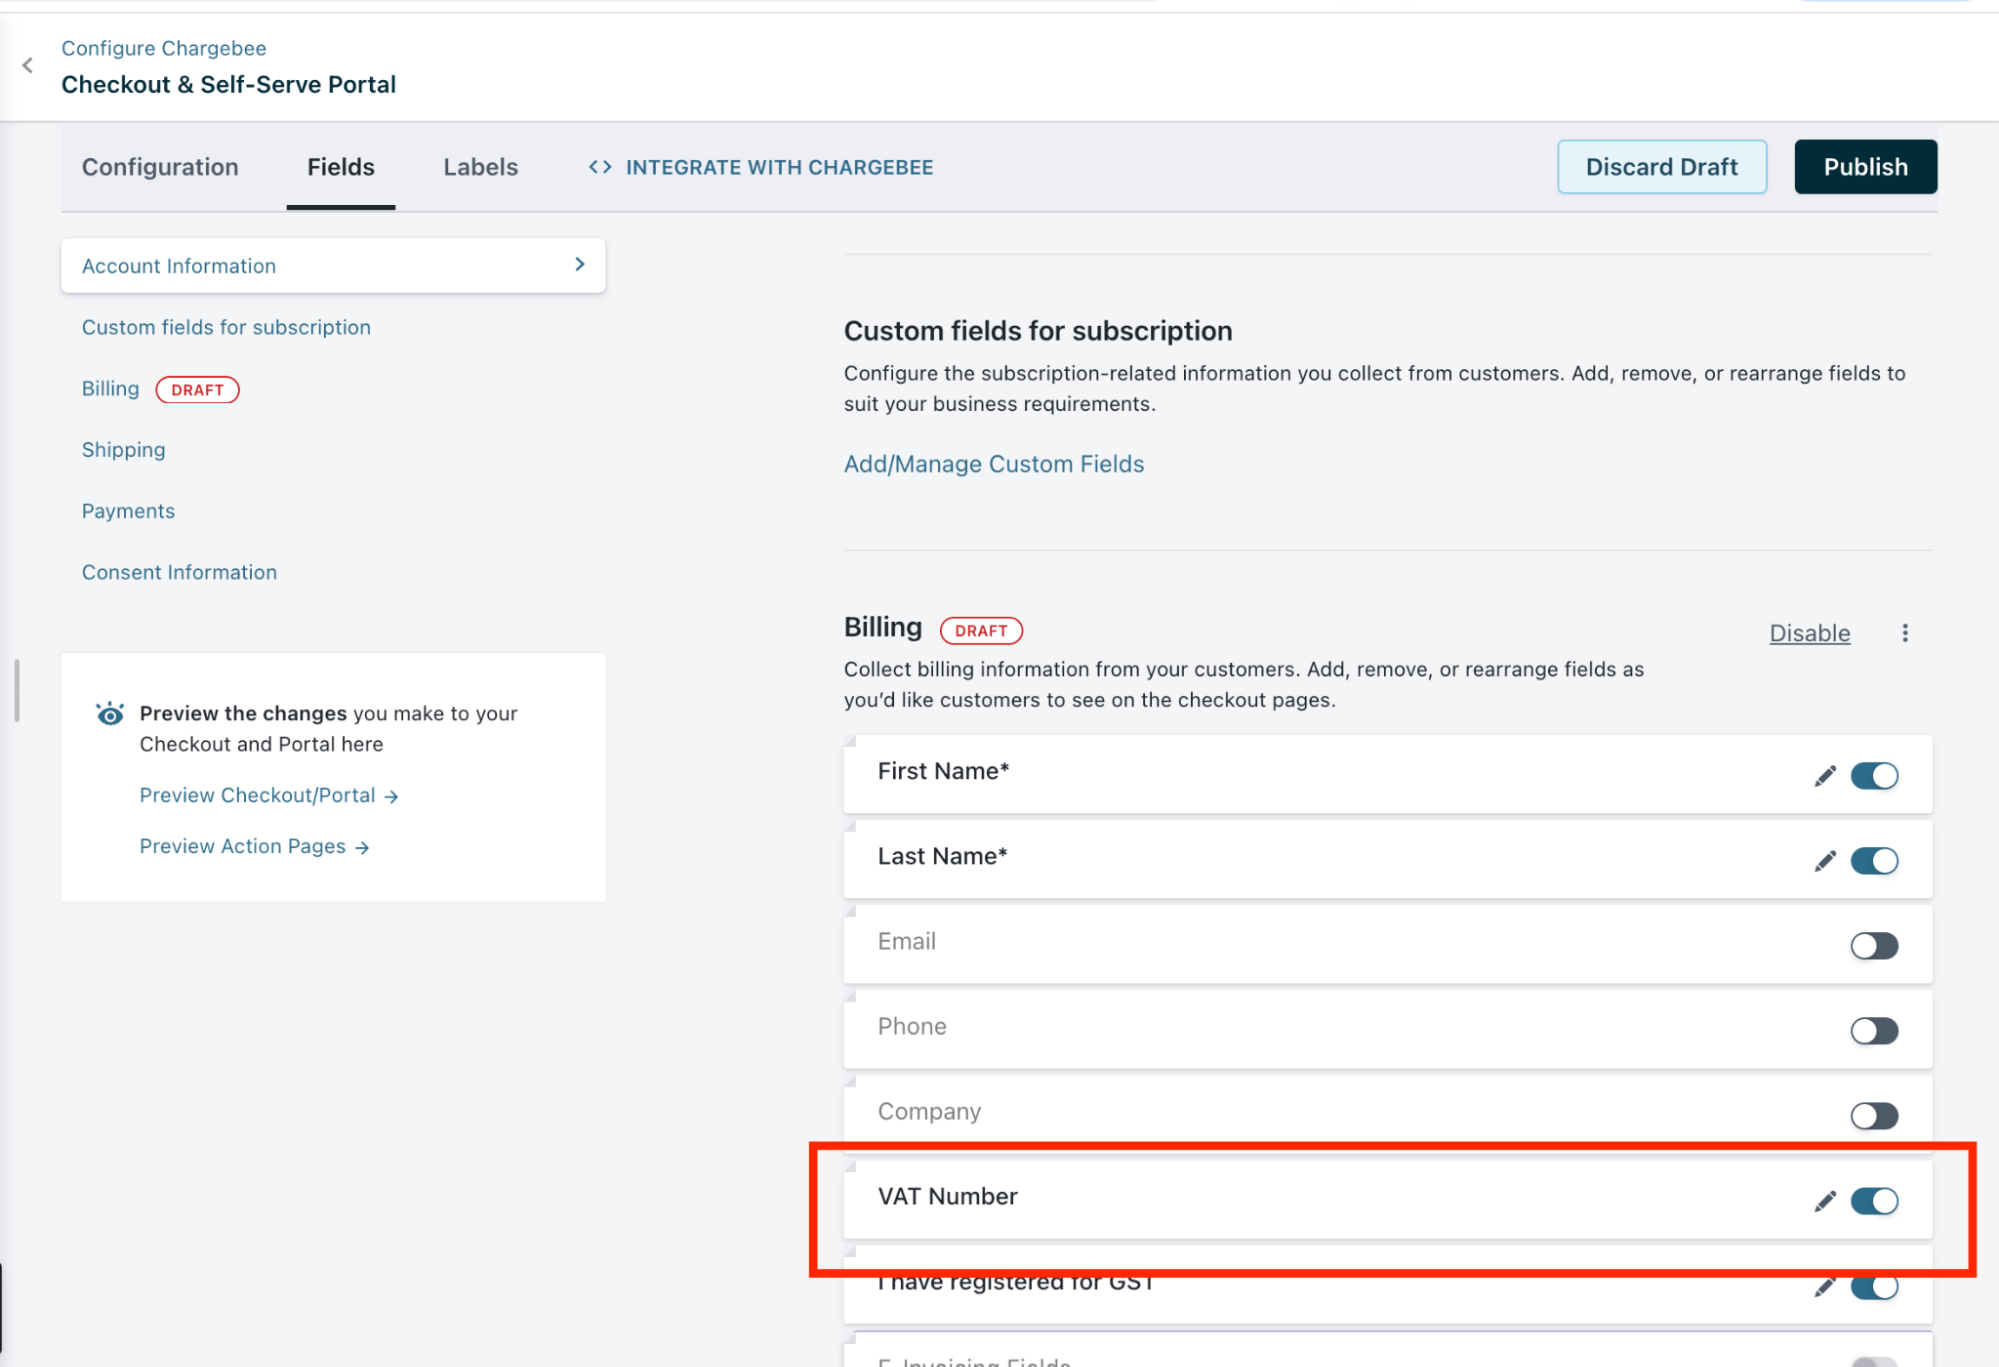
If you're using Hosted Pages, ensure you enabled the tax registration fields on the checkout settings. Navigate to Settings > Configure Chargebee > Checkout & Portal > Fields and enable VAT Number.
Vertex Validator
For instructions on setting up your account, please refer to this Vertex User Guide. Credentials: To connect the two applications, you need to retrieve the API key from your Vertex account. Follow the steps below to obtain the API key for Chargebee:
-
Log in to your Vertex account.
-
Go to Settings > API access > View API tokens.
-
On the API tokens page, generate a new token by clicking the Generate token button.
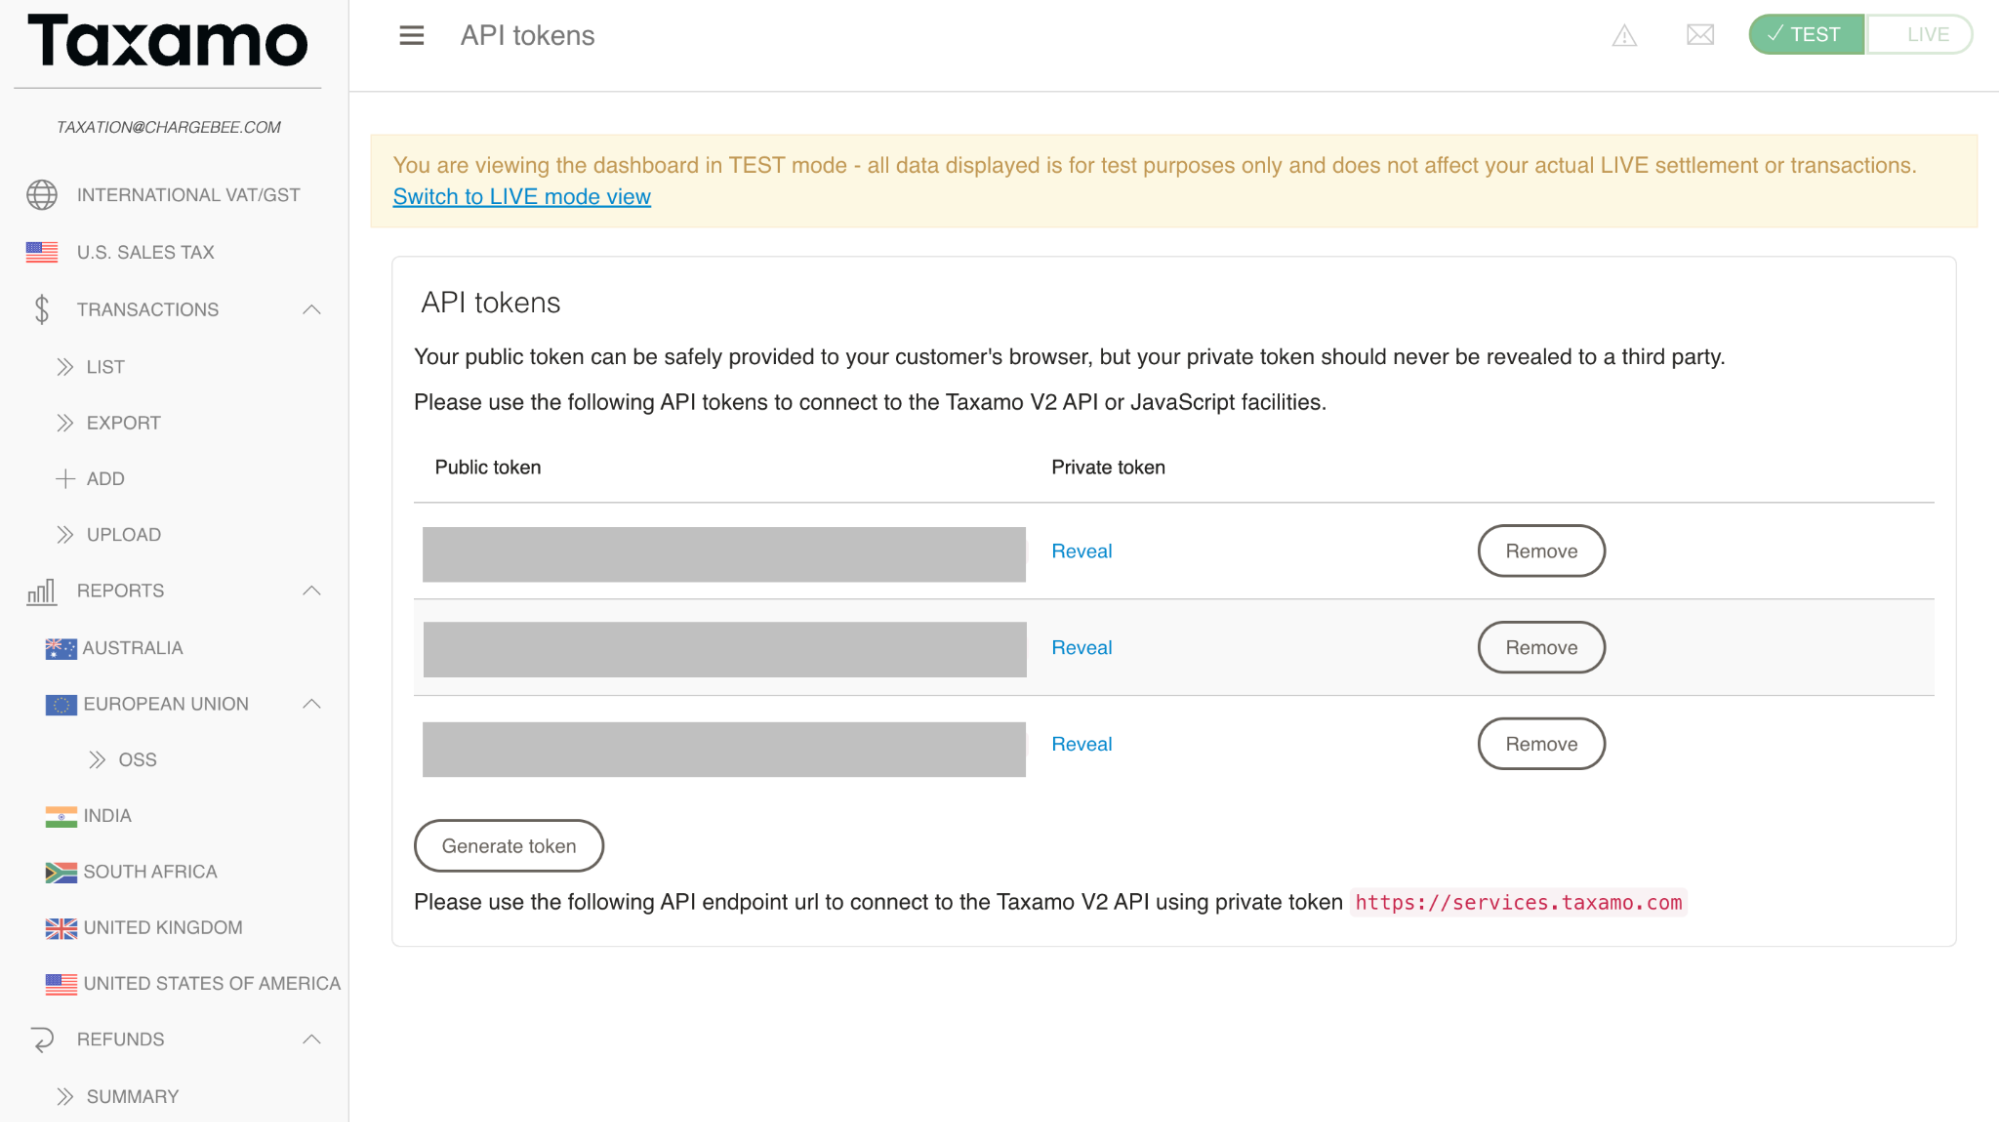
-
Click on the reveal private key option and copy the displayed private key. Ensure to store it securely for later use.
Enable Tax ID validation for the regions: To enable Tax ID validation for specific regions:
-
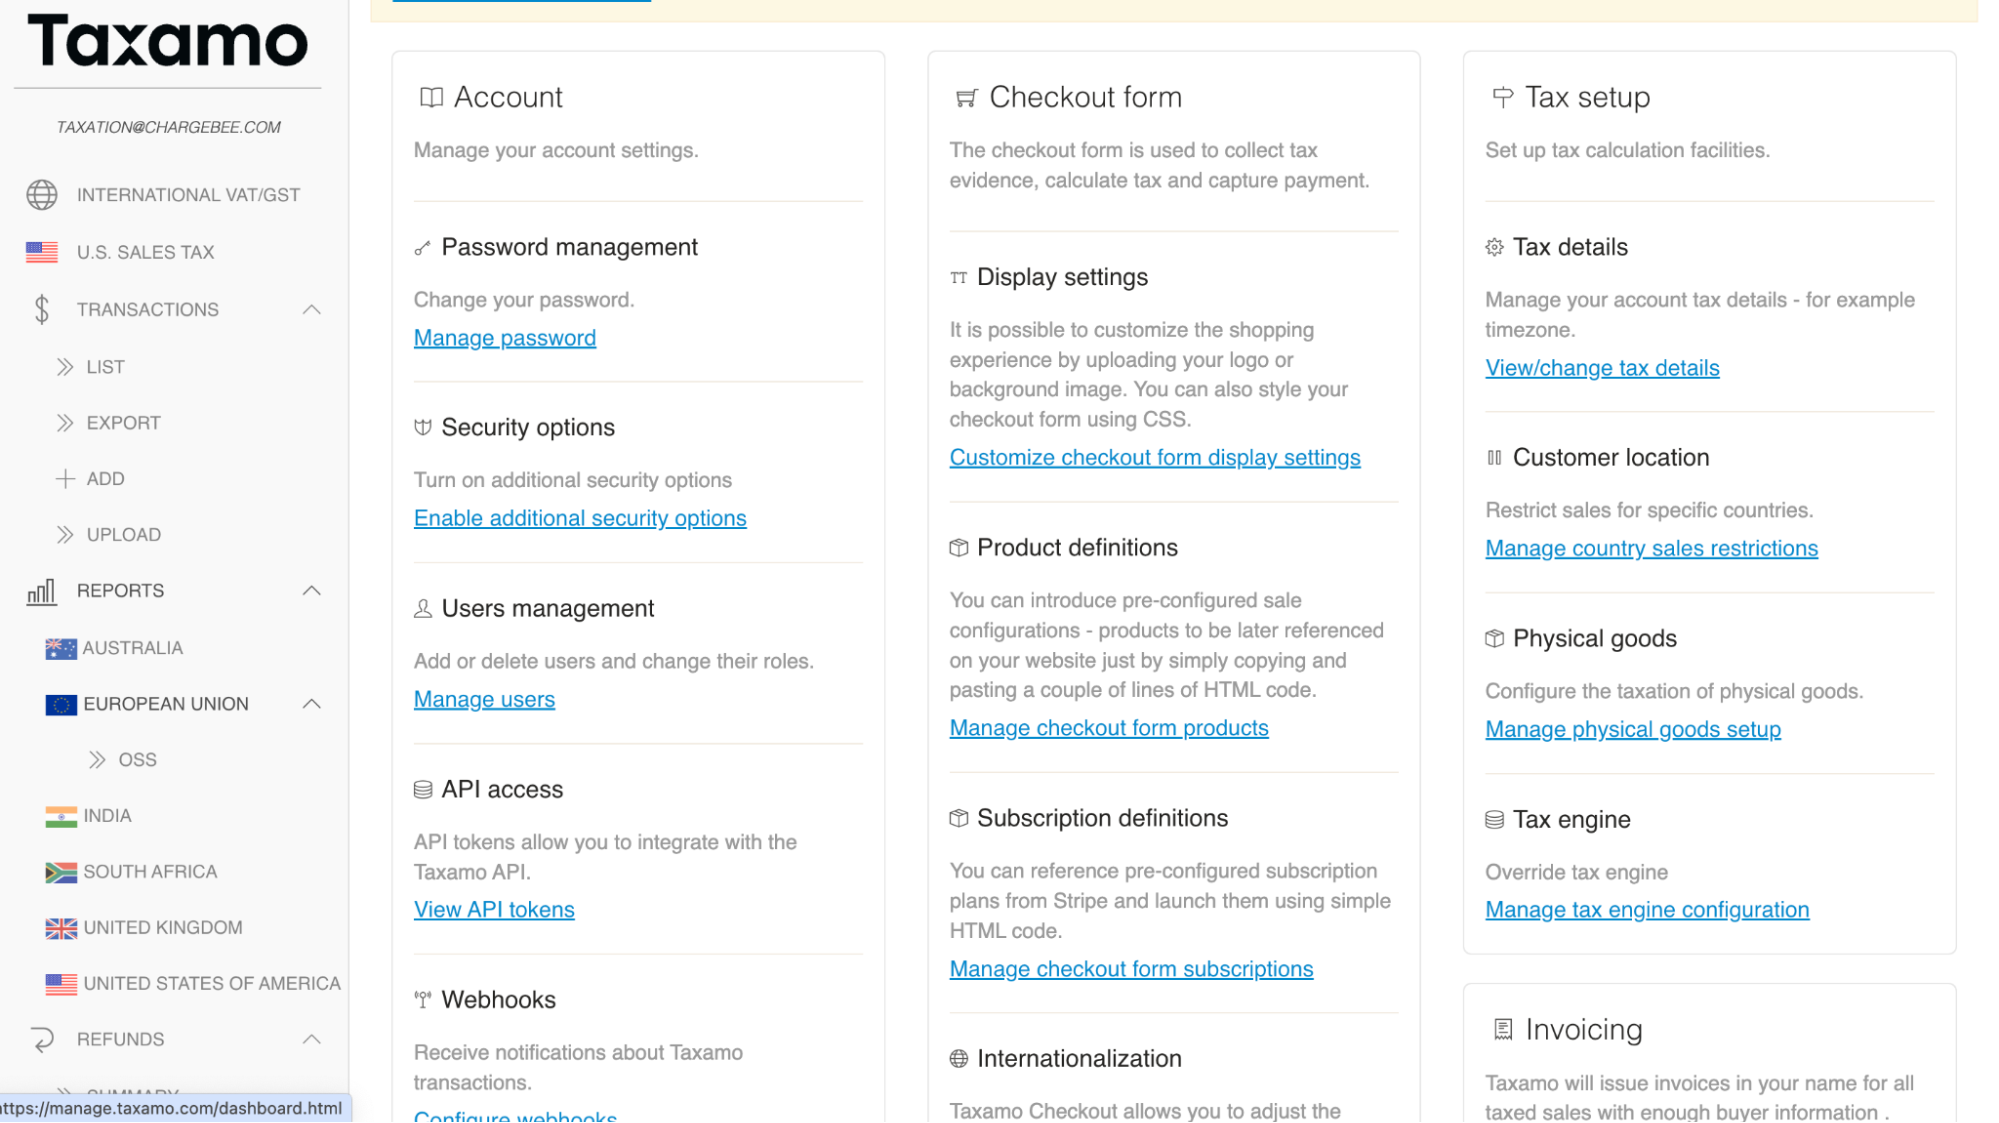
Navigate to International VAT/GST in Taxamo.
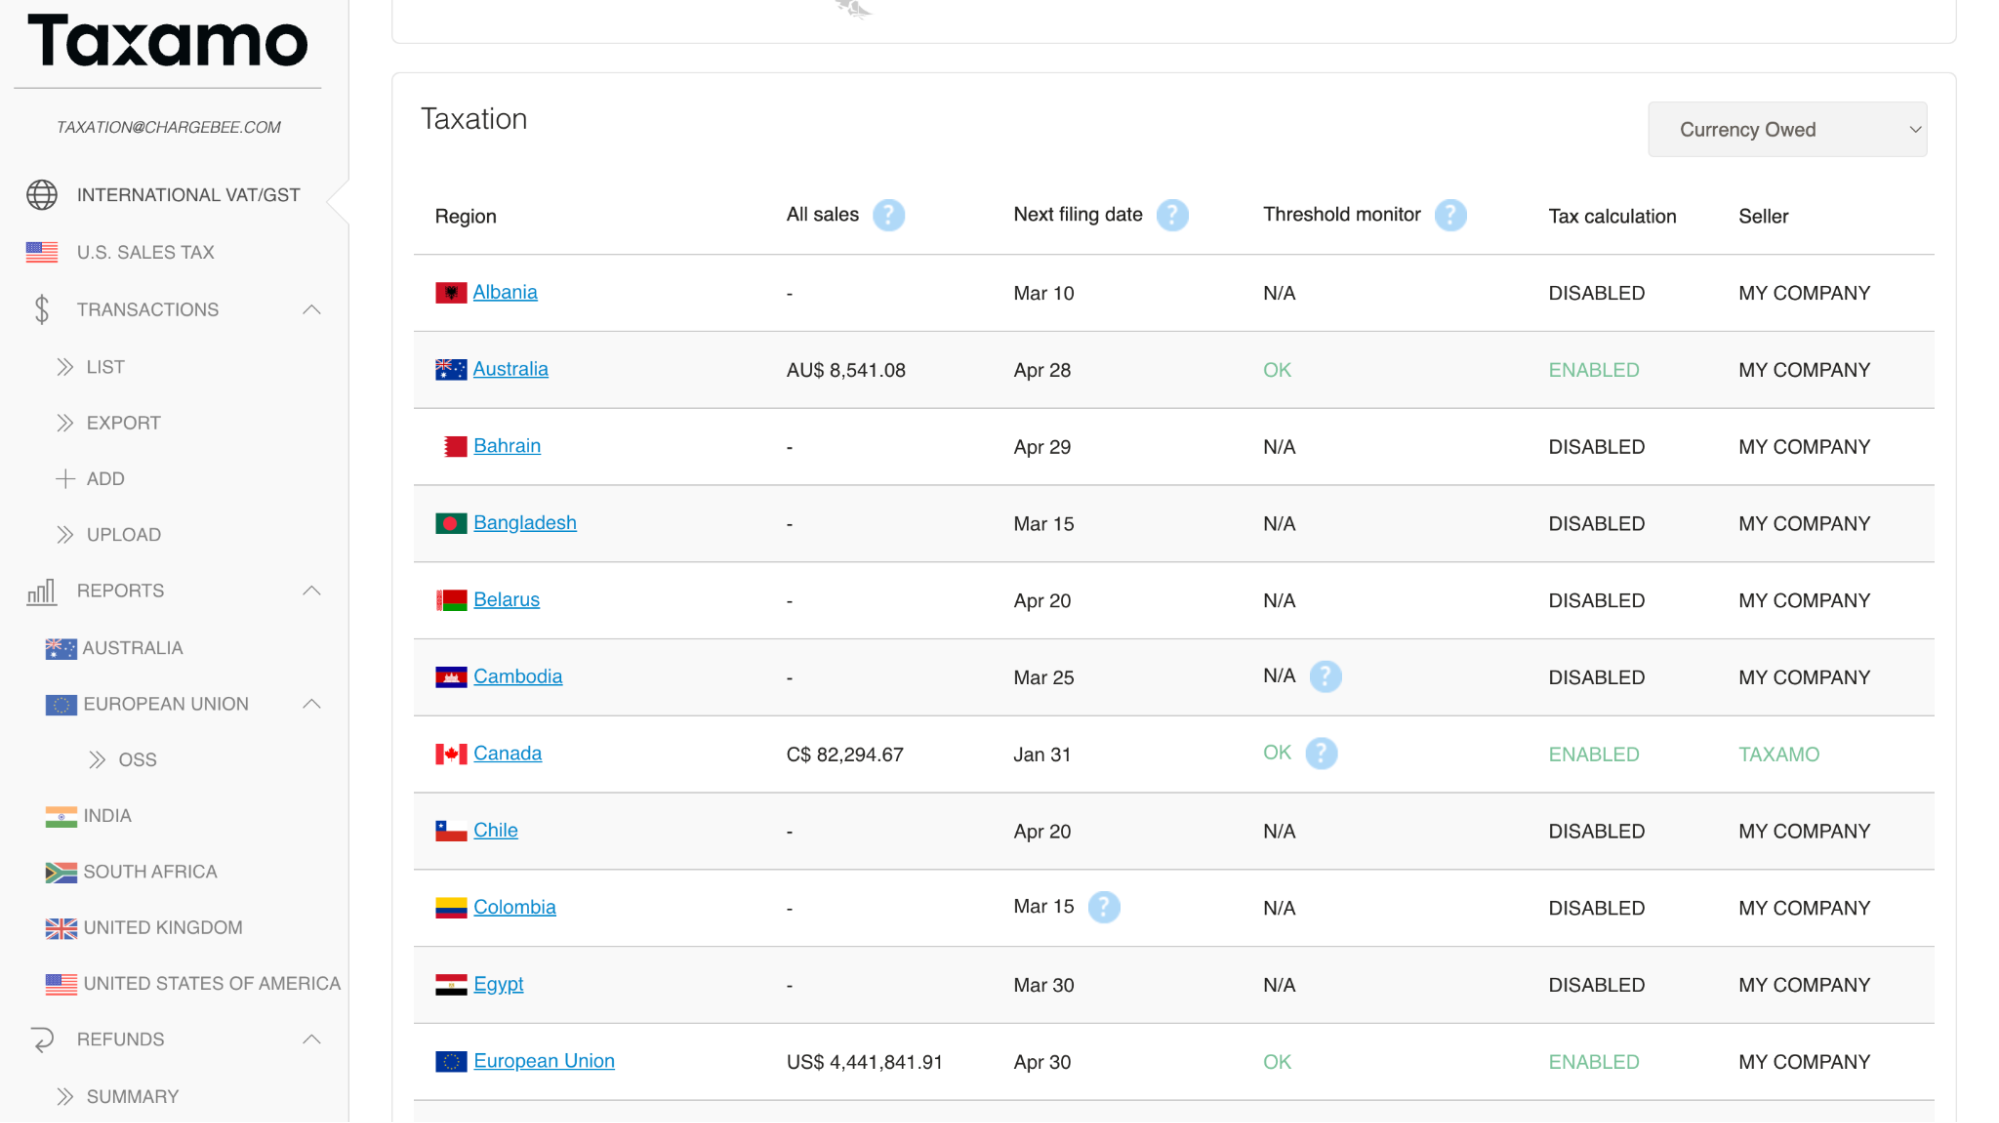
-
Select the desired region.
-
Enable tax calculation by checking Enabled.
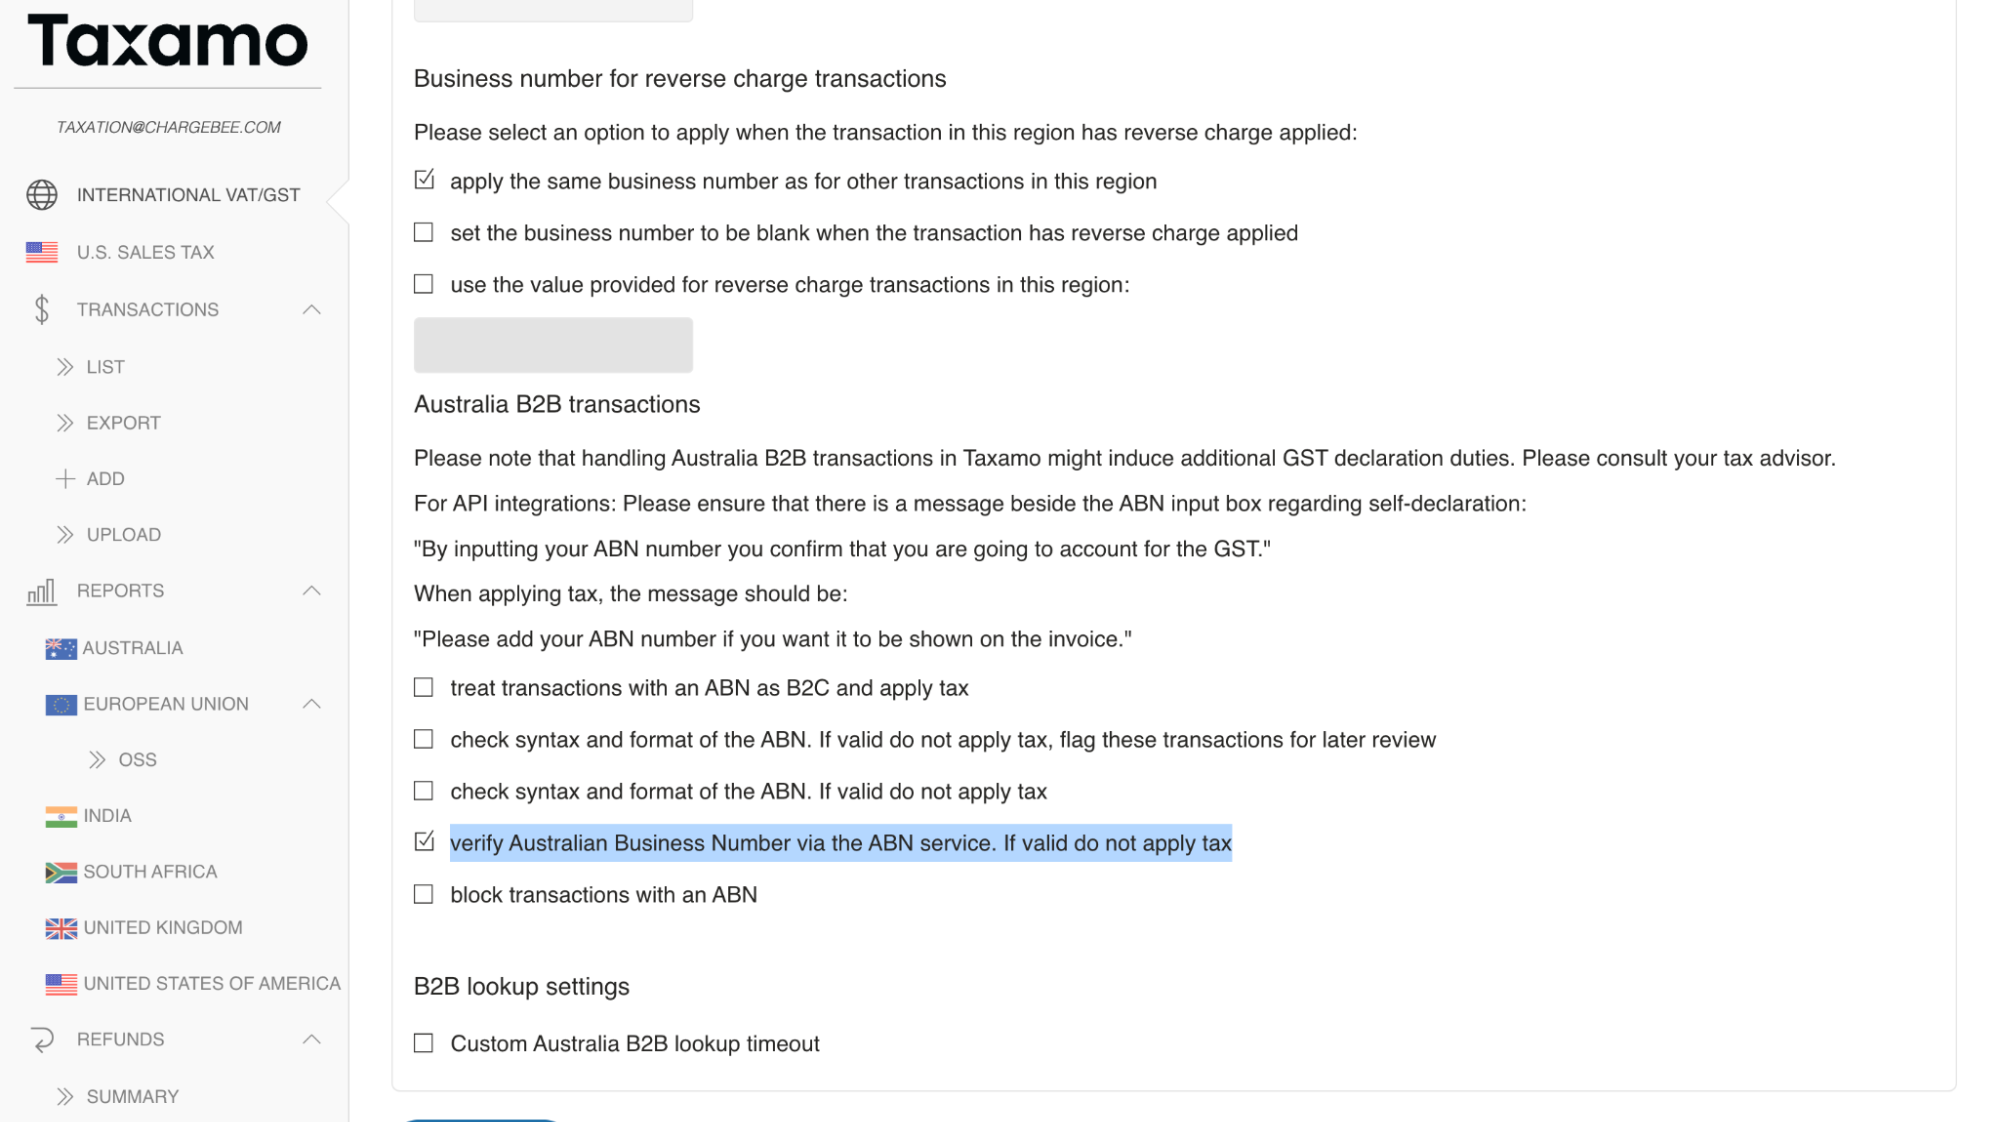
-
Scroll down and under the B2B transactions section, check Verify tax registration number to initiate Tax ID validation.
Configuration
Following are the steps to integrate Vertex Advantage account with your Chargebee site:
- Connecting Vertex Validator account with Chargebee
- Validate the Tax Registration numbers for existing customers
- Enable the Vertex Validator for regions
Connecting Vertex Validator Account with Chargebee Site
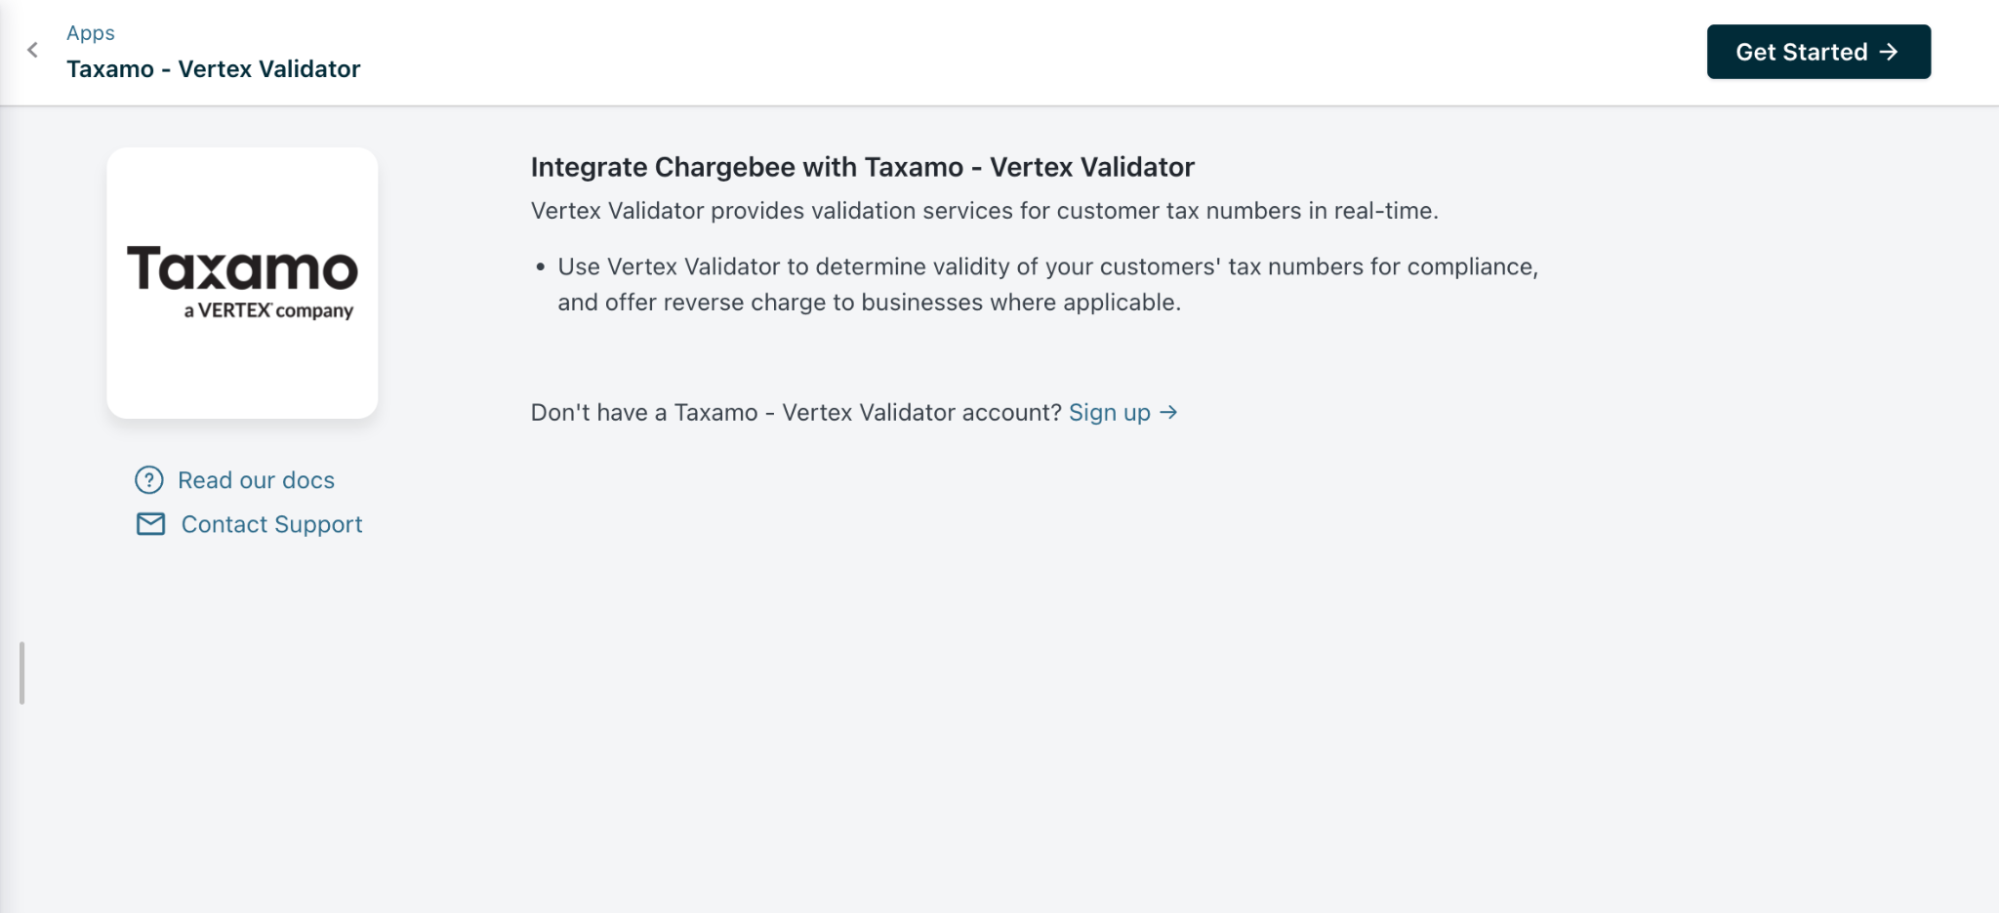
Once the Vertex app is enabled on your Chargebee site per your request, proceed with the following steps to connect the applications:
-
Log in to your Chargebee site and navigate to Apps > Marketplace > Vertex Validator.
-
On the configuration page, click Get Started if you already have a Vertex account. Alternatively, click Sign up to create a new account and proceed.
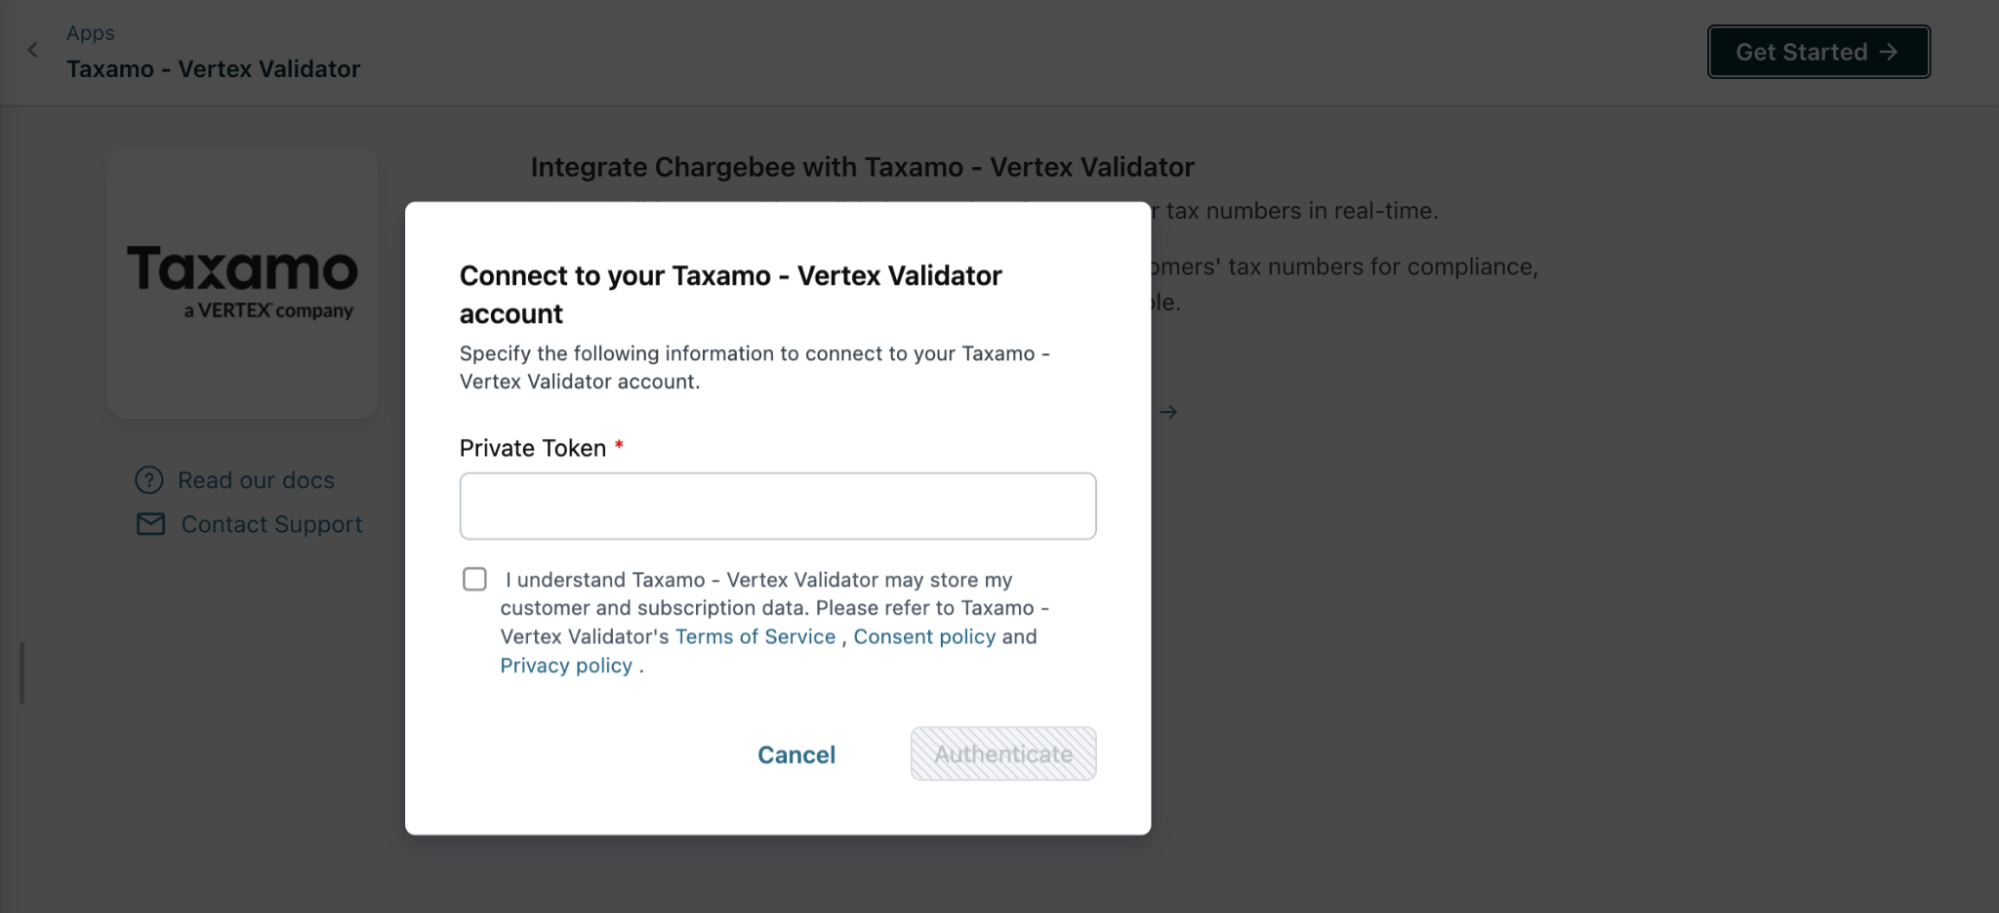
-
Enter your Vertex credentials by providing the Private Key obtained from Vertex for Chargebee. Confirm your understanding of Vertex's terms by checking the I understand Vertex... checkbox, then proceed to authenticate.
-
Verify your organization's address. Chargebee automatically fills in the address specified in your settings; however, you can make changes if necessary, or simply click Proceed to continue.
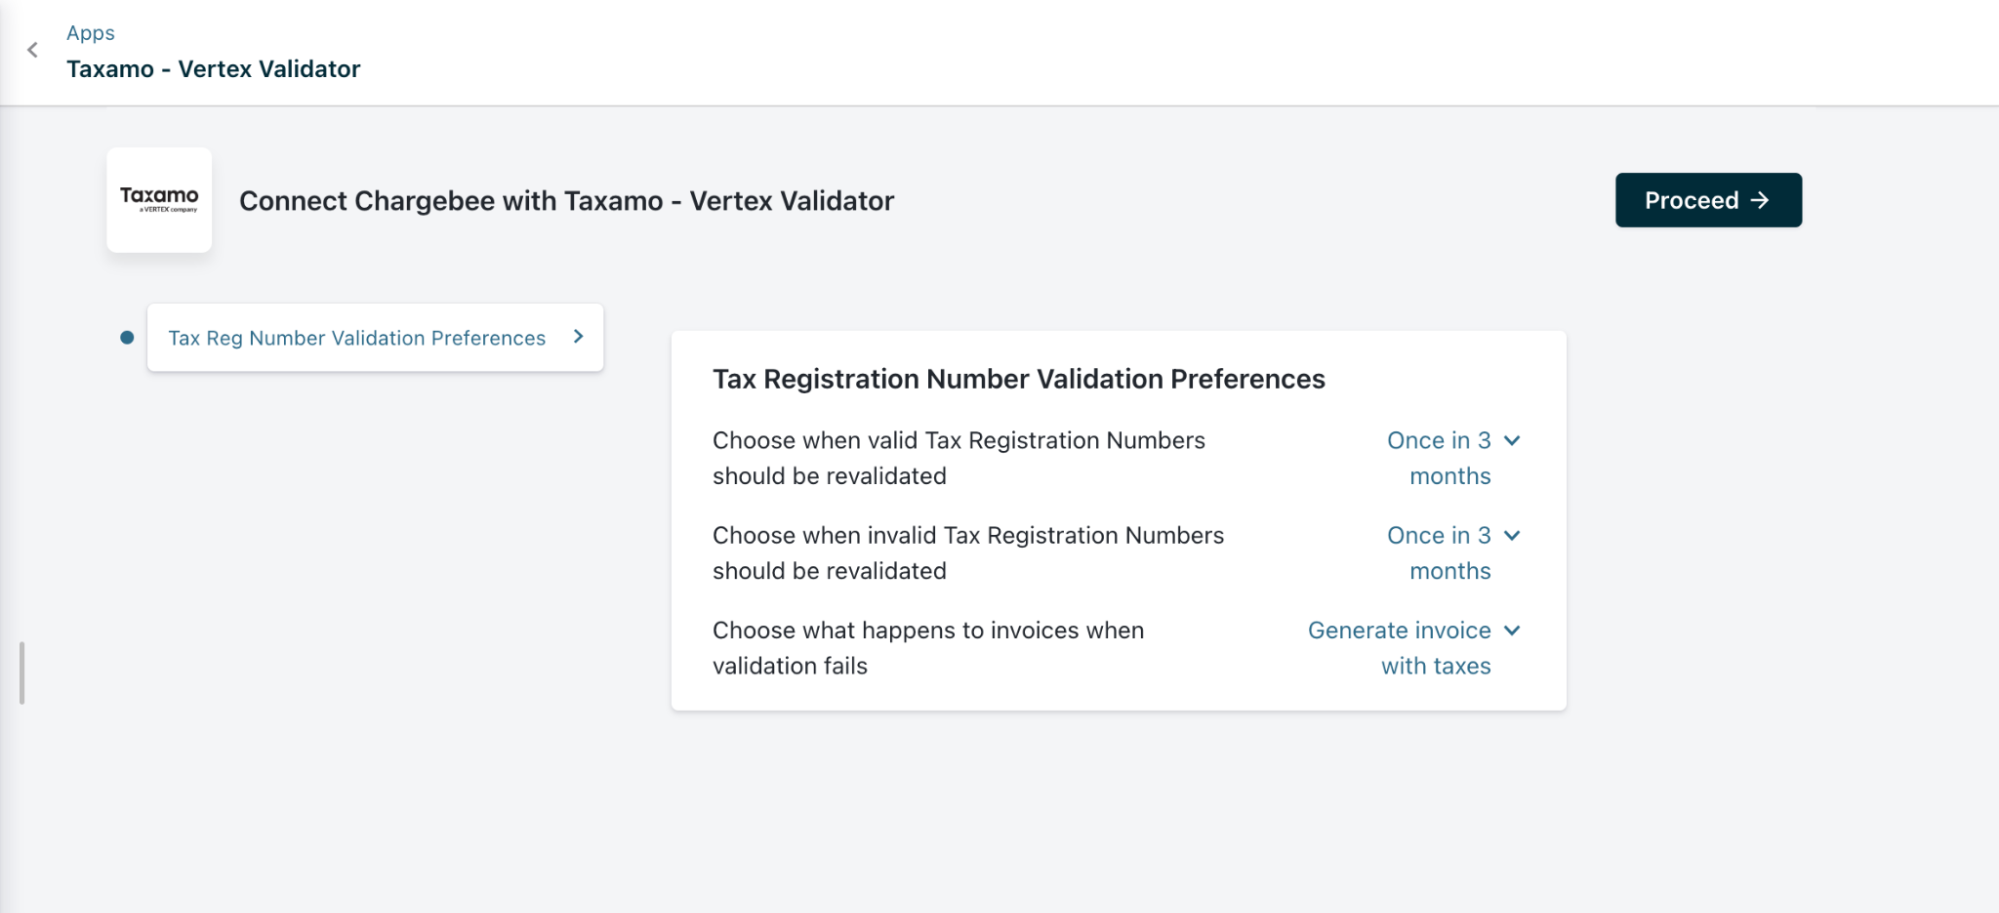
-
In the Preferences section, configure the rest of the tax registration number preferences.
-
Click Proceed. Your Vertex Validator account is now successfully connected to your Chargebee site. You can adjust integration preferences anytime by navigating to Apps > Apps Connected > Taxamo - Vertex Validator > Manage > Manage Preferences.
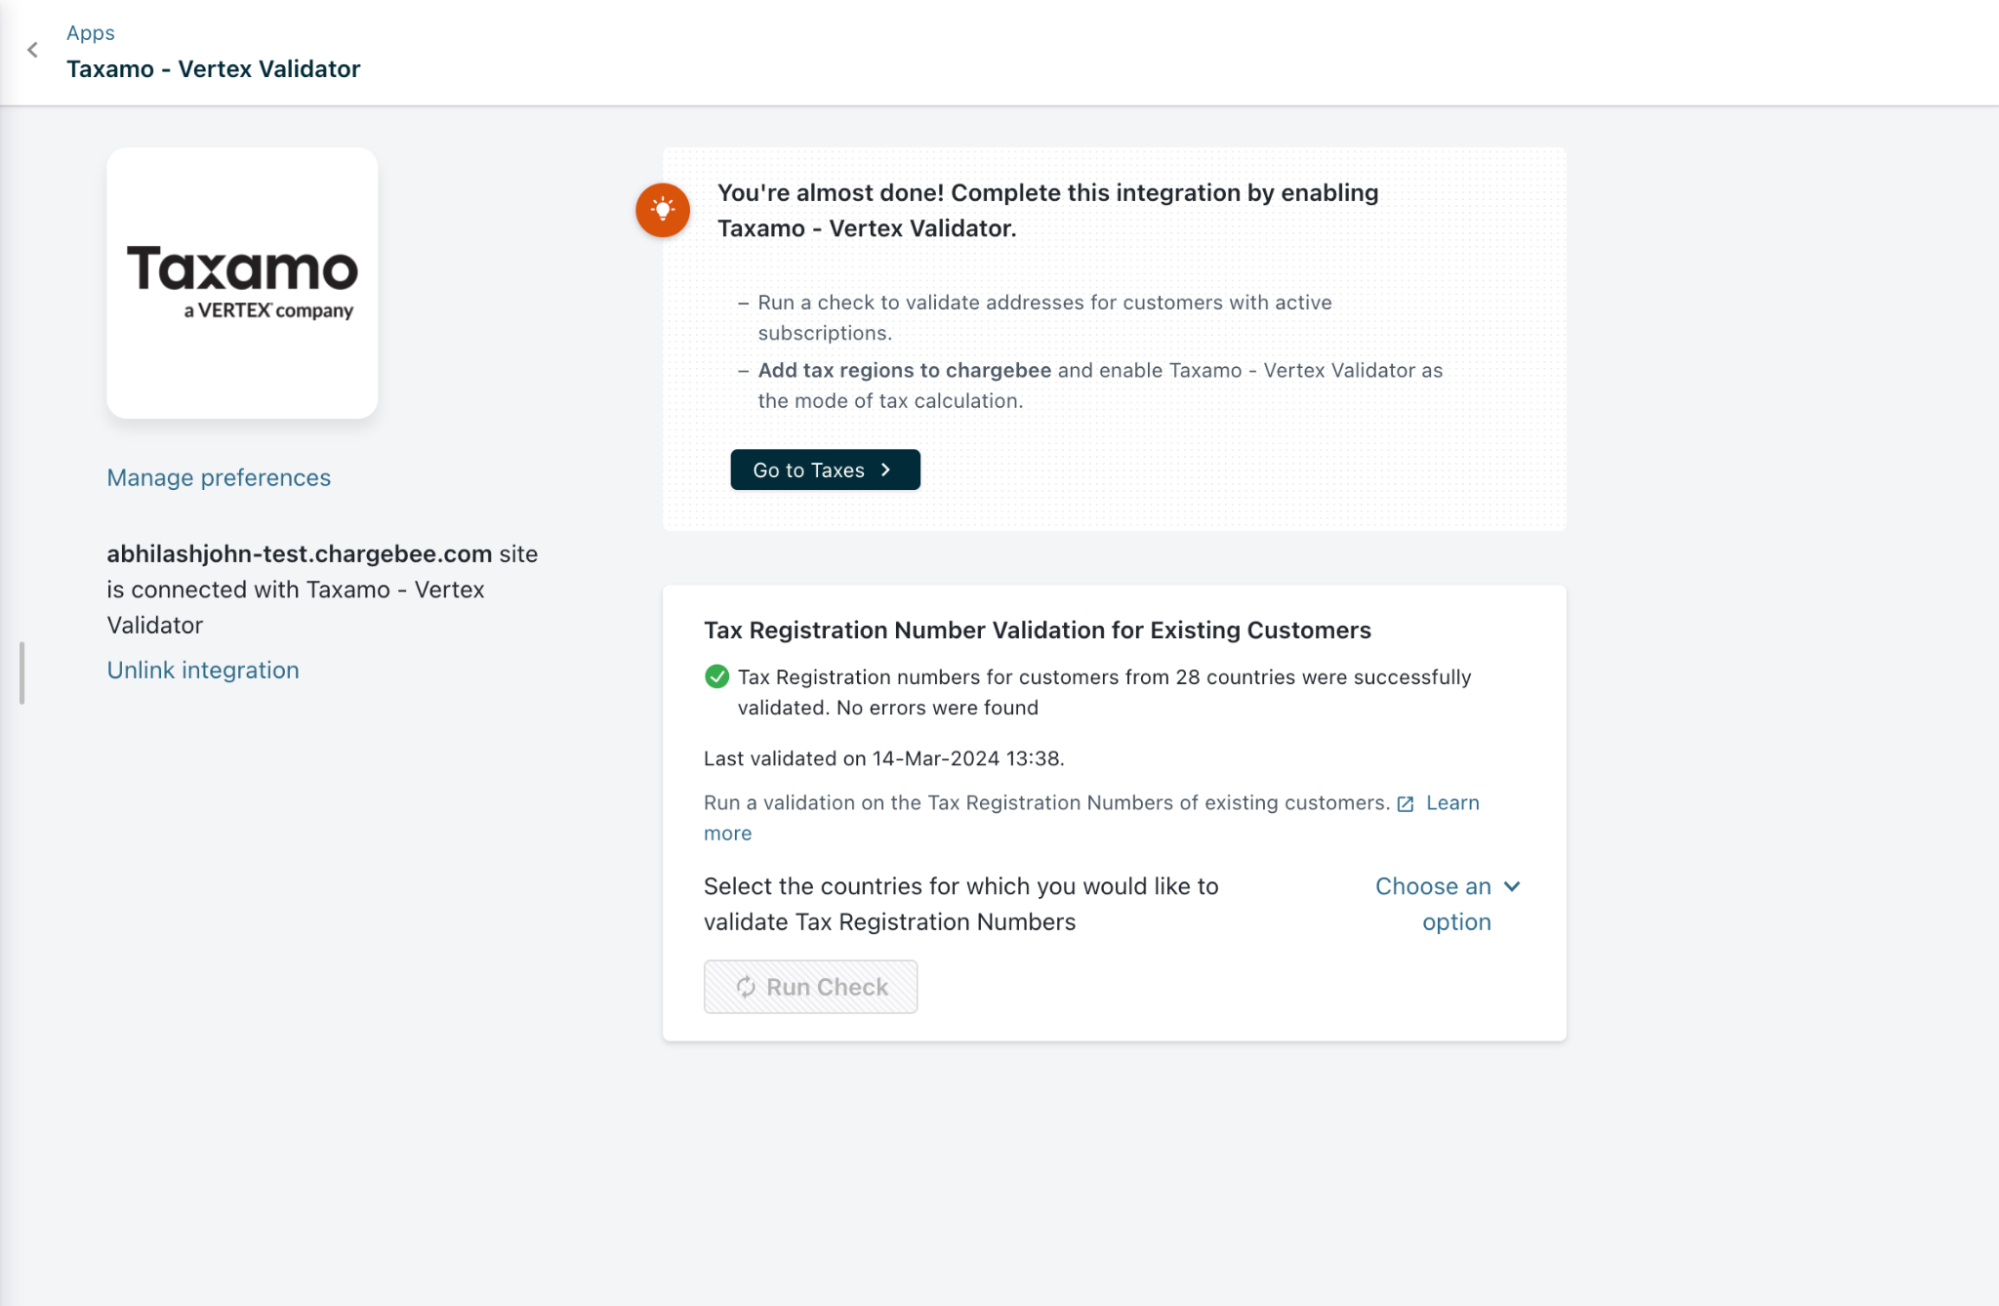
Validating Tax Registration numbers for Existing Customers
The Chargebee - Vertex Validator integration automatically validates Tax IDs for all new customers subscribing after enabling Vertex in a region. For existing customers signed up before enabling Vertex Validator, you have the option to validate VAT numbers and take corrective actions before their next renewal. If a number is found to be invalid, the behavior will default to the preferences saved earlier. To validate existing tax registration numbers:
-
Under Validate Existing Tax Registration Numbers, select your taxable region (e.g., EU) from the drop-down menu.
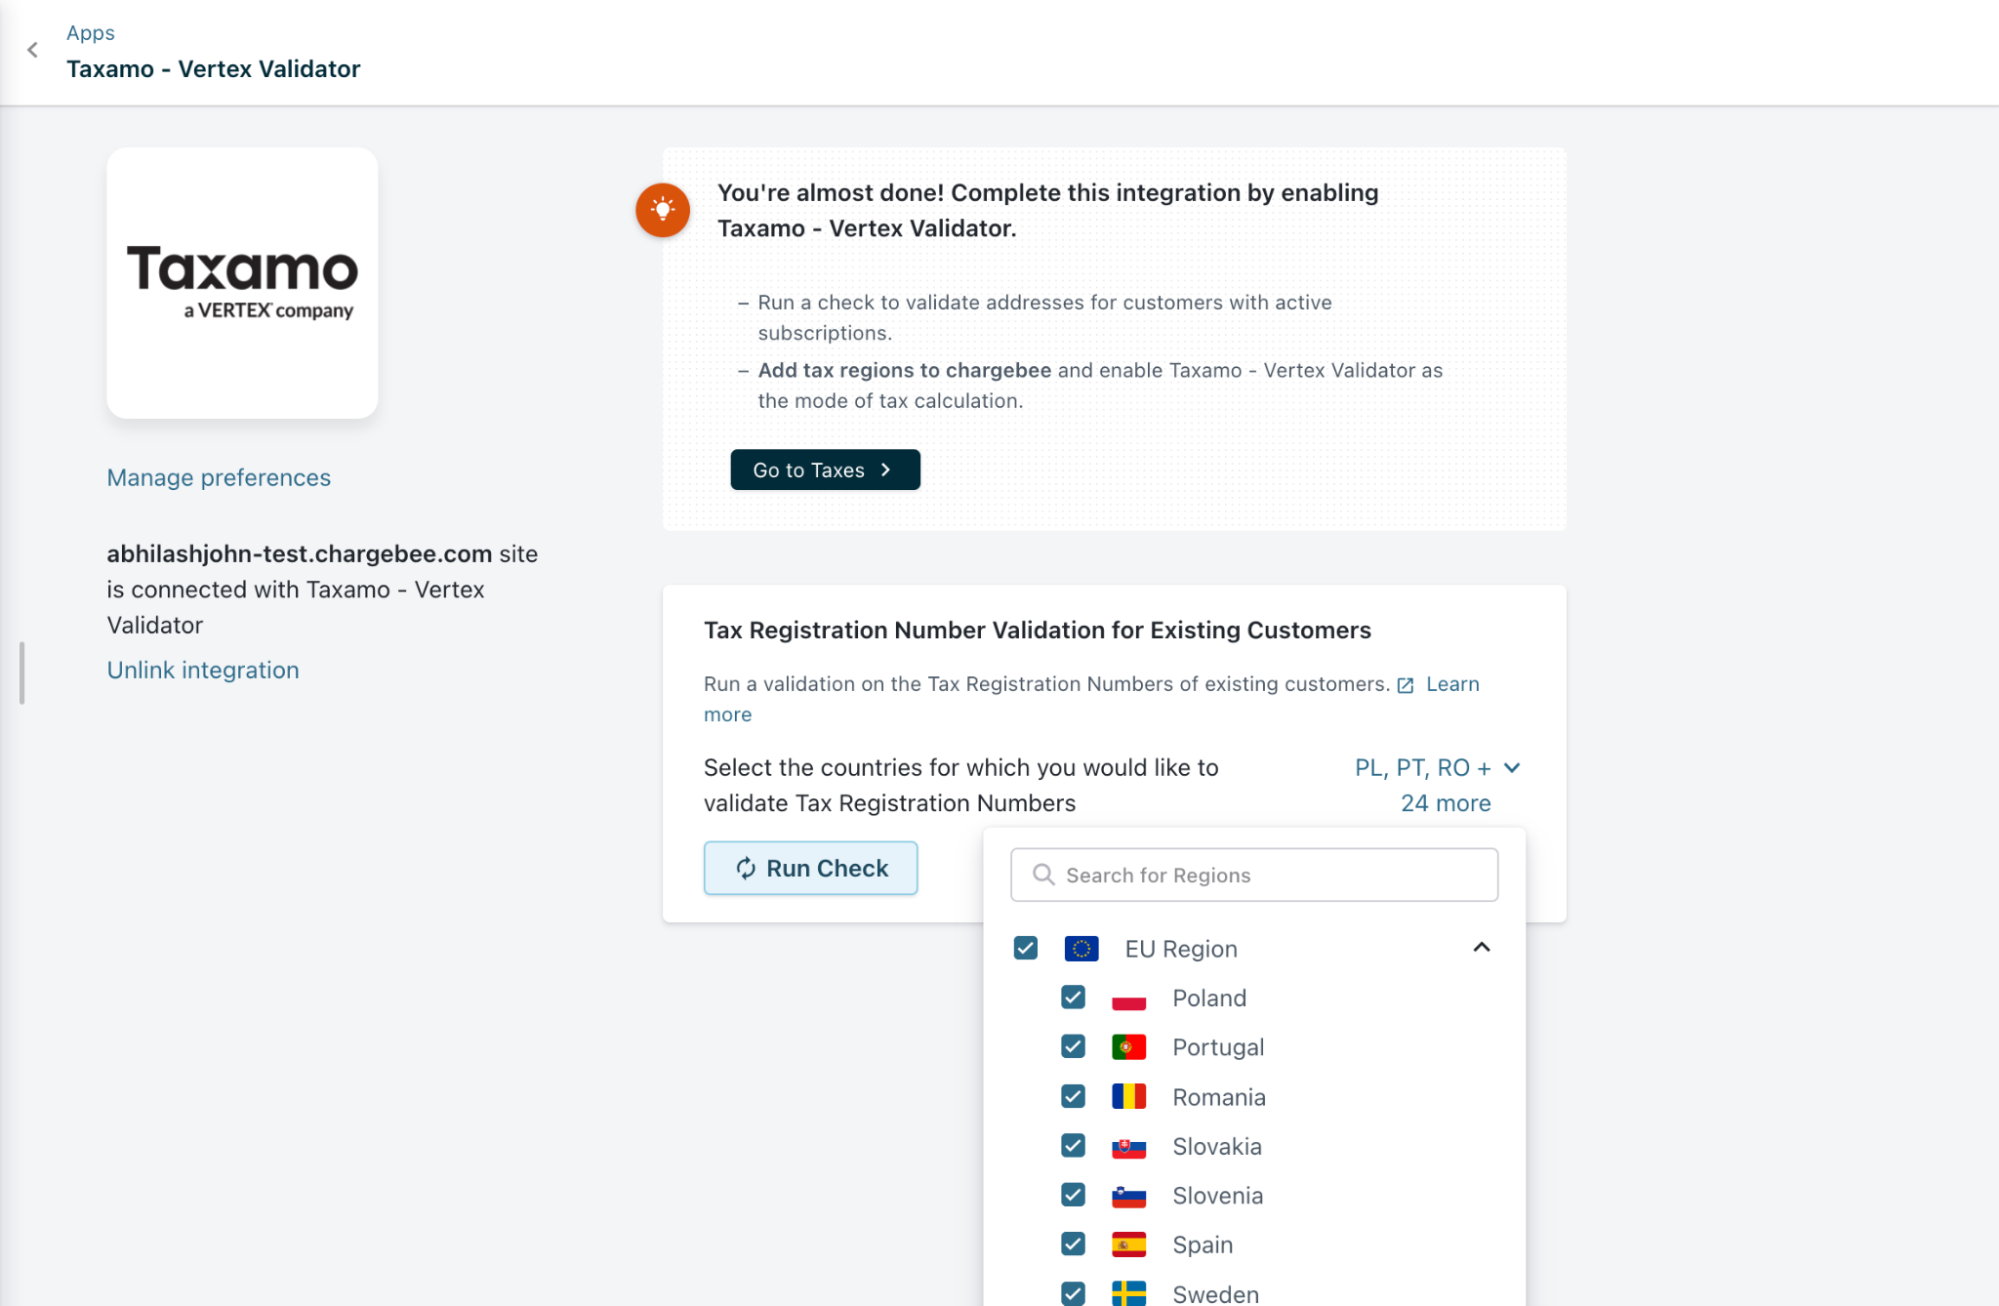
-
Click Run Check
Enabling Vertex Validator for Regions
Once the initial setup is done, you can enable VAT validation for specific regions. Navigate to Configure Chargebee > Taxes > Choose the desired region/country > Click on Manage Provider under Tax Registration Number Validation.
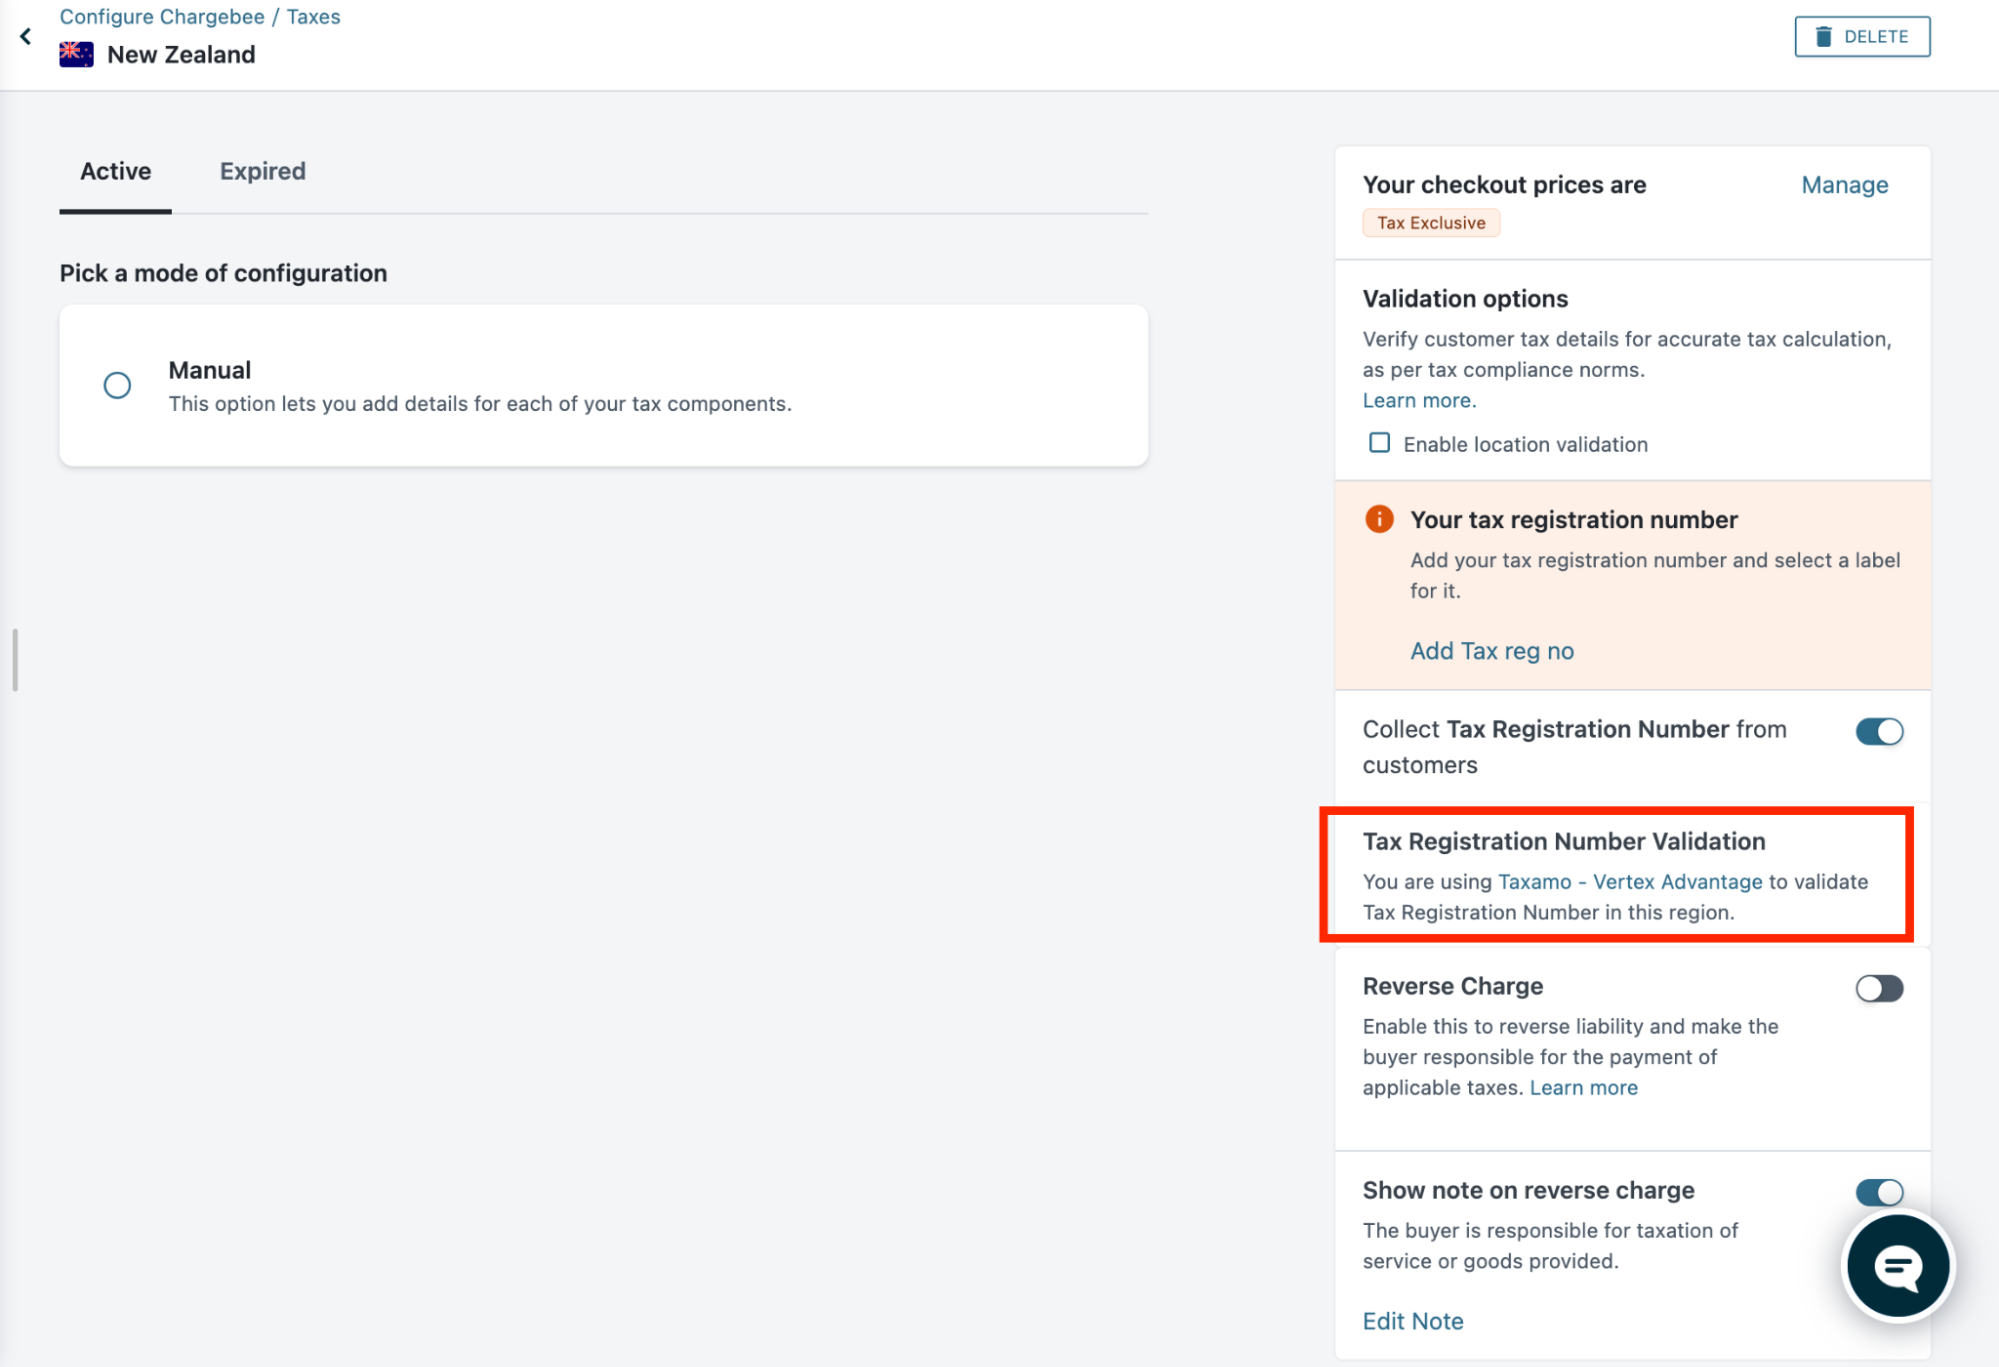
Then, click Add next to the option for Taxamo - Vertex Validator. This process mirrors how you manage tax providers, streamlining the setup for VAT validation.

Once the Validation is enabled for a region you will see the information as seen in the screenshot below
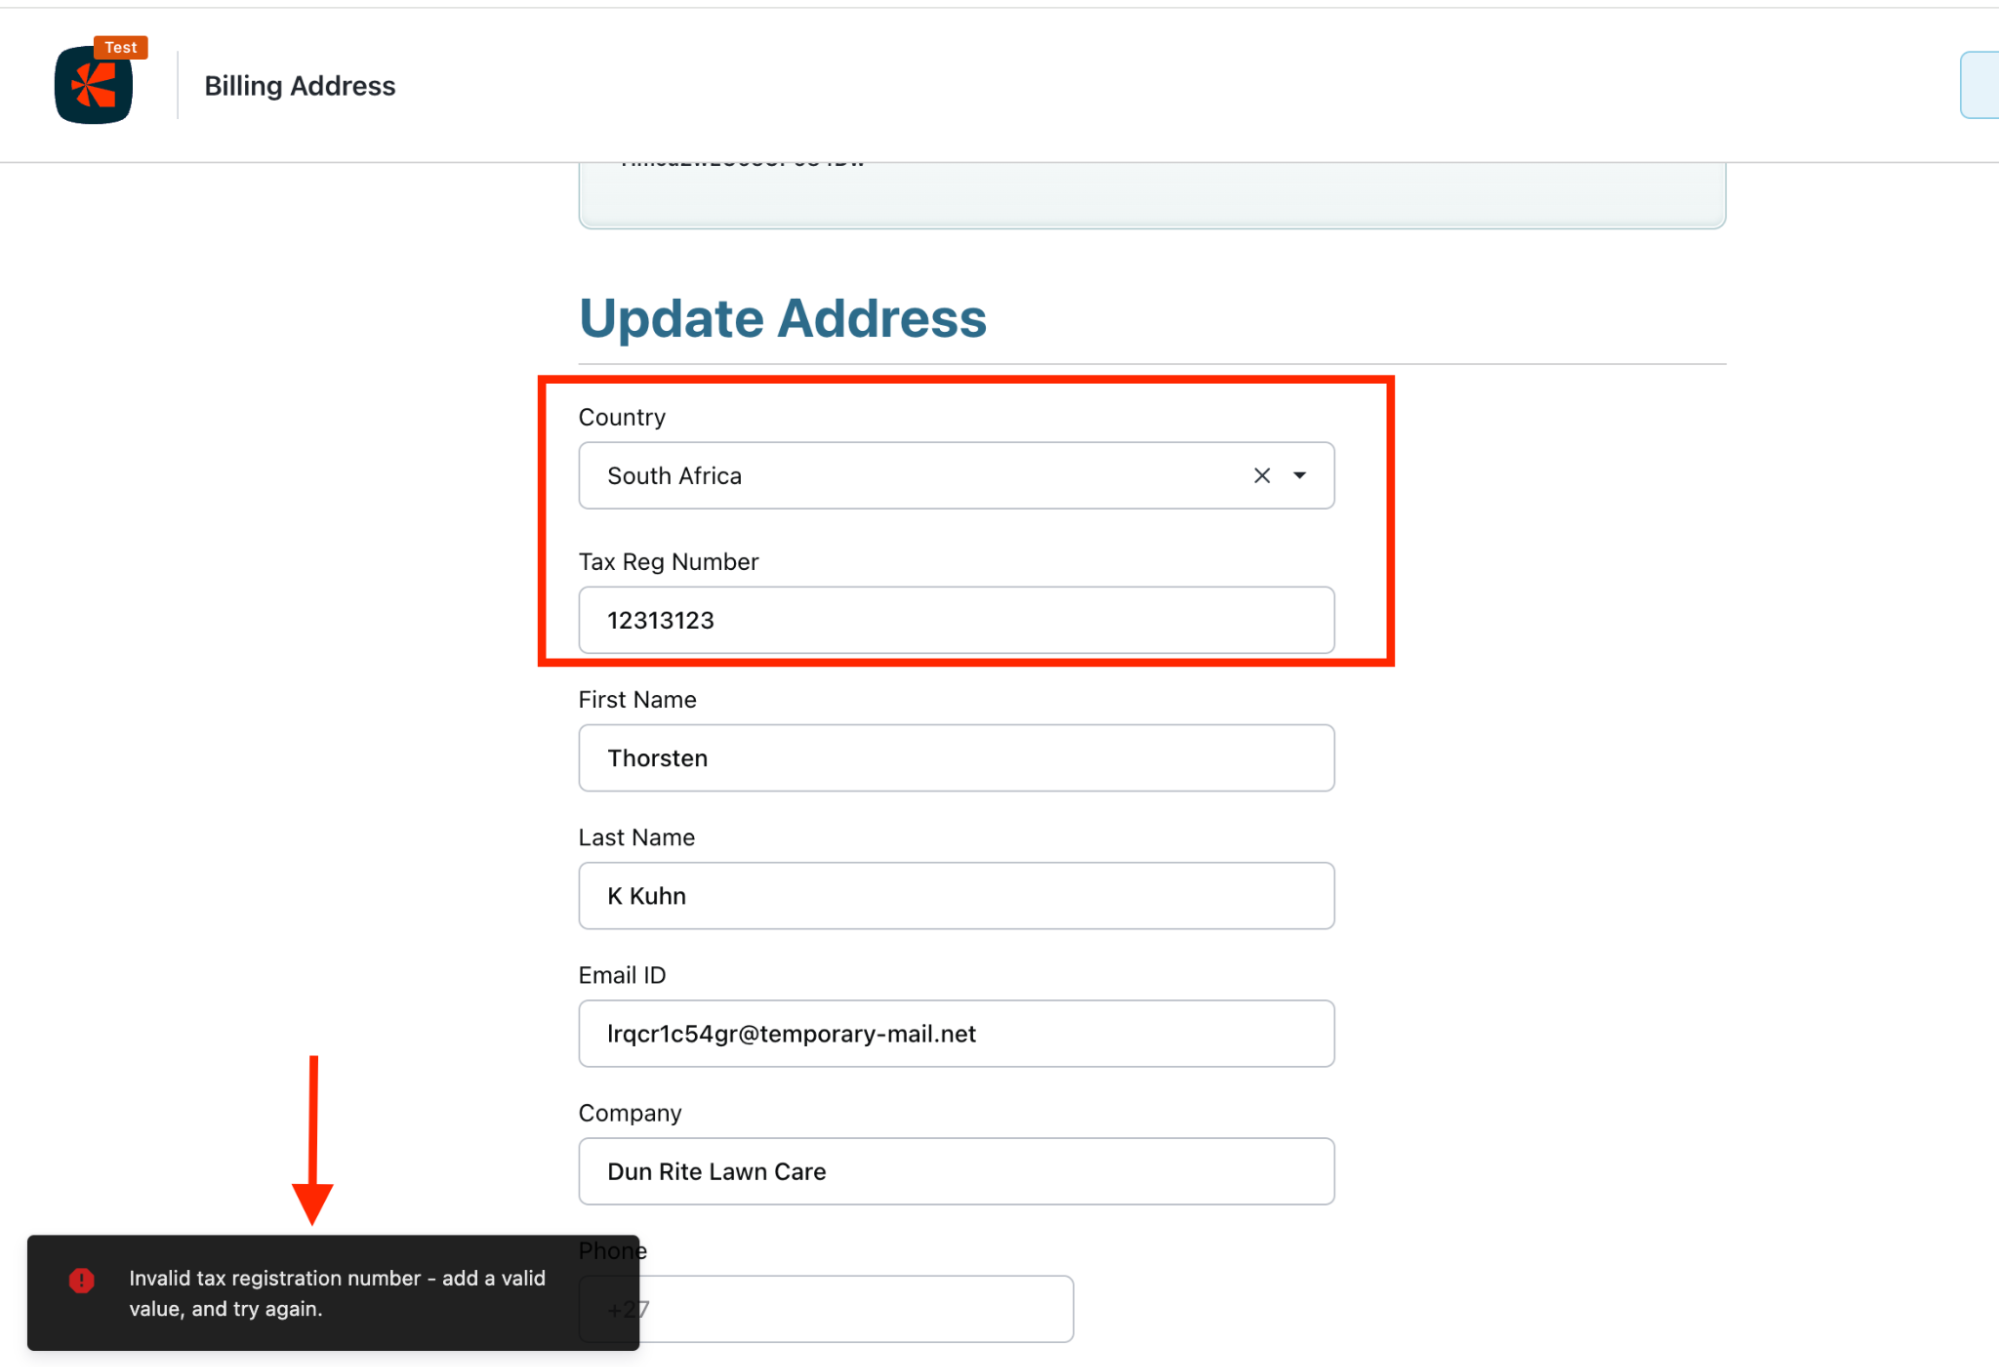
The tax registration number is included in the customer's billing address. Once validation is enabled for a region, whenever you add or update the tax registration number for a customer, the integration immediately verifies the number and provides the status. For instance, if an invalid tax registration number is entered, an error notification, like the one shown below, will be displayed.
Unlinking Integration
To unlink the Vertex integration from your Chargebee site, follow these steps:
-
Click Settings > Configure Chargebee > Taxes and switch from Vertex Validator to your preferred mode of tax calculation for the United States, by clicking Change.
-
Navigate to Apps > Apps Connected > Vertex Validator > Manage, and click Unlink integration.
Limitations
- Multi-entity feature is not supported by the Chargebee-Vertex integration currently.
Was this article helpful?