New in Chargebee: Explore Reveal and understand your payment performance end-to-end.Try Now
Docschargebee docs
HomeBillingCPQPaymentsRevRecGrowthReveal
Support

Product Updates


  • Release Notes

Getting Started


  • Overview
  • Chargebee Billing Data Centers
  • Object Relationship Model
  • Understanding Sites
  • Chargebee Tech Glossary
  • Articles and FAQ

Implementing Chargebee


  • Implementation Guide
  • Go-live Checklist
  • Articles and FAQ

Agentic AI


  • Chargebee Copilot
  • MCP Servers

Developer Resources


  • Developer Resources Overview
  • API Explorer
  • Articles and FAQ

Chargebee Apps


  • Chargebee Apps CLI Developer Guide

Product Catalog


  • Product Catalog Overview
  • Coupons
  • Articles and FAQ

Subscriptions


  • Working with Subscriptions
  • Billing
  • Orders
  • Articles and FAQ

Customers


  • Managing Customers
  • Account Hierarchy
  • Email Notifications
  • Branding
  • Configure Multiple Languages
  • Articles and FAQ

Entitlements


  • Entitlements Overview
  • Features Overview
  • Feature Management
  • Managing Product Entitlements
  • Subscription Entitlements
  • Customer Entitlements
  • Grandfathering Entitlements
  • Articles and FAQ

Usage Based Billing


  • Understanding Usages
  • Setting up Usage Based Billing
  • Usage Alerts
  • Prepaid credits

Invoices and Credit Notes


  • Invoices
  • Credit Notes
  • Quotes [Legacy]
  • Transactions
  • Articles and FAQ

Taxes


  • Overview
  • Configuring Taxes
  • Country-specific Taxes
  • Articles and FAQ

Hosted Capabilities


  • Overview
  • Hosted Checkout
  • Hosted Self-Serve Portal
    • Integration Options
    • Chargebee Self-Serve Portal
    • Portal Features
    • Chargebee Widgets
  • Hosted Pages Features
  • Additional Hosted Pages
  • Payment Components
  • Pricing Table
  • Managing Payments with Chargebee.js
  • Mobile-Optimized Hosted Pages
  • Articles and FAQ

Site Configuration


  • Users & Roles
  • Custom Fields & Metadata
  • Approvals
  • Mandatory Fields
  • File Attachments & Comments
  • Advanced Filter Options
  • Multicurrency Pricing
  • Multi-decimal Support
  • Configuring Reason Codes
  • Events and Webhooks
  • API Keys
  • Time Zone
  • Time Machine
  • Transfer Configurations
  • Articles and FAQ

Multi Business Entity


  • Multi Business Entity Overview
  • Customer Transfer Overview
  • Articles and FAQ

Mobile Subscriptions


  • Overview
  • Omnichannel Subscriptions
  • Omnichannel One-Time Orders
  • Mobile Subscriptions (Legacy)

Reports and Analytics


  • RevenueStory
  • Home Dashboard
  • Frequently Asked Questions
  • FAQs for Classic Reports Sunset
  • Articles and FAQ

Integrations


  • Sales
  • Customer Support and Success
  • Finance
  • Tax
  • eInvoicing
  • Marketing
  • Stitch
  • Collaboration
  • Contract Management
  • Ecommerce Management
  • Articles and FAQ

Data Privacy & Security


  • Two Factor Authentication
  • SAML Single Sign-On
  • System for Cross-Domain Identity Management (SCIM)
  • EU-GDPR
  • Consent Management
  • Personal Data Management
  • Compliance Certificates
  • HIPAA Guidelines
  • PCI Recommendations and Integration Types
  • Articles and FAQ

Data Operations


  • Bulk Operations
  • Migration
  • Articles and FAQ
  1. Billing
  2. Hosted Capabilities
  3. Hosted Self-Serve Portal
  4. Portal Features
  1. Billing
  2. Hosted Capabilities
  3. Hosted Self-Serve Portal
  4. Portal Features

Portal Features

This document explores one of the hosted portal features: Custom Codes.

With Custom Codes, you can tailor your customer portal to fit your business needs. Whether you want to refine the user experience or add specialized logic, this feature lets you build a customer portal that reflects how you sell.

Custom codes

Custom Codes is a Chargebee feature that lets you run your own business logic while a customer performs certain actions in the portal.

Information

  • Contact support to enable the Custom Codes feature.
  • This feature is currently supported in the customer portal's Edit Subscription flow using functions.

Custom codes use case

Consider an example.

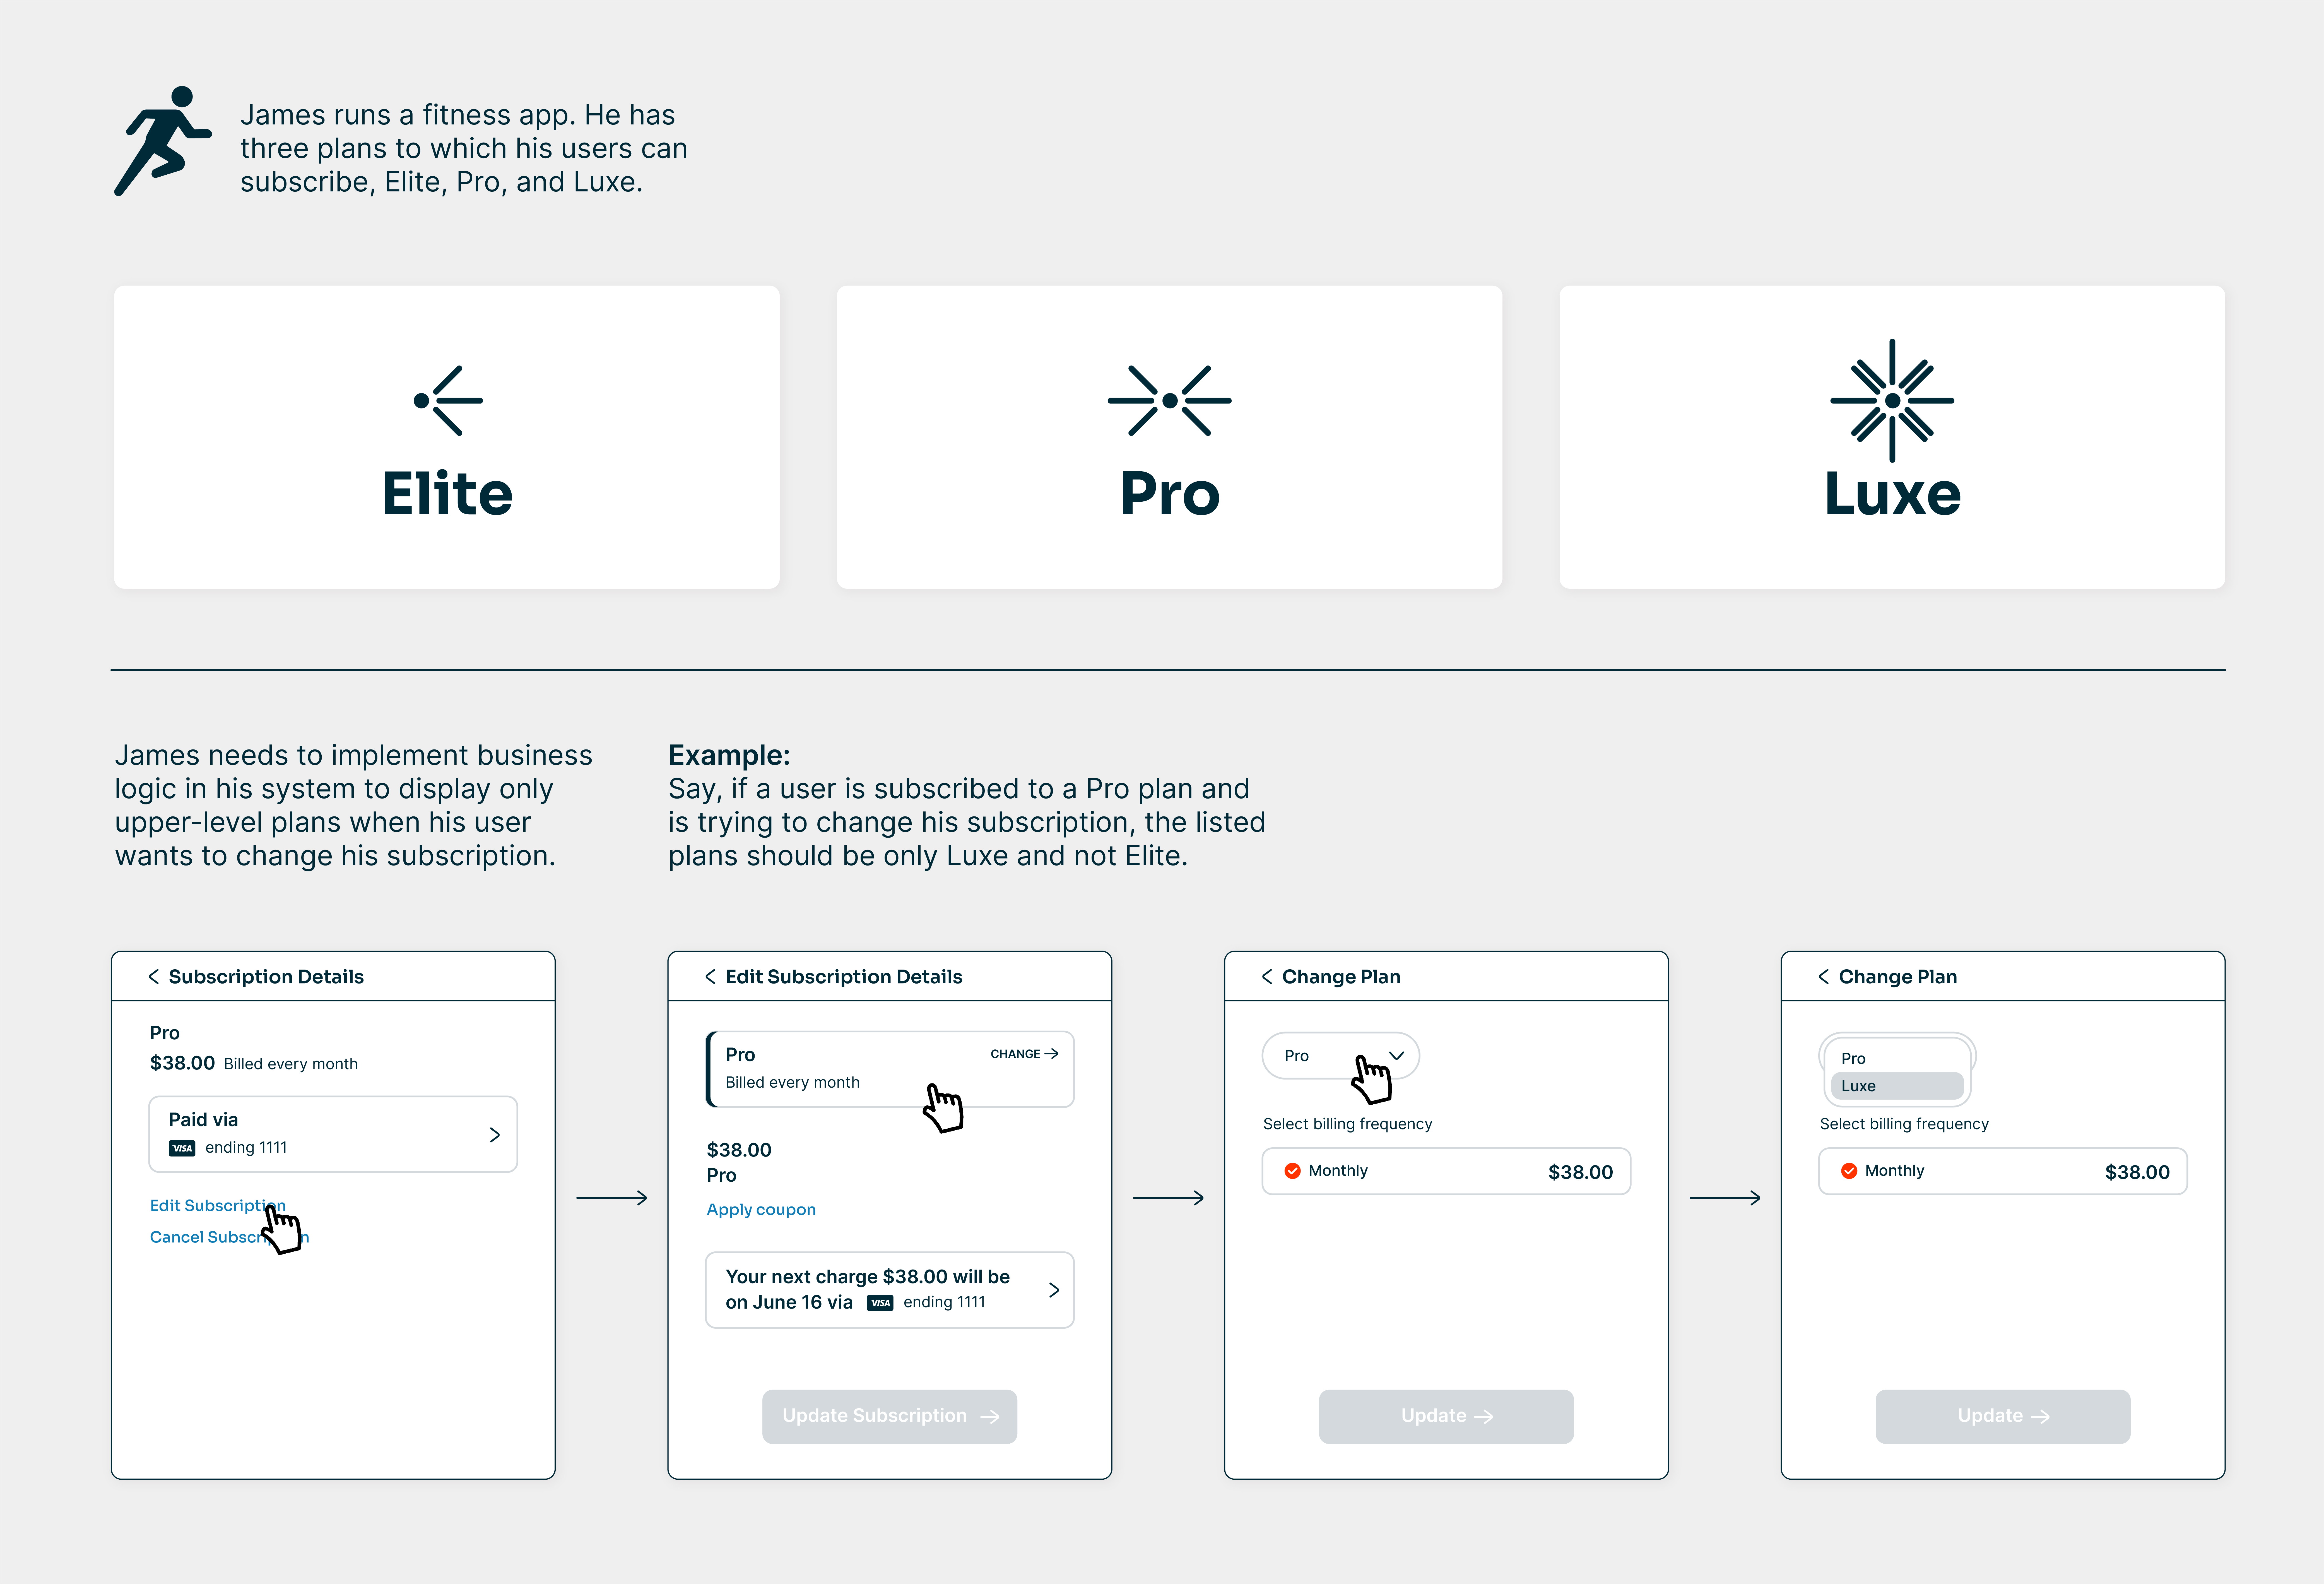
James runs a fitness app with three plans that his users can subscribe to: Elite, Pro, and Luxe.

James wants to show only higher-tier plans when a user changes their subscription. For example, when a user on the Pro plan changes their subscription, the portal should list only Luxe and not Elite.
image

Custom Codes lets James implement this logic using functions.

Supported functions for custom code

The fetchChangeSubscriptionOptions and fetchAllowedPlanConfig functions enable this feature.

Fetch change subscription options

Use fetchChangeSubscriptionOptions to control whether a subscription change takes effect immediately or at the end-of-term, based on your custom logic.

Implement your logic for the subscription-change scenarios that should apply immediately and those that should apply at the end of the term, and return a value for each:

  • To apply the change immediately, set end-of-term to false.
  • To apply the change at the end of the term, set end-of-term to true.

Note

For example, you can apply upgrades immediately and defer downgrades to the end of the term.

Fetch allowed plan config

Use fetchAllowedPlanConfig to do the following:

  • Specify the allowed plans and addons.
  • Auto-attach addons to a plan when it's selected.
  • Set quantity constraints for a plan or addon.

This function returns the plan and addon combinations available for a subscription. The customer sees only the plans and addons in this list when they change their subscription. Write your business logic in this function to restrict the plan and addon lists for your customers.

Note

For example, for customers on the Platinum plan, you can offer plans and addons from a premium group during an upgrade. For customers on the Gold plan, you can offer plans and addons from a basic group during a downgrade.

Learn more about the implementation details of these functions.

Execute your custom code

After support enables Custom Codes, access it at https://YOUR_SITE_NAME.chargebee.com/custom_codes.

The published version of your custom code is available at this link. To make changes, select Download code to download the current custom code.

To run your custom code, follow these steps:

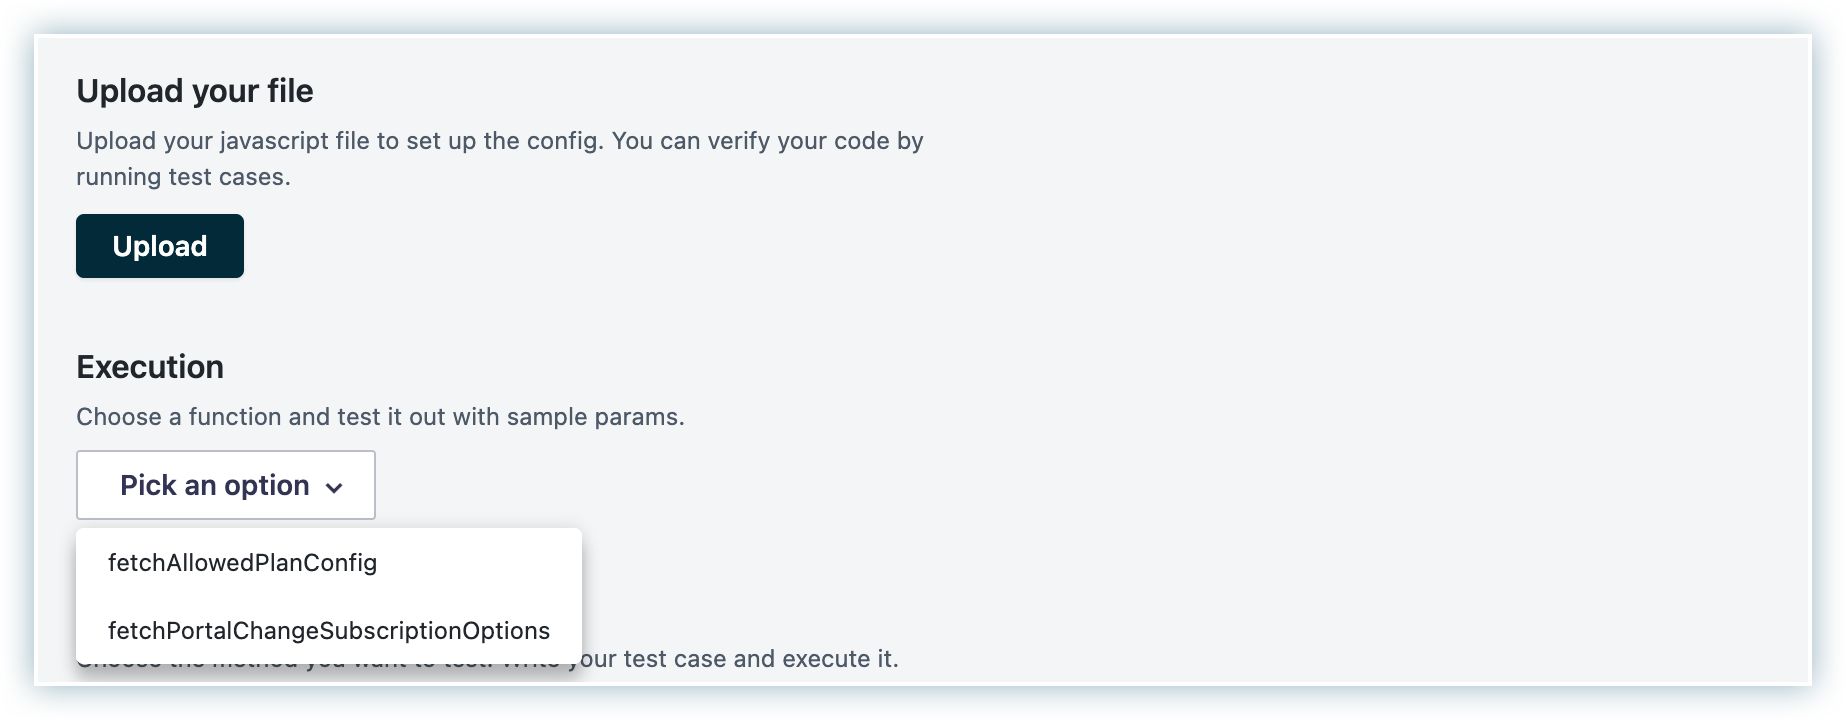
  1. Upload the file that contains your business logic.

  2. Pick an execution option. Depending on your code, fetchChangeSubscriptionOptions, fetchAllowedPlanConfig, or both appear in the dropdown.
image
  1. Enter the required input parameters. Sample input: ['sampleSubscriptionId']

  2. Click Run and validate your results.

  3. Click Publish.

With Custom Codes, you can shape your customer portal into a tailored experience that aligns with your business goals.

Articles & FAQs

What are the events that can be tracked using Facebook Pixel?

Was this article helpful?