QuickBooks custom field mapping
Chargebee allows you to create custom fields for the Customer, Subscription objects, Product items such as Plans/Addons/Item prices, and Product families. You can use this option to track additional information about a customer or their subscription. Once the custom fields are created, they can be added to the hosted checkout pages and invoices. They can be accessed through the web interface as well as API.
Note:
If you wish to pass the custom fields information into your QuickBooks account, contact support.
Custom Fields for Customers
Chargebee allows you to create custom fields for the Customer object to collect customer-specific information, such as date of birth, age, or gender.
Custom Fields for Subscriptions
Chargebee allows you to create custom fields for the Subscription record when the information you need is subscription-specific, and your customers have multiple subscriptions. For example: Domain URLs, Phone Numbers, Tracking ID, Shipping Date, T-Shirt size, and so on.
Custom Fields for Product Families
Chargebee allows you to create custom fields for the Product Family entity to capture additional information such as the list of products that form a part of the product family, or to add a point of contact.
Custom Fields for Plans/Addons/Price Points
Chargebee allows you to create custom fields for your plans, add-ons, and charge price points to store specific information related to them (for example, the regions in which this product is available) for future reference. The information, once captured, is displayed in the respective price points' create, edit, and details pages.
Note:
Price-related custom fields do not show up on Chargebee's hosted pages. Your customers cannot access custom fields related to a plan, addon, and charge price. They can be accessed through the web interface as well as API.
Types of Custom Fields
The supported custom field types are:
| Custom Field Type | Description |
|---|---|
| Single line text | This field will appear as a text box, and the maximum character limit is 99. |
| Multiline text | This field will appear as a text area, and the maximum character limit is 250. |
| Dropdown | This field type will appear as a dropdown menu. You can add as many options as you'd want, but ensure that the total number of characters used for all the options put together, does not exceed 5000. |
| Checkbox | As is evident from the name, the field type can be used for creating checkbox options. The default value of this field type will be false. |
| URL | This field type will appear as a text area. The URL provided here will be validated for "http://" and "https://". |
| This field type will appear as a text box. The email address will be validated. | |
| Date picker | Use this field type if you want to collect date-related information. |
| Timestamp | If you need to collect information related to date as well as time as a timestamp, use this field type. |
| Numbers | You could use this field type for collecting information such as phone numbers. This field does not accept input other than numbers. |
You can add up to a total of 50 custom fields each to Customers, Subscriptions, and Plans/Addons modules. You can create up to
- 30 String fields (includes single line text, multiline text, dropdown, checkbox, URL and email)
- 5 Date fields
- 5 fields of the type Timestamp
- 10 fields of the type Numbers
Creating Custom Fields
To create custom fields in your Chargebee site, go to Settings > Configure Chargebee > Custom Fields. You will be provided with a 'toolbox' to help you create the fields of your choice:
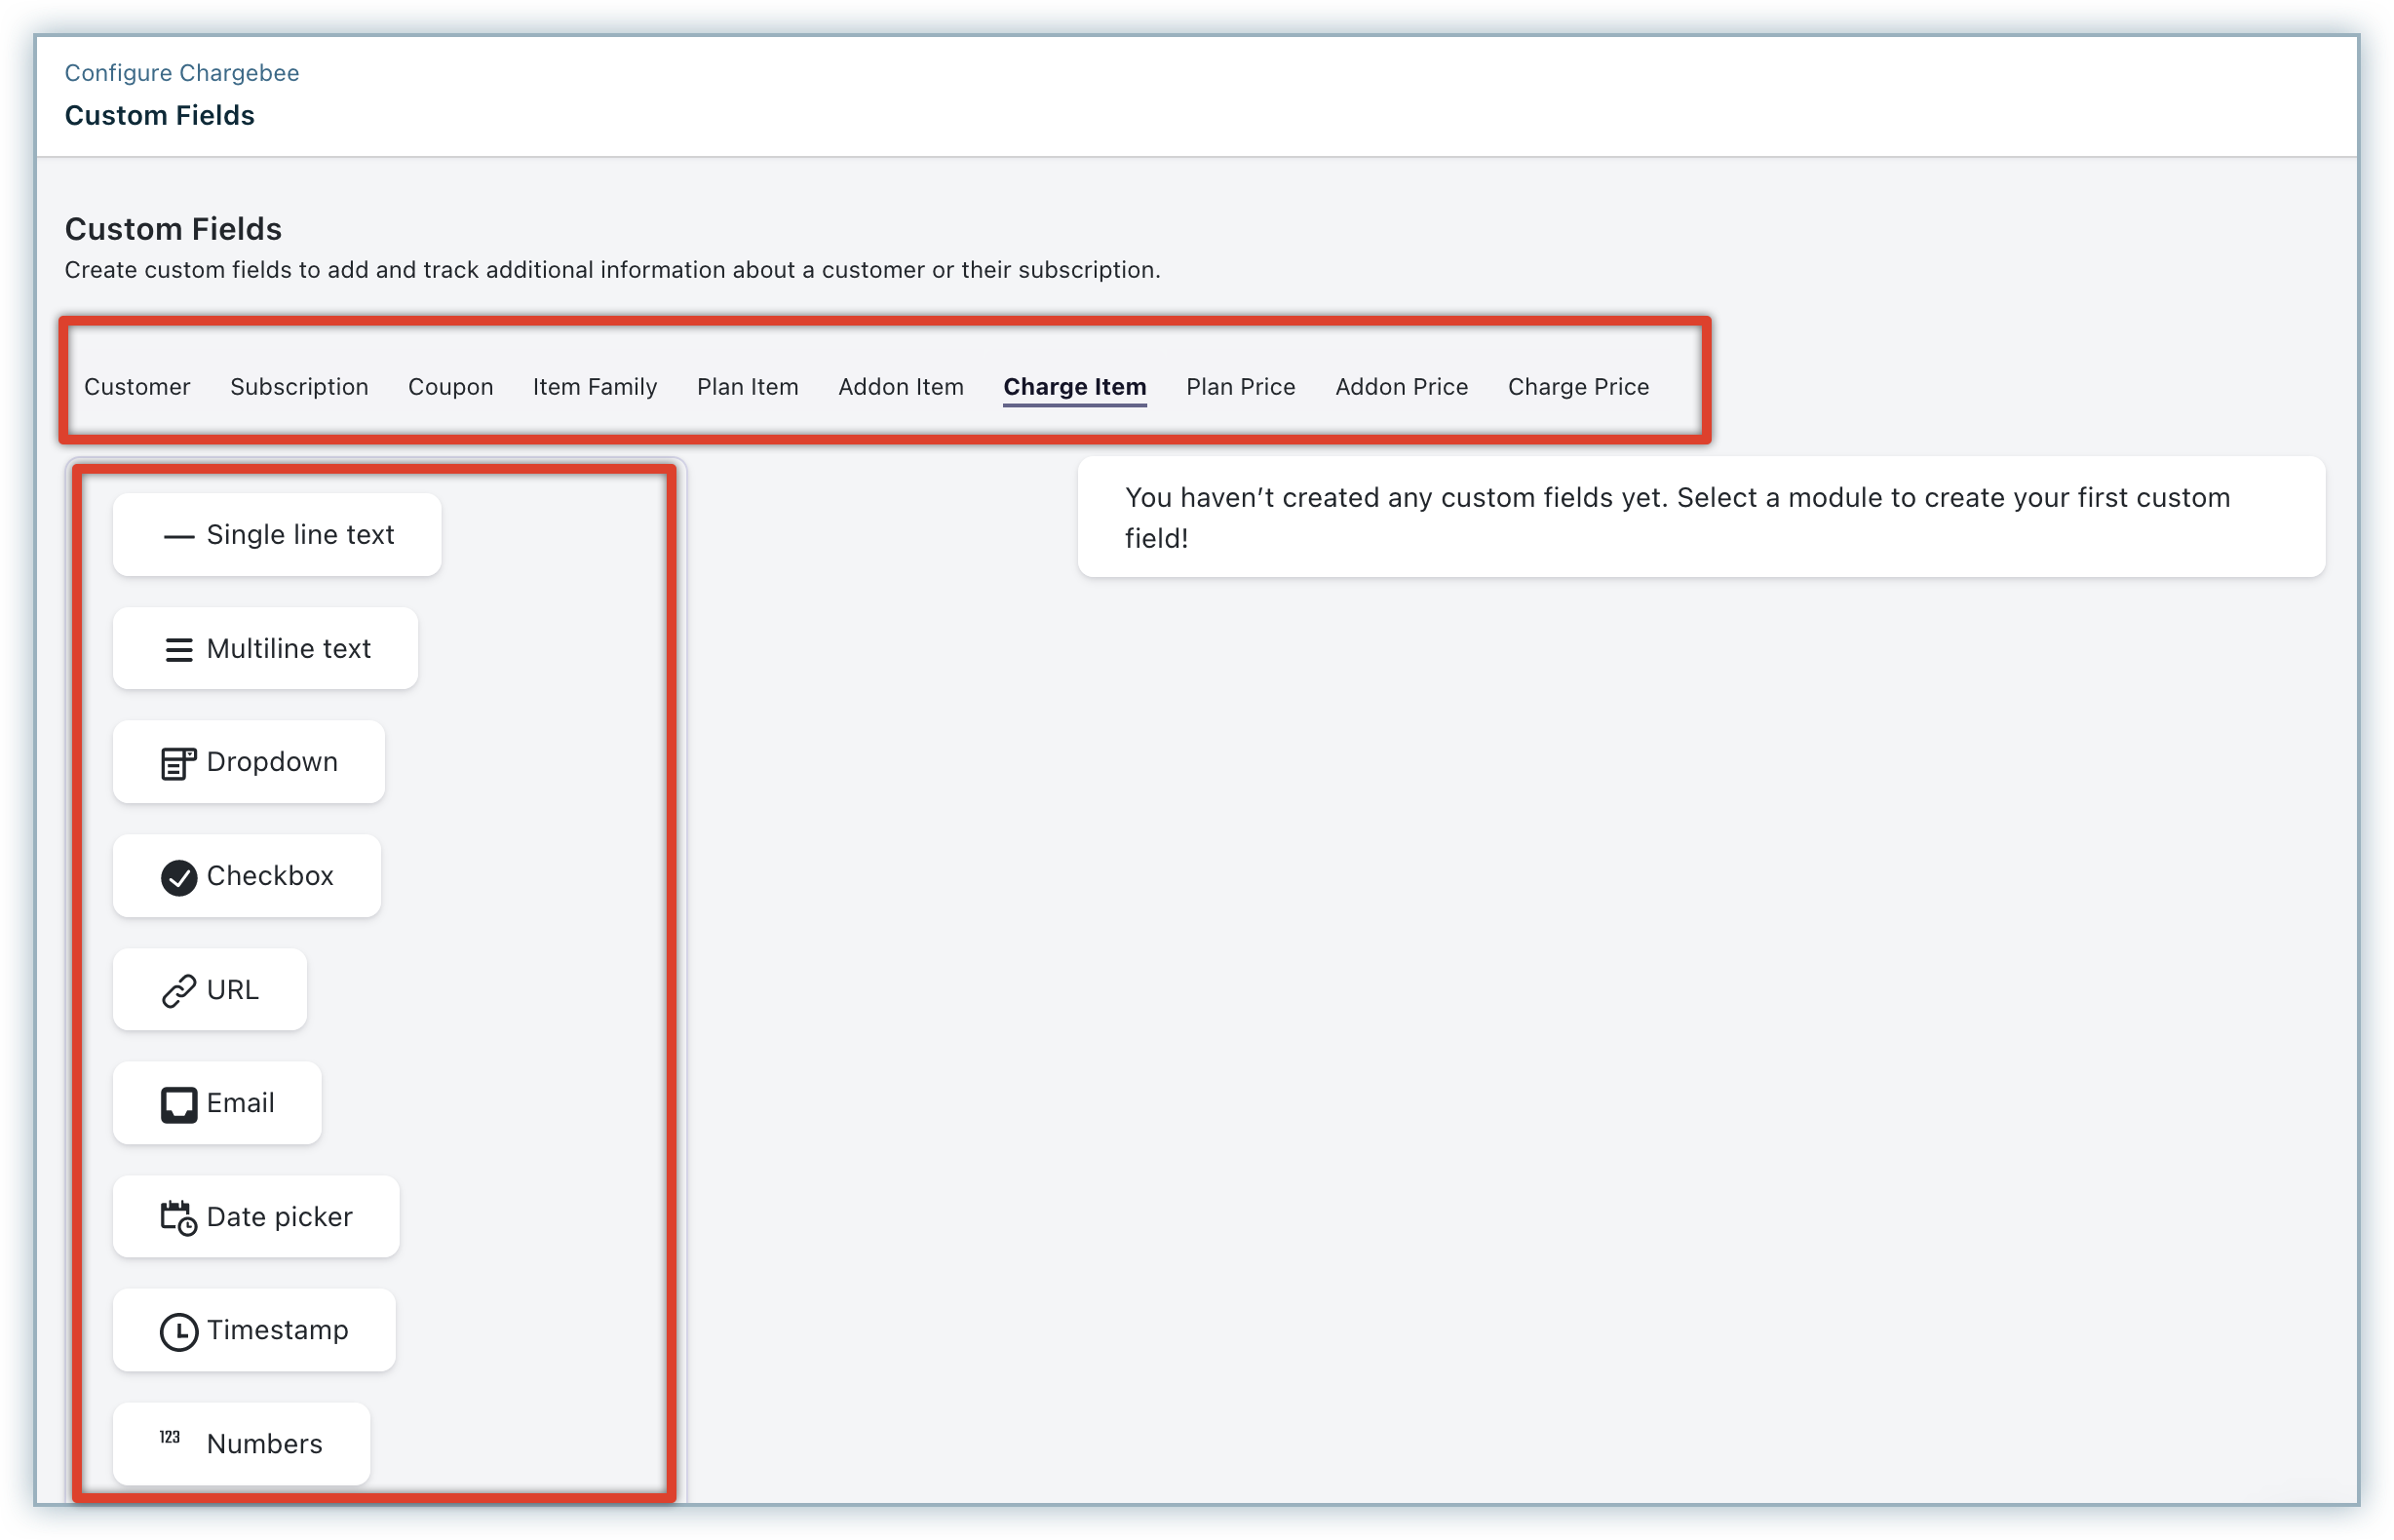
1. Create a Custom Field Select the field type from the drop-down box and fill in the details in the field creation screen that appears:

Field Label: Text that will appear on the UI for hosted pages and invoices. API Name: Field reference for API calls and merges.
The custom fields are considered 'active', and will now be available only on the test site. You need to publish the fields to your live site to include custom field information in the invoices that you send to your customers, or in the hosted pages viewed by them. Ensure that you check how the fields work for all your use cases before pushing it to your live site.
2. Publish a Custom Field On the Custom Fields main page, click Publish to Live and confirm changes.
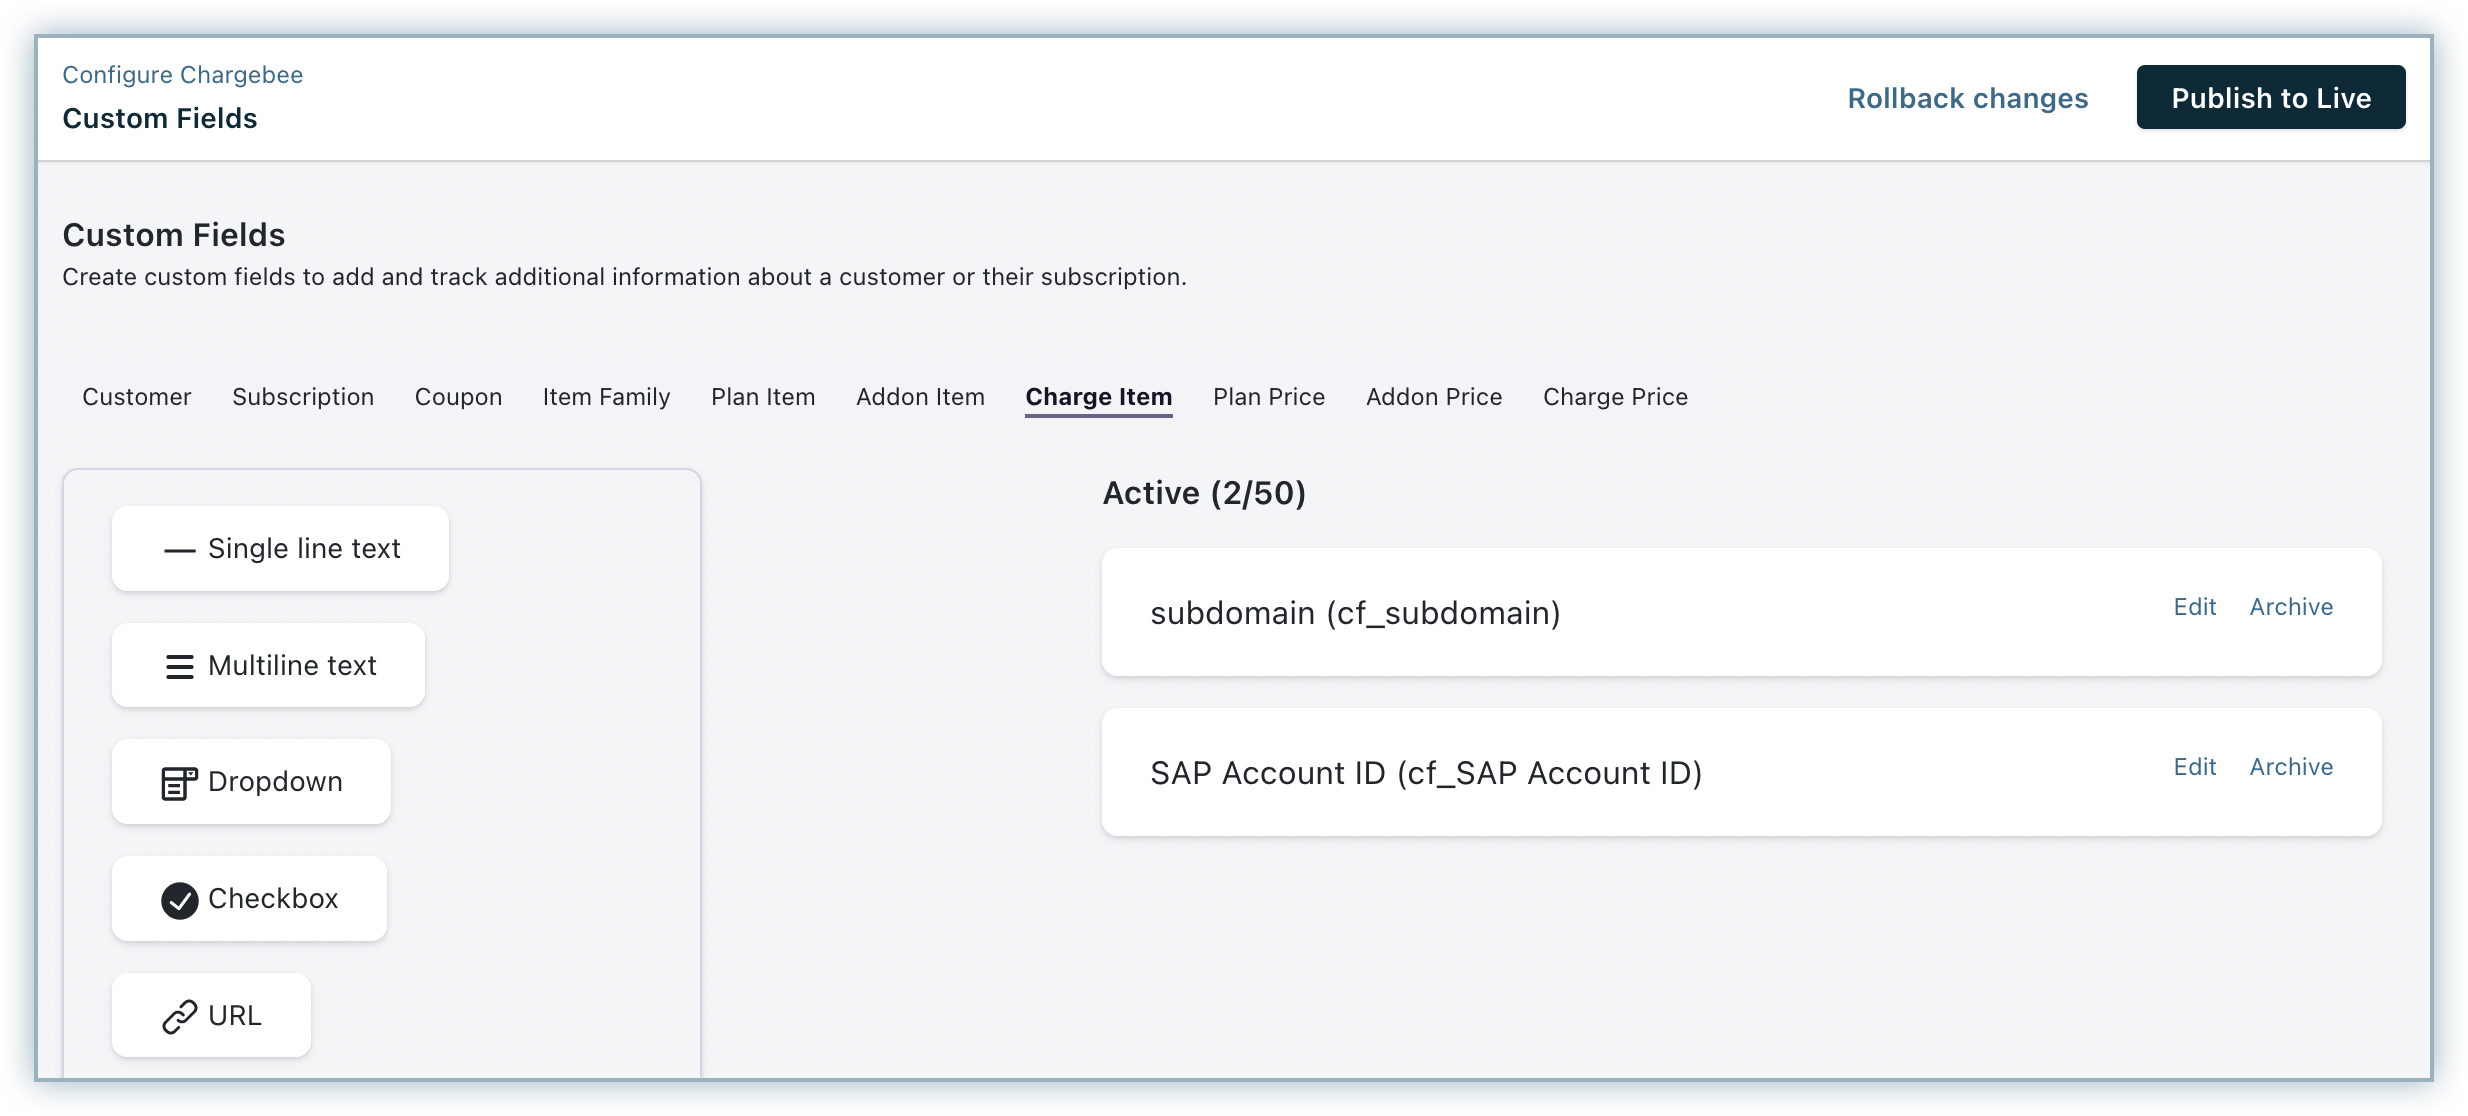
The custom fields will now be available on your LIVE site. To display the same on your hosted checkout page:
If you're using In-app Checkout, navigate to Settings > Configure Chargebee > Checkout & Self-serve portal to make further changes in the LIVE site.
Custom Field Support
The supported custom field types are:
| QB Online | QB Online Advanced | API Support |
|---|---|---|
|
| You can continue to read and use custom fields information for the first 3 string-based custom fields configured in QuickBooks Online Advanced. Note: To retrieve these custom fields through V3 API, it must be accessible to all Sales forms or Purchase Orders. |
Limitations
The supported custom field types are:
-
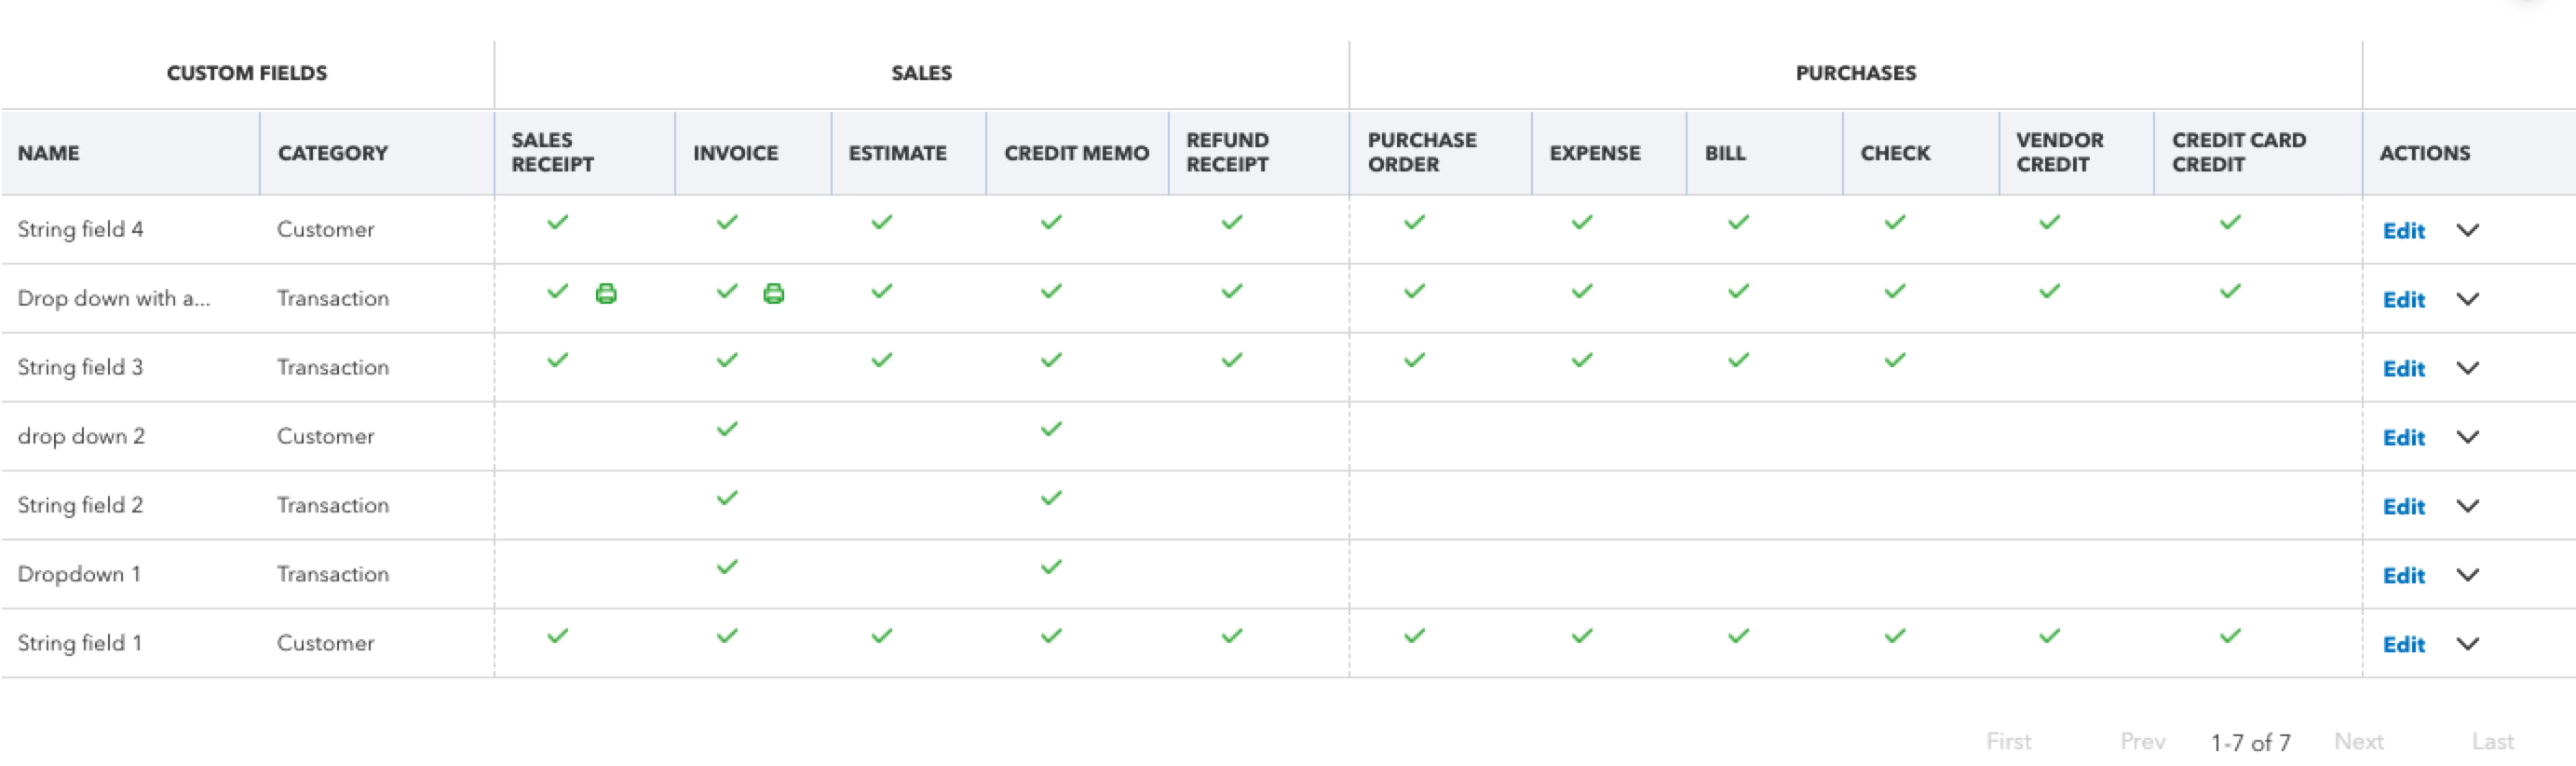
Currently, only the first three active string type fields are supported using API.
-
The first three string custom fields that are active and are enabled for all sales forms are available using API.
-
In the example given below, the string type fields such as String field 1, String field 3, and String field 4 are active and enabled using API.
Was this article helpful?