CPQ Integration Setup Guide
Prerequisites
- The CPQ integration requires Salesforce CPQ version 242.2 or higher.
- The Chargebee for CPQ integration cannot operate concurrently with the Chargebee Salesforce integration.
This guide provides the necessary information to install and deploy the Chargebee for Salesforce CPQ integration successfully.
Install the package
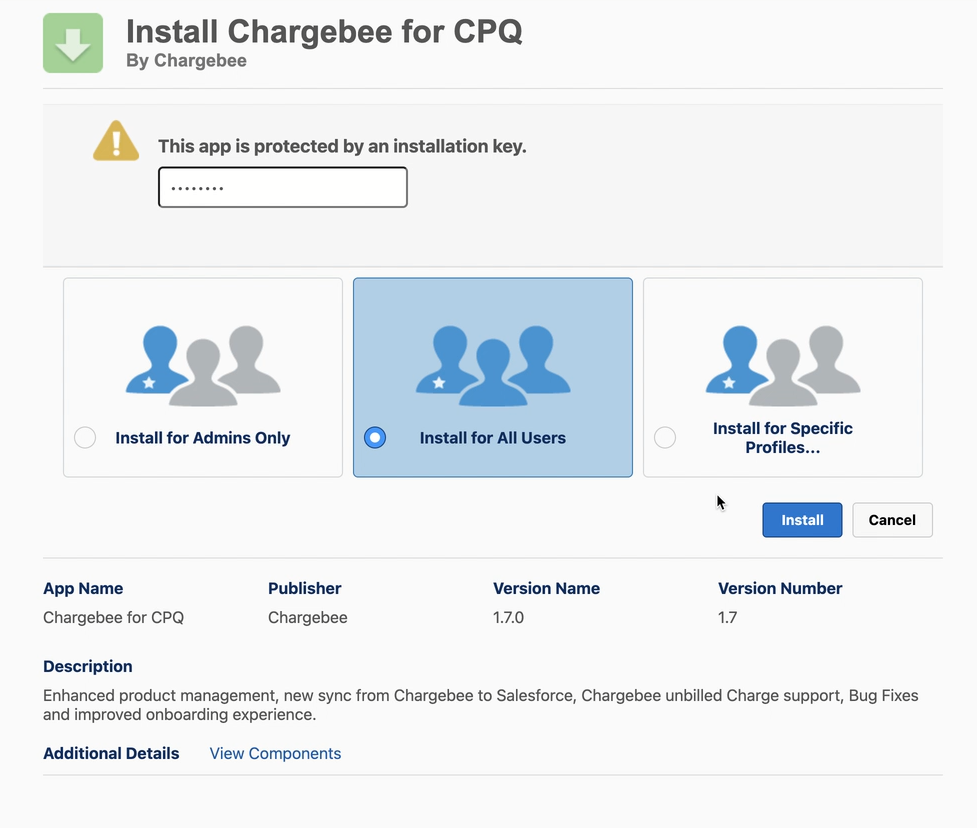
The CPQ integration is delivered as a Chargebee-managed package in Salesforce org. The integration package link, password, and Chargebee site details are shared securely when you sign up to use the integration.
To install the package, perform these steps:
-
Enter the package URL and the password.
-
Select the profile as Install for All Users or Install for Specific Profiles.
-
Click Install.
-
The installation could take a few minutes to complete. Once the installation is successful, follow the steps to set up the integration.
Set up the integration
After you've installed the package, you need to configure the integration to align with your business requirements.
Watch the video or follow the steps below to launch the Chargebee Settings app and set up the integration:
-
In Salesforce, click on the app launcher and select Chargebee. The app launches with the Chargebee Settings page open.
-
Click Next to move to the Add Site screen.
-
Click Connect Site to bring up the Connect Chargebee Site dialog.
-
Enter the Label, URL, and API Key as suggested in the dialog.
-
Click Add Site. You'll see a new row with the details you provided. The Connection Status field reads Not Connected.
-
Click Validate Connection on the new row. The integration will attempt to connect to the Chargebee site. If the connection is successful, the Connection Status field will change to Connected.
-
If you have multiple Chargebee sites to connect to the Salesforce org, repeat steps 5 and 6 for each site.
-
Click Next to move to the Verify Chargebee Features screen. Ensure that the Status field for each feature is set to Enabled. If any required features aren't enabled, follow the instructions in the How to enable this feature? column to enable them in Chargebee. Once enabled, click Refresh Status to update the Status fields.
-
Click Next to go to the Schedule Jobs screen.
-
Enter the sync job frequency and the number of days you want to keep log entries.
-
Click Next to navigate to the Sync Rules screen.
-
Follow the instructions starting from step 4 in this section to set up the sync rules for both customer and subscription records from Chargebee to CPQ.
-
Click Next to go to the Finish screen. Now, proceed to assign permission sets, set up page layouts, set up validation rules, and connect a price book with Chargebee.
-
Click Start using the integration. You'll then be redirected to the Salesforce CPQ app.
Set up sync rules
You can dictate how Chargebee customer records, with attached subscriptions, sync with Salesforce CPQ as either accounts or contacts. Furthermore, you can establish rules for creating corresponding opportunities and quotes in Salesforce CPQ whenever subscriptions in Chargebee are created or updated.
Steps to set up customer and subscription sync rules
-
In Salesforce, click on the app launcher and select Chargebee.
-
Navigate to Chargebee Settings > Sync Rules.
-
Choose the Chargebee Site.
-
Define the rules under Chargebee Customers:
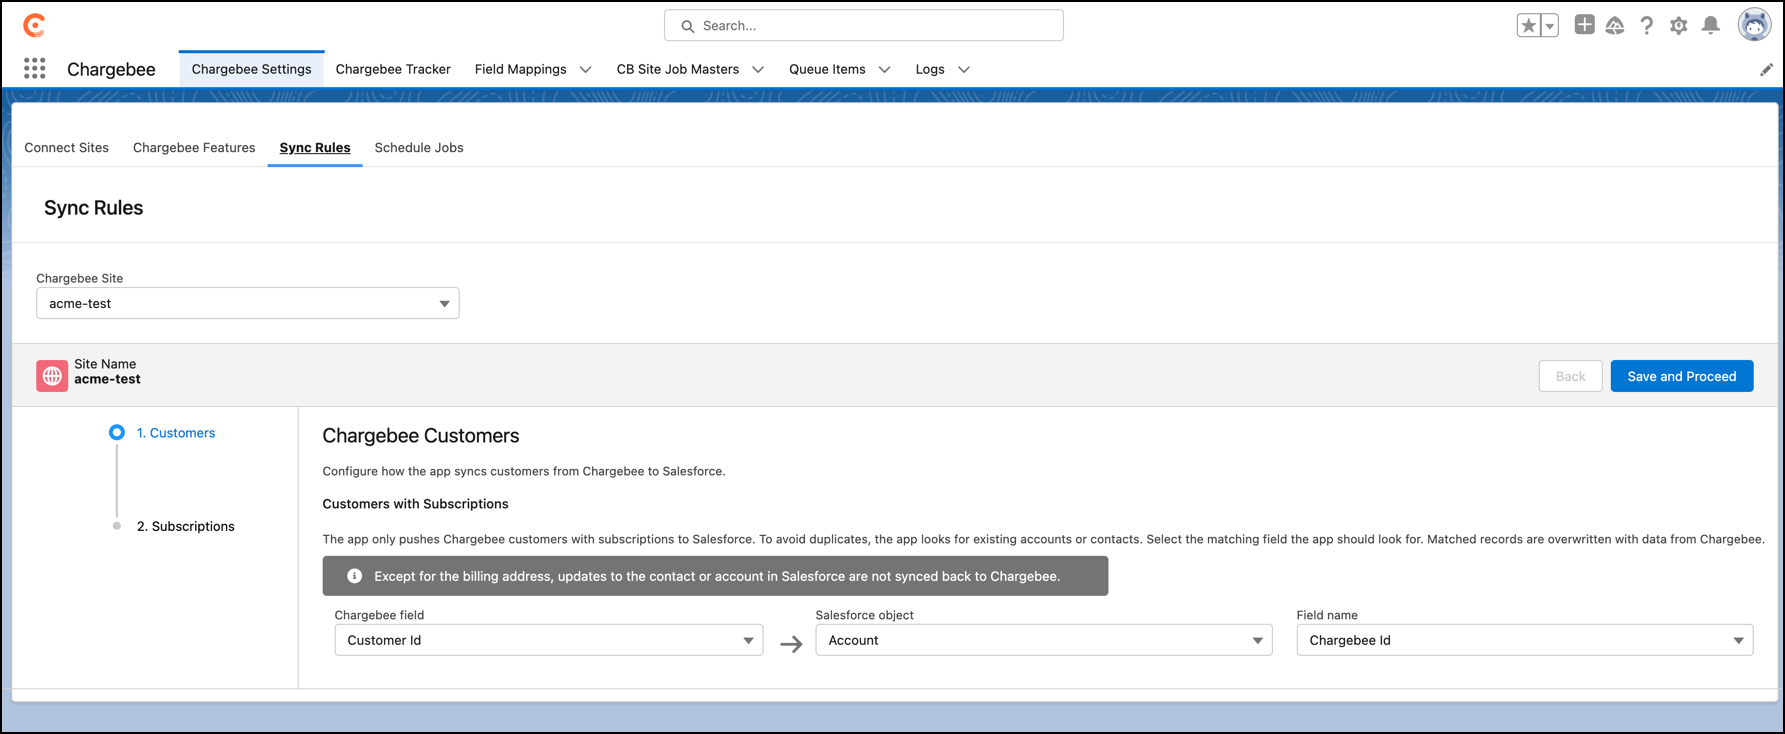
- Chargebee field: Choose the Chargebee customer object field to match an account or contact record in Salesforce.
- Salesforce object: Decide if the Chargebee customer record should sync with Account or Contact records in Salesforce.
- Field name: Choose the account or contact object field to locate a matching record in Salesforce.
- Click Save and Proceed.
-
Define the rules under Chargebee Subscriptions:
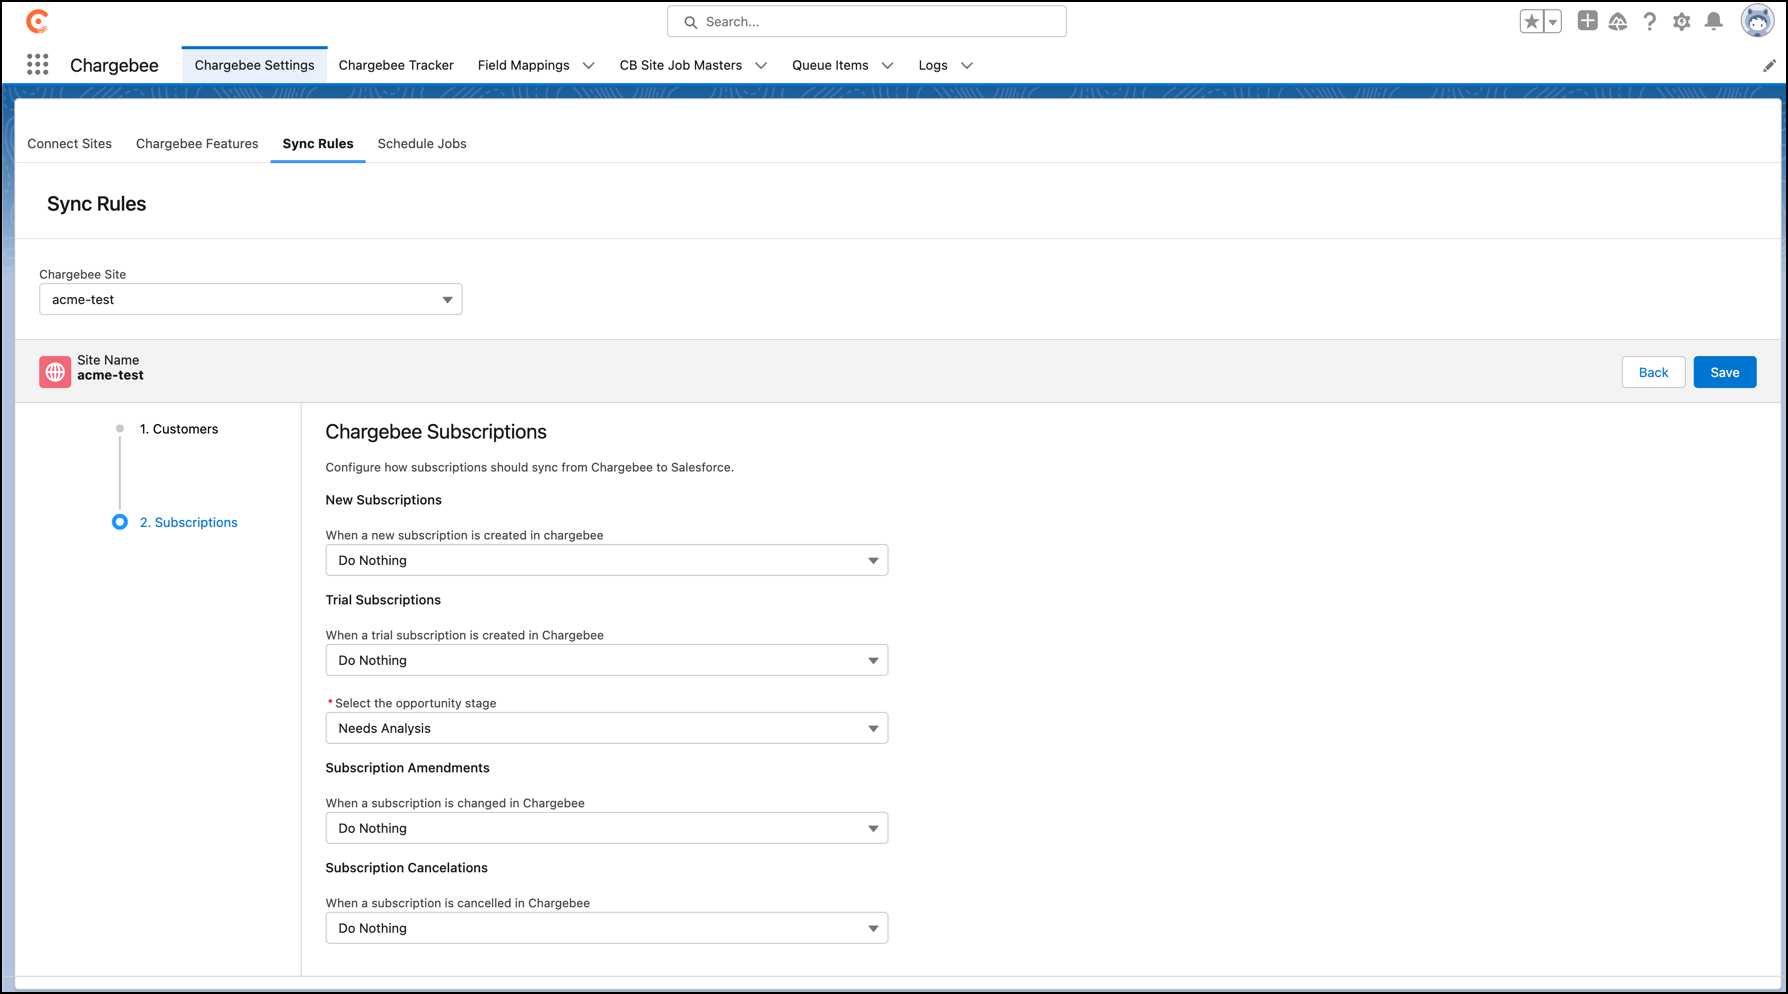
- From the When a new subscription is created in Chargebee dropdown, choose one:
- Create opportunity and quote: This generates a new opportunity and quote in Salesforce when a new active subscription is created in Chargebee. The opportunity stage is set to Closed-Won.
- Do Nothing: The integration will not trigger any changes in Salesforce when a new subscription is created in Chargebee.
- From the When a trial subscription is created in Chargebee dropdown, choose one:
- Create opportunity and quote: This generates a new opportunity and quote in Salesforce when a trial subscription is set up in Chargebee. You'll configure the opportunity stage in the next setting.
- Do Nothing: The integration will not trigger any changes in Salesforce when a trial subscription is created in Chargebee.
- From the Select the opportunity stage dropdown, choose the opportunity stage for trial subscriptions when the preceding setting is Create opportunity and quote.
- From the When a subscription is changed in Chargebee dropdown, choose one:
- Create amendment opportunity and quote: This generates a new amendment opportunity and quote in Salesforce when a subscription in Chargebee is updated. The opportunity stage is set to Closed-Won.
- Do Nothing: The integration will not trigger any changes in Salesforce when a subscription is modified in Chargebee.
- From the When a subscription is canceled in Chargebee dropdown, choose one:
- Create amendment opportunity and quote: This generates a new amendment opportunity and quote in Salesforce when a subscription in Chargebee is canceled. The opportunity stage is set to Closed-Won.
- Do Nothing: The integration will not trigger any changes in Salesforce when a subscription is canceled in Chargebee.
- From the When a new subscription is created in Chargebee dropdown, choose one:
-
Click Save > Next.
Assign permission sets
You can assign permissions to users with administrators and standard user privileges based on the tasks they perform using the Chargebee for CPQ integration.
Note
Ensure that the users you assign permission sets have access to the standard Salesforce objects.
To assign permission sets, perform these steps:
- Go to Setup, enter ‘permission sets' in the Quick Find search box, then select Permissions Sets.
- On the Permission Sets page, select the required permission sets.
- Select Chargebee Admin for admins.
- Select Chargebee User for standard users.
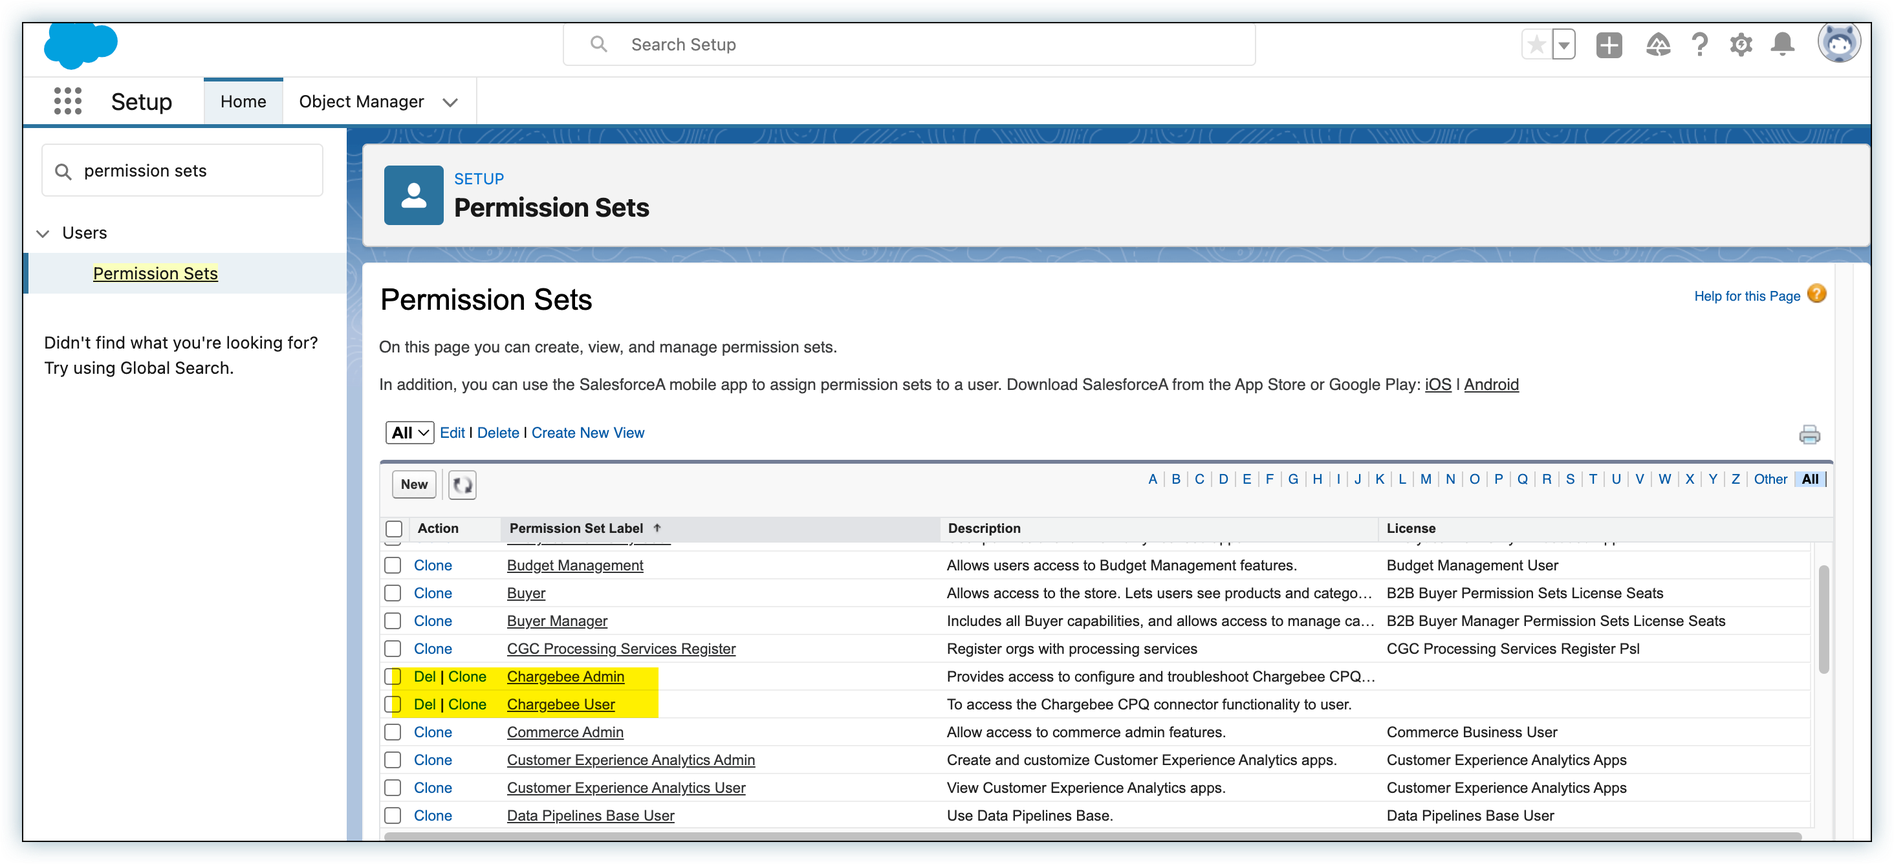
- Click Manage Assignments.
- Click Add Assignments.
- Select users and then click Assign.
Set up page layouts
Configure page layouts to add user interface elements for the following:
- Buttons for all Chargebee actions in Salesforce.
- Custom fields introduced by Chargebee for standard Salesforce CPQ objects
Product
To configure the product layout, perform these steps:
-
Go to Setup > Object Manager.
-
Select Product object and go to Page Layouts.
-
Edit CPQ Product Layout.
-
Click Fields and add the following fields: Chargebee Item, Chargebee ID, Chargebee Type, Billing Frequency.
-
Click Related Lists and add CB Item Prices.
-
Click Save.

Price book entry
To configure the price book entry layout, perform these steps:
-
Go to Setup > Object Manager.
-
Select the Price Book Entry object and go to Page Layouts.
-
Edit Price Book Entry Layout and add Chargebee ID, Chargebee Site ID, Send to Chargebee fields.
-
Click Save.

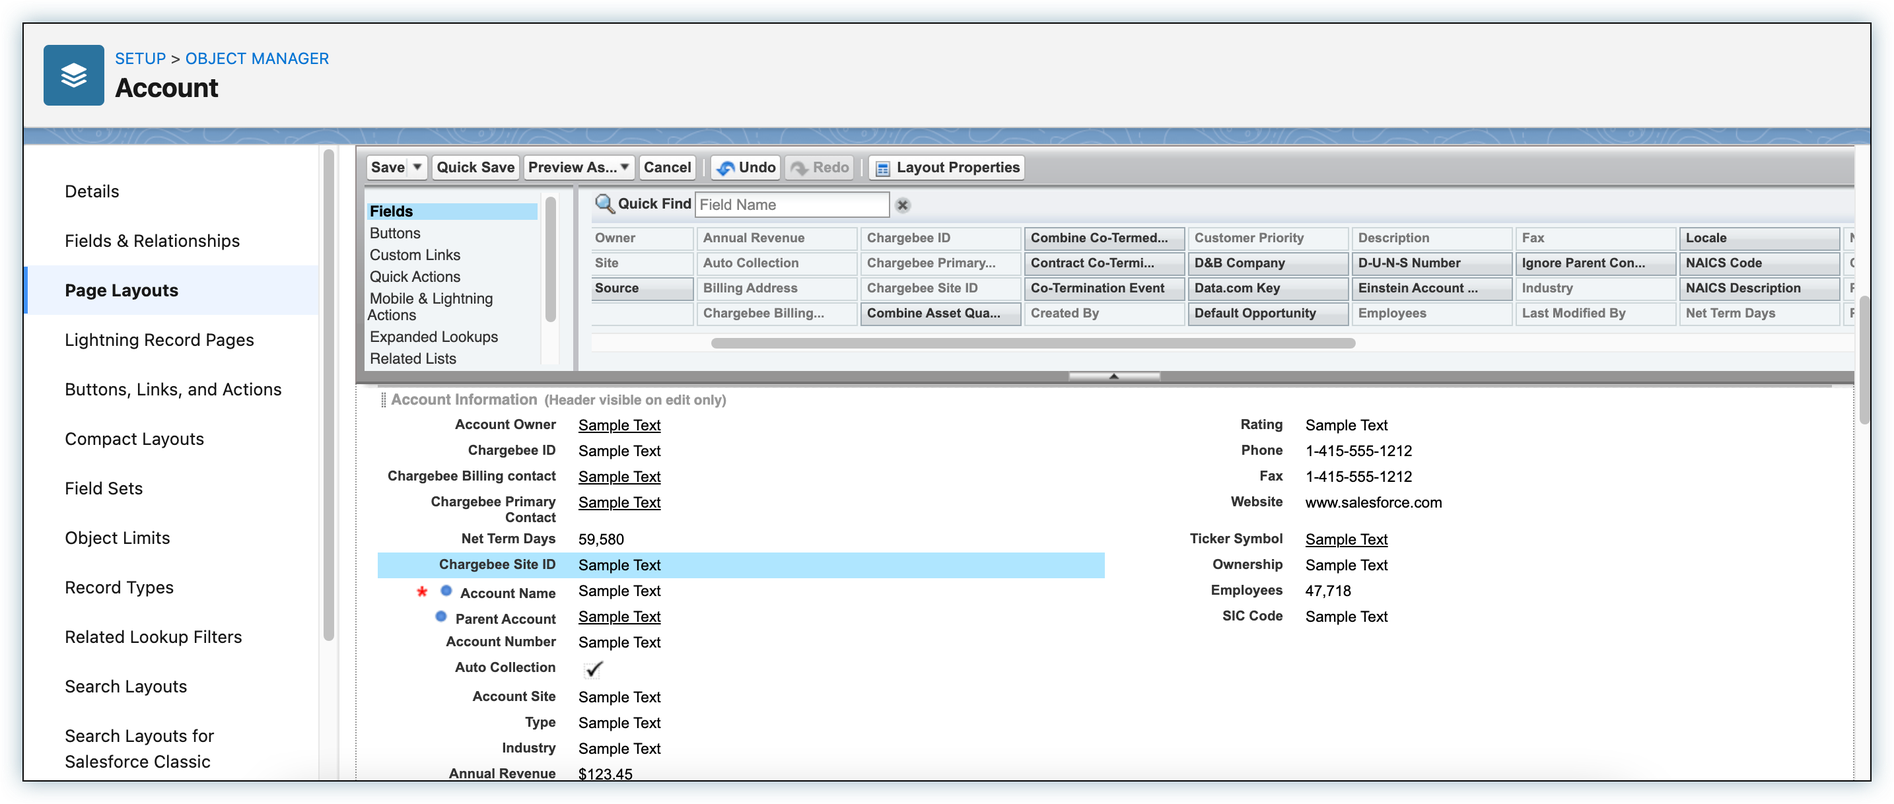
Account
To configure the account layout, perform these steps:
-
Go to Setup > Object Manager.
-
Select Account object and go to Page Layouts.
-
Edit Account Layout and add Auto Collection, Net Term Days, Chargebee Billing Contact, Chargebee Primary Contact, Chargebee ID, Locale, Chargebee Site, and Chargebee Site ID fields.
-
Click Save.
Quote
To configure the quote layout, perform these steps:
- Go to Setup > Object Manager.
- Select the Quote object and go to Page Layouts.
- Edit Quote Layout and add Send Charges and Create Unbilled Charges field.
- Click Save.
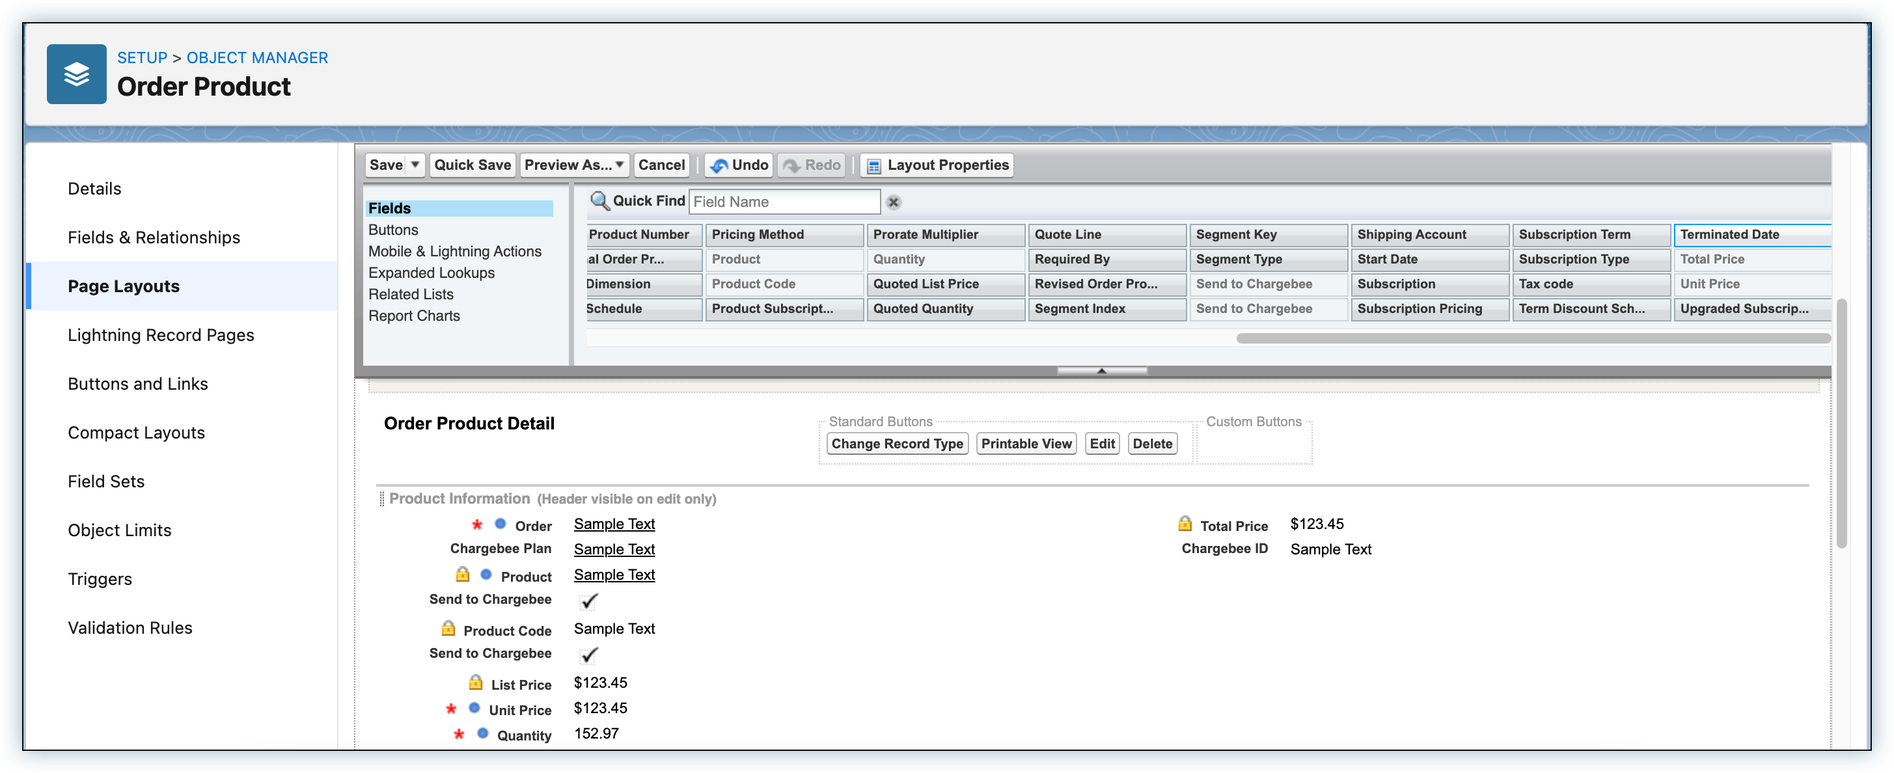
Order Product
To configure the order product layout, perform these steps:
-
Go to Setup > Object Manager.
-
Select Order Product object and go to Page Layouts.
-
Edit CPQ Order Product Layout and add Chargebee Plan, Chargebee ID, and Send to Chargebee fields.
-
Click Save.
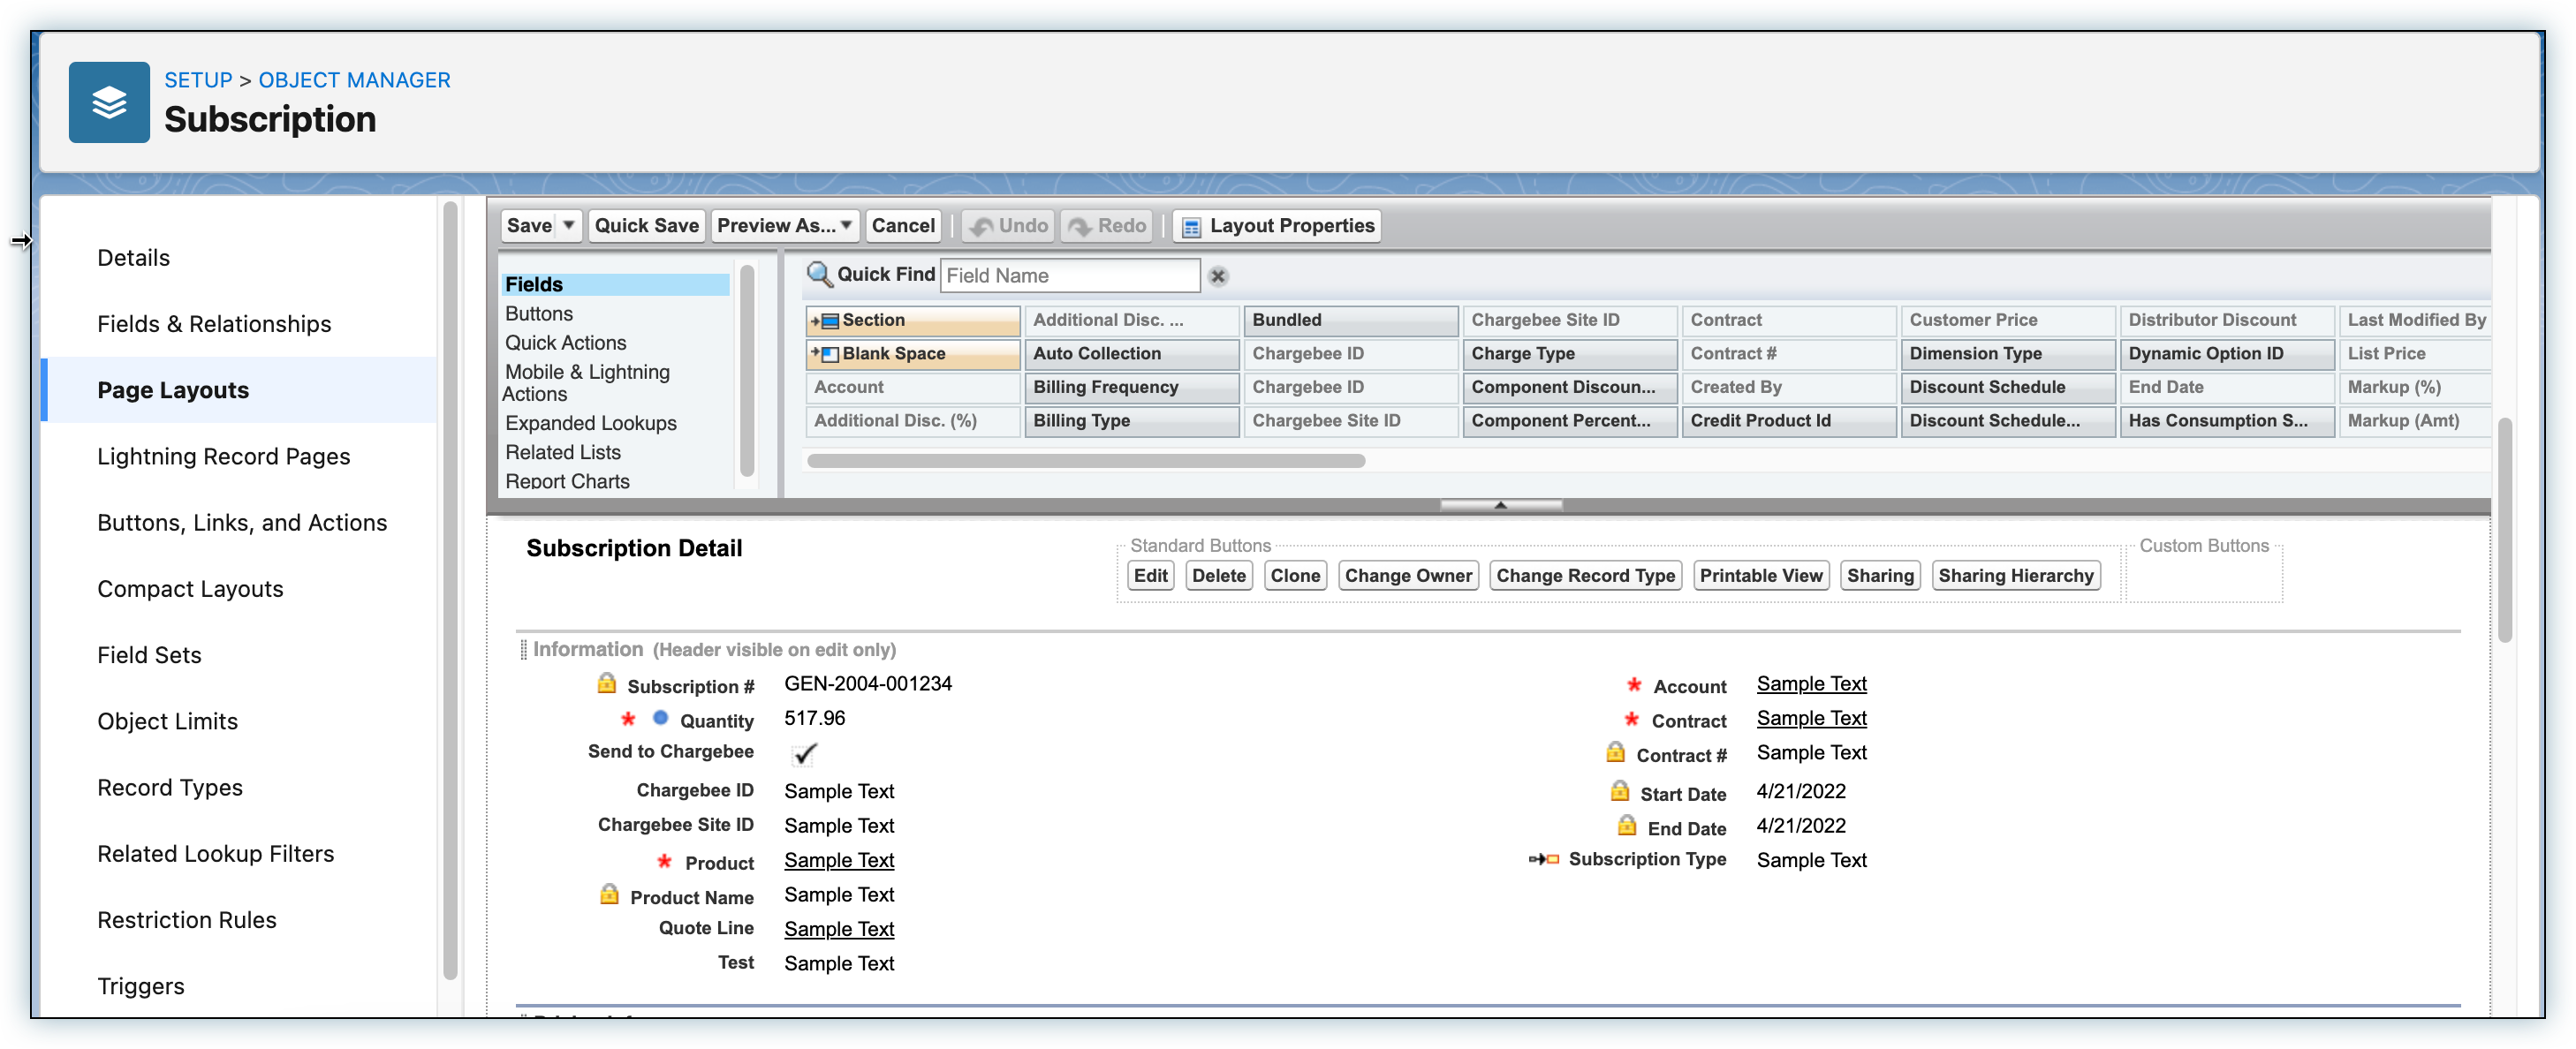
Subscription
To configure the subscription layout, perform these steps:
-
Go to Setup > Object Manager
-
Select Subscription object and go to Page Layouts.
-
Edit Subscription Layout and add Chargebee ID, Chargebee Site ID, Send to Chargebee fields. For more information, see Edit Page Layouts for Standard Objects.
-
Click Save.
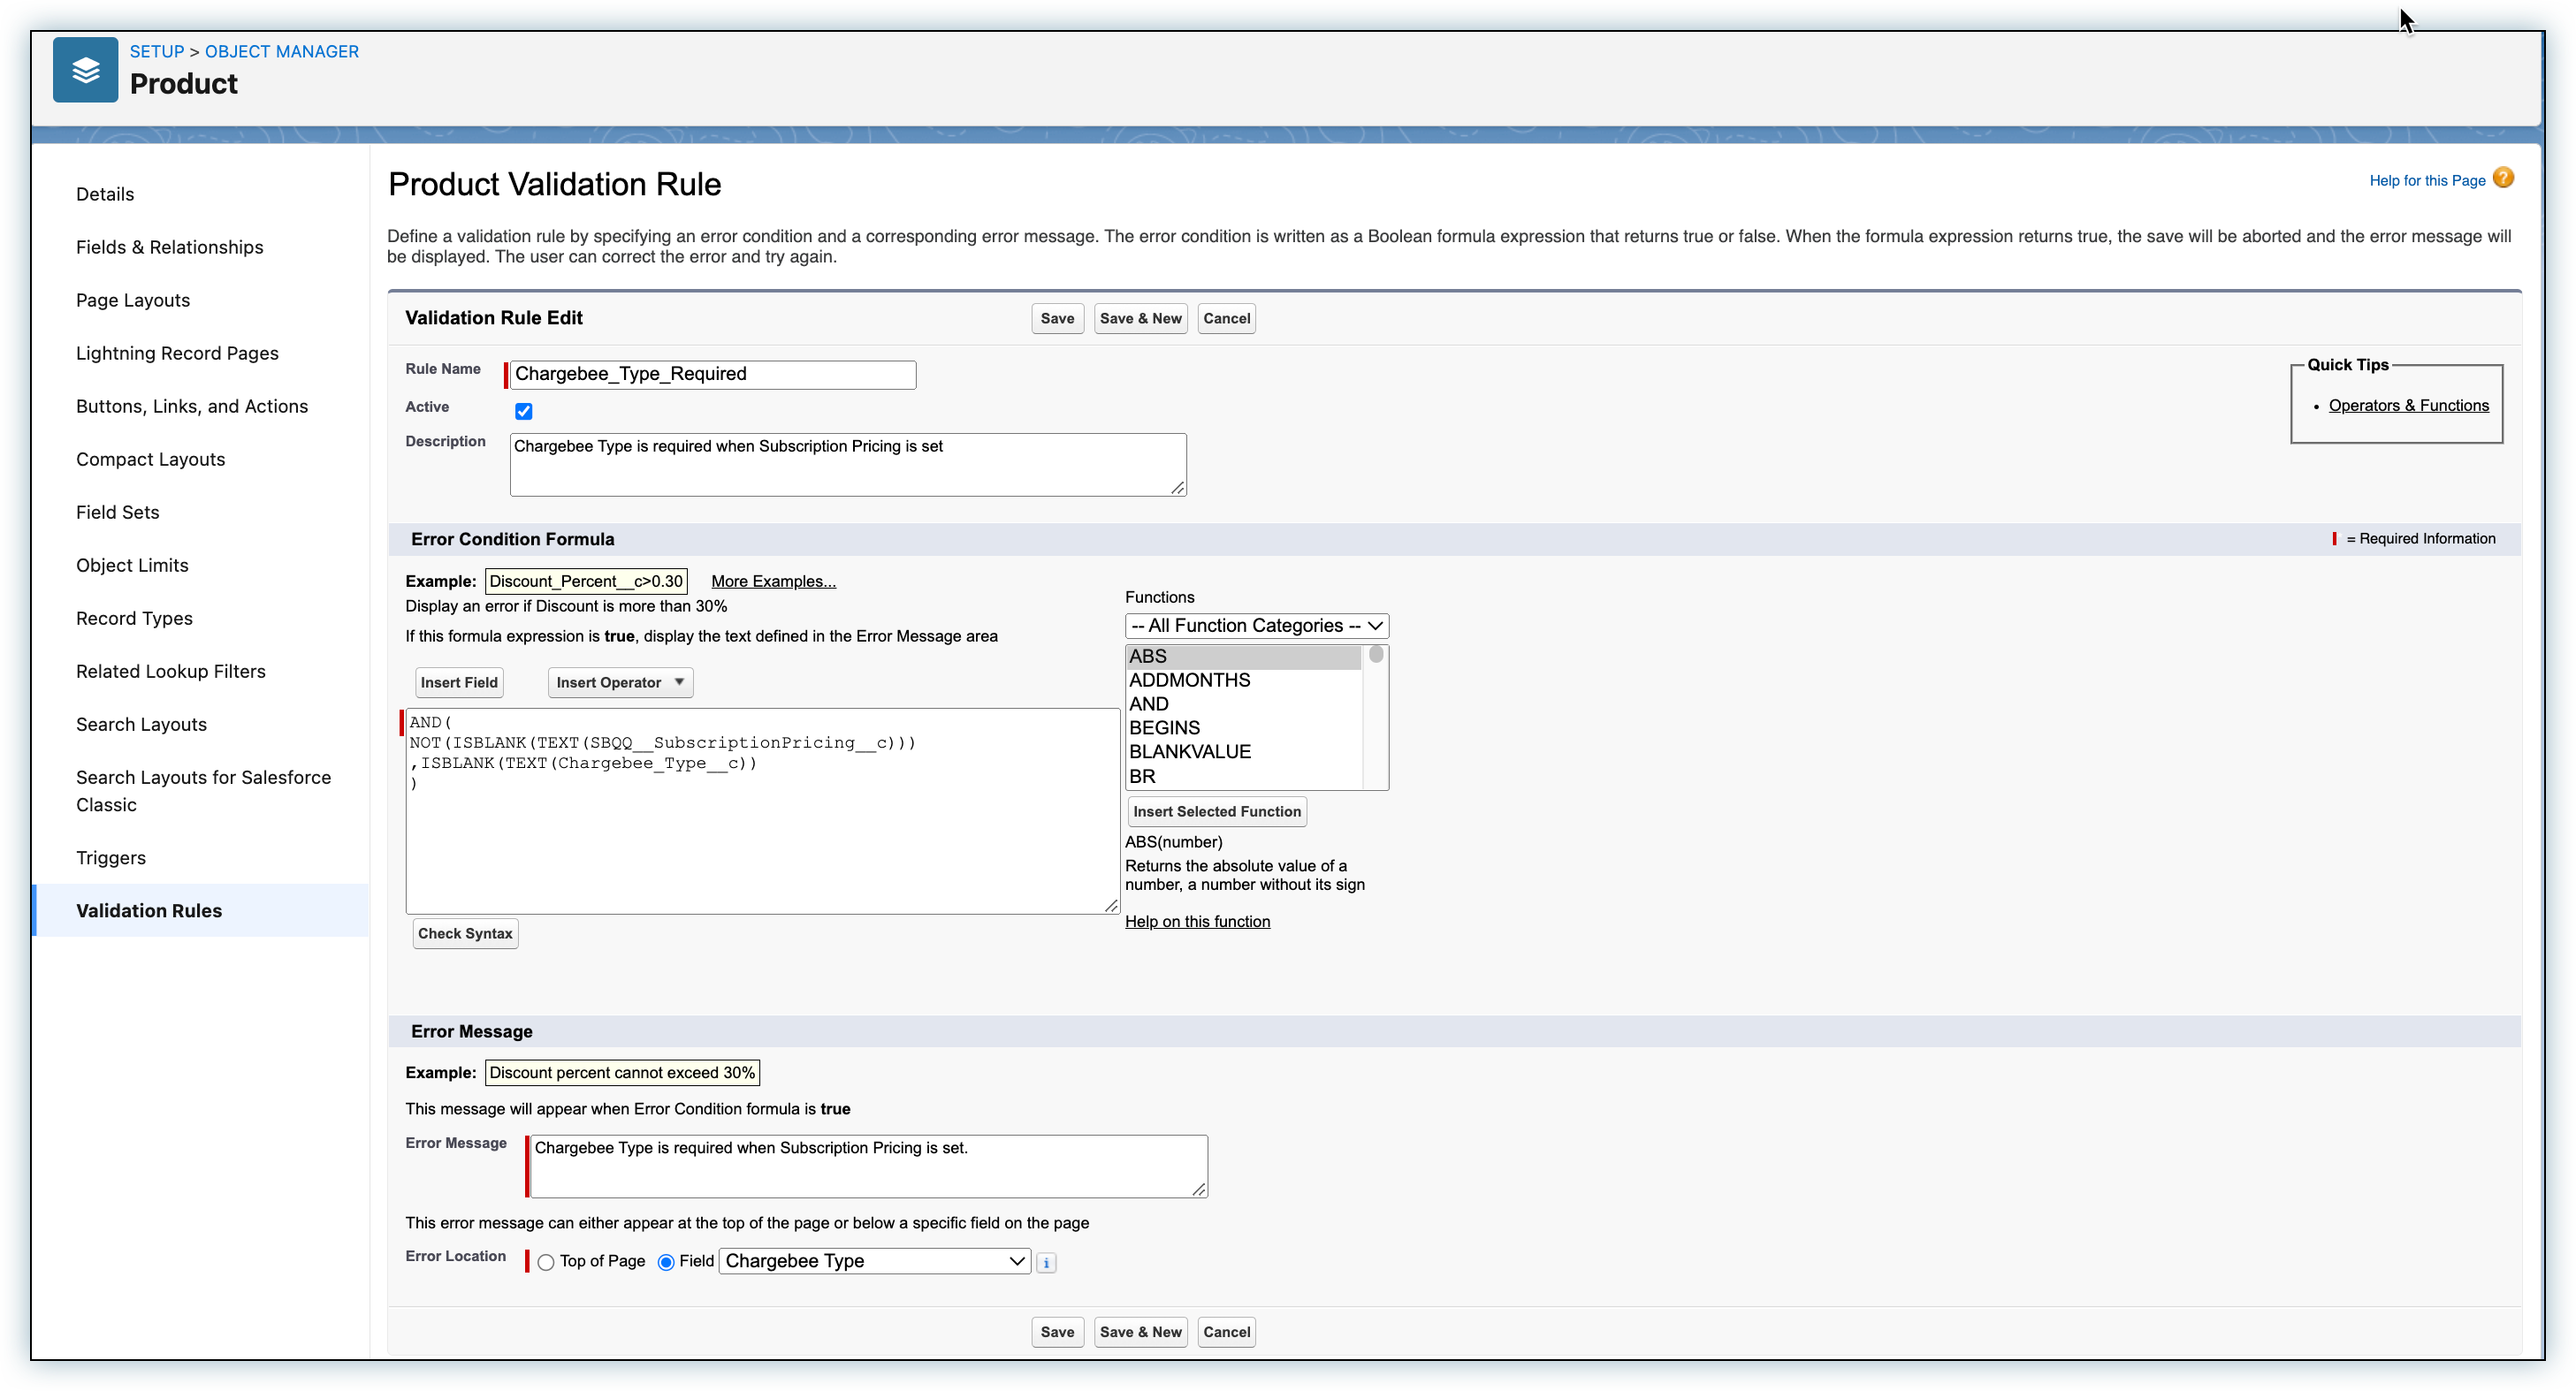
Set up validation rules for the Chargebee Type field
Validation rules ensure that user-entered data meet certain standards before it can be saved. Defining validation rules lets the integration sync correct data. To configure the validation rules for the Chargebee Type, perform these steps:
- Go to Setup > Object Manager.
- Select the Product object and go to Validation Rules.
- Click New.
- Enter the Rule Name as
Chargebee_Type_Required. - Select the Active checkbox.
- Enter the Description as
Chargebee Type is required when Subscription Pricing is set. - Enter the Error Condition Formula as
AND(NOT(ISBLANK(TEXT(SBQQ__SubscriptionPricing__c))),ISBLANK(TEXT(chargebeecpq__Chargebee_Type__c))). - Enter the Error Message as
Chargebee Type is required when Subscription Pricing is set. - Select the Error Location as Field and set the field as Chargebee Type.
- Click Save.
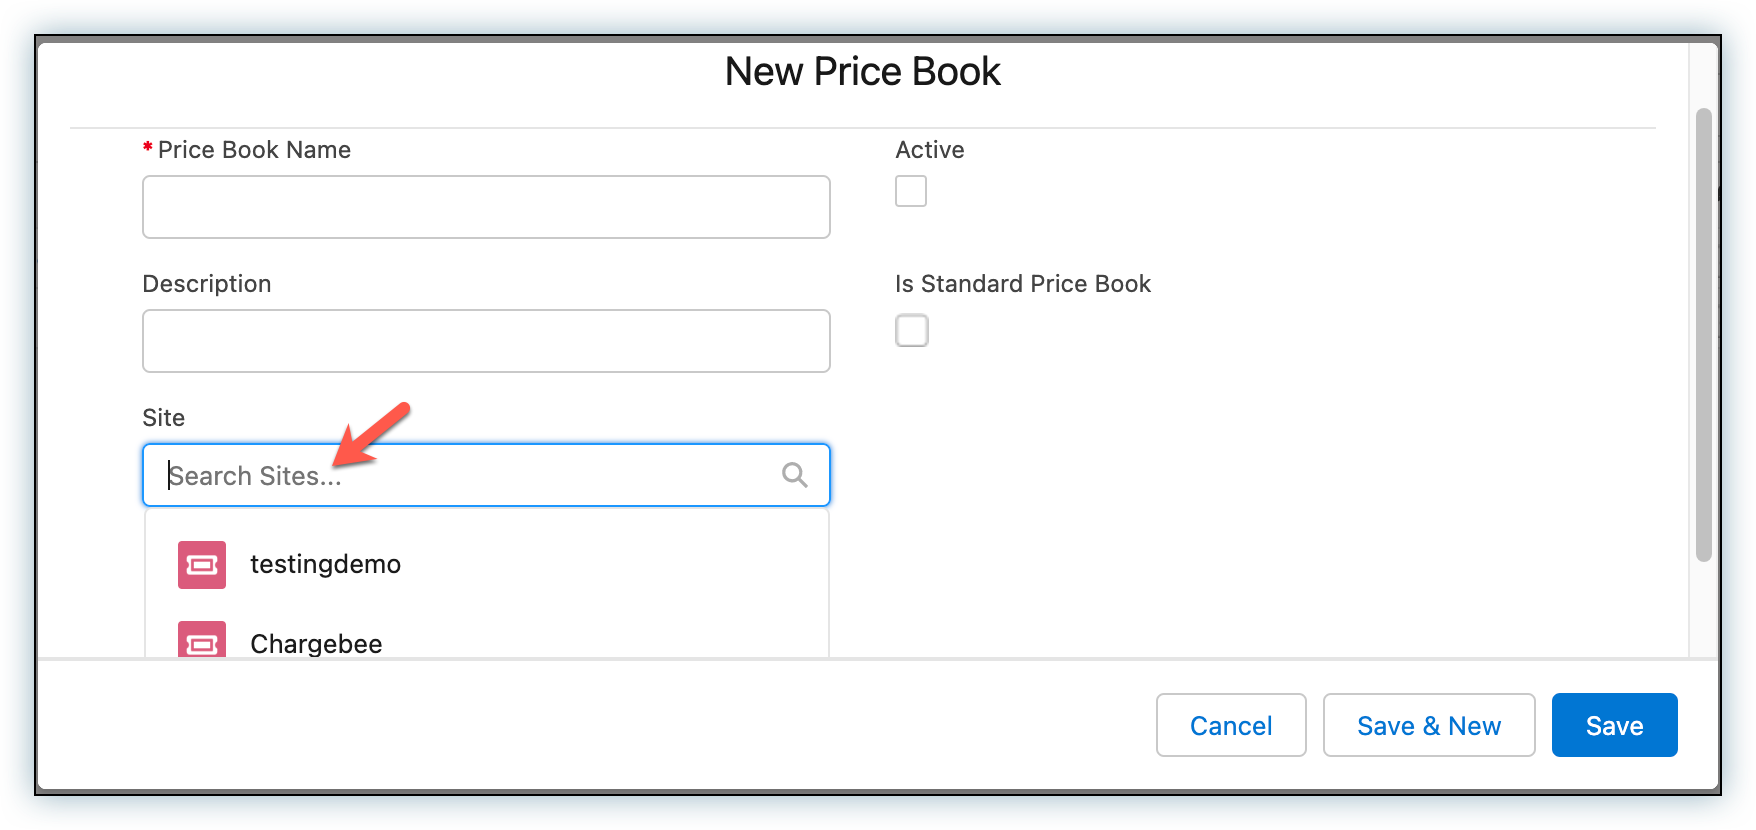
Connect price book(s) with Chargebee site(s)
When the Salesforce CPQ instance is connected to multiple Chargebee sites, it is necessary to specify which price book is associated with which site, so that product changes and requirements are reflected in the appropriate site. There is a one-to-one relationship between a Salesforce price book and a Chargebee site.
To connect a price book, perform these steps:
- In the Quick Find search box, enter 'price books', then select Price Books.
- Create a custom price book.
- Select the Chargebee site you want to associate with the price book from the Site dropdown menu.
- Add a site for existing price books. Navigate to the Details tab of a price book and select a Site using the dropdown option. Ensure to add the Site field in the page layout.
Was this article helpful?