New in Chargebee: Explore Reveal and understand your payment performance end-to-end.Try Now
Docschargebee docs
HomeBillingPaymentsRevRecGrowthReveal
Support

Product Updates


  • Release Notes

Getting Started


  • Overview
  • Chargebee Billing Data Centers
  • Object Relationship Model
  • Understanding Sites
  • Chargebee Tech Glossary
  • Articles and FAQ

Implementing Chargebee


  • Implementation Guide
  • Go-live Checklist
  • Articles and FAQ

AI in Chargebee


  • Chargebee Copilot
  • Chargebee Model Context Protocol (MCP) Server

Developer Resources


  • Developer Resources Overview
  • API Explorer
  • Articles and FAQ

Product Catalog


  • Product Catalog Overview
  • Coupons
  • Articles and FAQ

Subscriptions


  • Working with Subscriptions
  • Billing
  • Orders
  • Articles and FAQ

Customers


  • Managing Customers
  • Account Hierarchy
  • Email Notifications
  • Branding
  • Configure Multiple Languages
  • Articles and FAQ

Entitlements


  • Entitlements Overview
  • Features Overview
  • Feature Management
  • Managing Product Entitlements
  • Subscription Entitlements
  • Customer Entitlements
  • Grandfathering Entitlements
  • Articles and FAQ

Usage Based Billing


  • Understanding Usages
  • Setting up Usage Based Billing
  • Usage Alerts
  • Metered Billing
  • Articles and FAQ

Chargebee CPQ


  • Chargebee CPQ
  • Chargebee CPQ for Salesforce
  • Chargebee CPQ for HubSpot

Invoices, Credit Notes, and Quotes


  • Invoices
  • Credit Notes
  • Quotes [Legacy]
  • Transactions
  • Articles and FAQ

Taxes


  • Overview
  • Configuring Taxes
  • Country-specific Taxes
  • Articles and FAQ

Hosted Capabilities


  • Overview
  • Hosted Checkout
  • Hosted Self-Serve Portal
  • Hosted Pages Features
  • Additional Hosted Pages
  • Payment Components
  • Pricing Table
  • Managing Payments with Chargebee.js
  • Mobile-Optimized Hosted Pages
  • Articles and FAQ

Site Configuration


  • Users & Roles
  • Custom Fields & Metadata
  • Approvals
  • Mandatory Fields
  • File Attachments & Comments
  • Advanced Filter Options
  • Multicurrency Pricing
  • Multi-decimal Support
  • Configuring Reason Codes
  • Events and Webhooks
  • API Keys
  • Time Zone
  • Time Machine
  • Transfer Configurations
  • Articles and FAQ

Multi Business Entity


  • Multi Business Entity Overview
  • Customer Transfer Overview
  • Articles and FAQ

Mobile Subscriptions


  • Overview
  • Omnichannel Subscriptions
  • Omnichannel One-Time Orders
  • Mobile Subscriptions (Legacy)

Reports and Analytics


  • RevenueStory
  • Home Dashboard
  • Frequently Asked Questions
  • FAQs for Classic Reports Sunset
  • Articles and FAQ

Integrations


  • Sales
  • Customer Support and Success
  • Finance
  • Tax
  • eInvoicing
  • Marketing
  • Stitch
  • Collaboration
  • Contract Management
  • Ecommerce Management
  • Articles and FAQ

Data Privacy & Security


  • Two Factor Authentication
  • SAML Single Sign-On
  • System for Cross-Domain Identity Management (SCIM)
  • EU-GDPR
  • Consent Management
  • Personal Data Management
  • Compliance Certificates
  • HIPAA Guidelines
  • PCI Recommendations and Integration Types
  • Articles and FAQ

Data Operations


  • Bulk Operations
  • Migration
  • Articles and FAQ
  1. Billing
  2. Invoices, Credit Notes, and Quotes
  3. Articles and FAQ
  4. Billing
  1. Billing
  2. Invoices, Credit Notes, and Quotes
  3. Articles and FAQ
  4. Billing

How do I add e-invoice for more than one EU country?

Problem Statement

You want to know how do I add e-invoice for more than one eu country.

Scope

How to add more recipient countries for e-invoicing?

Can I add more than one country for e-invoicing?

Summary

This is feature is currently in Beta testing. To enable this feature on your site, please reach out to support

Once you have configured the e-invoicing feature, you can add more countries for e-invoicing by

  1. Configuring taxes for other countries by navigating to Settings > Configure Chargebee > Taxes > Add Region

  2. Add a country under the Recipient Countries for E-invoicing, by navigating to Settings > Configure Chargebee > E-invoicing.

Solution

Adding more recipient countries for e-invoicing

If you are selling in more than one country in the EU and want to add them as recipient countries for e-invoicing in Chargebee, follow these steps:

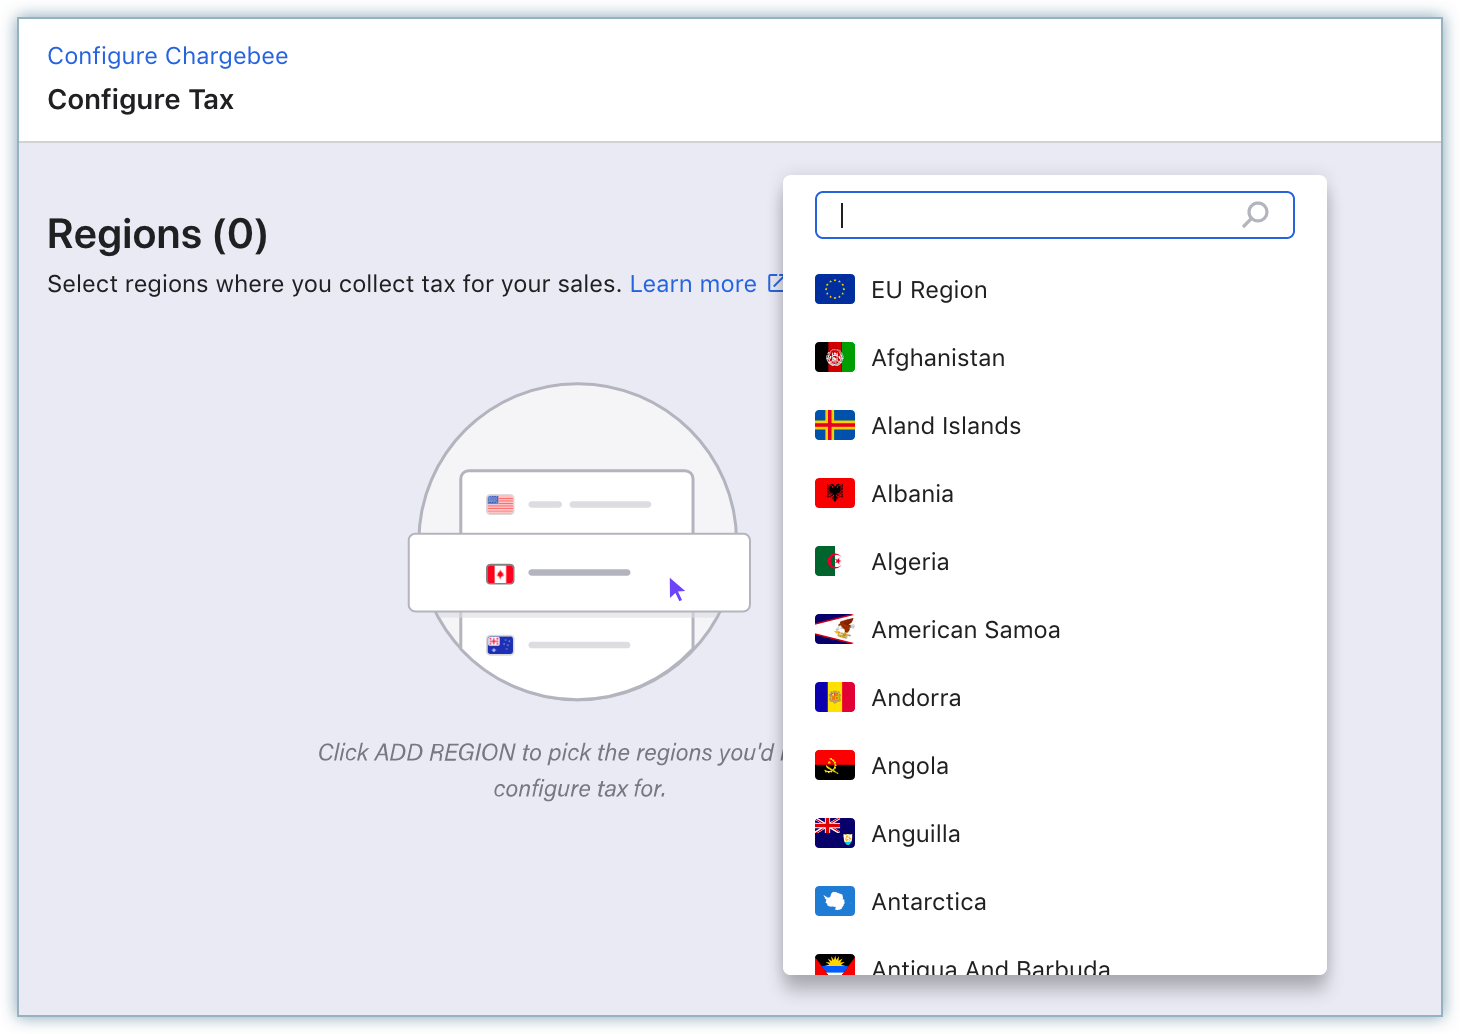
  1. Click Settings > Configure Chargebee > Taxes.

    image
  2. Click Add Region and configure taxes for the country that you want to add as recipient country for e-invoicing. After configuring the tax rates, click Add Tax reg no, select a tax label and specify your tax registration number for the country.

  3. Click Save. Unless you add the tax registration number for the country, you will not be able to add this as a recipient country for e-invoicing.

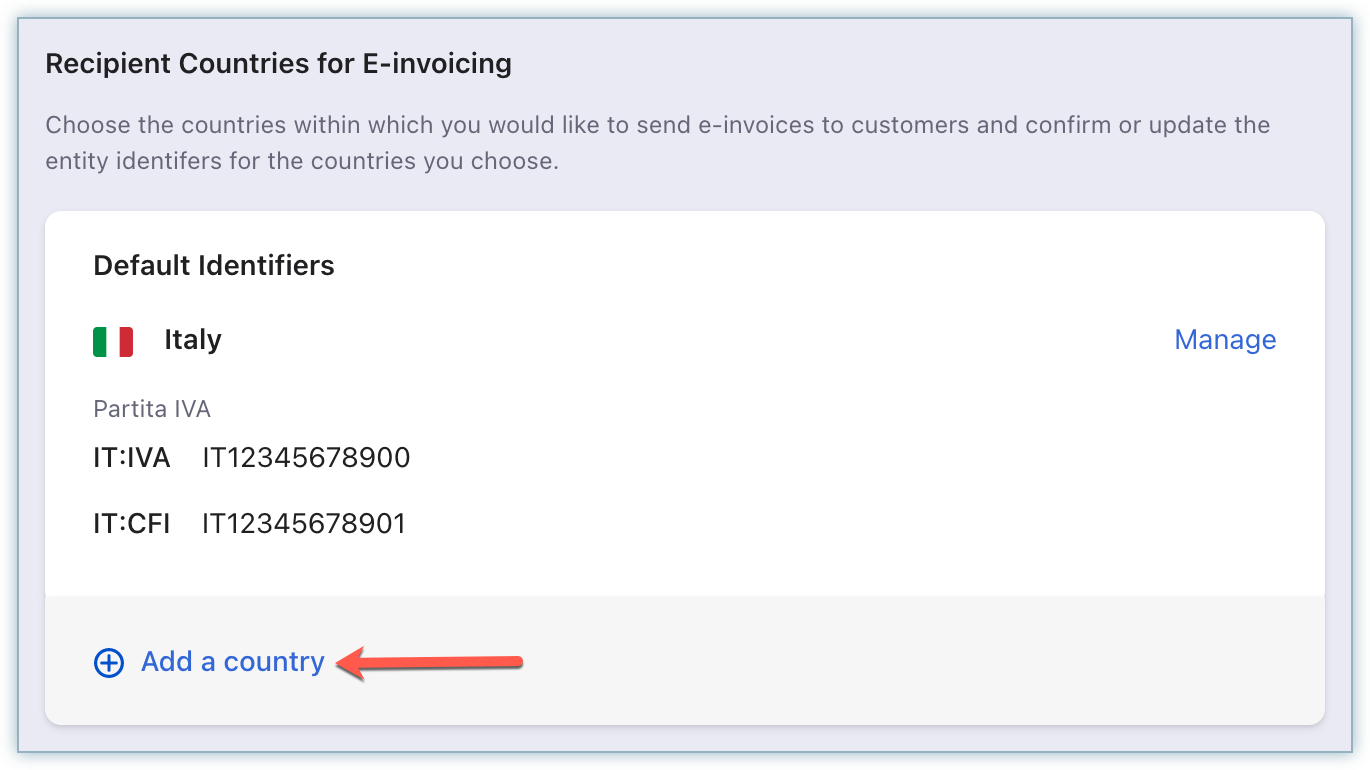
  4. Click Settings > Configure Chargebee > E-invoicing.

  5. On the Configure E-Invoicing page, under the Recipient Countries for E-invoicing, click Add a country.

    image
  6. Select the country and specify the entity identifier details. In case you do not specify the entity identifier information, Chargebee will not verify the identifier. This identifier is used only for B2C invoices. All other invoices are generated on the primary identifier of the organization's country.

  7. Click Save.

Note:

  • Chargebee currently supports entity identifiers for a single tax profile only.
  • You can collect entity identifiers from your customers only after you activate e-invoicing in the respective country

Was this article helpful?