New in Chargebee: Explore Reveal and understand your payment performance end-to-end.Try Now
Docschargebee docs
HomeBillingPaymentsRevRecGrowthReveal
Support

Product Updates


  • Release Notes

Getting Started


  • Overview
  • Chargebee Billing Data Centers
  • Object Relationship Model
  • Understanding Sites
  • Chargebee Tech Glossary
  • Articles and FAQ

Implementing Chargebee


  • Implementation Guide
  • Go-live Checklist
  • Articles and FAQ

AI in Chargebee


  • Chargebee Copilot
  • Chargebee Model Context Protocol (MCP) Server

Developer Resources


  • Developer Resources Overview
  • Articles and FAQ

Product Catalog


  • Product Catalog Overview
  • Coupons
  • Articles and FAQ

Subscriptions


  • Working with Subscriptions
  • Billing
  • Orders
  • Articles and FAQ

Customers


  • Managing Customers
  • Account Hierarchy
  • Email Notifications
  • Branding
  • Configure Multiple Languages
  • Articles and FAQ

Entitlements


  • Entitlements Overview
  • Features Overview
  • Feature Management
  • Managing Product Entitlements
  • Subscription Entitlements
  • Customer Entitlements
  • Grandfathering Entitlements
  • Articles and FAQ

Usage Based Billing


  • Understanding Usages
  • Setting up Usage Based Billing
  • Usage Alerts
  • Metered Billing
  • Articles and FAQ

Chargebee CPQ


  • Chargebee CPQ
  • Chargebee CPQ for Salesforce
  • Chargebee CPQ for HubSpot

Invoices, Credit Notes, and Quotes


  • Invoices
  • Credit Notes
  • Quotes [Legacy]
  • Transactions
  • Articles and FAQ

Taxes


  • Overview
  • Configuring Taxes
  • Country-specific Taxes
  • Articles and FAQ

Hosted Capabilities


  • Overview
  • Hosted Checkout
  • Hosted Self-Serve Portal
  • Hosted Pages Features
  • Additional Hosted Pages
  • Payment Components
  • Pricing Table
  • Managing Payments with Chargebee.js
  • Mobile-Optimized Hosted Pages
  • Articles and FAQ

Site Configuration


  • Users & Roles
  • Custom Fields & Metadata
  • Approvals
  • Mandatory Fields
  • File Attachments & Comments
  • Advanced Filter Options
  • Multicurrency Pricing
  • Multi-decimal Support
  • Configuring Reason Codes
  • Events and Webhooks
  • API Keys
  • Time Zone
  • Time Machine
  • Transfer Configurations
  • Articles and FAQ

Multi Business Entity


  • Multi Business Entity Overview
  • Customer Transfer Overview
  • Articles and FAQ

Mobile Subscriptions


  • Overview
  • Omnichannel Subscriptions
  • Omnichannel One-Time Orders
  • Mobile Subscriptions (Legacy)

Reports and Analytics


  • RevenueStory
  • Home Dashboard
  • Frequently Asked Questions
  • FAQs for Classic Reports Sunset
  • Articles and FAQ

Integrations


  • Sales
  • Customer Support and Success
  • Finance
  • Tax
  • eInvoicing
  • Marketing
  • Stitch
  • Collaboration
  • Contract Management
  • Ecommerce Management
  • Articles and FAQ

Data Privacy & Security


  • Two Factor Authentication
  • SAML Single Sign-On
  • System for Cross-Domain Identity Management (SCIM)
  • EU-GDPR
  • Consent Management
  • Personal Data Management
  • Compliance Certificates
  • HIPAA Guidelines
  • PCI Recommendations and Integration Types
  • Articles and FAQ

Data Operations


  • Bulk Operations
  • Migration
  • Articles and FAQ
  1. Billing
  2. Hosted Capabilities
  3. Articles and FAQ
  4. Portal V2 - Pop Up
  1. Billing
  2. Hosted Capabilities
  3. Articles and FAQ
  4. Portal V2 - Pop Up

How to mark some fields as mandatory in Checkout?

Problem Statement

You want to know how to mark some fields as mandatory in checkout.

Solution

Scope

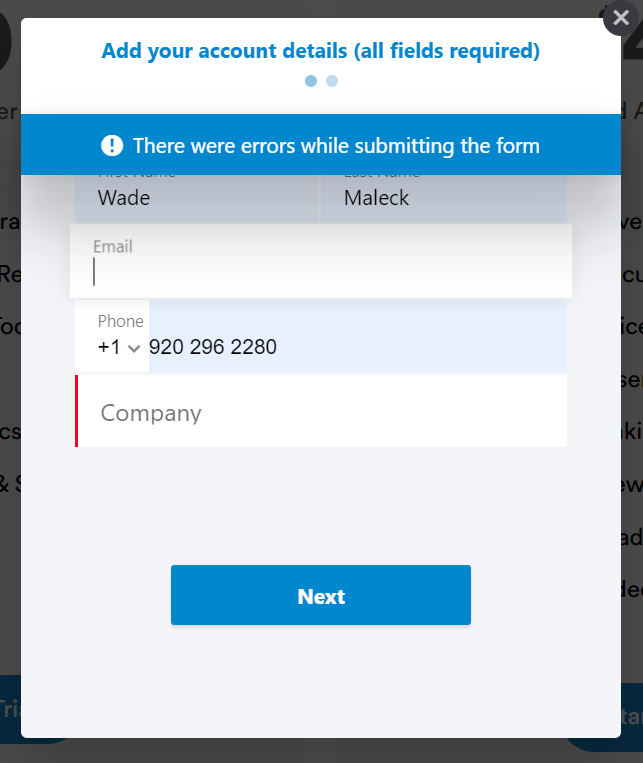
Required fields in checkout do not create the red bar

Summary

You can decide the fields that you want to show/hide on the Hosted Checkout Pages and Customer Portal, as well as if the fields should be mandatory or optional. If the field is set as Mandatory, the user cannot move to the next window without filling it and it will display a red bar indicating it is an obligation.

Solution:

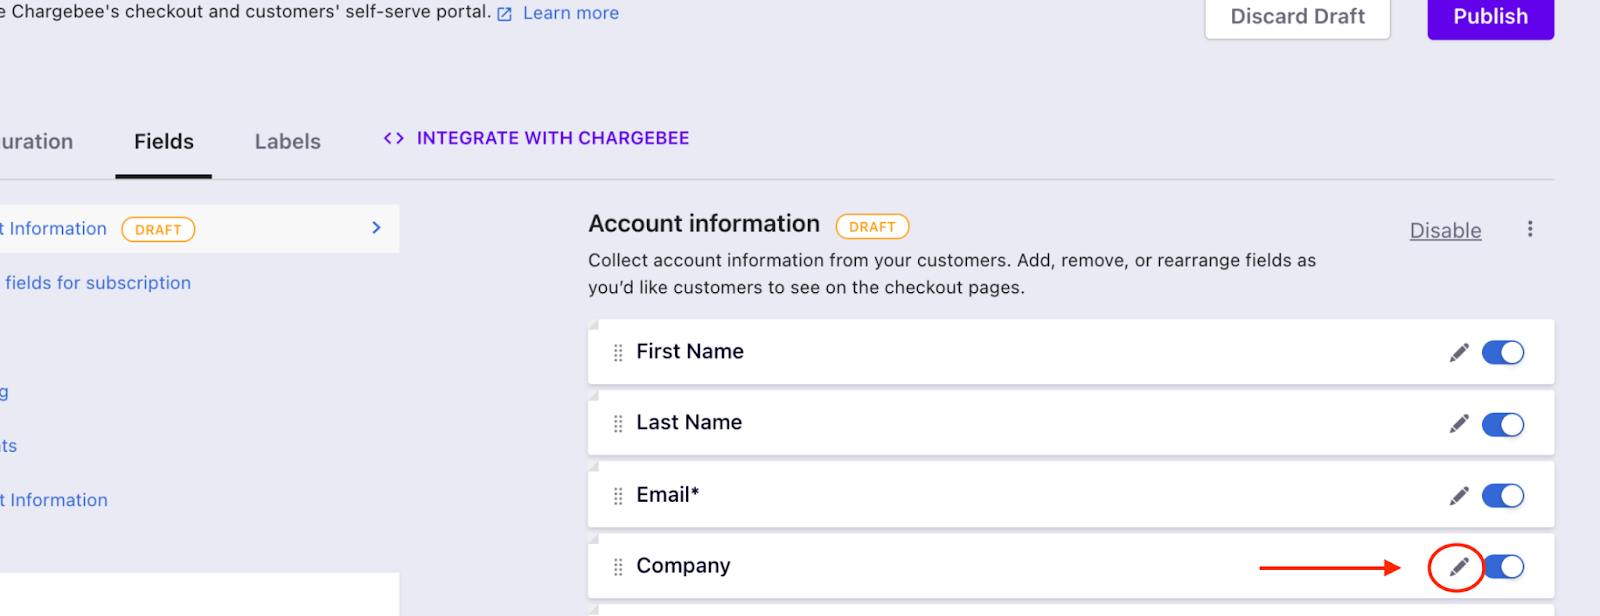
To configure your fields, go to Settings > Configure Chargebee > Checkout & Self-Serve Portal > Fields.

Now, on the right-hand side of the field, you will find a toggle button to enable/disable the field on the Checkout/Self-serve portal and a pen icon to edit the field display settings.

image

By clicking on the pen icon or edit button, you will get a list of options to set the options to display the field as follows:

image

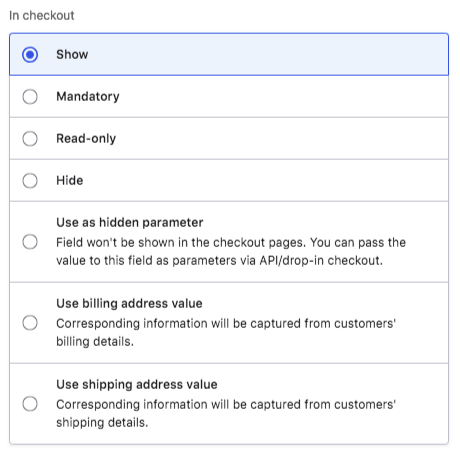
To set a field as Mandatory, select that option and click 'Apply & 'Publish'

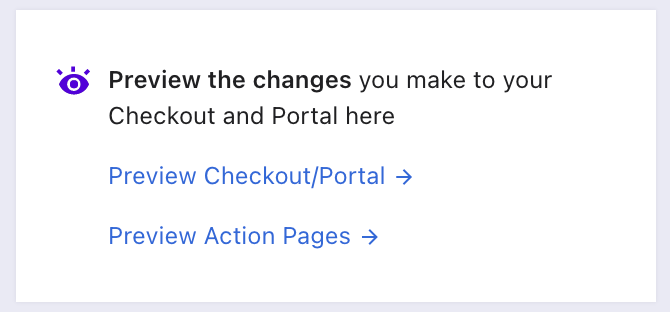
Now you can use 'Preview Checkout/Portal' to preview the updated changes.

image

This is how it looks if a field is set as 'Mandatory' on the Checkout.

image

To know how to set a Custom field as Mandatory, refer to this article How to create a custom mandatory field?

Related Articles

How to edit font in checkout and self serve portal?
I am trying to pass the MetaData parameter while updating subscriptions using API. However, the response does not have the metaData passed.
How to hide plans/addons in Chargebee's portal?

Was this article helpful?