Ingesting Usage from Amazon S3
Overview
Simplify and streamline your usage-based billing process by directly ingesting usage data from Amazon S3 bucket into Chargebee Billing. With this integration, Chargebee automatically fetches and processes usage files from your Amazon S3 bucket without any manual interventions for data uploads or preparation. This ensures that Chargebee Billing always works with the most up-to-date customer usage records, helping you eliminate errors, reduce delays, and improve invoice accuracy.
This integration is ideal for businesses that generate high volumes of usage data such as IoT, SaaS, or API-driven services, and store that data in S3. By automating the data pipeline between S3 and Chargebee, your team can focus on building seamless, scalable billing workflows that support real-time usage-based billing and customer transparency.
Prerequisites
Before you set up usage ingestion from your Amazon S3 bucket into Chargebee Billing, ensure the following prerequisites are in place:
-
Usage-based Billing: You must have an active Chargebee Billing site with usage-based billing feature enabled and configured.
-
Amazon S3 Bucket access: Ensure you have an Amazon S3 bucket where usage data files are stored. You should have access to the bucket’s name, region, and permission to read objects.
-
Consistent File Naming Convention: Ensure that "/" is not used in any file_name as AWS might consider it as folders.
Connecting your Amazon S3 bucket with Chargebee Billing
You can connect your Amazon S3 bucket with Chargebee Billing in four simple steps to automatically ingest usage data into your site:
- Enter S3 Bucket details in Chargebee Billing
- Set up Event Notifications in AWS
- Update Bucket Policy in AWS
- Test the connection
This setup ensures that any new usage file uploaded to your bucket is detected and processed by Chargebee in real time. To get started with the integration, follow these steps:
- Log in to your Chargebee Billing site.
- Navigate to Apps > Amazon S3 Bucket.
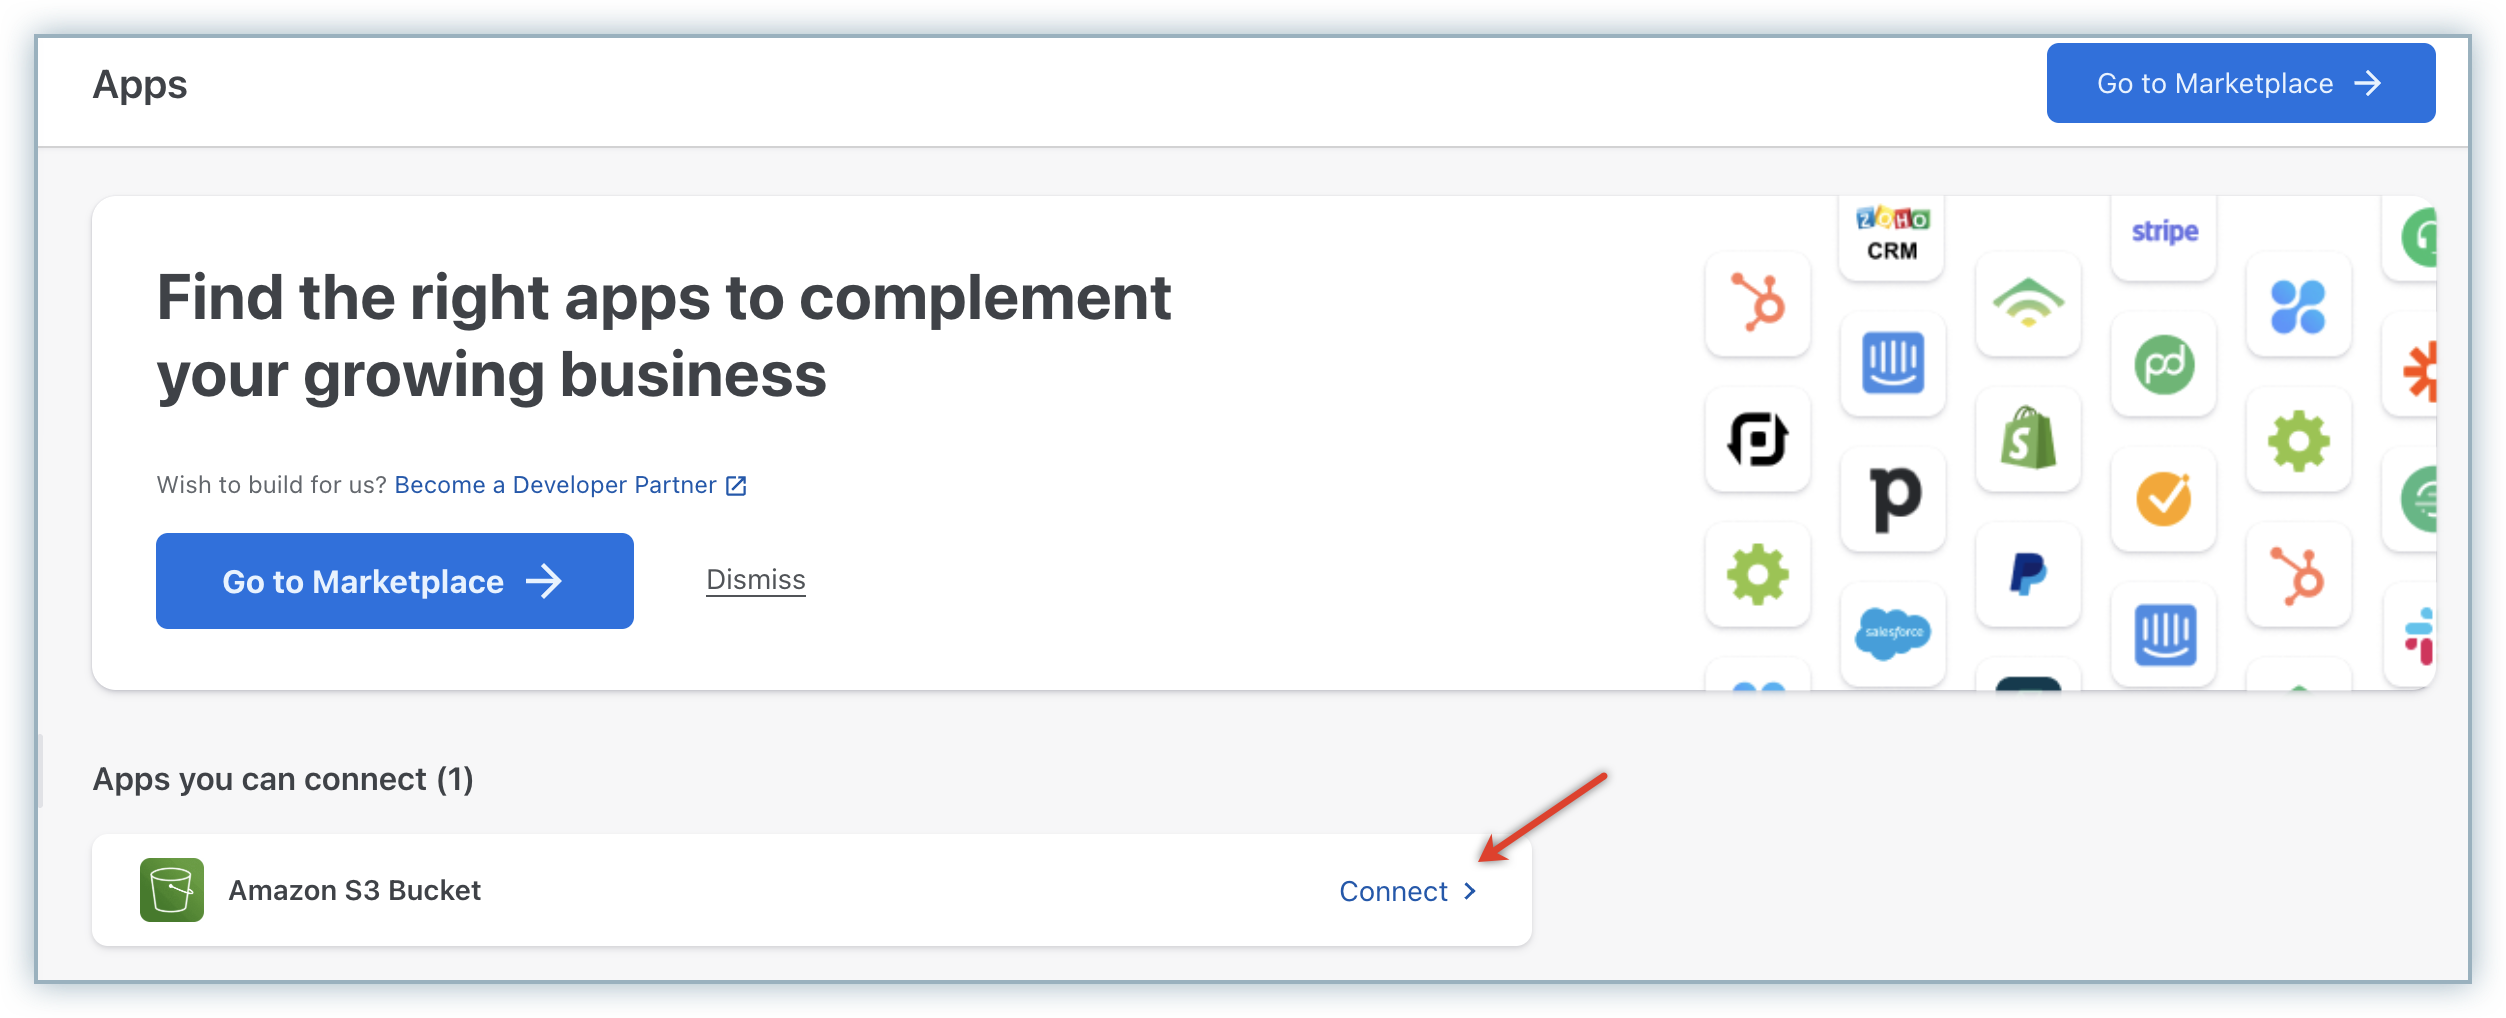
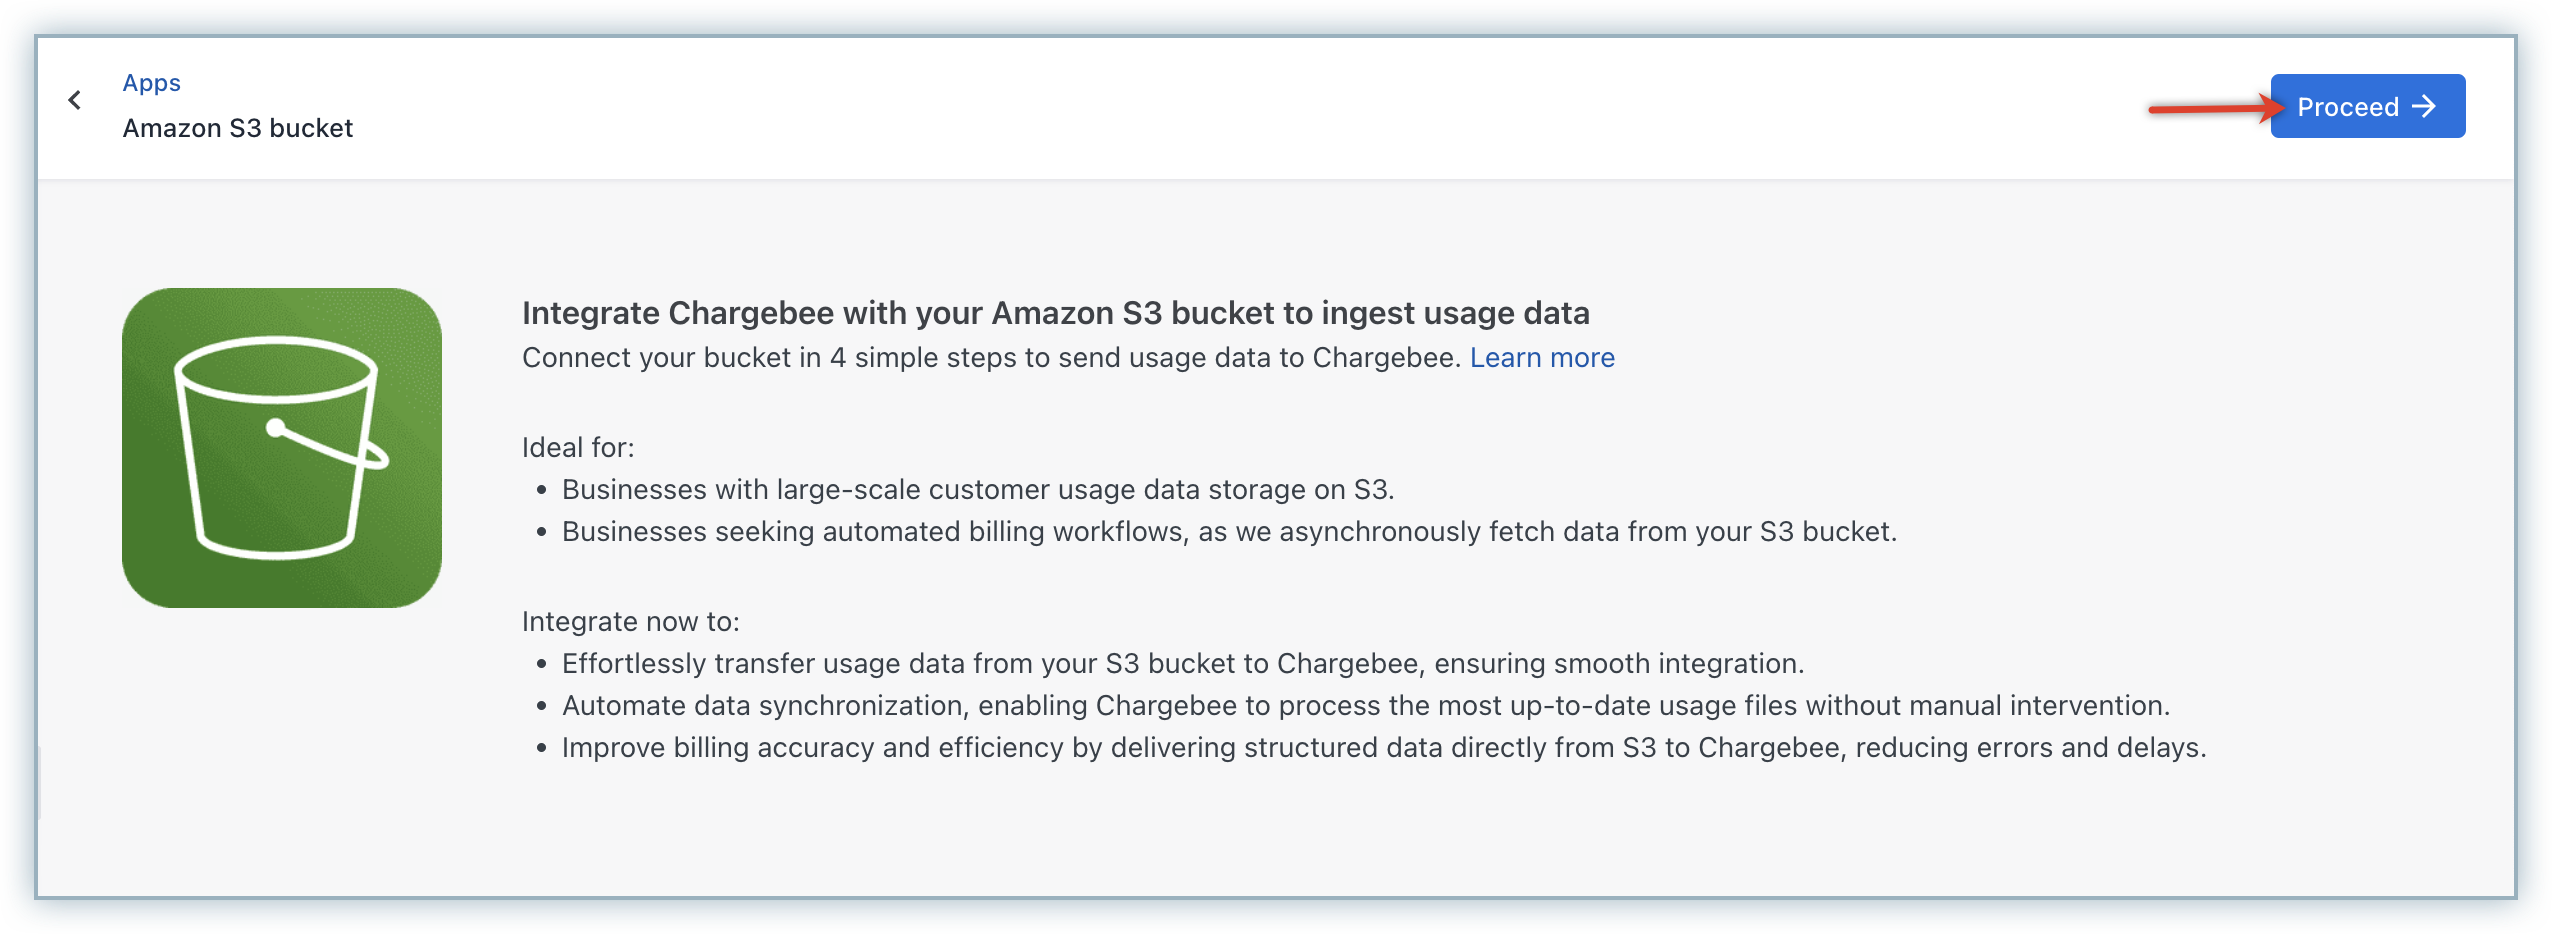
- Click Proceed to begin the setup.
Step 1: Enter S3 Bucket details in Chargebee Billing
Your bucket details are needed for Chargebee to allowlist your bucket and account_id in SNS topic for receiving events. On the Connect with Amazon S3 bucket page, specify the following bucket details from your AWS account:
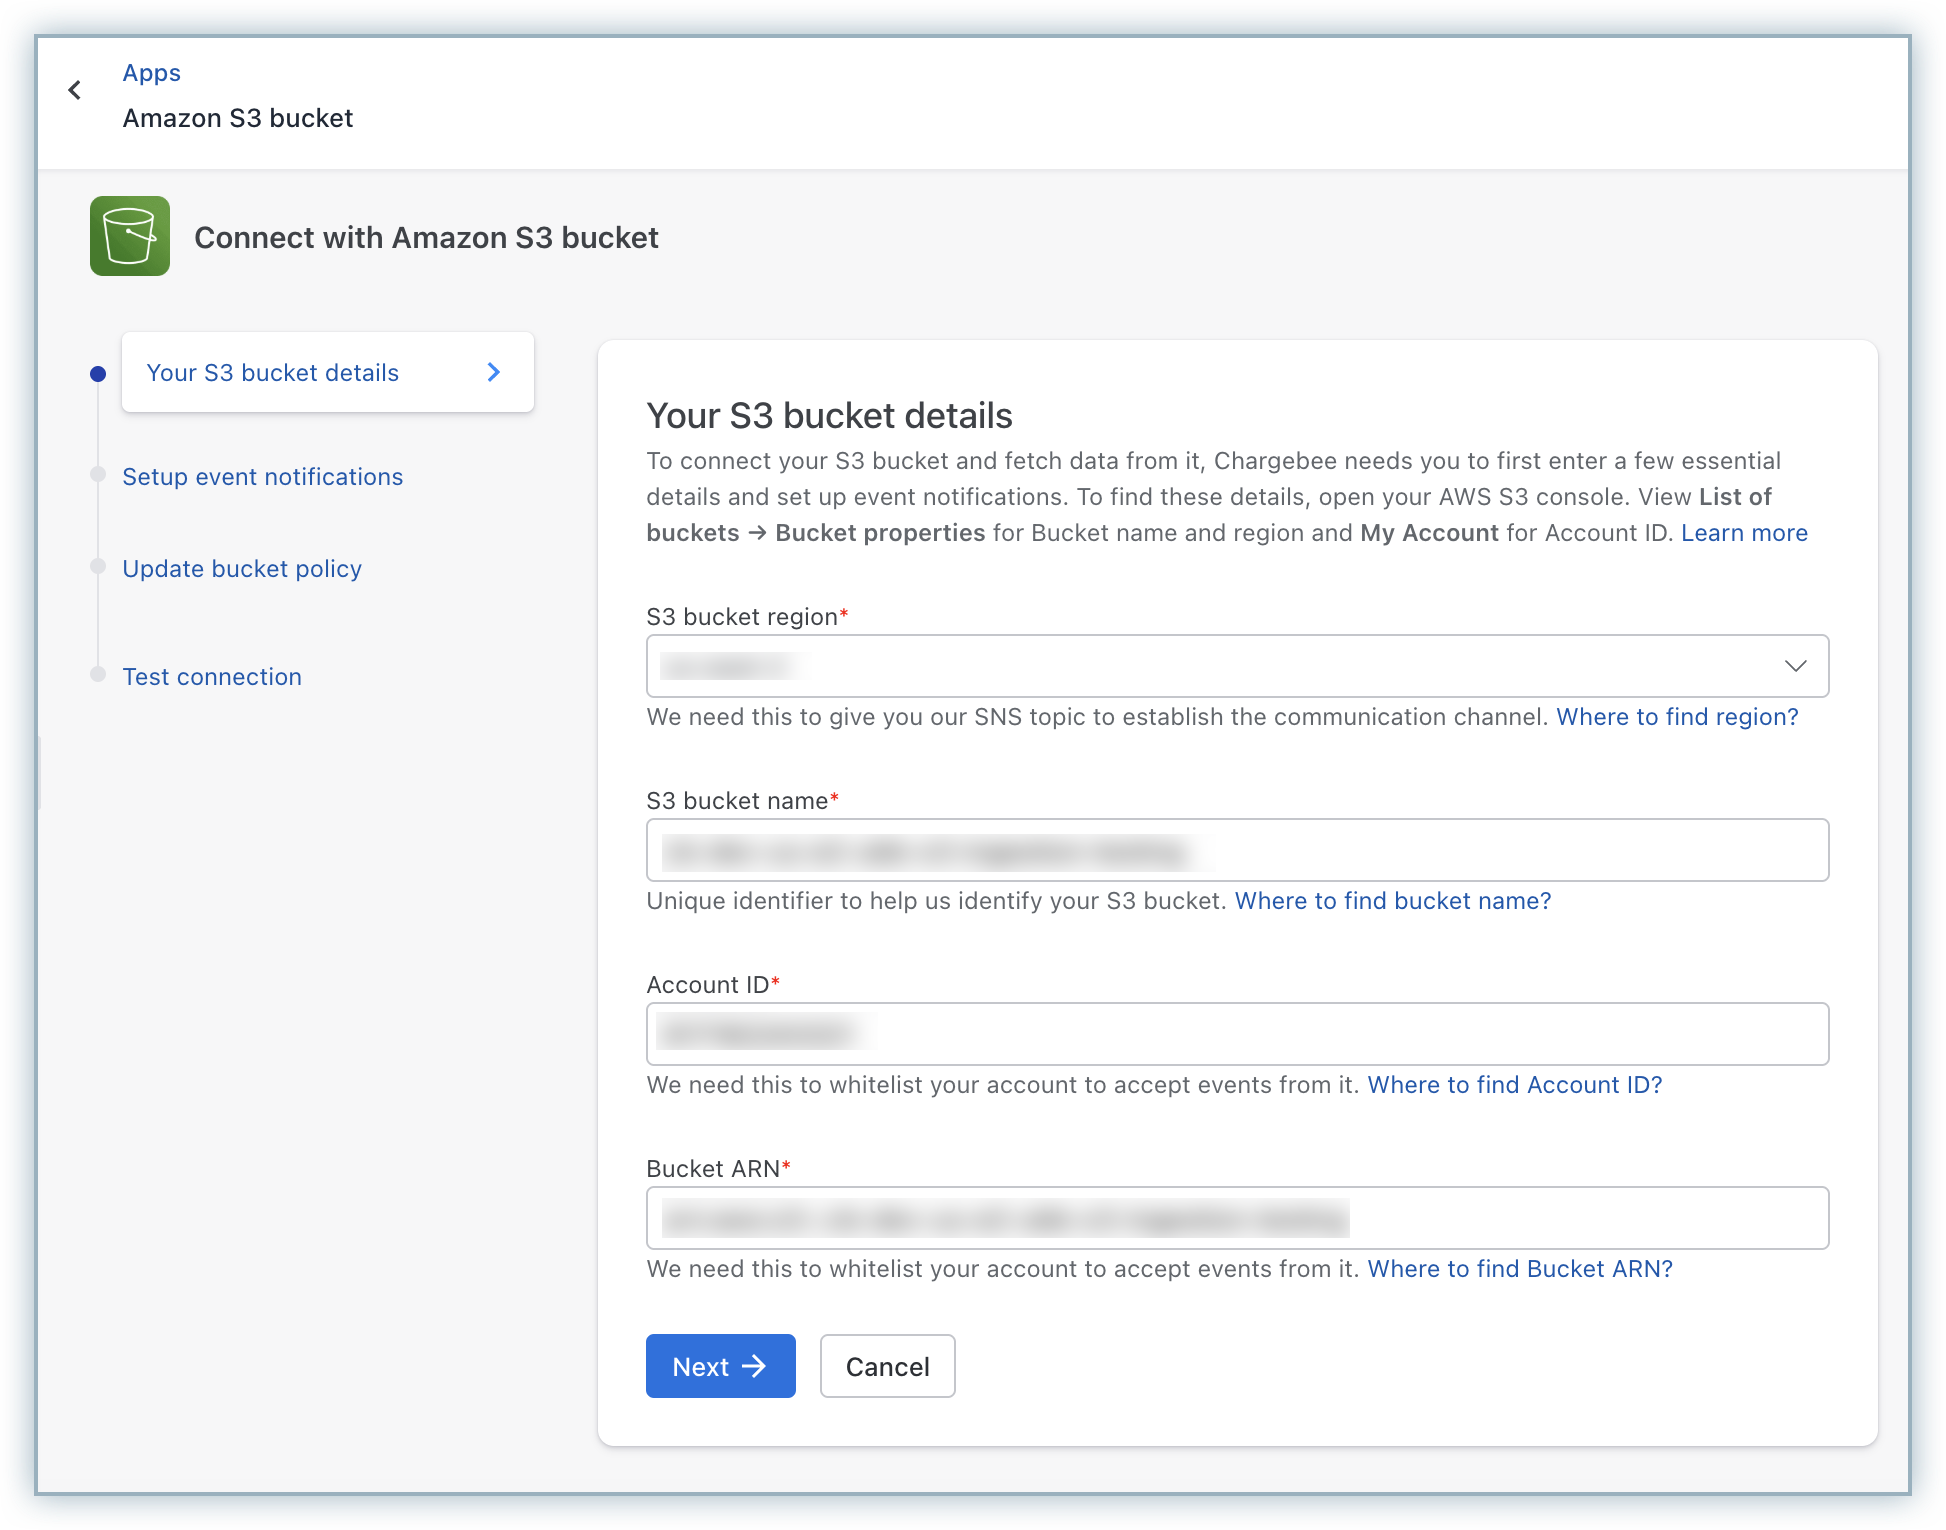
S3 Bucket Region
This is the AWS region where your S3 bucket is hosted. It is required to configure the SNS topic for event notifications. Follow these steps to get it from your S3 console:
- Go to your Amazon S3 console.
- In the Buckets list, locate your bucket and click its name.
- Under the Properties tab, find the Region listed.
S3 Bucket Name
This is the name of the S3 bucket from which usage data will be fetched. You can find it in the same Buckets list in your S3 console.
AWS Account ID
This is your 12-digit AWS account ID used to identify and allowlist your account. Follow these steps to get it from your S3 console:
- In the AWS Console, click your Account name in the top-right corner.
- Select My Account.
- Your Account ID is listed on the Account Settings page.
Bucket ARN (Amazon Resource Name)
The ARN uniquely identifies your S3 bucket and is used to configure access policies. Follow these steps to find or construct it on your S3 console:
- Navigate to your bucket in the S3 console.
- Use the
arn:aws:s3:::your-bucket-nameformat, replacingyour-bucket-namewith the actual bucket name.
Once all details are entered, click Next.
Step 2: Set up Event Notifications in AWS
This step ensures Chargebee receives a notification whenever a new usage file is uploaded.
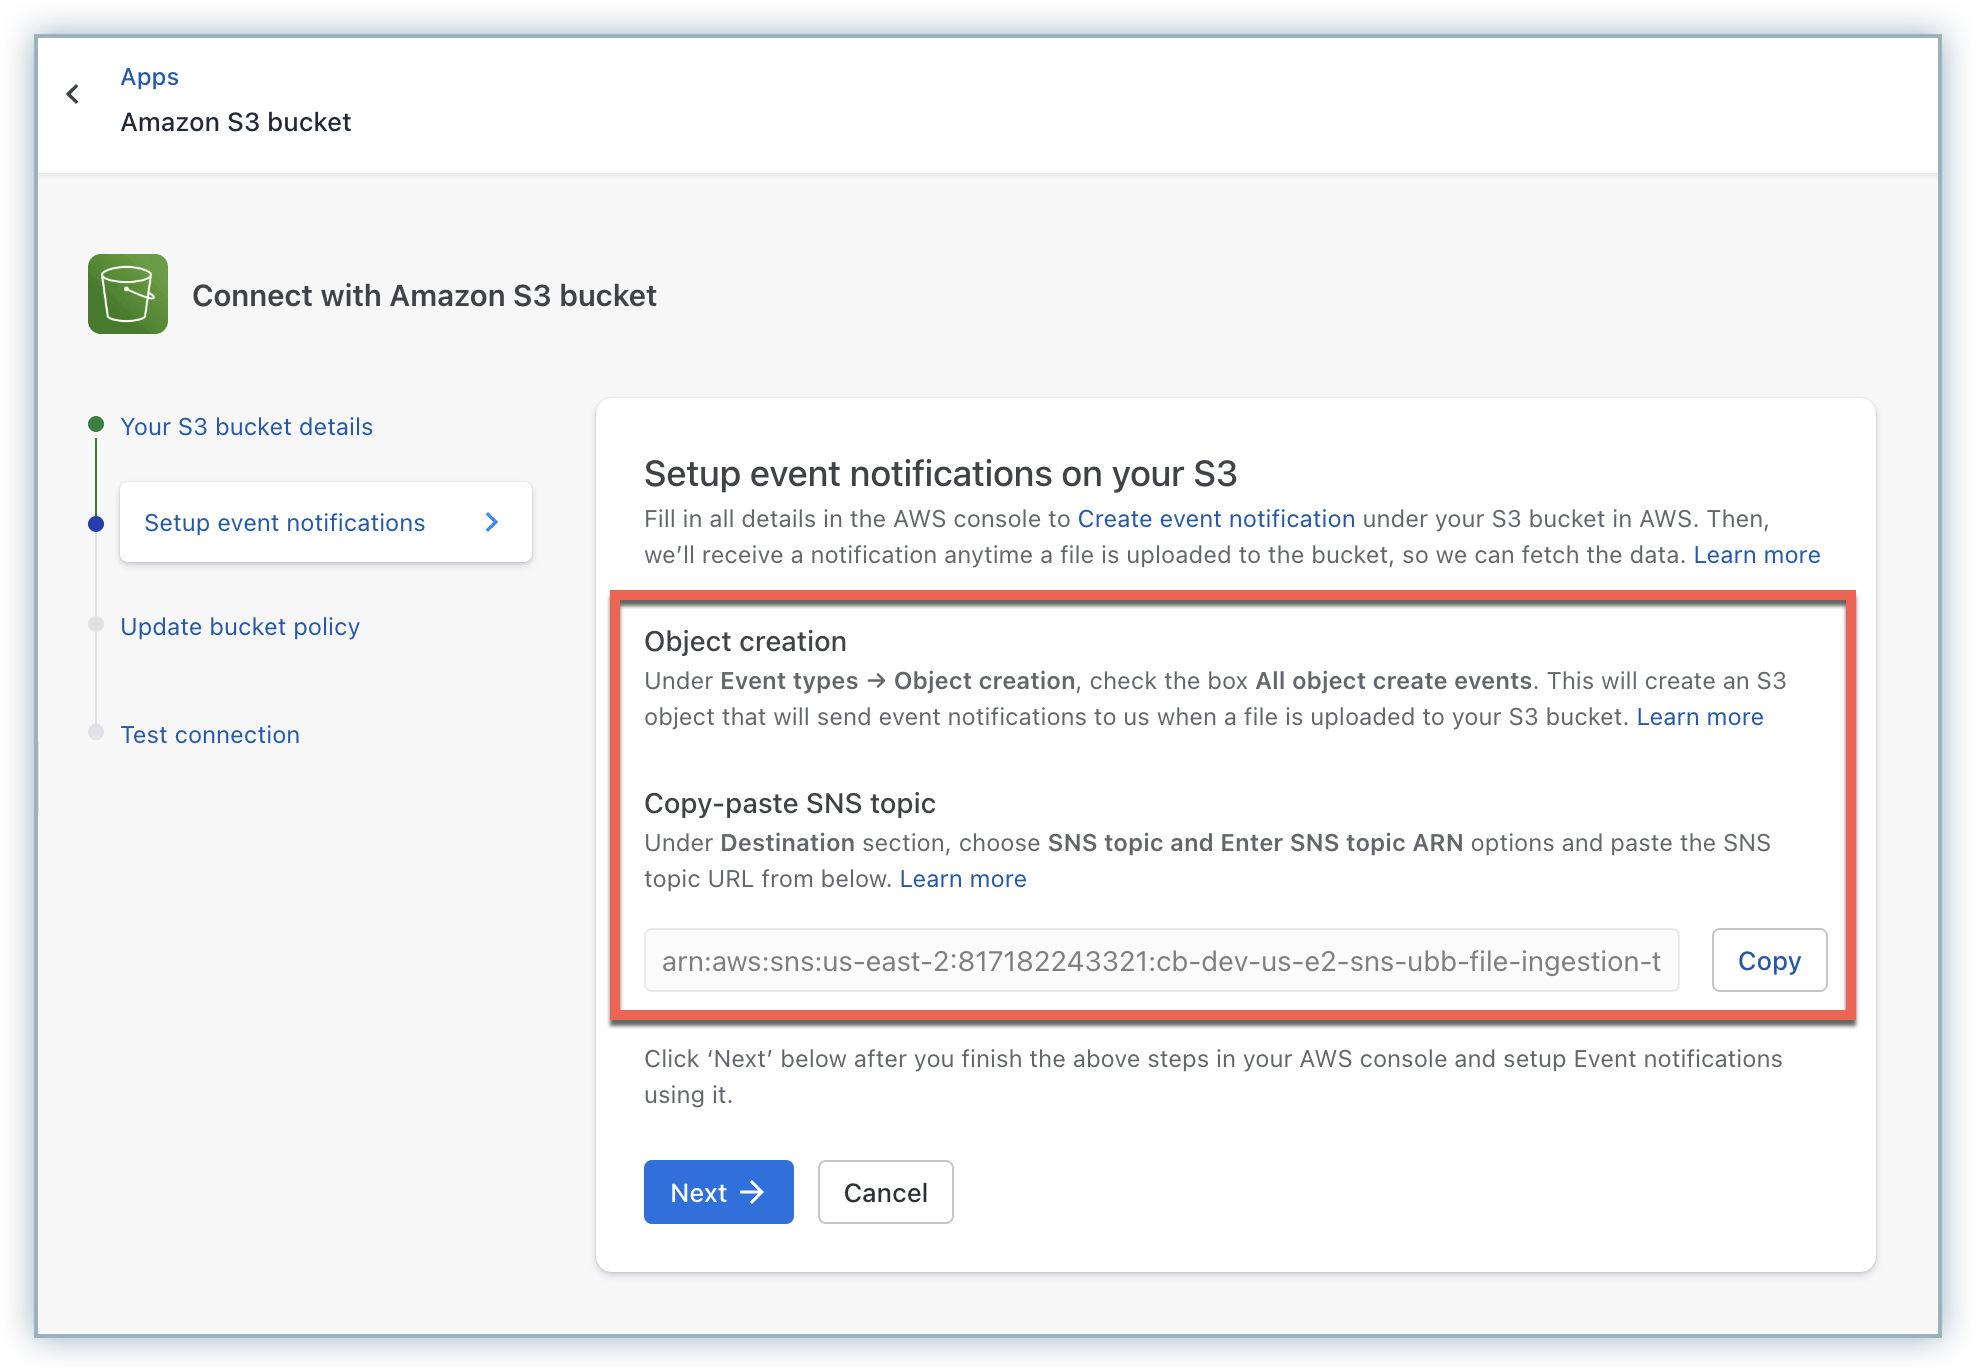
Object Creation
- In your S3 Console, open the relevant bucket.
- Navigate to the Properties tab > Event notifications, and click Create event notification.
- Set a name for the event (e.g.,
chargebee-usage-ingest). - Under Event types, check All object create events.
Destination
- In your S3 Console, open the relevant bucket.
- Under Destination, choose SNS topic.
- Select Enter SNS topic ARN, and paste the SNS topic ARN provided on the Set up event notifications page in Chargebee.
- Click Save changes.
Once you're done, return to your Chargebee Billing site, and click Next.
Step 3: Update Bucket Policy in AWS
To allow Chargebee to fetch data from your S3 bucket, you need to add a bucket policy. Follow these steps to add a bucket policy:
- On the Update Bucket Policy page in Chargebee Billing, click Copy to copy the generated bucket policy snippet.
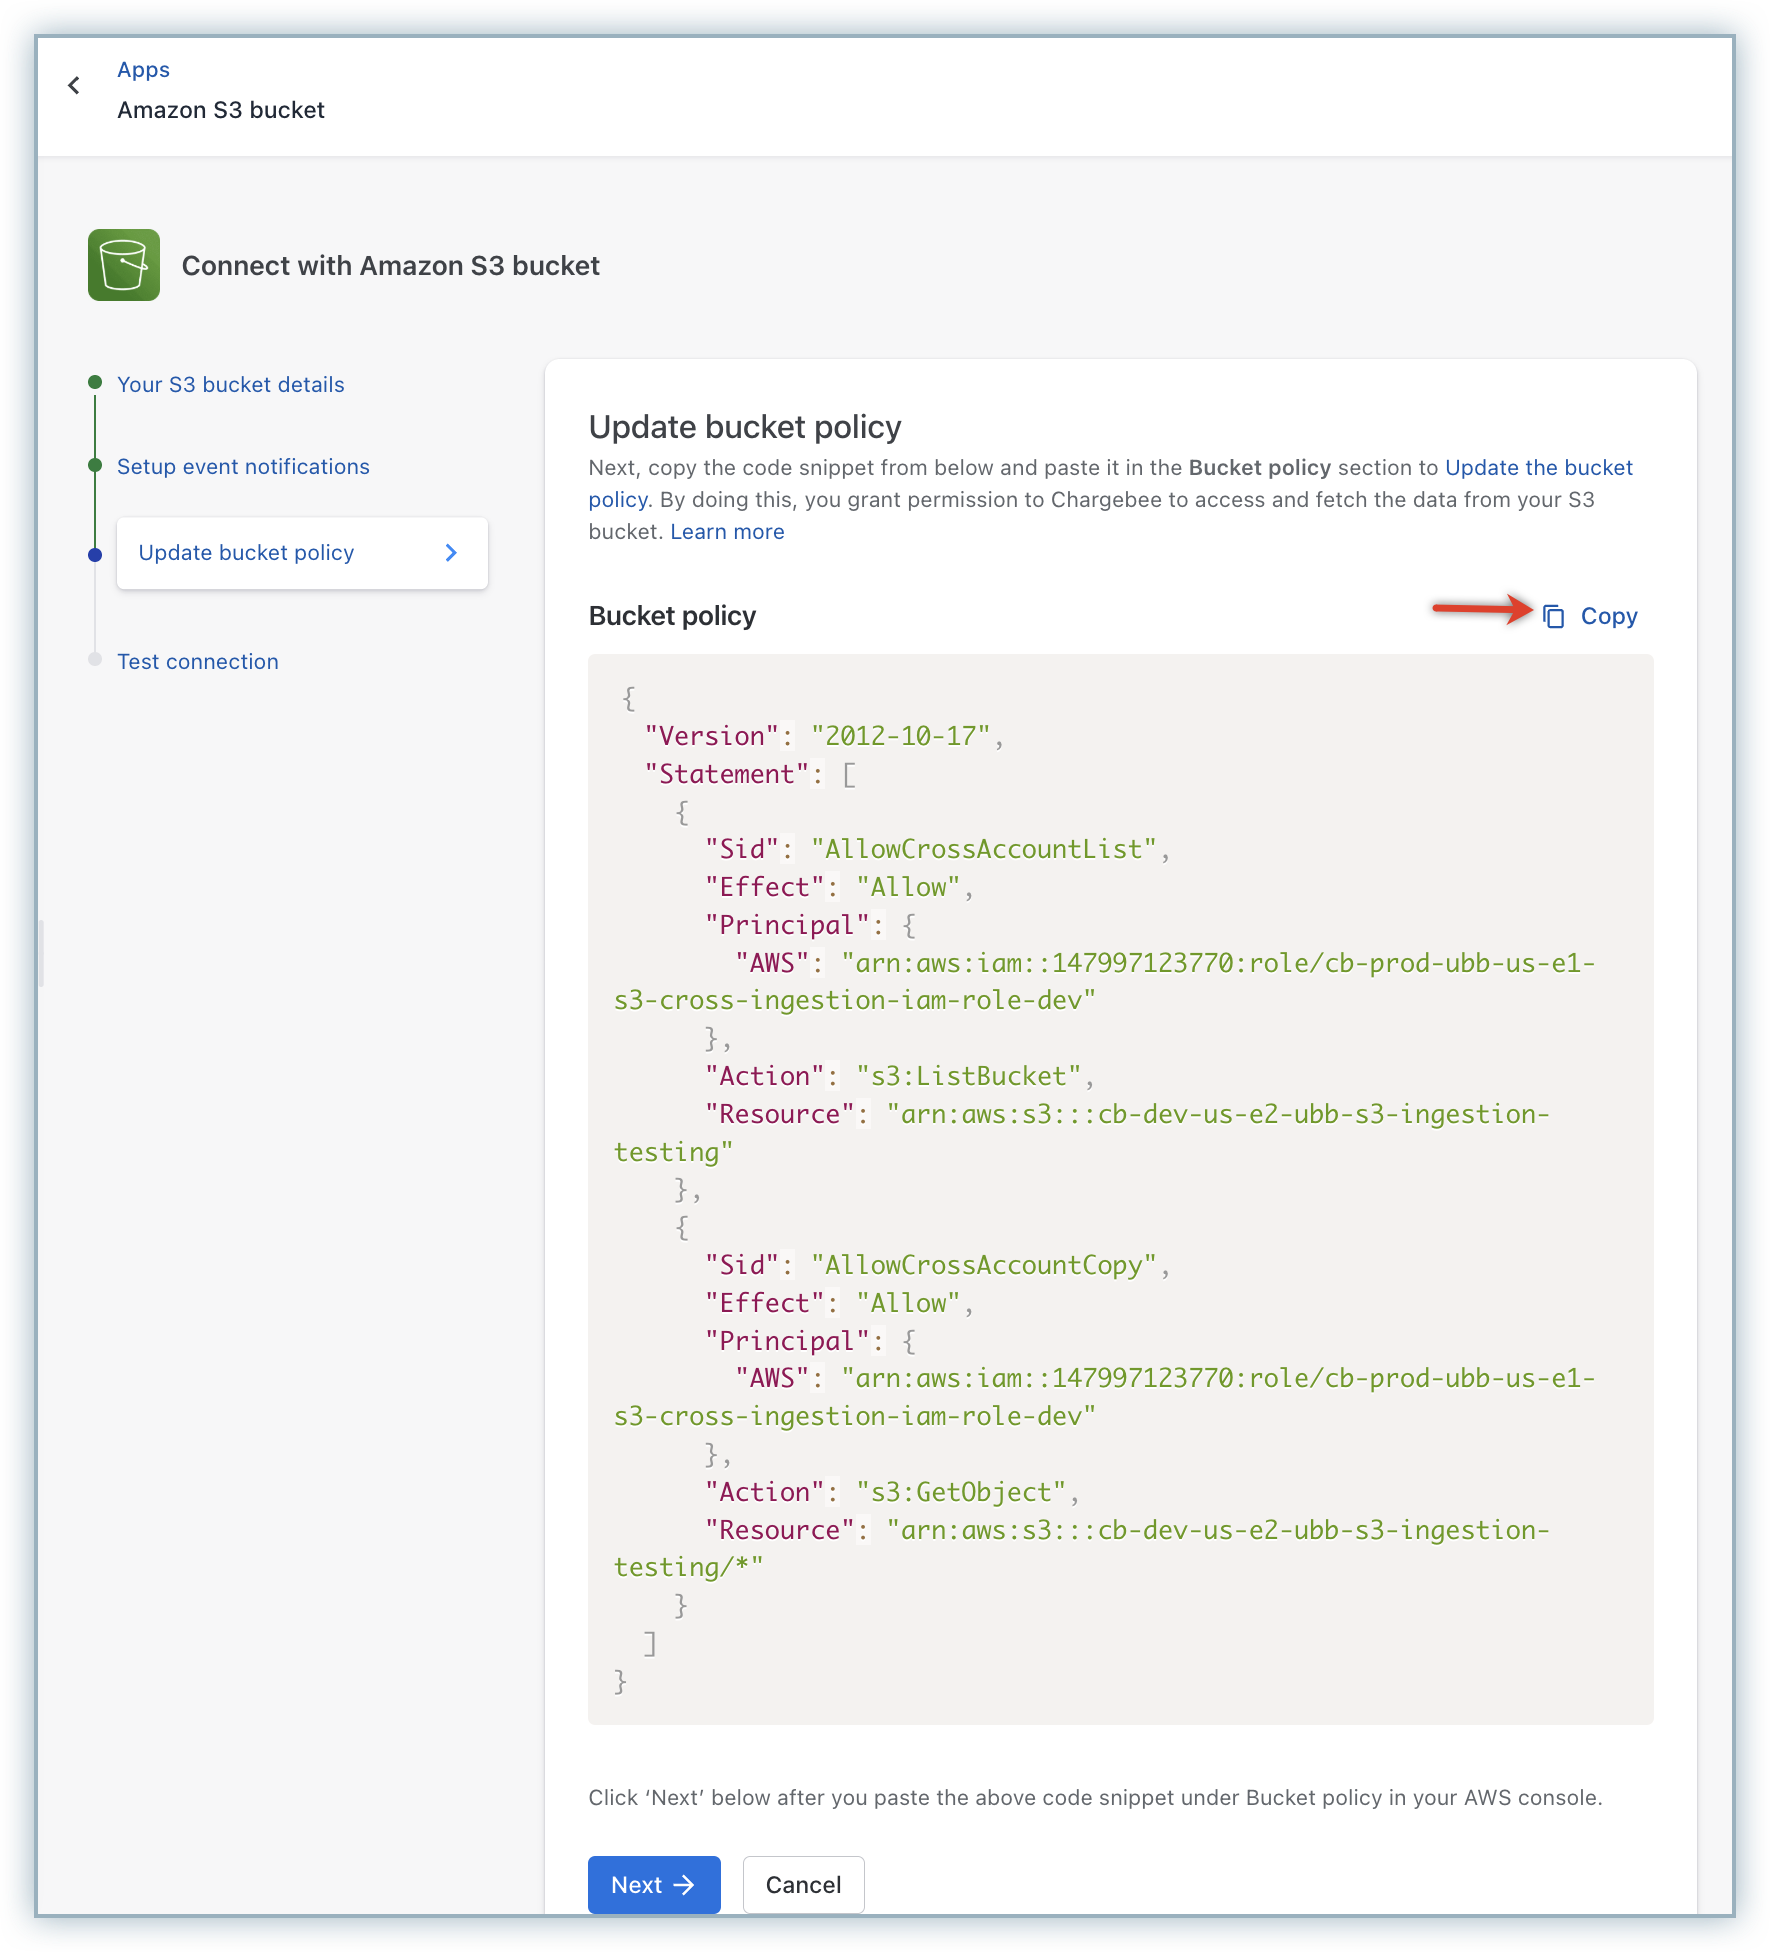
- In your AWS Console:
- Navigate to the S3 service.
- Select your bucket and go to the Permissions tab > Bucket policy, and click Edit.
- Paste the policy snippet copied from Chargebee, replacing any placeholder values if needed.
- Click Save changes.
Once done, return to your Chargebee Billing site, and click Next.
Step 4: Test the connection
To verify the integration and confirm that your connection is up and running, follow these steps:
- Upload a sample usage file to your S3 bucket.
- In Chargebee Billing, click Confirm Upload.
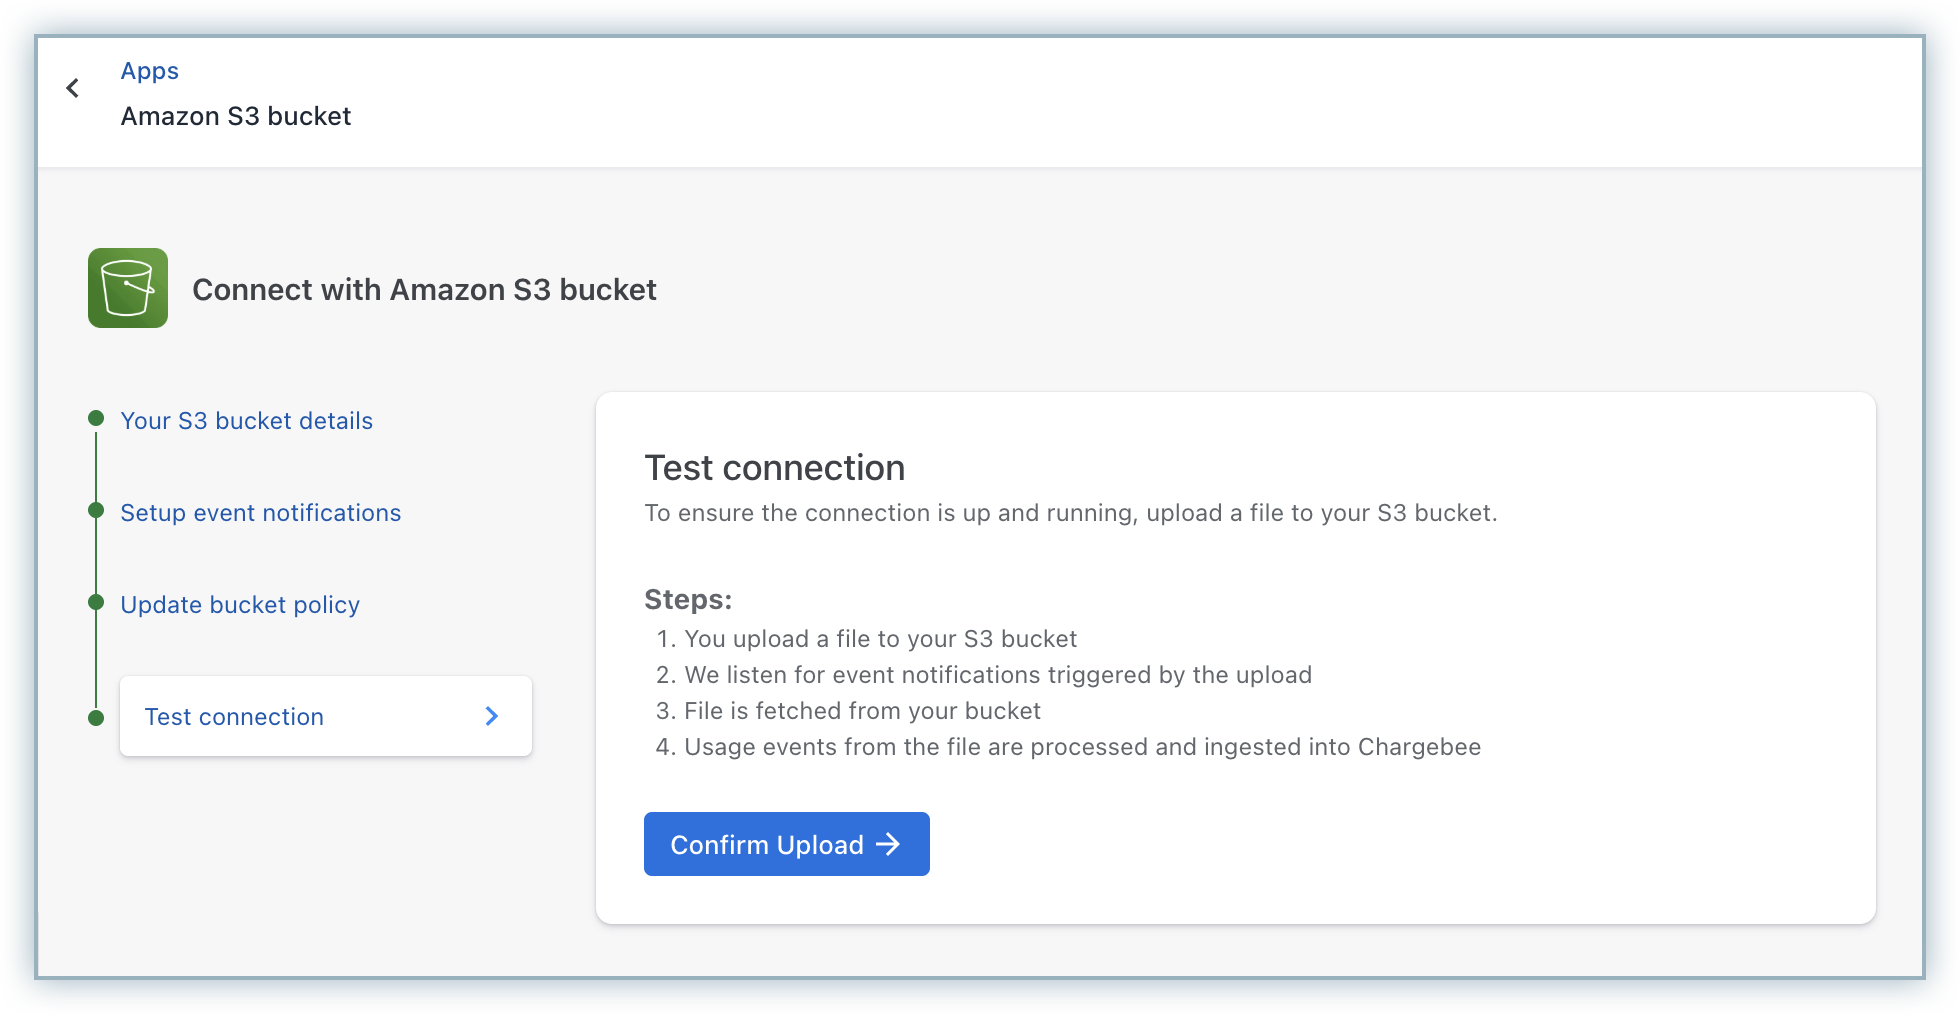
Chargebee does the following:
- Listens for the event notification from your S3 bucket.
- Fetches the uploaded file.
- Ingests usage events from the file into your Chargebee Billing site.
You’ll be notified once each step is completed.
You can click View setup status to confirm that the connection is up to date.
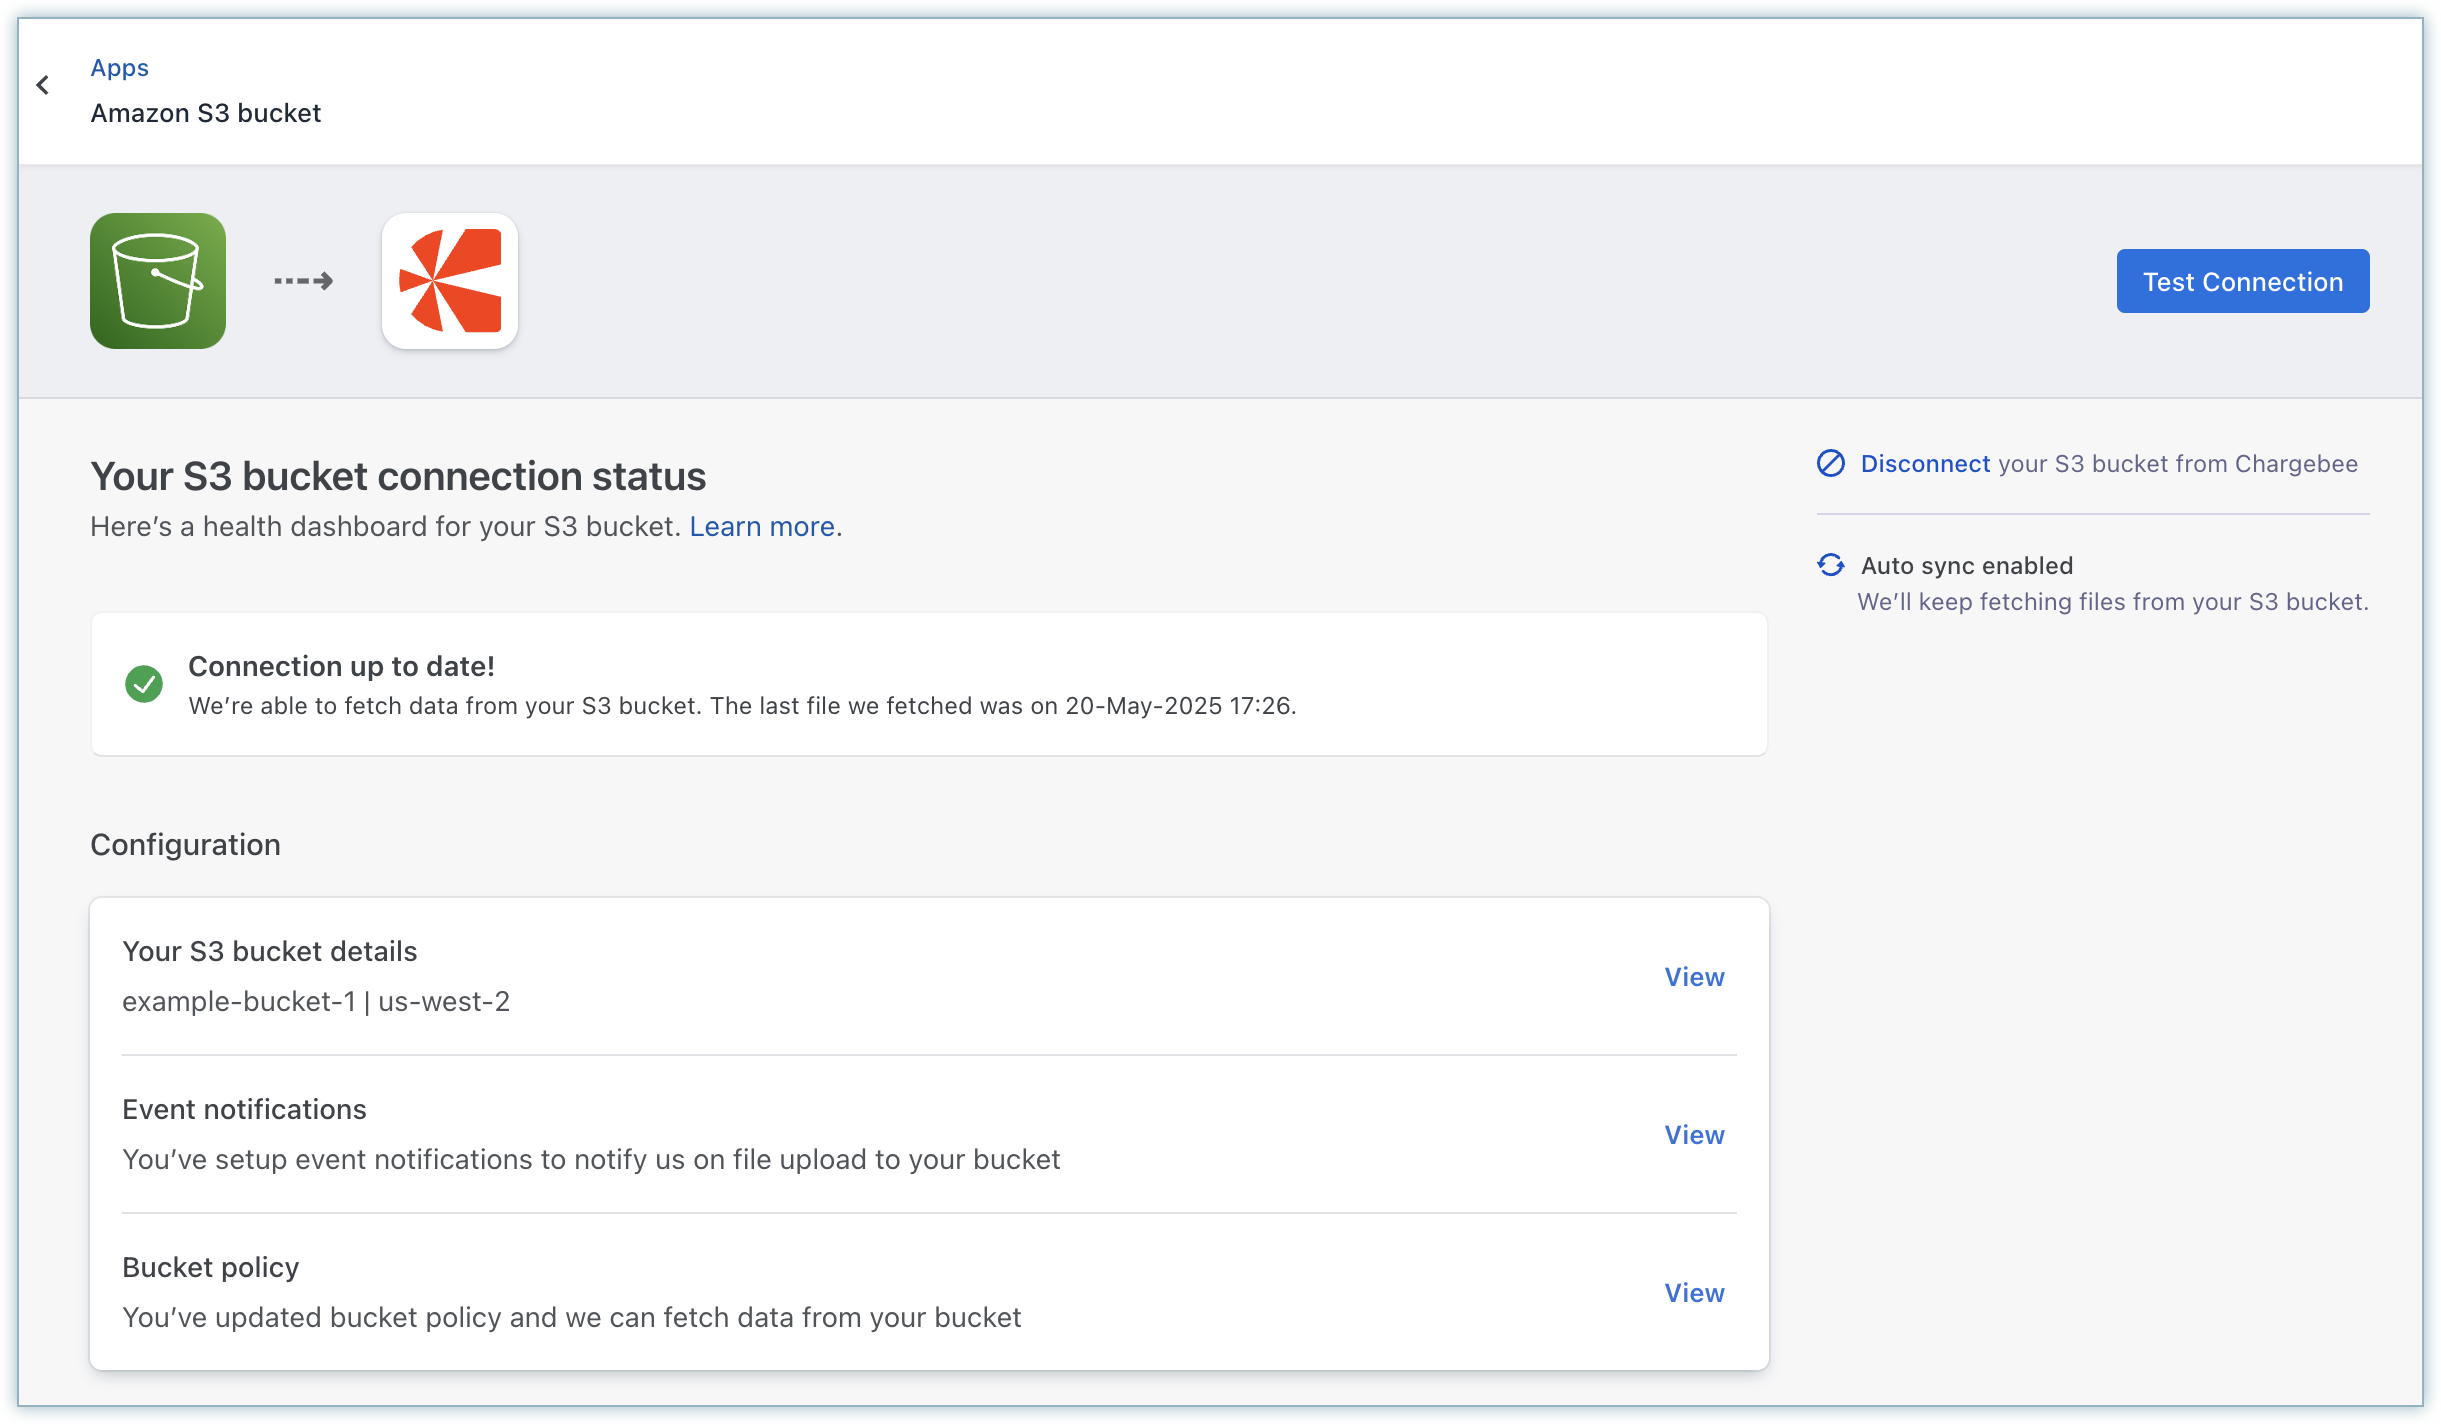
Managing your Amazon S3 bucket
Once your Amazon S3 bucket is connected, you can monitor its connection status anytime using the Health Dashboard in Chargebee Billing. This dashboard provides real-time visibility into the health of your S3 integration and helps ensure uninterrupted usage data ingestion. From the Health Dashboard, you can:
-
Check if your S3 connection is active and up to date.
-
View or update key configuration details such as bucket name, region, and policy.
-
Receive alerts when the connection fails, along with actionable error messages.
For example, if Chargebee is unable to access your S3 bucket due to a misconfigured bucket policy, an alert will appear on the dashboard with the reason for failure. You can review the suggested fix, update the bucket policy in your AWS console (using the policy snippet provided in Chargebee), and restore the connection.
Disconnecting your Amazon S3 bucket from Chargebee Billing
You can disconnect your Amazon S3 bucket from Chargebee Billing site at anytime as required. Once disconnected, Chargebee Billing stops listening for event notifications from the disconnected S3 bucket and will no longer have access to your S3 bucket. To disconnect your S3 bucket, follow these steps:
- Navigate to Apps > Amazon S3 bucket > Manage.
- On the Amazon S3 bucket page, click the Disconnect link.
- On the pop-up that appears, click Disconnect.
Related Articles
See also
API References
Was this article helpful?