Defining Metered Features
Introduction
Features help you define the various aspects offered as part of your product line. Metered features, which can be considered as your value metrics, allow you to track and bill customers based on the actual usage of these specific aspects of your product or service. Furthermore, you can link pricing for these metered features by mapping them to relevant plans and addon.
Let's consider a SaaS business, offering two plans as follows, with respective features and pricing:
| Regular Plan | Premium Plan |
|---|---|
| $30 per month for 3 users | $50 per month for 3 users |
| $15 per month for every additional user | $20 per month for every additional user |
| Limited access to application | Unlimited access to application |
| 15 hours of free on-call support | 40 hours of free on-call support |
For the above use case, metered features can be created to track the number of users signing up, and allocated usage of on-call support provided for the plans individually. Customers can be billed for any additional users as required.
Things to Consider
To create a Metered Feature, you must consider the following key aspects:
-
Identify usage variables: You must first identify the usage event attributes that you want to track and bill your customers for. This is usually the most sought capabilities of your product offering. Going by the above example, you would create metered features using attributes such as user sign-ups, and on-call support minutes/hours. Ensure that while ingesting usage events into Chargebee Billing, you ingest these billable/meterable attributes. This is when you clearly know which parts of your product offerings you want to charge your customers for. Alternatively, you can work your way backward and review usage trends for various usage event attributes and monetize them.
-
Determine the aggregation method: The aggregation method is how you would derive the final quantity of the usage event attribute for which you bill your customer. You can use sum, count, min, max, and average. In the above example, you would use count for the number of user sign-ups, and sum for the on-call support minutes/hours.
-
Determine the filter conditions: Filter conditions help you narrow down the usage aggregation for the usage event attributes from the entire usage stream for specific conditions that you define. For instance, you can create metered features with filters to track the usage event attributes for each of your plan offering.
-
Create, Link Price, Analyze, Repeat: Create metered features to easily track usage of specific attributes, link pricing to them, analyze usage metrics, and refine your pricing strategy through experimentation. Repeat the process to optimize your pricing model.
Creating a Metered Feature
To create a new metered feature in your Chargebee Billing site, follow these steps:
- Navigate to Usages > Metered Features, and click Create Metered Feature.
- On the Create a Metered Feature page, specify the following details:
- Enter a name for the feature that you are metering.

- Under Usage Calculation,
- Specify how usage is aggregated or calculated in your billing period. You can select from the following aggregation methods: Sum, Count, Min, Max, Average, Count Distinct.
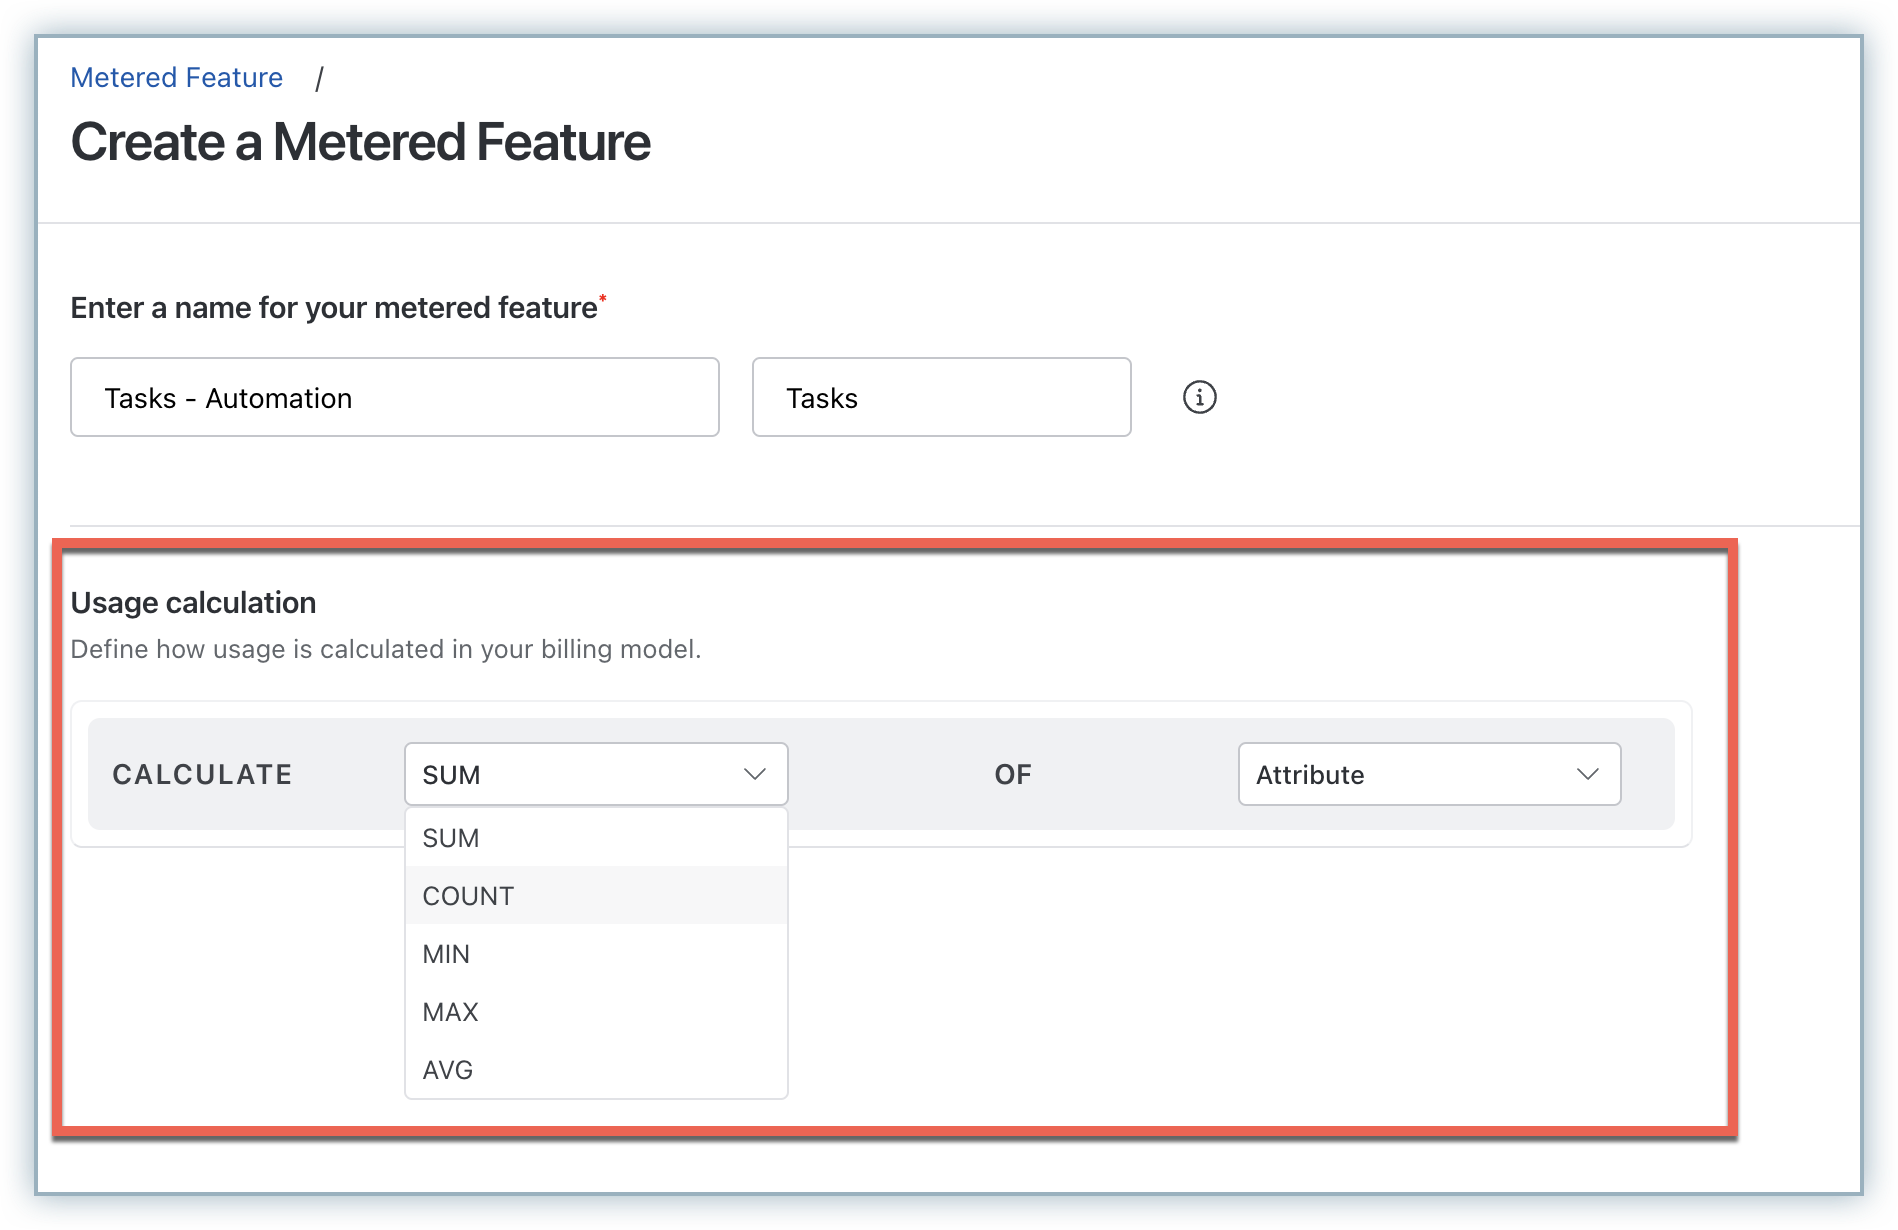
- Select the usage event attribute that you want to aggregate. You can select any quantity based attributes from your usage event resource.
- Specify how usage is aggregated or calculated in your billing period. You can select from the following aggregation methods: Sum, Count, Min, Max, Average, Count Distinct.
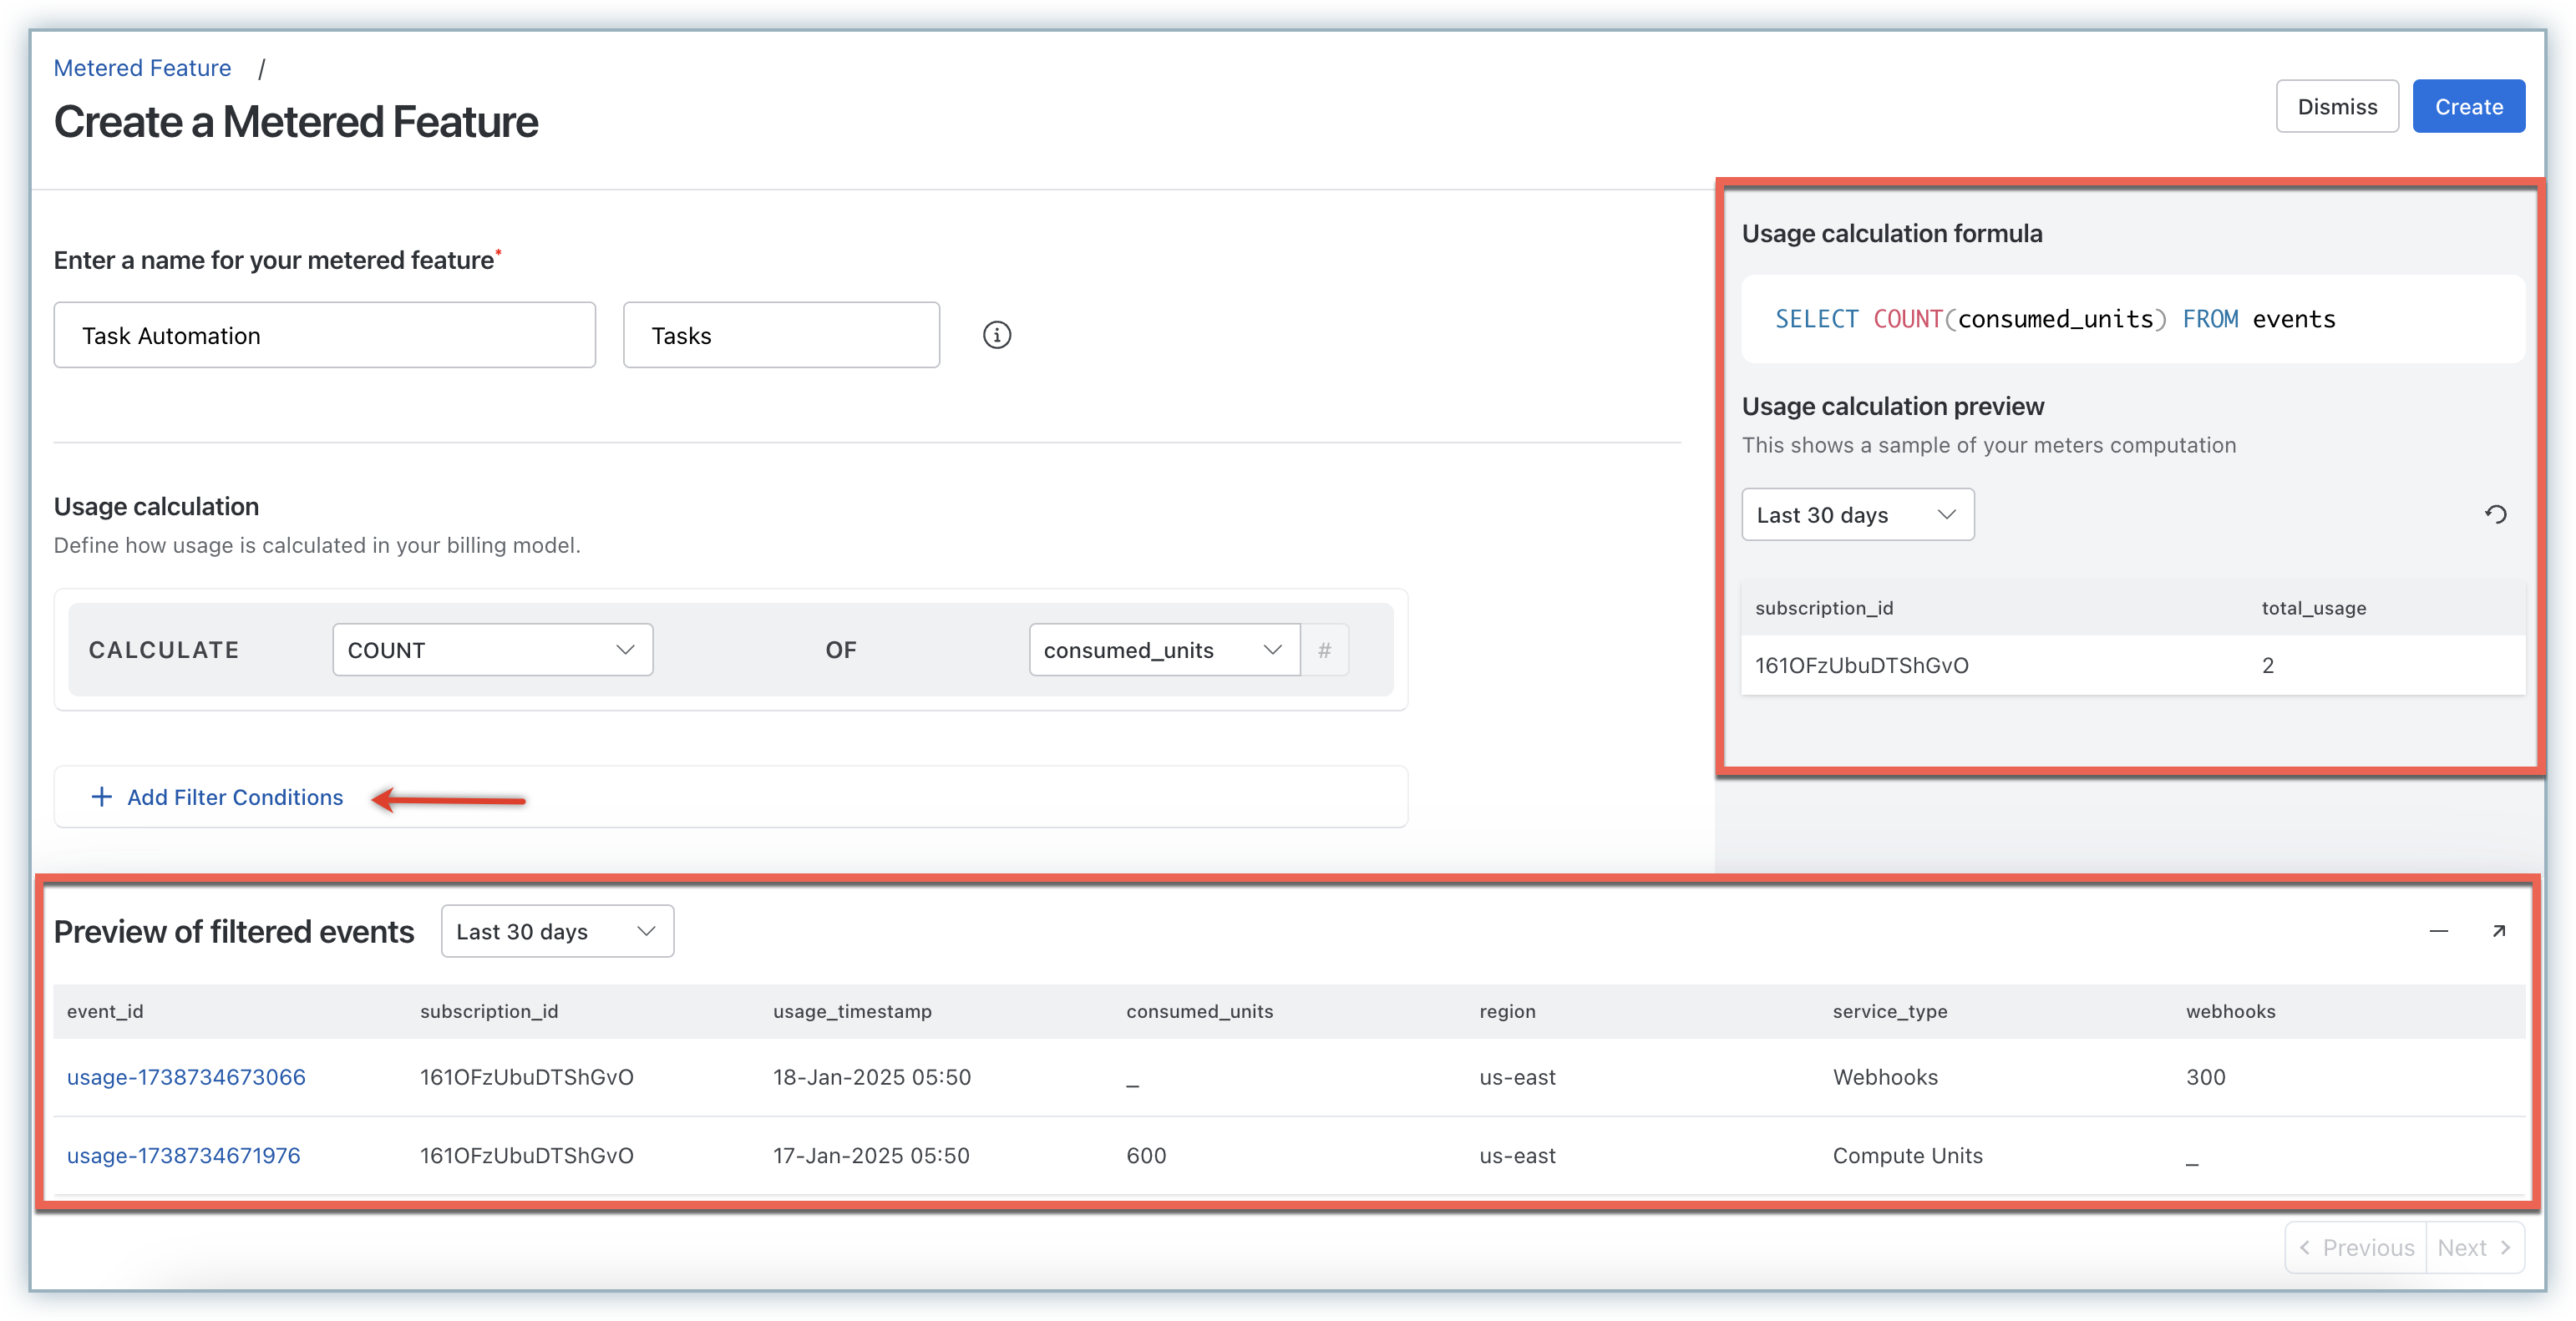
- The Usage Calculation Formula gets displayed as you define the metered feature.
- The Usage Calculation Preview displays a sample set computation for your metered feature from the available usage data. You can also view a Preview of Filter events for the feature.
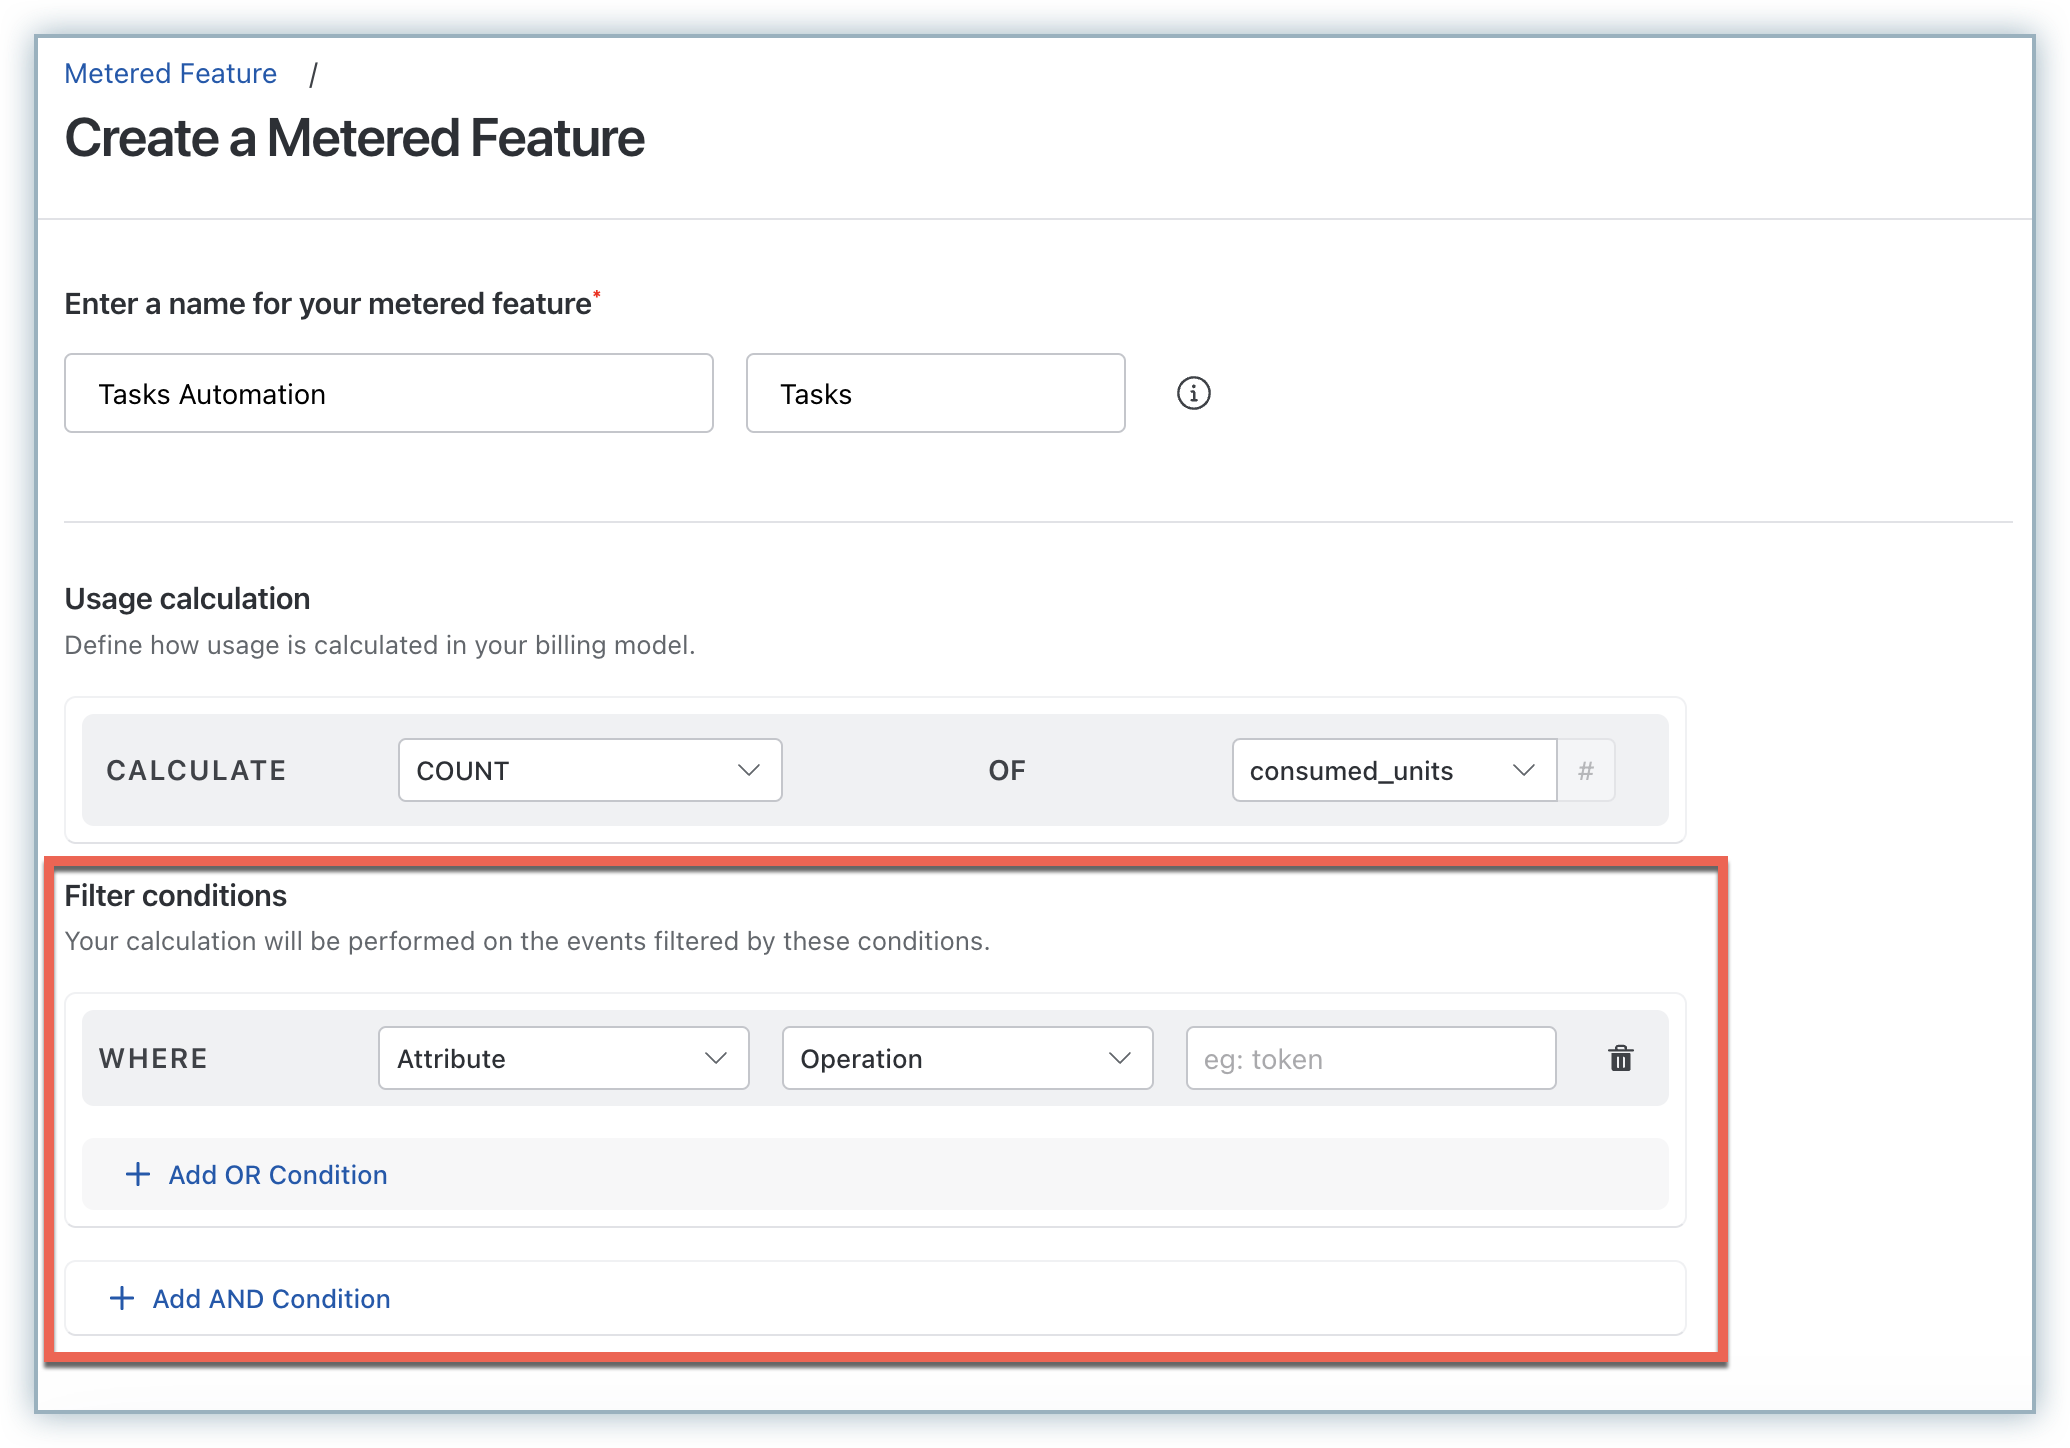
- Under Filter Conditions, you can add AND/OR filter conditions to filter usage events for which usage gets calculated.
- For complex calculations and use cases where basic filter conditions might not suffice, you can use the SQL mode that allows custom SQL queries.
- Enter a name for the feature that you are metering.
- Once you're done, click Create.
The metered feature is successfully created. You can now proceed to Link Pricing for the metered feature as required.
Was this article helpful?