Setting up Alerts
This guide walks you through creating alerts, handling webhook notifications, and managing alerts over time. If you haven't already, read Usage Alerts to understand the key concepts before proceeding.
This feature is a Private Beta release. Contact Chargebee Support to enable Usage Alerts for your live and test sites.
Prerequisites
Before you create an alert, ensure the following prerequisites are met:
- Metered feature defined: You need at least one metered feature configured in your Chargebee Billing site.
- Usage events flowing: Chargebee Billing evaluates alerts as usage events are processed. Make sure your application is ingesting usage events for the metered feature you plan to monitor.
- Webhook endpoint configured: Alert notifications are delivered via webhooks. Configure your endpoint under Settings > Webhooks in the Chargebee UI, or refer to the Webhooks settings for setup instructions.
Information
During development, you can use tools like webhook.site to inspect alert webhook payloads before integrating them into your application.
Creating an alert
To create a new alert in your Chargebee Billing site, follow these steps:
- Navigate to Usages > Alerts > Create Alert.
- On the Create Usage Alert page, provide the following details:
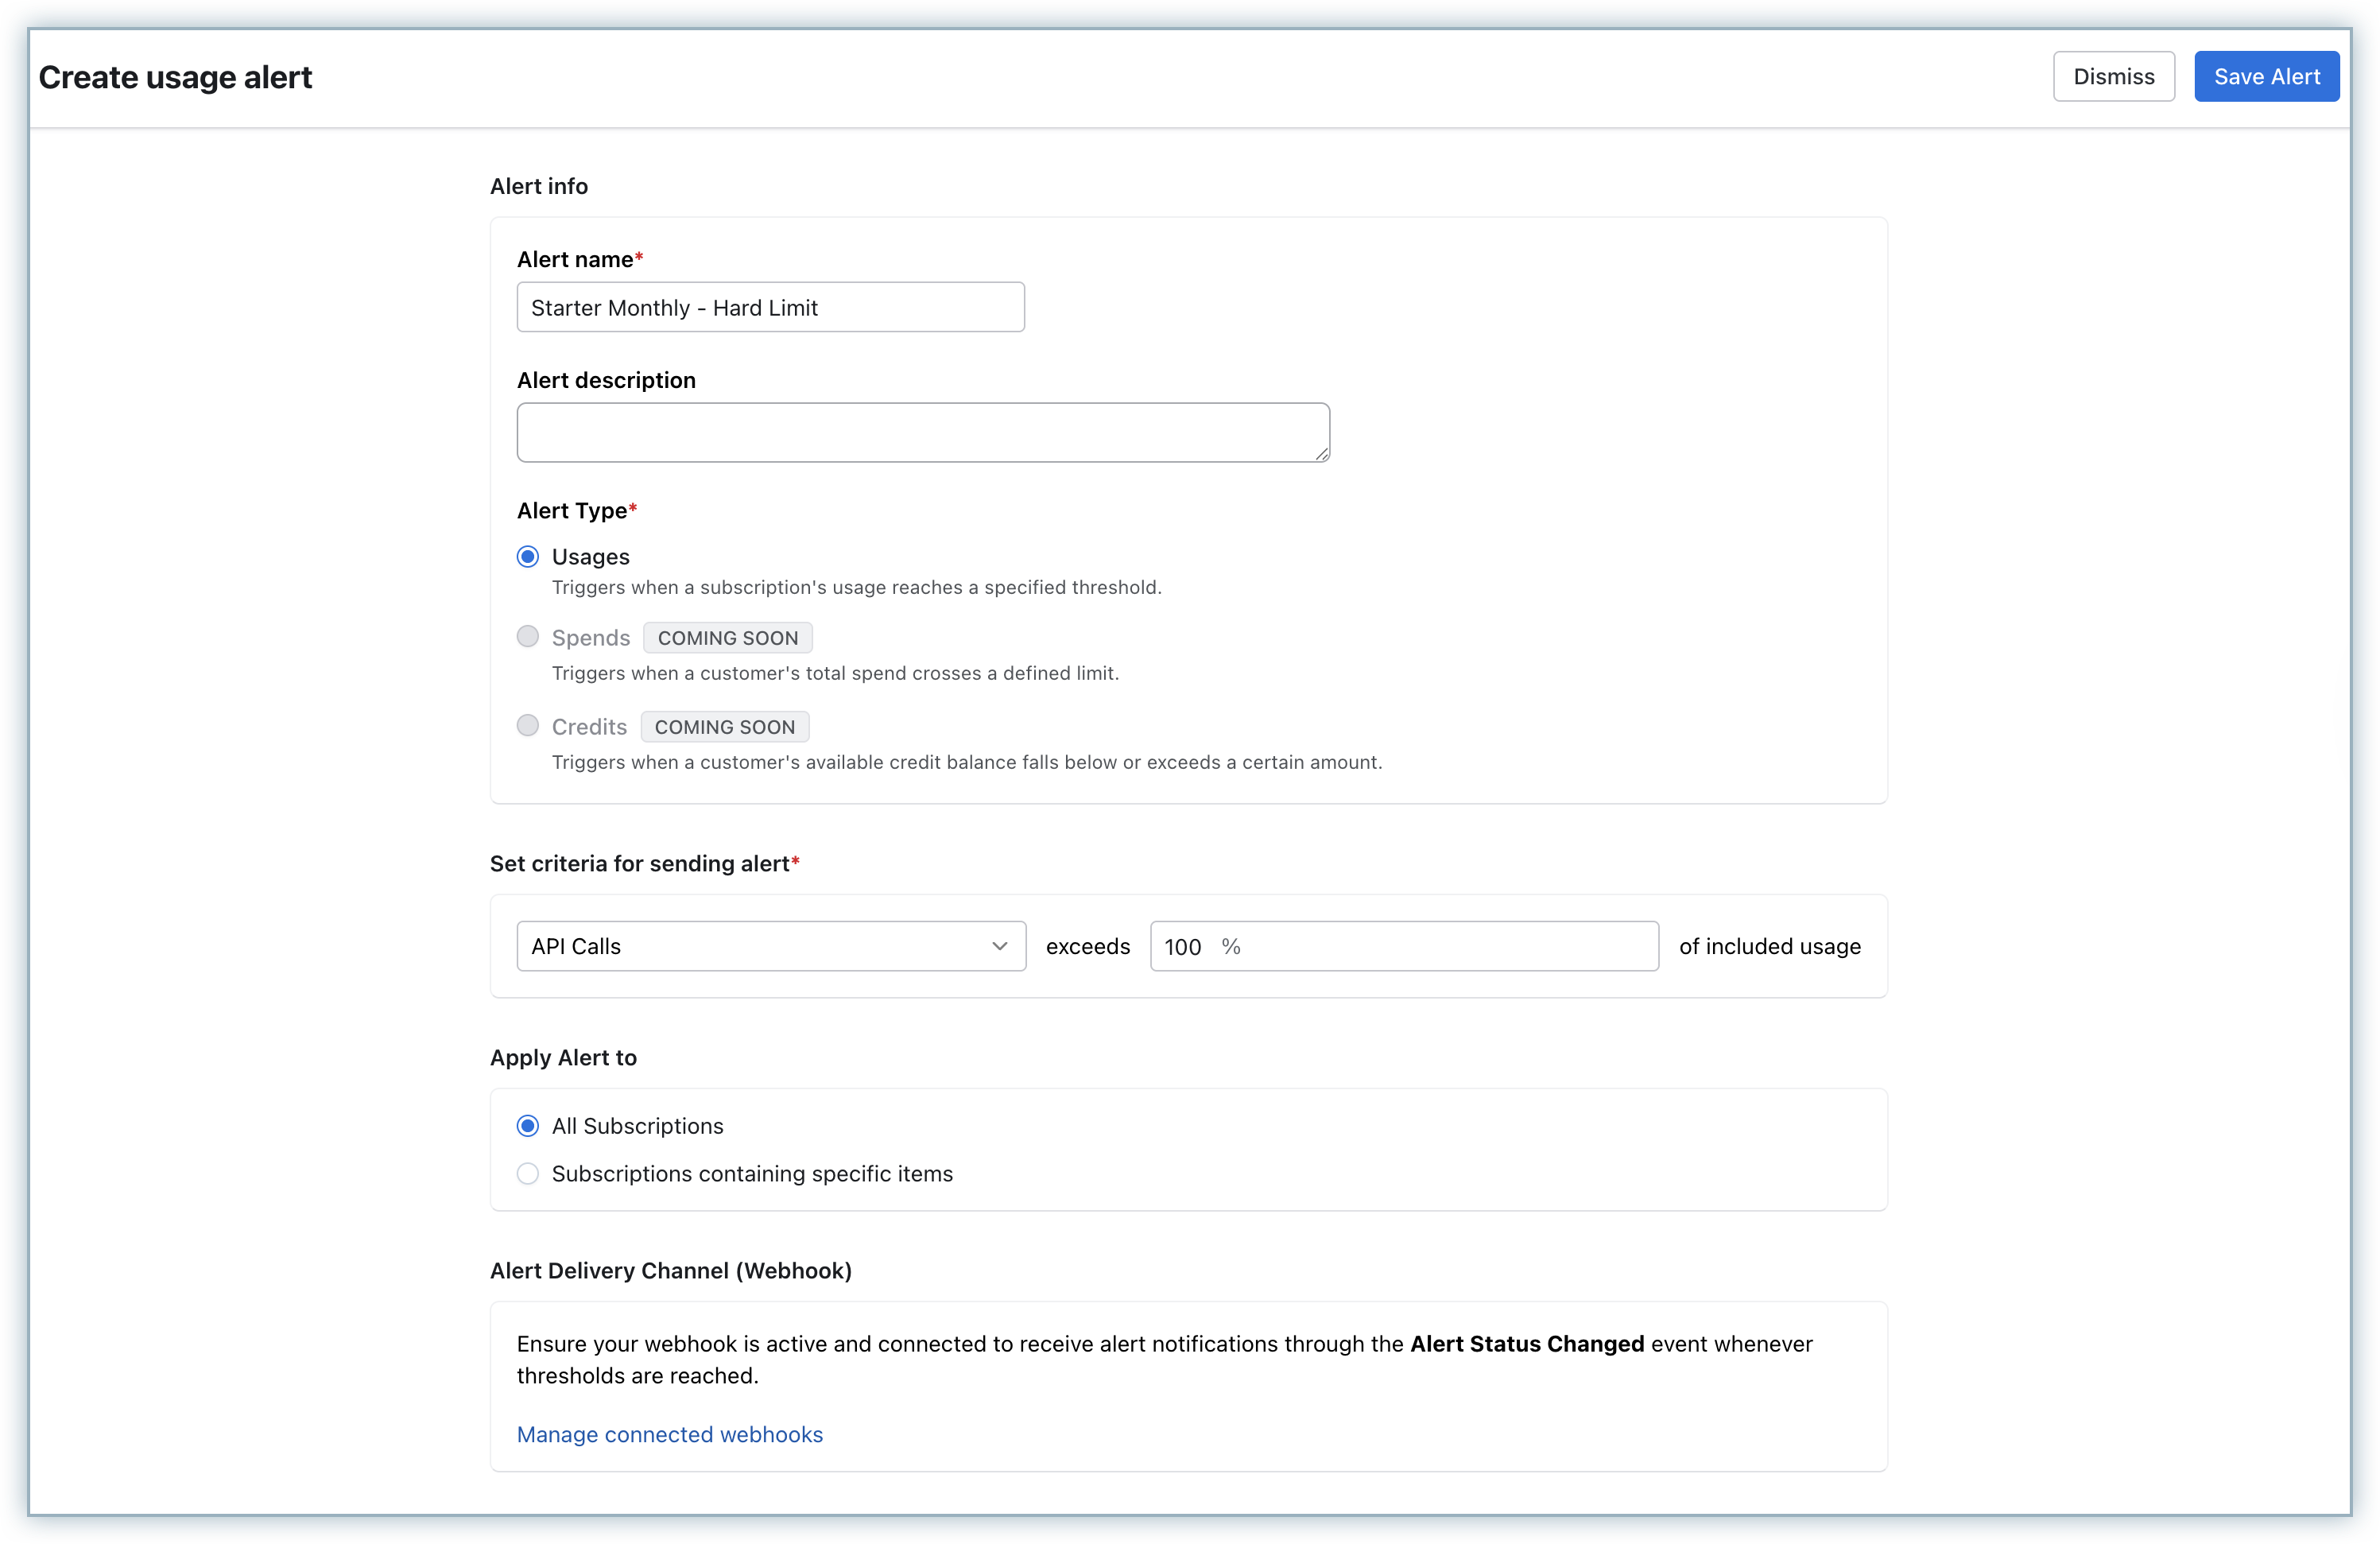
- Alert name: Enter a unique name to identify the alert.
- Alert description: Add a brief description to provide context for the alert.
- Alert type: Select the alert type. Currently, only Usage alerts are supported.
- Criteria for sending alerts:
- Select the metered feature you want to monitor.
- Enter the percentage of included usage that should trigger the alert (for example, 80% or 100%).
- Apply alert to:
- Choose All subscriptions to apply the alert universally, or
- Use filters to apply the alert to specific subscriptions.
- Alert delivery channel:
- Click Manage connected webhooks to configure or select webhook endpoints.
- You will be redirected to the API Keys and Webhooks page to add or manage endpoints.
- Click Save Alert.
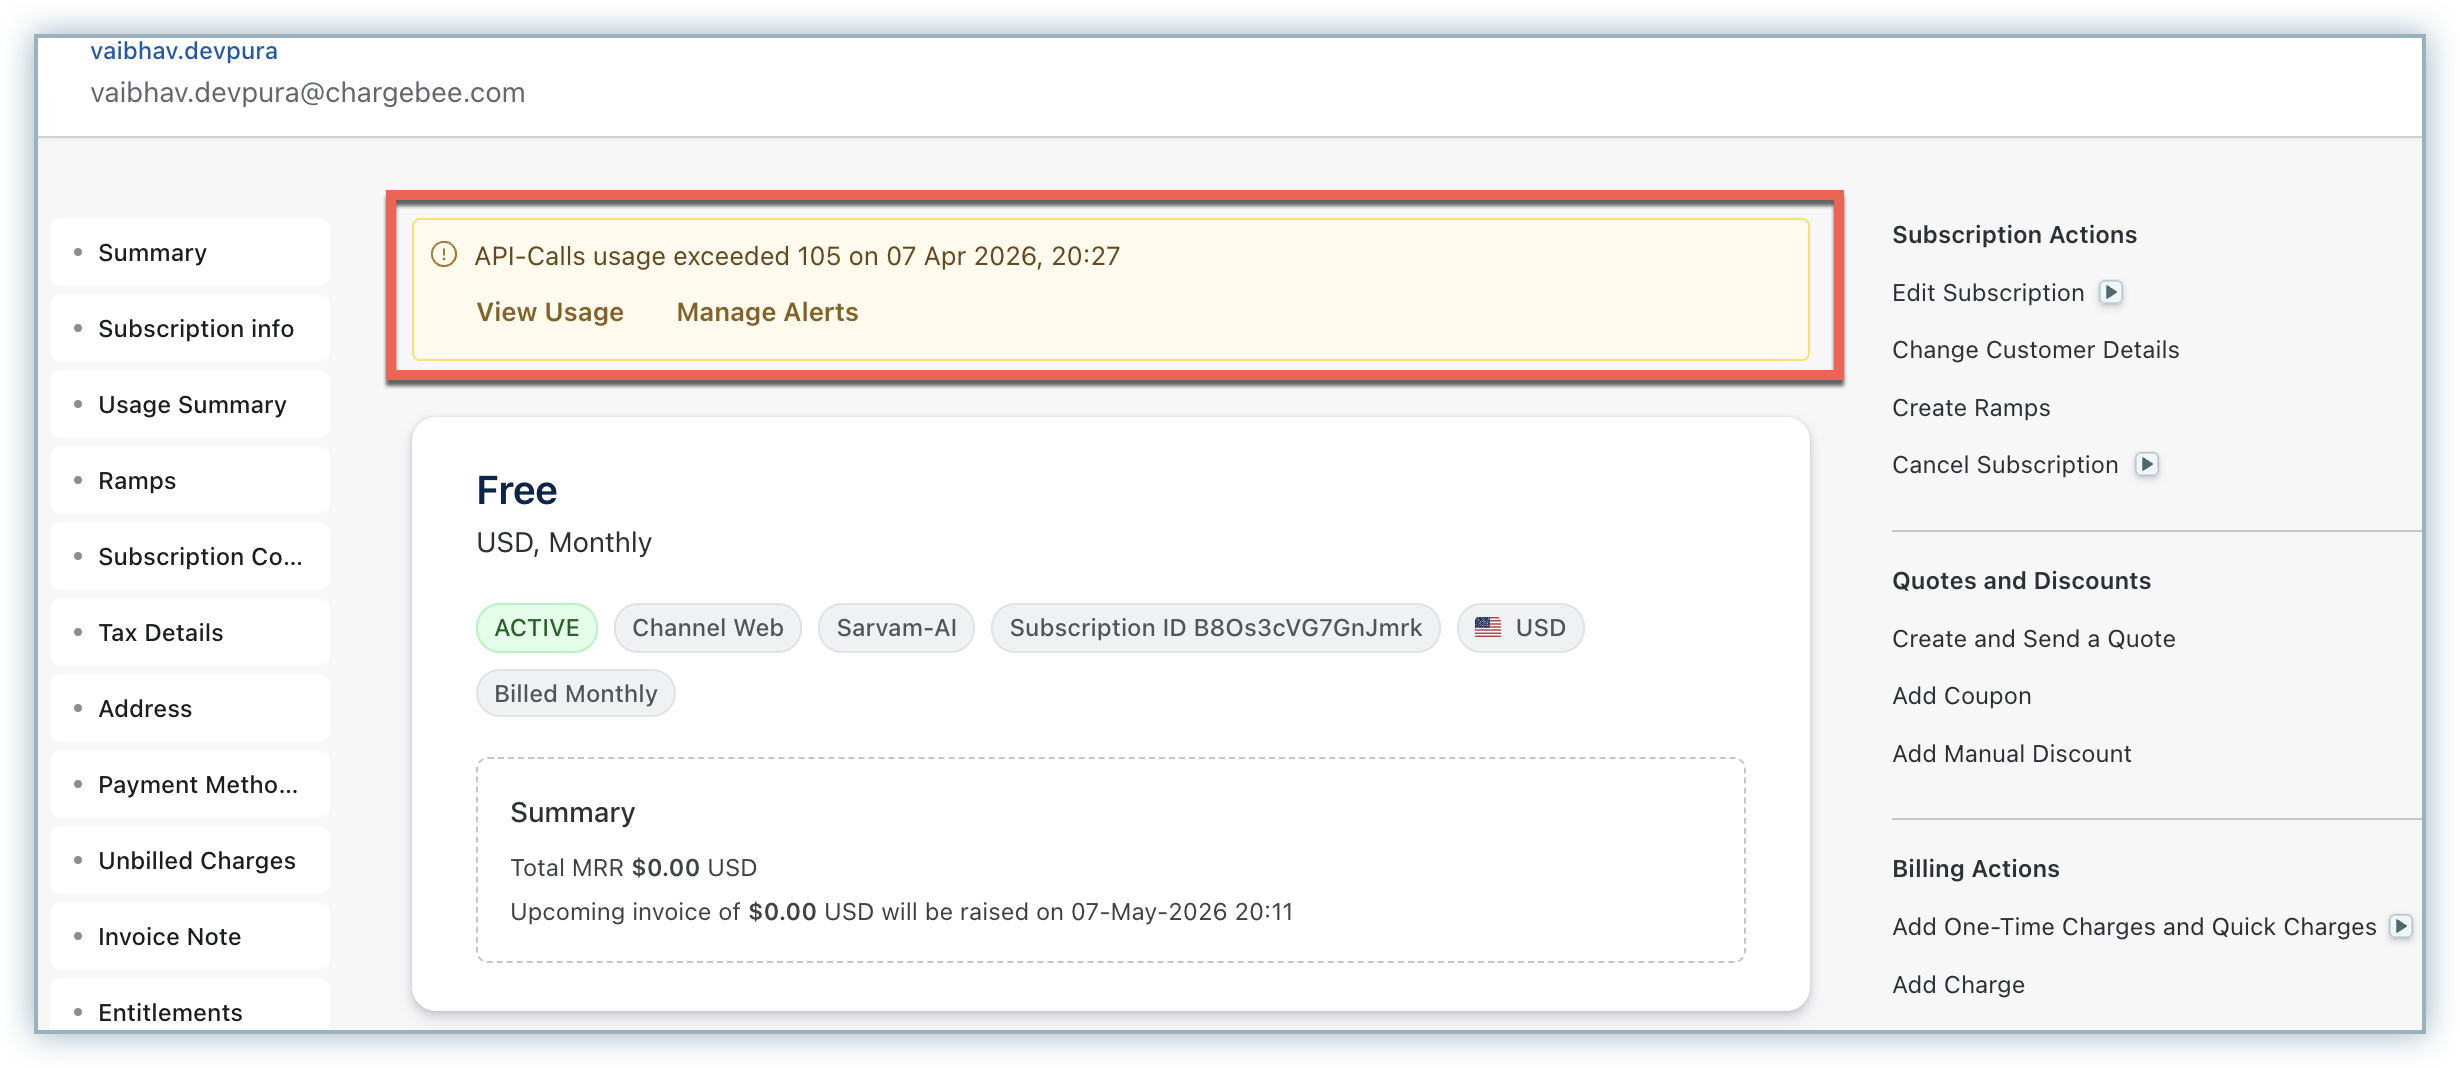
You have successfully created a usage alert. Once created, the alert becomes active and Chargebee starts evaluating it against incoming usage events.
When the configured usage threshold is exceeded for a subscription, Chargebee displays a warning banner in the UI indicating that the alert condition has been met.
To modify an existing alert:
- Navigate to Usages > Alerts.
- Select the alert you want to update.
- Click Edit Alert under Actions.
- Make the required changes and click Save Alert.
Disabling an alert
Disabling an alert allows you to temporarily stop notifications without deleting the alert configuration. This is useful when you want to pause monitoring or make changes without triggering alerts.
To disable an alert:
- Navigate to Usages > Alerts.
- Select the alert you want to disable.
- Click Disable Alert under Actions.
Once disabled:
- Chargebee stops evaluating the alert against incoming usage events.
- No webhook notifications are sent for the alert.
You can re-enable the alert at any time by selecting Enable Alert from the same menu.
Deleting an alert
Deleting an alert permanently removes it from your Chargebee site. This action cannot be undone.
Warning
Deleting an alert is irreversible. If you may need the alert in the future, consider disabling it instead.
To delete an alert:
- Navigate to Usages > Alerts.
- Select the alert you want to delete.
- Click Delete Alert under Actions.
- Click Delete to confirm the deletion when prompted.
After deletion:
- The alert configuration is permanently removed.
- No further evaluations or notifications will occur for that alert.
Was this article helpful?