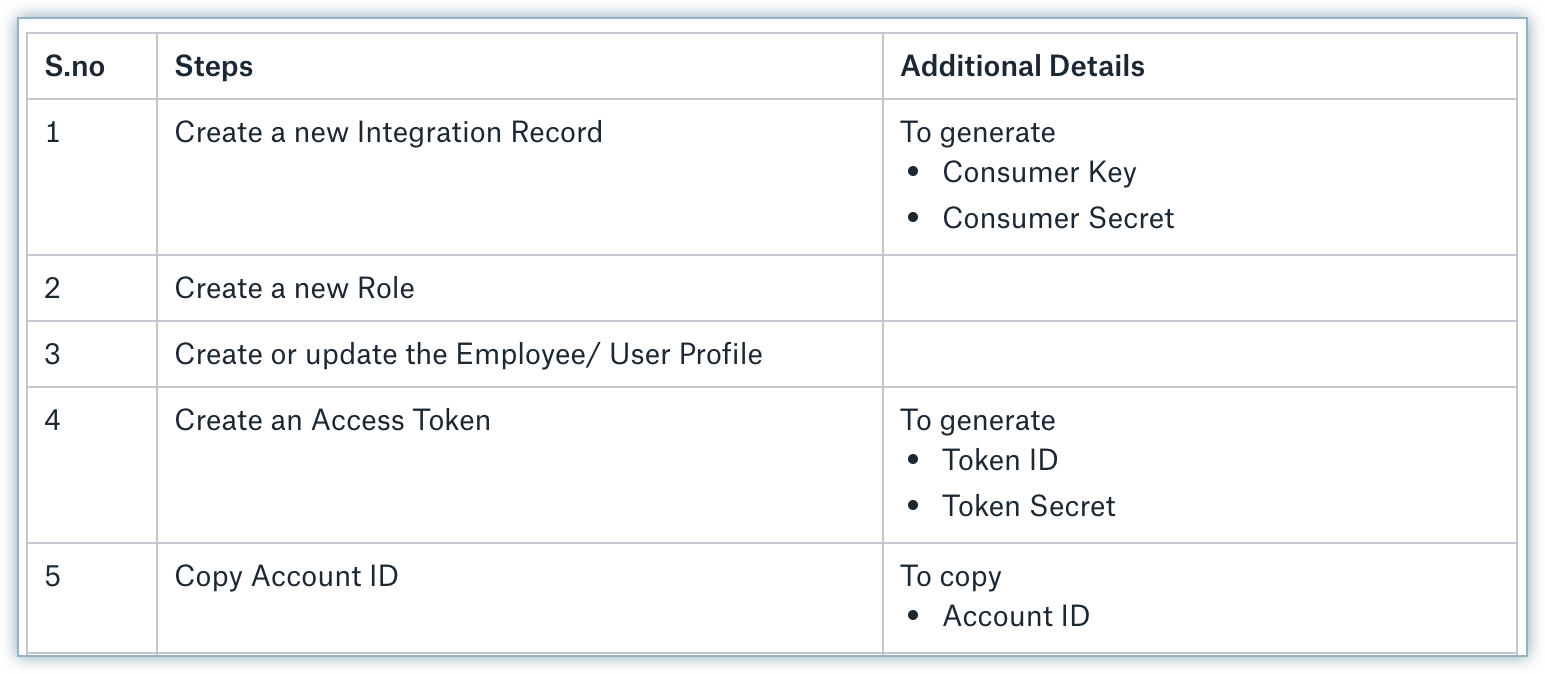
Setting up Token-based Authentication in NetSuite
Follow these steps to authenticate Chargebee to communicate with Oracle NetSuite, so you can retrieve these details in your Oracle NetSuite account:
- Consumer Key
- Consumer Secret
- Token ID
- Token Secret
- Account ID
Here's an overview of the steps that you need to follow:
Step 1 - Generating Consumer Key / Consumer Secret
Once you have logged in to your NetSuite account, click Setup > Integration > Manage Integrations > New. Specify the integration details and follow these steps:
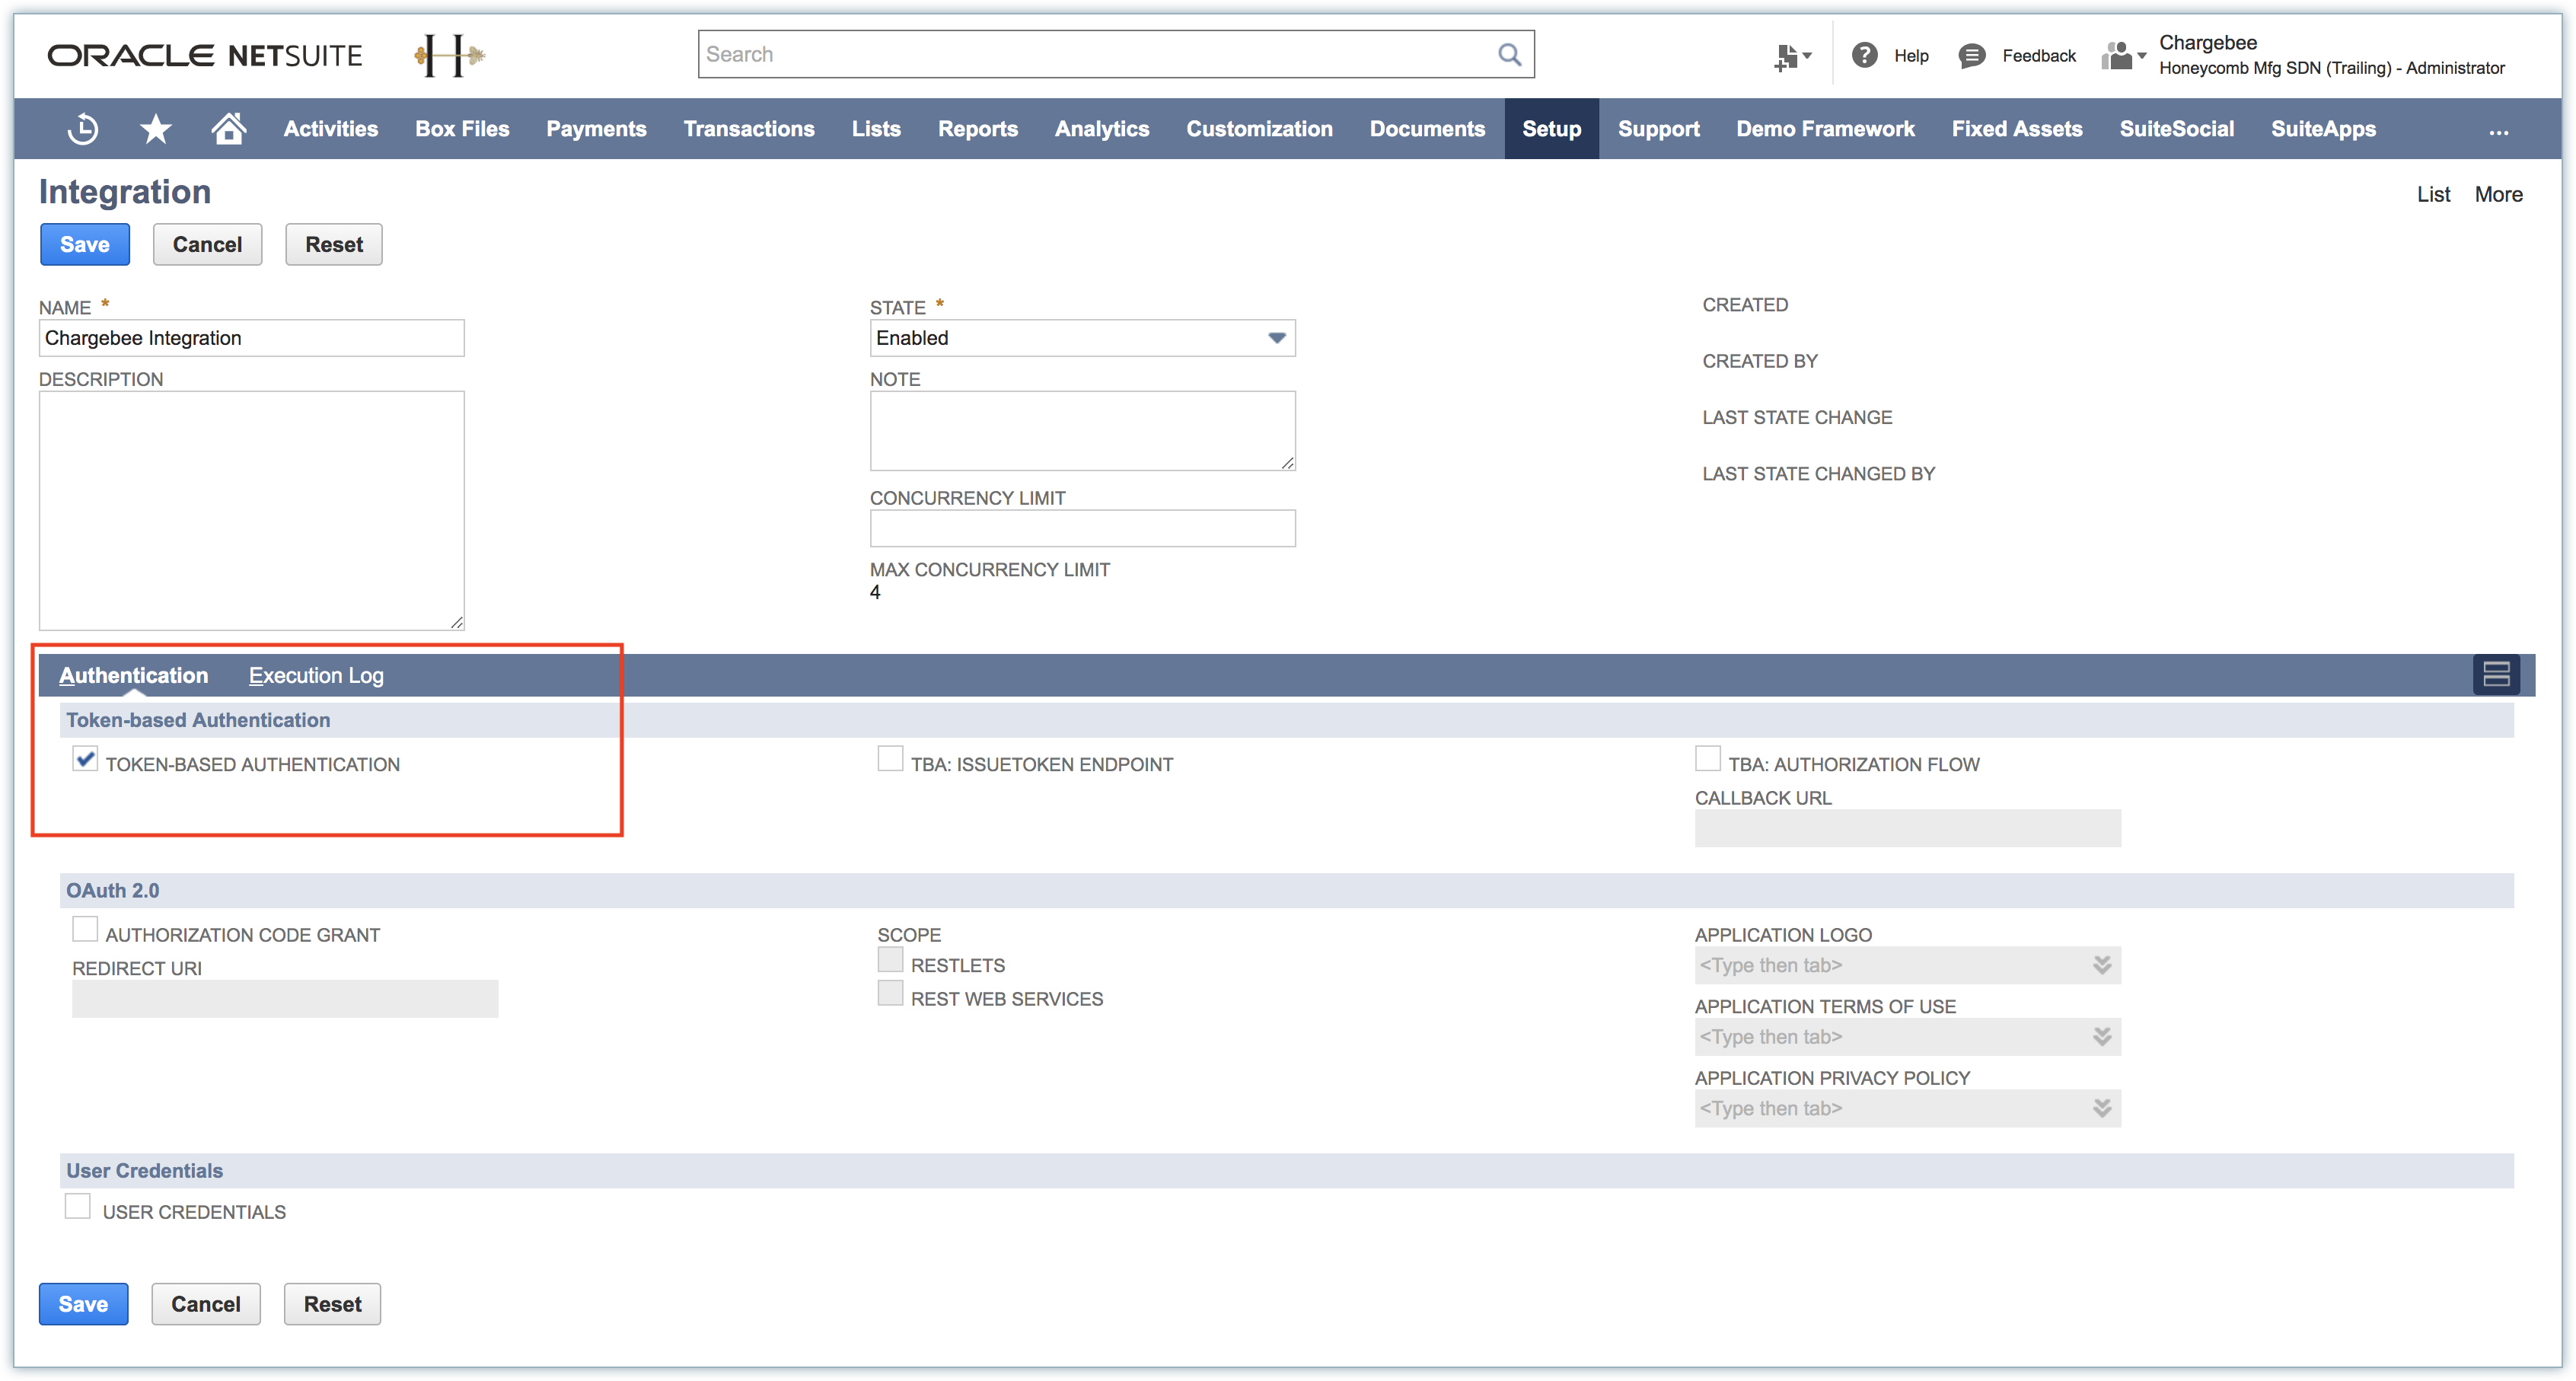
- Under Authentication, select Token-based Authentication.
- Click Save. The Client Credentials are displayed. Copy the Consumer Key/Client ID and Consumer Secret/Client Secret and save it in a document for your reference. You can not access this information once you exit this screen.
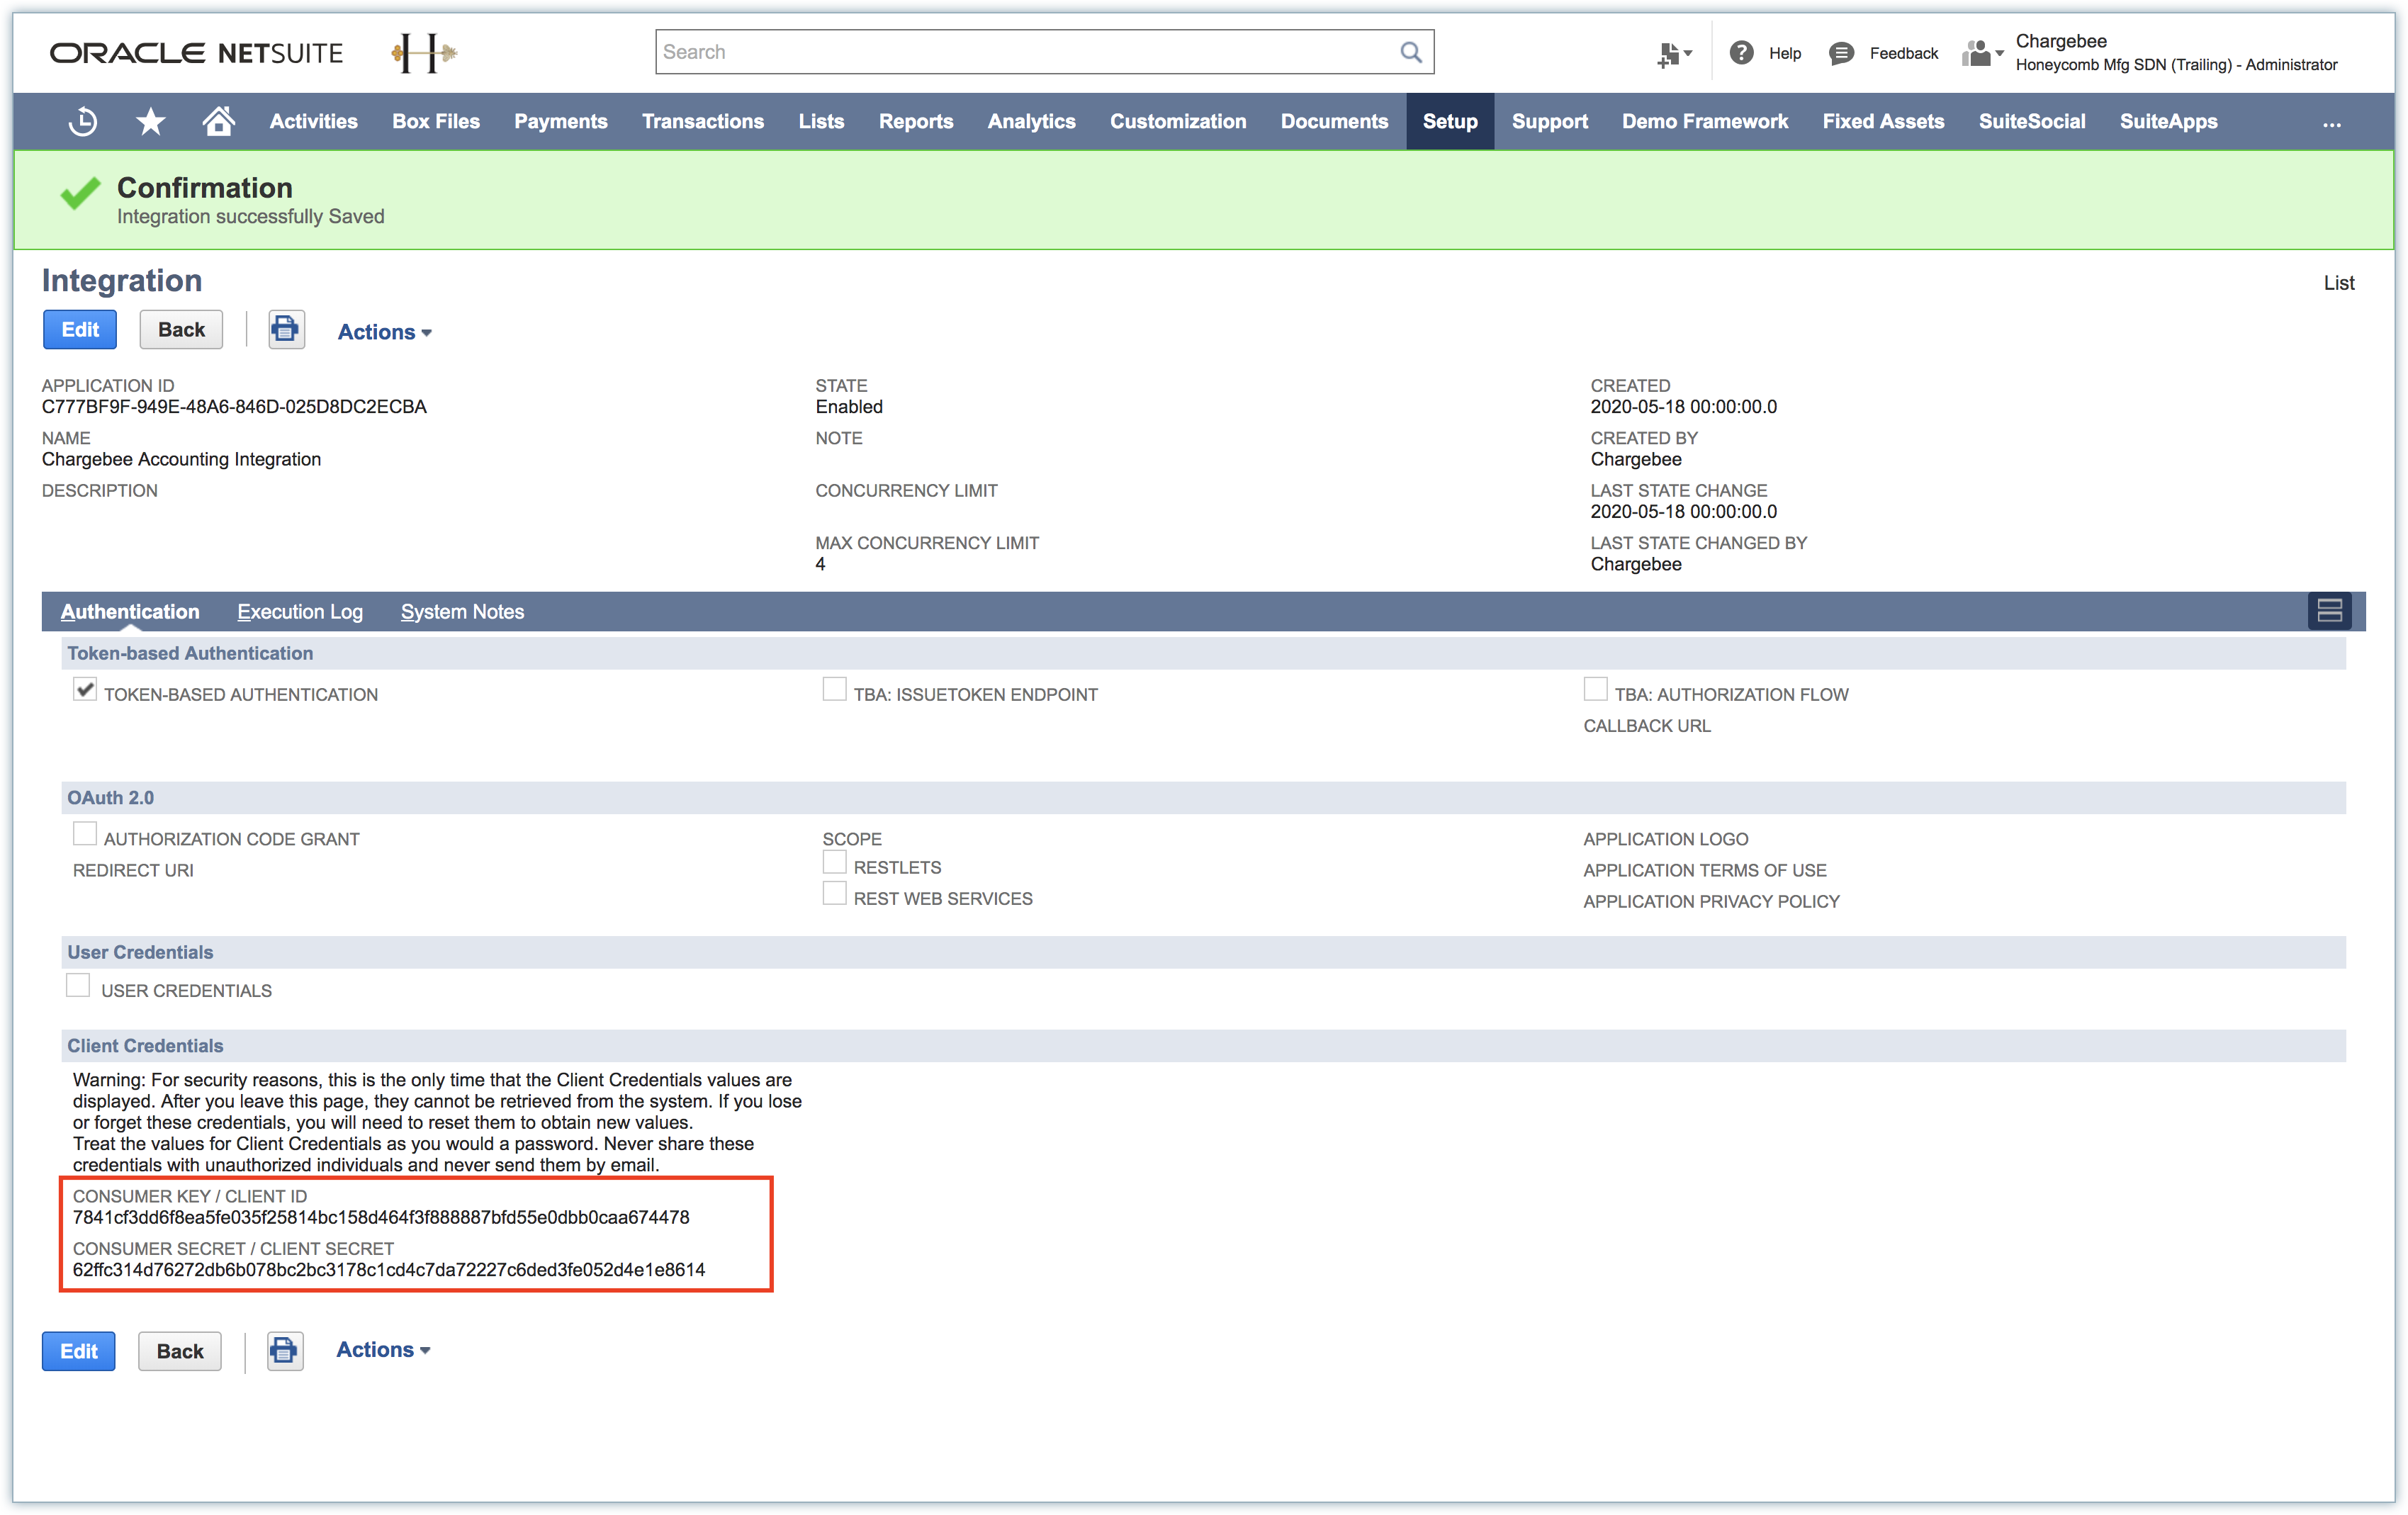
Note:
You cannot retrieve the info once you navigate away from the page (you will have to repeat the steps again). So ensure you have copied the keys before proceeding.
Step 2 - Creating a New Role
Click Setup > Users/Roles > Manage Roles > New. Enter the role details and follow these steps:
-
Under Subsidiary Restrictions, select All for Accessible Subsidiaries.
-
Under Authentication, select Web Services Only Role.

-
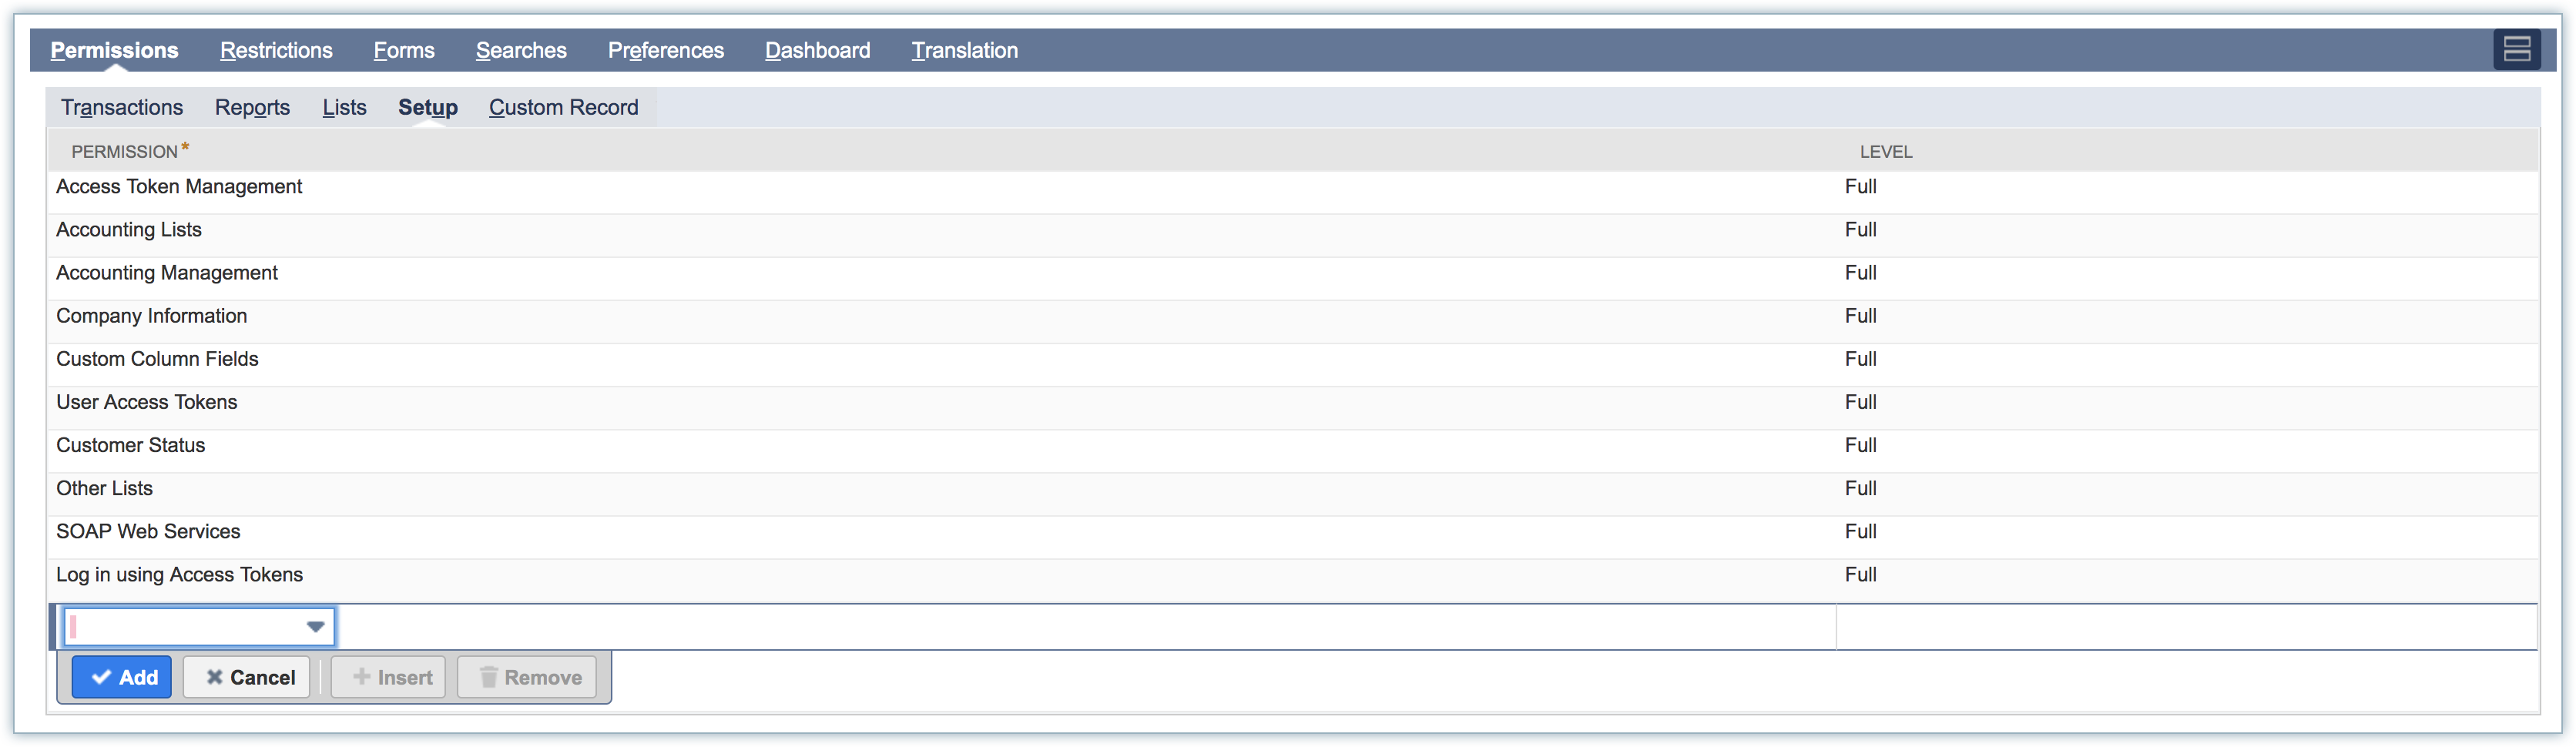
In the Permissions tab, select and grant Full permission for the following items:
Transactions
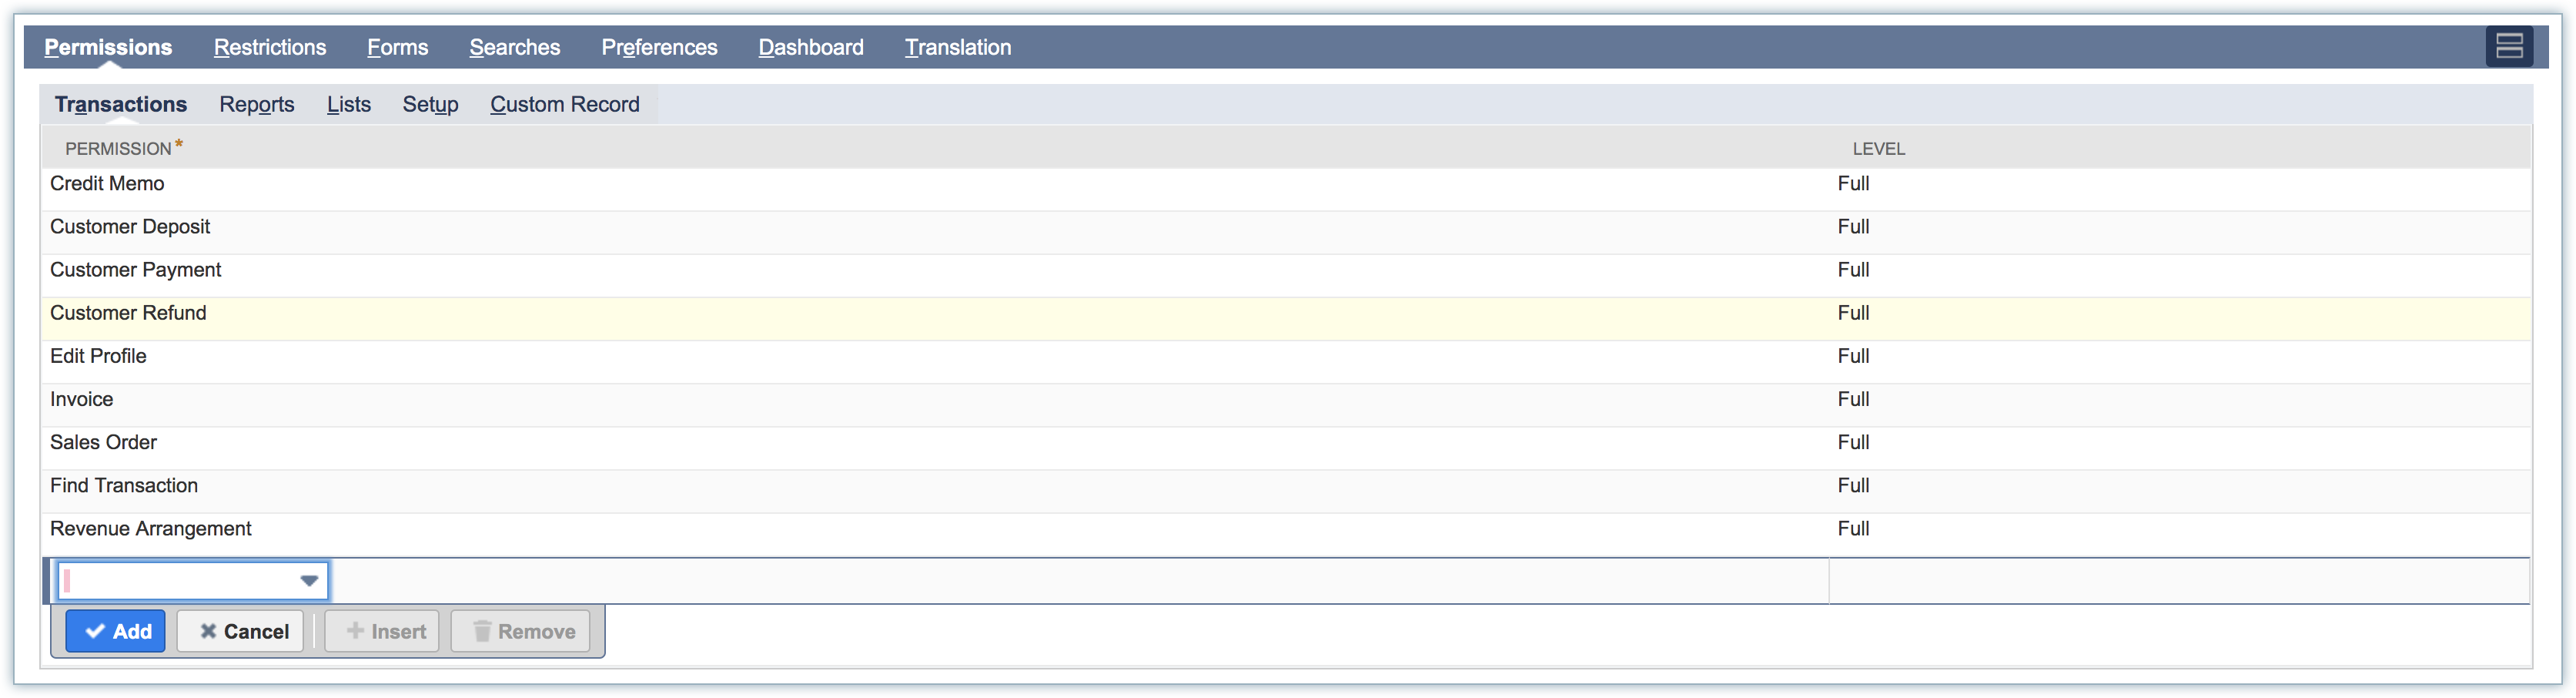
Lists
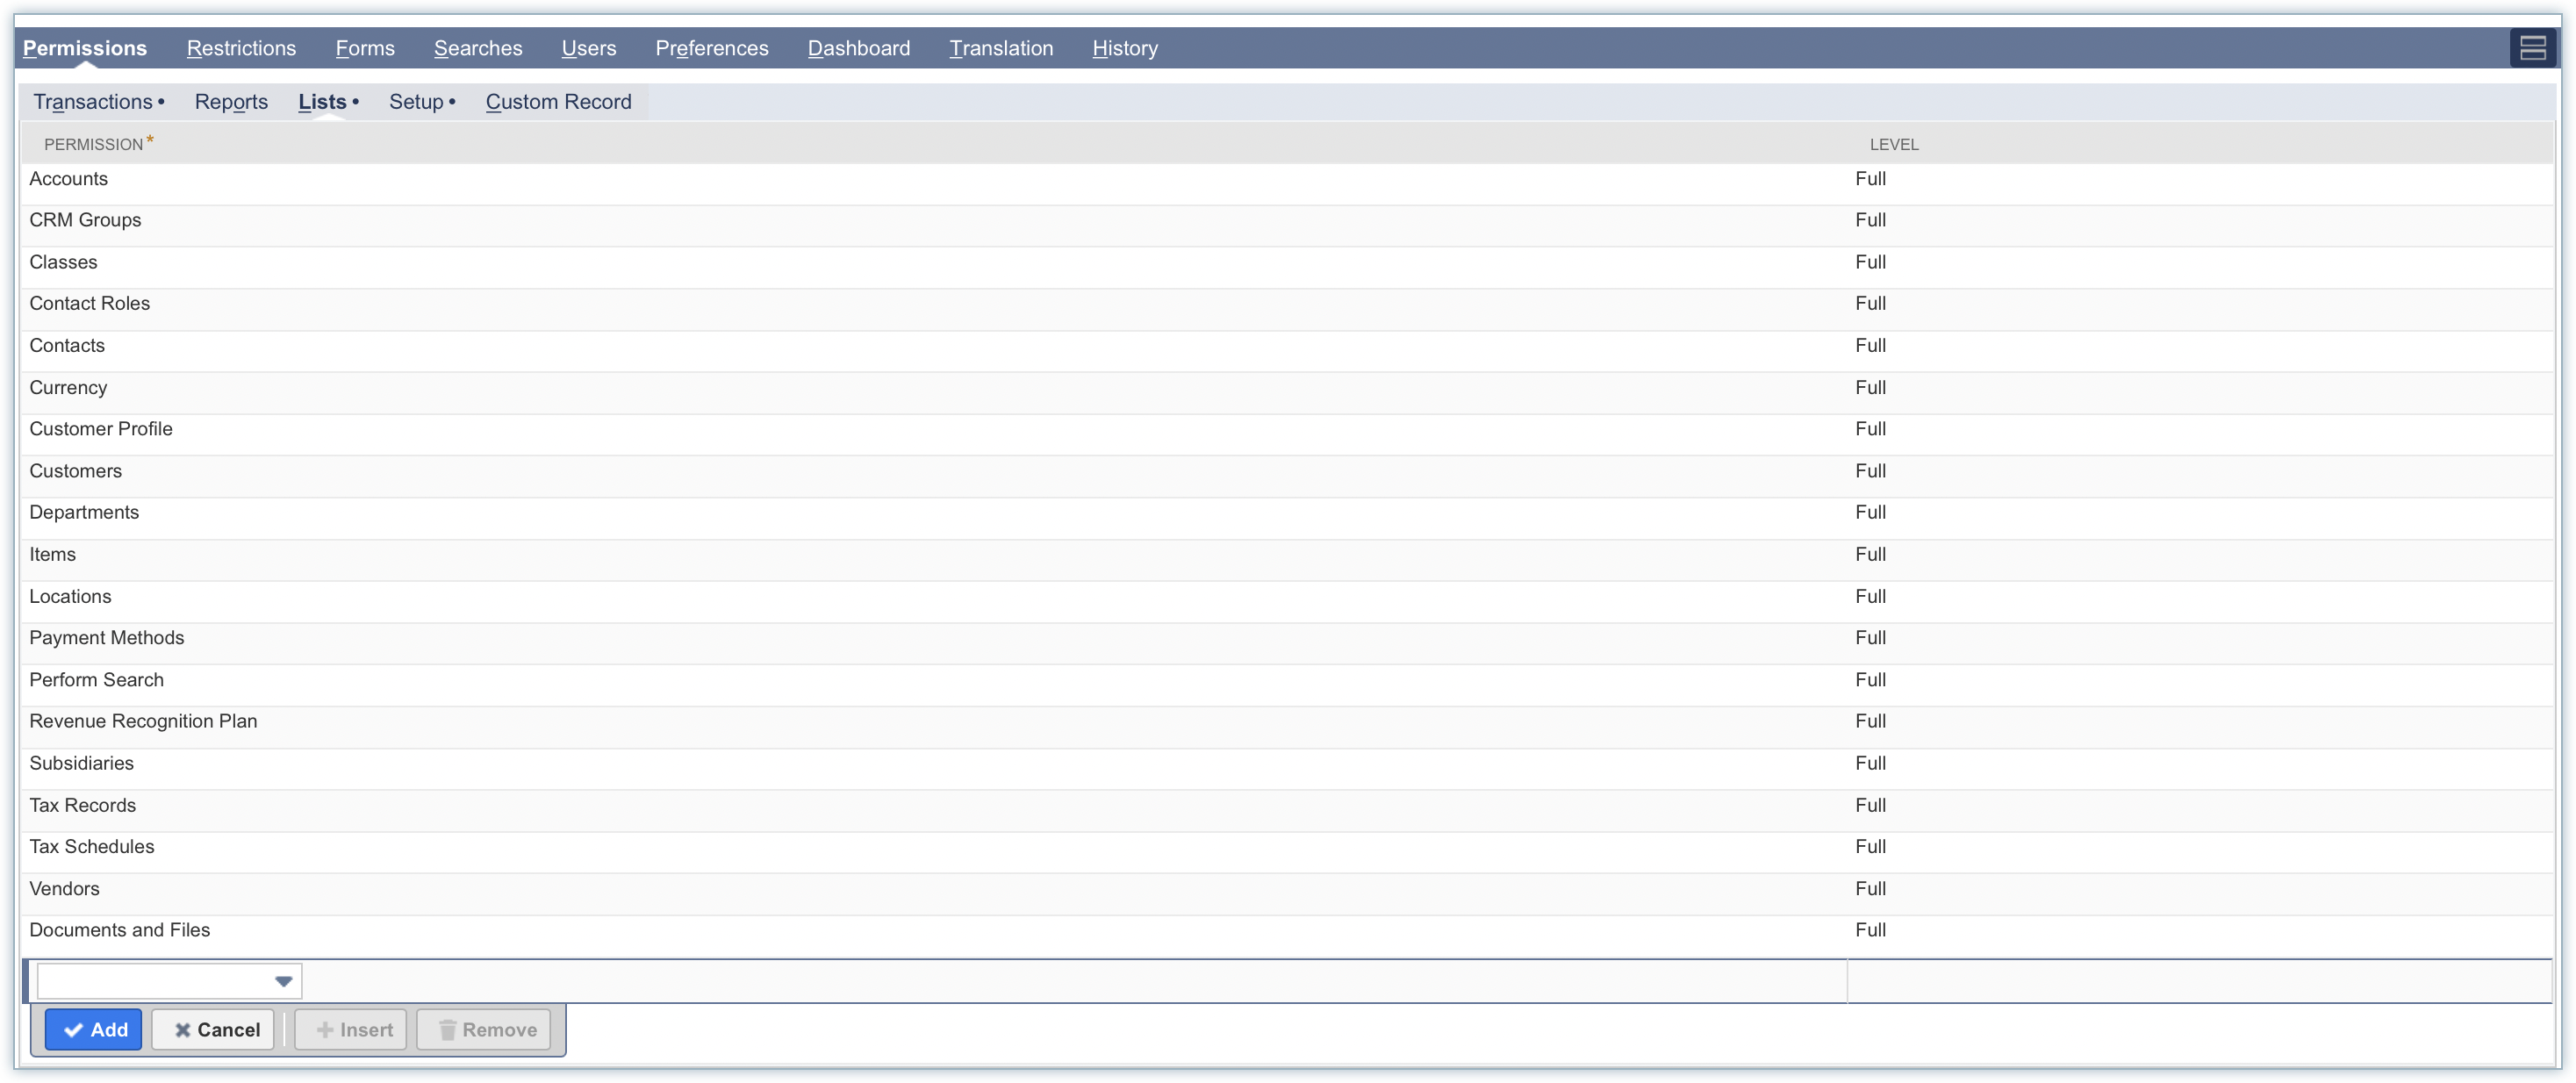
Setup
Note:
- Level should be = ‘Full' for all privileges.
- Granting Full permission for Subsidiaries (under Lists) is only applicable when you are integrating your Chargebee site with NetSuite OneWorld edition.
You can give permission for additional items based on your requirement, however, missing an item from the following could throw an error.
Once the privileges are created, click Save and proceed.
Step 3 - Assigning the Role to a User
It is recommended that you create a separate user for this purpose instead of assigning the role to an existing user. It helps with better tracking and auditing operations.
-
Click Lists > Employees > New.
-
Enter the employee details, and email address.
-
Click Access tab and select Give Access. You can either send a notification email with password URL or enable Manually Assign or Change Password and specify a password.
-
Under Roles, select the role that you created in Step 2 from the drop down list and click Add.
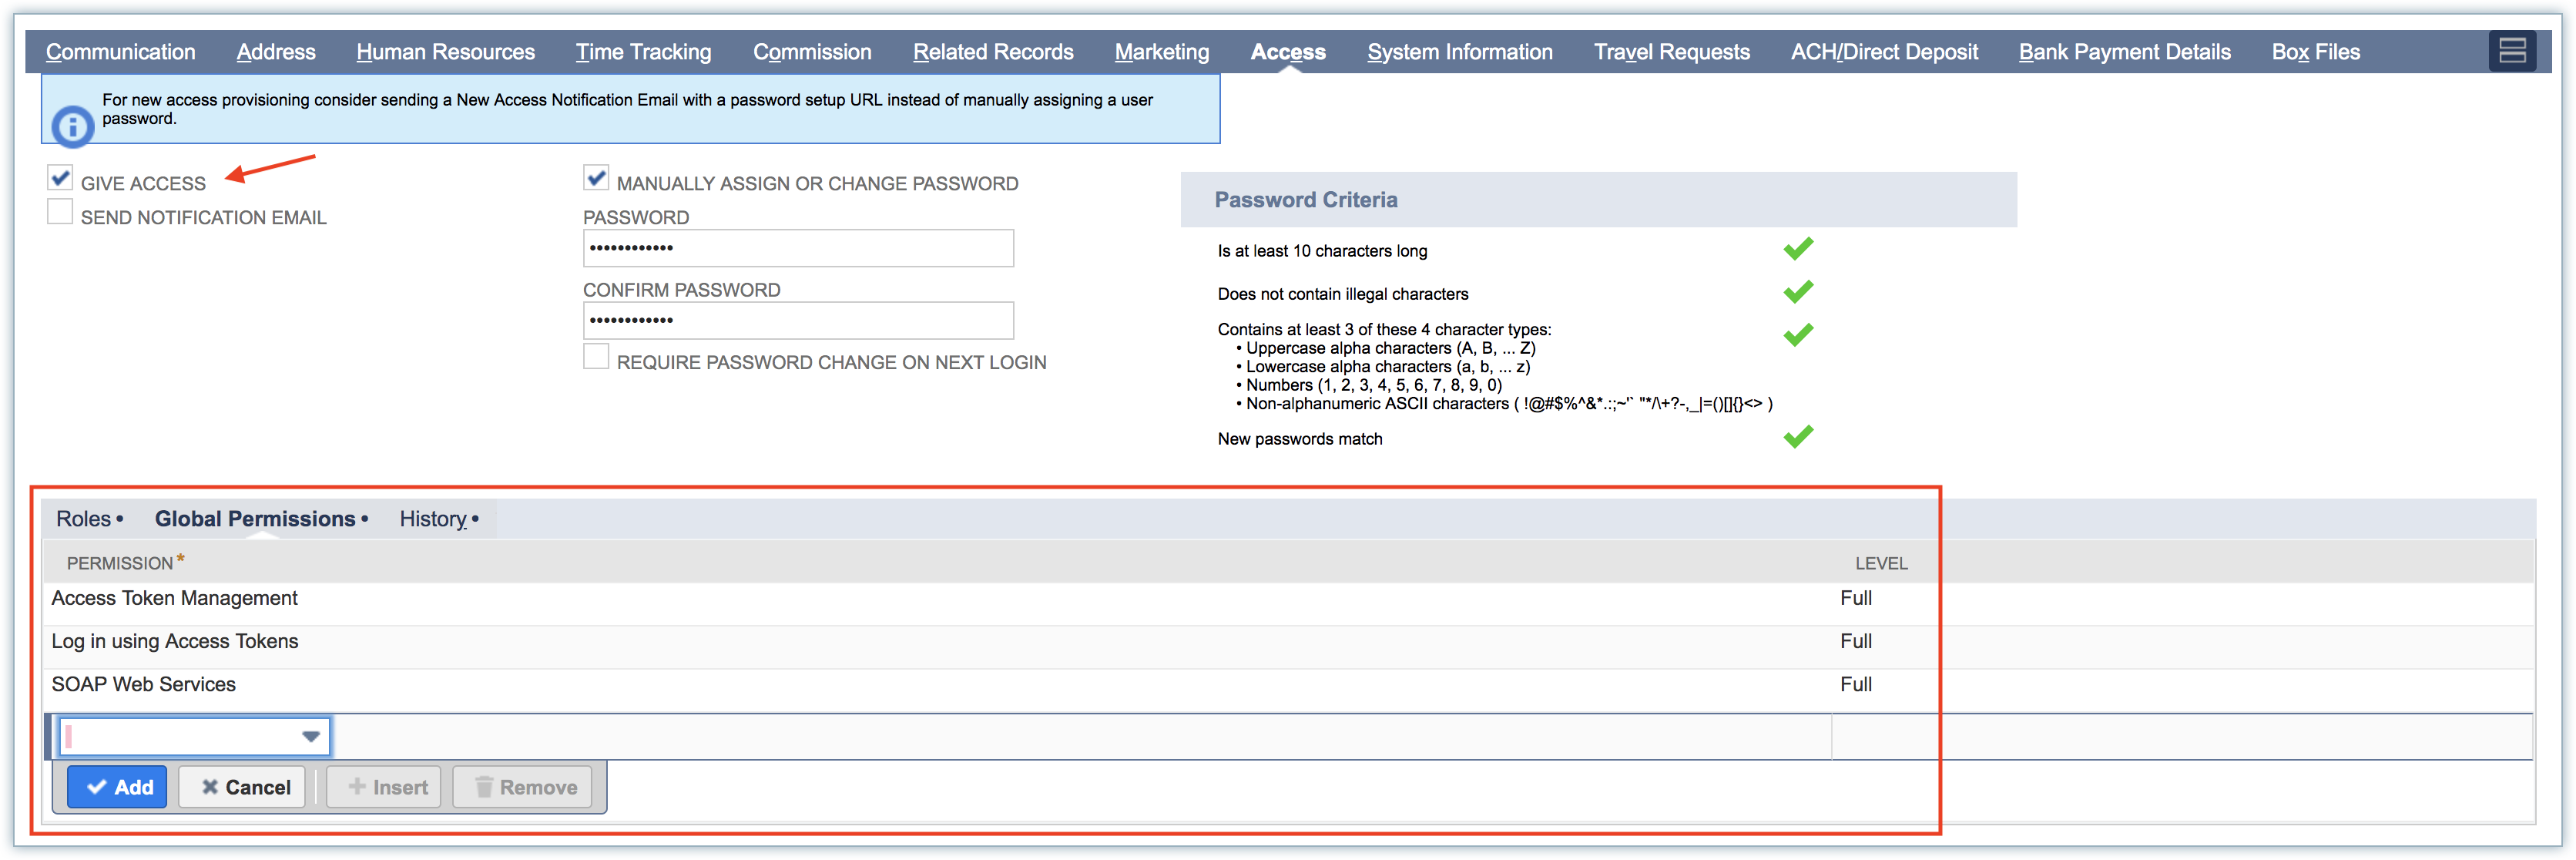
-
Under Global Permissions, select Access Token Management, SOAP Web Services, and Login using Access Token from the drop down list. Provide Full level permission for these items and click Add.

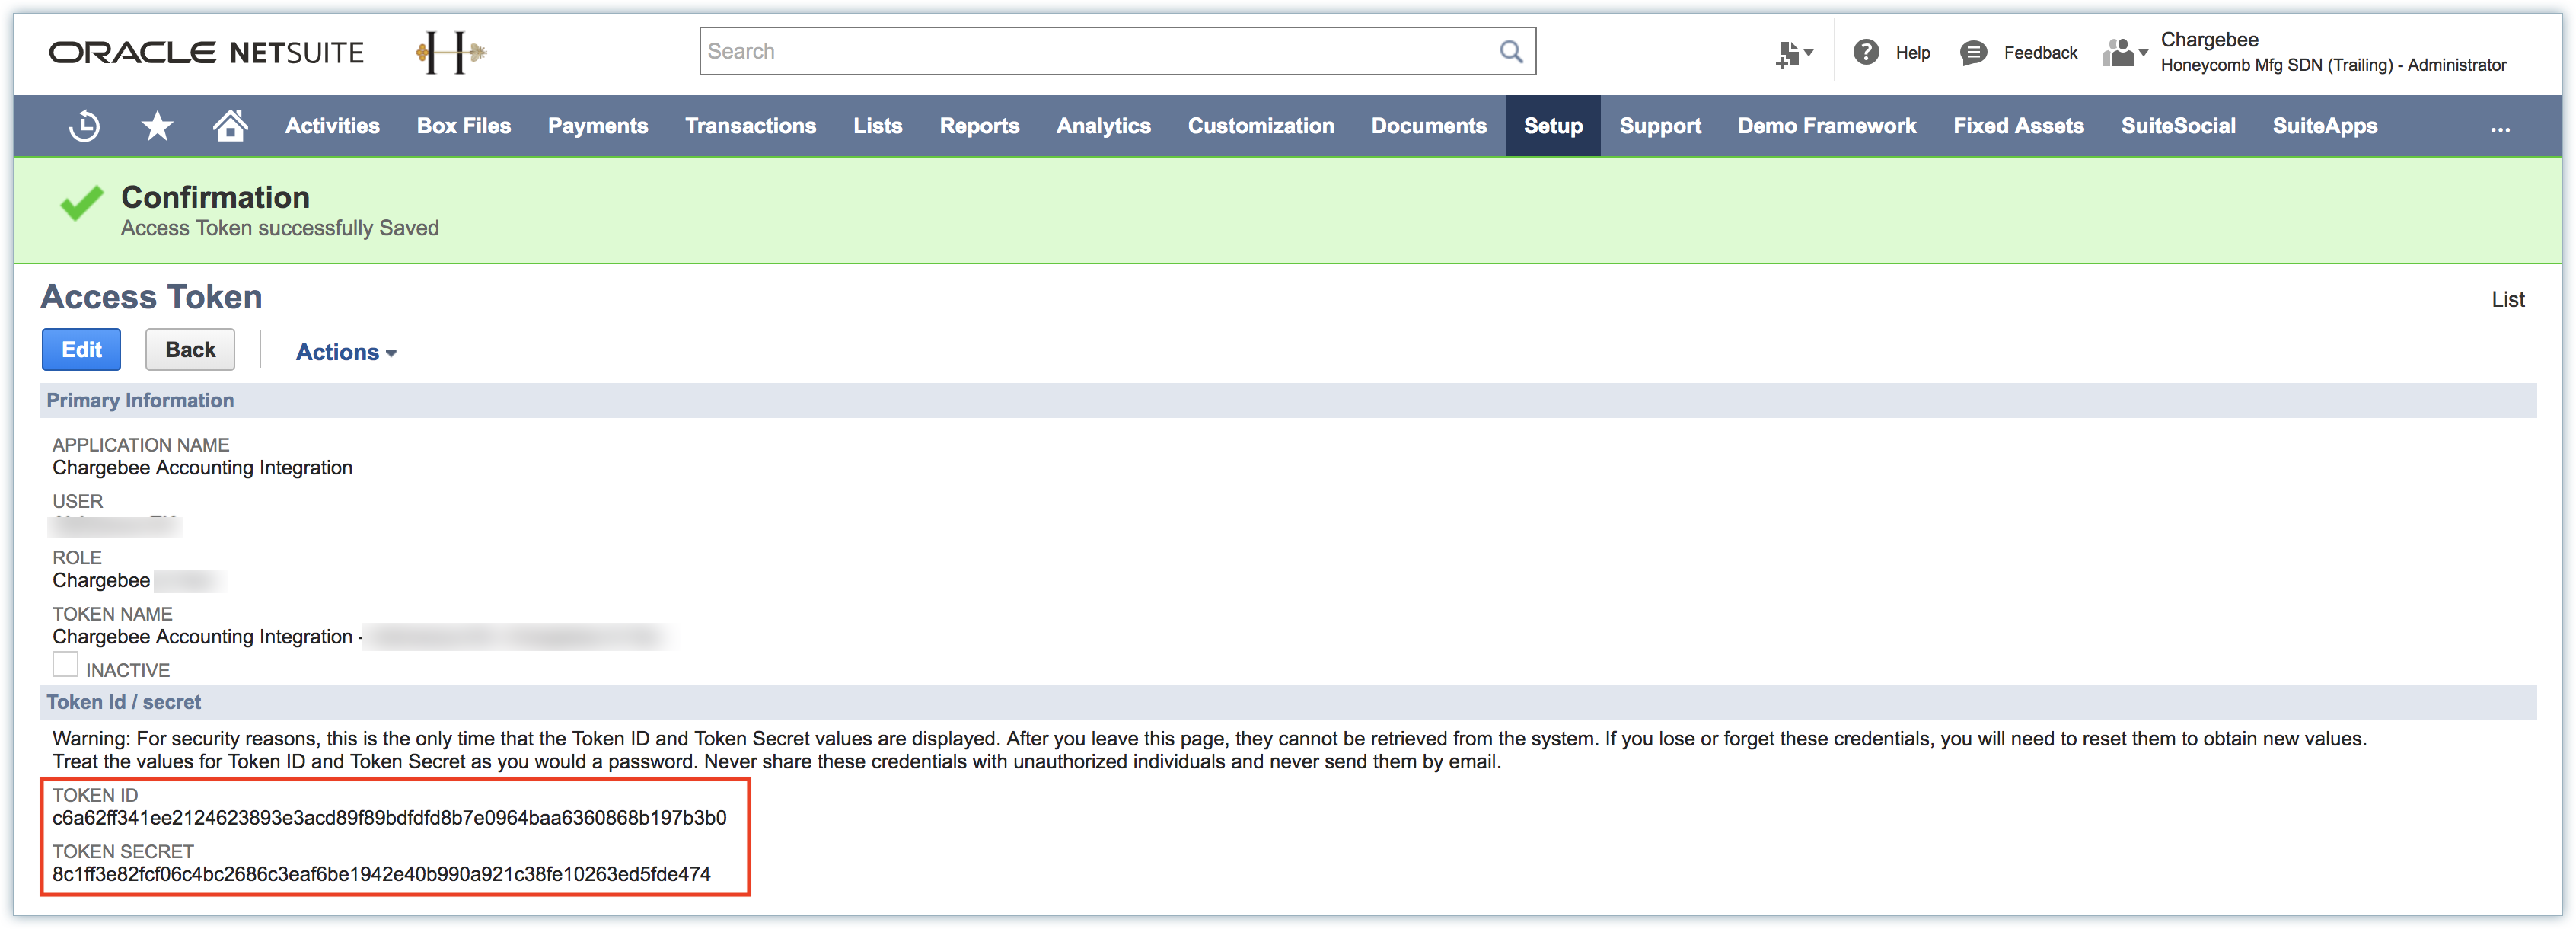
Step 4 - Creating an Access Token
-
Click Setup > Users/Roles > Access Tokens > New.
-
Select the Application name.
-
Select the User that you created in the previous step.
-
Select the role that you created in Step 2.
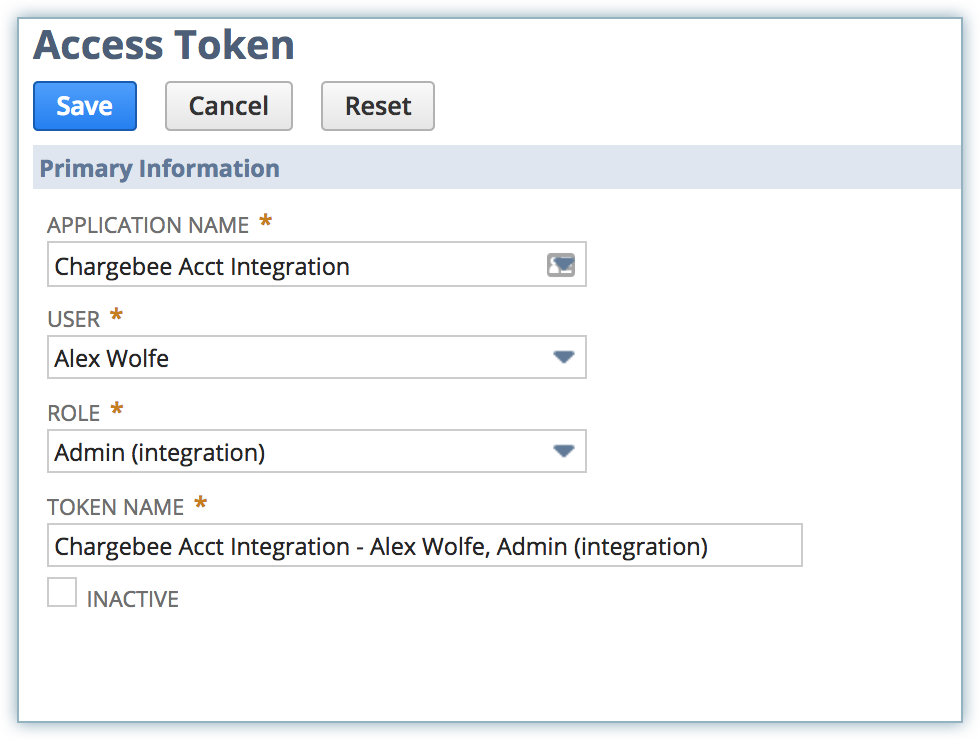
-
Click Save. The Token ID / Secret are displayed. Copy the Token ID and Token Secret and save it in a document for your reference. You can not access this information once you exit this screen. It is advised that you save this information in a plain text editor.
Step 5 - Copying Account ID
- Click Setup > Company > Company Information > Copy the Account ID.

Once you have retrieved the above details to authenticate Chargebee to communicate with Oracle NetSuite, log in to your Chargebee account and click Apps > Go to Marketplace > Accounting > Oracle NetSuite > Connect.
Enter the Consumer Key, Consumer Secret, Token ID, Token Secret and Account ID to get started with the integration.
Was this article helpful?