Configuring Multiple General Ledger (GL) Accounts in NetSuite for Discount Mapping in Chargebee
This guide provides detailed instructions for configuring multiple General Ledger (GL) accounts for discounts created in Chargebee and mapped to third-party accounting systems.
Overview
With discount mapping, you can map discounts, such as those from coupons or promotions, to specific GL accounts. This capability streamlines accounting processes for different SKUs and business requirements.
Prerequisites
Before configuring discount mapping, ensure that you have:
- Connected your NetSuite instance to the Chargebee account.
- Downloaded the CSV template file in the required format to configure the discount mapping.
CSV Template and Data Export
Follow these steps for mapping discounts:
Step 1: Download the CSV Template File
- Go to the Configure Coupons section on the NetSuite integration page.

- Click Download Template File to download the CSV template, which includes the fields required for mapping.
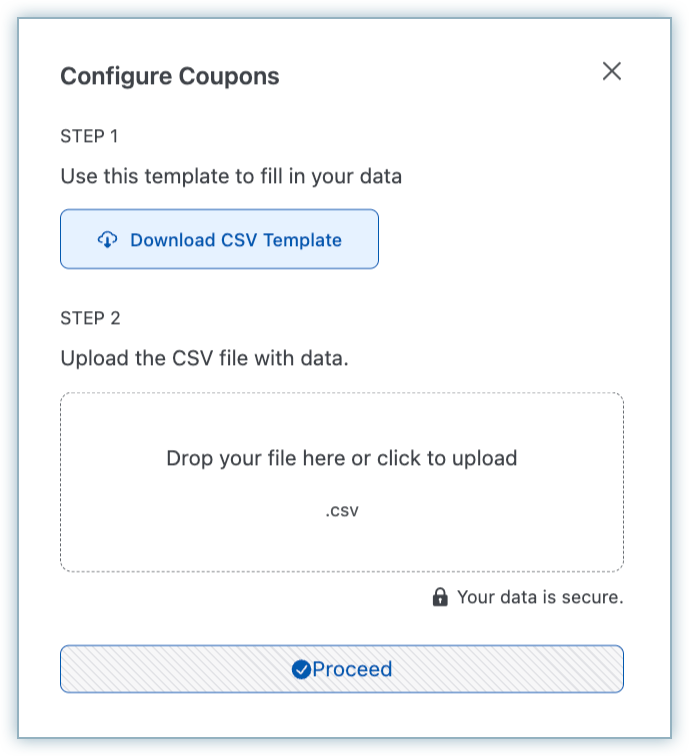
Note
The template must be followed precisely to avoid errors in mapping.
Step 2: Ensure Data Availability
- The data from the last three months can be downloaded directly using the Download CSV Template.
- For data older than three months, use Chargebee's Export Data feature. Before uploading, ensure that the data is in the required CSV format.
CSV Format for Discount Mapping
Prepare your CSV file with the following columns.
| Name of the field | Description |
|---|---|
COUPON_ID | The external ID of the coupon in Chargebee. |
COUPON_NAME | The name of the coupon in Chargebee. |
COUPON_TP_ID | The third-party ID of the item in the accounting system. |
BE_NAME | The name of the Business Entity (BE) where the mapping is applied. |
Note
All column names and values are case-sensitive.
CSV File Sample
| COUPON_ID | COUPON_NAME | COUPON_TP_ID | BE_NAME |
|---|---|---|---|
| Coupon_test_1 | Coupon_test_1 | 12475 | mbe1 |
Configuring Discount Mapping
Follow these steps to configure discount mappings in Chargebee:
Step 1: Access the Manage Mapping Section
- Navigate to the Configure Coupons section on the NetSuite Integrations page.
- Select Get Started, then upload the CSV file with the updated data.
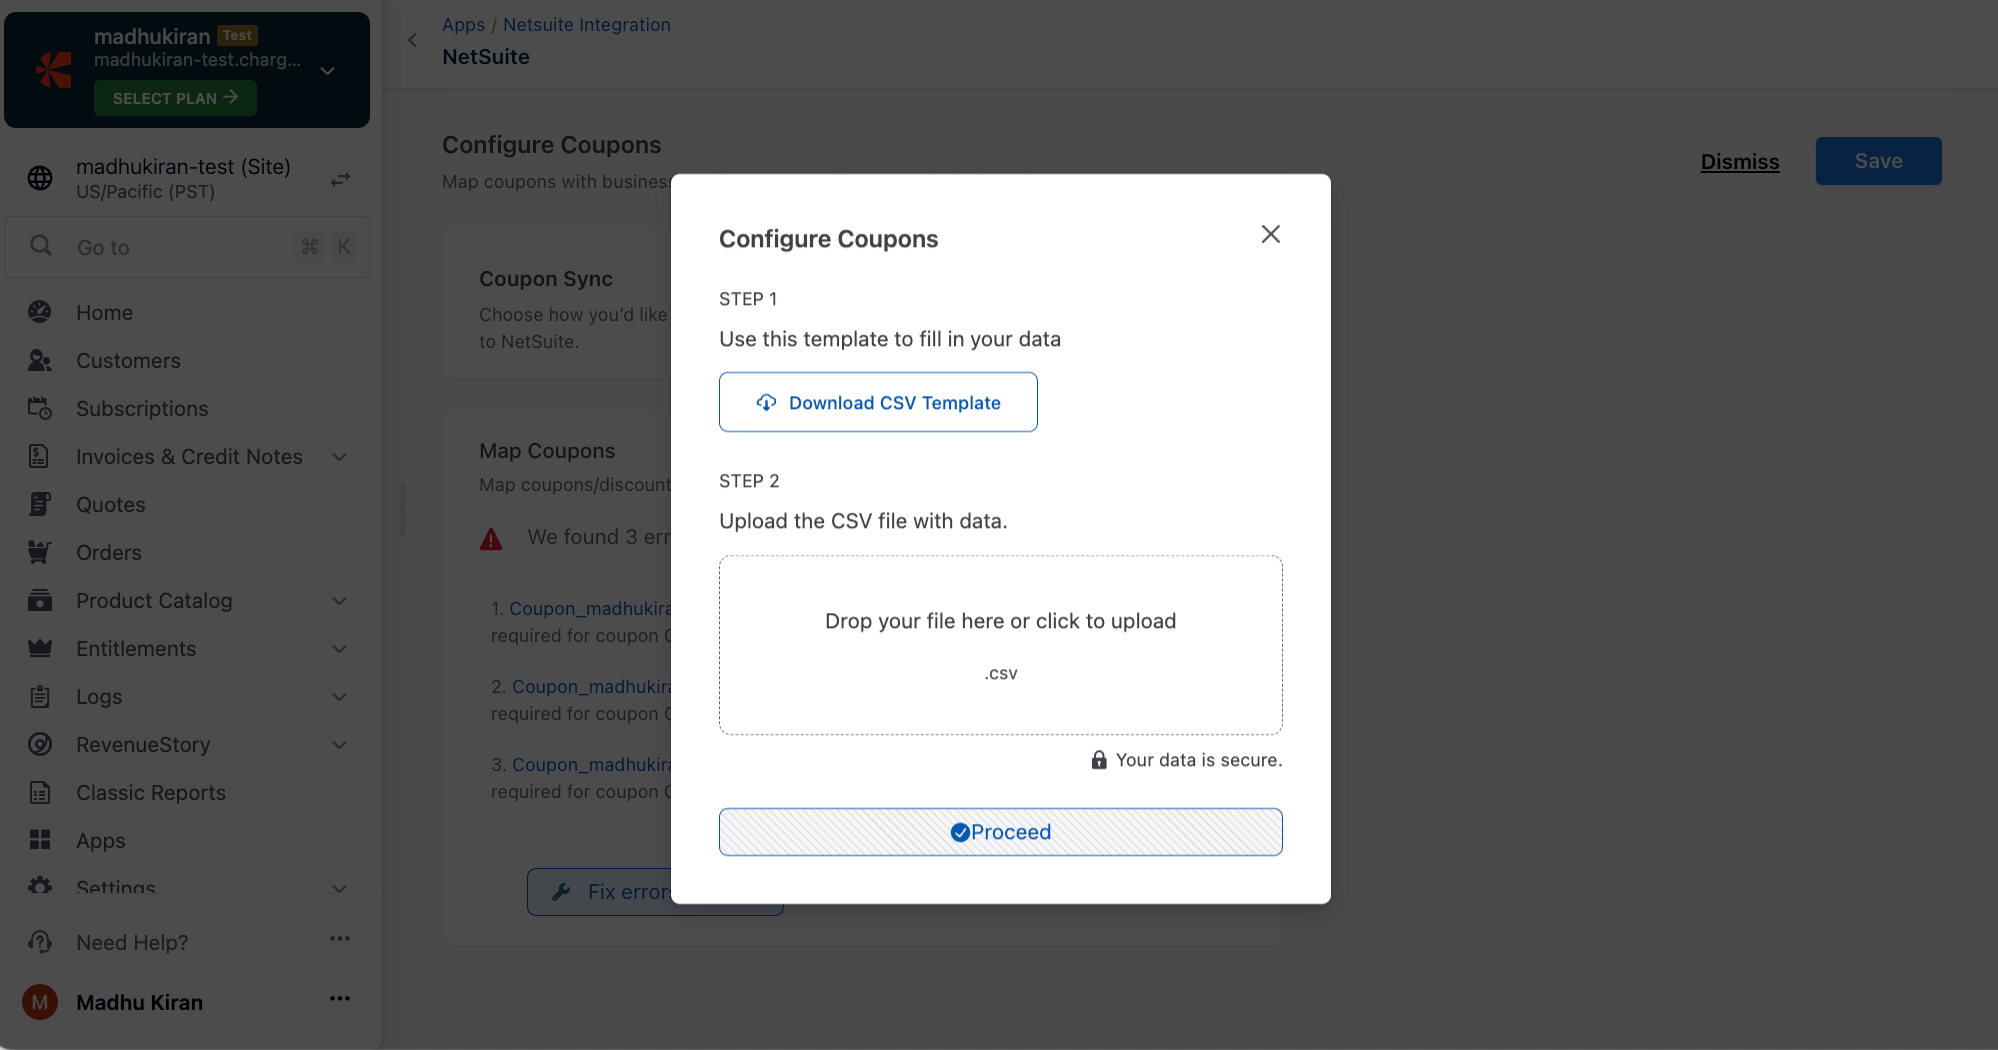
Step 2: Allow for Processing Time
- The system will process the file. Once the mapping is successful, a confirmation screen will appear.
- To download the mapped file, select Download Mapping.
Step 3: Re-upload or Fix Errors
- To upload a new mapping file, click Upload Mapping and repeat the process.
- If errors occur, an error screen will display. Use Download Errors to download the CSV with the error details, make corrections, and re-upload as needed.
This document provides a straightforward, structured approach for configuring discount mappings in Chargebee with NetSuite integration. If you need additional assistance, contact our support team.
Was this article helpful?