How to configure Multi Business Entity for Sage Intacct?
Problem Statement
You want to know how to configure multi business entity for sage intacct.
Scope
How to integrate Multi Business Entity with Sage Intacct?
Summary
A user who has multi-business entity enabled and has access to global sites and all entities can select from the complete list of entities to connect with Sage Intacct. Once enabled, navigate from Apps > Marketplace > Sage Intacct > Manage > Select Chargebee Entities.
Solution
Connecting Chargebee to Sage Intacct
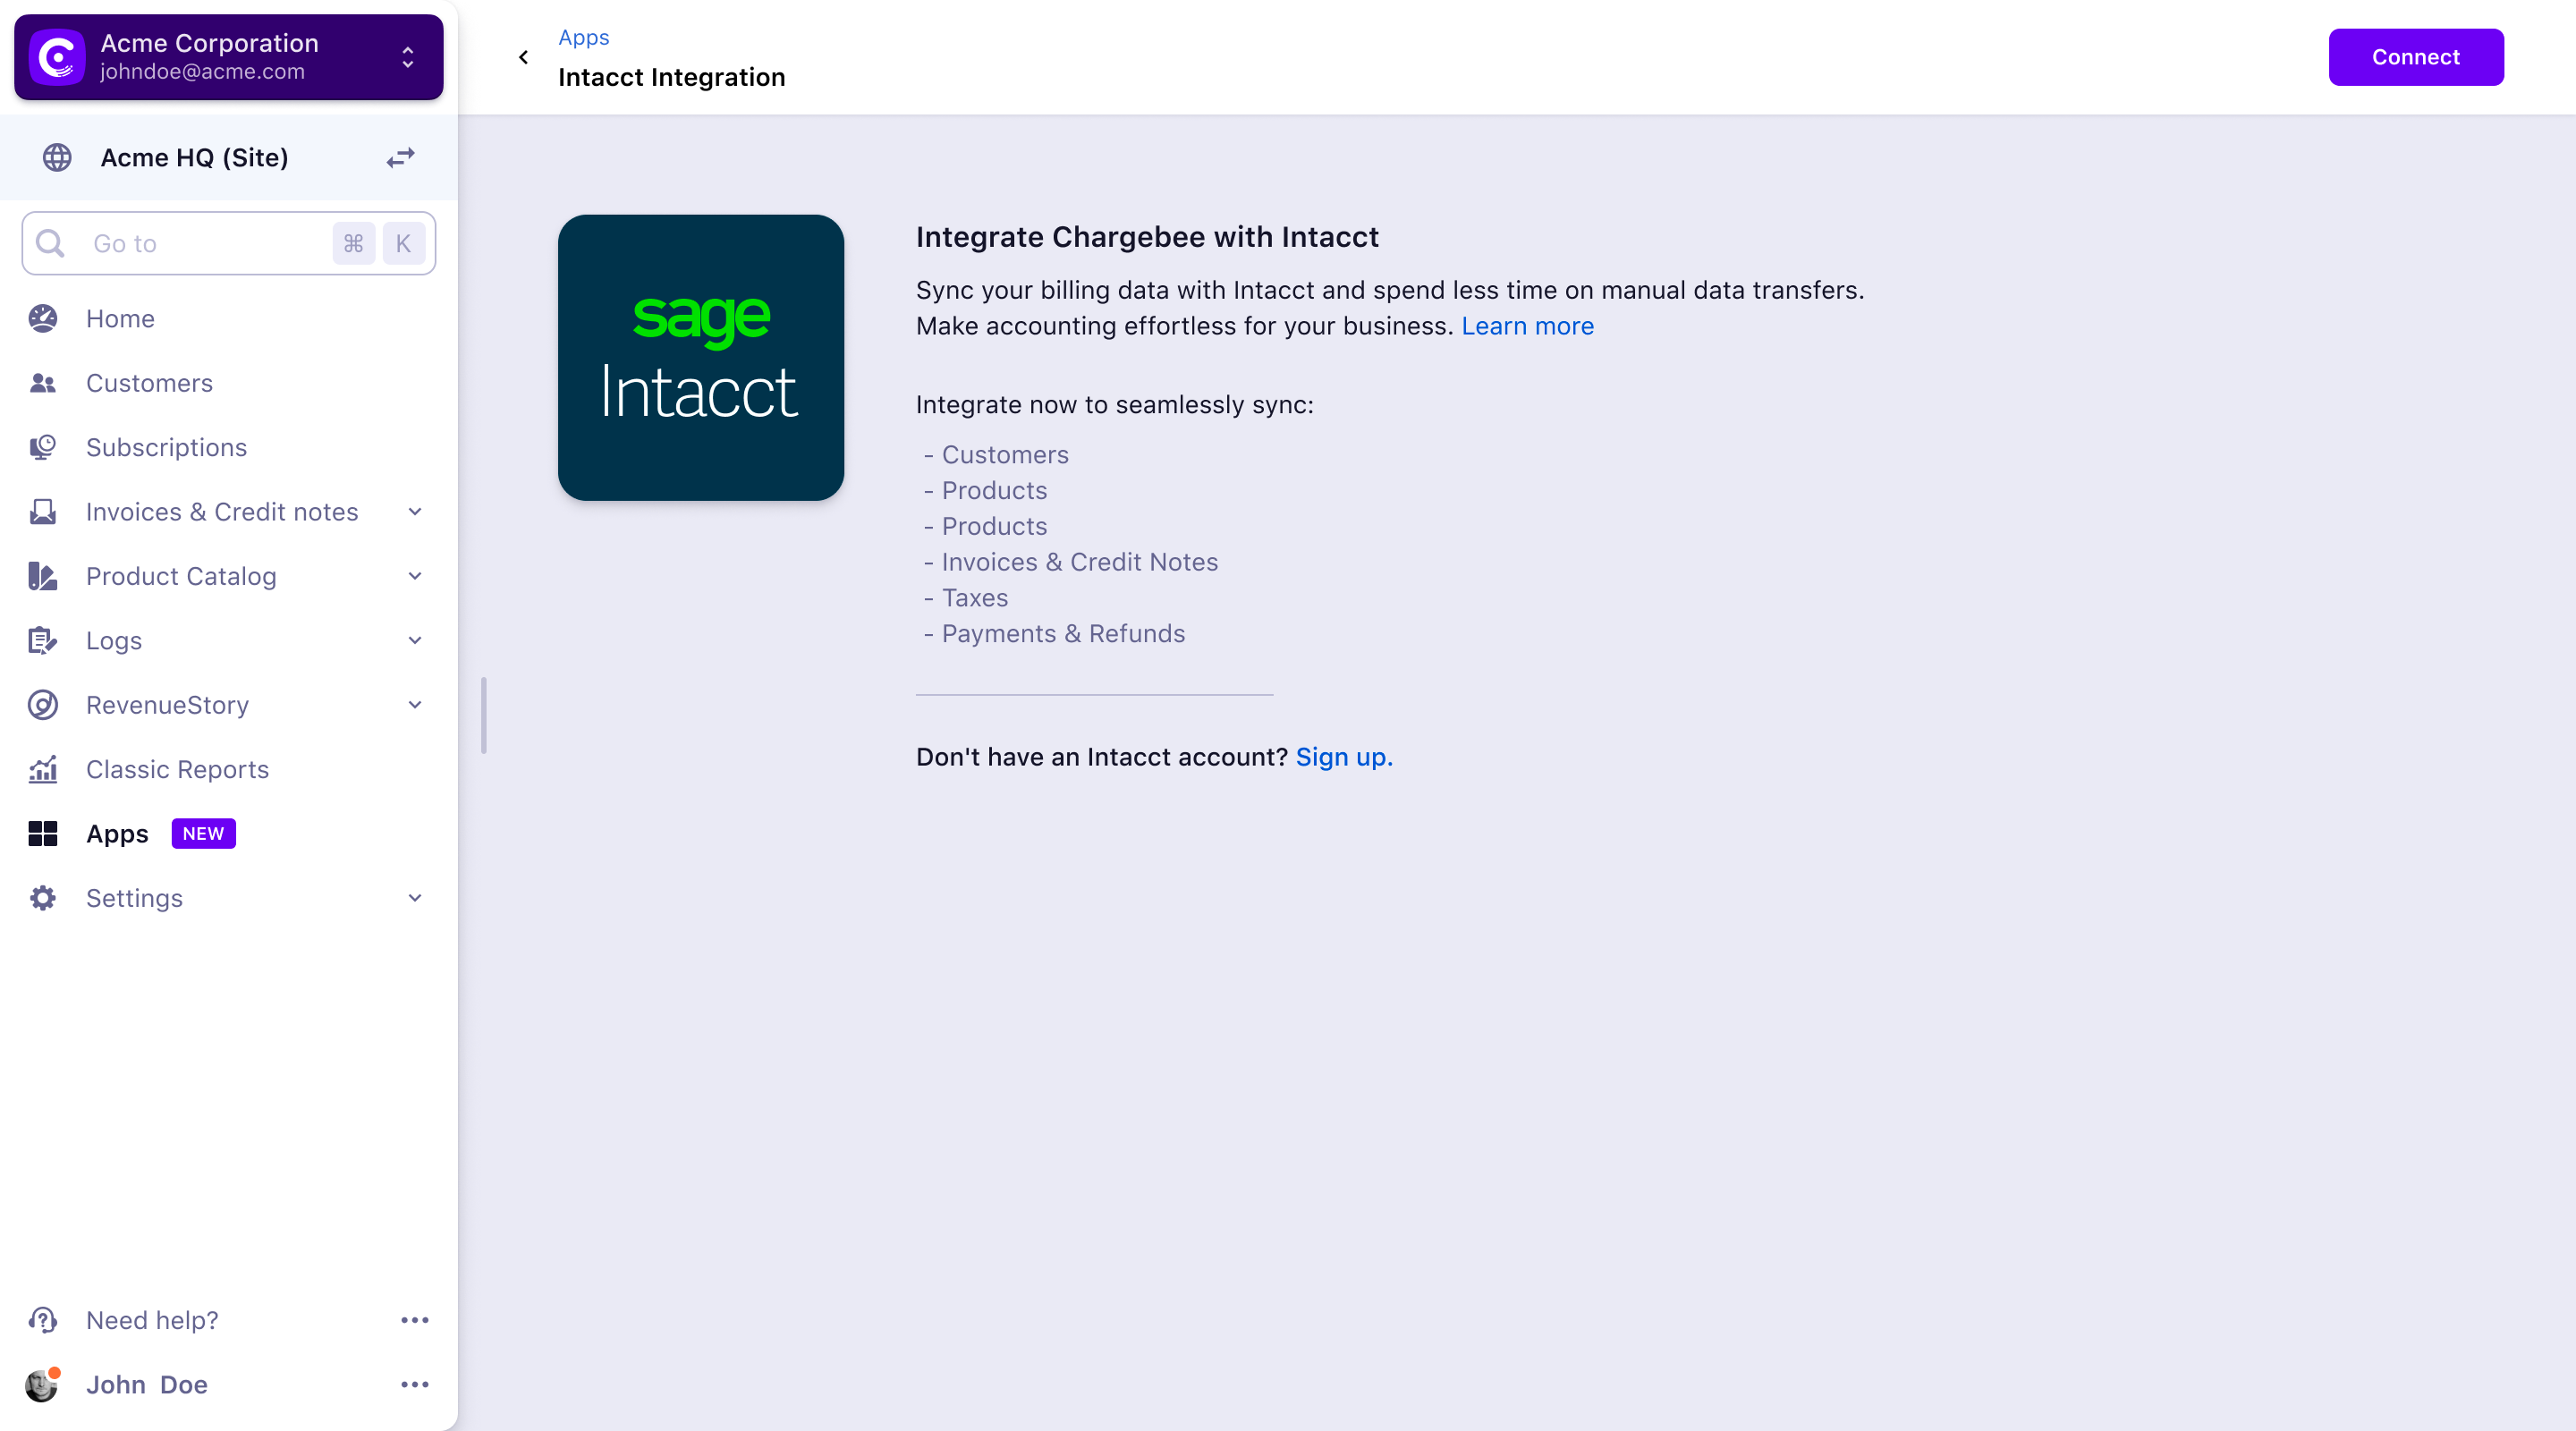
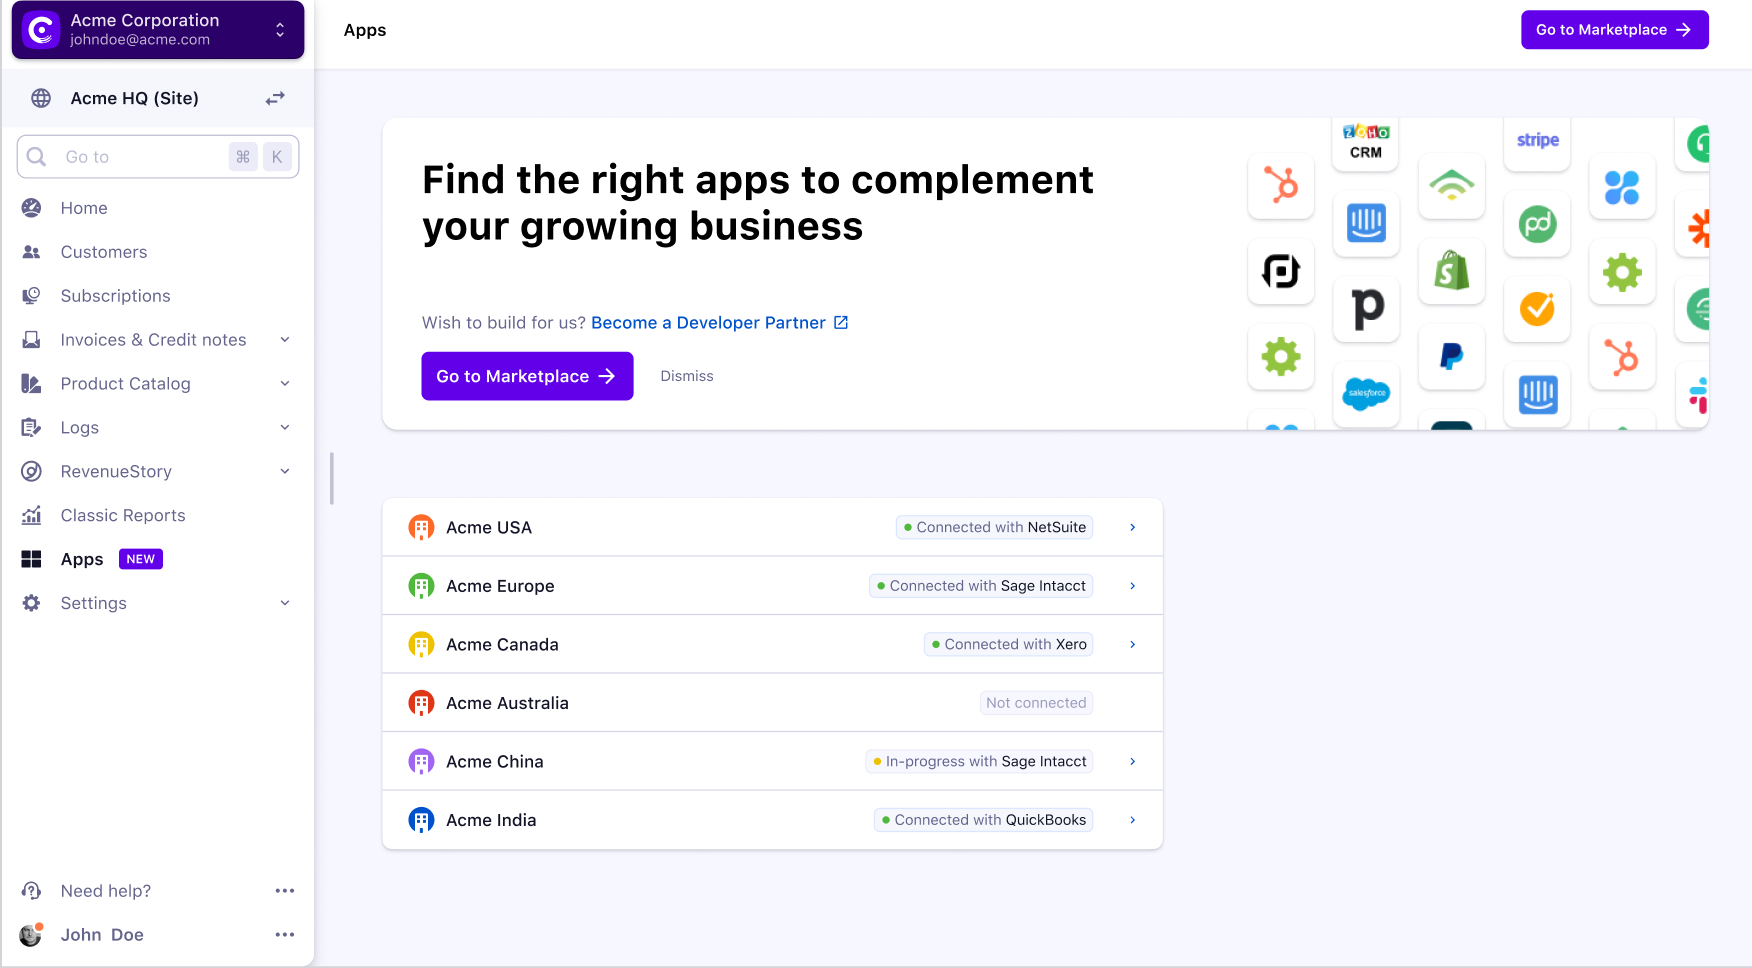
- Go to Apps>Go to Marketplace and search for Sage Intacct from the list of apps.
- Click Connect from the Sage Intacct on the Marketplace home screen.
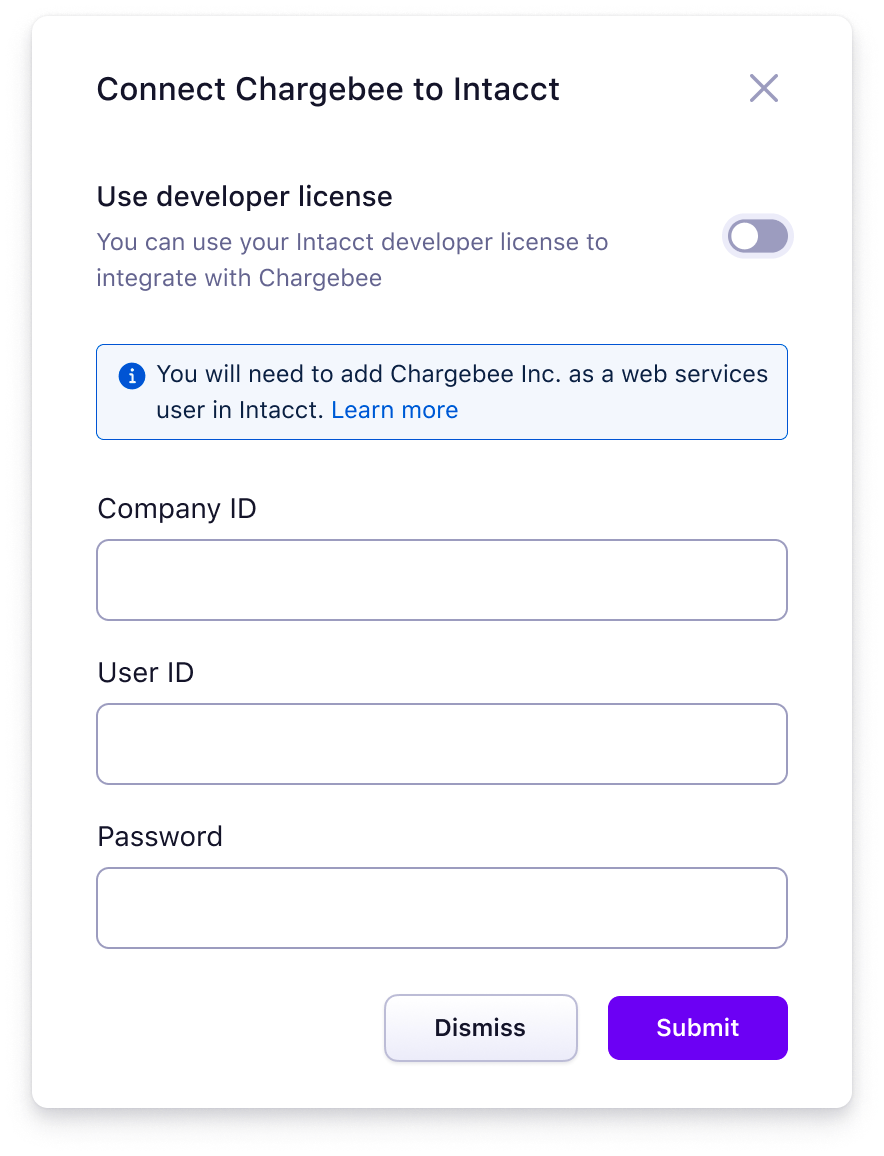
- Enter the login credentials. You can connect your Chargebee Site with Intacct either using Chargebee's license or using your own web services developer license, as required. If you already have a developer license with Intacct, select the Use developer license option and enter the required details.
Selecting Chargebee Entities
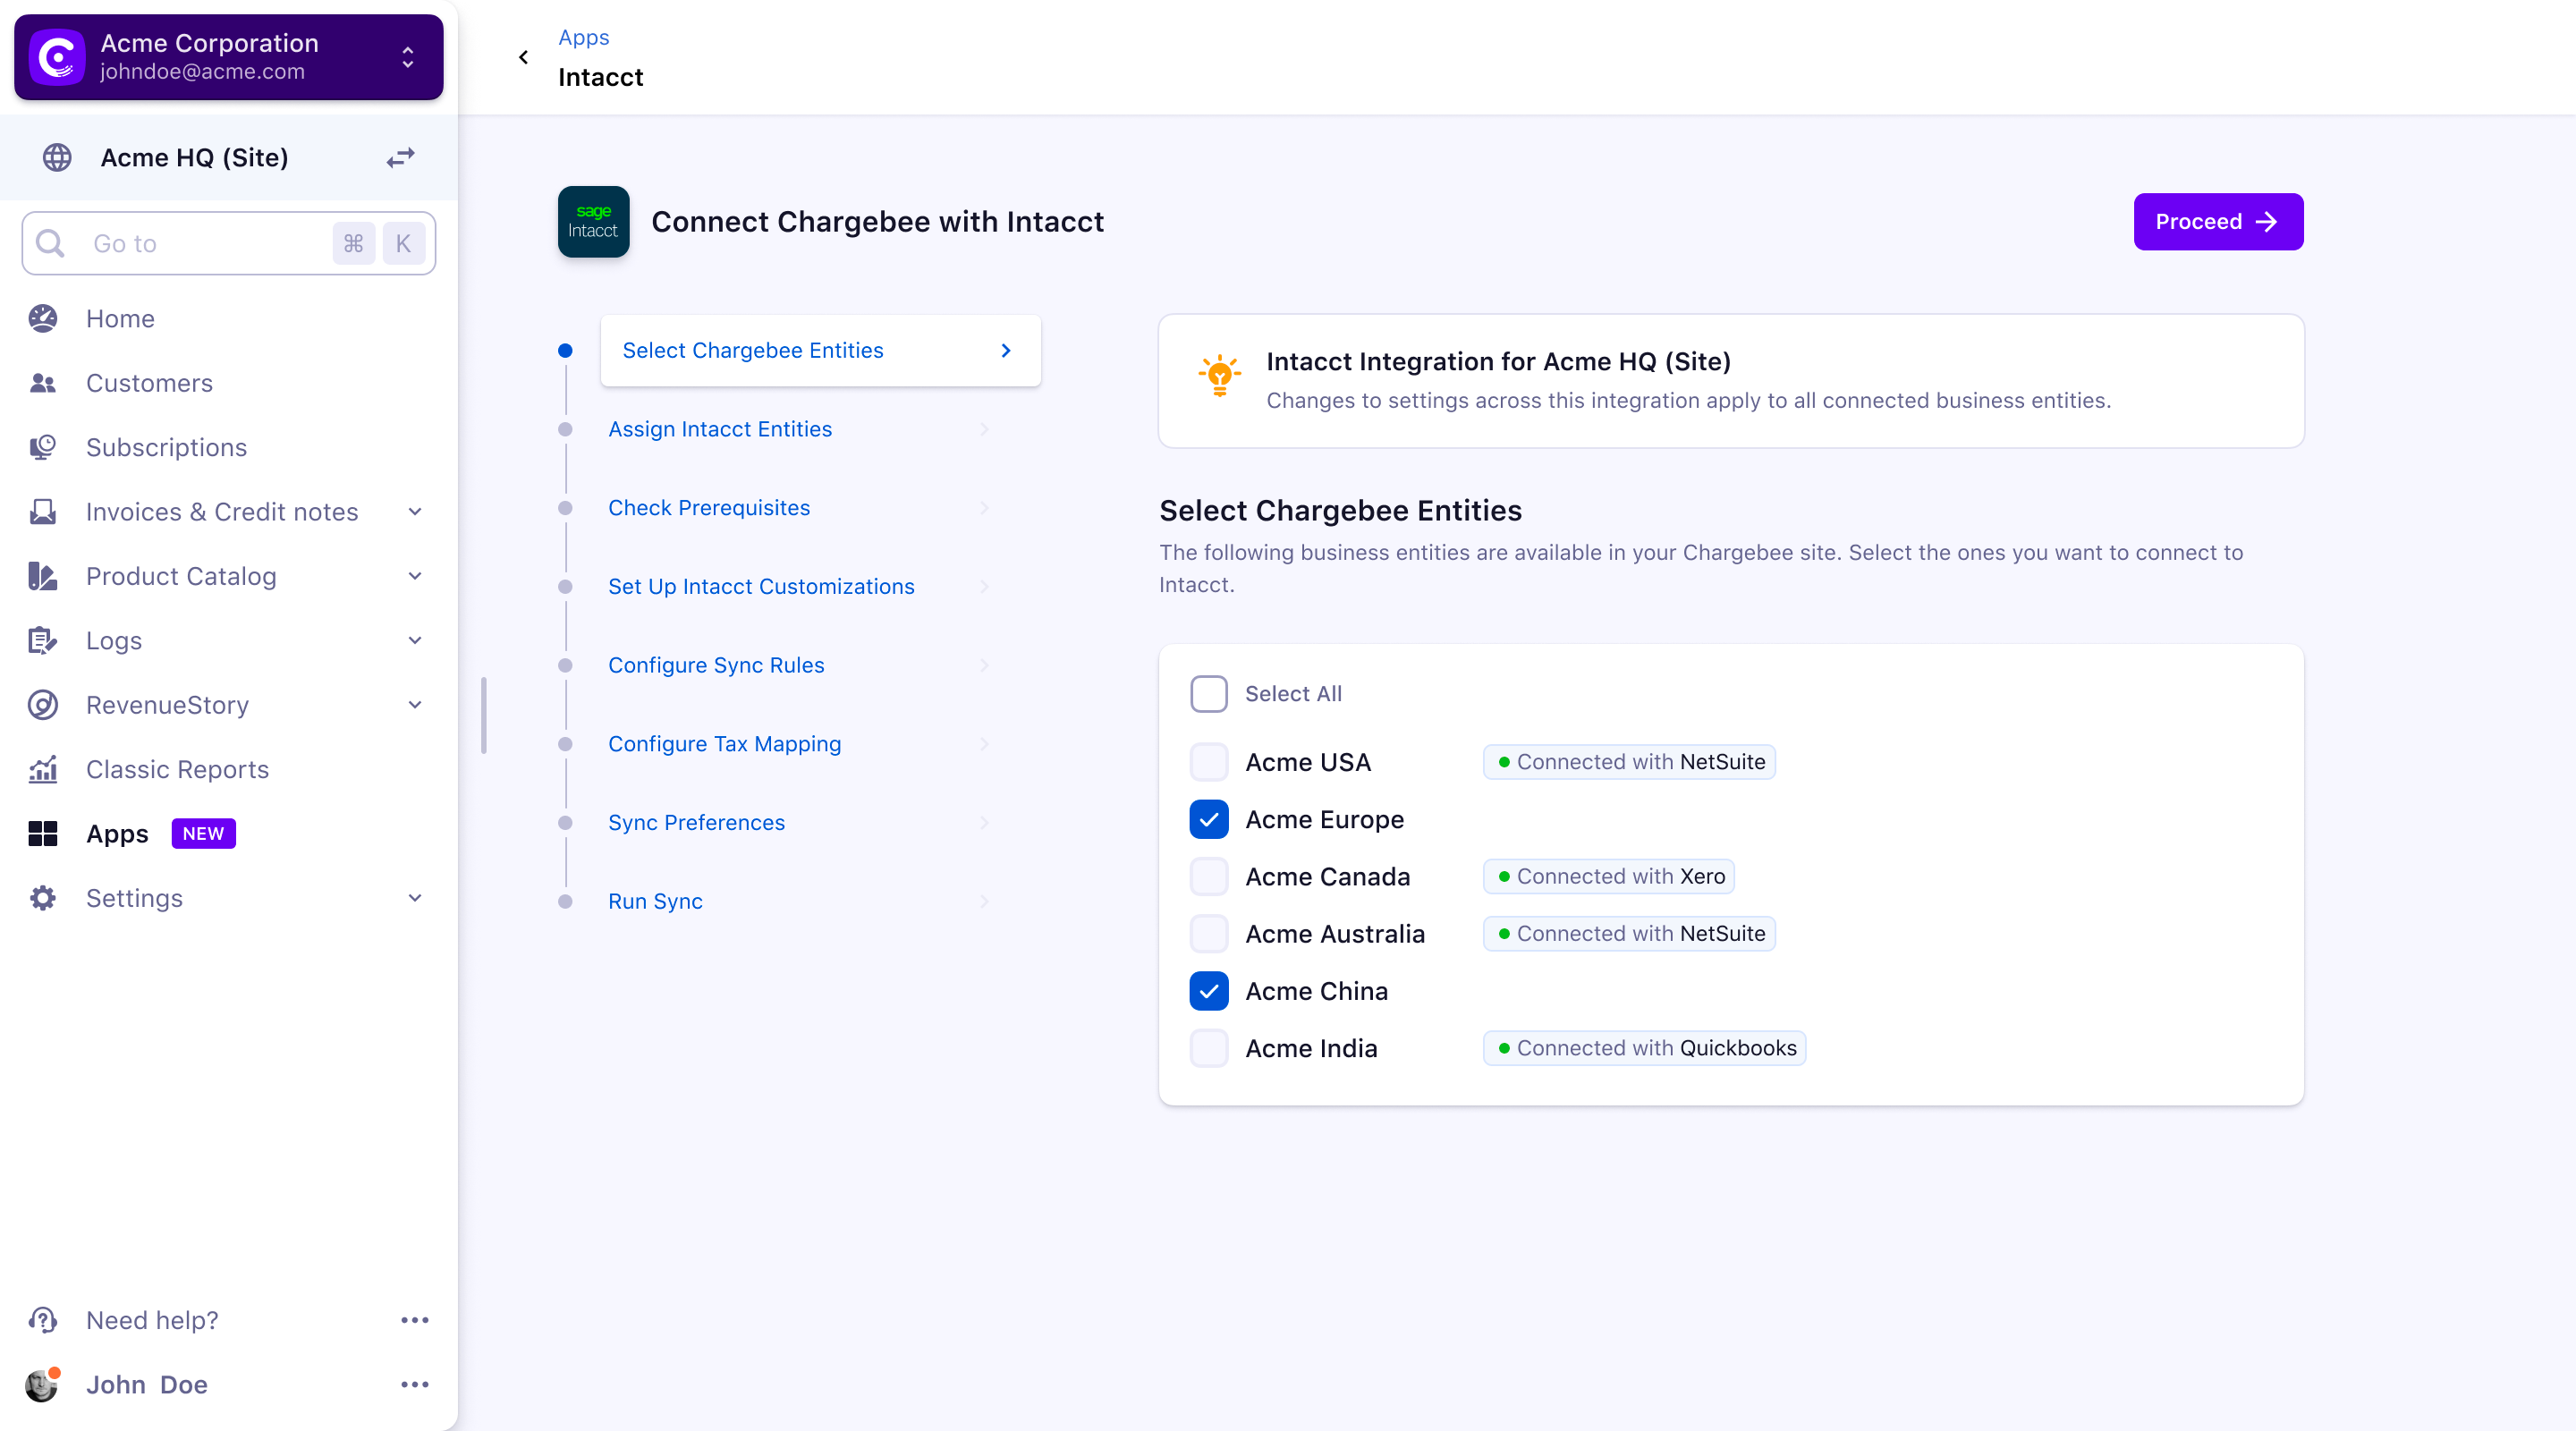
When multiple business entity is enabled, the list of entities will be listed as in the below screenshot.
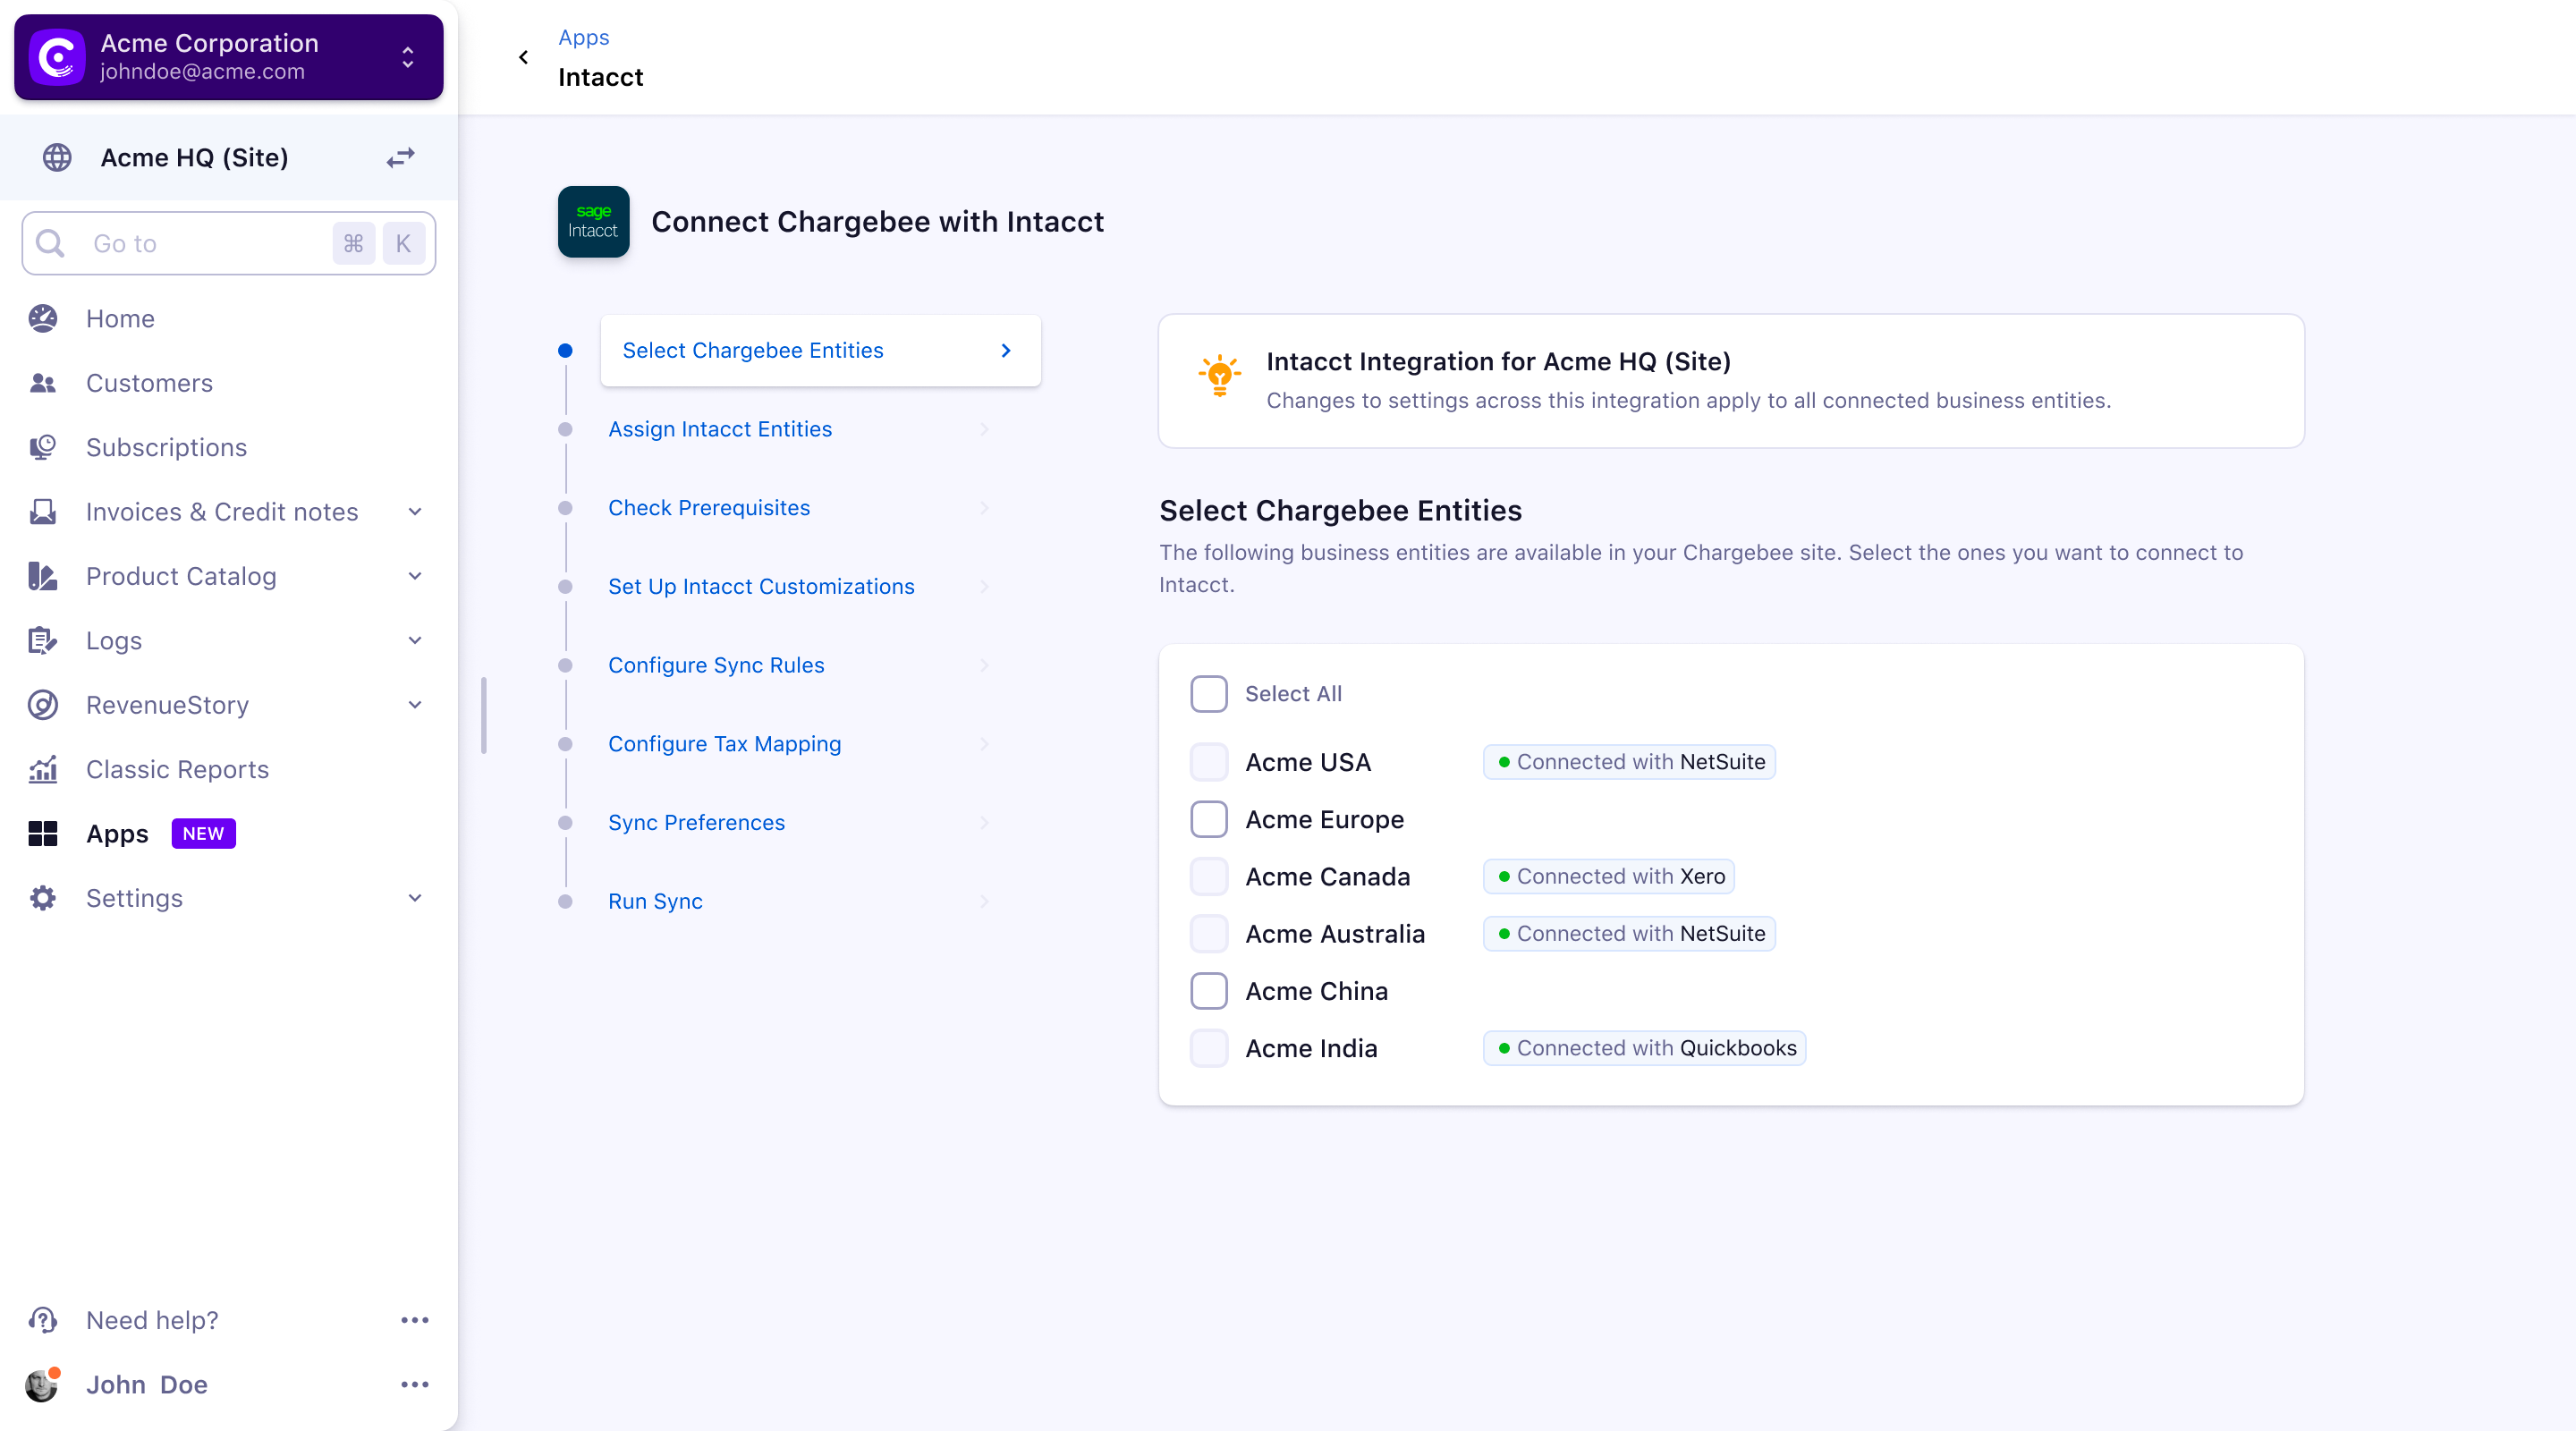
You can select the entities that are available using the checkbox and click Proceed.
Note: The greyed-out entities are connected with other Accounting integrations and are not available for selection
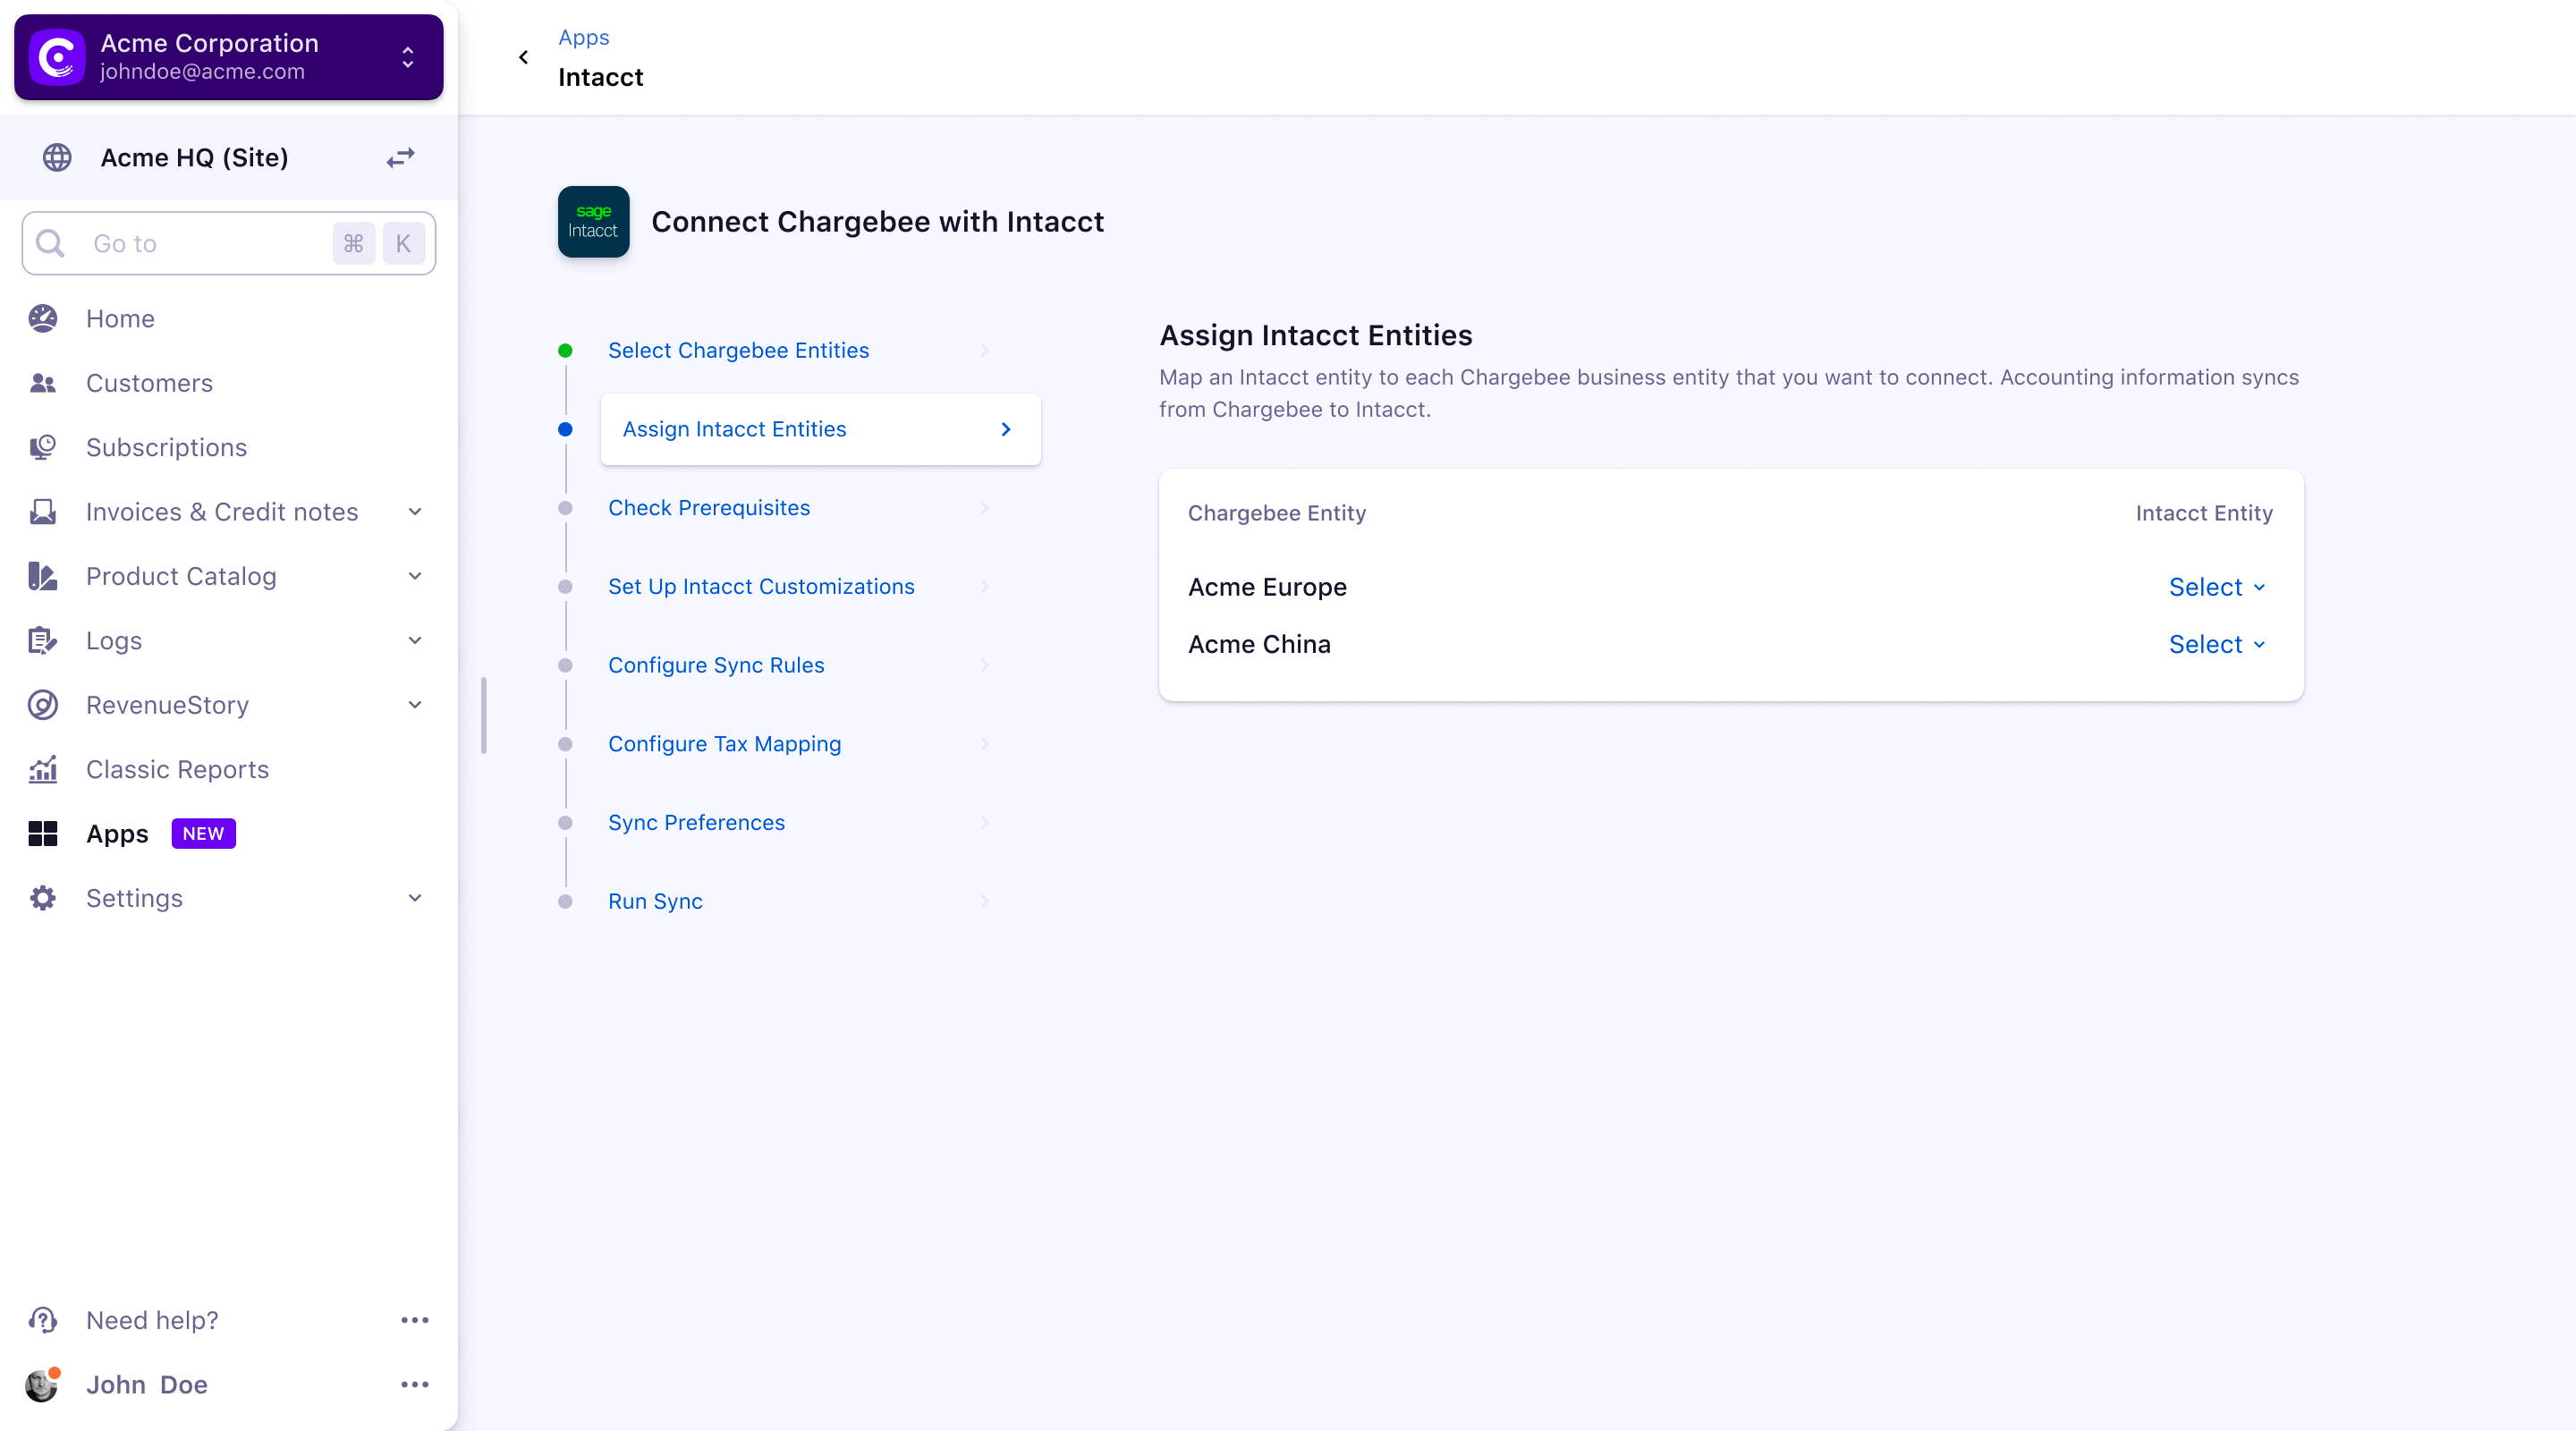
Assigning Intacct Entities
When you select the dropdown displays a list of Intacct entities available for connecting to Chargebee.
Note: You can map multiple Chargebee entities to a single Sage Intacct entity
An entity-level user will only find that the sites they have access to are available for the integration
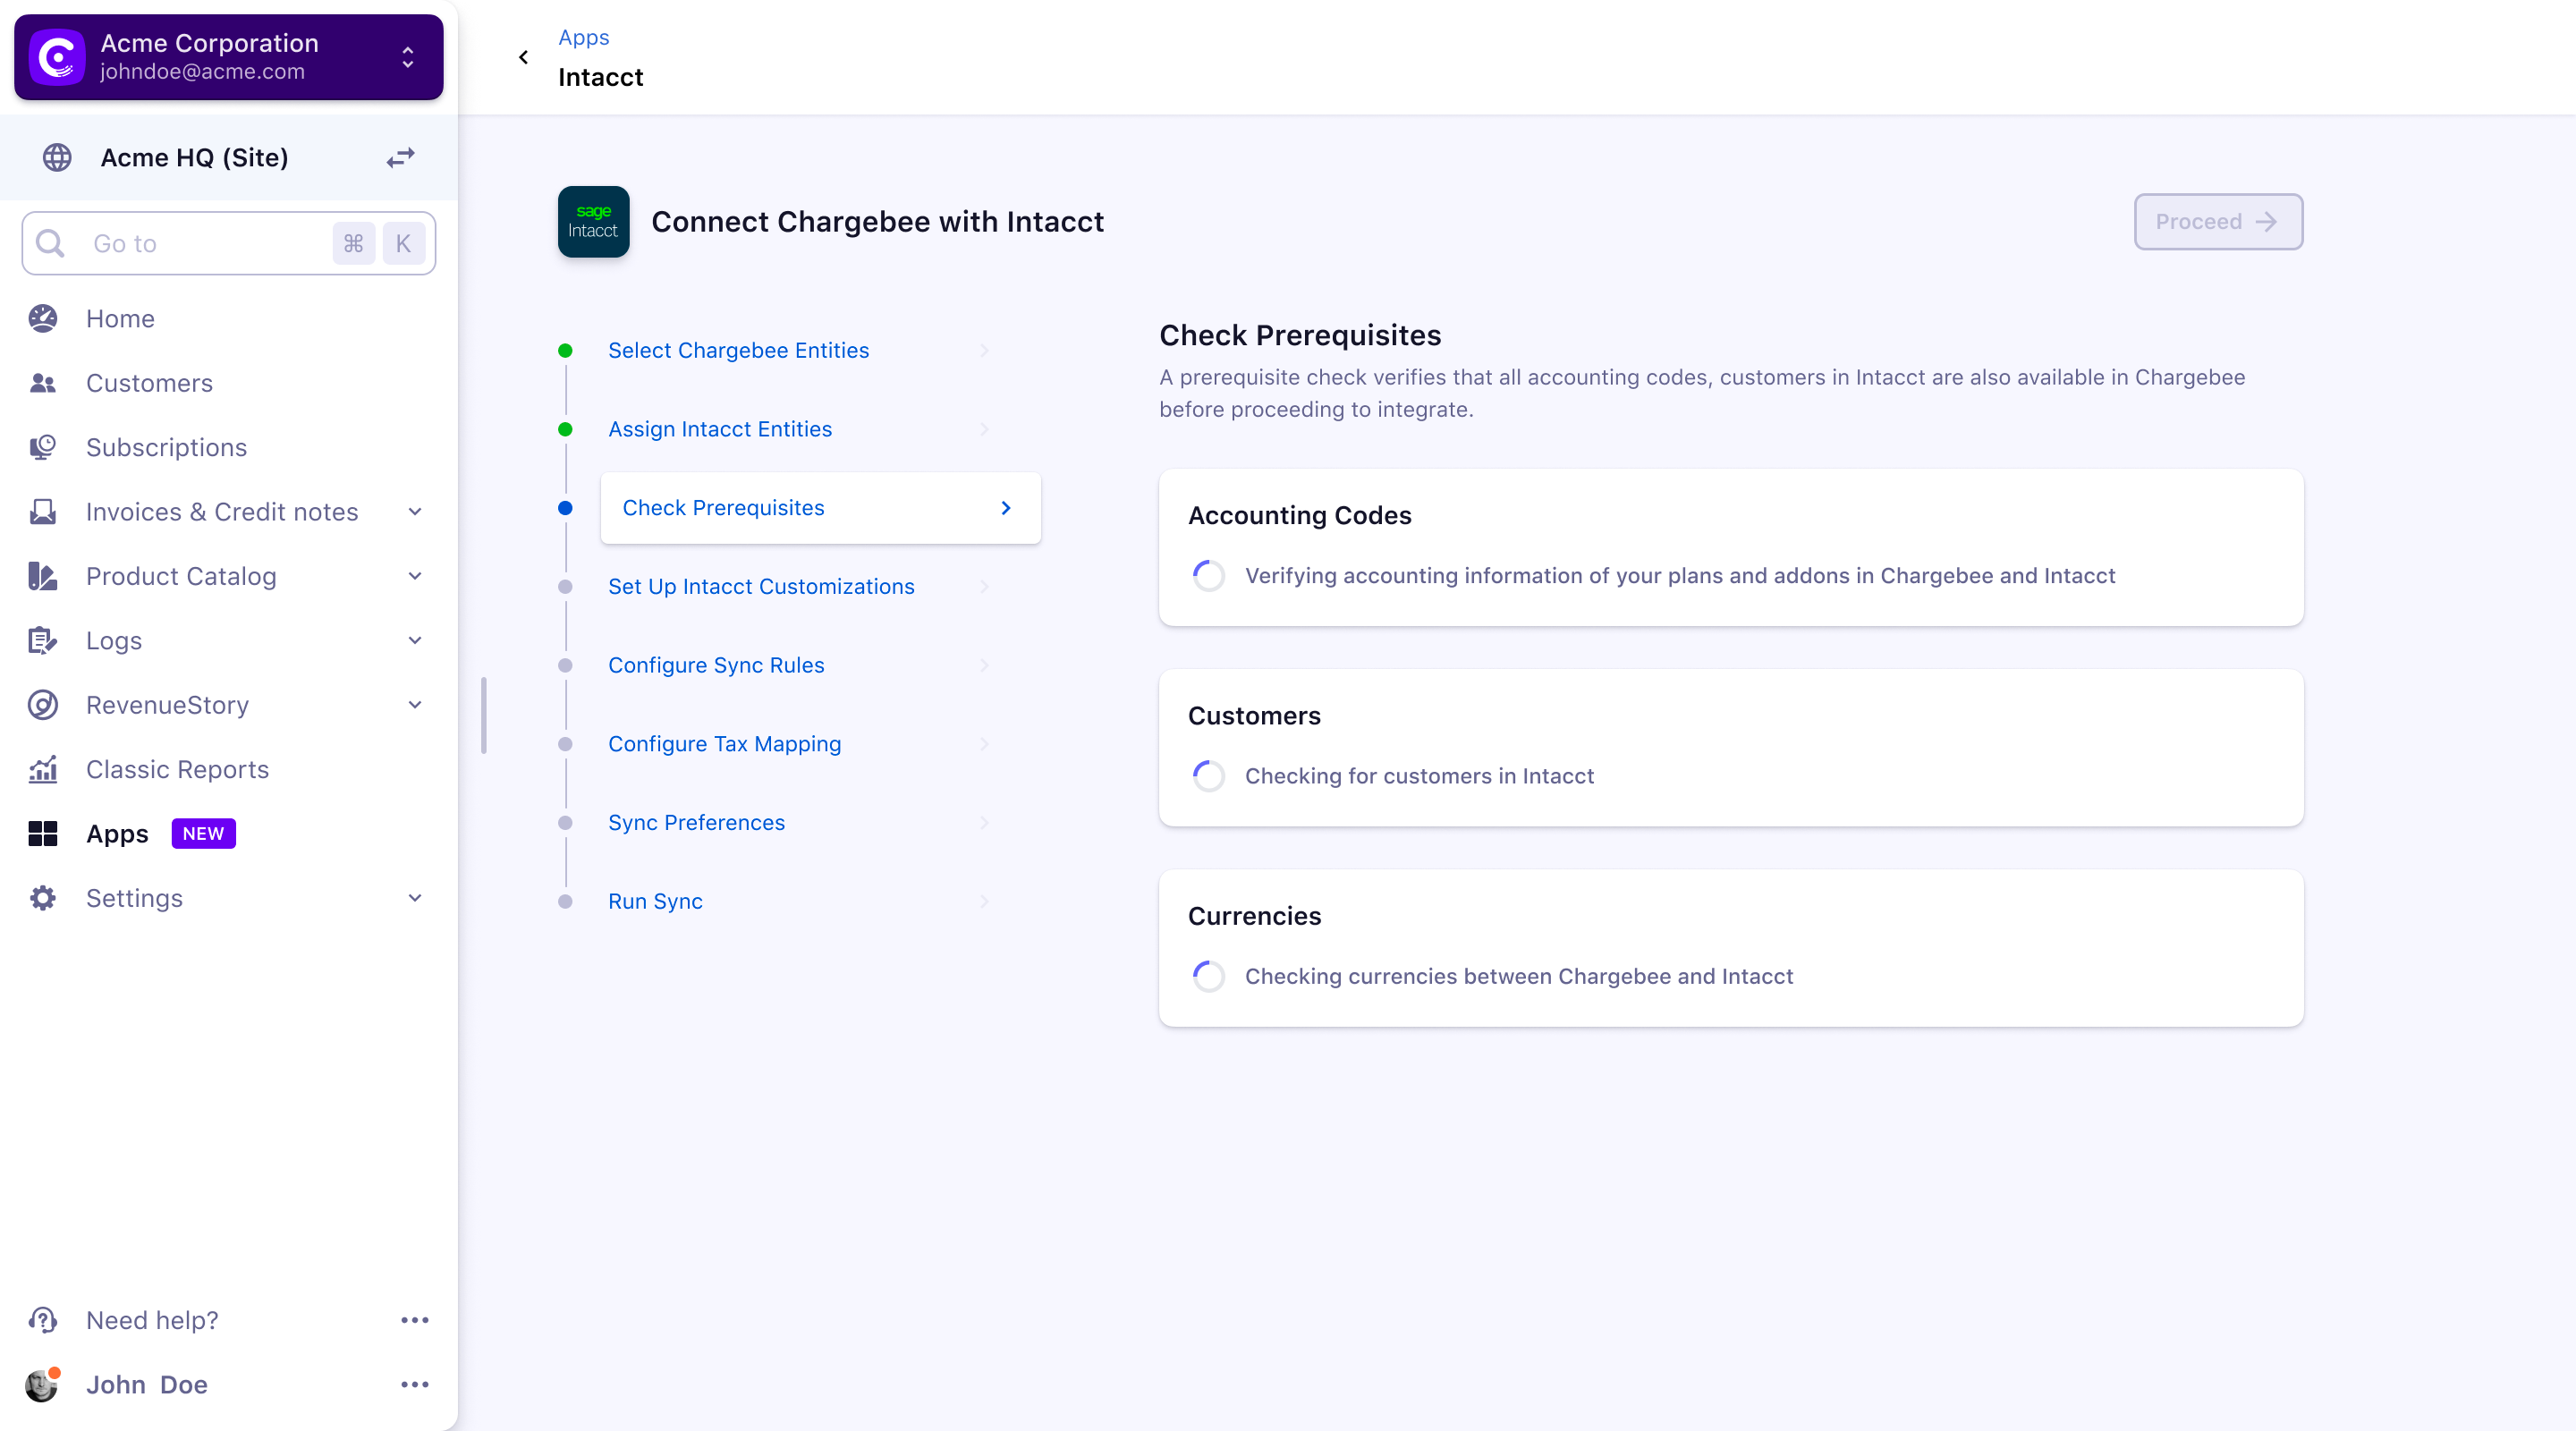
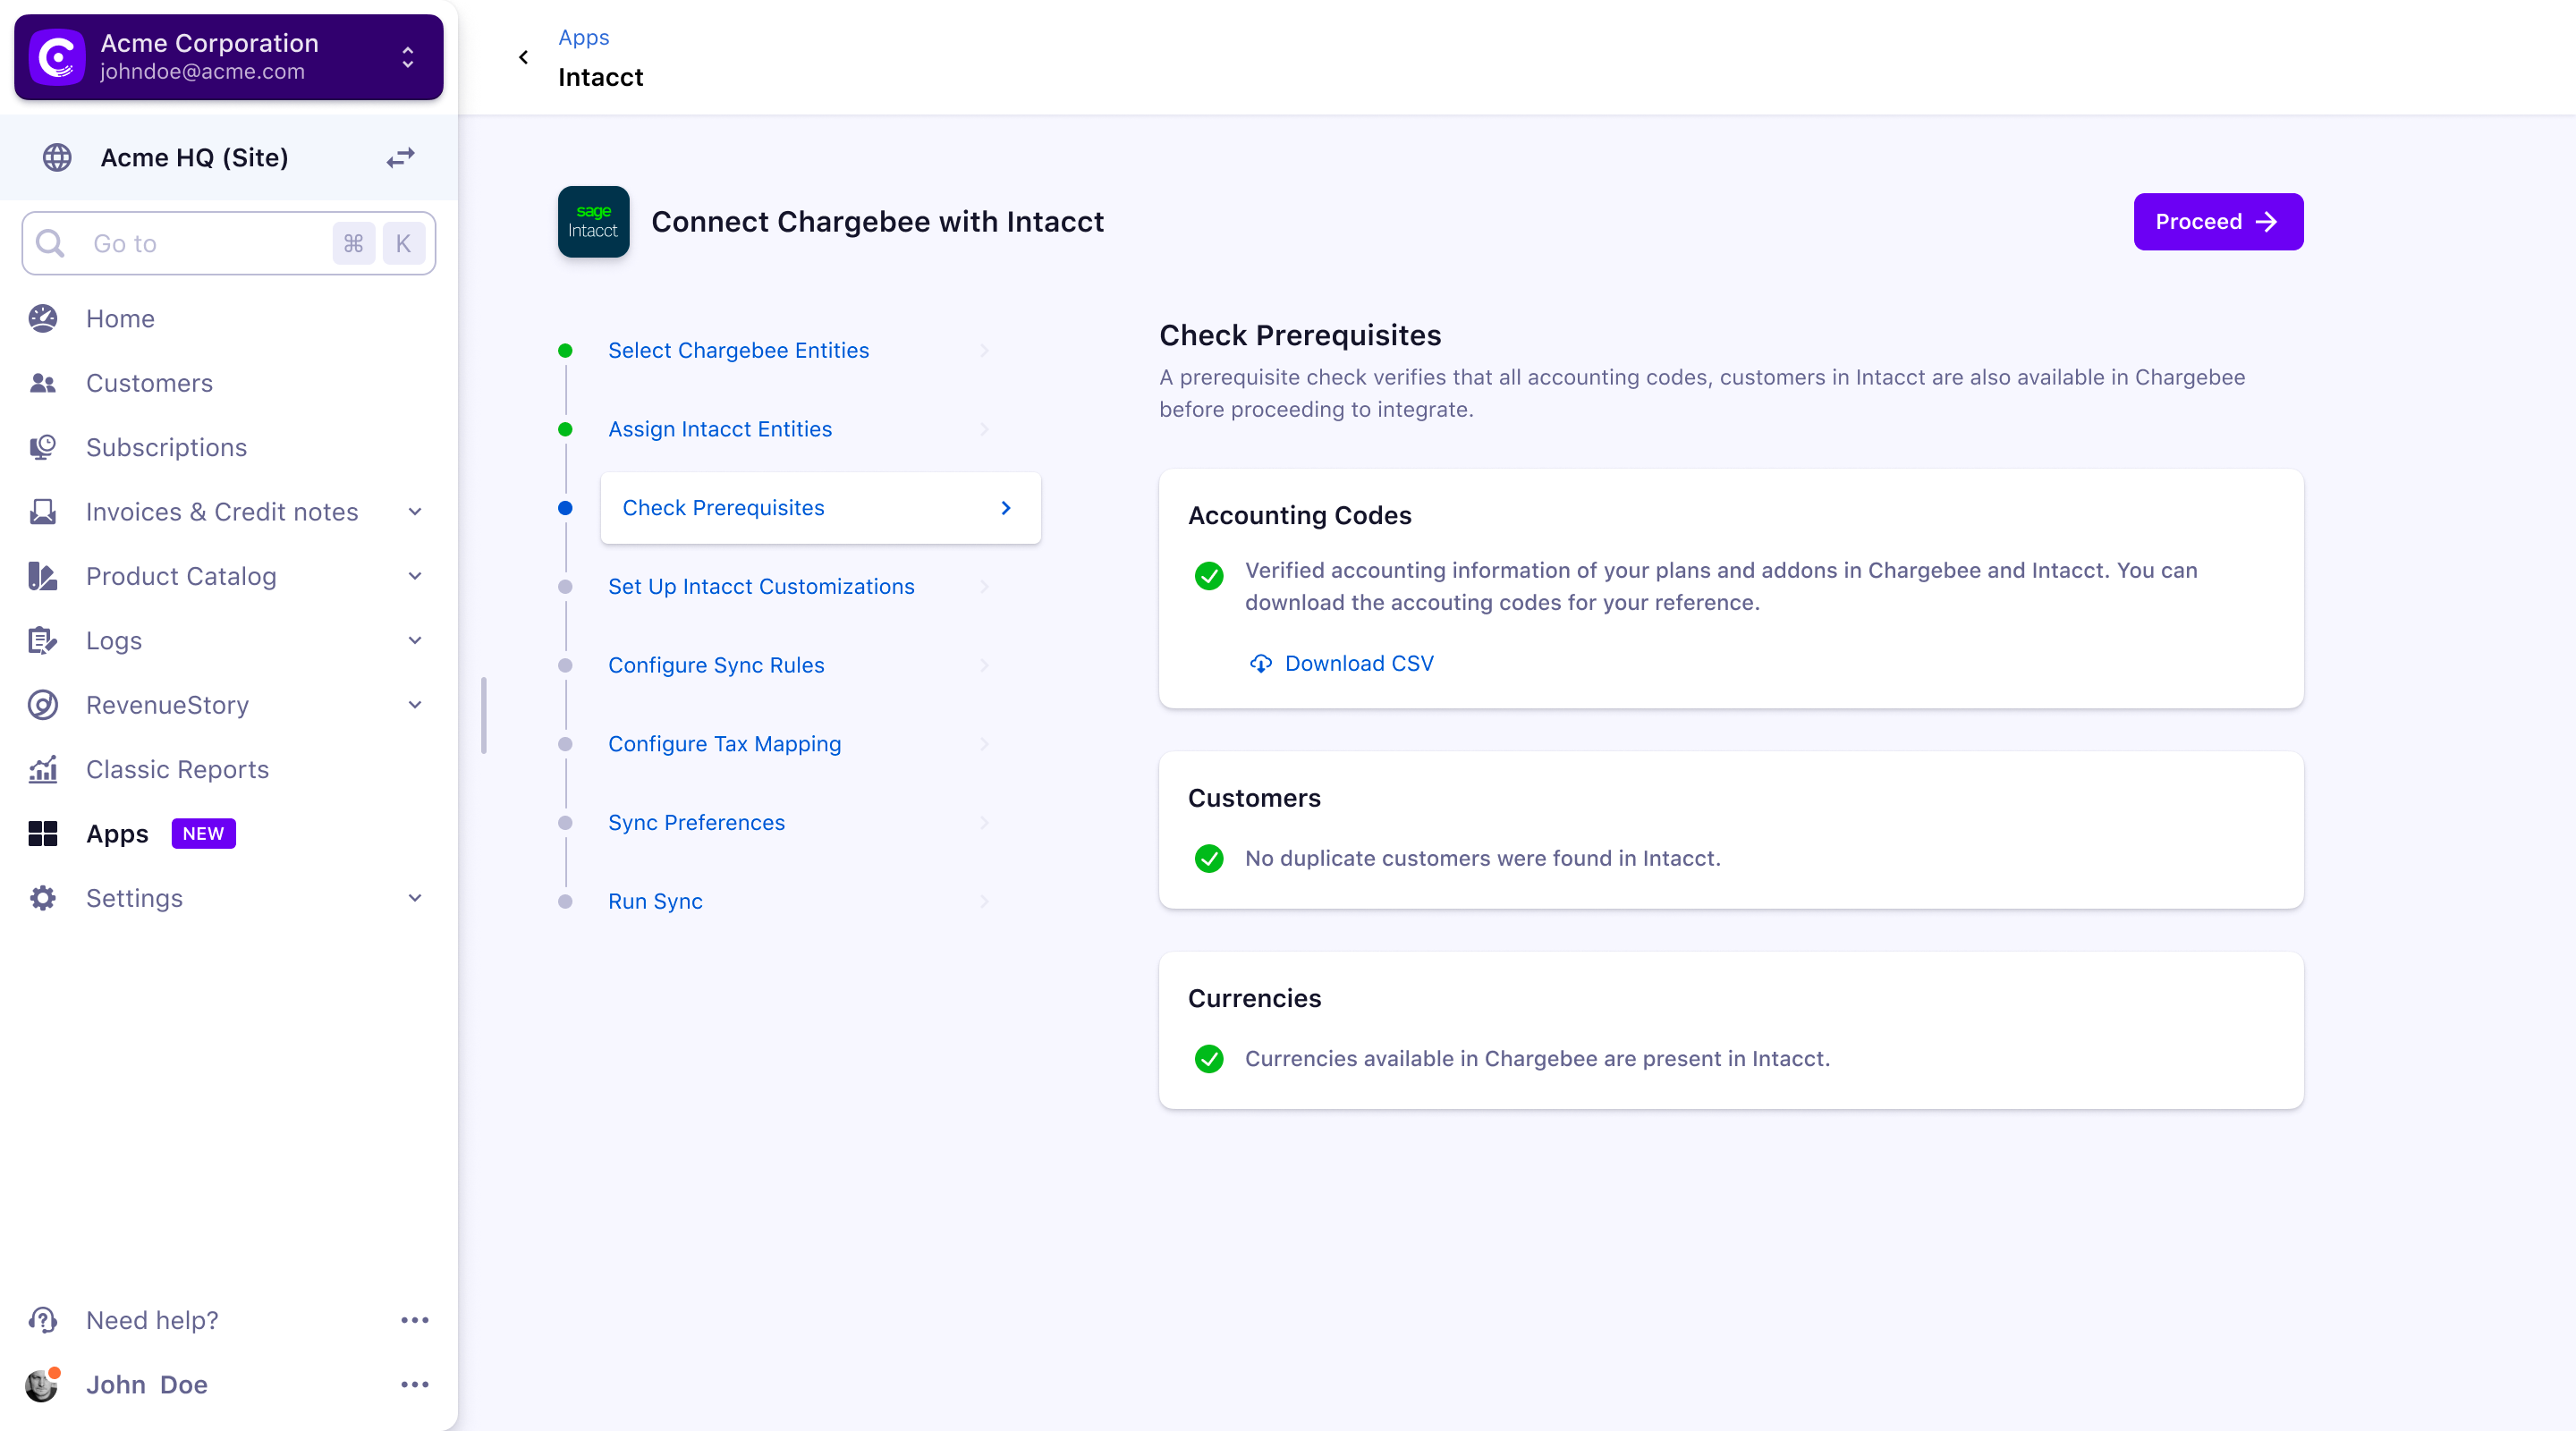
Verification of Prerequisites
Next, Chargebee performs a list of checks in Intacct. A prerequisite check verifies if the accounting codes, customers, and their currencies available in Intacct are available in Chargebee before proceeding with the integration.
-
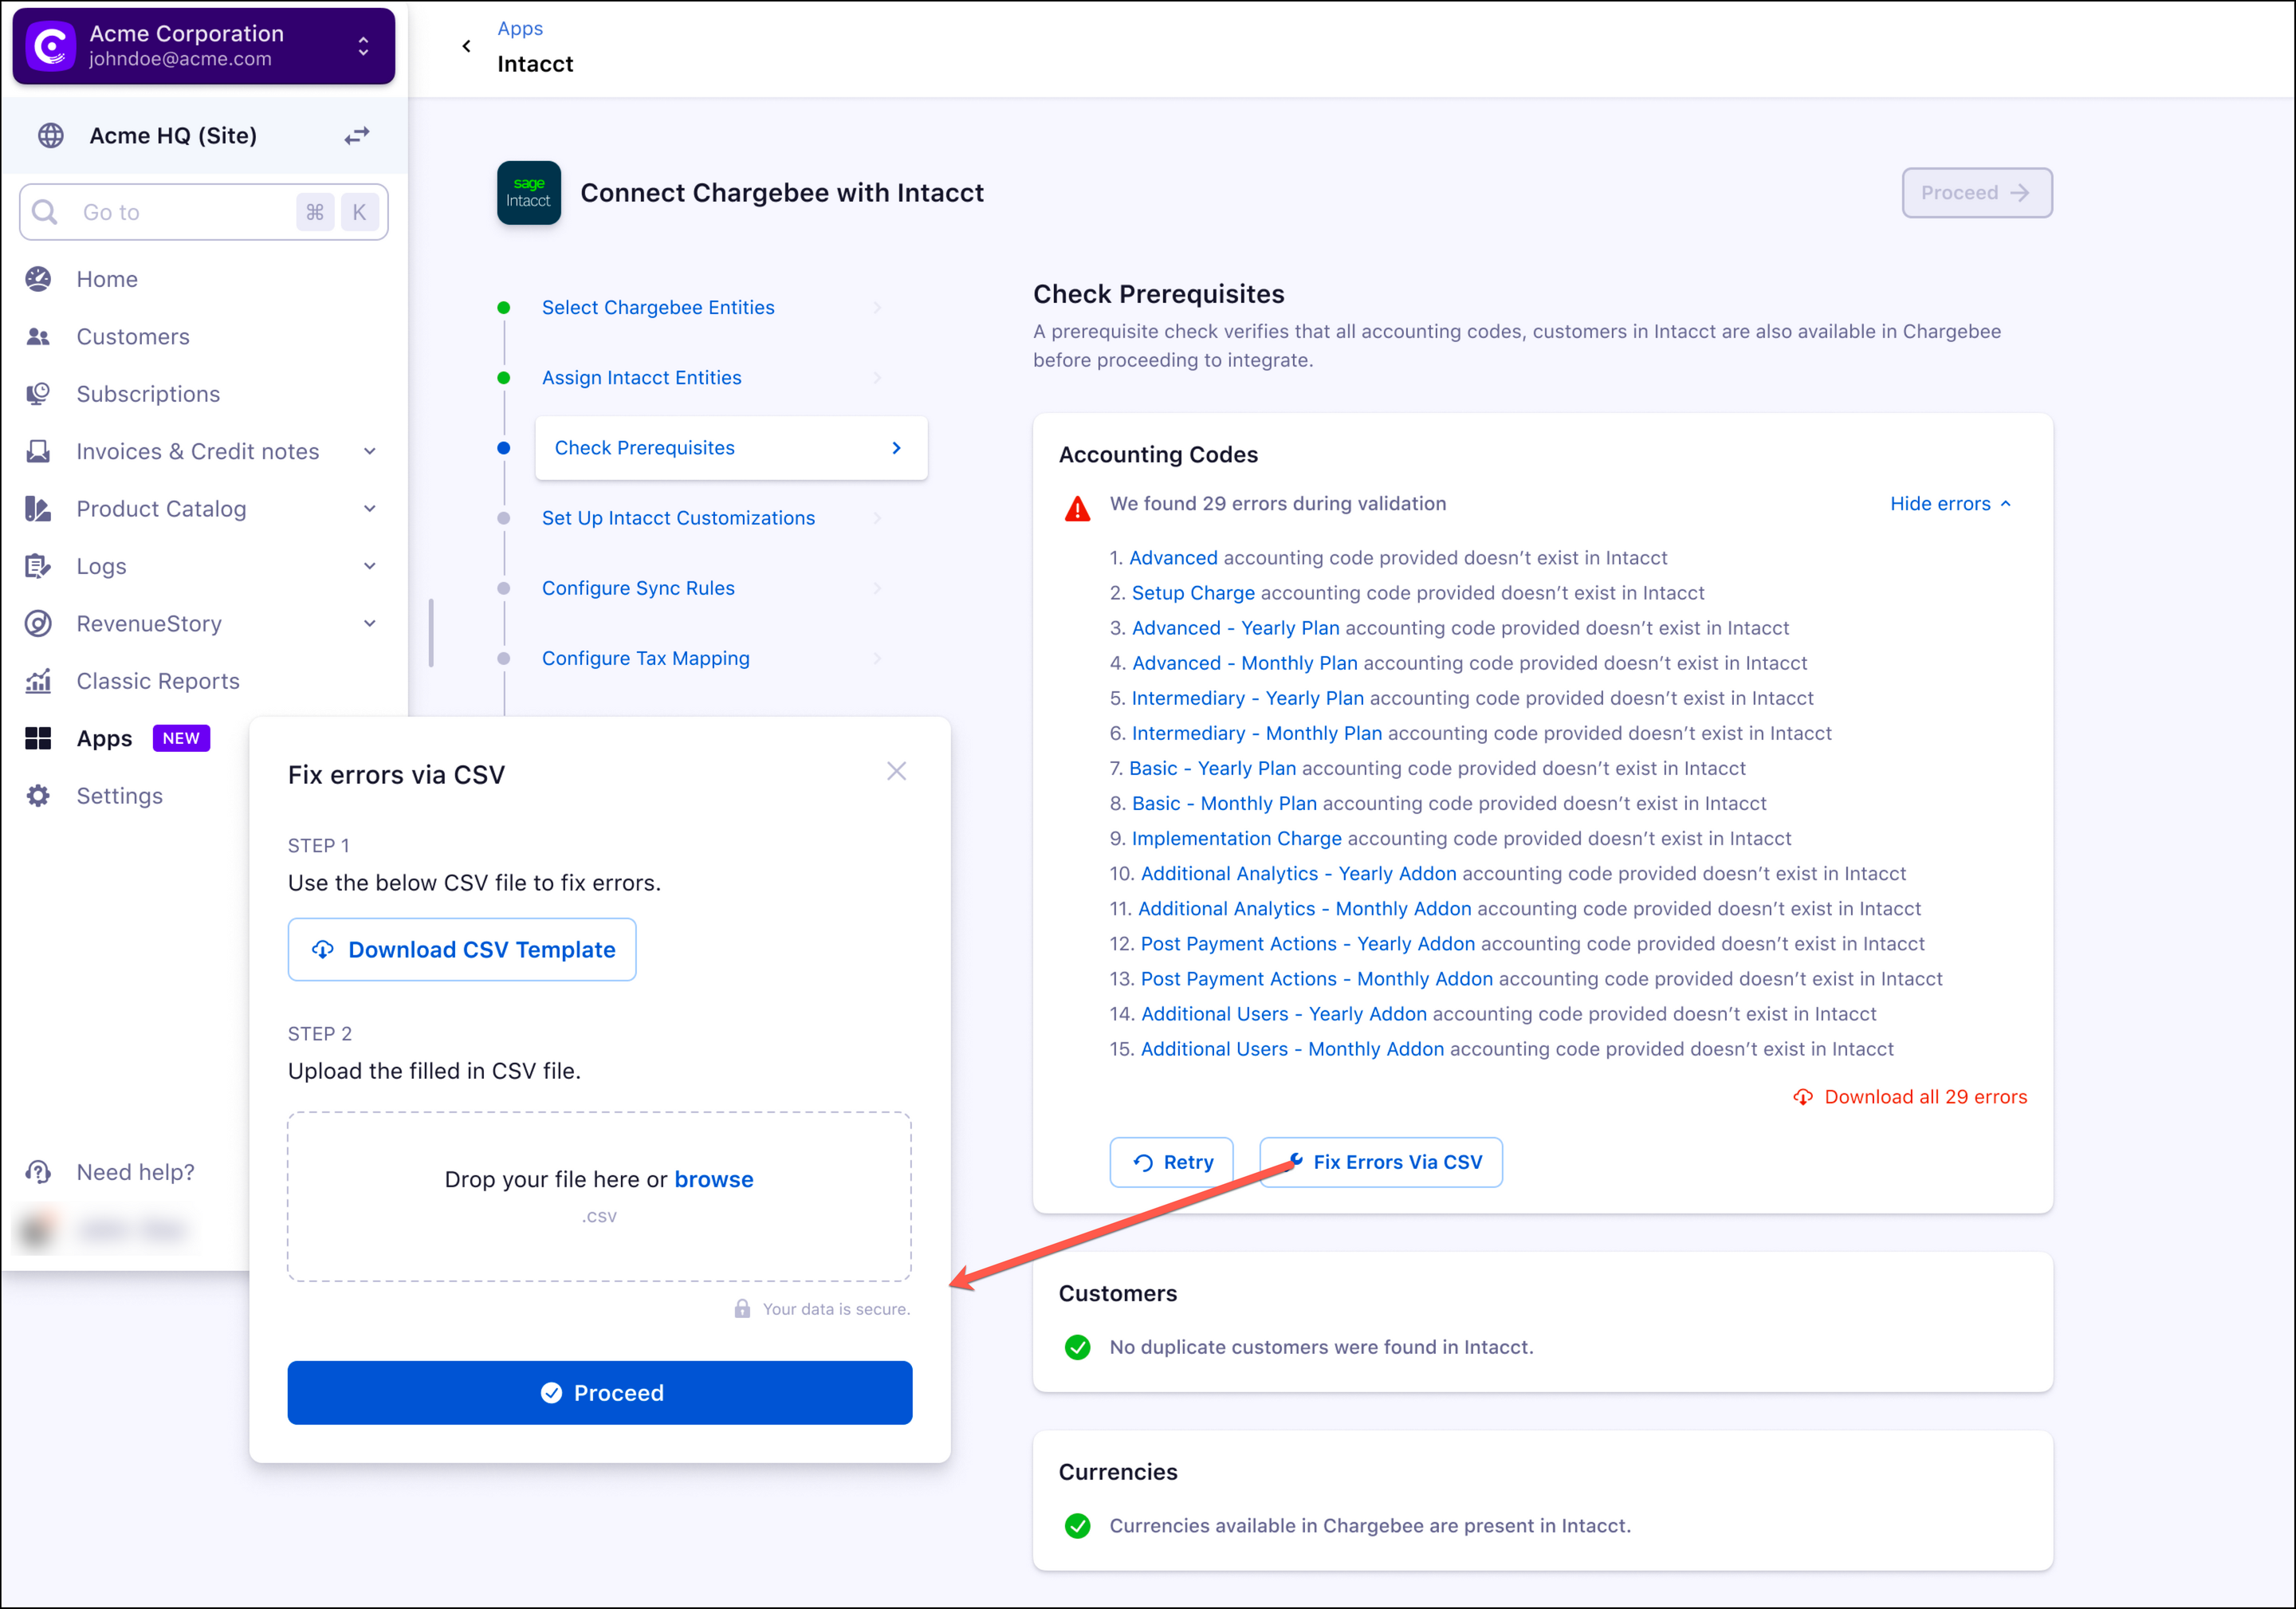
Customer duplicate check: If invoices from Chargebee are already available in Intacct, customers will be present as well. In order to avoid duplicates, you should map the customer records between both systems. You can download the list of customers as a CSV file, map the customers and upload the updated sheet in Chargebee. If there is no possibility of duplicates, ignore it and proceed.
-
Currency check: The currencies present in Chargebee should be present in Intacct. You should manually compare and add the currencies in Intacct. Chargebee can not compare the currencies via API.
This prerequisite check returns errors in the accounting codes during validation. These errors can be fixed using the Fix Errors Via CSV.
After the verification is complete all the mentioned prerequisites are checked in green as displayed in the screenshot here.
Payment Account Mapping: Payment transactions recorded in Chargebee can be mapped to payment accounts in Intacct. For reconciliation purposes, you can select a clearing or undeposited funds account. If you have multiple currencies or payment gateways or payment methods enabled, you can choose a specific payments or checking account.
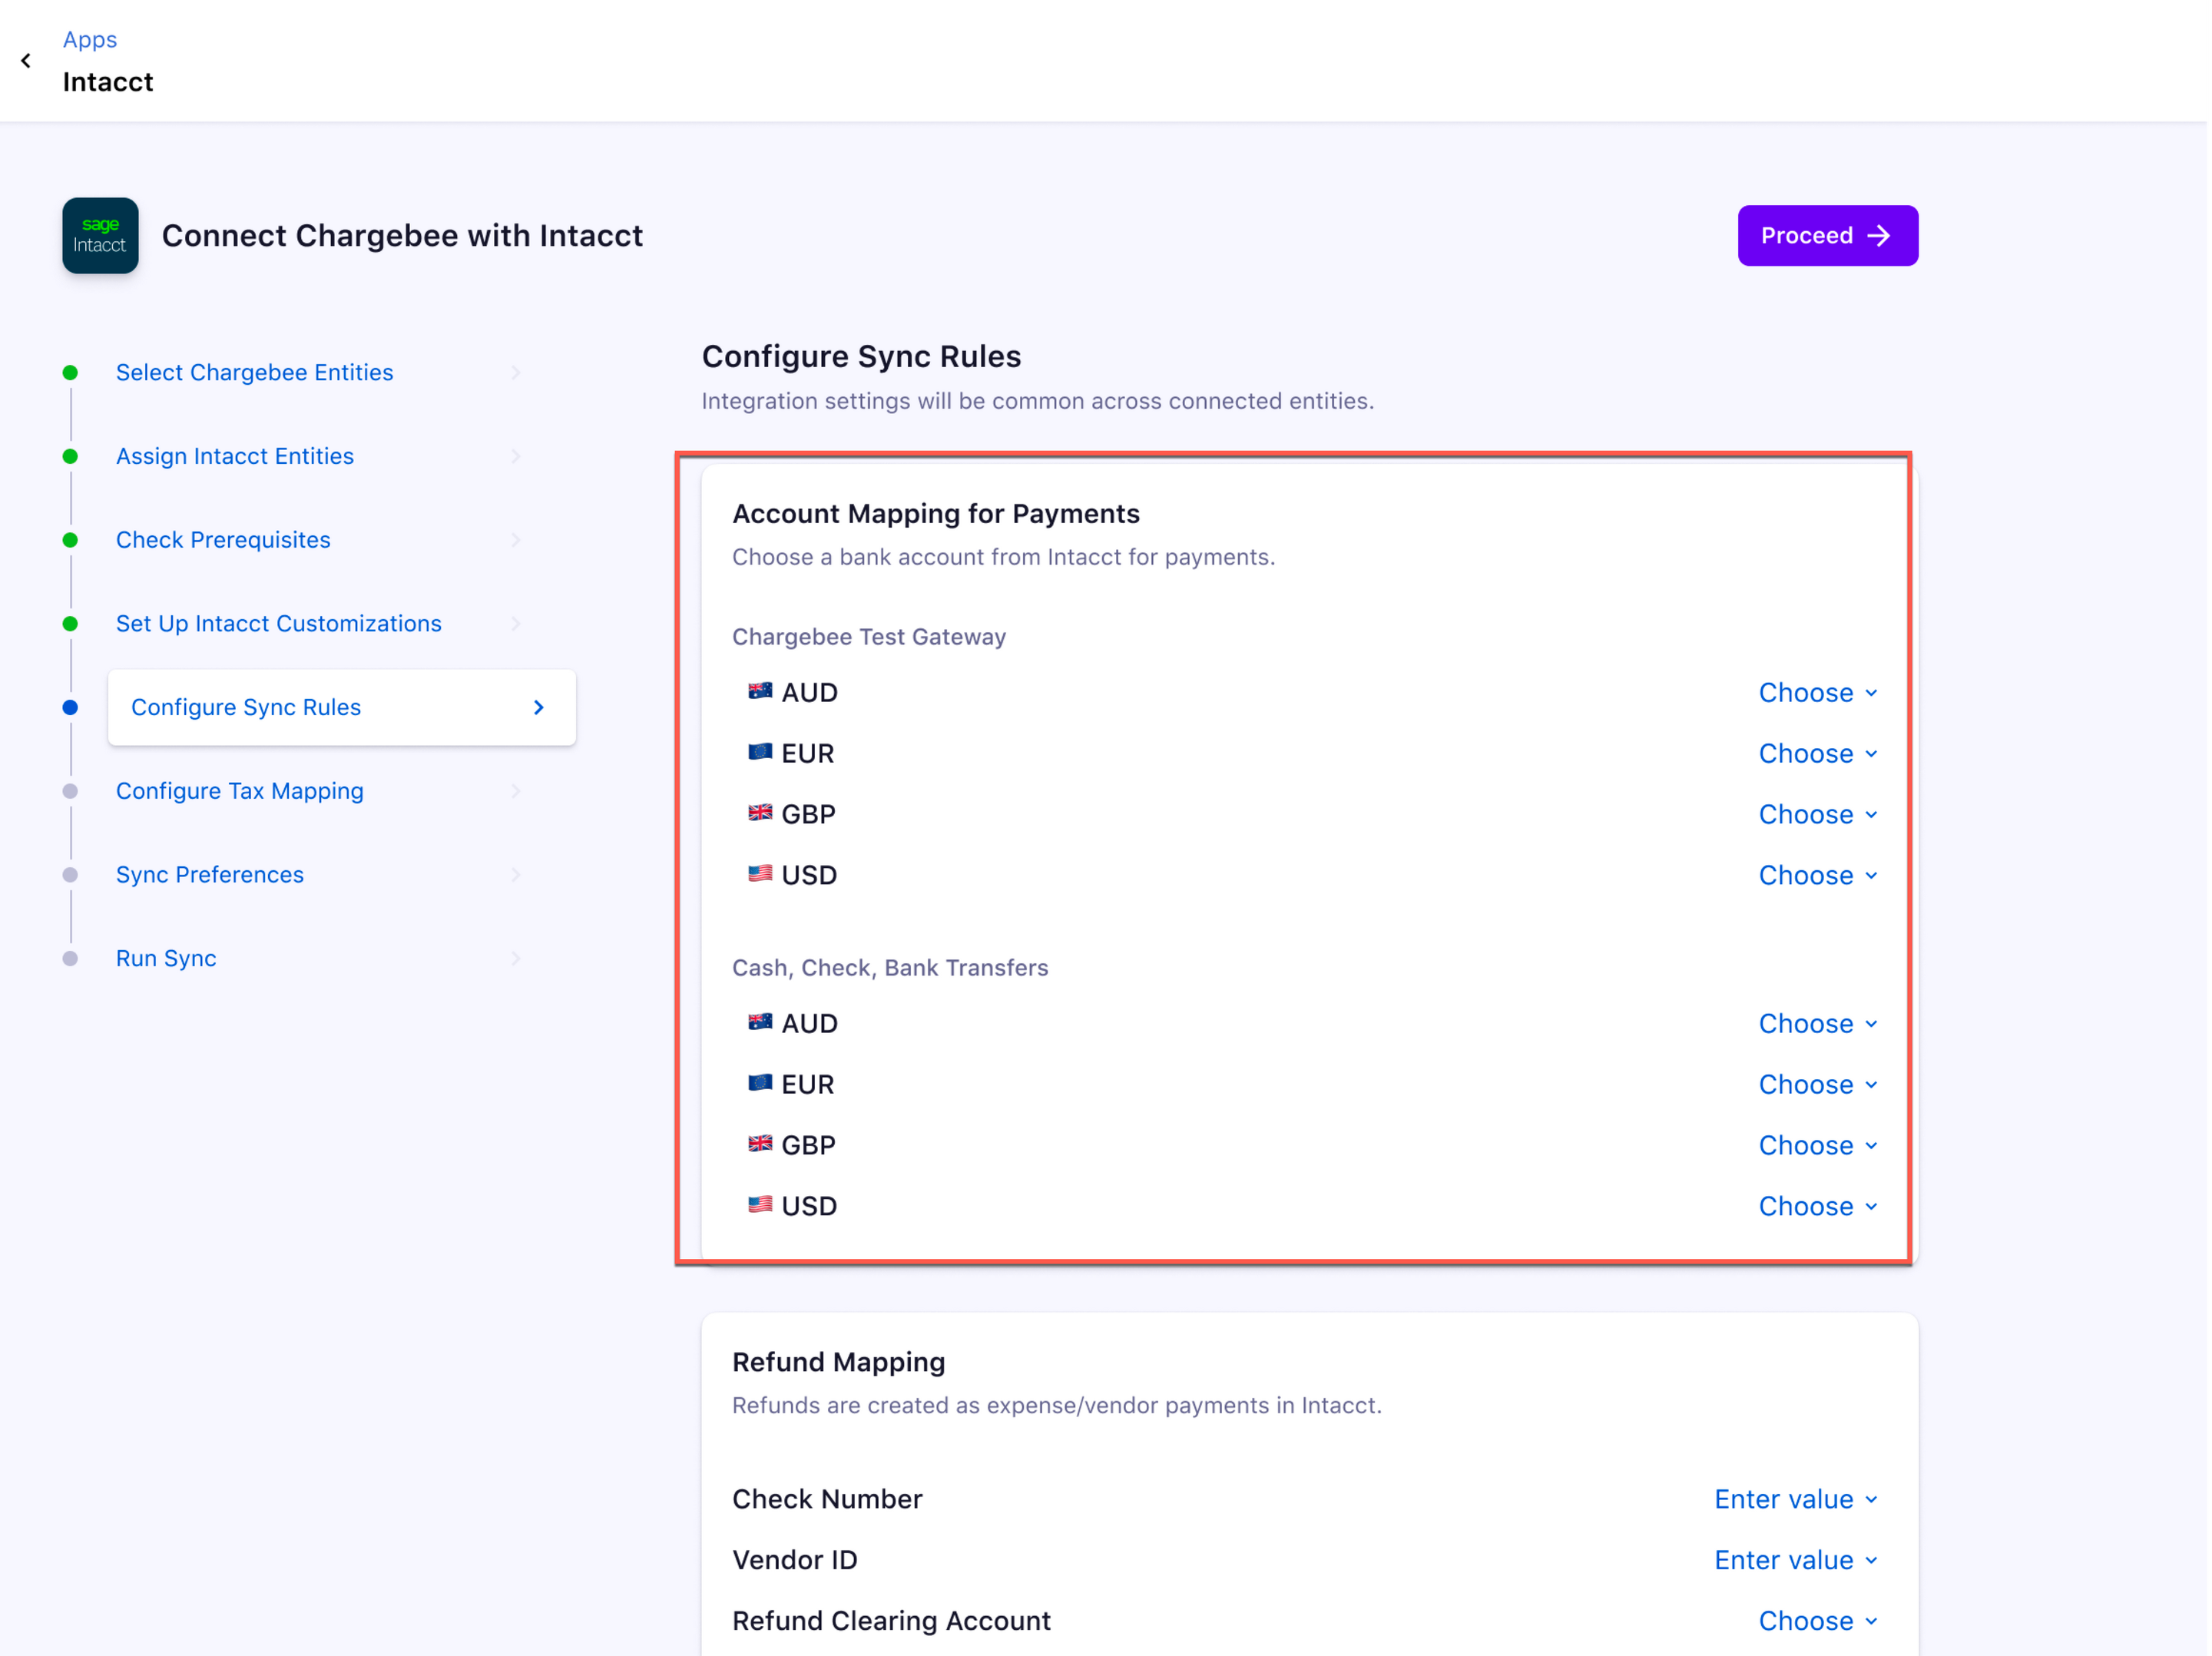
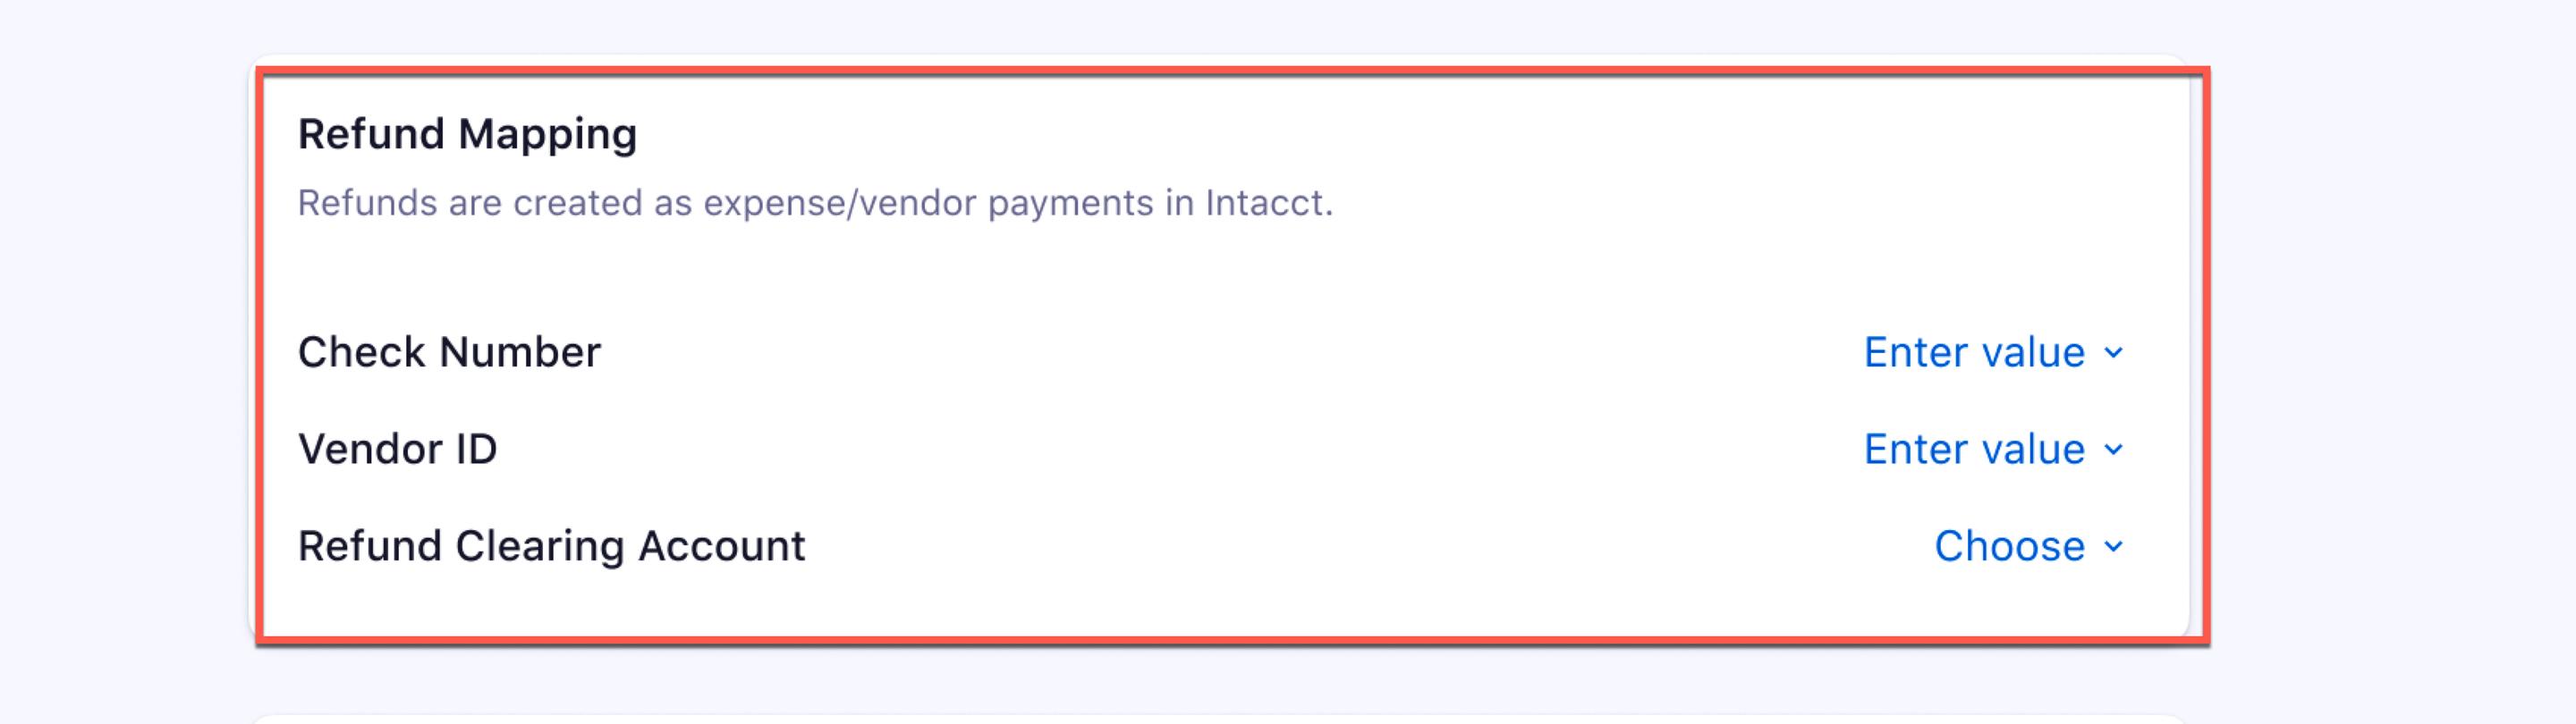
b. Refund Mapping: Refunds are created as Vendor payments in Intacct. You can configure the following for mapping refunds:
-
Check Number: Check number is a reference number. When there is a refund, auto-increment occurs from the number you provide here.
-
Vendor ID: Enter a vendor ID for the refund.
-
Refund Clearing Account: Select a clearing or temporary account to map refund transactions.
c. Account Mapping for Invoice Line Items:
-
One-time charges: One-time or Adhoc charges created in Chargebee can be mapped to a GL Account in Intacct.
-
Discounts: Select an Account to map Discounts/Cost of Goods (COGs) in Intacct.
-
Bad debts (write-offs): You can choose where Bad Debts should be mapped in Intacct.
-
Round-offs: If there is a difference in the invoice total calculation between Chargebee and Intacct, then Chargebee will add a round-off item automatically, you can select an Account to map these round-off line items.

The customer selects the invoice line items in the item GL group only if the feature, Multi-entity with different base currencies is enabled.
d. Configure Product Line: If you have multiple Chargebee sites you can provide a Product Line per Chargebee site.

Dimension Configuration: The customer defines the Dimension Configuration for each currency. The following are invoice line items within the Dimensions Configuration:
-
Location
-
One Time Charges
-
Setup Fee
-
Round Off
-
Refund Location is a mandatory field in the dimension configuration if the Multi-entity support with different base currencies feature is enabled.
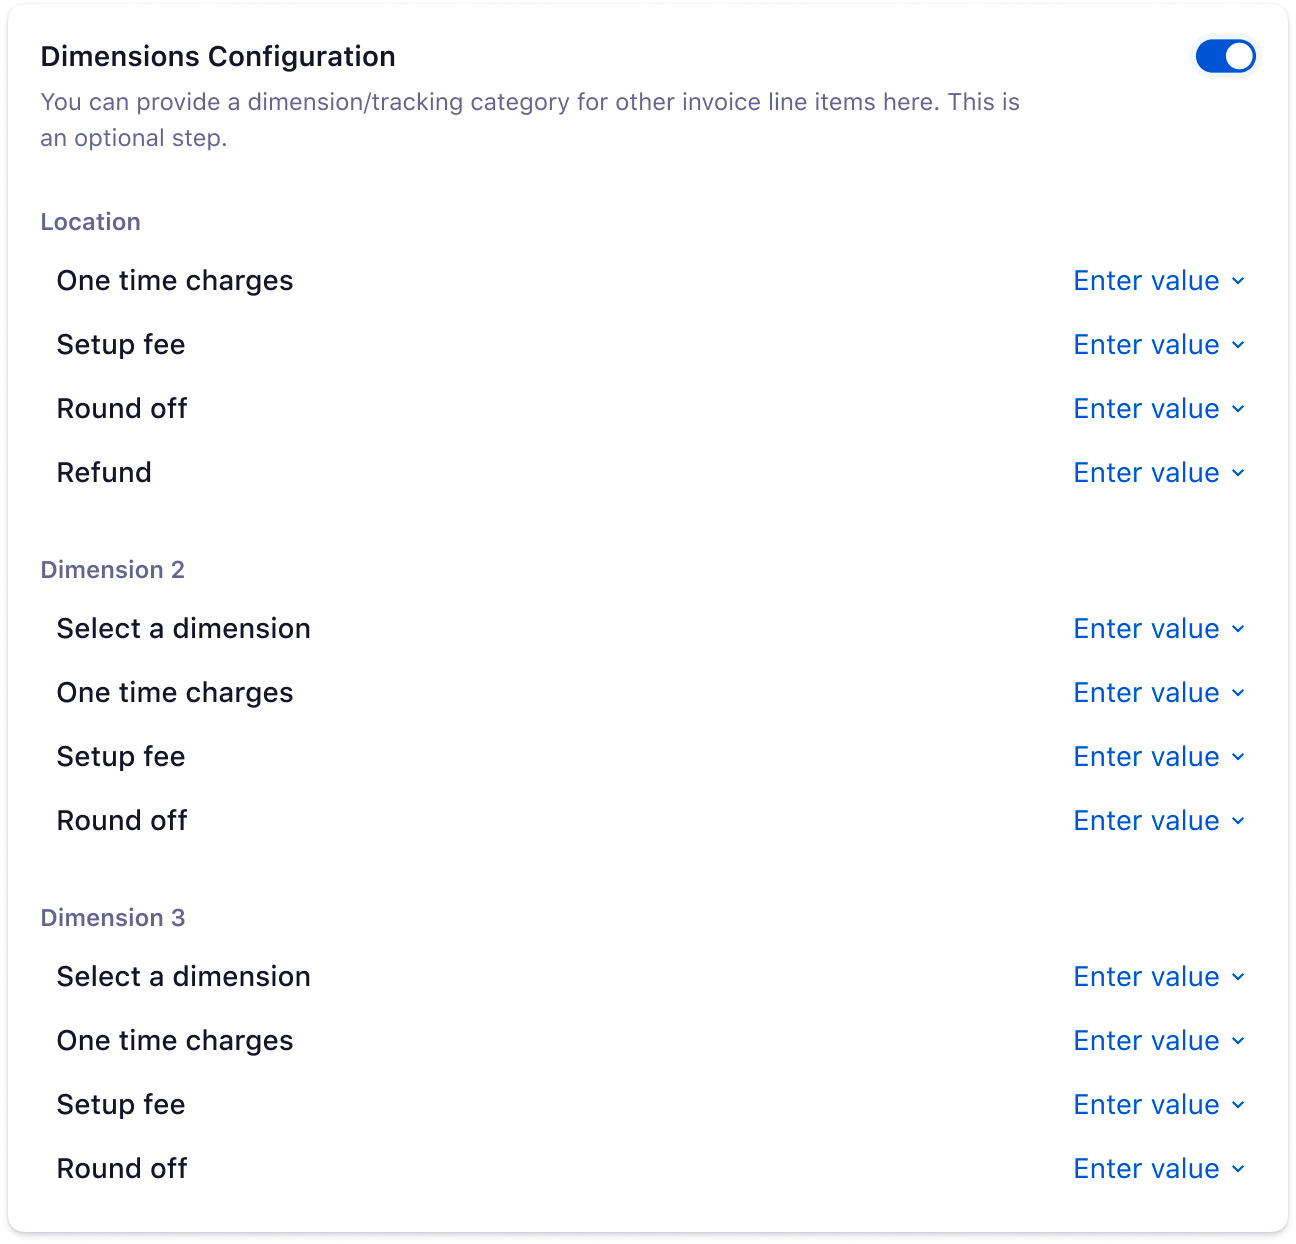
Note: Defining Dimension 2 and Dimension 3 is optional.
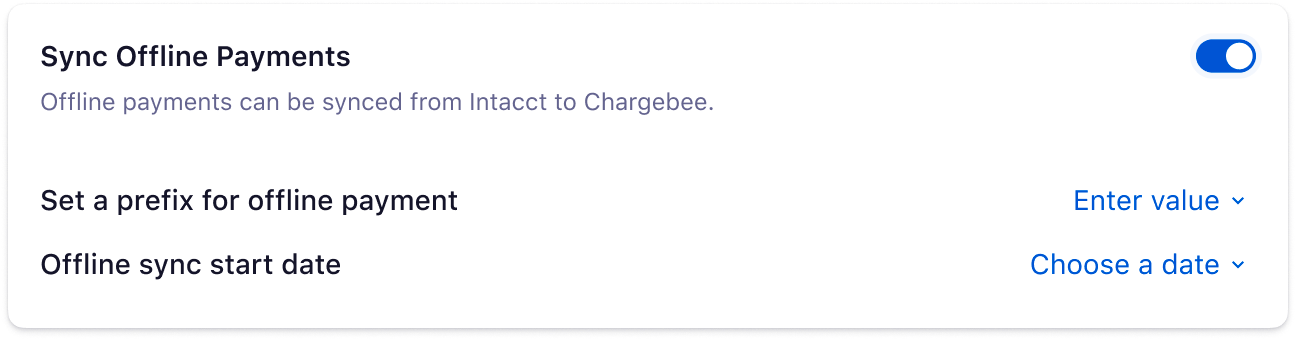
Sync Offline payments: When offline payments are reconciled against Payment Due invoices in Intacct, invoices get updated as Paid in Intacct. These payments can be synced back to close Payment Due invoices in Chargebee. You can choose to enable this option.
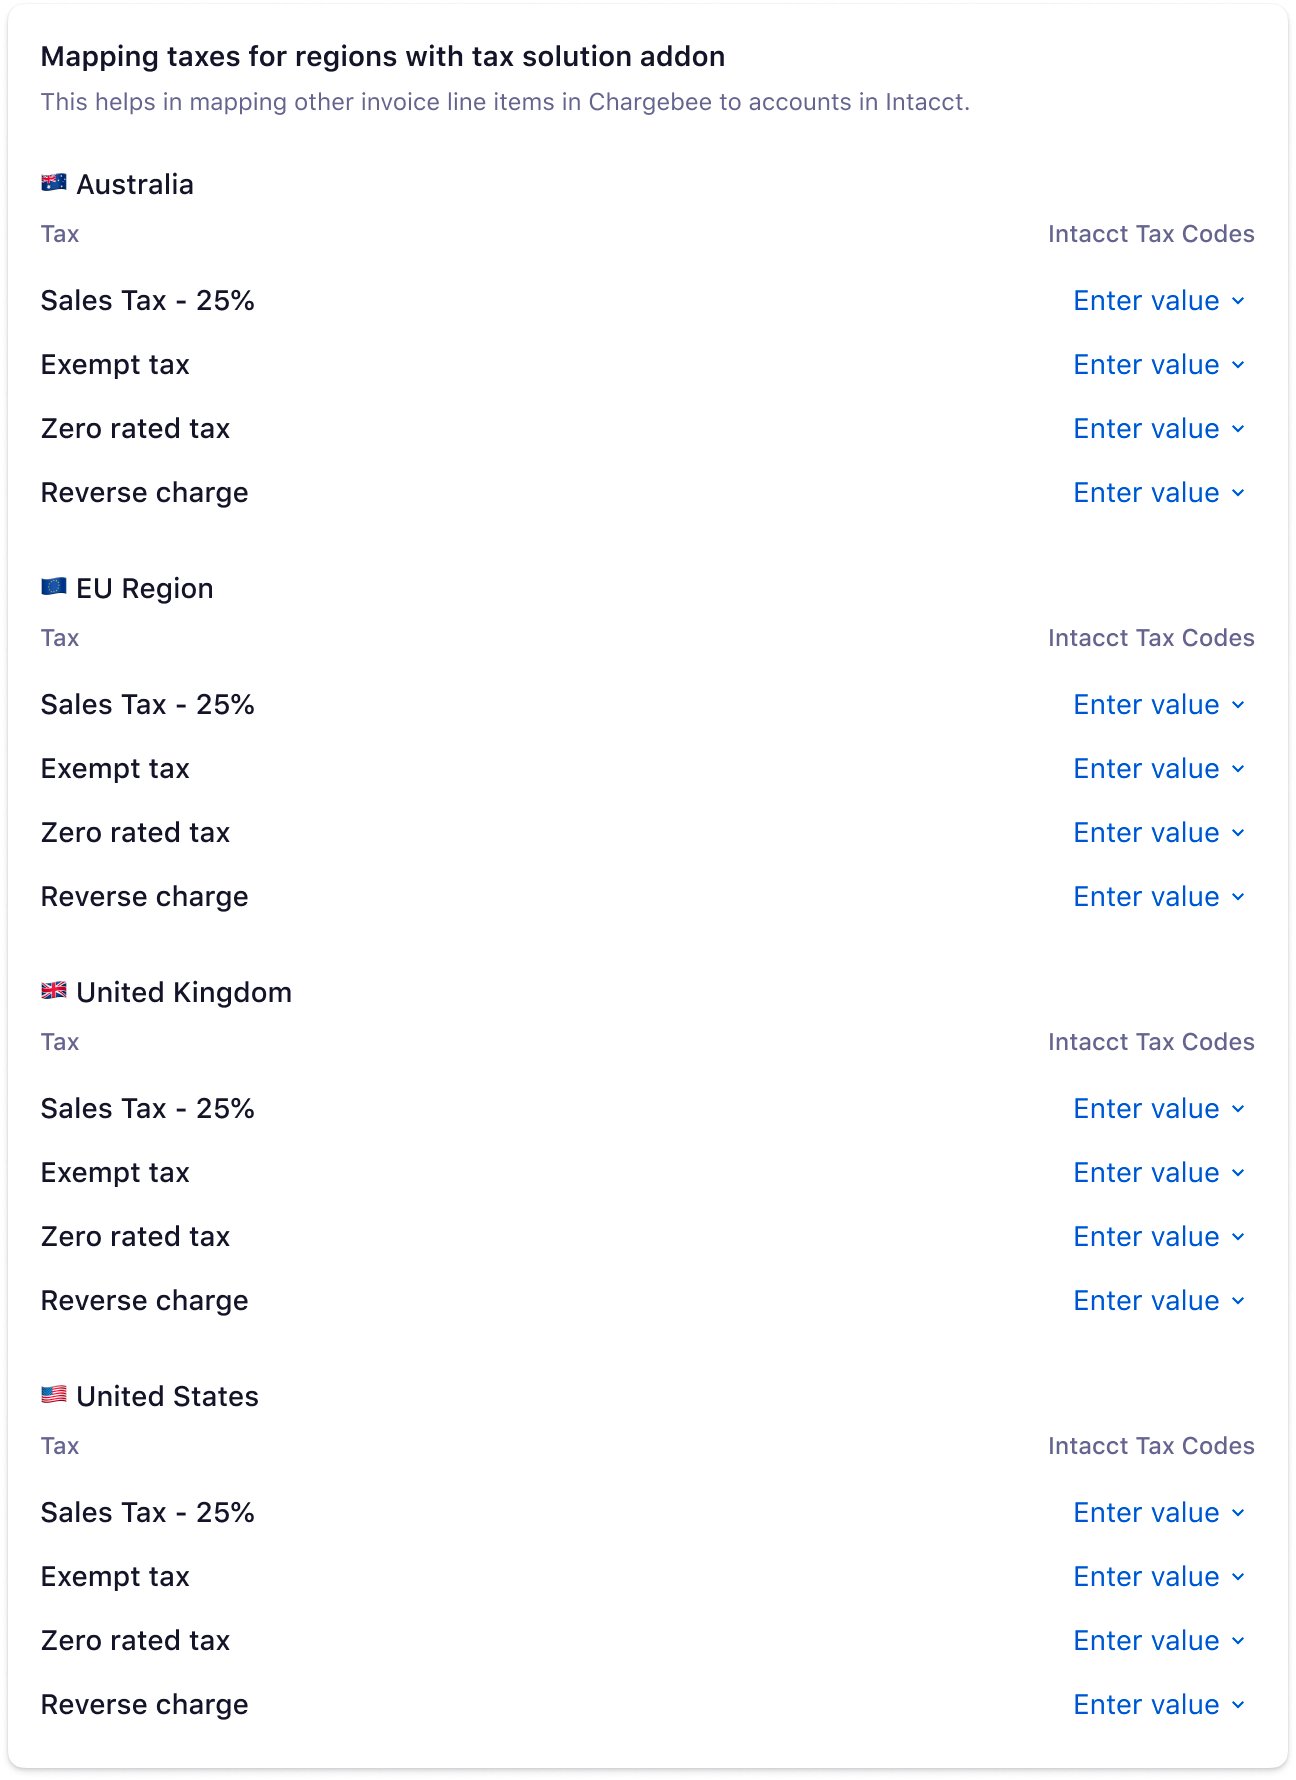
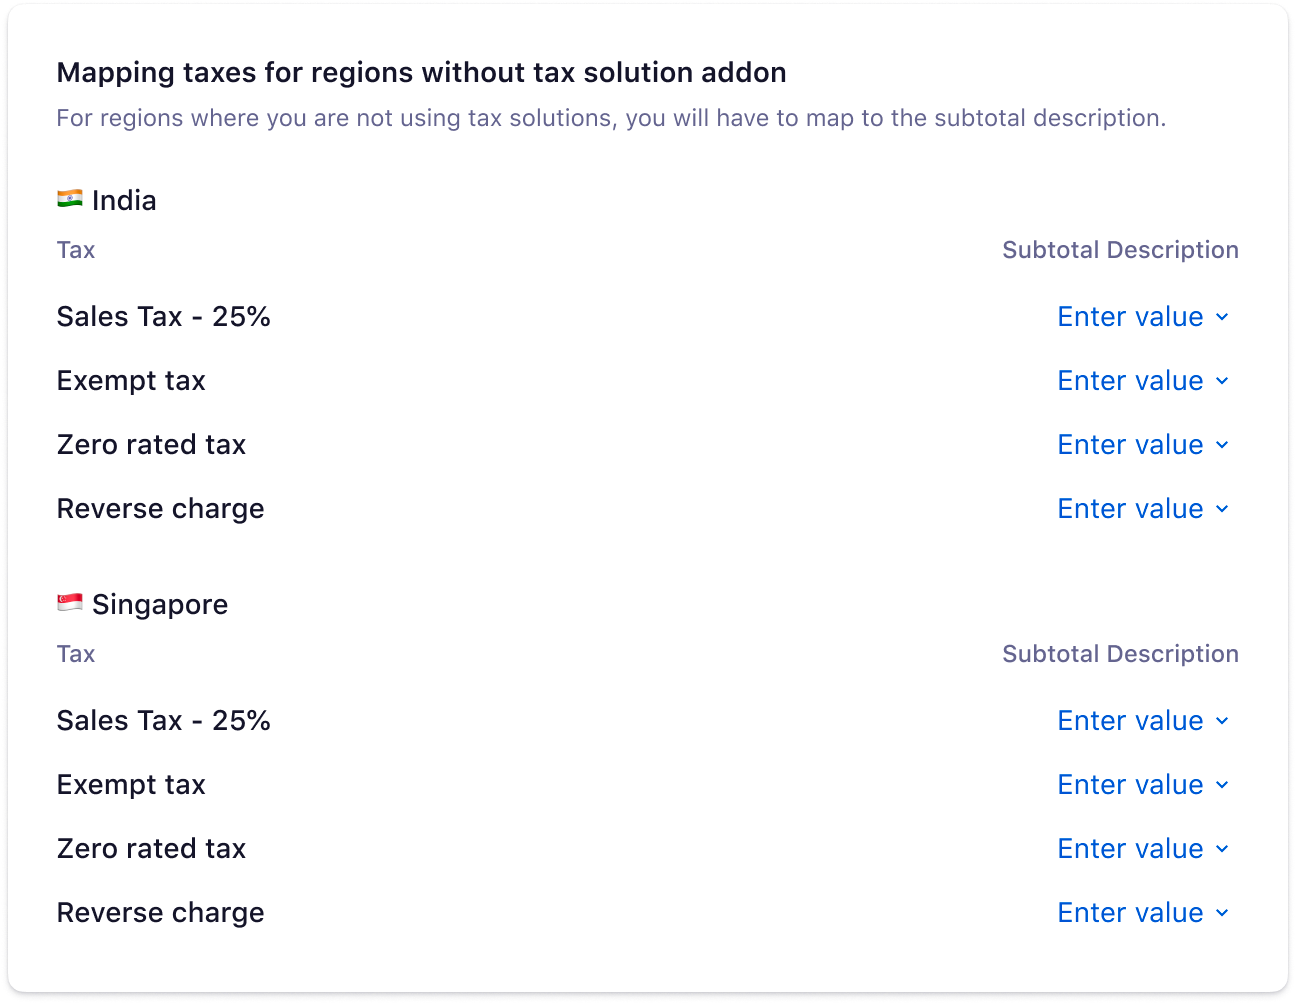
Configure Tax Mapping
You can add taxes as sub-totals in Sage Intacct for Accounting or ERP modules. For example, if you are remitting sales tax in New York (which is based in the US), you can create a sub-total item for each tax jurisdiction within that region.
-
For the Sales invoice, the Subtotal description is mapped for countries that have Tax solutions disabled.
-
Tax details from Chargebee will be mapped as AR invoices with taxes for countries that have Tax solutions enabled.
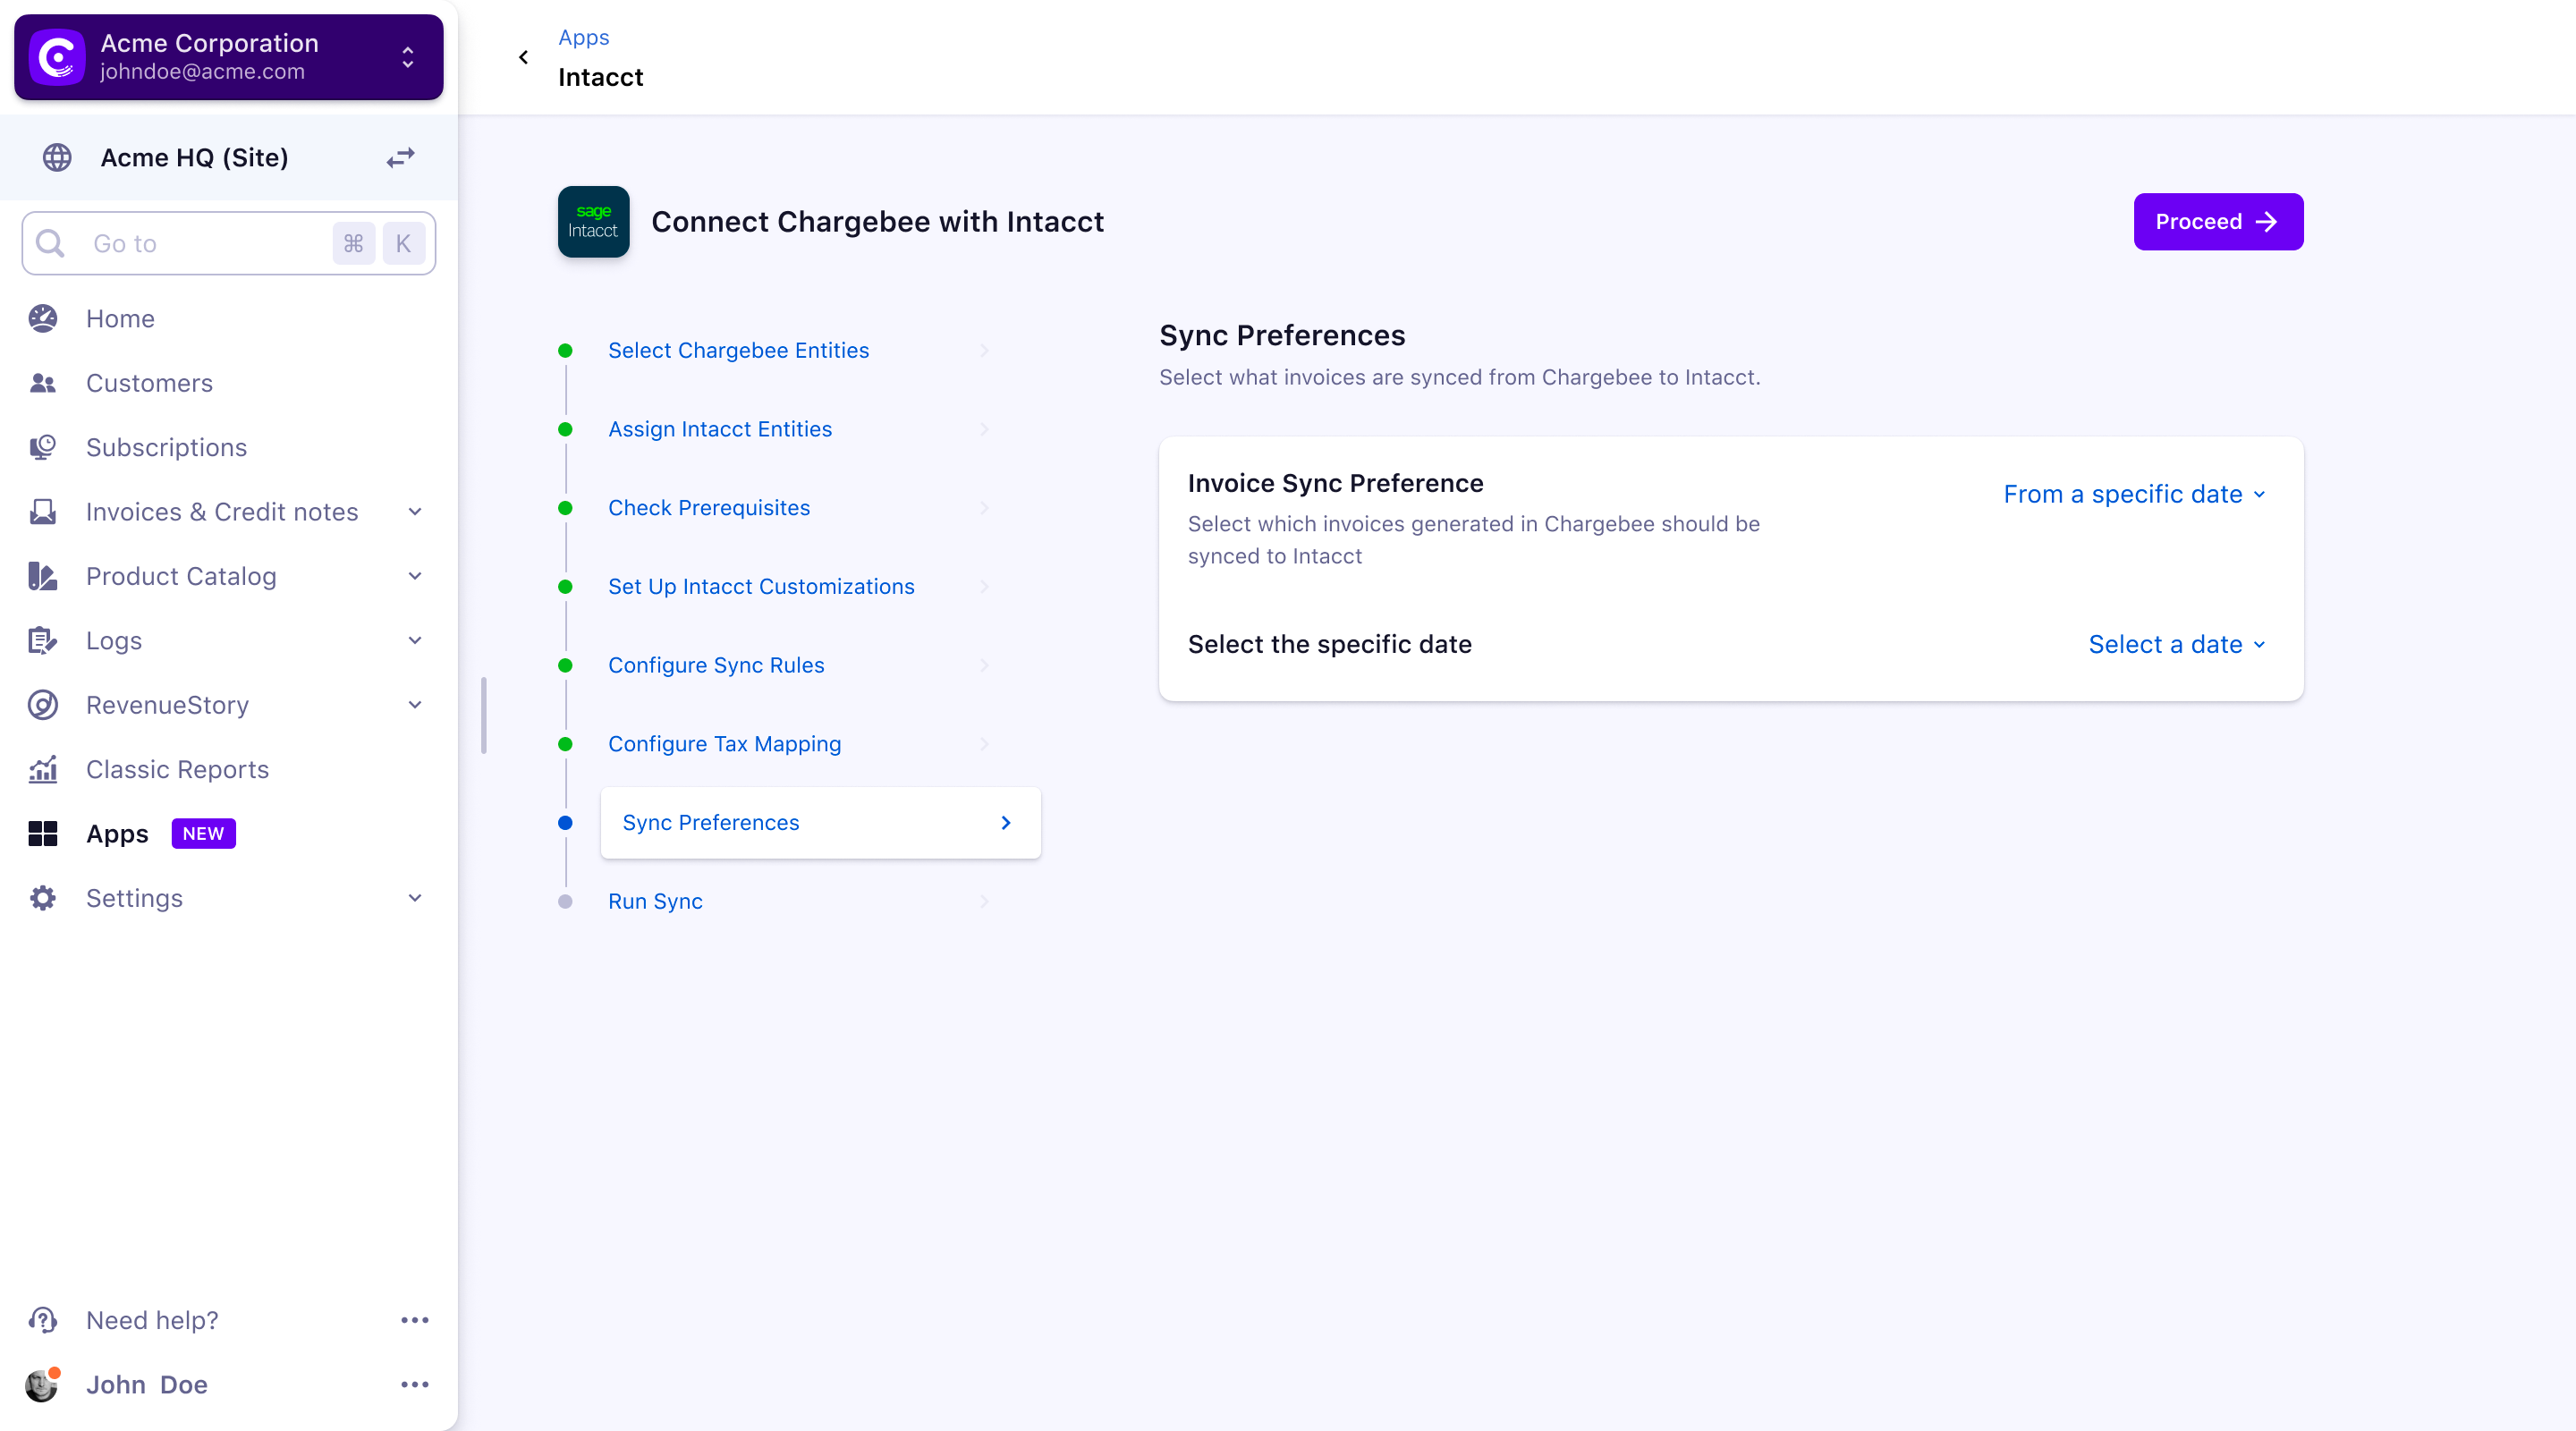
Sync Preferences
Once the integration is setup, you can see when the last sync was run, the success or errors in the sync, and options to edit the configurations:
Enable/Disable Auto Sync: After setting up the integration, you can configure the daily schedule to sync all the information to Intacct automatically. Invoices and related information will be synced once every 24 hours. You can choose to disable auto-sync if required.
Sync Now: For on-demand sync, you can sync data from Chargebee to Intacct immediately.
Manage Mapping: You can edit the configurations or GL Account mapping provided during the setup process.
Manage Tax Mapping: You can modify the tax sub-totals provided during the setup process. If you have added tax regions in your Chargebee settings, you can provide new tax sub-totals here.
Manage Preferences: You can enable the Tax solutions for the countries that do not have it enabled previously.
Run Initial Sync:
Once the configuration is complete, you can begin the sync. Chargebee will sync the first 10 invoices, to ensure that mapping, conventions, and sync criteria align with your requirements.
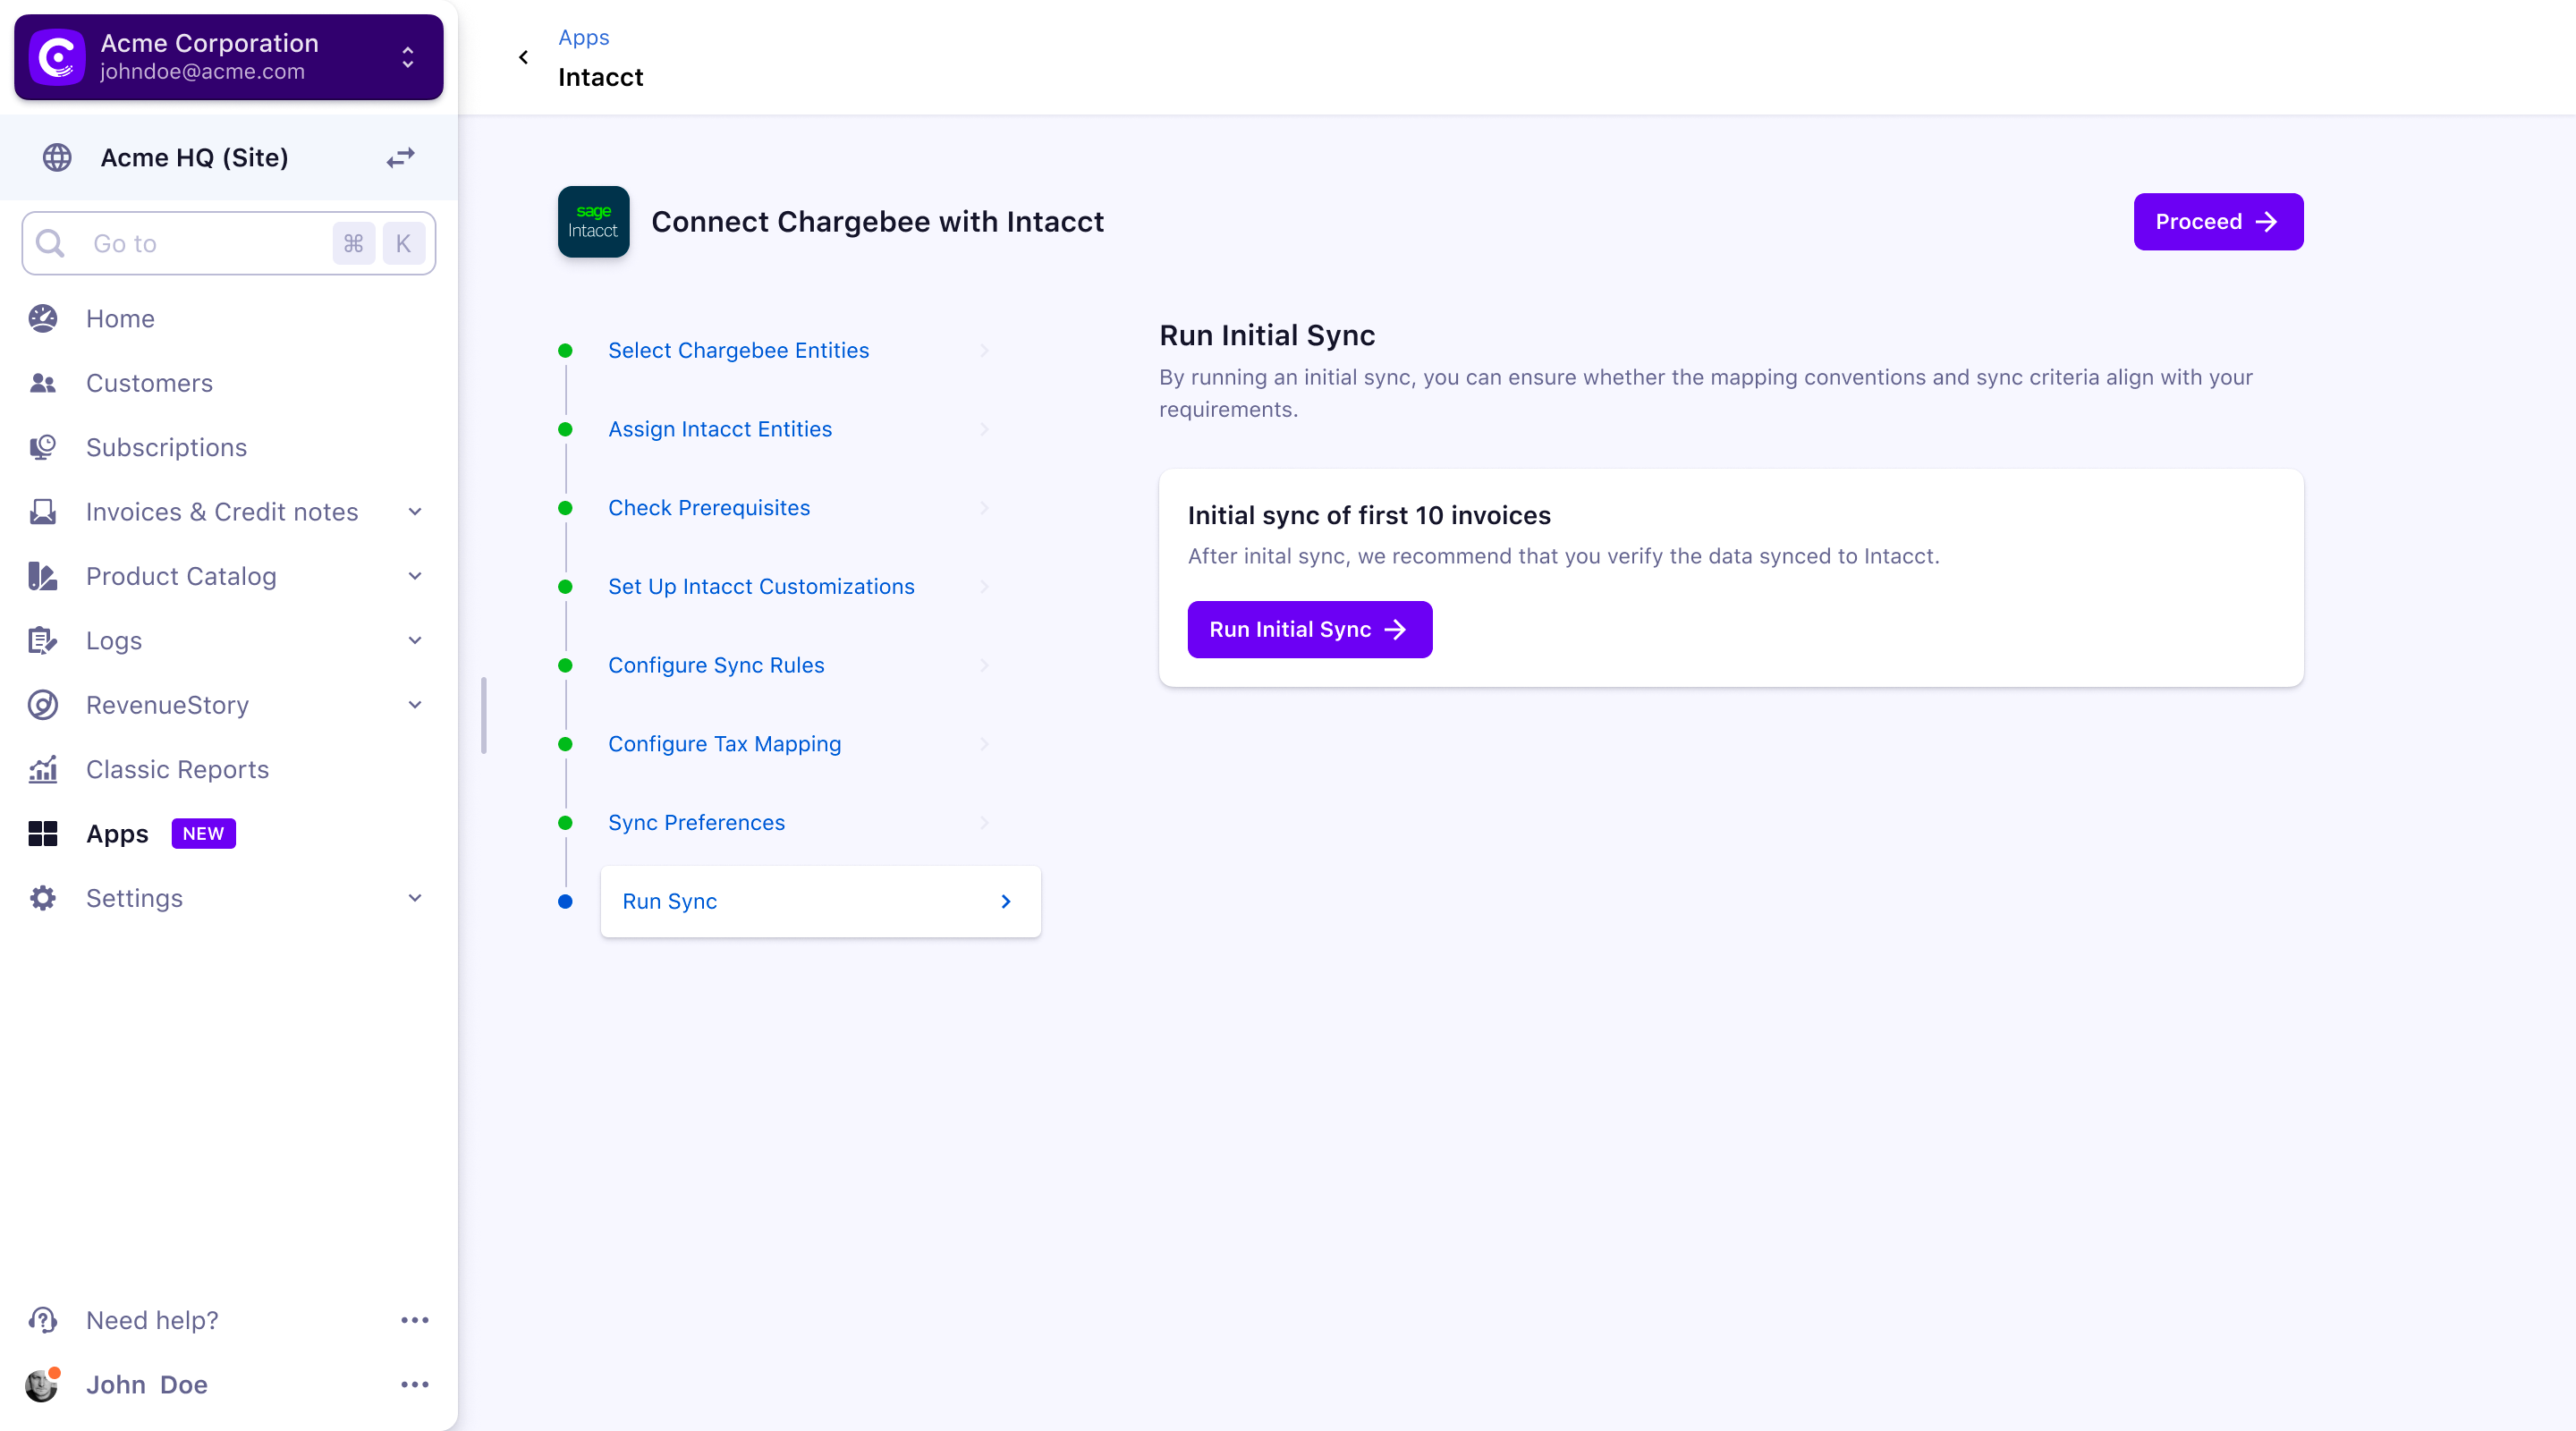
We recommend that you review these invoices in Intacct. If the sync works as expected, you can click the Sync All Records option and proceed.

The Intacct setup is now complete.
Was this article helpful?