You are viewing:
Product Catalog 2.0
Setting up Facebook Pixel Tracking if I'm using Chargebee Checkout (V3)
Tracking Pixels are 1 x 1-pixel images that lets you track the actions of your visitors on your website and measure the conversion.
To set this up, you need to:
-
Setup Facebook Pixel Tracking on your website
-
Enable Facebook Pixel Tracking in Chargebee
Step 1: Setup Facebook Pixel Tracking on your website
-
Log in to your business account on Facebook and navigate to the Pixel tab under Event Manager
-
Click Create a Pixel
-
Fill in information about the pixel and click Create
-
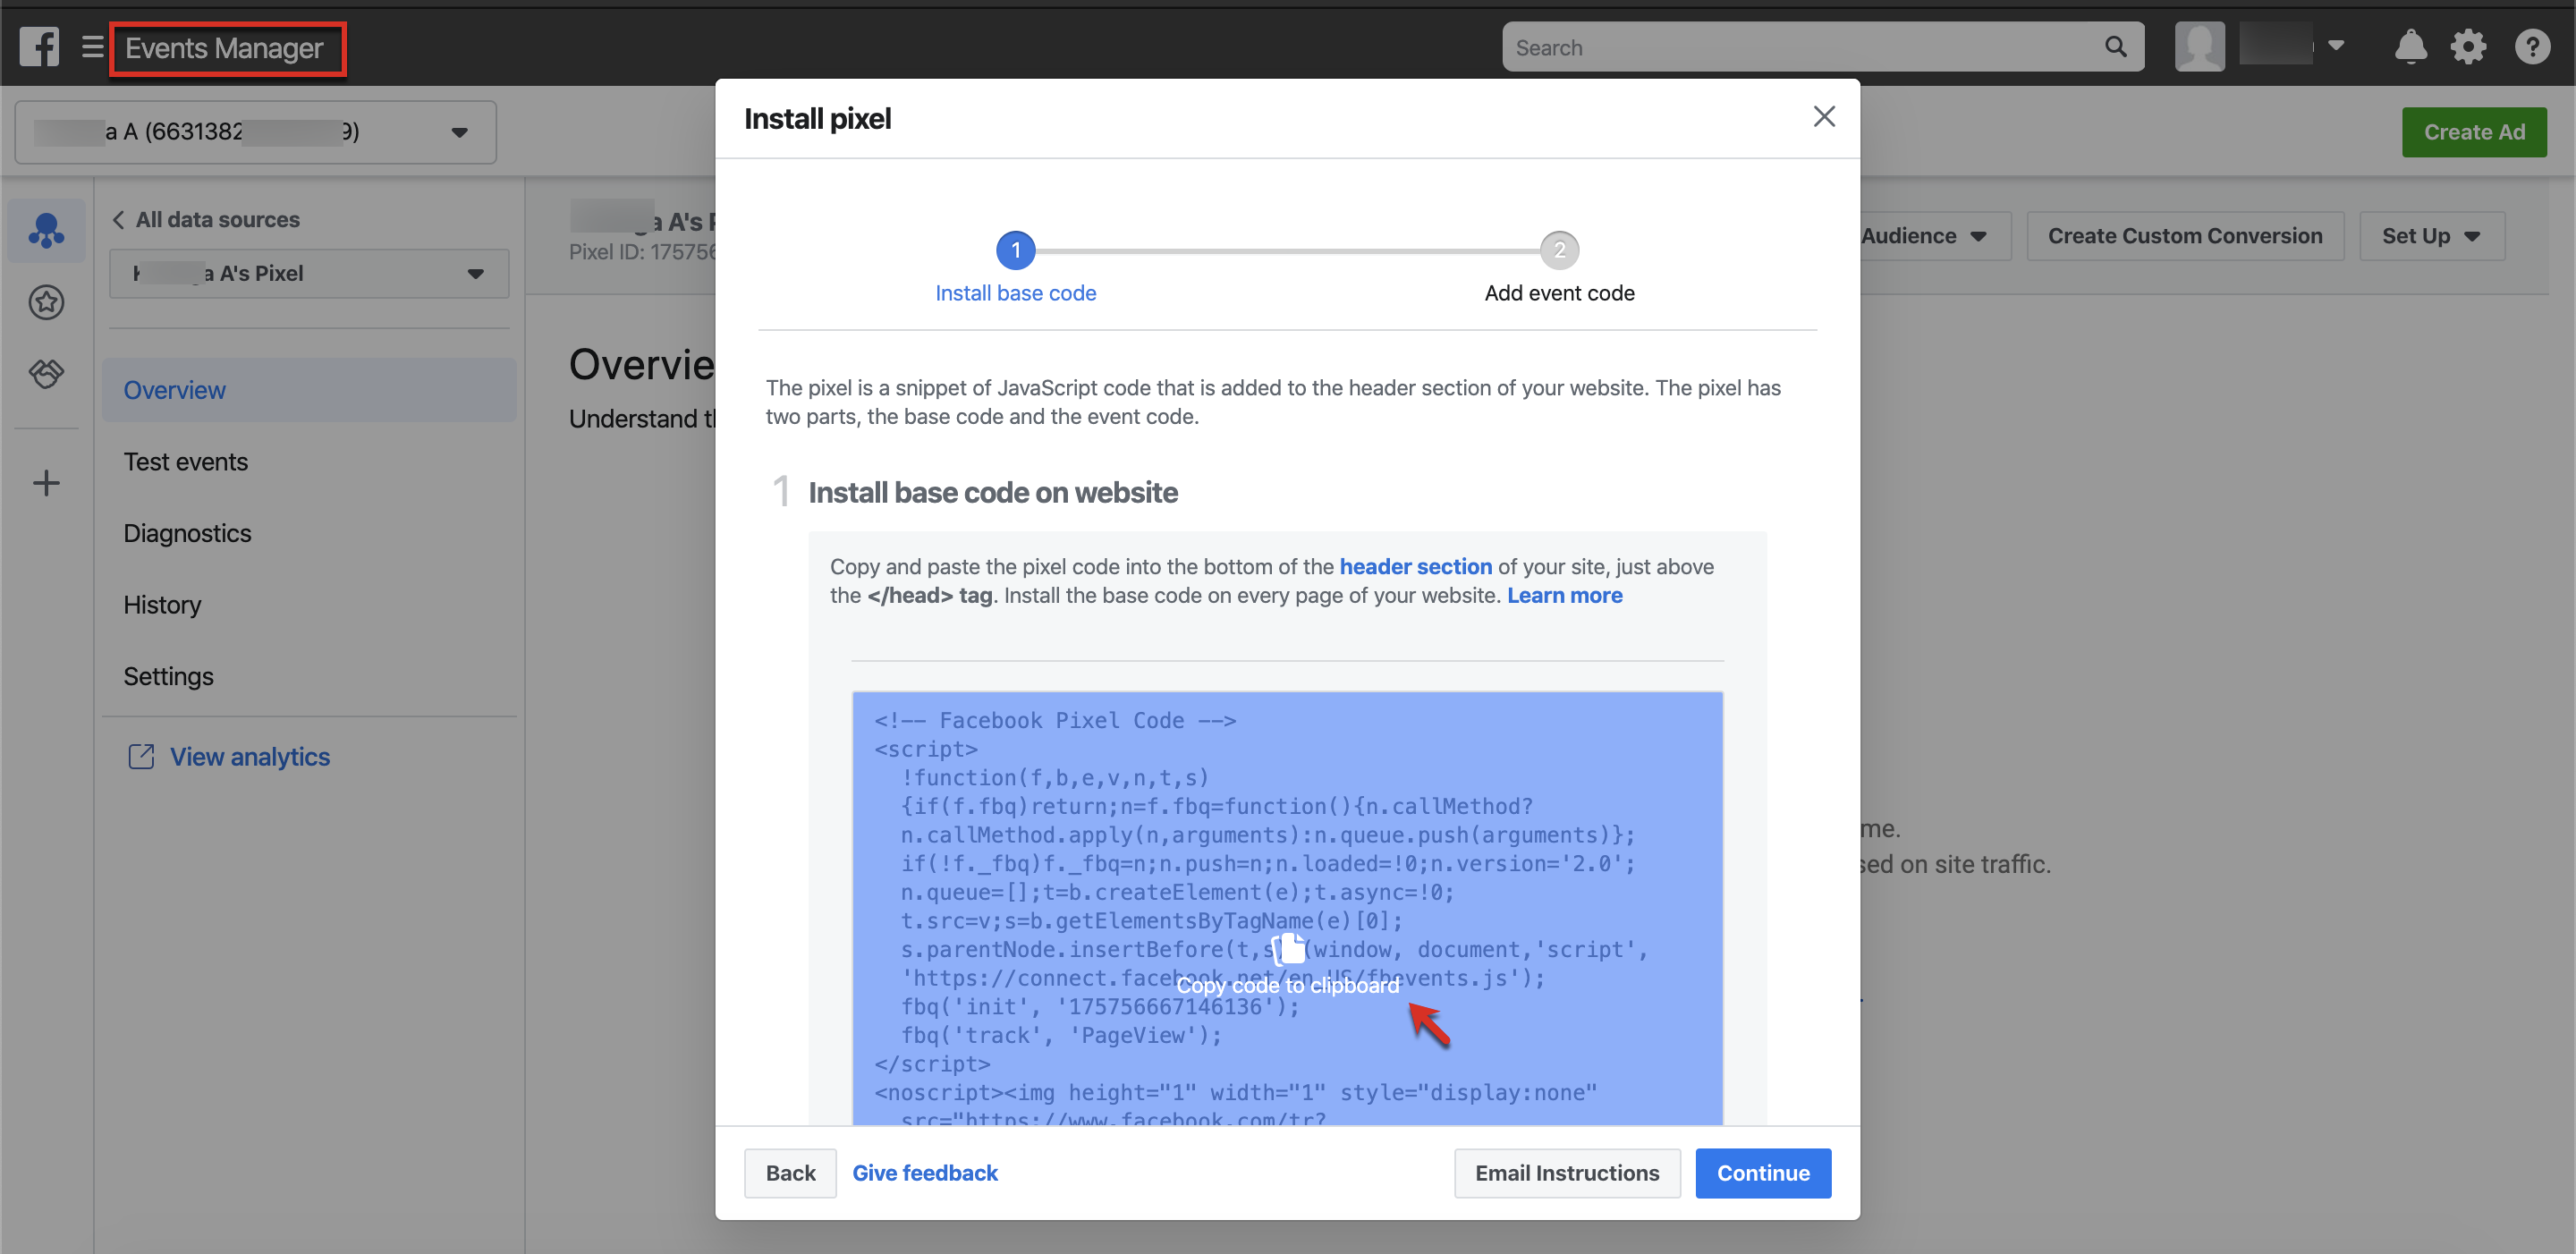
In the pop-up window that follows, choose the option Manually Install Code Yourself

-
The subsequent screen will give you the code you need to integrate with your business website. Here's how it's done:
-
Locate the header section in your webpage code (
tags)
-
Copy the pixel code from Facebook and paste it within the header
-
Step 2: Enable Facebook Pixel Tracking in Chargebee
In Checkout v3, you can enable Facebook Pixel Tracking following one of these approaches:
- If you are using Drop-in Checkout
-
Go to Setting → Configure Chargebee -→ Checkout & Self Serve Portal → Advanced Settings
-
Add your site domain in the whitelisted domains section
-
In drop-in header script, include the data-cb-fbq-enabled="true" attribute
Sample:
https://js.chargebee.com/v2/chargebee.js " data-cb-site="your-site" data-cb-fbq-enabled="true">
- If you have integrated via Chargebee Checkout API
-
Go to Setting → Checkout & Self Serve Portal → Advanced Settings
-
Add your site domain in the whitelisted domains section
-
While initializing Chargebee instance, pass the enableFBQTracking parameter with value as true
Sample:
  var chargebeeInstance = Chargebee.init({

    site: "your-site",

    enableFBQTracking: true

  });

});
Related Articles
Show more
Was this article helpful?