Apple App Store
The Apple App Store integration helps you record in-app subscription purchases made on the Apple app store using Storekit 2.0 in Chargebee and maintain the subscription state in Chargebee by listening to Apple server notifications.
What You Need to Know
- To monetize digital products/services on your app, you can use the in-app purchases solution offered by the Apple App Store. For detailed guidance on various business models offered by the App Store, visit this page.
- Since in-app purchases are made on the Apple App Store and the subscription state is managed by Apple, Chargebee's billing engine doesn't control these subscriptions.
- The omnichannel solution offered by Chargebee helps you record the in-app subscription purchases made on the Apple App Store using Storekit 2.0 in Chargebee.
- Upon successful purchase recording, an Omnichannel subscription is created in Chargebee, which is managed through Apple server notifications.
- We recommend reviewing the Omnichannel subscriptions page to understand the solution, its benefits, and its limitations.
- If you use different app user accounts on the same device but share the same Apple ID to purchase subscription plans within the same subscription group, Apple treats this as an upgrade or downgrade, not a new purchase. Chargebee also upgrades or downgrades the corresponding omnichannel subscription and ignores the Record a Purchase API request because the subscription already exists in Chargebee.
- To test new purchases from the same device, create different Apple sandbox accounts and sign in with those accounts. You may also need to delete and reinstall your app to clear the purchase history associated with a sandbox account.
- Ensure that the prerequisites are completed before attempting to record a purchase in Chargebee. Ensure that Chargebee's notifications URL is configured in App Store Connect or in your backend so that Chargebee can maintain the subscription state by listening to Apple notifications.
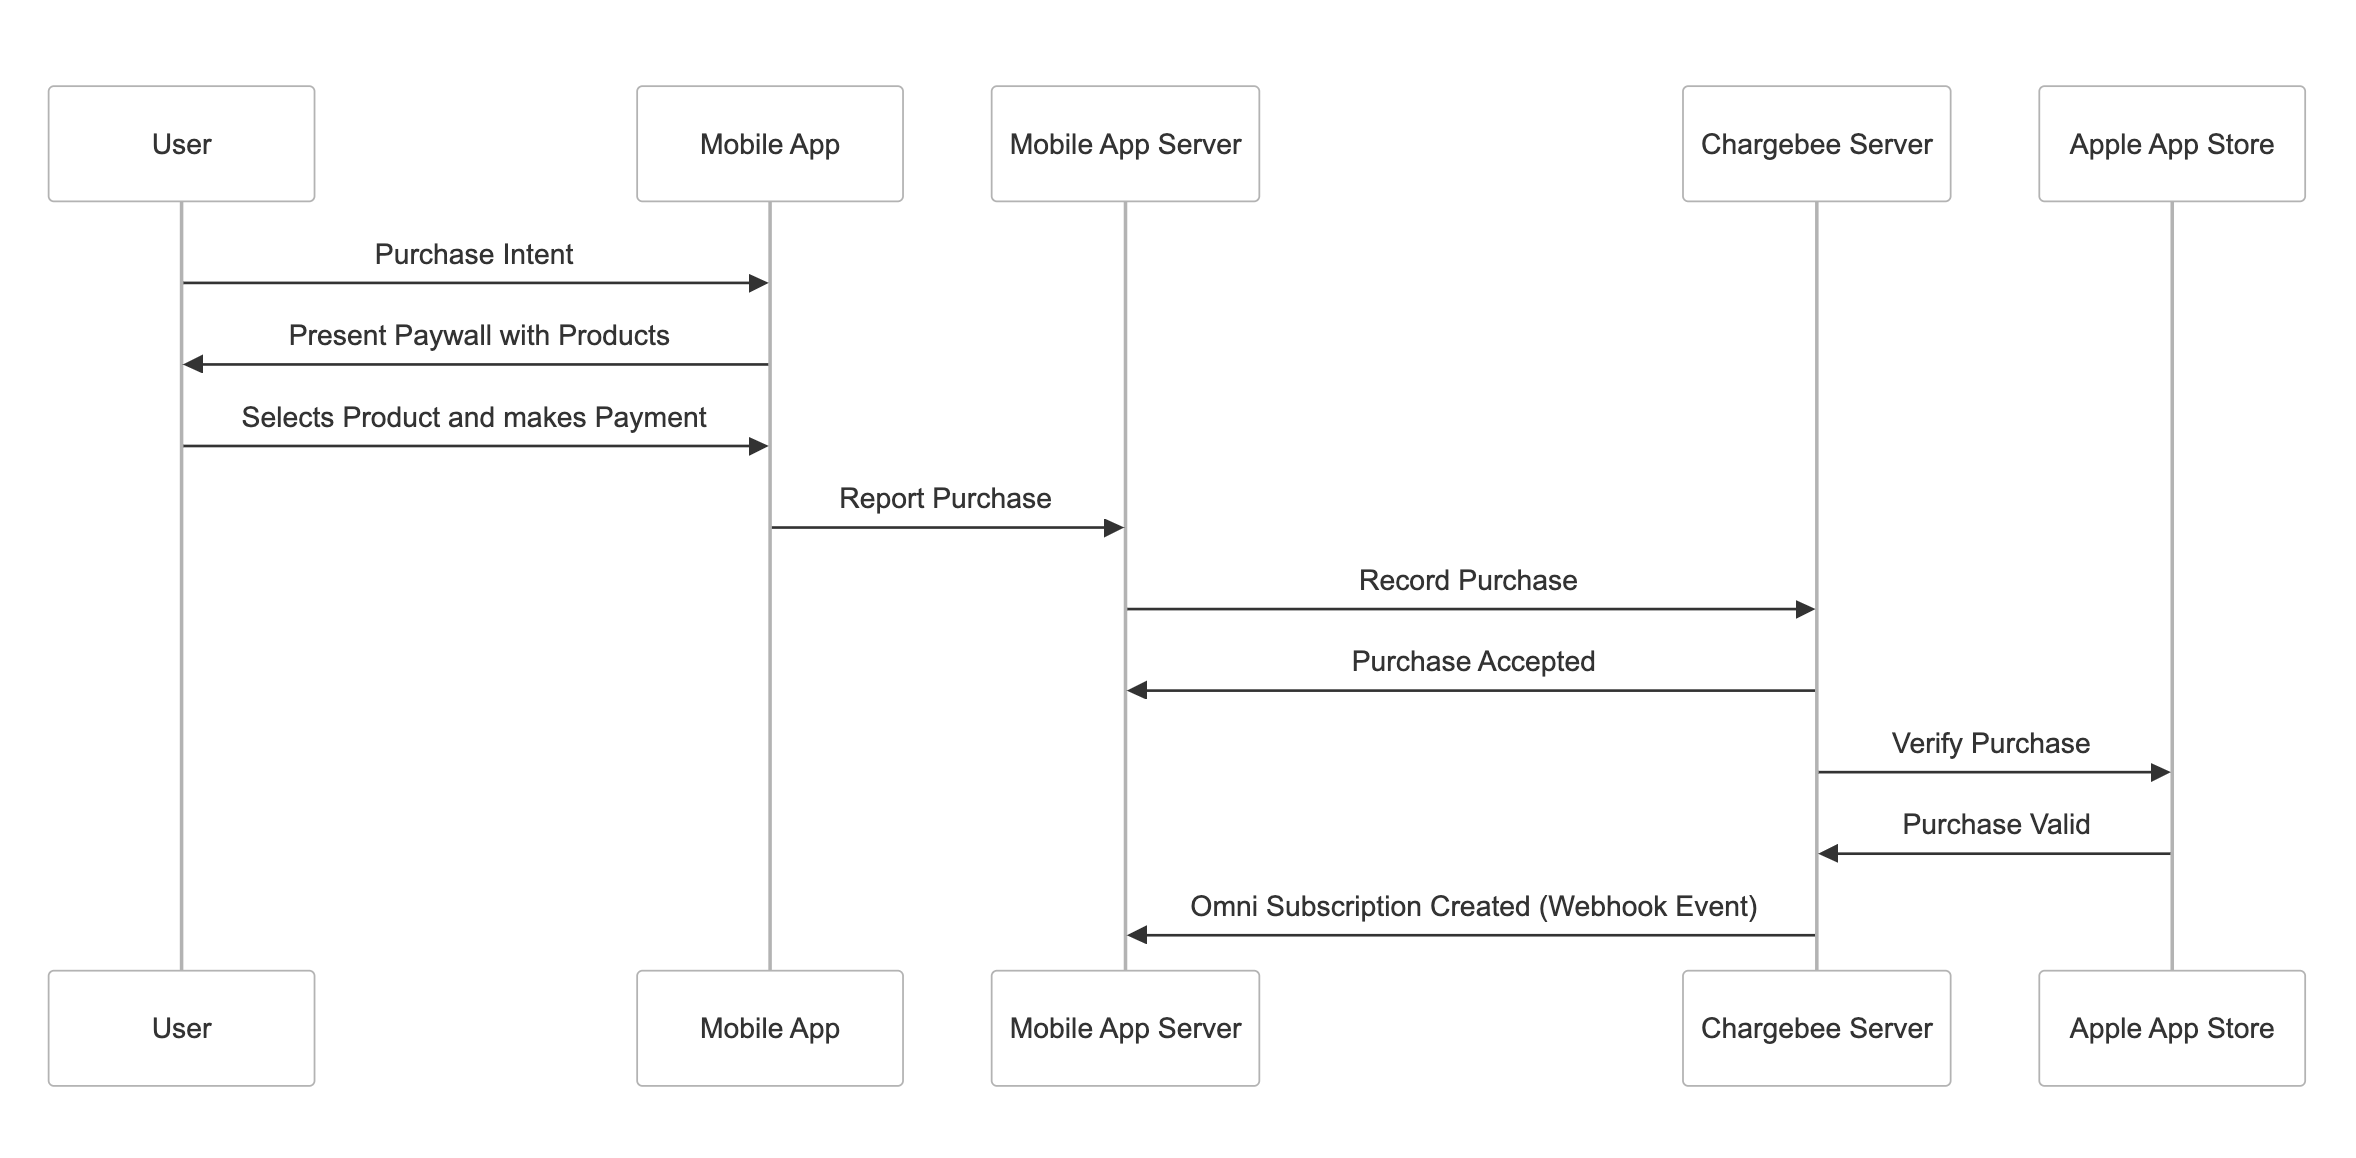
- Refer to the web sequence diagram here to understand the purchase journey.
What You Need to Know if you are using mobile subscriptions legacy solution
If you are using the Apple App Store integration offered by the mobile subscriptions legacy solution, review the key points below to understand how both legacy and new solutions can be enabled on the same Chargebee site.
-
The Apple App Store integration of the mobile subscriptions legacy solution and the new Omnichannel solution can coexist in the same Chargebee site. All you need to do is connect your apps again to the same Chargebee site using the new solution as described here. You will see both the legacy and new solutions under the Apps section in the Chargebee site once the apps are connected.

-
You do not need to make any changes to your mobile SDK implementation or backend to capture subscriptions in the new system. When a subscription is created in the legacy solution using the purchase method of the SDK or process purchase command API, the corresponding subscription will be auto-created in the new Omnichannel solution. Thus, there is no need to implement the Omnichannel APIs using the App ID generated in the new system.
-
You do not need to configure the Notifications URL generated by the new solution in the App Store Connect account. Chargebee will listen to the notifications in the old system and automatically consume these notifications in the new system.
-
At the customer level, you can view the subscription created through the legacy solution and also the link to view the corresponding Omnichannel subscription in the new system.
Prerequisites
These are the steps that you need to complete to make your app ready for in-app purchases.
Configure in-app purchase products
Configure the products that your app merchandises in App Store Connect. Learn more about configuring in-app purchase products in App Store Connect. If you are a developer building a test app with sample in-app subscription products, you can configure the products in the StoreKit configuration file.
Implement in-app purchases using Storekit 2.0
Apple's Storekit 2.0 framework offers the entire set of Swift APIs that help you retrieve the in-app purchase products configured in Apple App Store Connect, make a purchase using the purchase method, keep track of the purchase using the account token, and get the purchase and verification result.
Since Storekit 2.0 does the transaction verification, no additional server verification is needed. So, every time your app receives a transaction from Storekit 2, the transaction has passed through the verification process, and thus, you can grant access to the paid content to the end user.
Go through this WWDC link and Apple developer guide to implement the purchase flow in your app. For every transaction made using the Storekit 2.0 framework, Apple will return a signed JSON Web Signature (JWS) token. The transaction type contains the signed JWS payload which represents the signed transaction. You need to pass this signed transaction to Chargebee to record the purchase in Chargebee.
Create an Omnichannel subscription for in-app purchases
Once you have an active Chargebee test or live site, follow these steps to start recording in-app subscription purchases in Chargebee.
Connect Apple App to Chargebee to generate unique App ID & Notifications URL
Connect your apps listed in the Apple App Store to Chargebee to record and manage your Apple App Store subscriptions through Chargebee. Once your app is connected, Chargebee will generate a unique App ID that can be used for recording purchases and a unique Notifications URL that can be used to relay the Apple in-app subscription state change events to Chargebee.
To connect your app with Chargebee, follow the steps:
-
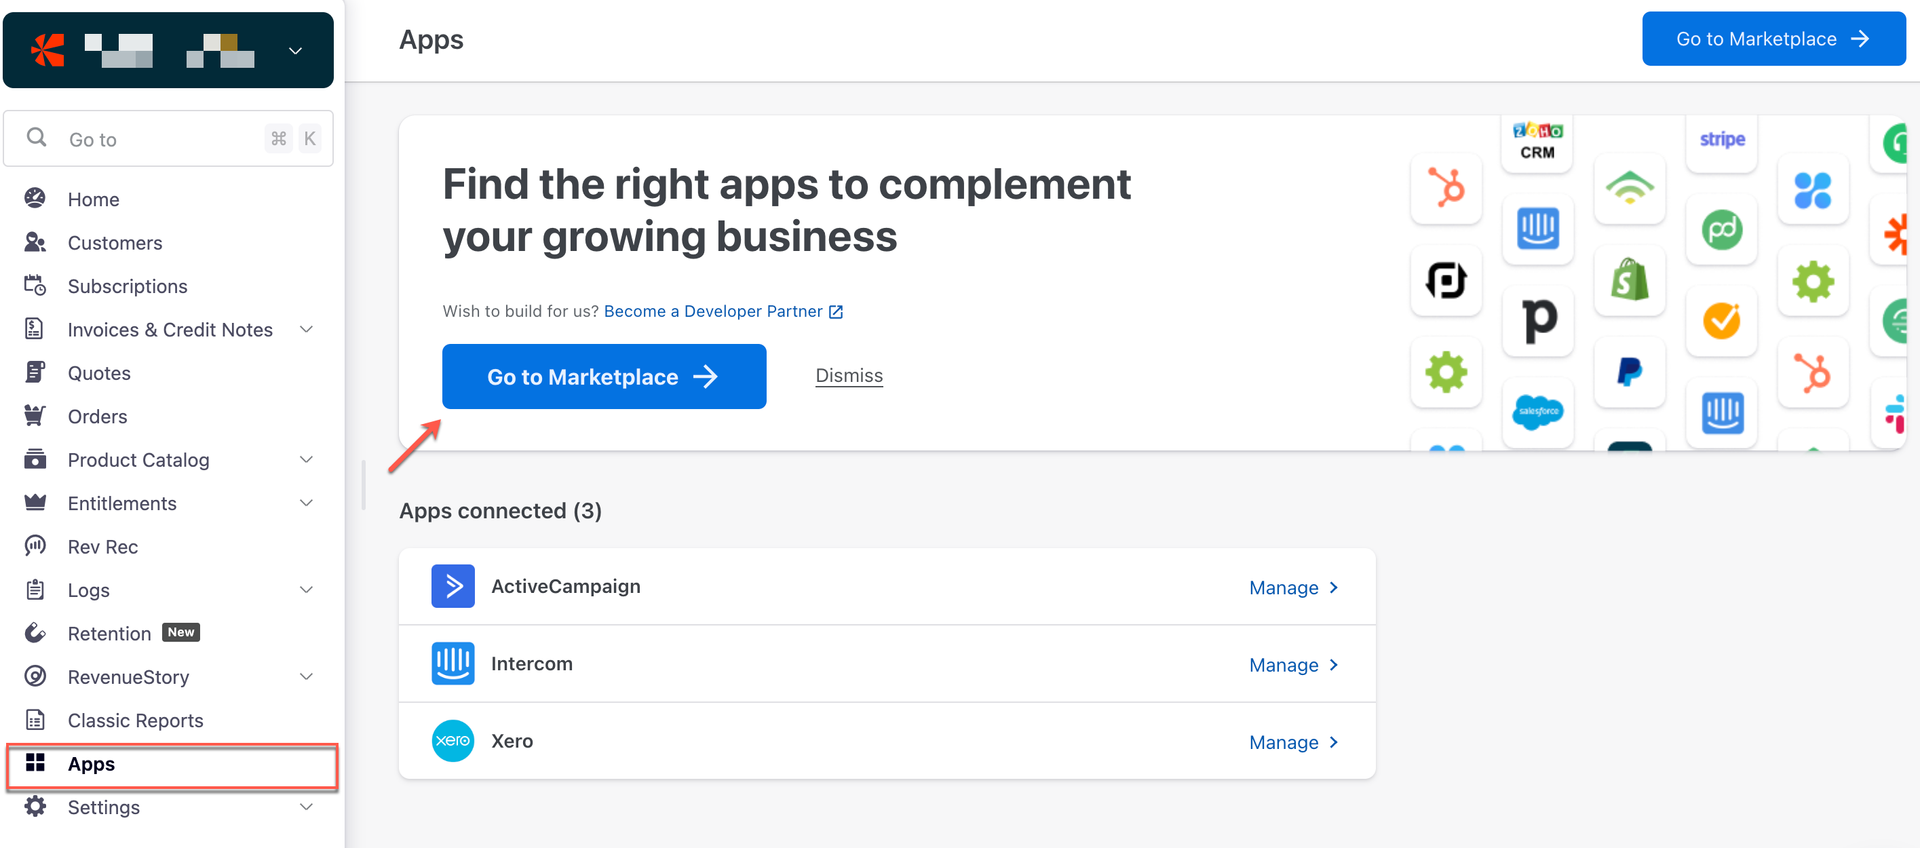
Login to your Chargebee site and navigate to Apps on the left menu. Click Go to Marketplace.
-
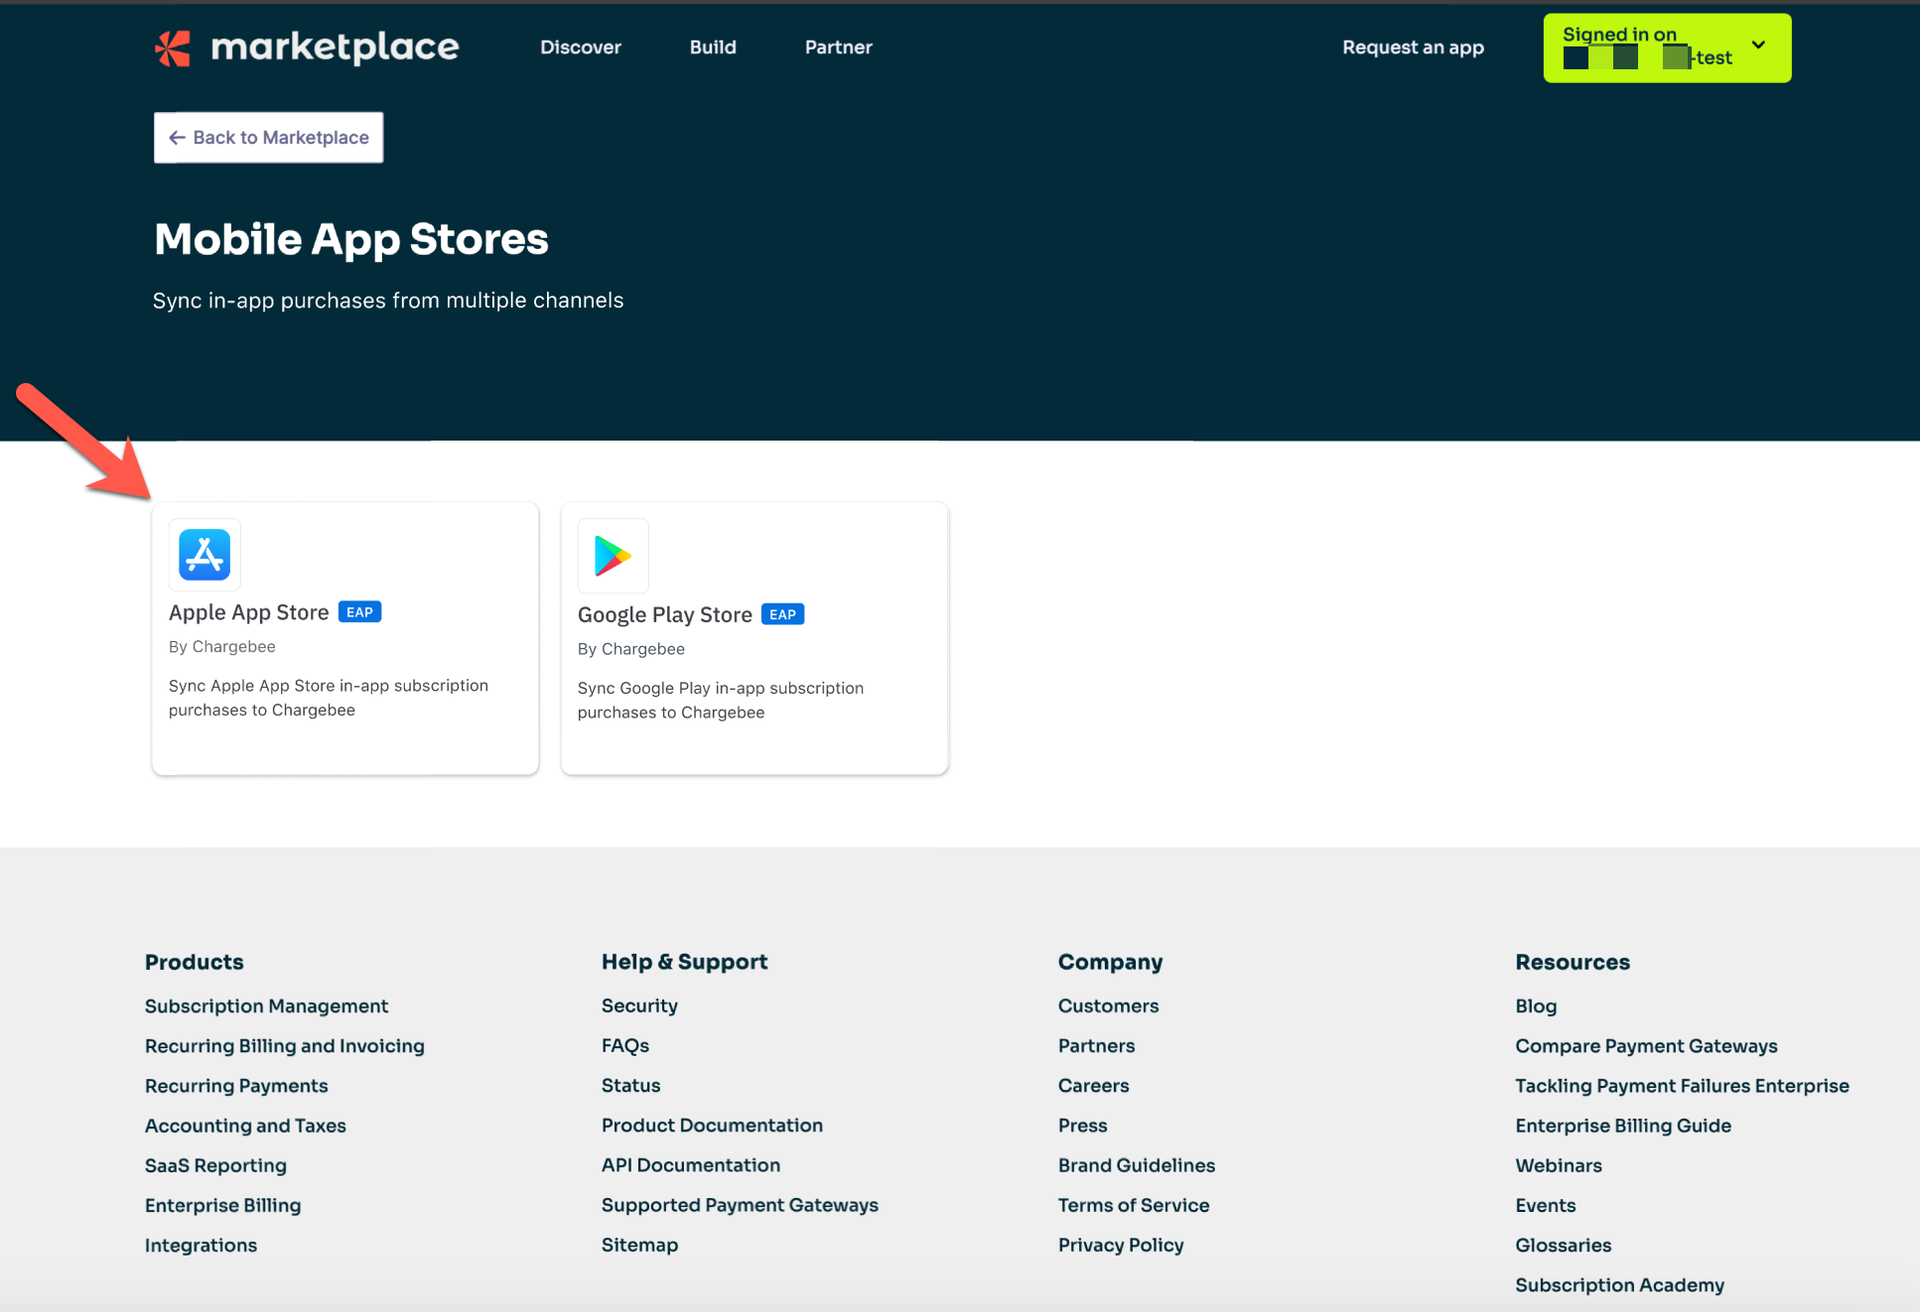
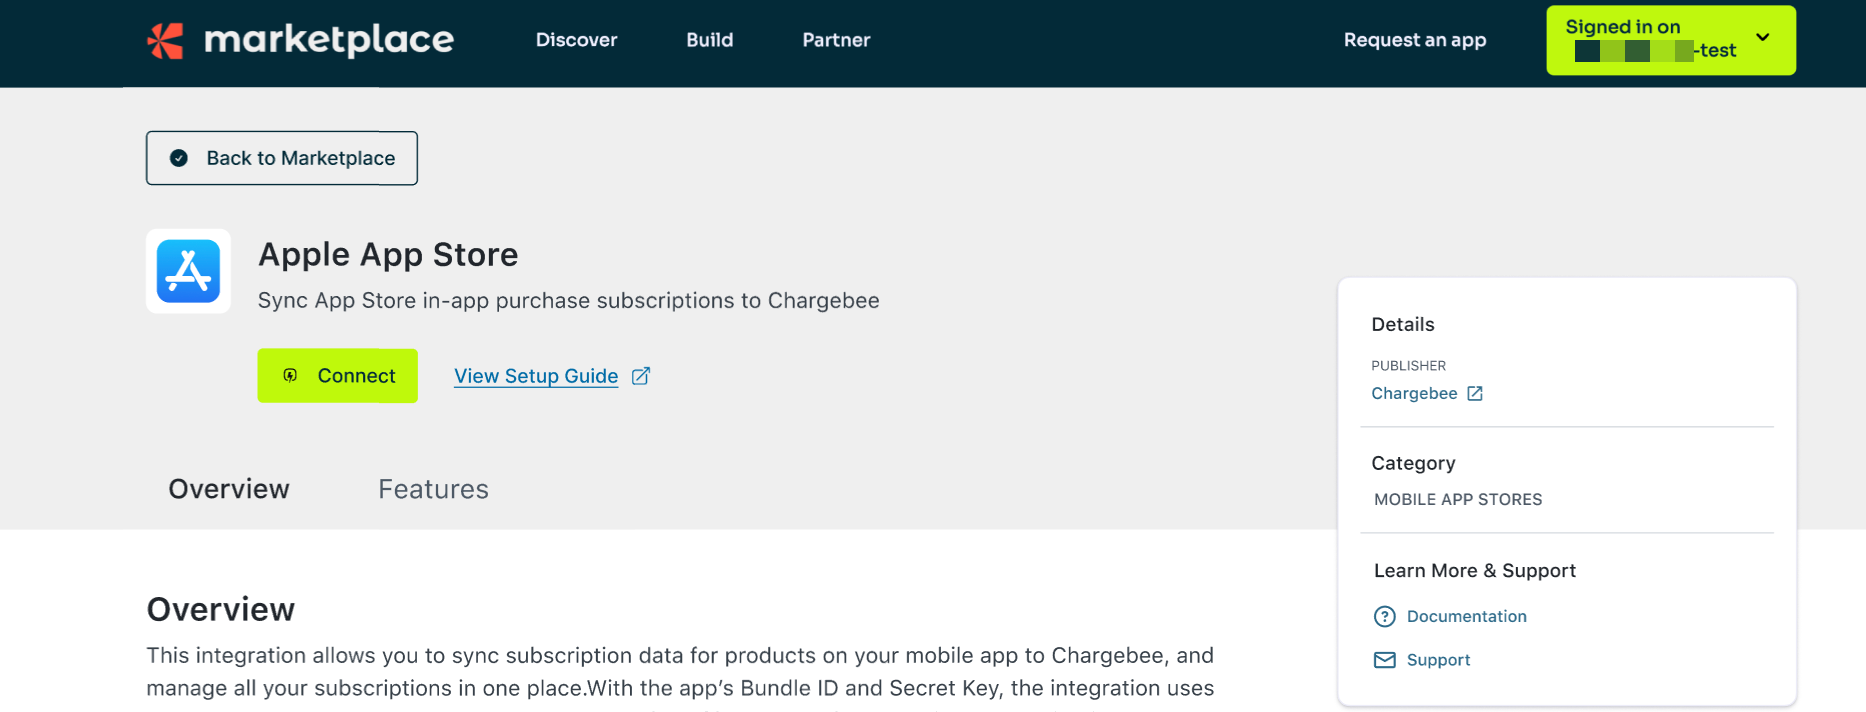
Click Mobile App Store > Apple App Store
-
Click Connect and Proceed.
-
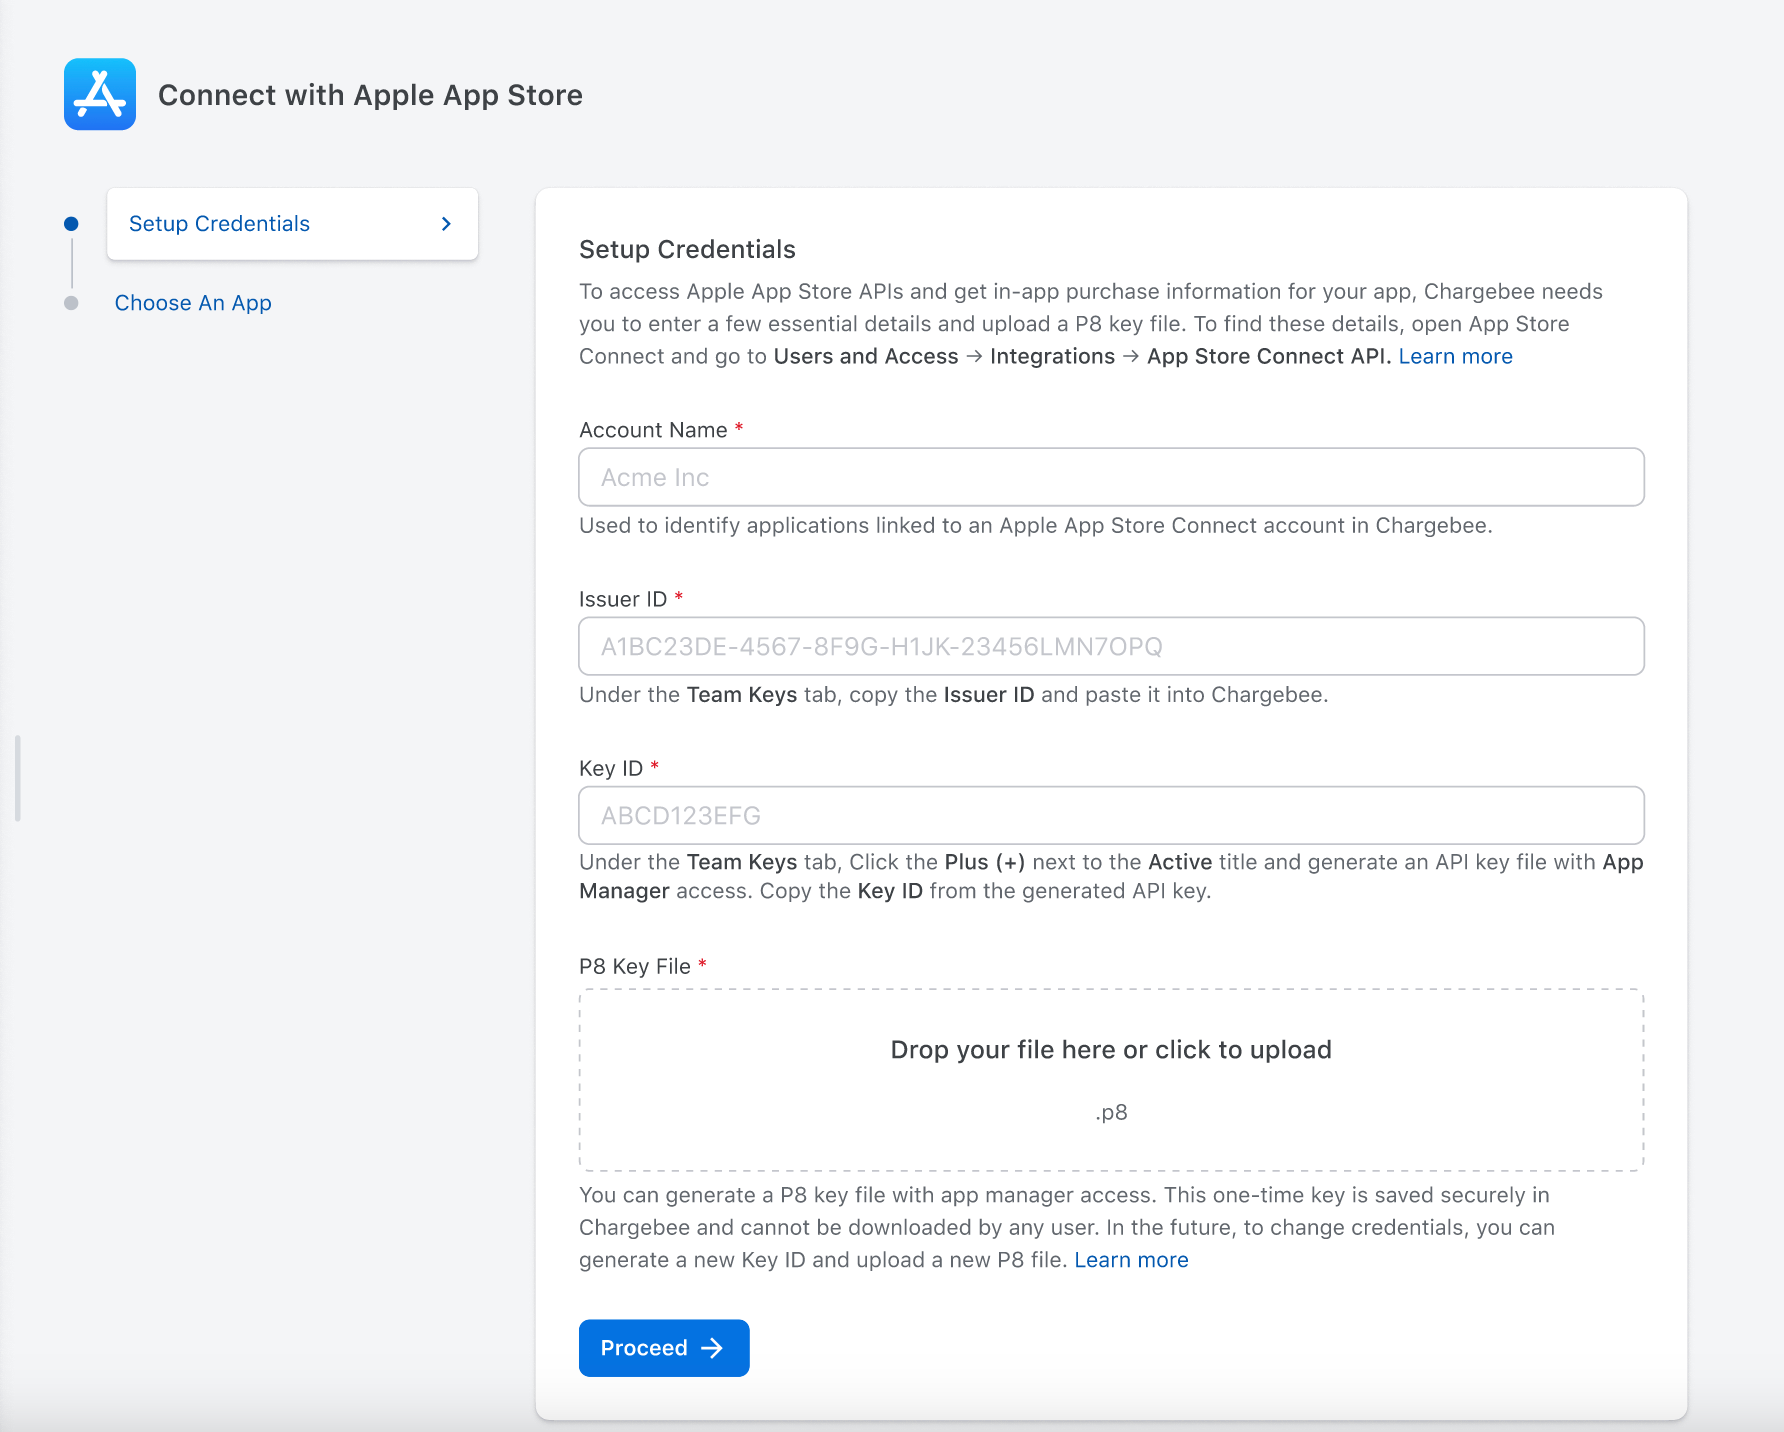
Enter Setup Credentials and click Proceed. To access Apple App Store APIs, Chargebee needs you to set up the credentials below. To find these details, open App Store Connect and go to Users and Access > Integrations > App Store Connect API.
- Account Name: This is the display name for your Apple App Store account on the Chargebee site. You can choose to give any name here, such as Acme Inc.
- Issuer ID: Get this ID from the Team Keys tab in App Store Connect.
- Key ID: Get this ID from the Team Keys tab. Click the Plus (+) next to the Active title to generate an API key file with App Manager access. Copy the Key ID from the generated API key and paste it here.
- P8 Key File: Generate a P8 key file with app manager access. This one-time key is saved securely in Chargebee and cannot be downloaded by any user. In the future, to change credentials, you can generate a new Key ID and upload a new P8 file. Learn more.
-
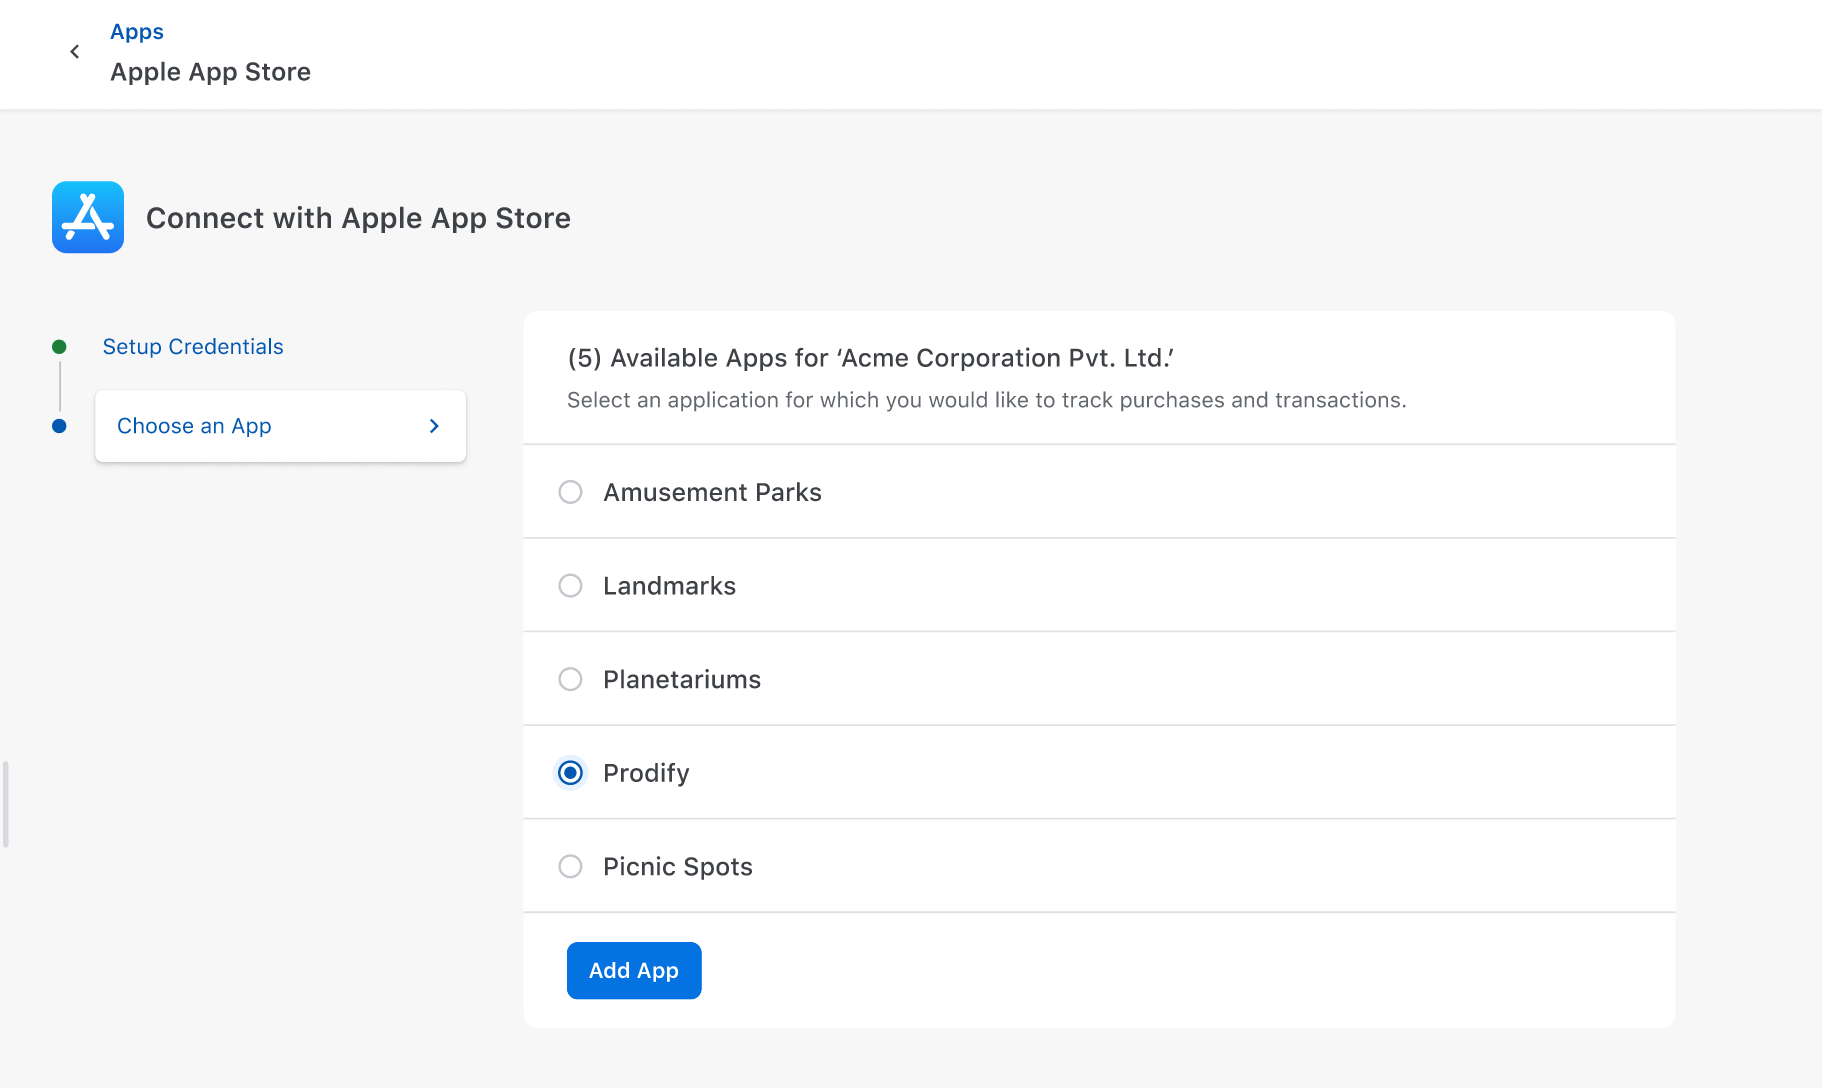
In the Choose an App section, select the application that you want to add. Click Add App.
-
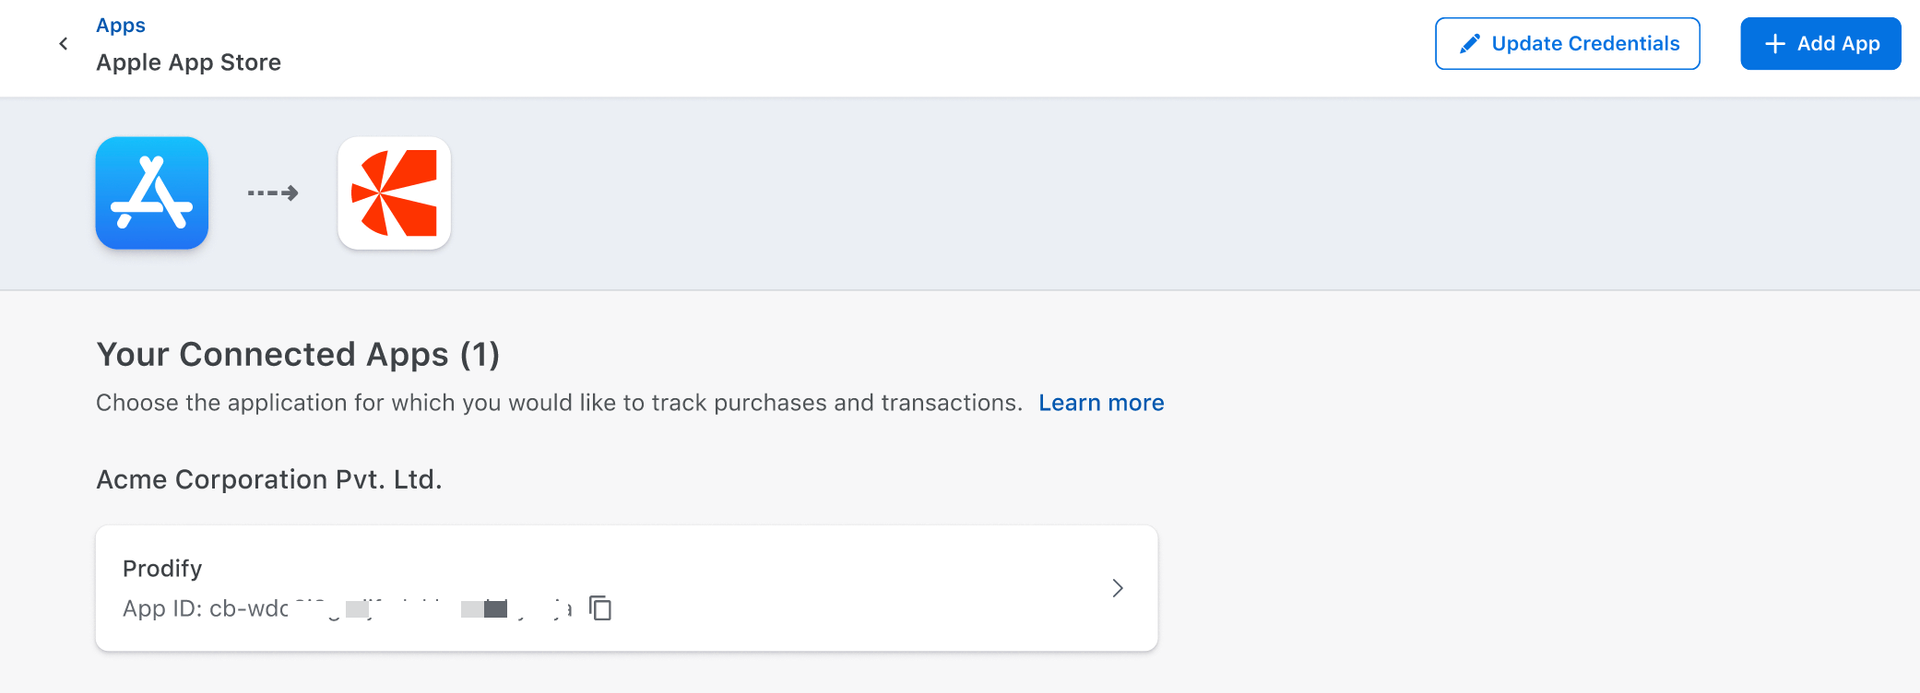
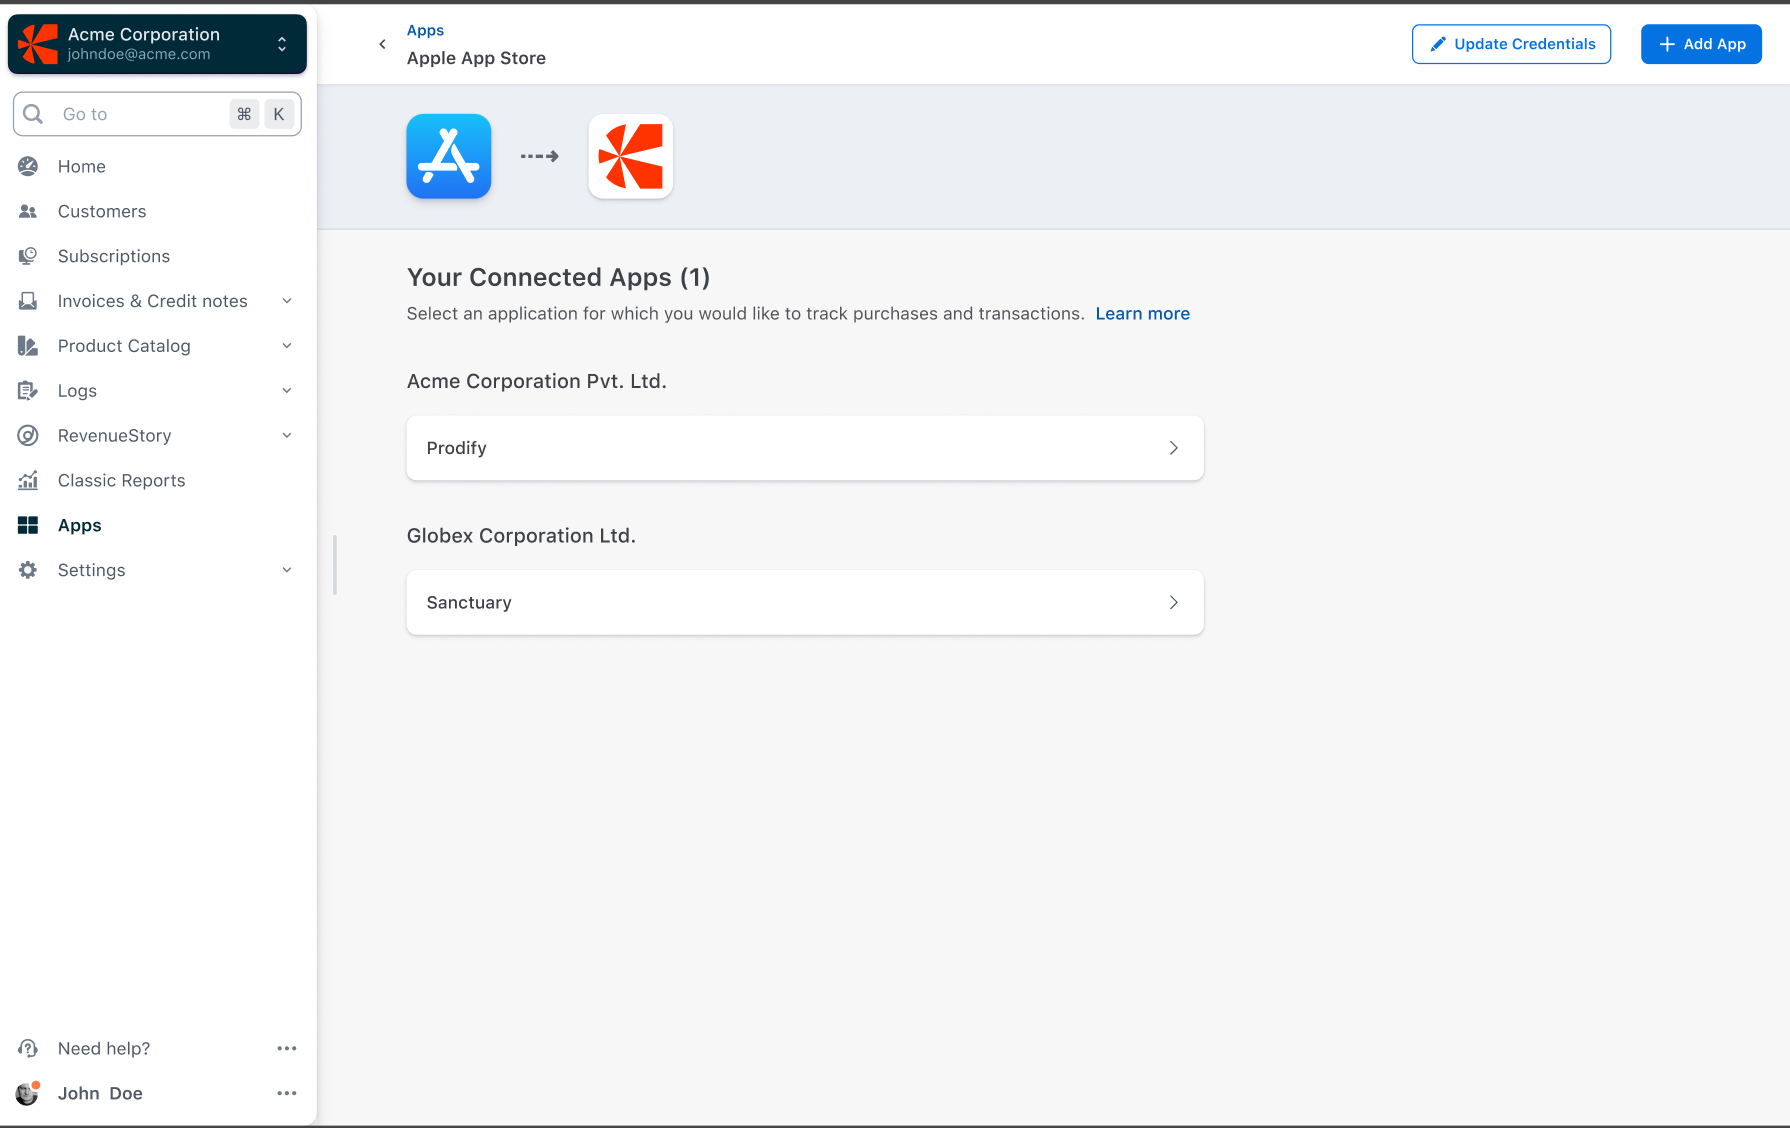
View the newly connected app on the Apps page under the Your Connected Apps section. Click Add App to connect another app to Chargebee. If you want to modify the credentials of your Apple App Store in Chargebee, click Update Credentials.
-
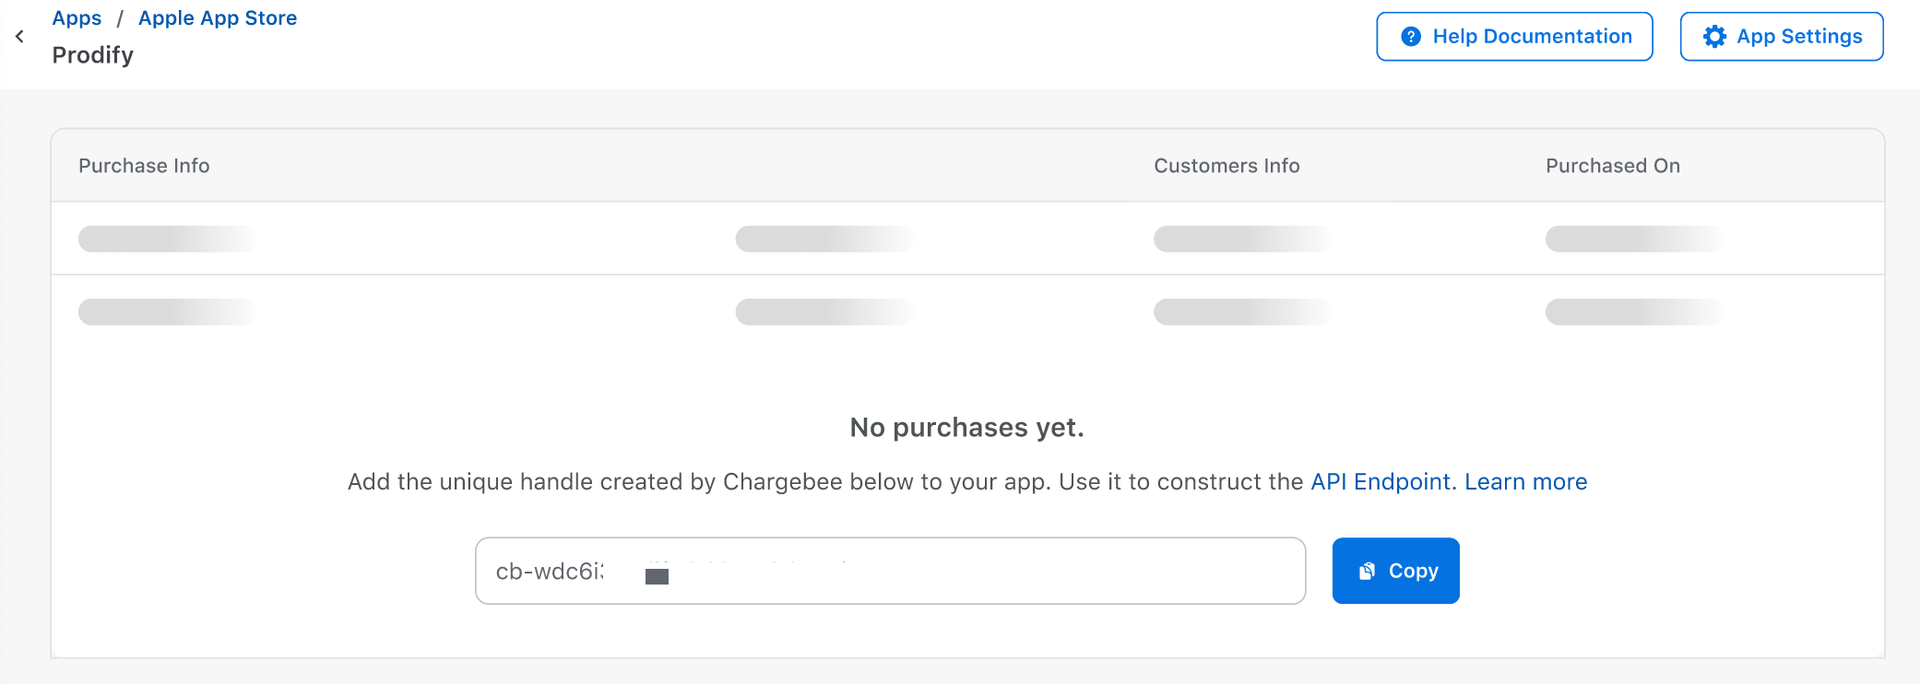
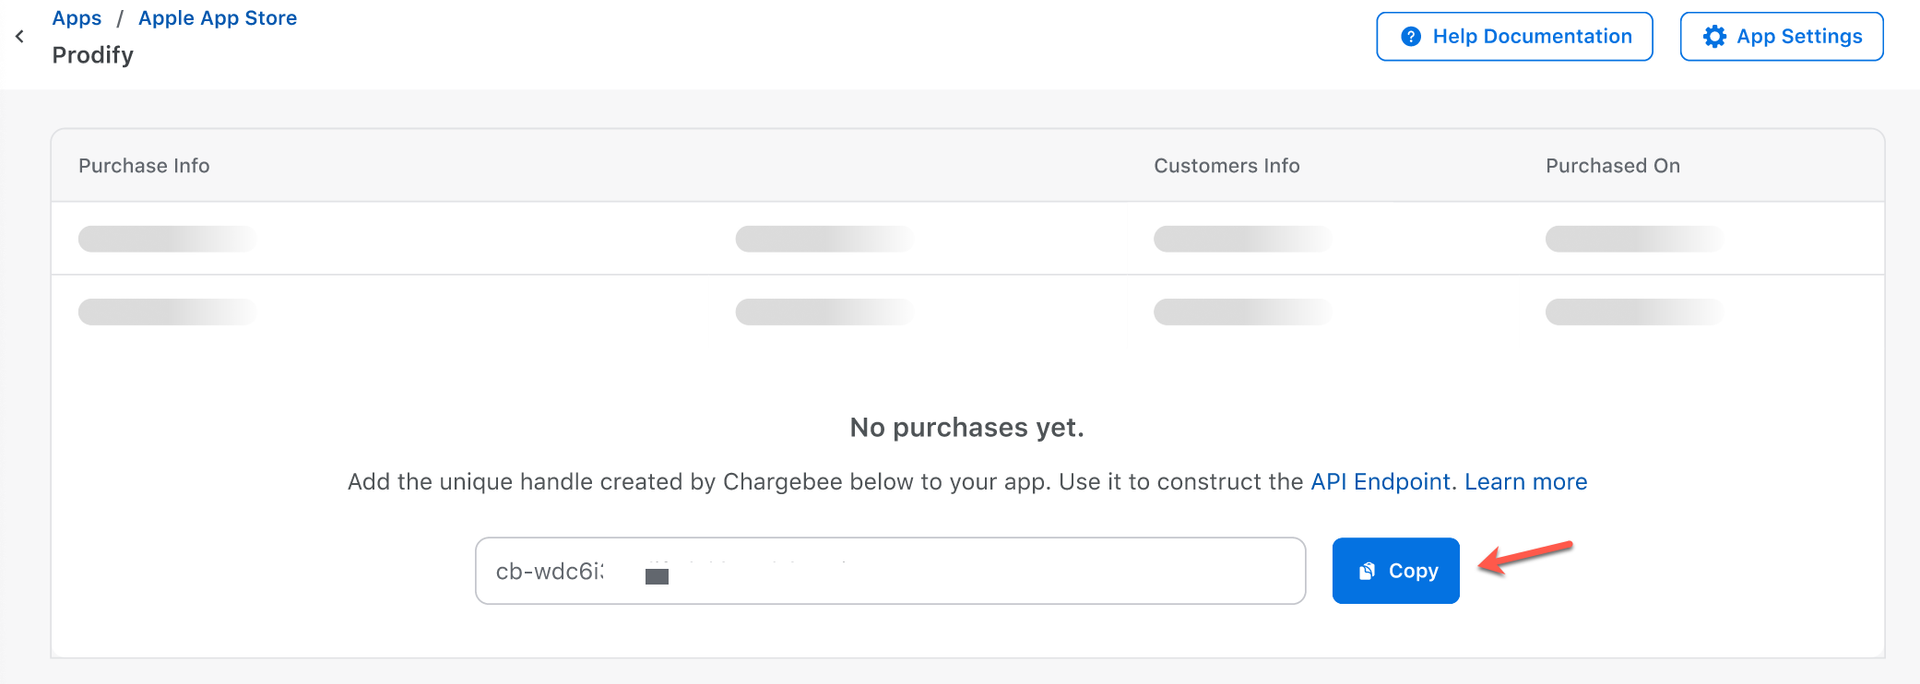
Once you have successfully connected your App to Chargebee, click on your connected App to land on the Purchase info page. Since no purchases are made, this page will be blank.
-
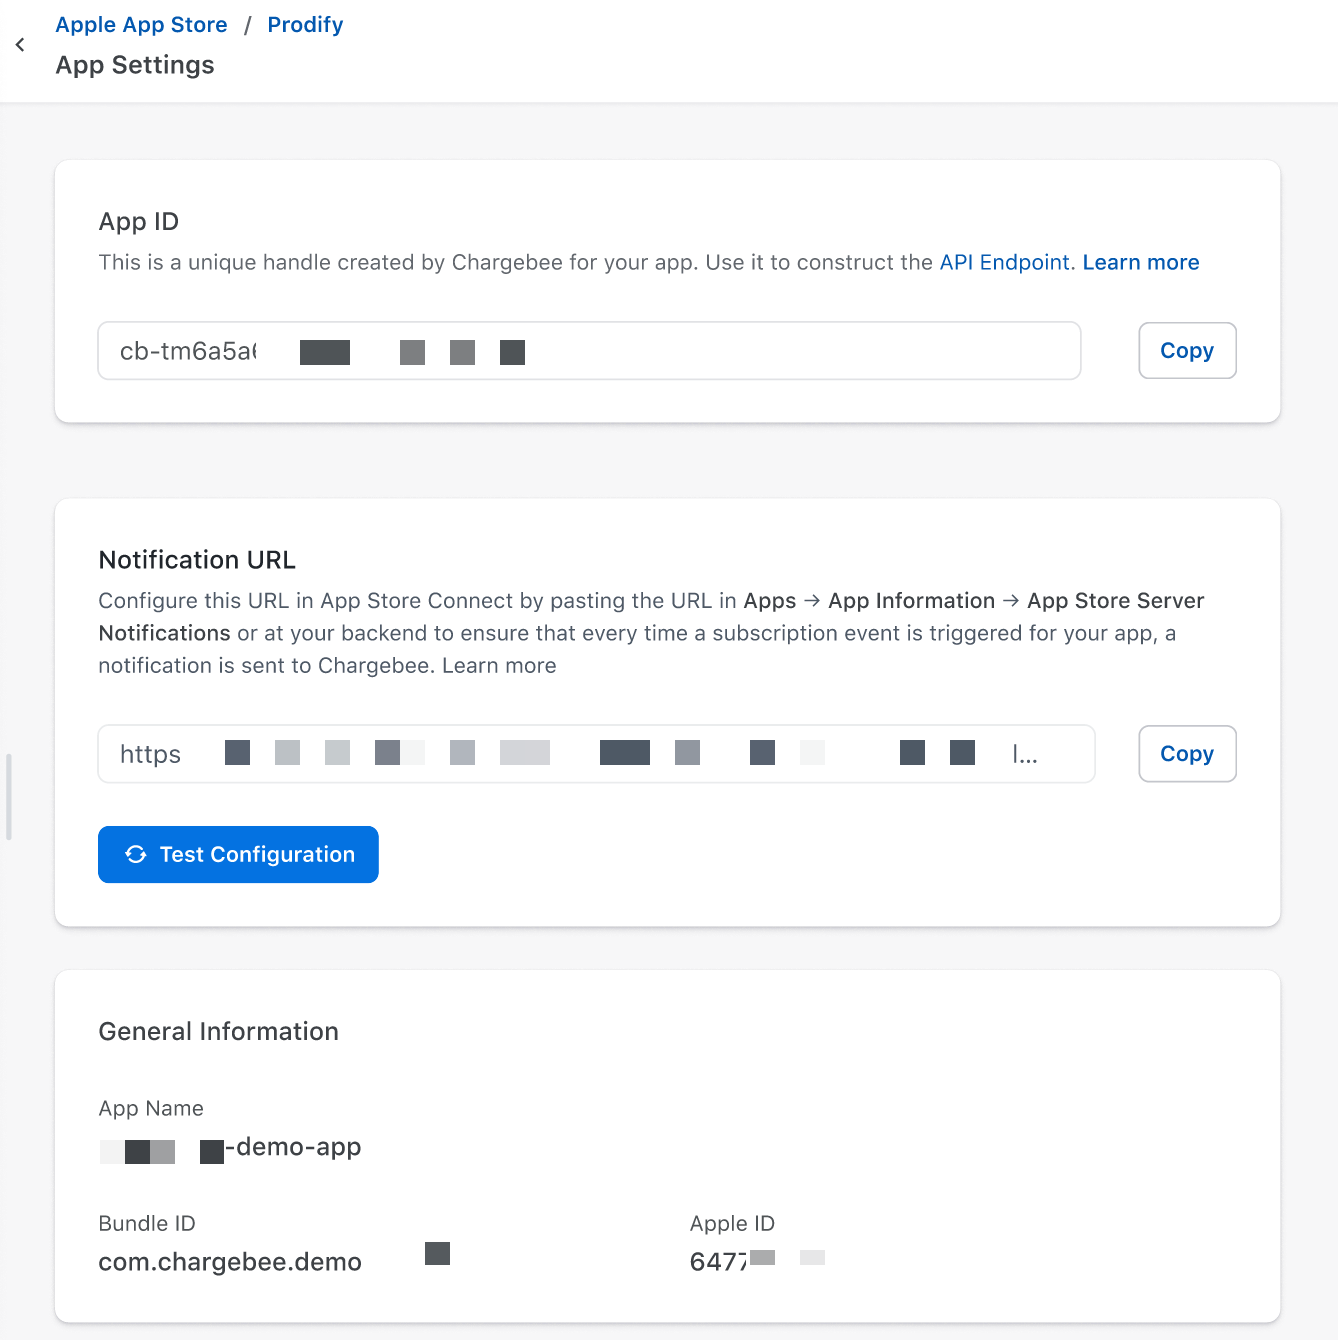
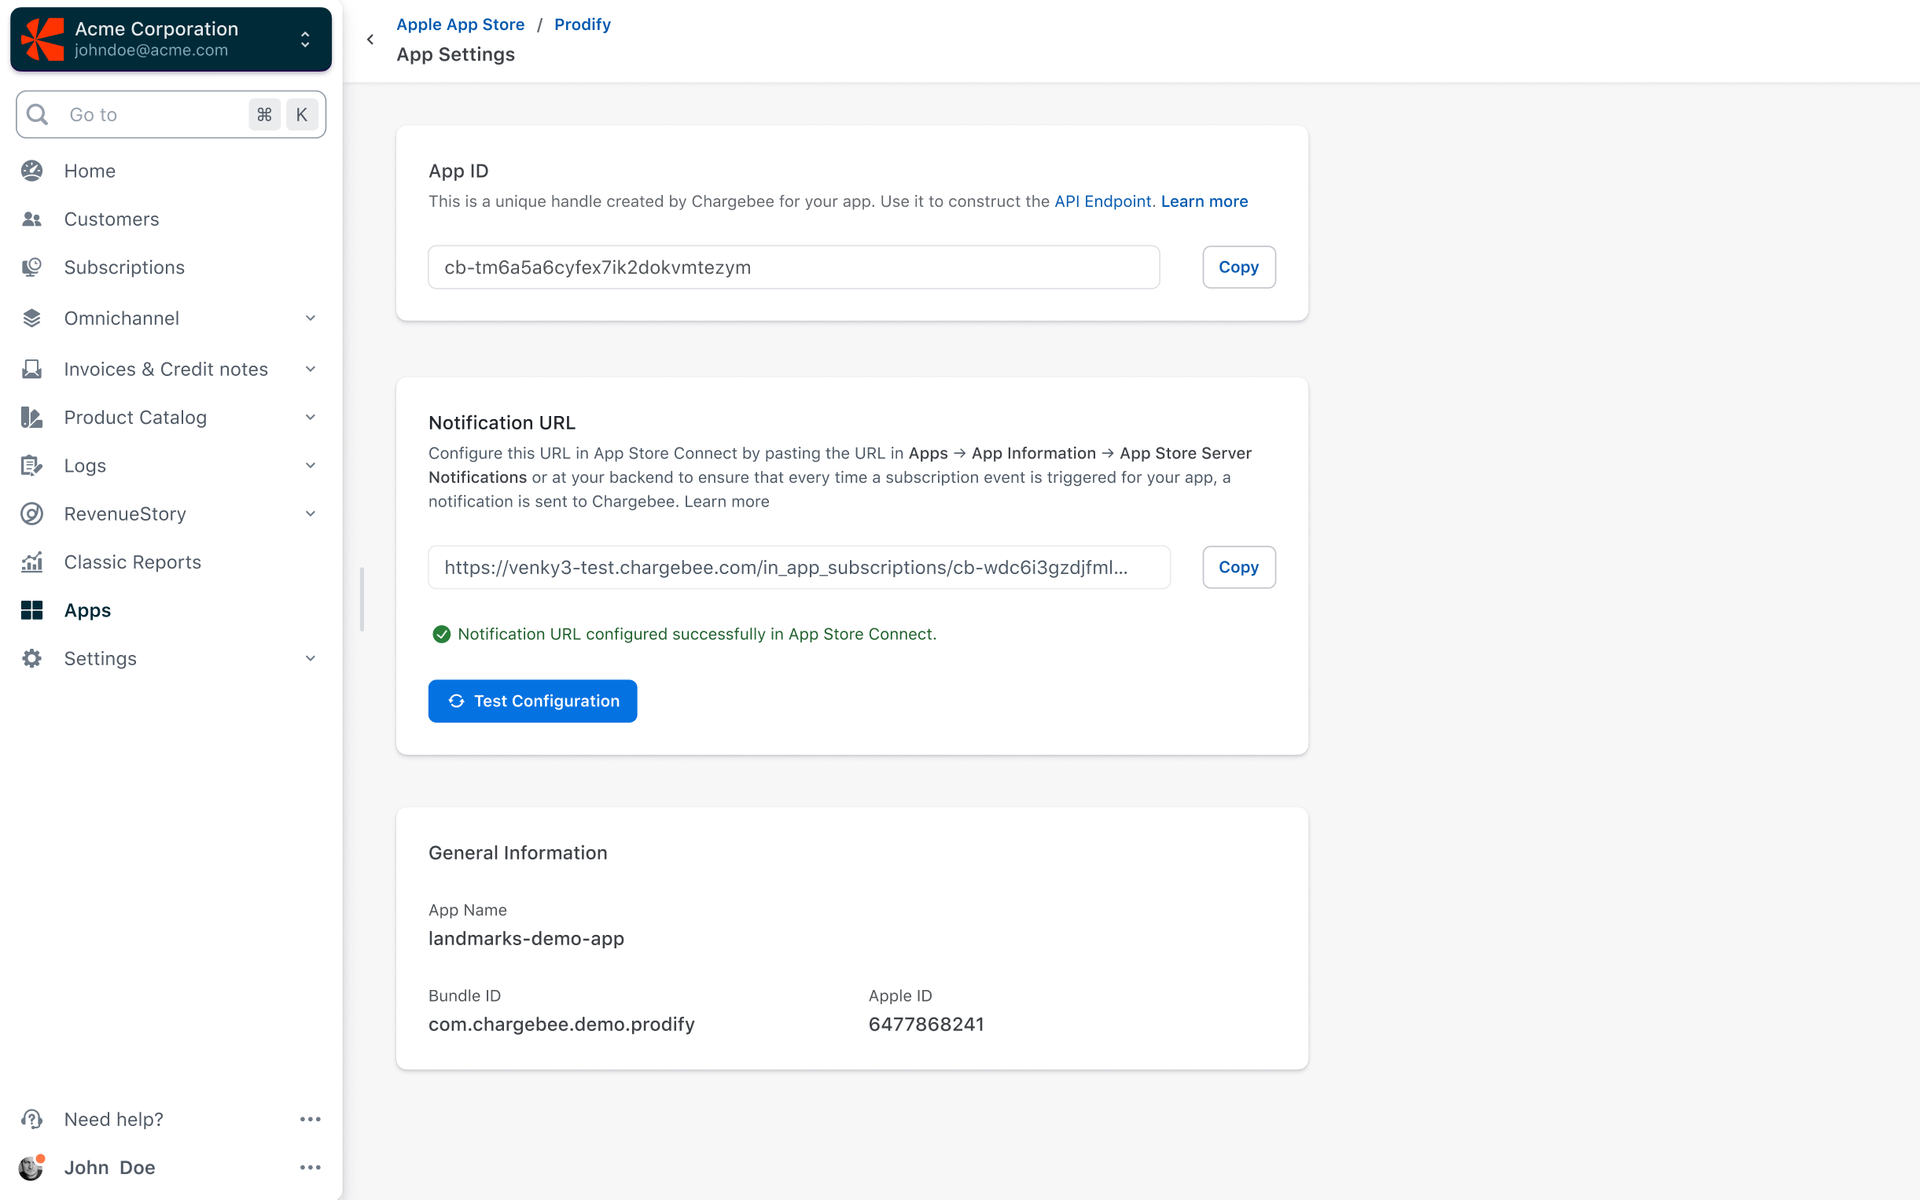
On the Purchase Info page, click the App Settings to view the unique App ID generated by Chargebee. Copy the App ID to record a purchase and the Notifications URL to pass the Apple server notifications to Chargebee.
Connect Apple Apps from a different account (Optional)
If you want to connect apps that are linked to a different apple app store account, then you need to enter the account credentials for this account as well in Chargebee. Follow the steps:
-
Login to your Chargebee site and navigate to Apps on the left menu.
-
Click Mobile App Store > Apple App Store
-
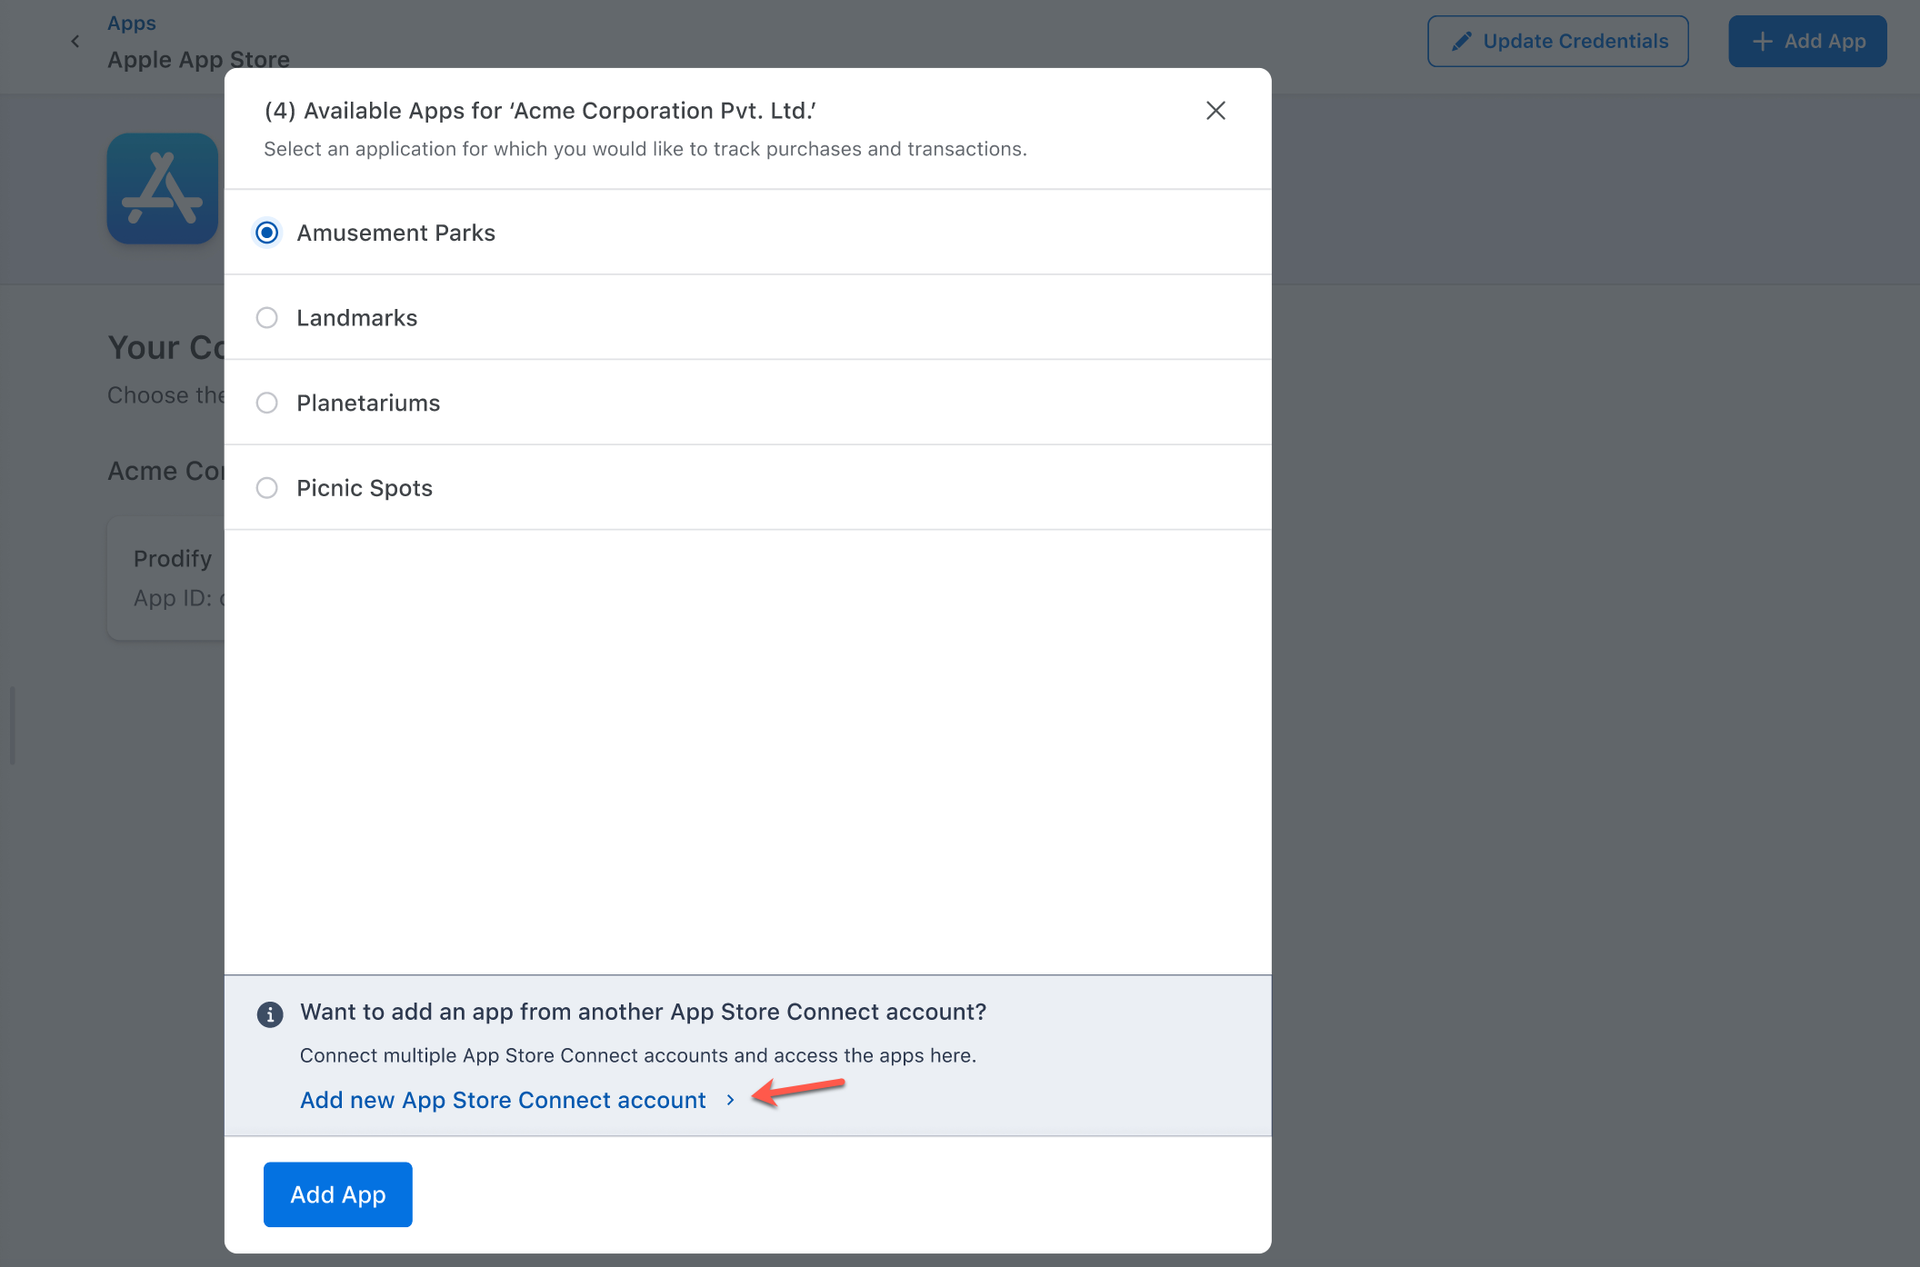
Click Add App on the Apps page to connect another app to Chargebee.
-
On the Apps page, click Add new App Store Connect account in the info banner.
-
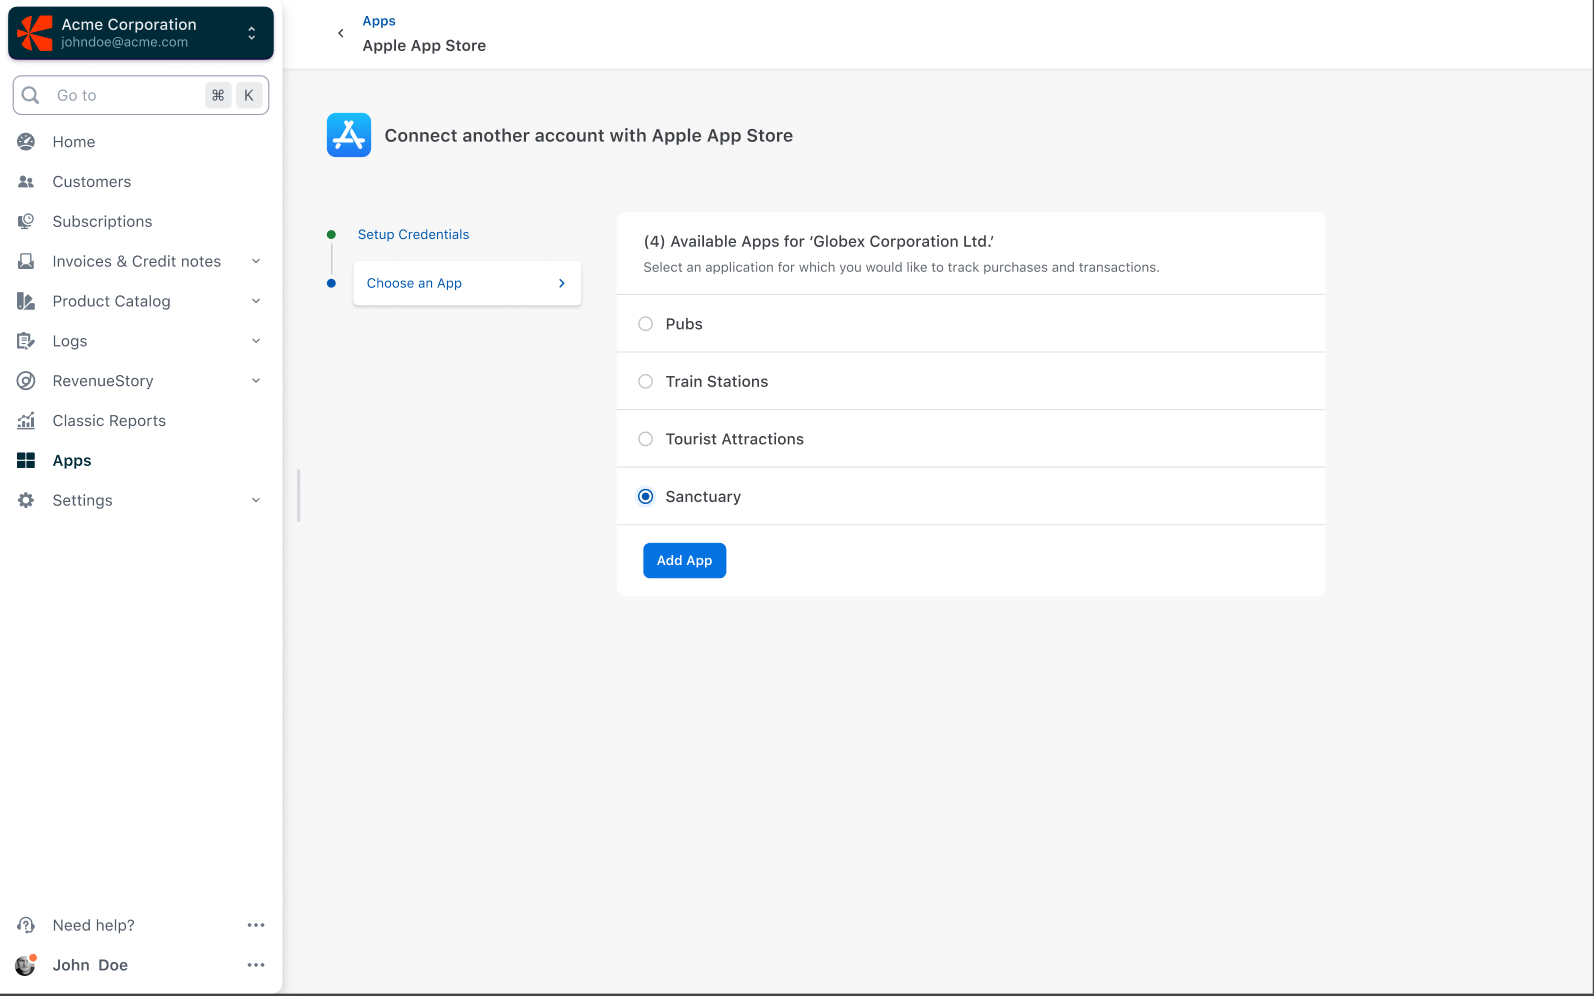
On the Credentials page, enter the new Apple App Store account credentials, as mentioned in Step 5. Ensure to enter a unique account name for this account.
-
In the Choose an App section, choose the application that you want to add to your account and click Add App.
-
Once the connection is successful, view all the apps belonging to all your accounts on the Apps page.
Record an Apple purchase using the App ID and Create Omnichannel Subscription
To view subscription purchases made on the Apple App Store in Chargebee, you must record these purchases using the Record a Purchase API. You need the App ID to invoke this API.
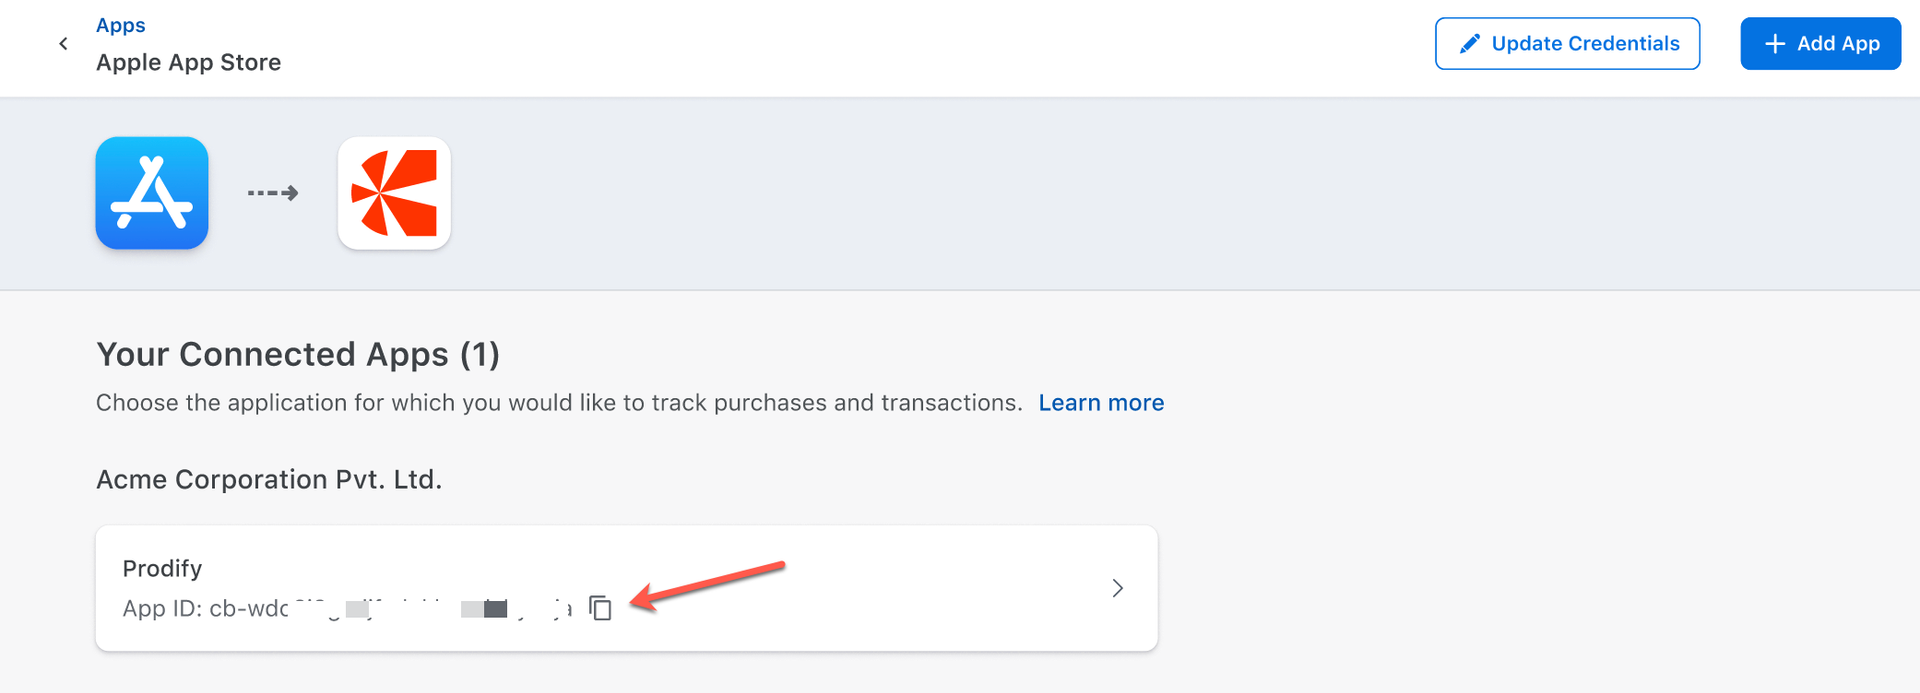
- Get the App ID generated by Chargebee either from the Apps page or the App Settings page. In case you haven't made any purchases then this ID can also be fetched from the purchase Info page. All three options are mentioned below:
- Option 1: Navigate to Apps > Apple App Store > Apps and Copy the App ID associated with the App.
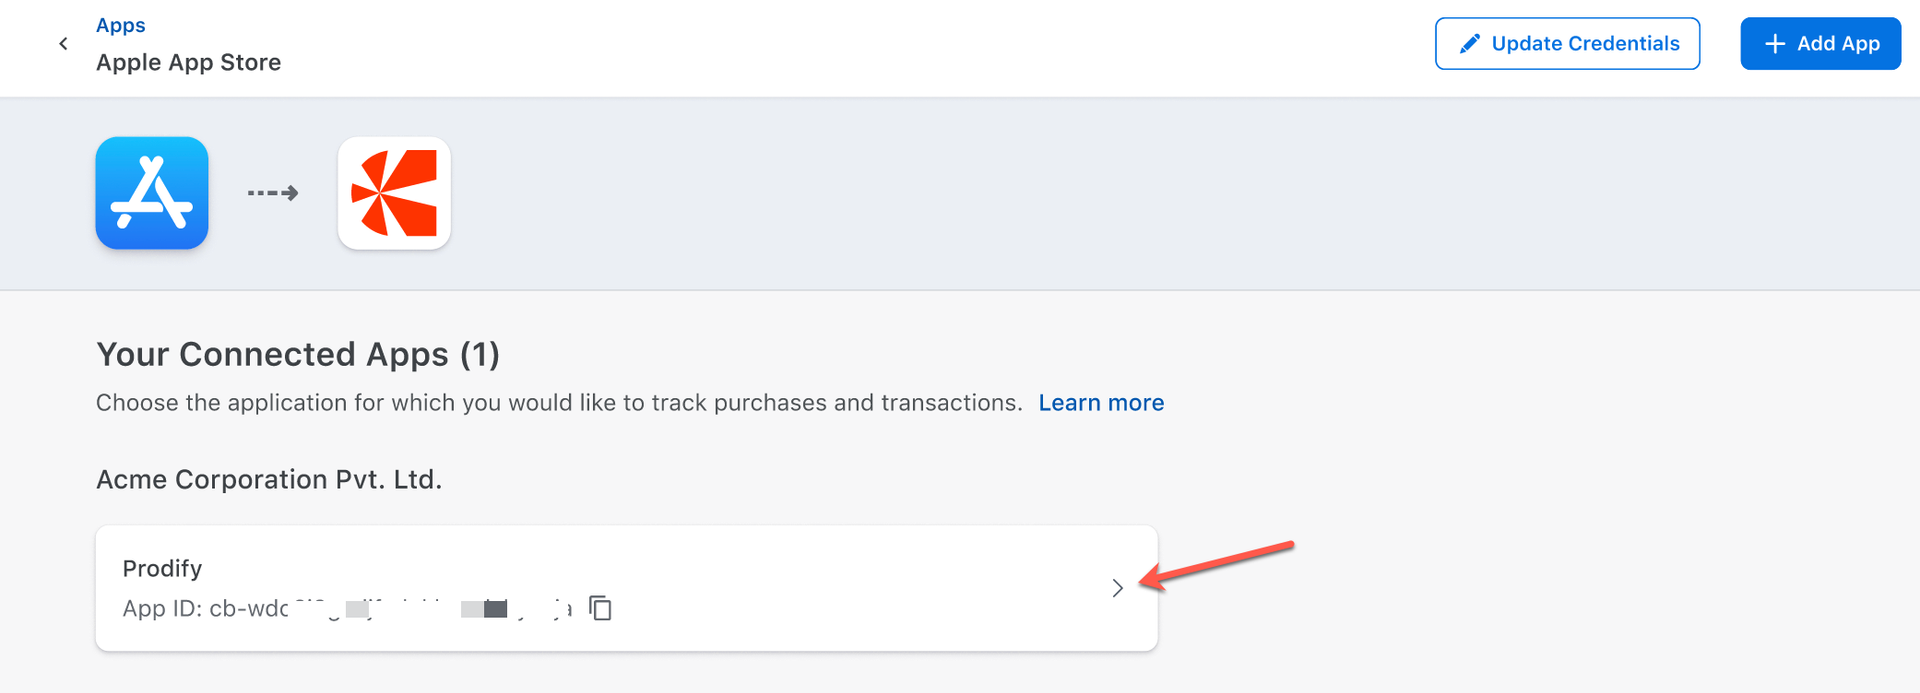
- Option 2: Navigate to Apps > Apple App Store > Apps. In the Apps page, click on the application for which you want to retrieve the App ID, click App Settings, copy the App ID, and keep it for further use.

- Option 3: If no purchases are recorded in Chargebee, this information will be available upfront on the Purchase Info page. Click on the application for which you want to retrieve the App ID and copy the App ID, and keep it for further use.
- Option 1: Navigate to Apps > Apple App Store > Apps and Copy the App ID associated with the App.
- Provide the
app_id,transaction_id, andcustomer_idparameters in the Record a Purchase API. This returns arecorded_purchaseresource with the statusin_process. This will initiate the verification of provided Apple transactions by invoking Apple API. Upon successful verification of the transaction, the purchase will be recorded in Chargebee, and an Omnichannel subscription corresponding to this purchase will be created in Chargebee. Learn more about implementing record a purchases API.
Set Up Notification URL in App Store Connect for Subscription-State Sync with Chargebee
Configure the notification URL in App Store Connect to sync subscription state changes with Chargebee for real-time updates.
To set up the notification URL in App Store Connect, follow these steps:
-
Login to your Chargebee site and navigate to Apps on the left menu.
-
Click Apple App Store.
-
Click on the application for which you want to set up the Notifications URL.
-
Click the App Settings and copy the Notification URL.
-
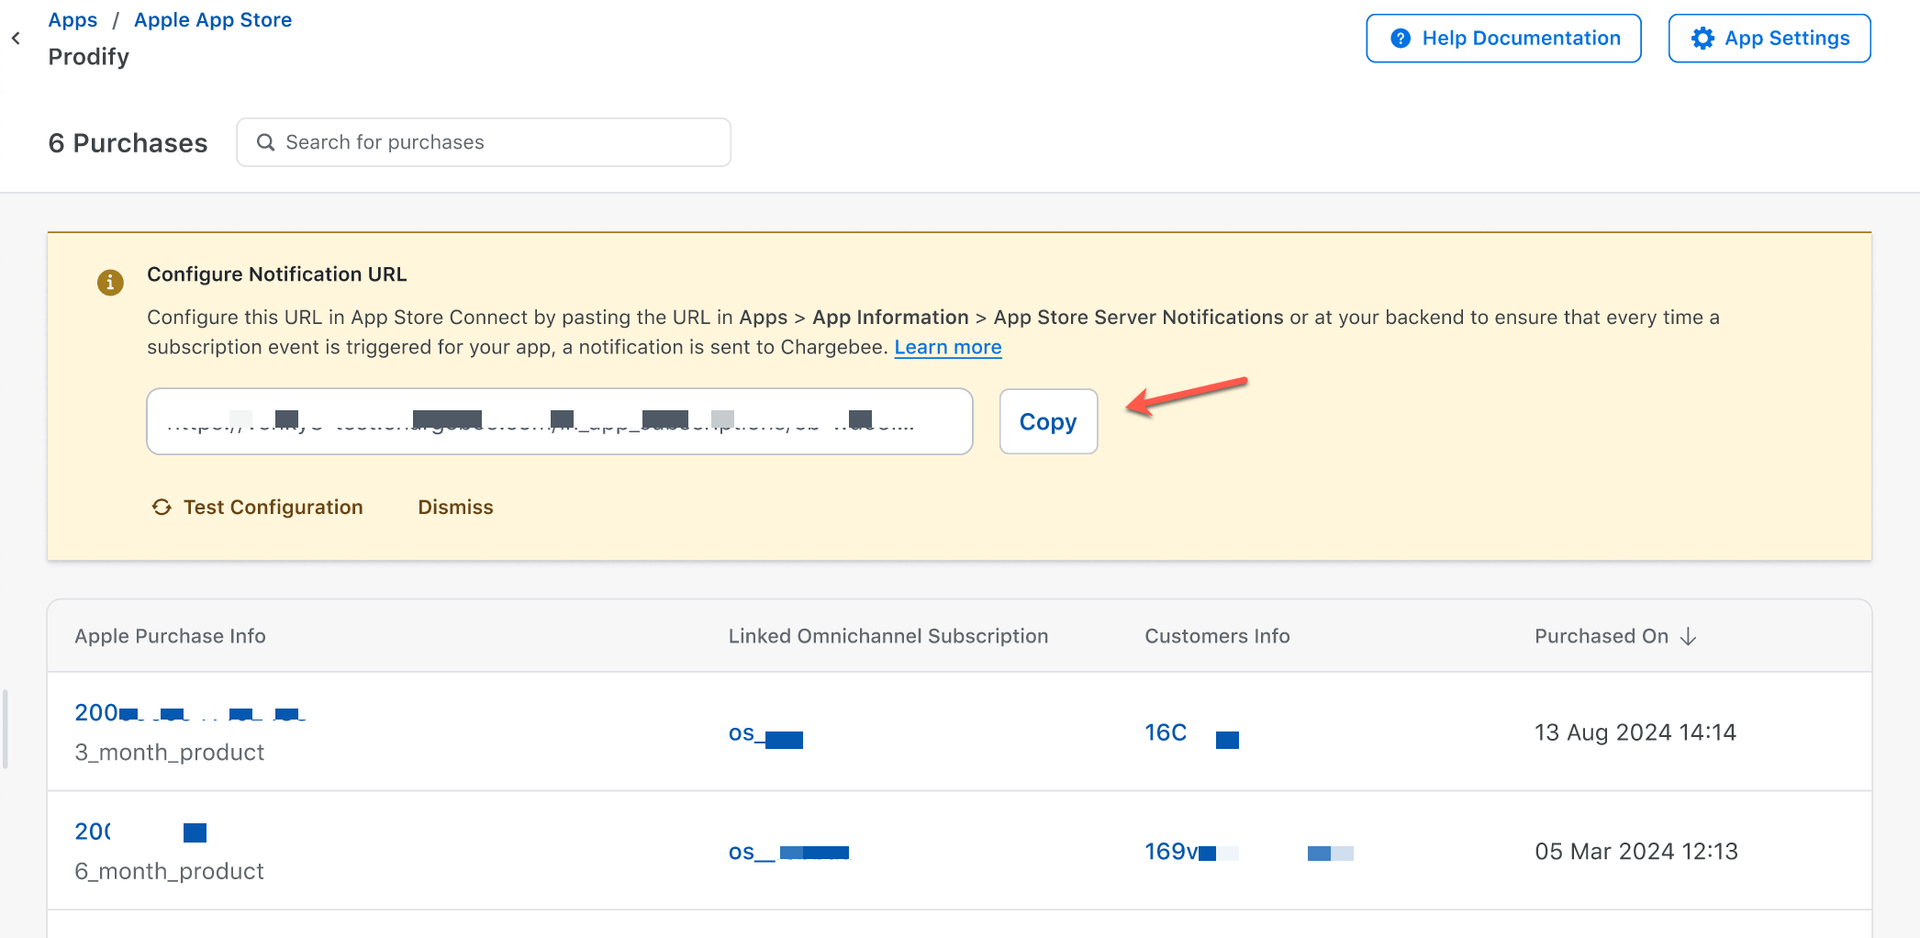
If Chargebee has not received any notification events yet, it will display an alert message in the Purchase Info page. Copy the Notification URL from this alert message.
-
Paste the Notification URL in App Store Connect (Apps > App Information > App Store Server Notifications) or at your backend to ensure that Chargebee receives a notification every time a subscription event is triggered for your application. Note: We recommend configuring the Notification URL generated for your Chargebee Test Site under the Sandbox Server URL and the URL generated for your Chargebee Live Site under the Production Server URL in your App Store Connect account.
-
Click Test Configuration in the App Settings, to check if the Notification URL is configured in the App Store Connect account. Once verified, a message will appear on the screen.
Subscribe to Omnichannel webhook events
Once Chargebee's notification URL is successfully set in App Store Connect, Chargebee will receive the Apple server notifications for subscription state changes in the App Store and generate corresponding omnichannel webhook events.
These omnichannel webhook events are needed for your downstream operations, such as provisioning content, generating reports, planning email campaigns, etc. Learn more about the omnichannel webhook events generated by Chargebee.
To receive these omnichannel subscription state change events from Chargebee, you need to subscribe to the omnichannel subscription webhook events. Learn more about subscribing to webhook events from Chargebee.
View Apple In-App Purchases in Chargebee
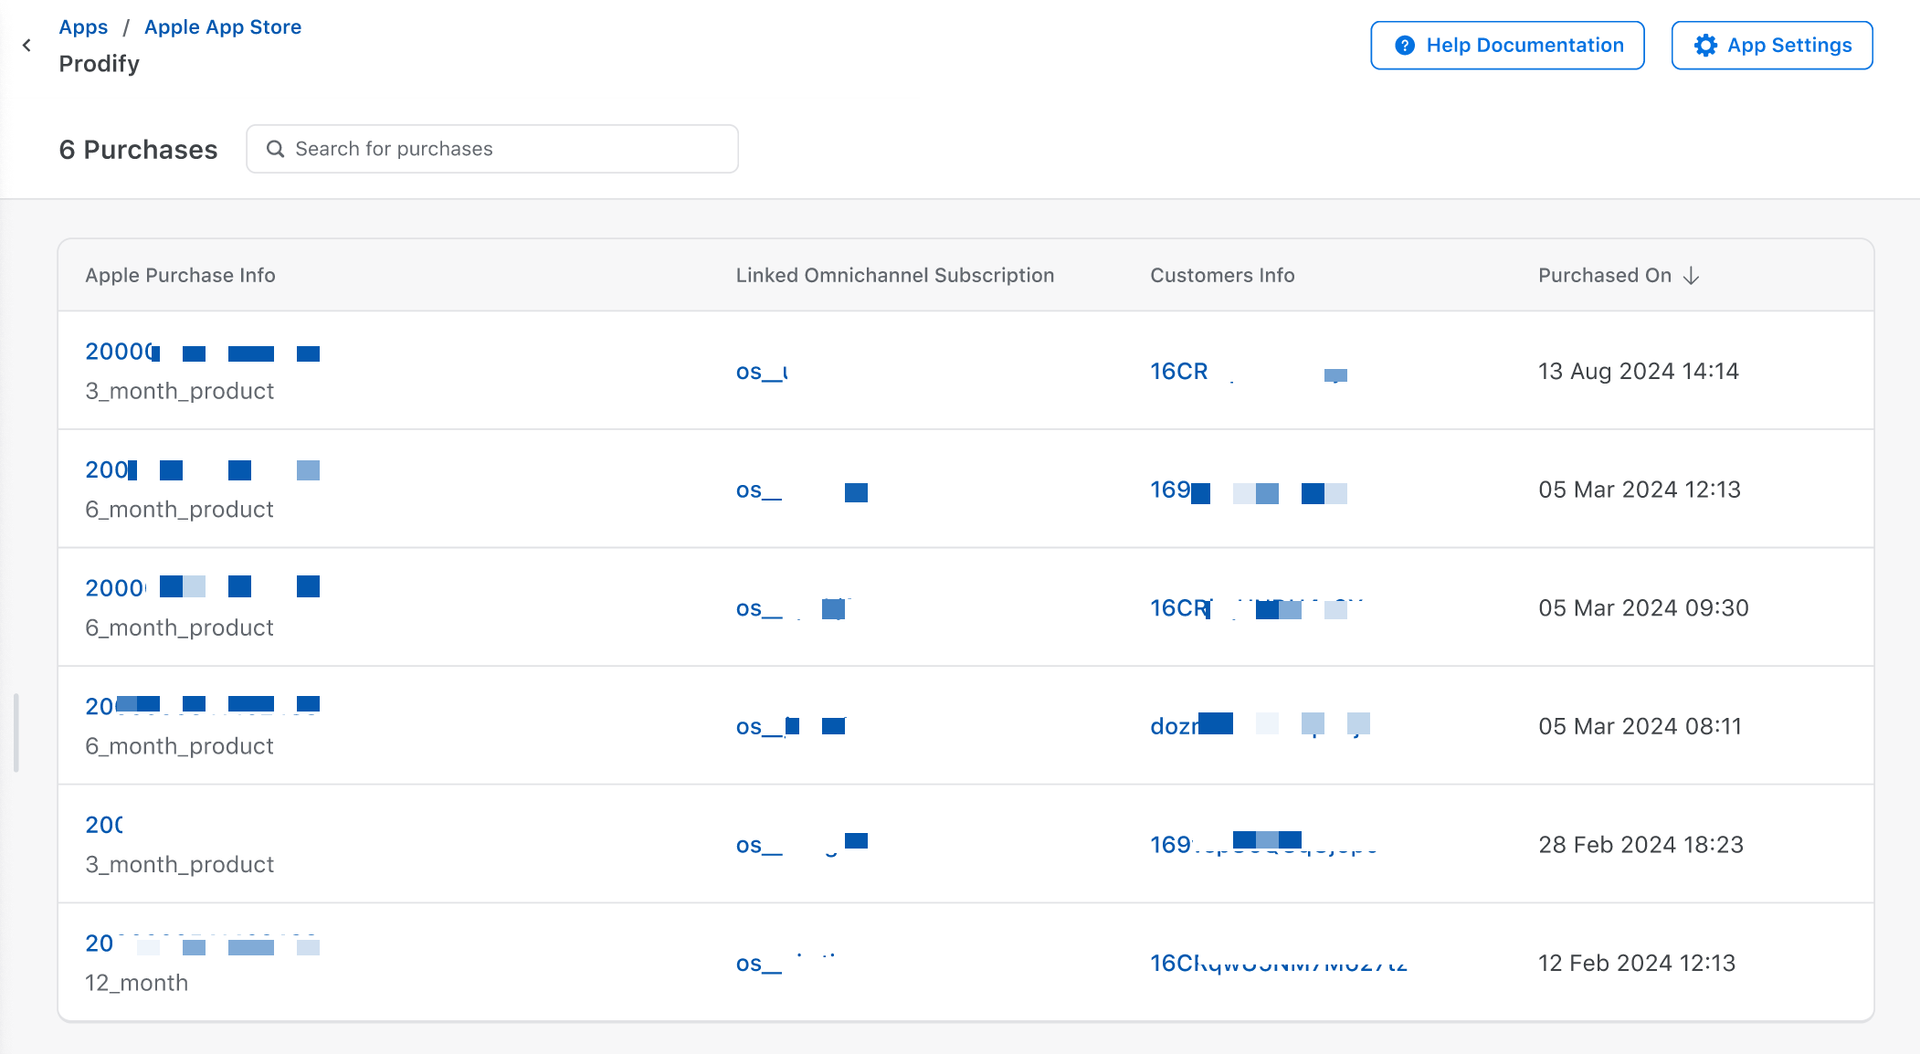
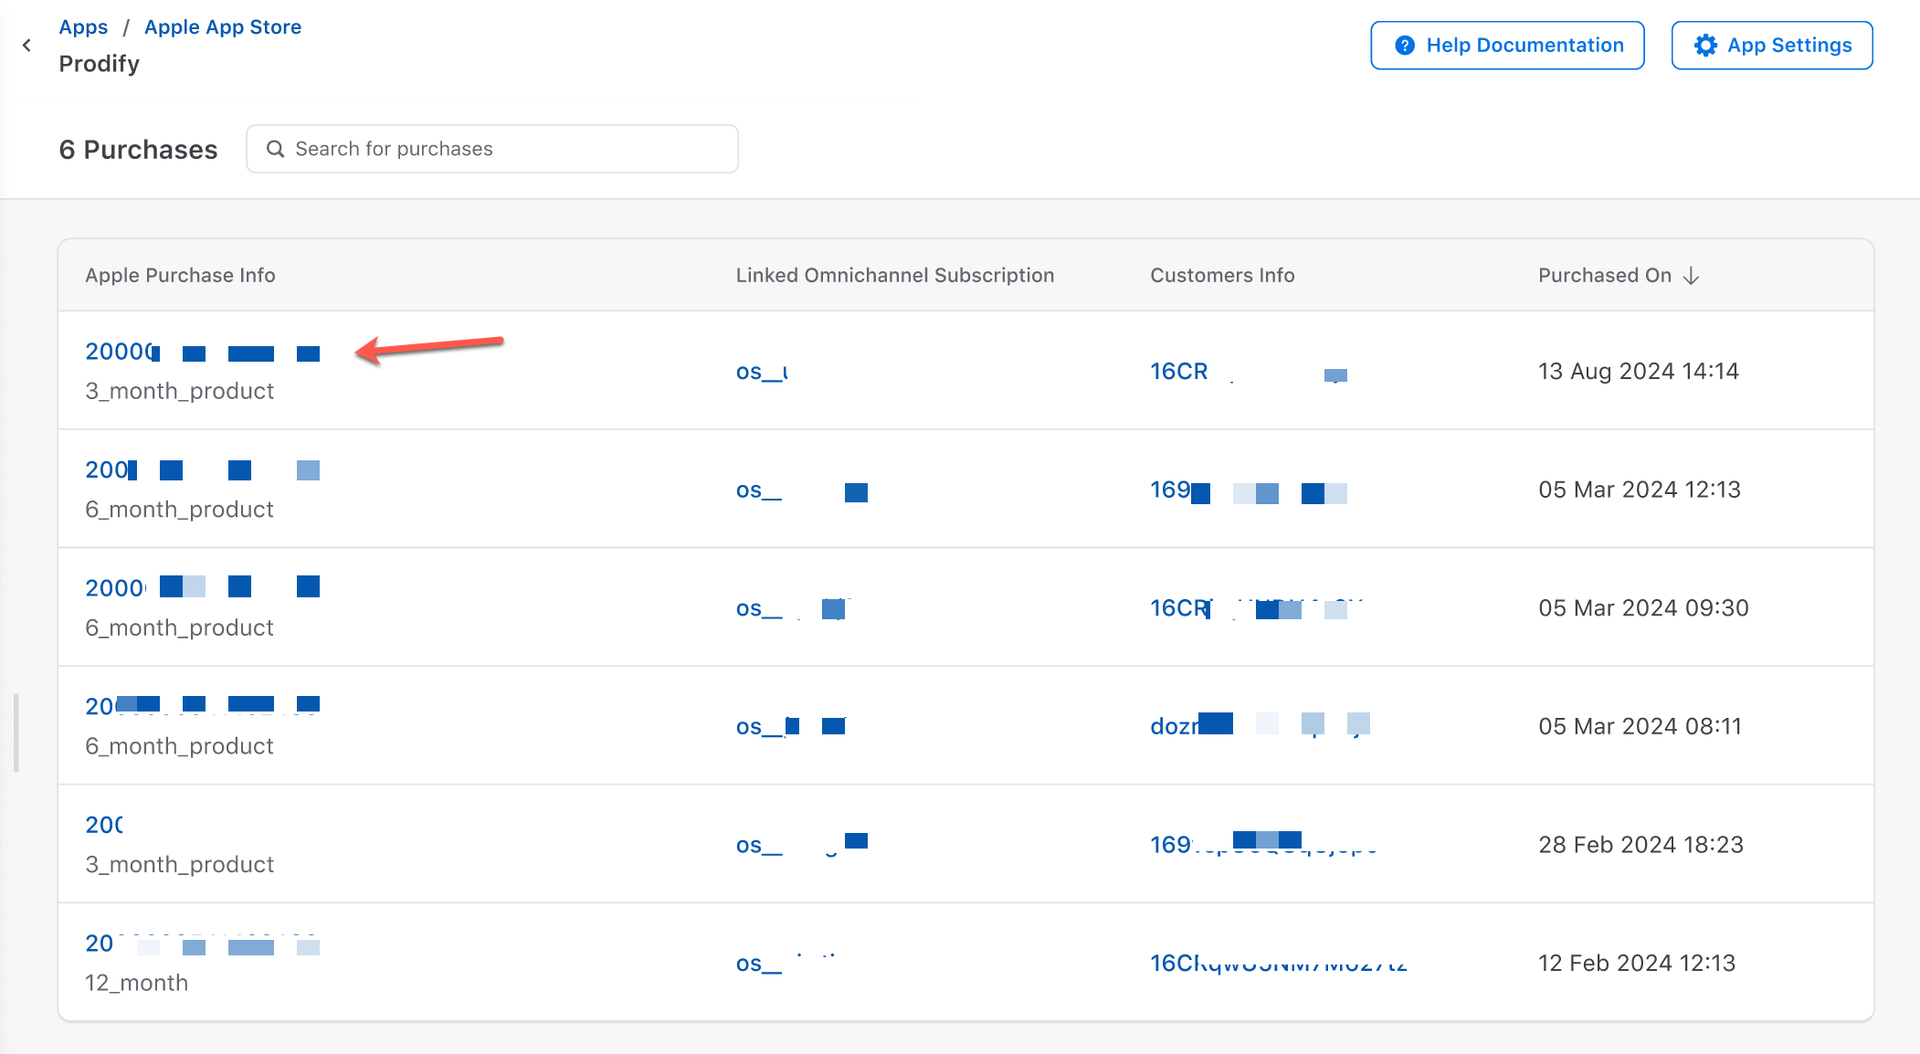
As an app developer, you may want to view purchases and transactions made through the Apple App Store. The Purchases page in Chargebee displays all recorded Apple purchases. When you click on a purchase, Chargebee calls Apple's APIs to retrieve the latest transactions and events related to that purchase.
Note
Apple's APIs only provide data for the last 180 days. Therefore, this page will display transactions and events from the past 180 days.
To view in-app purchases and the details of the purchase in Chargebee, follow these steps:
-
Login to your Chargebee site and navigate to Apps on the left menu.
-
Click Apple App Store.
-
Click on the application for which you want to view in-app purchases.
-
Under Purchase Info, view the list of in-app purchases.
-
Click on the purchase for which you want to check the purchase history.
-
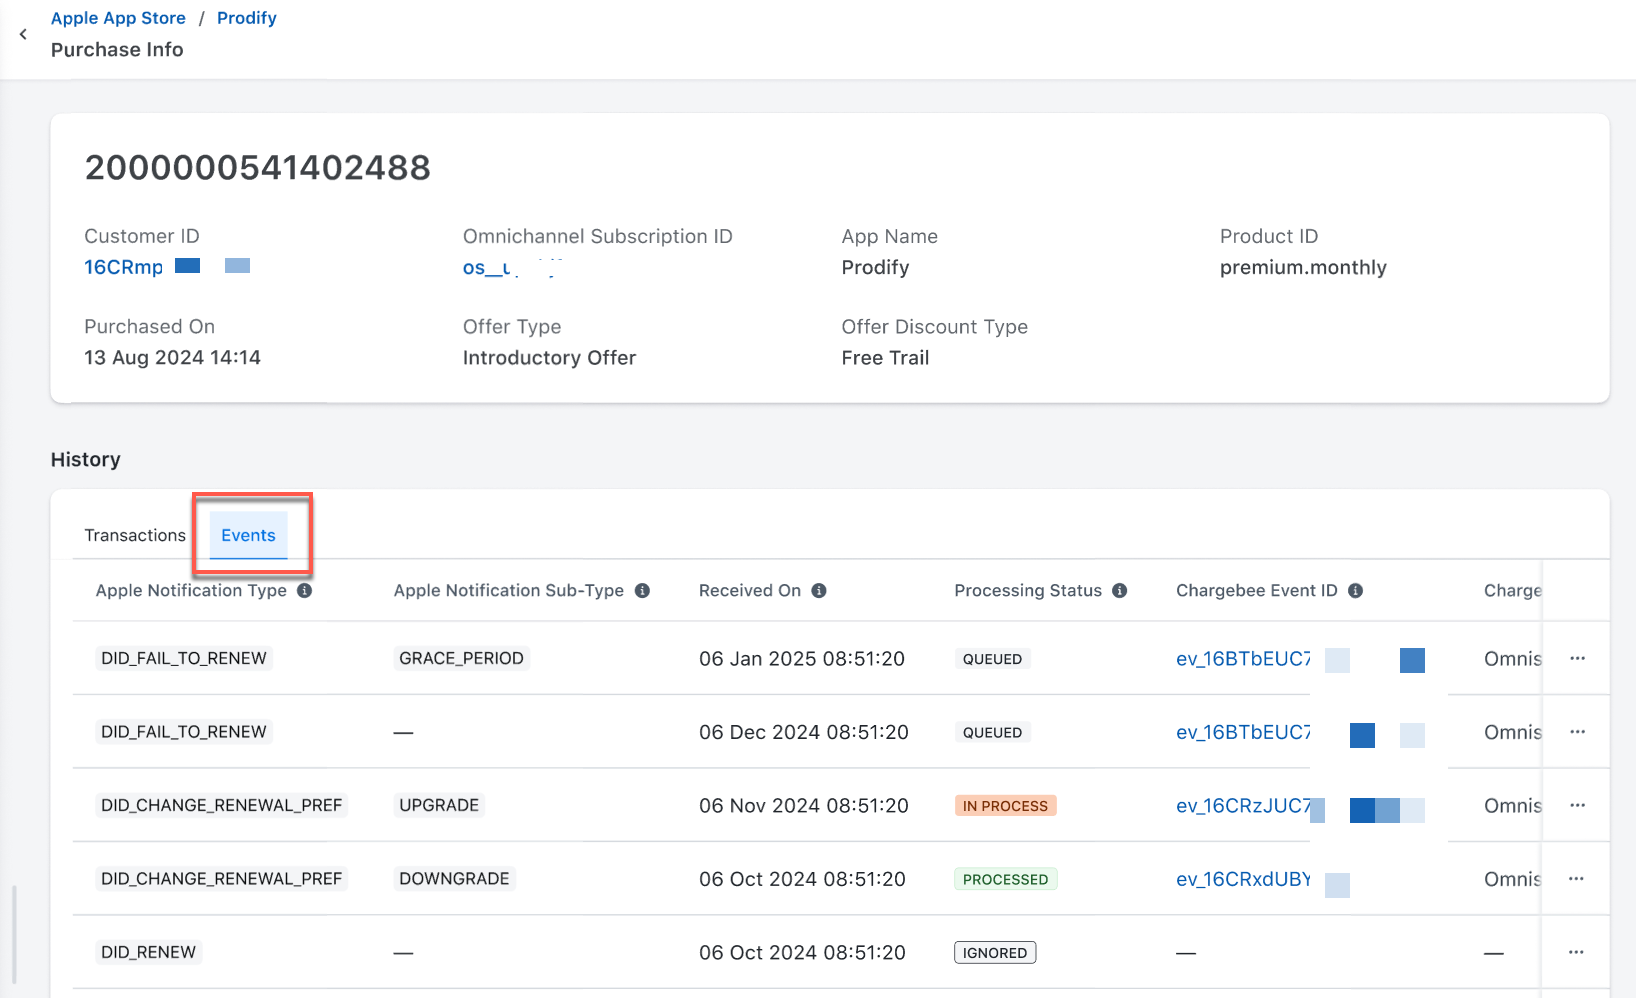
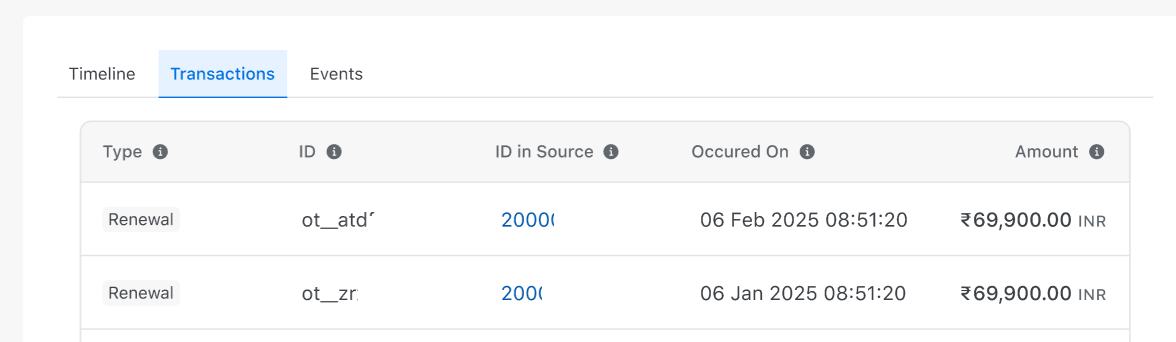
View Transactions and Events for every purchase.
- The Transaction tab shows the type of transaction that occurred in Apple, its date and time, and its amount.

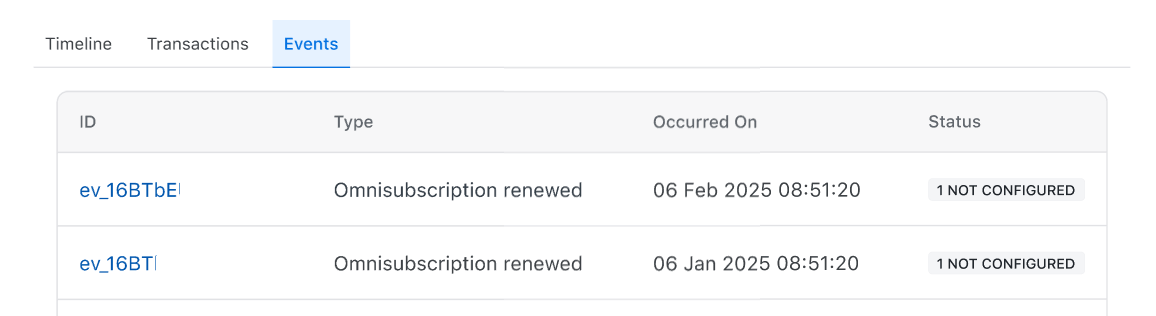
- The Events tab shows the triggered Apple event and the corresponding Chargebee event. Refer to the Apple notification type and subtype to understand the Apple event. If Chargebee triggers a webhook event for an Apple event, you can see those events under the Chargebee event ID and Event type column.
Note: Currently, Chargebee processes the events mentioned here and ignores other events.
- The Transaction tab shows the type of transaction that occurred in Apple, its date and time, and its amount.
View Omnichannel Subscriptions in Chargebee
As a customer care, marketing, or revenue growth professional, you can use Chargebee's Omnichannel Subscriptions page to view all the omnichannel subscriptions corresponding to all Apple App Store. App-specific filters can be applied to view subscriptions corresponding to specific apps. You can click any omnichannel subscription ID and access the omnichannel subscription's details page to check the subscription details and thus quickly respond to customer queries.
To view an omnichannel subscription corresponding to a customer in Chargebee, follow these steps:
-
Login to your Chargebee site and navigate to Customers.
-
On the Customer Index page, click on the customer ID to view the customer details.
-
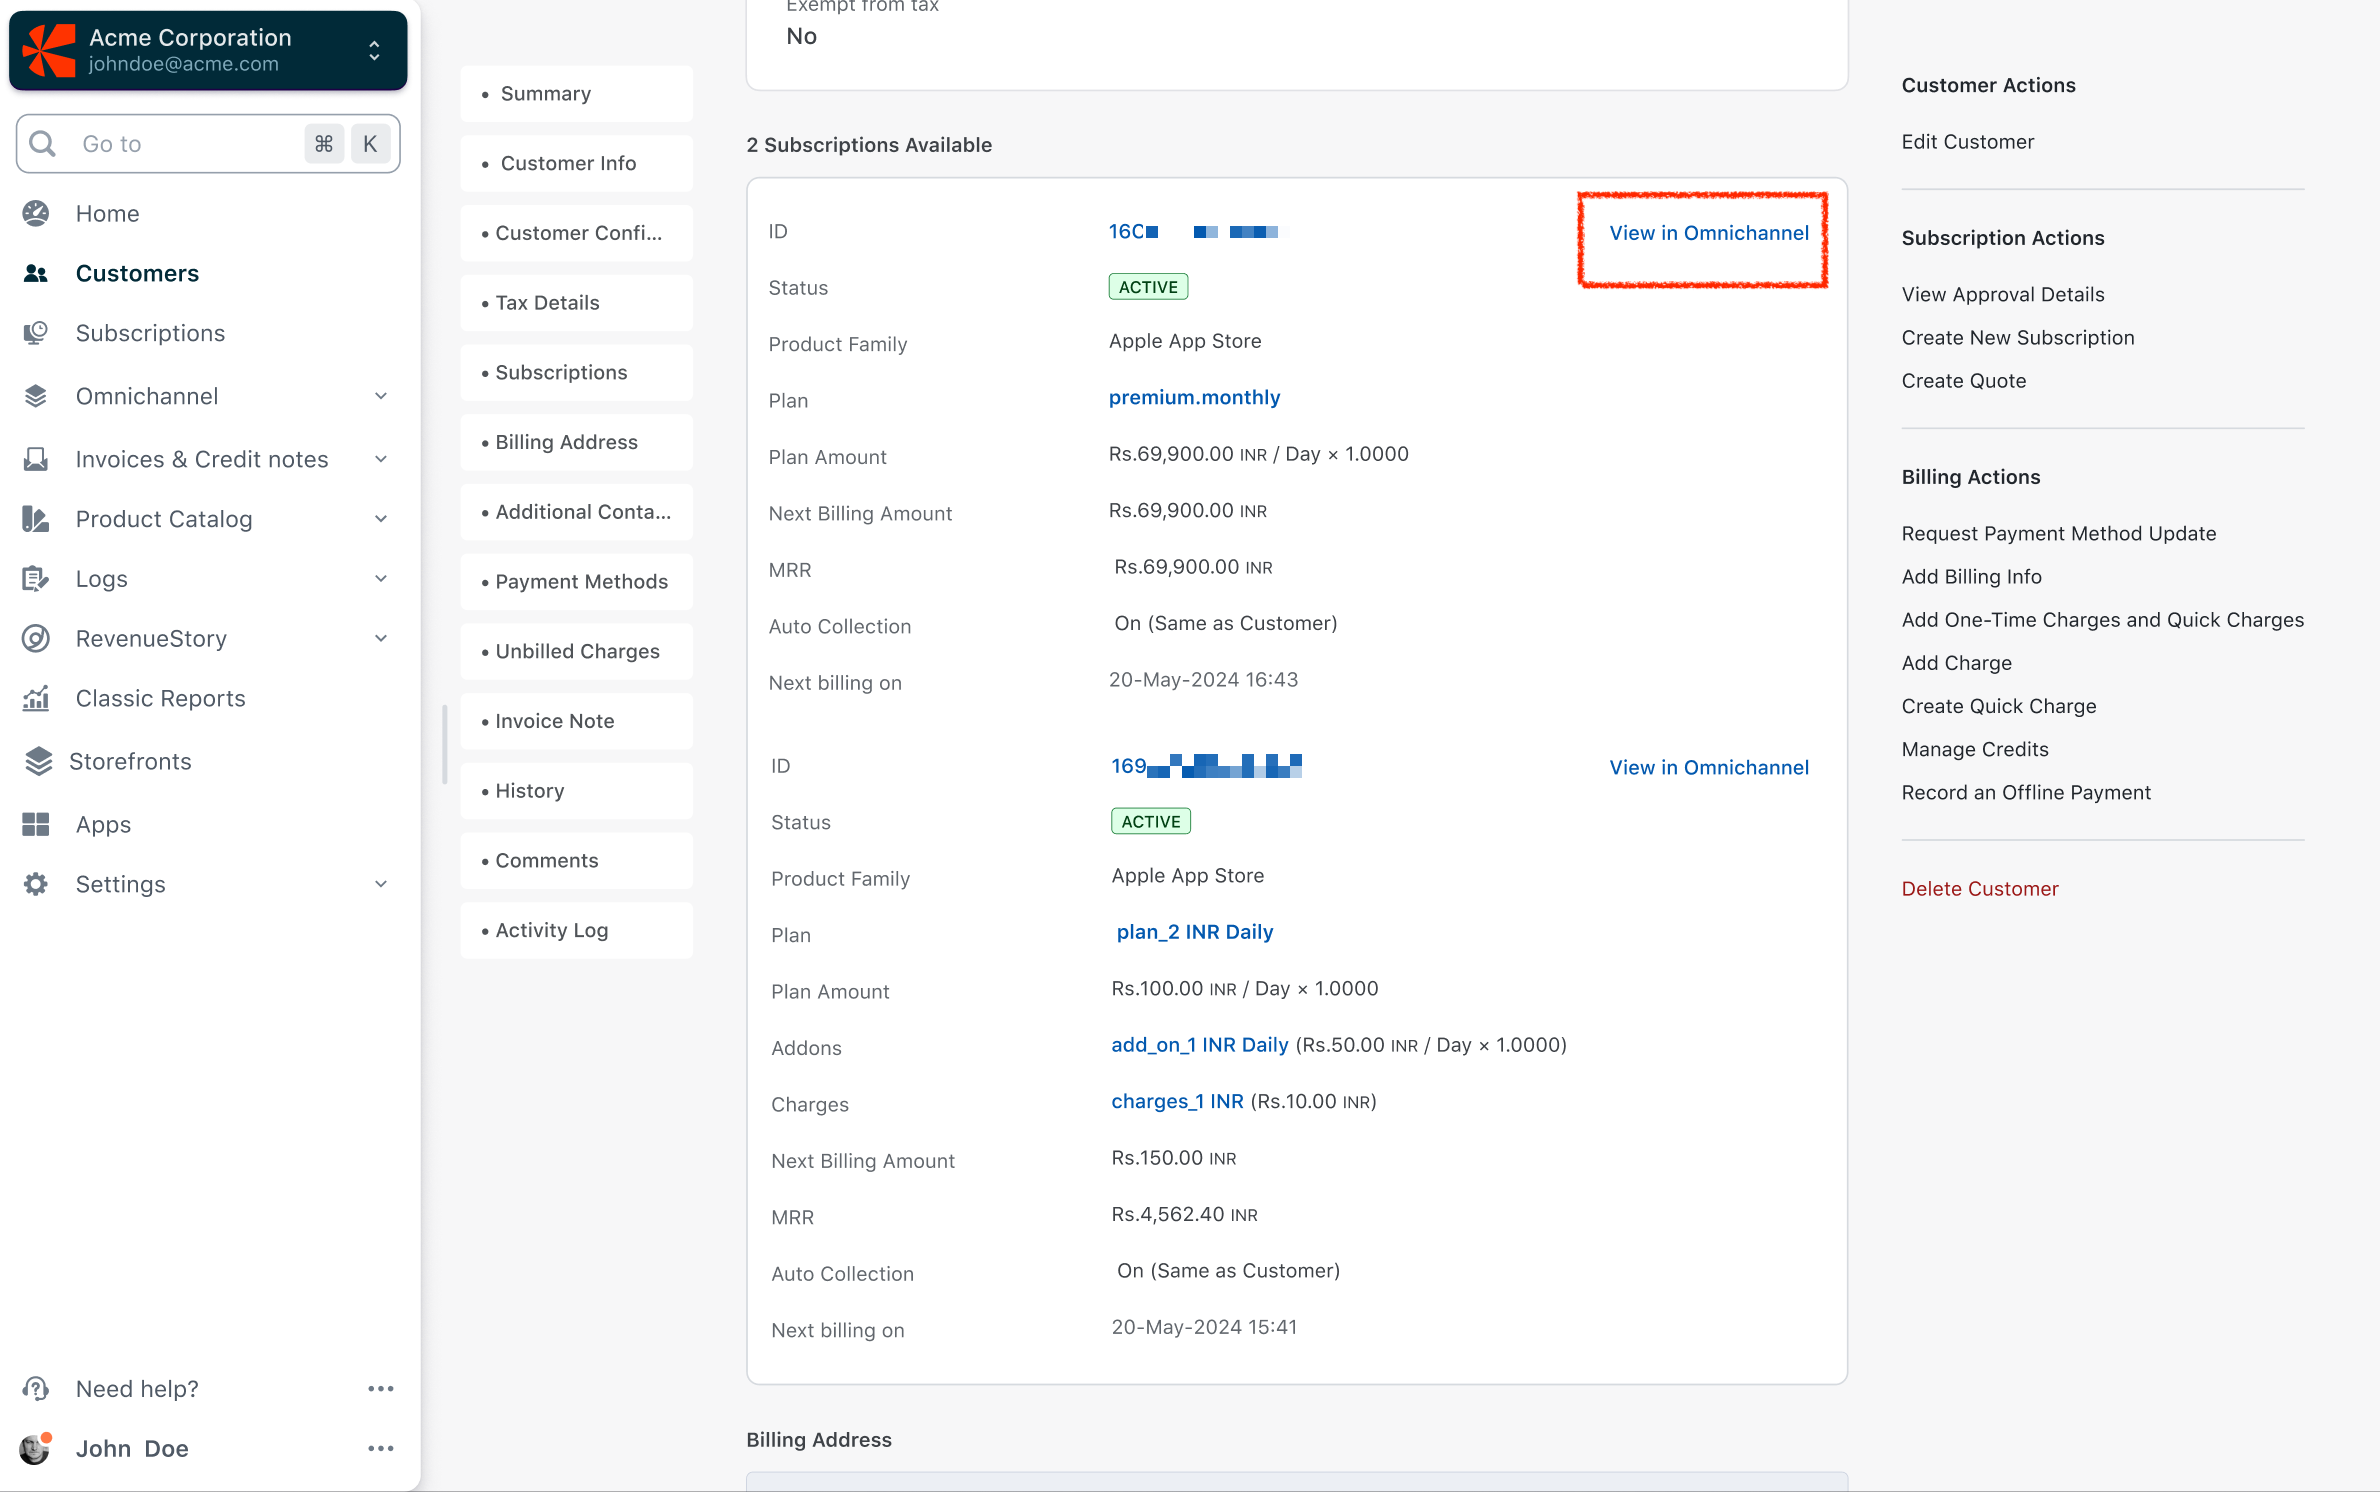
On the Customer Details page, click on the Apple App Store tab to view the omnichannel subscription associated with the customer.
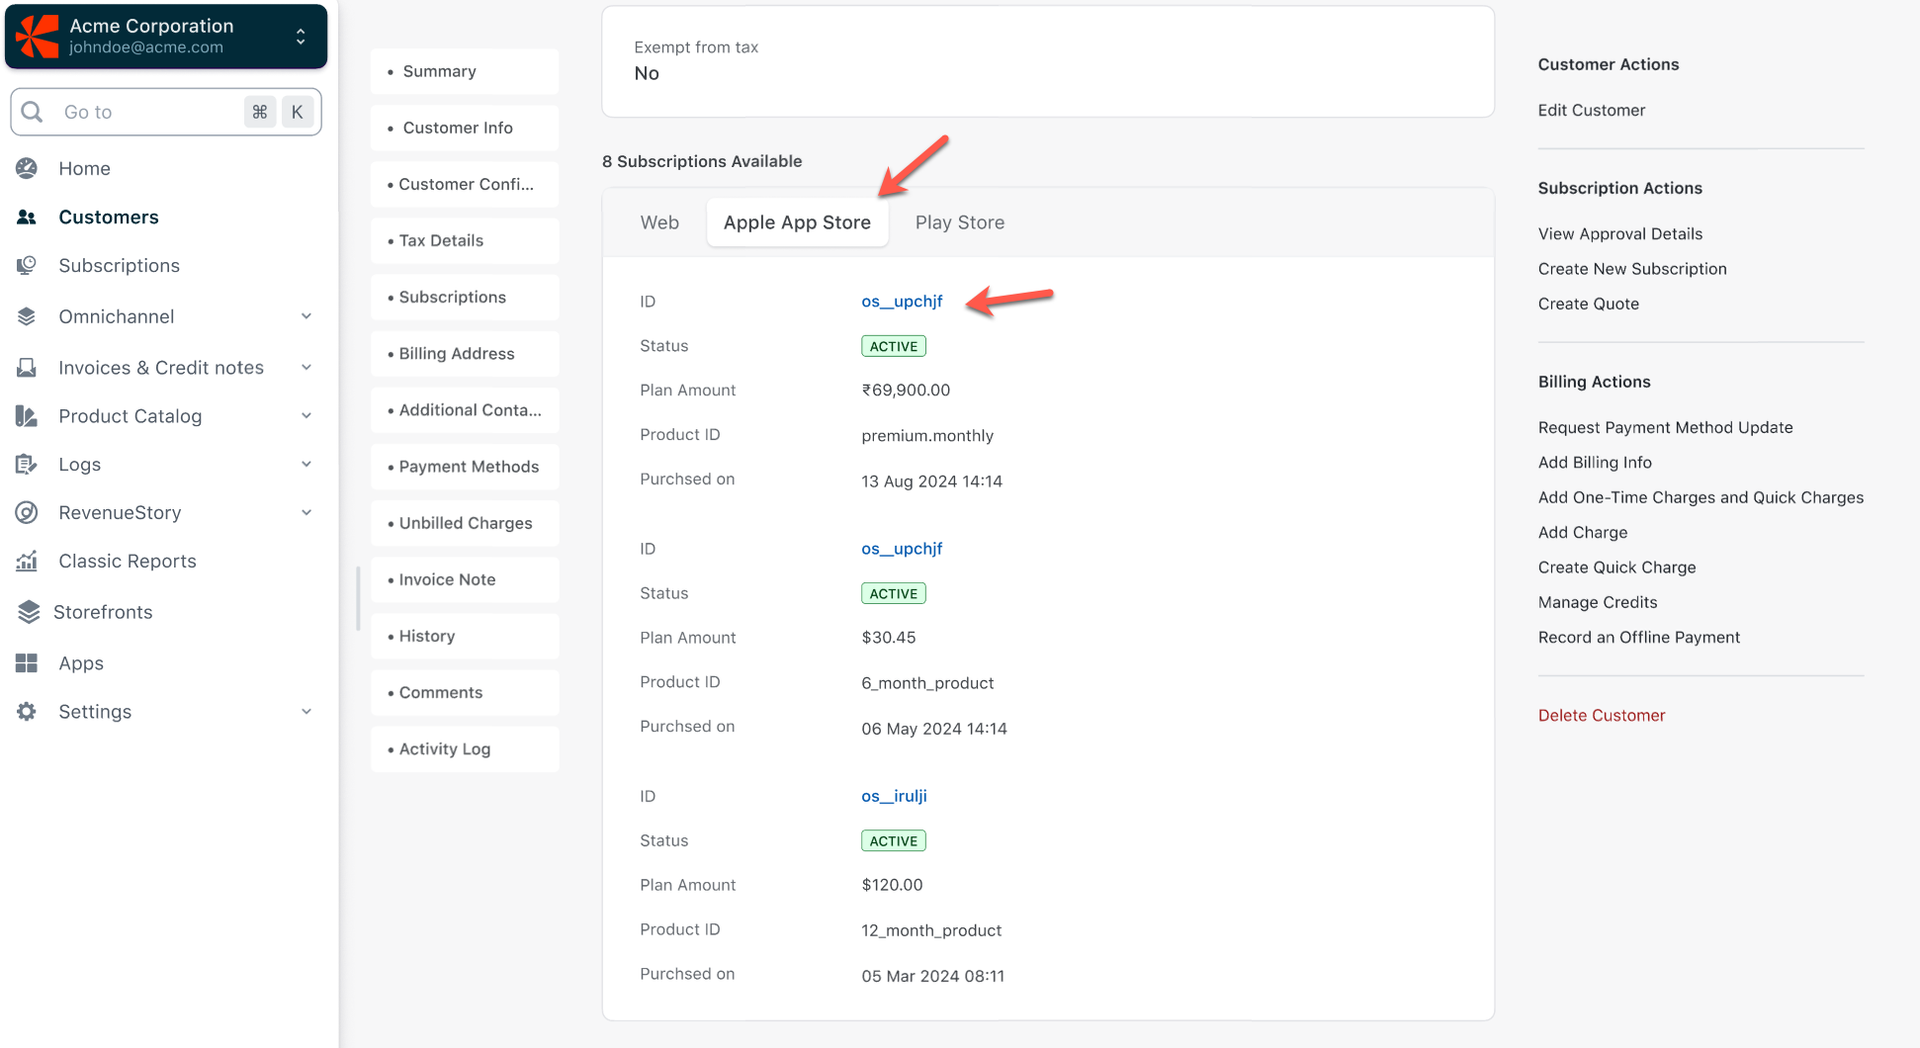
-
Click on the Subscription ID to open the subscription details page. This page contains Chargebee's omnichannel subscription details, such as subscription items, customer details, transactions, events, and more.
- The Timeline tab shows the operation (such as Subscription created, Subscription modified, and more) completed for the subscription, along with the timestamp of when the operation was triggered.
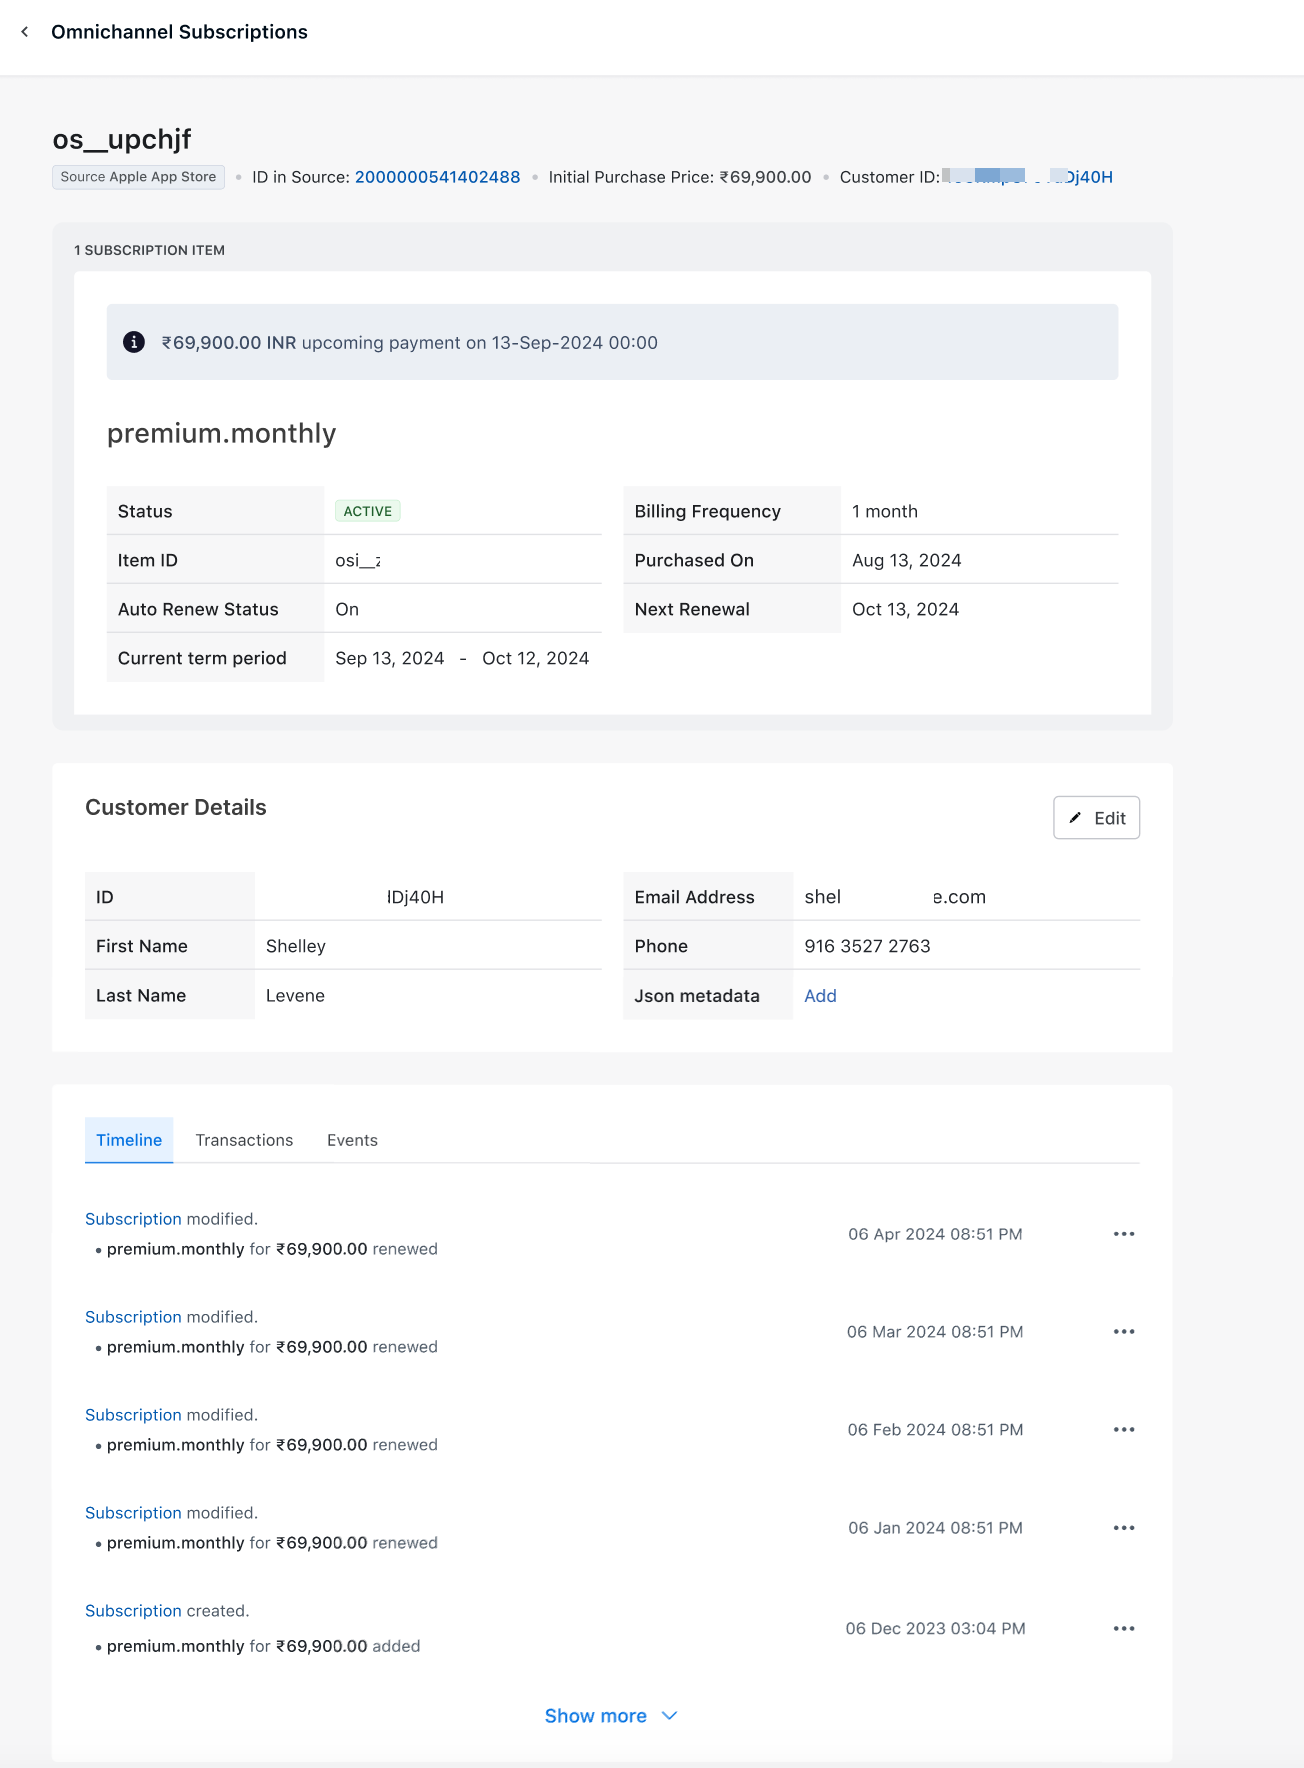
- The Transactions tab shows the transaction ID created in Chargebee and the corresponding transaction ID of the App Store. It also mentions the transaction type, timestamp, and the transaction amount.
- The Events tab shows Chargebee's event ID, type, triggering time, and status.
- The Timeline tab shows the operation (such as Subscription created, Subscription modified, and more) completed for the subscription, along with the timestamp of when the operation was triggered.
See also
Was this article helpful?