Configuring Oracle NetSuite
Integrate your Oracle NetSuite account with Chargebee to automate the synchronization of Invoices, Customers, and other data from Chargebee to NetSuite. This data is crucial for the financial management and analysis of your business.
We recommend consulting an accounting advisor before configuring the integration. You can test the integration on the Test Site before setting up the integration on the Live Site.
Note
- This integration supports NetSuite OneWorld and NetSuite Standard editions (without subsidiary) of the NetSuite ERP financial products only. Contact support for more help.
Pre-implementation steps in Chargebee
Make sure the following configurations are set up in your Chargebee site before enabling this integration.
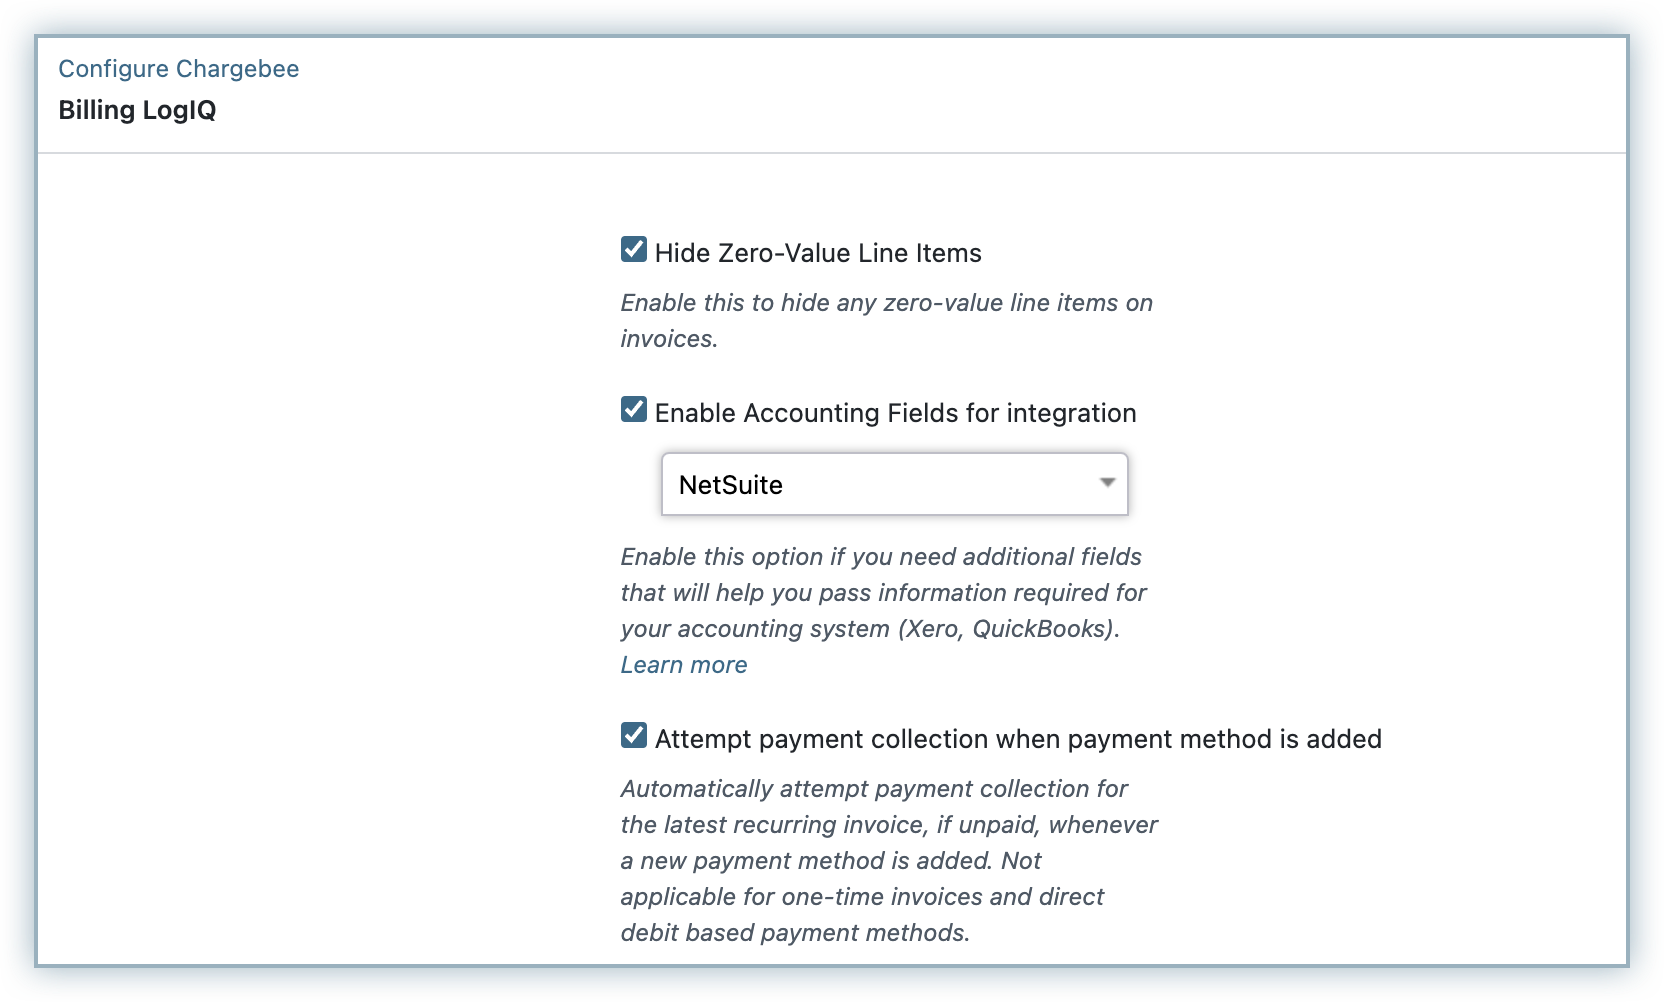
- Enable Accounting fields: Log in to the Chargebee app. Click Settings > Configure Chargebee > Billing LogIQ and enable accounting fields for NetSuite. This will add the Accounting attributes in the Plans and Addons pages.
- Enter a General Ledger (GL) Account for each Plan/Addon in Chargebee. Navigate to Product Catalog > Plans/Addons > Select a Plan/Addon > Accounting Information. Enter the GL Account Name. You can also provide a Revenue Recognition Template ID for Plan/Addons. This ID refers to the internal ID of the Revenue Recognition rules in NetSuite.
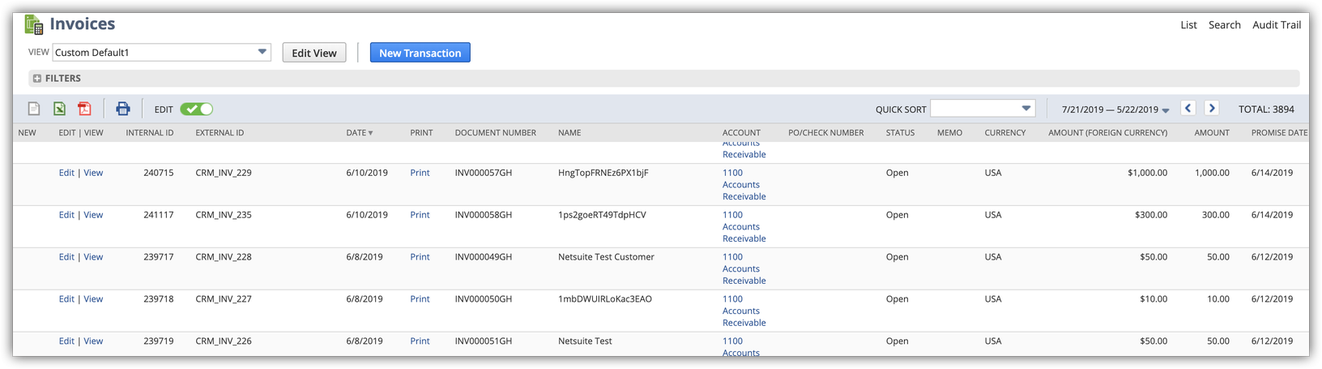
- To differentiate the invoices sent from Chargebee (from the invoices already present in NetSuite), you can enter a prefix and sequence number for Invoices and Credit Notes in Chargebee. Navigate to Configure Chargebee > Invoices & Credit Notes > Invoices/Credit Notes and set a prefix and a sequence number of your choice.
Pre-implementation steps in NetSuite
-
Authentication: Authentication is done based on Tokens created in NetSuite. You can follow the steps mentioned in this page and create the tokens. It generally takes 3-4 hours to refresh the tokens and it is recommended to create the tokens at least one day before setting up the integration in Chargebee.
-
Unlock Accounting Periods: Ensure you have the necessary periods unlocked in NetSuite. Navigate to Setup > Accounting > Manage Accounting Periods and ensure that the FY/Quarters are unlocked.
-
Currencies: The currencies present in Chargebee should be present in NetSuite. You need to manually add the currencies in NetSuite. Click here for more information.
-
Enable Features: Ensure you have enabled features such as SuiteCloud or Advanced Revenue Management for the integration. Navigate to Setup > Company > Enable Features and enable the features as required.
-
Create Rev Rec Start Date/End Date (Advanced Revenue Management (ARM) Start/ End Date):
- If you want Chargebee to send the subscription start date and end date to NetSuite, you can create a Start Date and End Date.
- Navigate to Customization > Lists, Records & Fields > Transaction Line Fields > create invoice level fields (Transaction Column Custom fields) to accept Start Date and End Date.
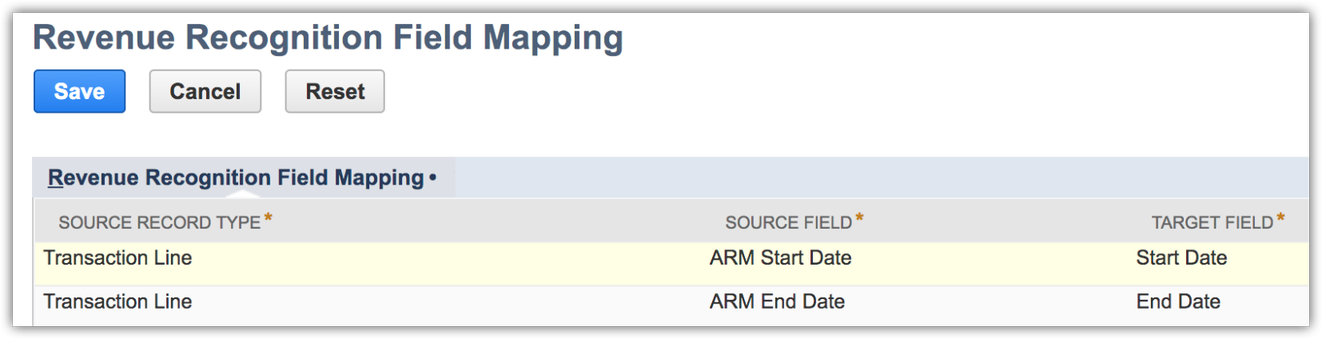
- You can then map the custom fields with Advanced Revenue Management fields by navigating to Setup > Accounting > Revenue Field Mapping.
-
Mandatory Custom Fields: If there are custom fields mandatory in NetSuite, it is recommended to make the fields optional and set a default value.
- Custom fields at Customer, Item, or Invoice levels should be reviewed before setting up the integration. Navigate to Customization > Lists, Records & Fields > Entity Fields or Item fields and make the necessary edits.
- If you do not prefer to make the fields optional, you can create custom fields in Chargebee and map them to the respective fields in NetSuite. Contact support for more help on mapping custom fields.
-
Override Document Numbers: You can select Chargebee's document numbers in NetSuite.
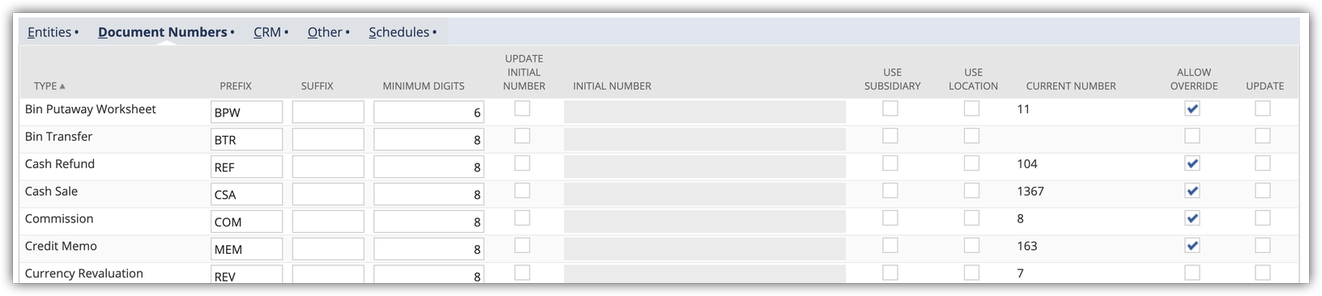
- You can enable this option in NetSuite by navigating to Setup > Company > Auto-Generated Numbers > Review the option in Entities and Document Number sub-tabs.
- If you have checked the Allow Override option, then Chargebee's identifiers will be set as the primary ID for Invoices, Credit Memos, Customers, and so on.
-
Timezone Alignment: As a preliminary step, ensure that the timezone set for the user in NetSuite matches that of the Chargebee site before establishing the integration. This alignment is crucial as NetSuite converts the UTC date format sent by Chargebee to the user's timezone, potentially leading to discrepancies in invoice dates, revenue recognition dates, and other relevant timestamps if the time zones differ.
Note
Chargebee's ID is set as the External ID for search/reference purposes in NetSuite.
Configuration
Follow these steps to connect NetSuite to Chargebee.
Step 1: Connect Chargebee to NetSuite
- Log in to your Chargebee site.
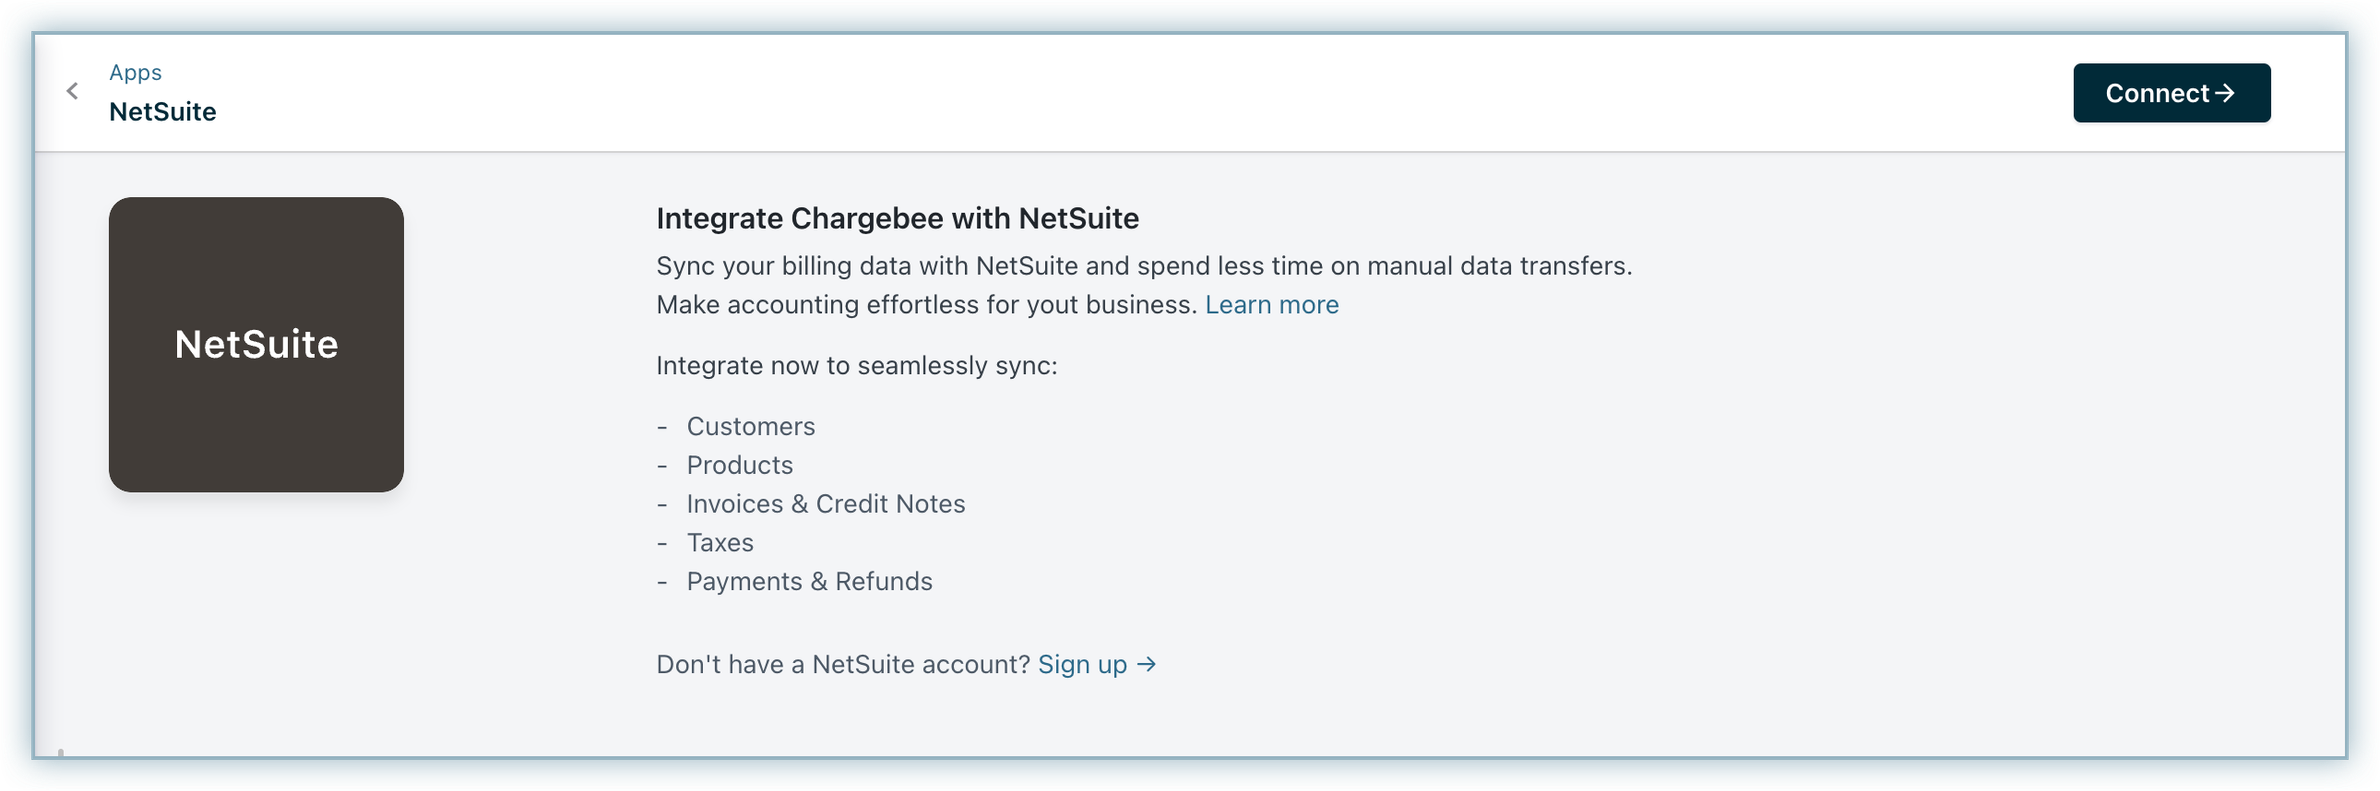
- Connect to the NetSuite application listed on Chargebee's app marketplace by selecting Apps > Marketplace > NetSuite.
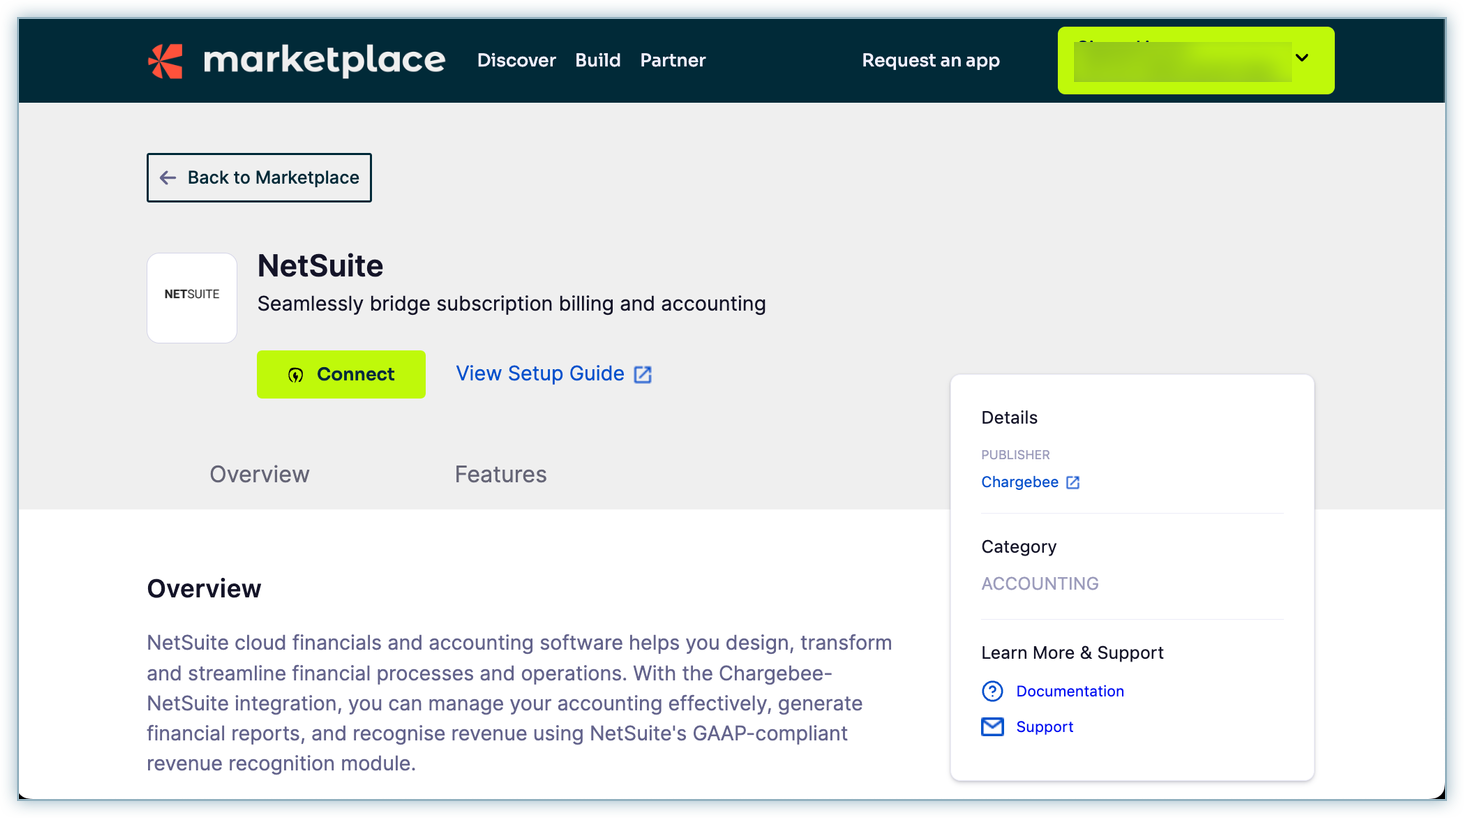
- Click Connect to get started with the integration.
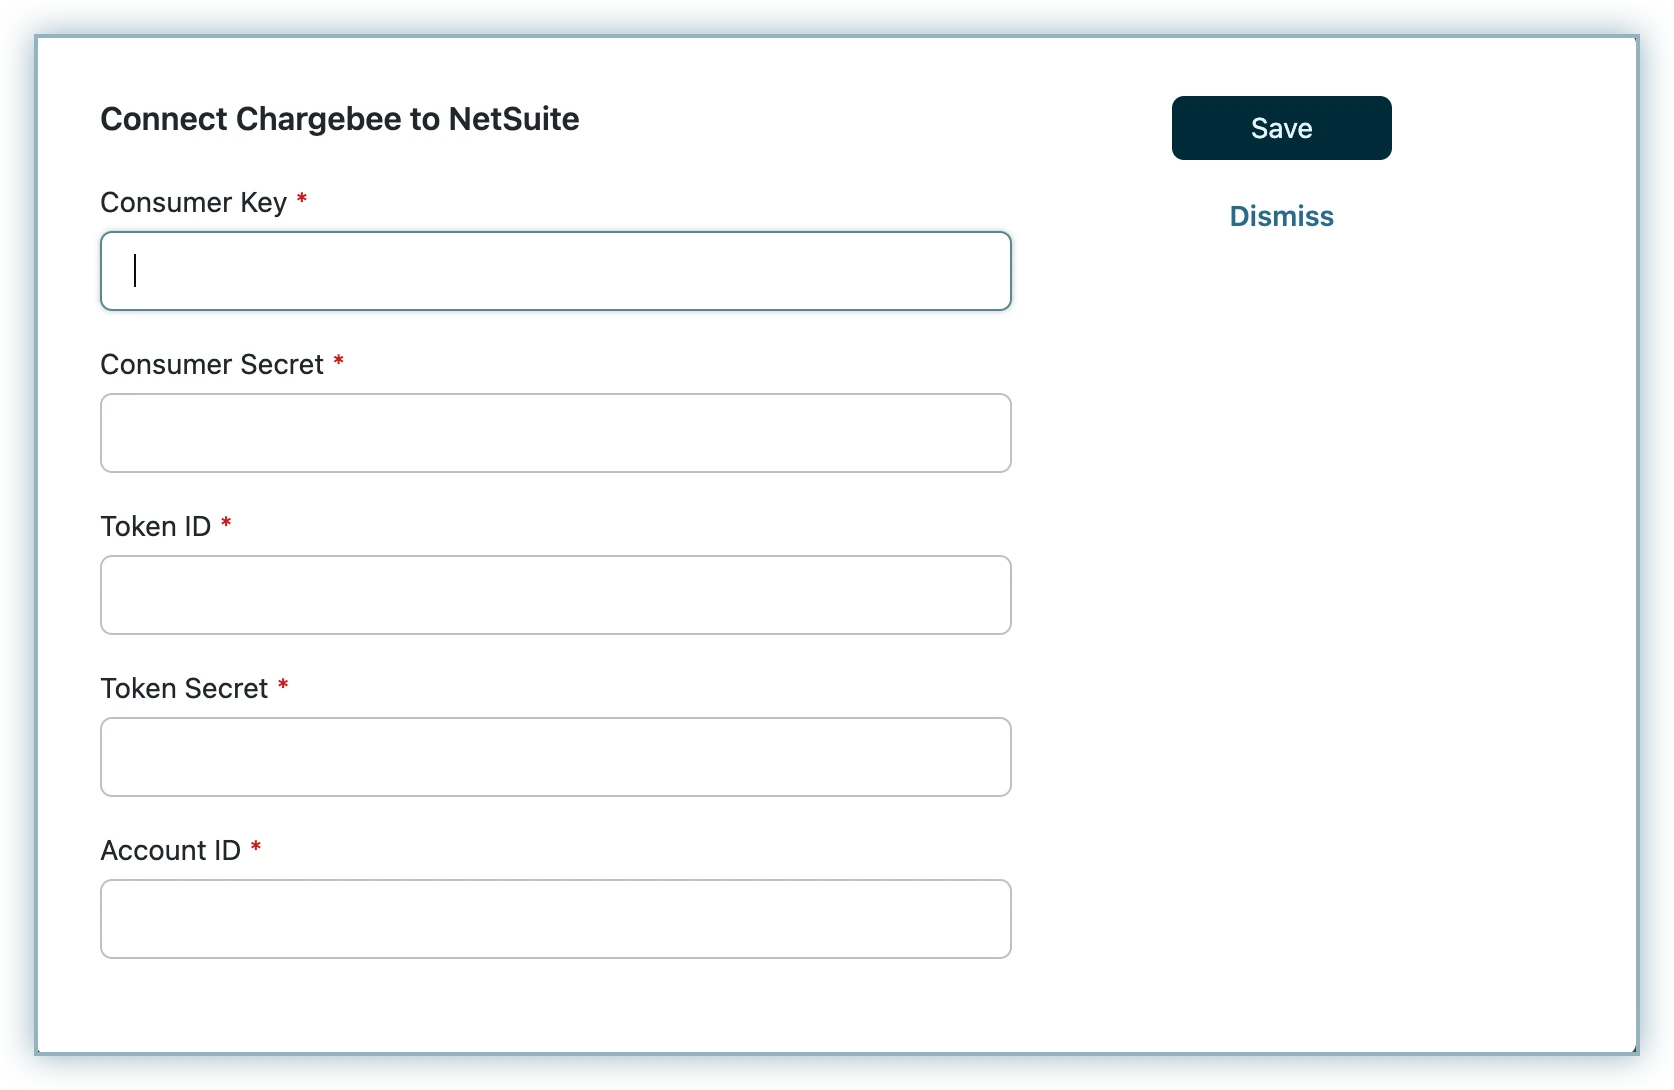
- Enter the NetSuite login credentials in the pop-up connect box.
- Click Save.
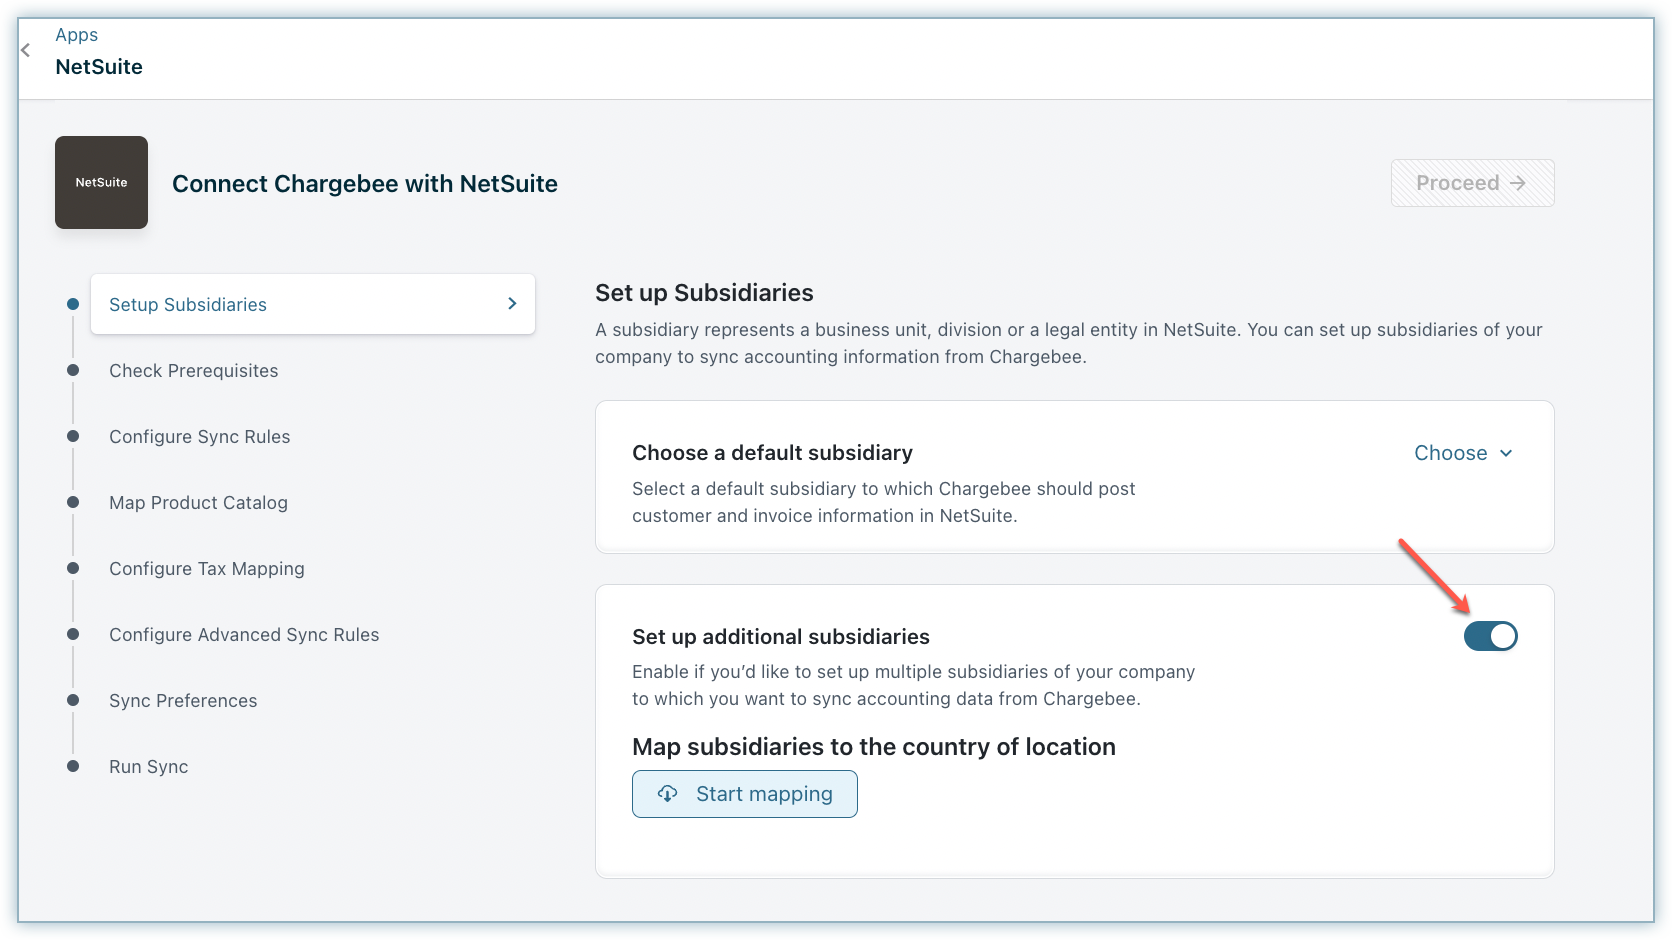
Step 2: Setup Subsidiary
A subsidiary is a distinct legal entity or company within a hierarchical structure, representing a separate entity in a global organization, with its own data management and potentially unique tax considerations.
Choose a default Subsidiary
Choose a default subsidiary within NetSuite where Chargebee can securely post customer and invoice-related information.
Set up additional subsidiaries
Enable this option if you wish to sync accounting information from Chargebee across multiple subsidiaries in NetSuite.
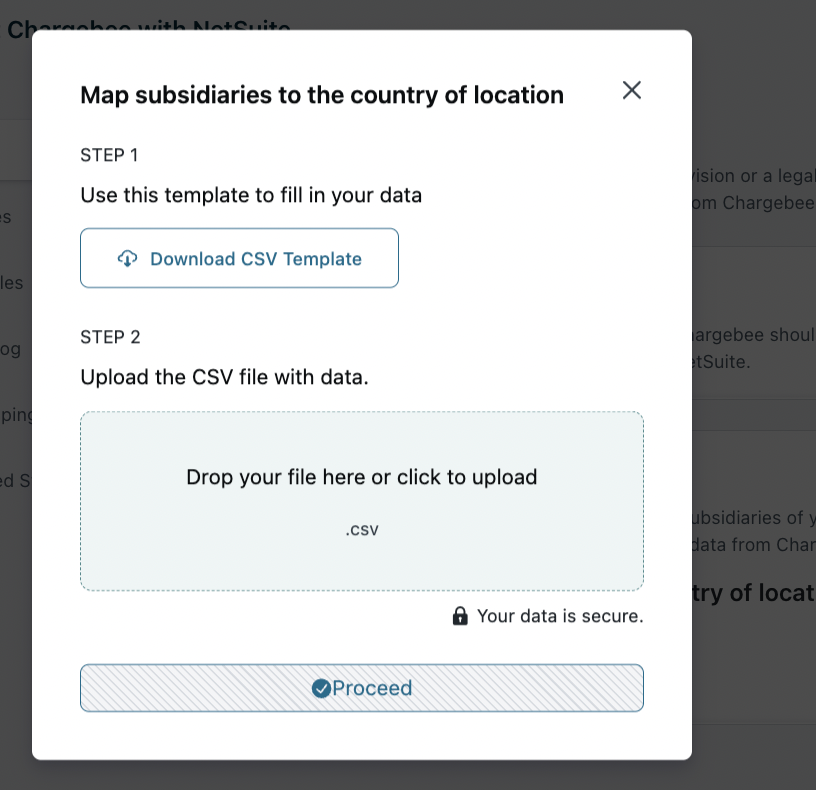
A sample CSV template with the headers is displayed here.
| ISO_Country_Code(2 Letters) | Country Code |
|---|---|
| Subsidiary_Internal_ID | Internal Id of the Subsidiary from NetSuite |
Note
By default, subsidiaries are organized by country; if not, please contact support. Set up additional subsidiaries should be used only when the Multi-Entity feature is not enabled in Chargebee.
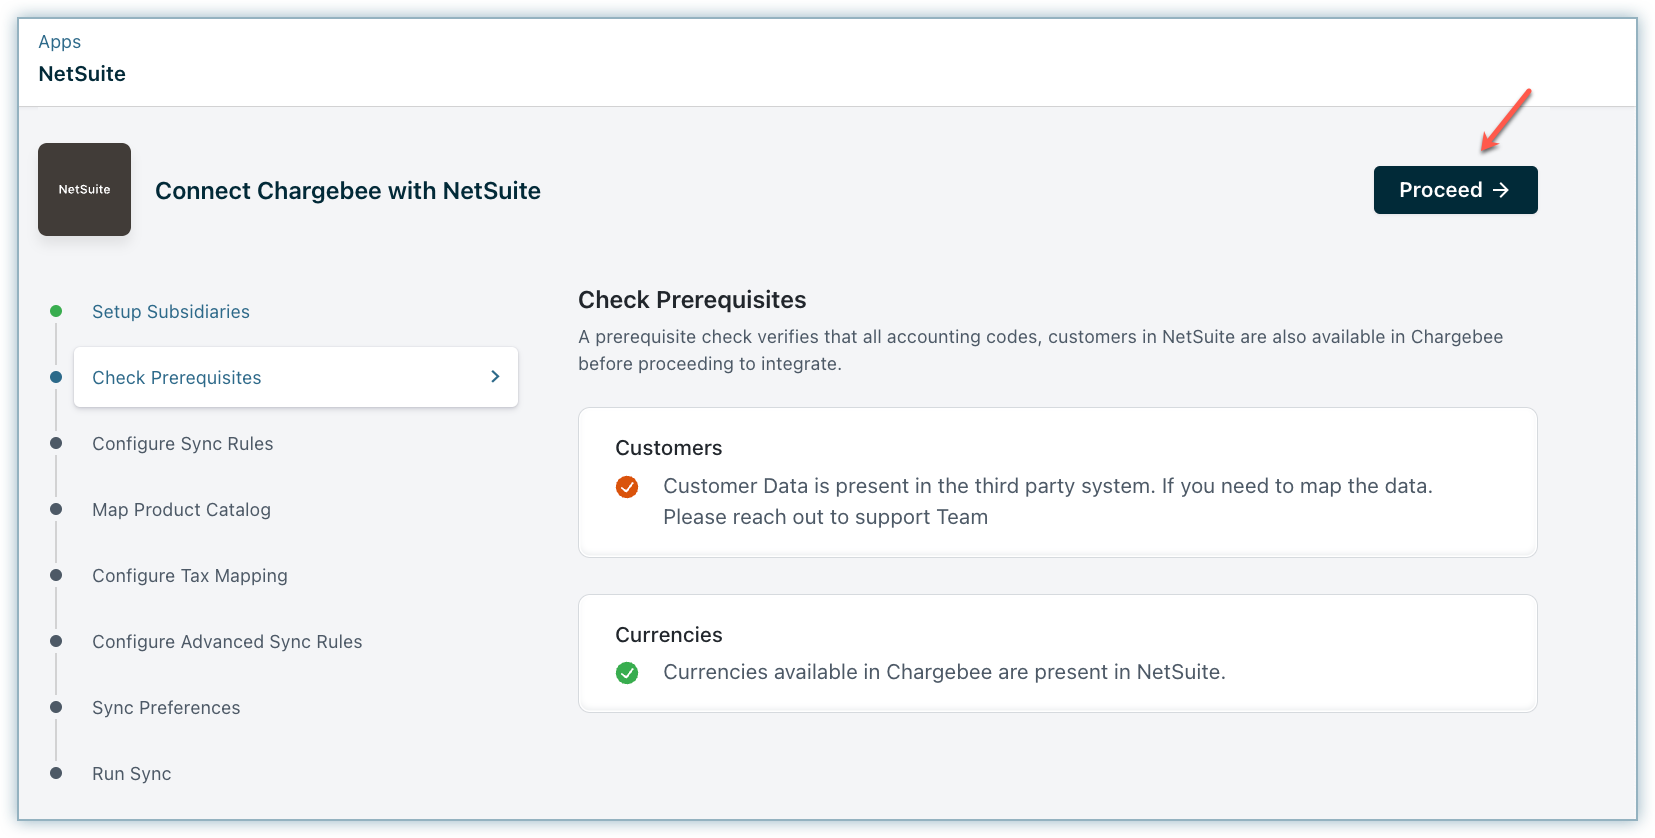
Step 3: Check Prerequisites
Chargebee performs a list of checks in NetSuite. This prerequisite check verifies if the accounting codes, customers, and their currencies in NetSuite are available in Chargebee before proceeding with the integration.
-
Customer duplicate check: If invoices from Chargebee are already available in NetSuite, customers will be present as well. To avoid duplicates, you must map the customer records between both systems. You can download the list of customers as a CSV file, map the customers, and upload the updated sheet using record mapping once the setup is complete.
-
Currency check: The currencies present in Chargebee must be present in NetSuite. Chargebee does not compare the currencies via API. You must manually compare and add the currencies in NetSuite.
Click Proceed to move to the next step.
Note
This error message is displayed if customer data already exists in NetSuite, and you can contact Chargebee support.
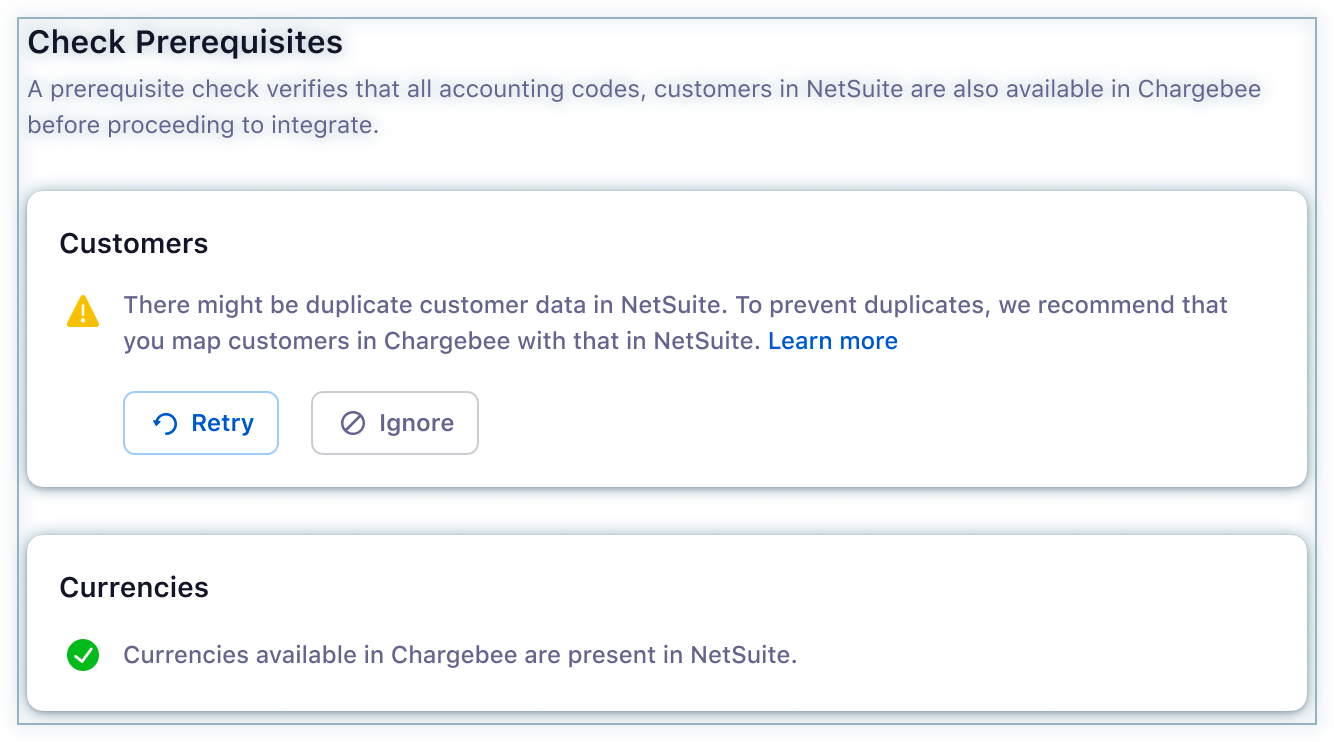
If you choose to ignore, click Ignore, following which the Proceed button is enabled.
Step 4: Configure Sync Rules
In this section, you need to perform account mapping for payments, invoice line items, and refunds.
Account mapping for payments
Payment transactions recorded in Chargebee can be mapped to payment accounts in NetSuite. For reconciliation purposes, you can select a clearing or undeposited funds account. If you have multiple currencies, payment gateways, or payment methods enabled, you can choose specific payments or checking accounts.
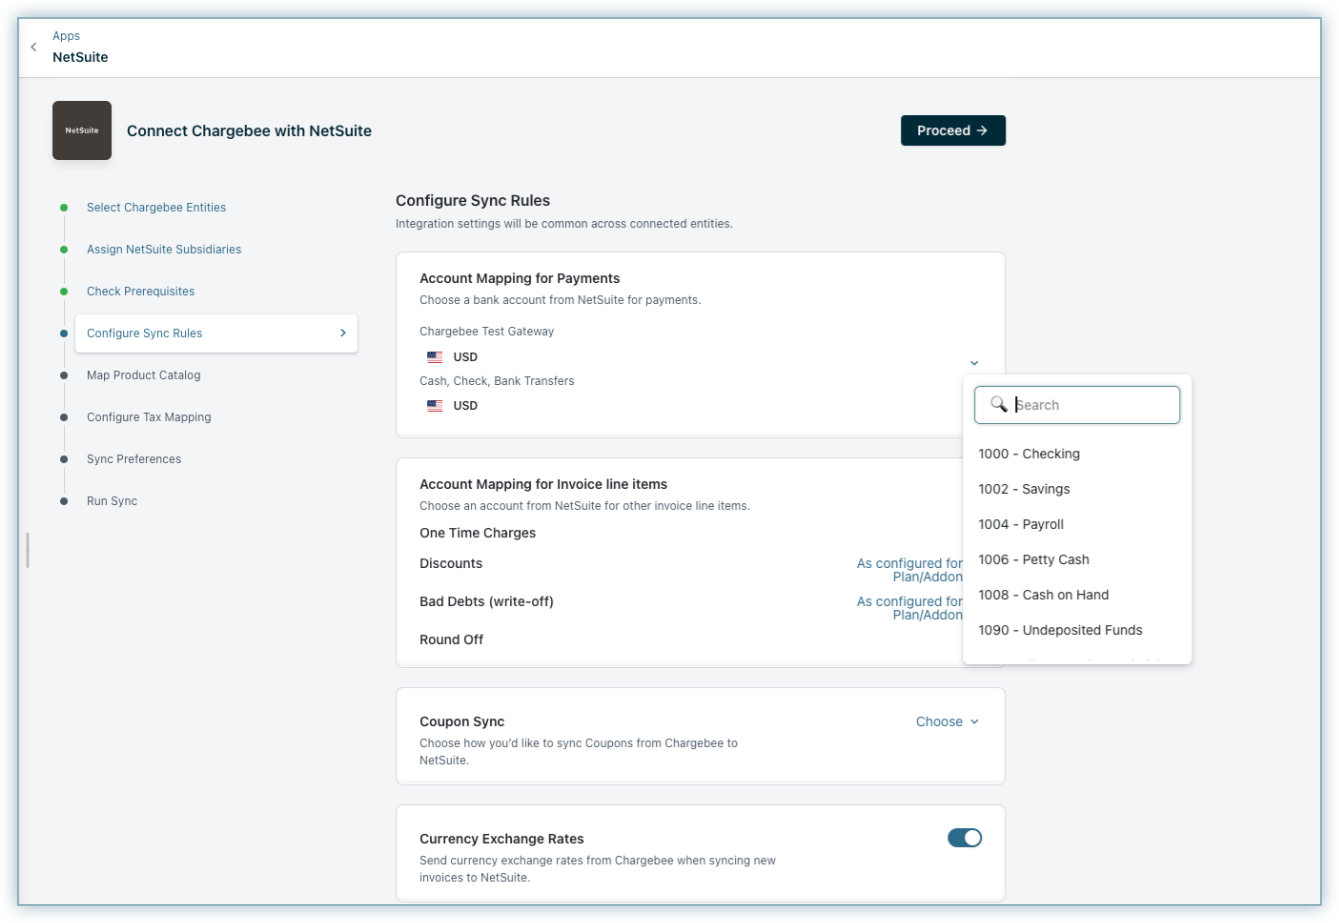
Account mapping for invoice line items
Account mapping for invoice line items involves assigning specific accounts or categories to each line item on an invoice. The following account types of NetSuite can be configured for other line items:
| Other Line Items | Netsuite Account Types |
|---|---|
| One-time charges / Adhoc charges | Income, other income, deferred revenue |
| Discounts | Income, other income, expense, deferred revenue, other expense, long term liability, other current liability, and "As configured for Plan/Addon" |
| Bad debts (write-offs) | Income, other income, expense, deferred revenue, other expense, long term liability, other current liability, and "As configured for Plan/Addon" |
| Round offs | Income, other income, expense, deferred revenue, other expense, long term liability, and other current liability |
Coupon sync
Choose how you would like to sync coupons from Chargebee to NetSuite. You can choose either of the two options listed here:
Option 1: Non-Inventory Sales Line items
Option 2: Discount
By default, coupons will be created as discounts.
Currency exchange rates
When the currency exchange rates are enabled, you can send currency exchange rates from Chargebee for transactions, invoices, or credit notes to NetSuite.
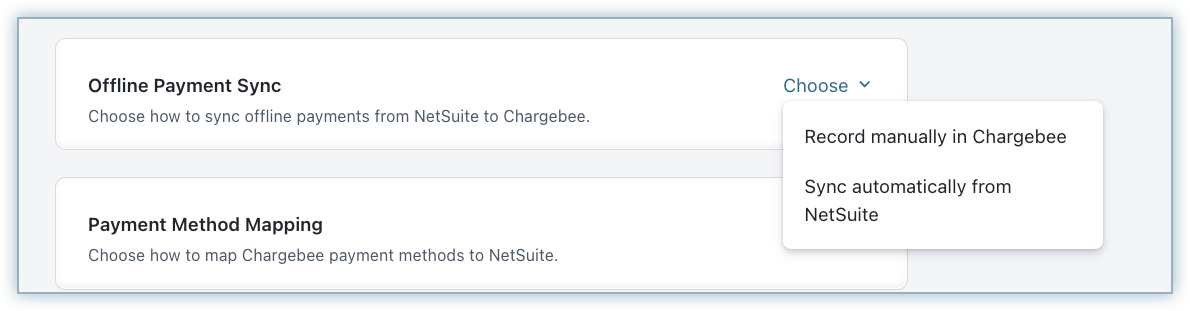
Offline payment sync
Offline Payment Sync offers flexibility for automatically syncing offline payments from NetSuite to Chargebee. You can allow sync to handle offline payments automatically or skip offline payments from sync, and in that latter case, you need to manually record offline payments in Chargebee.
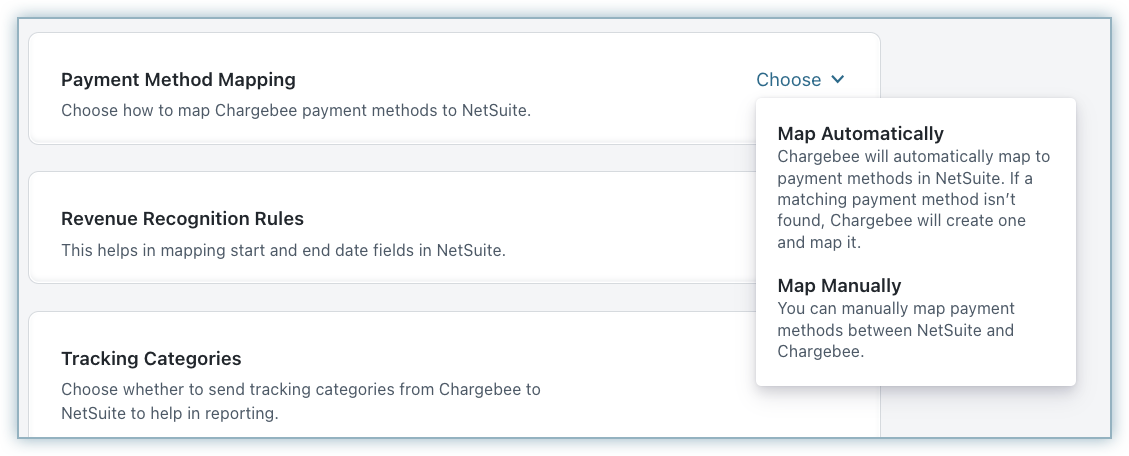
Payment method mapping
You have the option to map payment methods manually using the Map Manually option or let it be done automatically. If you choose Map Automatically, the sync will automatically match payment methods between Chargebee and NetSuite. If it doesn't find a relevant match, it will create a new payment method and use it automatically.
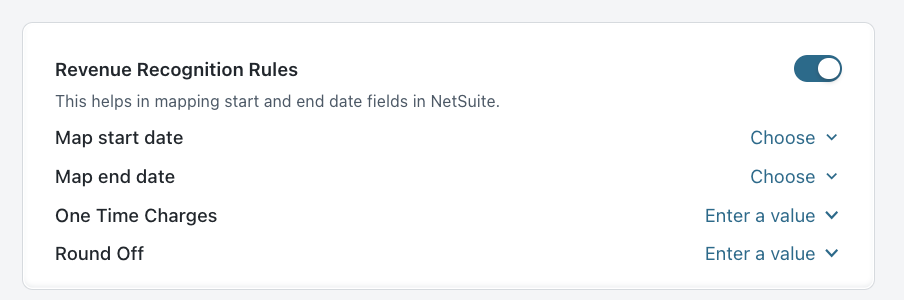
Revenue recognition rules
You can send revenue recognition information from Chargebee for invoice line items when this Revenue Recognition Rules button is enabled.
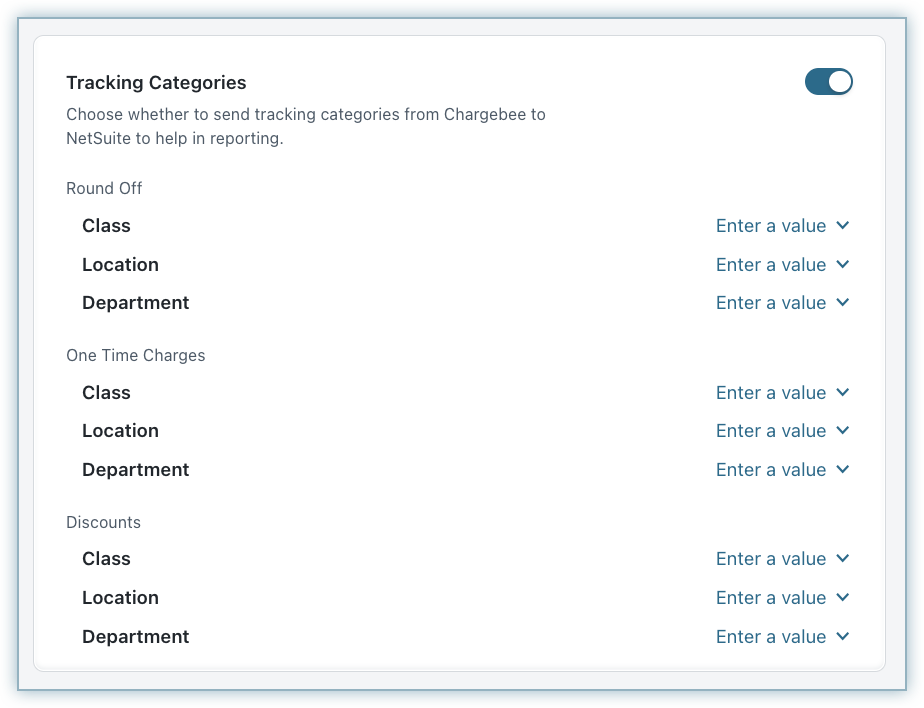
Tracking categories
You can send tracking category information from Chargebee for invoice line items when the Tracking Categories button is enabled.
Customer duplicate check
You can choose to identify duplicate customers in NetSuite when data is synced from Chargebee using the two options available in the Customer Duplicate Check. You can use the customer's email or ID to check for duplicates.

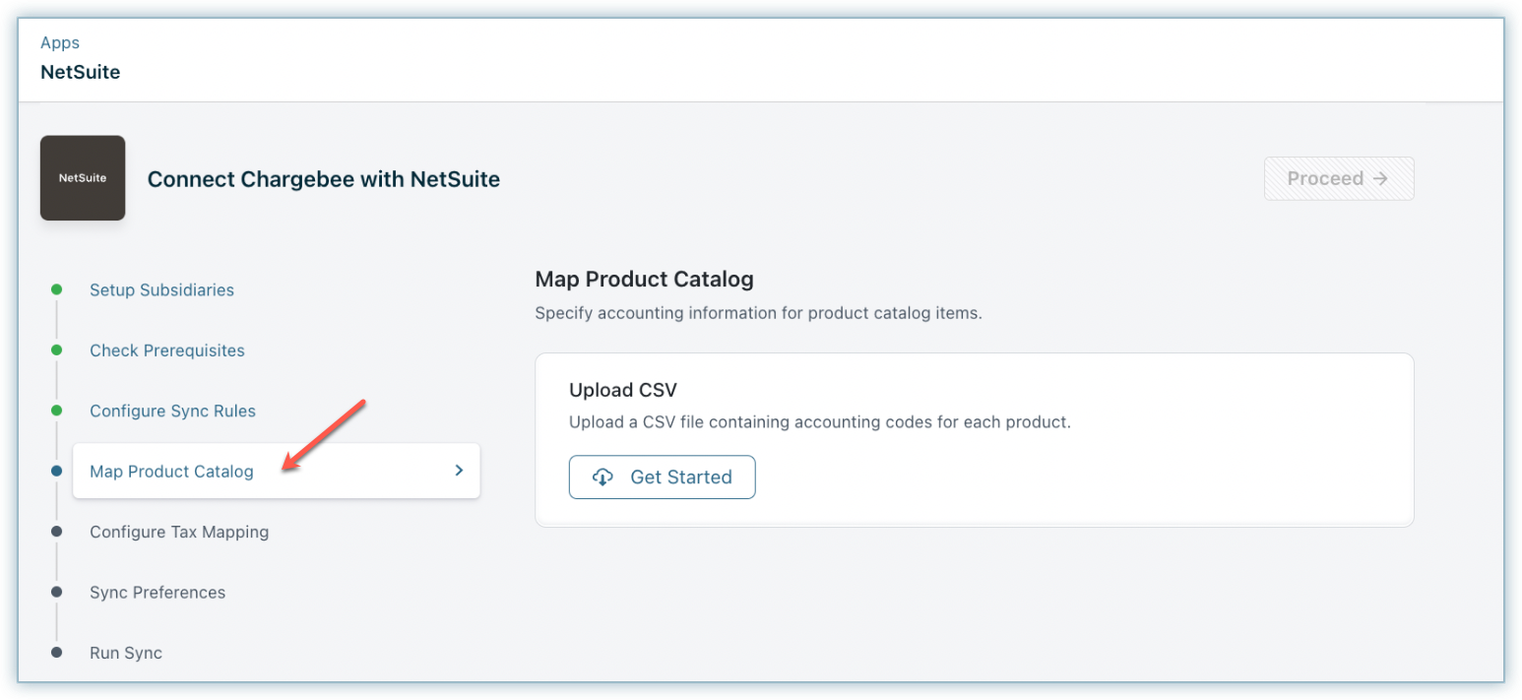
Step 5: Map Product Catalog
Within Chargebee, items are configured at the site level, and different accounting attributes, such as accounting code, SKU identifier, and tracking category cannot vary for each business entity. To enable distinct accounting fields for each business entity, you can enable product catalog mapping, which allows you to assign the necessary data at the business entity level according to specific requirements.
Note
The Map Product Catalog feature is deprecated for test sites, and the product catalog step will no longer be available except for sites using Multi Business Entity with Product Catalog. Deprecation for all live sites is also planned. New users should configure price points for the plan, addon, and charge under Accounting Details.
You can upload a CSV file containing mapping details of the products. Within these mappings, you can specify accounting codes for each entry and other accounting information.
Upon clicking Get Started, you can see the below pop-up where you can download the sample CSV template using this button.
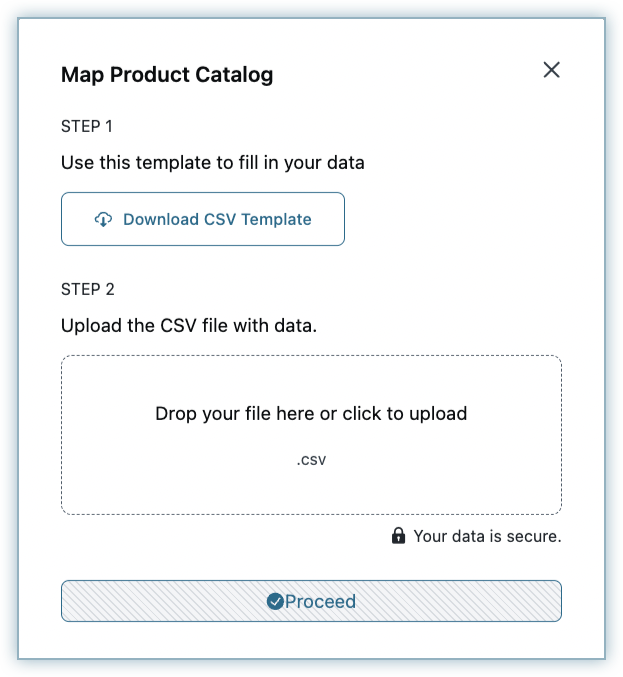
The sample downloaded CSV file contains the following fields:
| CSV Field Name | Description | Additional Info |
|---|---|---|
| PRODUCT_ID | Unique identifier for Chargebee's item prices. | |
| PRODUCT_NAME | Name of the Item price in Chargebee's Product catalog. | |
| SKU | SKU of the product | This field is used to map the existing items from NetSuite to the respective plan/add-on in Chargebee. It can be used as an alternative name for plan/add-on and its character limit should not exceed 30 characters. |
| ACC_CODE | The accounting code associated with the item | The Accounting code field should be filled for all the plans and add-ons. |
| ACCOUNTING_FIELD1 | Class | If you have classified Dimensions for your products in NetSuite and would like to sync data specific to it, enter the information here |
| ACCOUNTING_FIELD2 | Location | If you've classified Dimensions for your products in NetSuite and would like to sync data specific to it, enter the information here |
| ACCOUNTING_FIELD3 | Department | If you've classified Dimensions for your products in NetSuite and would like to sync data specific to it, enter the information here |
| ACCOUNTING_FIELD4 | Revenue Recognition Rule Id | If you've configured Rev Rec for your products in NetSuite, and would like to sync data specific to it, enter the information here |
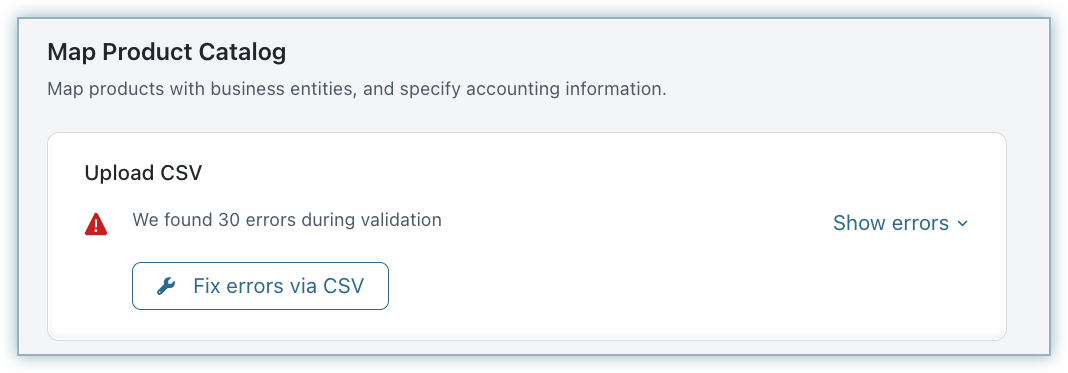
In case of any errors during validation, an error message is displayed. You can fix this by re-uploading the file with the correct mapping.
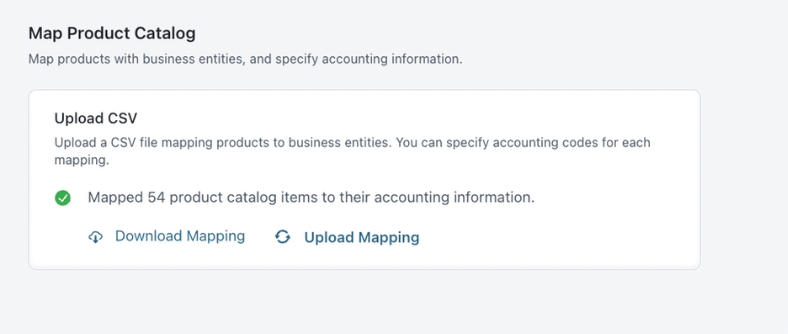
Upon successful validation, you can view the successfully mapped records as shown below.
Note
- Once Product Catalog Mapping is done, configurations on the item prices details page will no longer apply.
- If you prefer not to create multiple items and instead use a single item for all business entities, ensure that the SKU remains consistent and upload the CSV file accordingly.
- To streamline the process and save time, Chargebee pre-fills the CSV file with information from the UI filled on the item prices page's accounting details tab. Even if there are no changes, the CSV file needs to be re-uploaded initially.
Step 6: Configure Tax Mapping
You can choose how taxes are to be computed, and also set up tax sync from Chargebee to NetSuite if required. Enable the Sync tax information from Chargebee to NetSuite.
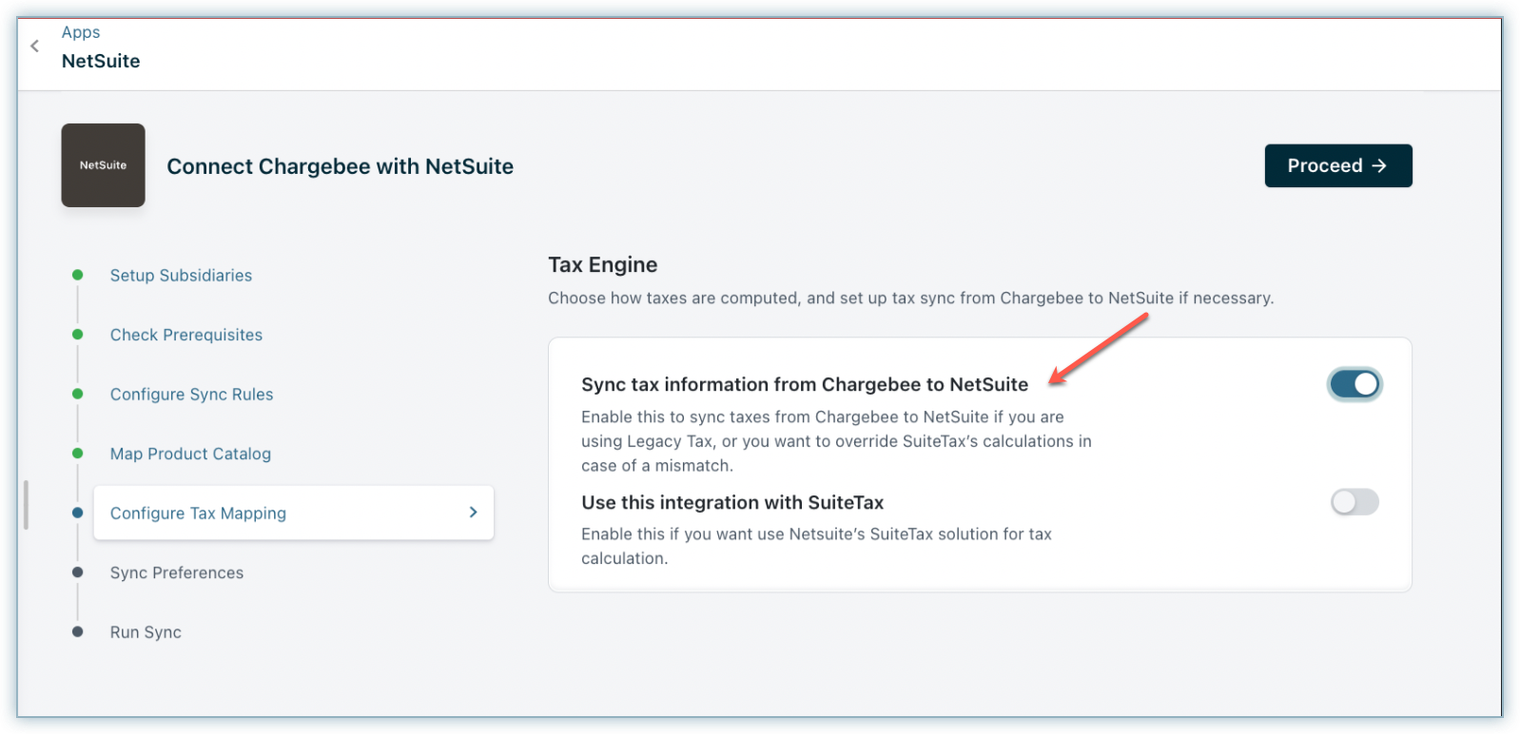
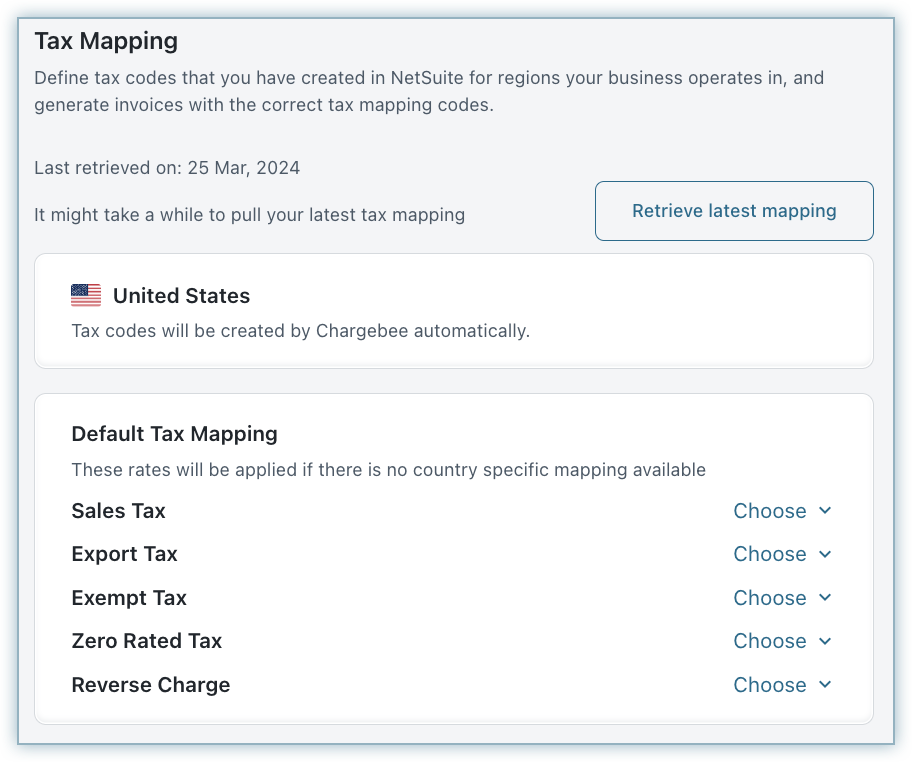
Retrieve the latest mapping
The Retrieve latest mapping button retrieves the latest tax codes/tax groups used for tax mapping. This will run for some time to fetch the latest tax information that can be used for default tax mapping.
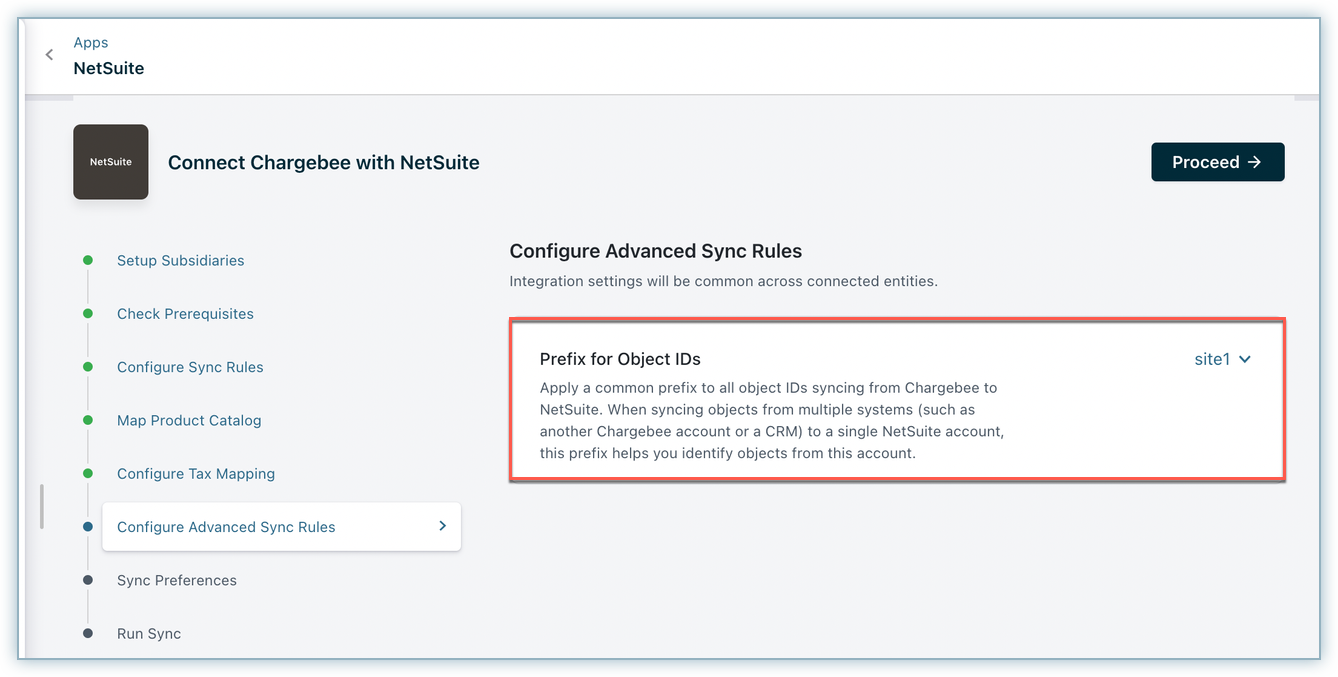
Step 7: Configure Advanced Sync Rules
This is an additional non-mandatory sync rule step. You can choose to skip it by clicking Proceed.
Prefix for object IDs
This value acts as a common prefix to all object IDs syncing from Chargebee to NetSuite. When syncing objects from multiple systems (such as another Chargebee account or a CRM) to a NetSuite account, this prefix helps you identify objects from this account.
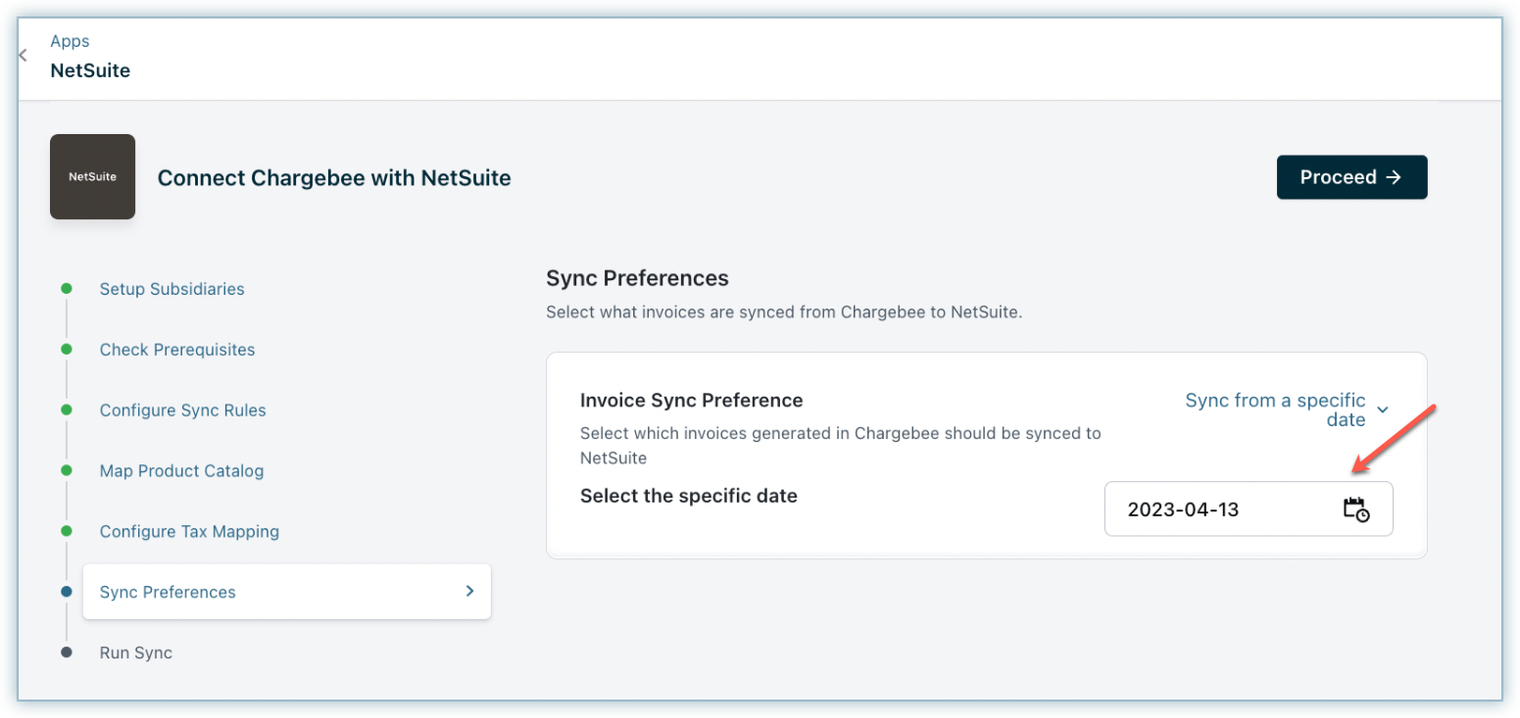
Step 8: Sync Preferences
You can choose to sync invoices from Chargebee to NetSuite from a particular date by selecting the relevant date from the drop-down.
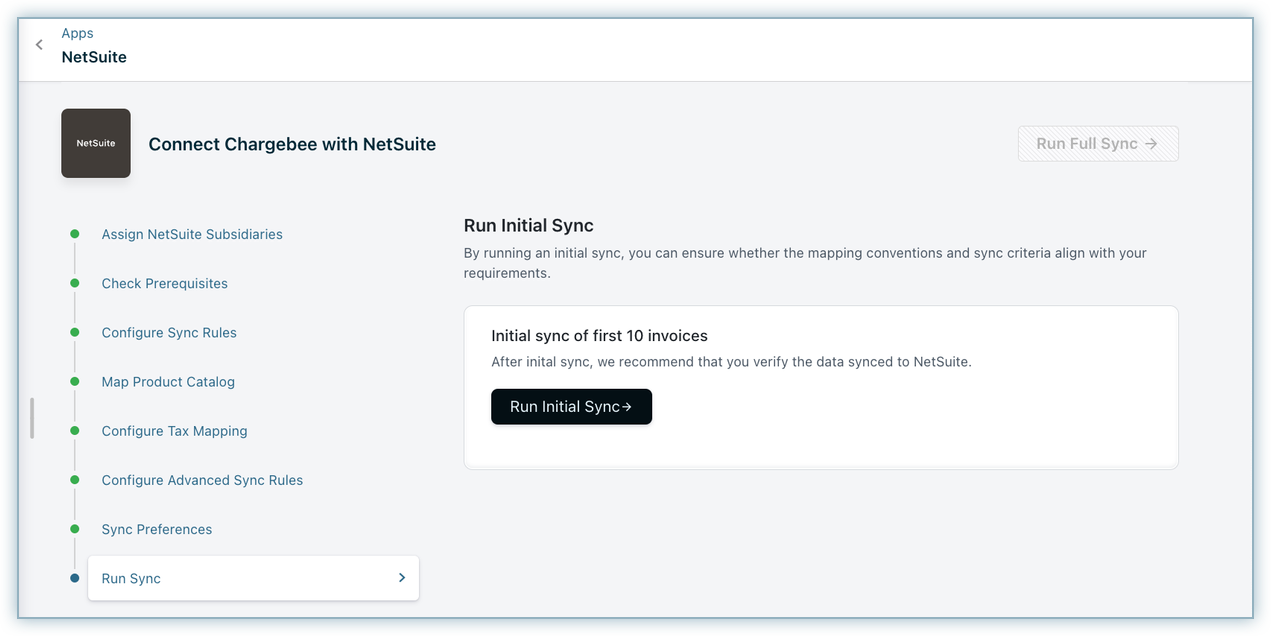
Step 9: Run Sync
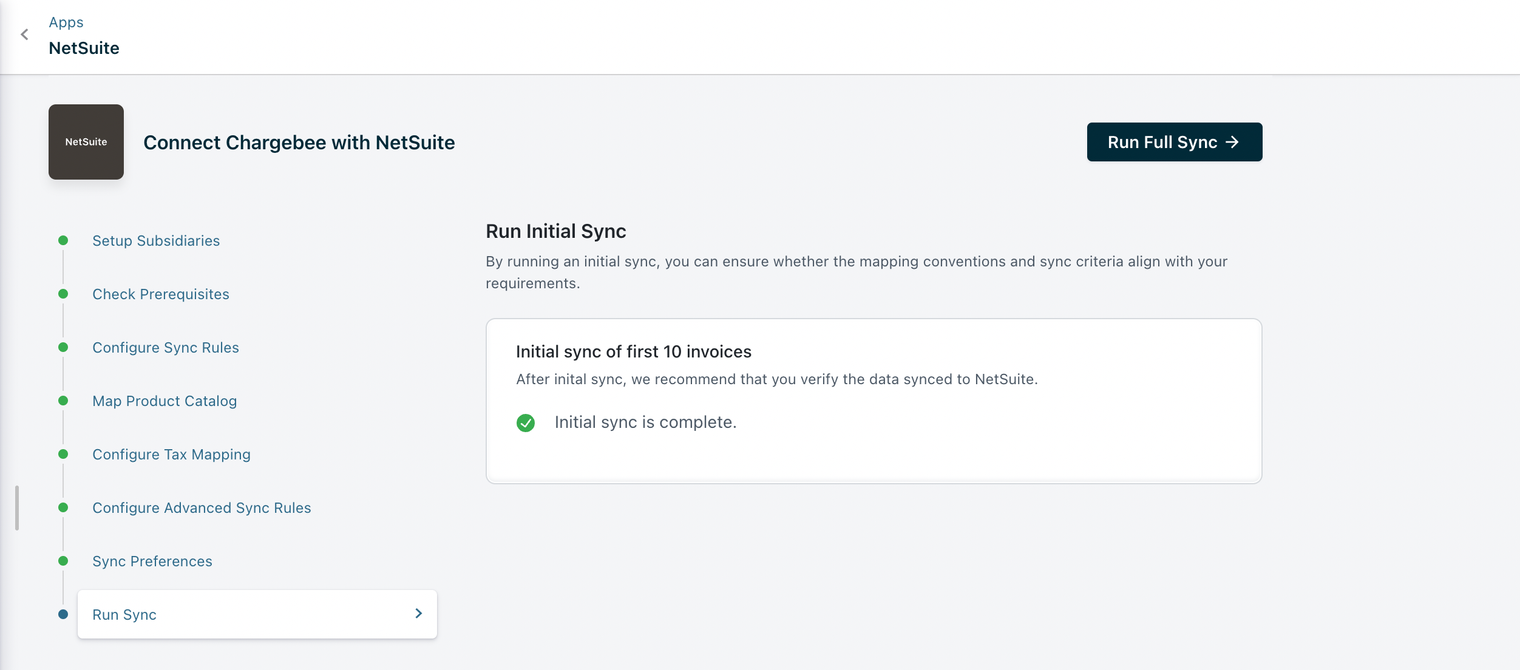
Once the configuration is complete, click Run Initial Sync to begin the sync. Chargebee will sync the first 10 invoices to ensure that mapping, conventions, and sync criteria align with your requirements.
You need to review these invoices in NetSuite. If the sync works as expected, you can click Run Full Sync.
On triggering Run Full Sync, the sync dashboard is displayed where you can view or manage settings.
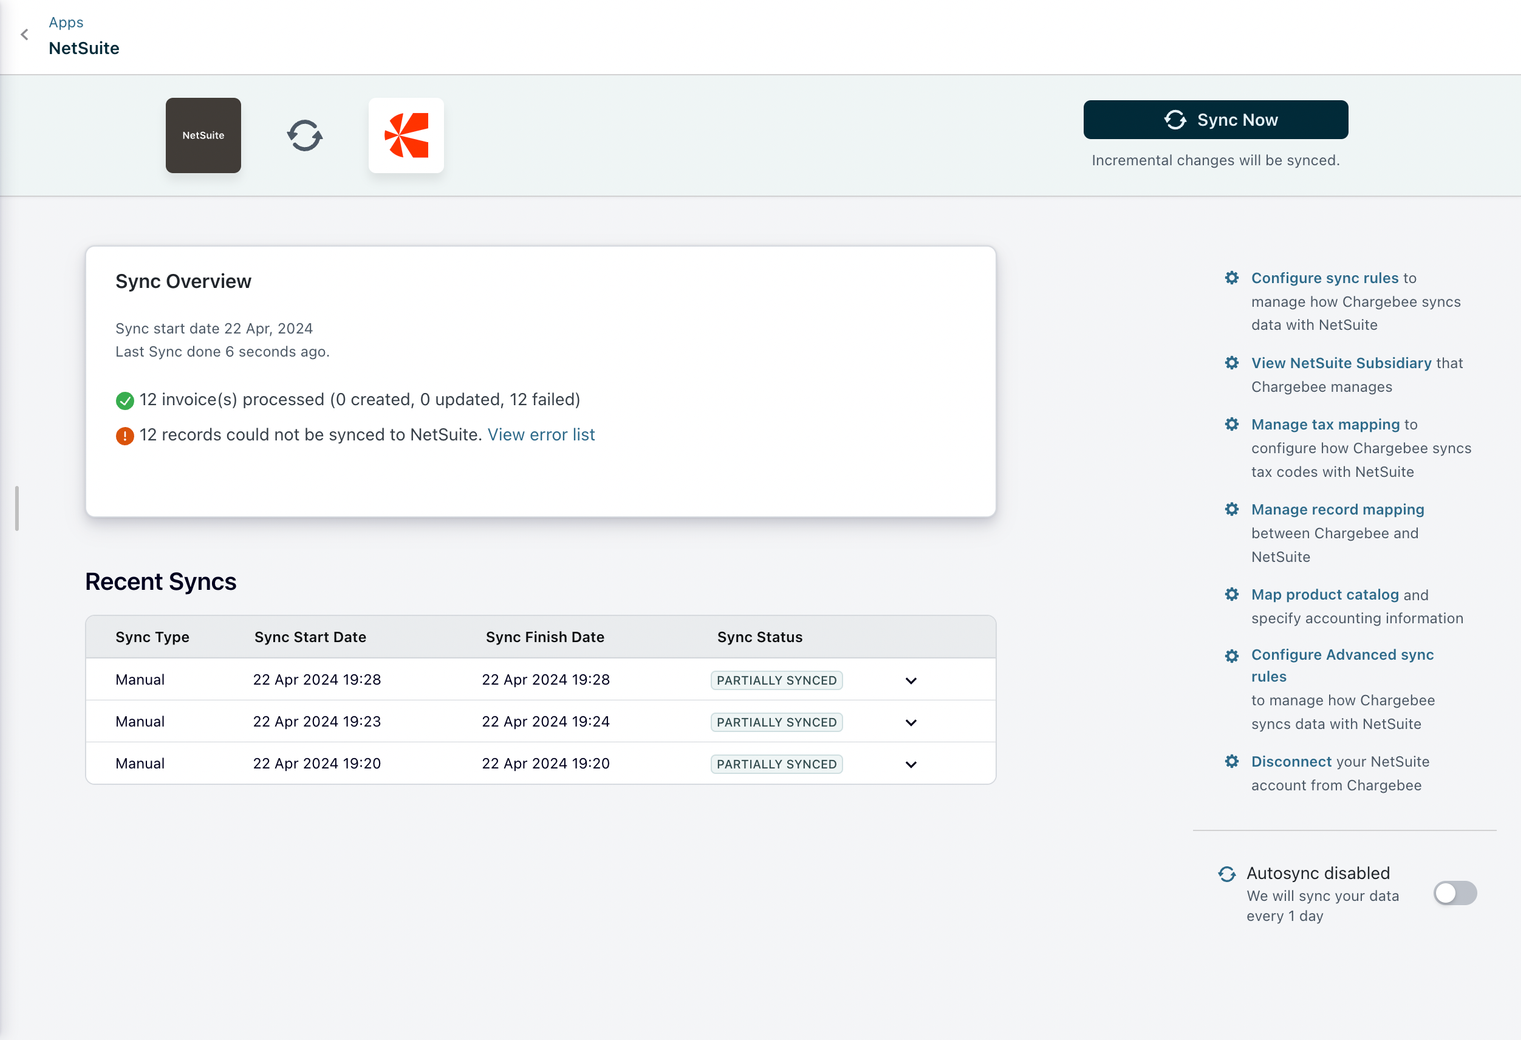
Enable/Disable auto sync
After setting up the integration, you can configure the daily schedule to sync all the information to NetSuite automatically. Invoices and related information are synced once every 24 hours. You can choose to disable auto-sync if required.
Sync Now
For on-demand sync, you can sync data from Chargebee to NetSuite immediately.
Manage mapping
You can edit the configurations or GL Account mapping provided during the setup process.
Manage record mapping
You can add/update the mappings for the Chargebee records (Invoices, Customers, Credit Notes, and Transactions).
Manage tax mapping
Adjust the tax mapping configured during the setup process. If new tax regions have been added in Chargebee settings, update the tax mapping in this section accordingly.
Map product catalog
Manage and update the product catalog.
Manage advanced sync rules
Allows you to modify advanced sync rules. This new value will be applicable for further sync that will run; it will not modify any existing records.
Disconnect
On disconnecting at the site level, it'll disconnect all the entities. Disconnecting at the entity level will only disconnect at a specific entity level.
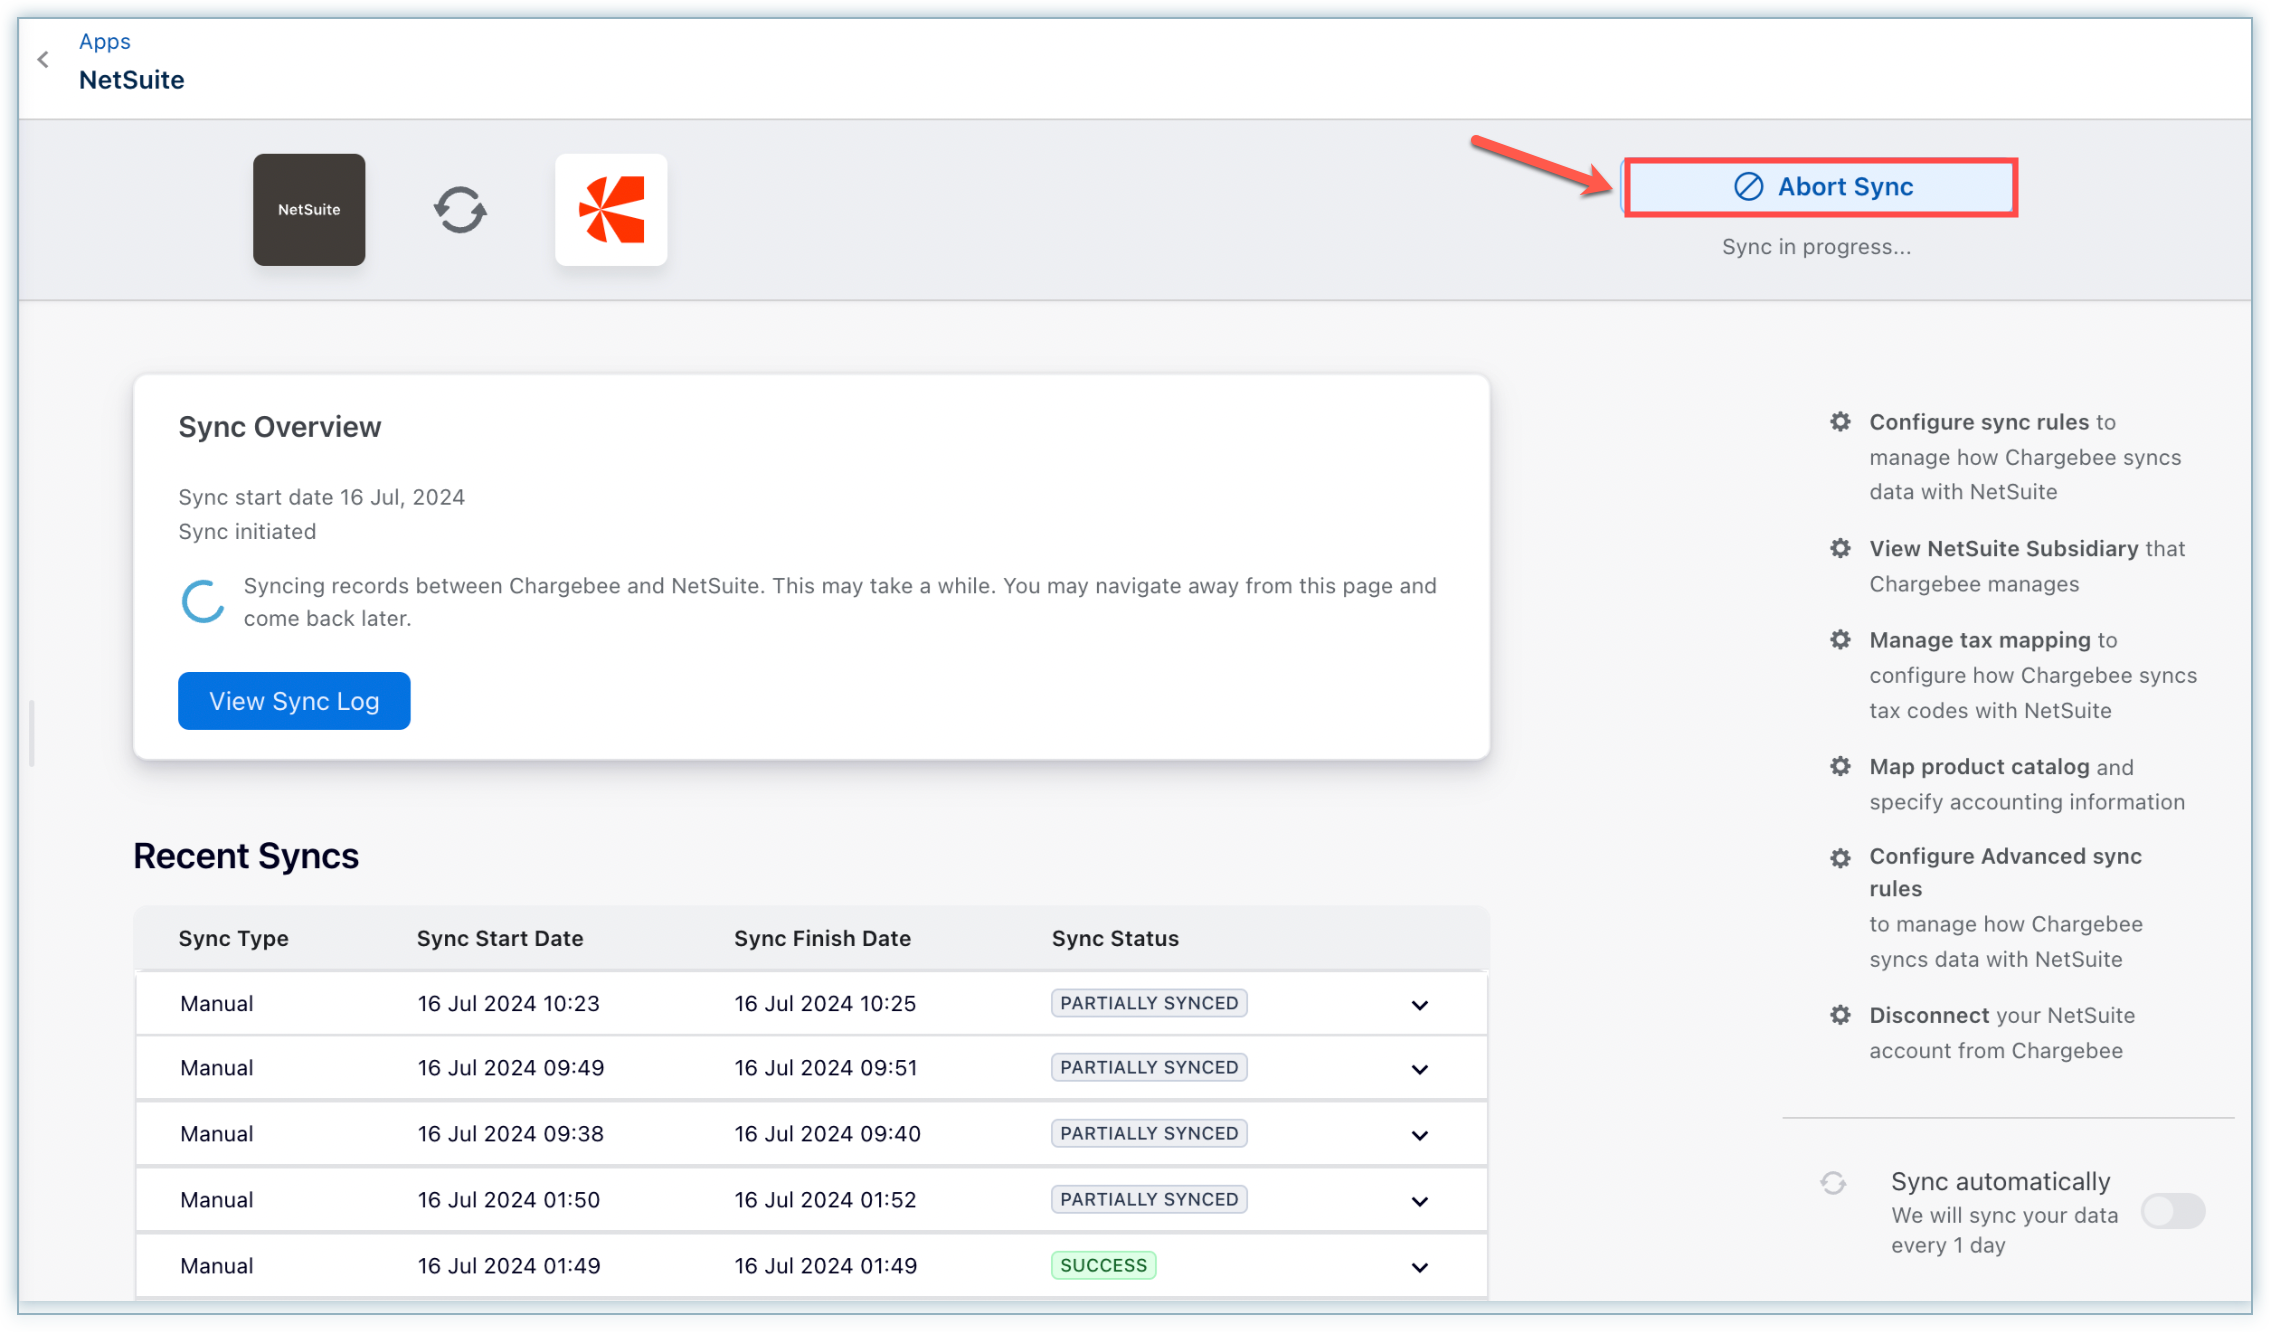
Abort Sync Functionality
The Abort Sync functionality in Chargebee enables you to halt ongoing sync jobs, providing greater control over your sync processes and configurations. When you click Abort Sync, the current batch of processed records will be completed. Subsequently, the sync job will stop, and the remaining batches will not be processed. Any records skipped in this sync will be included in the next sync batch.
For domains with auto-sync enabled, sync resumes 15 minutes after the abort action. This ensures that all records, including those halted by the abort action, are synchronized in the next sync cycle. You can monitor the status of sync jobs in the Recent Syncs table.
The Abort Sync functionality is useful when updating specific records between syncs or pausing the sync process to verify or modify records in Chargebee before syncing to NetSuite.
Sync Preferences
Once the sync is set up, you can see when the last sync was run, success/errors in the sync, and options to edit the configurations:
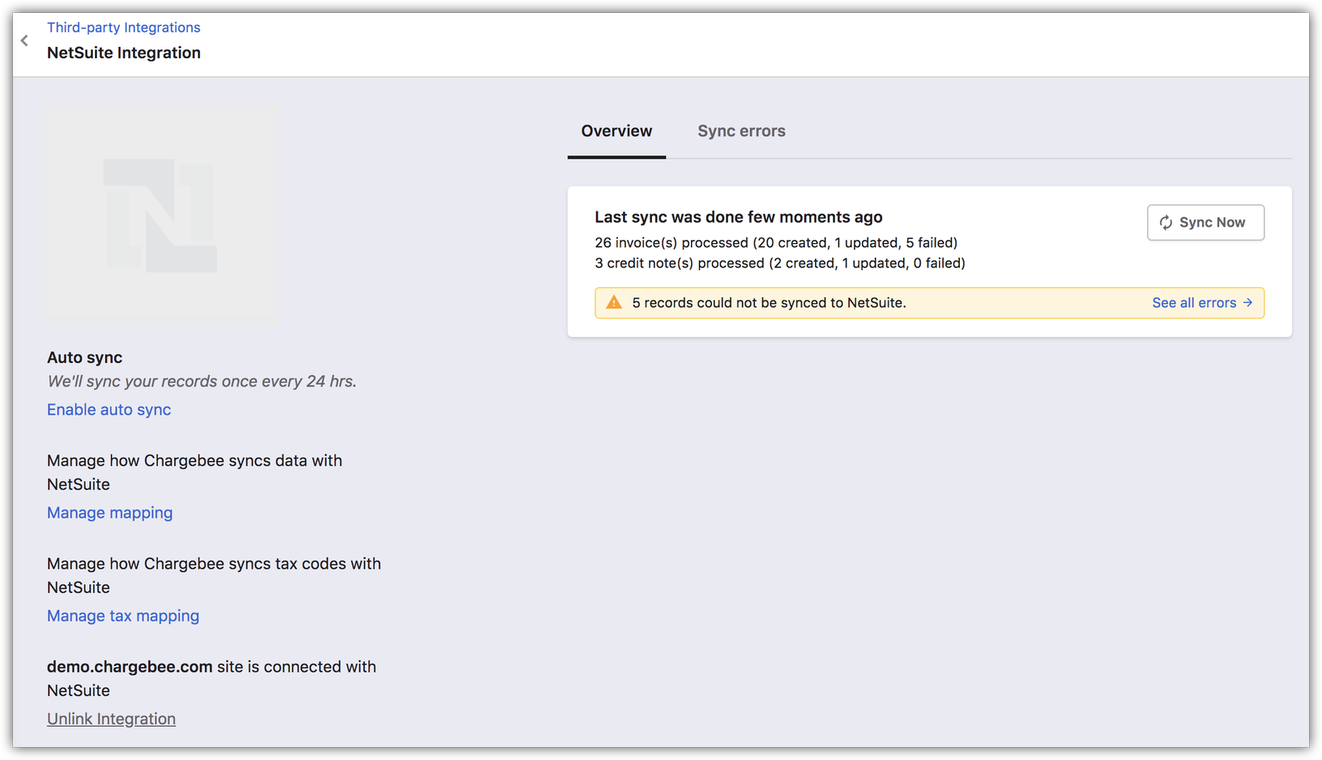
Enable/Disable Auto Sync
After setting up the integration, you can set a daily schedule to sync all the information to NetSuite automatically. Invoices and related information will be synced once every 24 hours. You can reach out to support for reducing the sync timing to 24 hours and also disable auto-sync if required.
Sync Now
For on-demand sync, you can sync data from Chargebee to NetSuite immediately.
Manage Mapping You can edit the configurations/GL Account mapping provided during the setup process.
Note
- If you want to update details, please do so in Chargebee; the modifications will be synced to NetSuite in a subsequent update.
- We recommend that you make the changes in NetSuite so that data is consistent in both systems.
- If you do the payments and refunds mapping for each offline payment and currency, then to update the mapping details, you need to contact support.
Manage Tax Mapping
You can modify the tax code mapping provided during the setup process. If you have added tax regions in your Chargebee settings, you can update tax codes here.
Unlink If you want to stop syncing data from Chargebee to NetSuite, you can unlink the integration. For more information, contact support.
FAQ
1. Are UTF-8 characters supported in the customer email field?
No, NetSuite does not support UTF-8 encoding for the customer email field.
See also
Was this article helpful?