Chargebee Self-Serve Portal
Using the Chargebee Self-Serve Portal, customers can modify subscriptions (add, edit, pause, resume, cancel, or reactivate), download previous invoices, manage payment methods, manage addresses and pay unpaid invoices.
The Self-Serve Portal displays as a modal popup or as a standalone page. Do not embed hosted portal URLs in your own iframe elements. Use Chargebee.js to open the portal as a modal, or redirect customers to the standalone portal page.
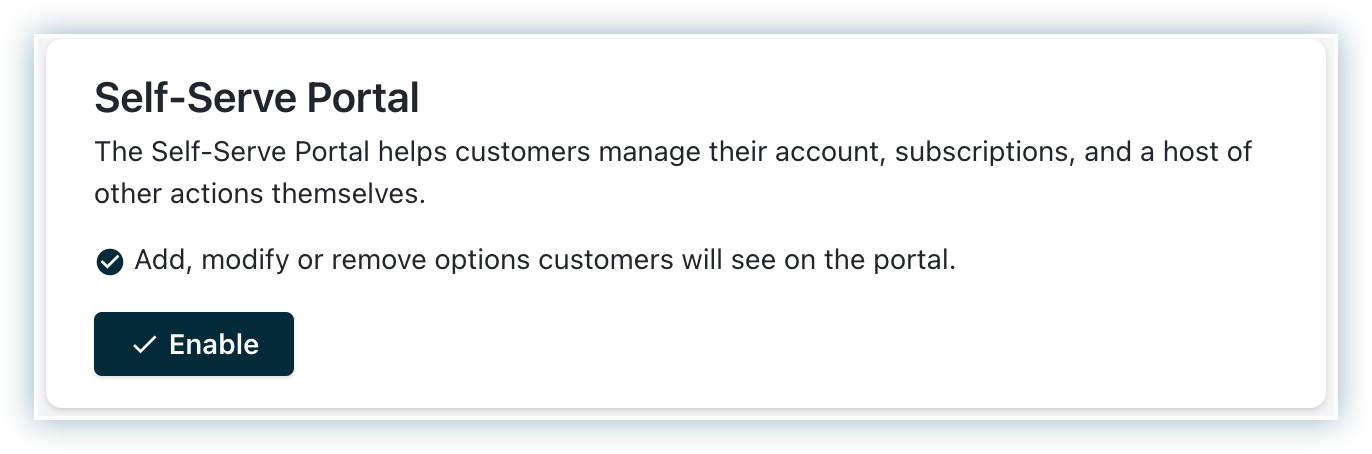
Enable the self-serve portal
To enable the Self-Serve Portal, click Settings > Configure Chargebee > Checkout and Self Serve Portal > Portal > Enable.
Configure self-serve portal
General settings
You can configure specific settings for customers to access using the Self-Serve Portal. To set up these settings, click Settings > Configure Chargebee > Checkout and Self Serve Portal > Portal.

-
Customers can access the self-serve portal: This setting provides two options for enabling access to the self-serve portal:
-
Via Single Sign On API: Recommended if you manage user authentication in your application. After users sign in to your application, create portal sessions for them dynamically. This approach enhances the customer experience by eliminating the need for users to sign in again after logging into your application or website.
-
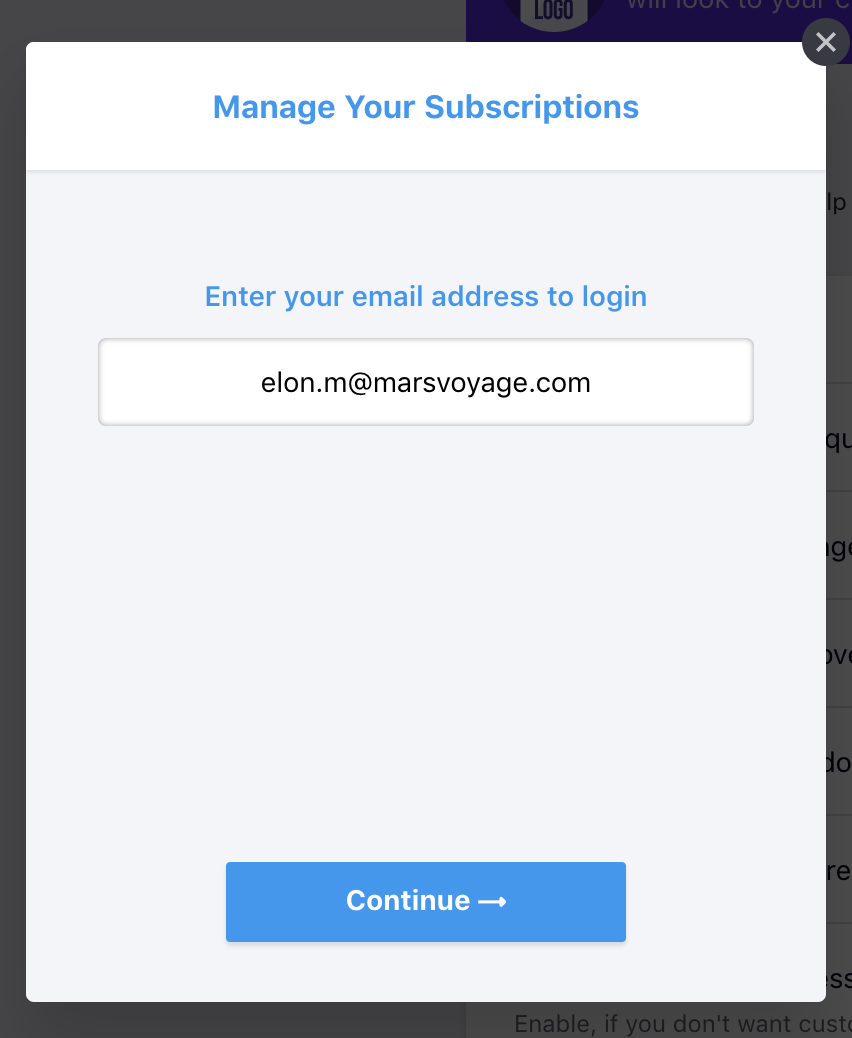
Via Chargebee Login: This option uses the default portal that Chargebee provides. Customers must sign in by entering their primary email address. They receive a one-time password (OTP) by email. After the first sign-in, they are prompted to create a password for later access.
Note
Email addresses that you add under additional contacts, including addresses marked for billing or account email, cannot be used to sign in to the portal.
-
See also
- Allow customers to download invoices: Enable this option to let customers download previous invoices.
Information
The invoice might be hidden in the customer portal if any of the customers in the hierarchy are unlinked.
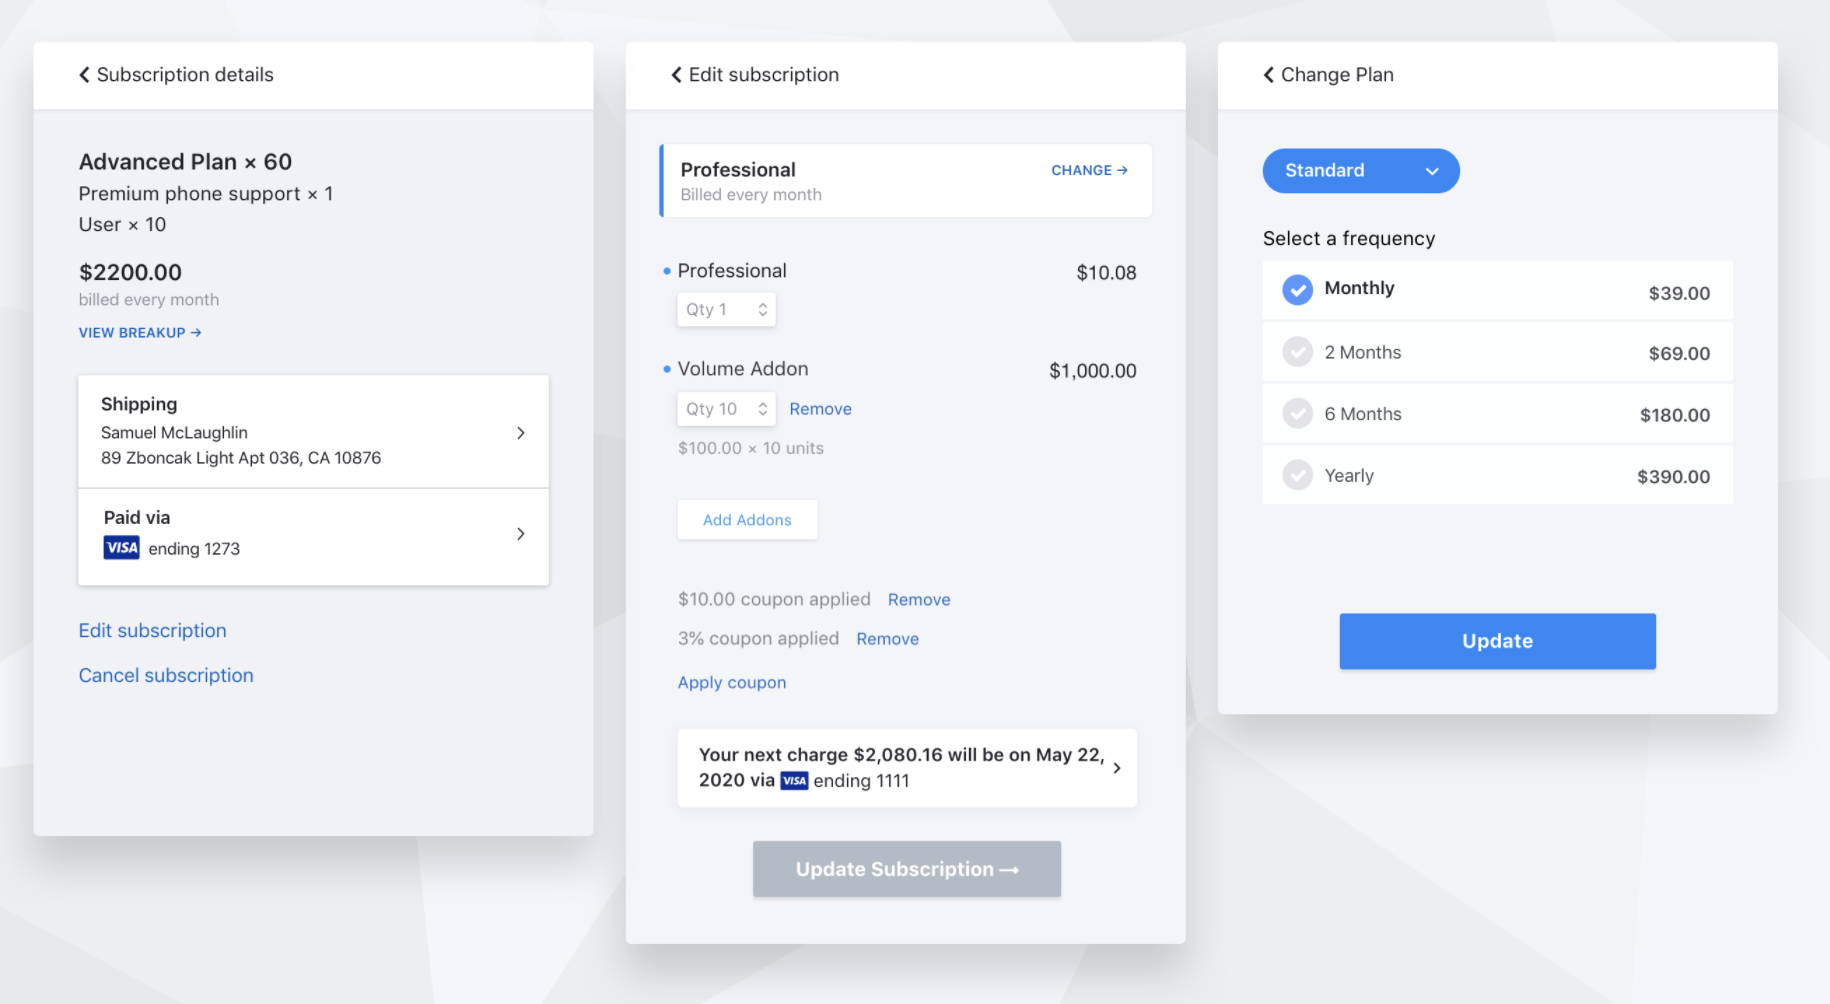
- Allow customers to change subscription: Enable this option to let customers change their subscription using the self-serve portal. You can also control the behavior of the change subscription action in the Self-Serve Portal using the following sub-settings:
| Setting | Functionality |
|---|---|
| Statuses in which subscriptions can be changed | Choose the subscription states where changes are allowed: active, non-renewing, and trial. |
| Apply subscription changes | Decide when changes take effect: immediately or at the end of the term. |
| Allow customers to change plans | Turn on this option to let customers change their plan. Proration applies based on site settings. |
| Allow customers to change plan quantity | Turn on this option to let customers change the plan quantity. |
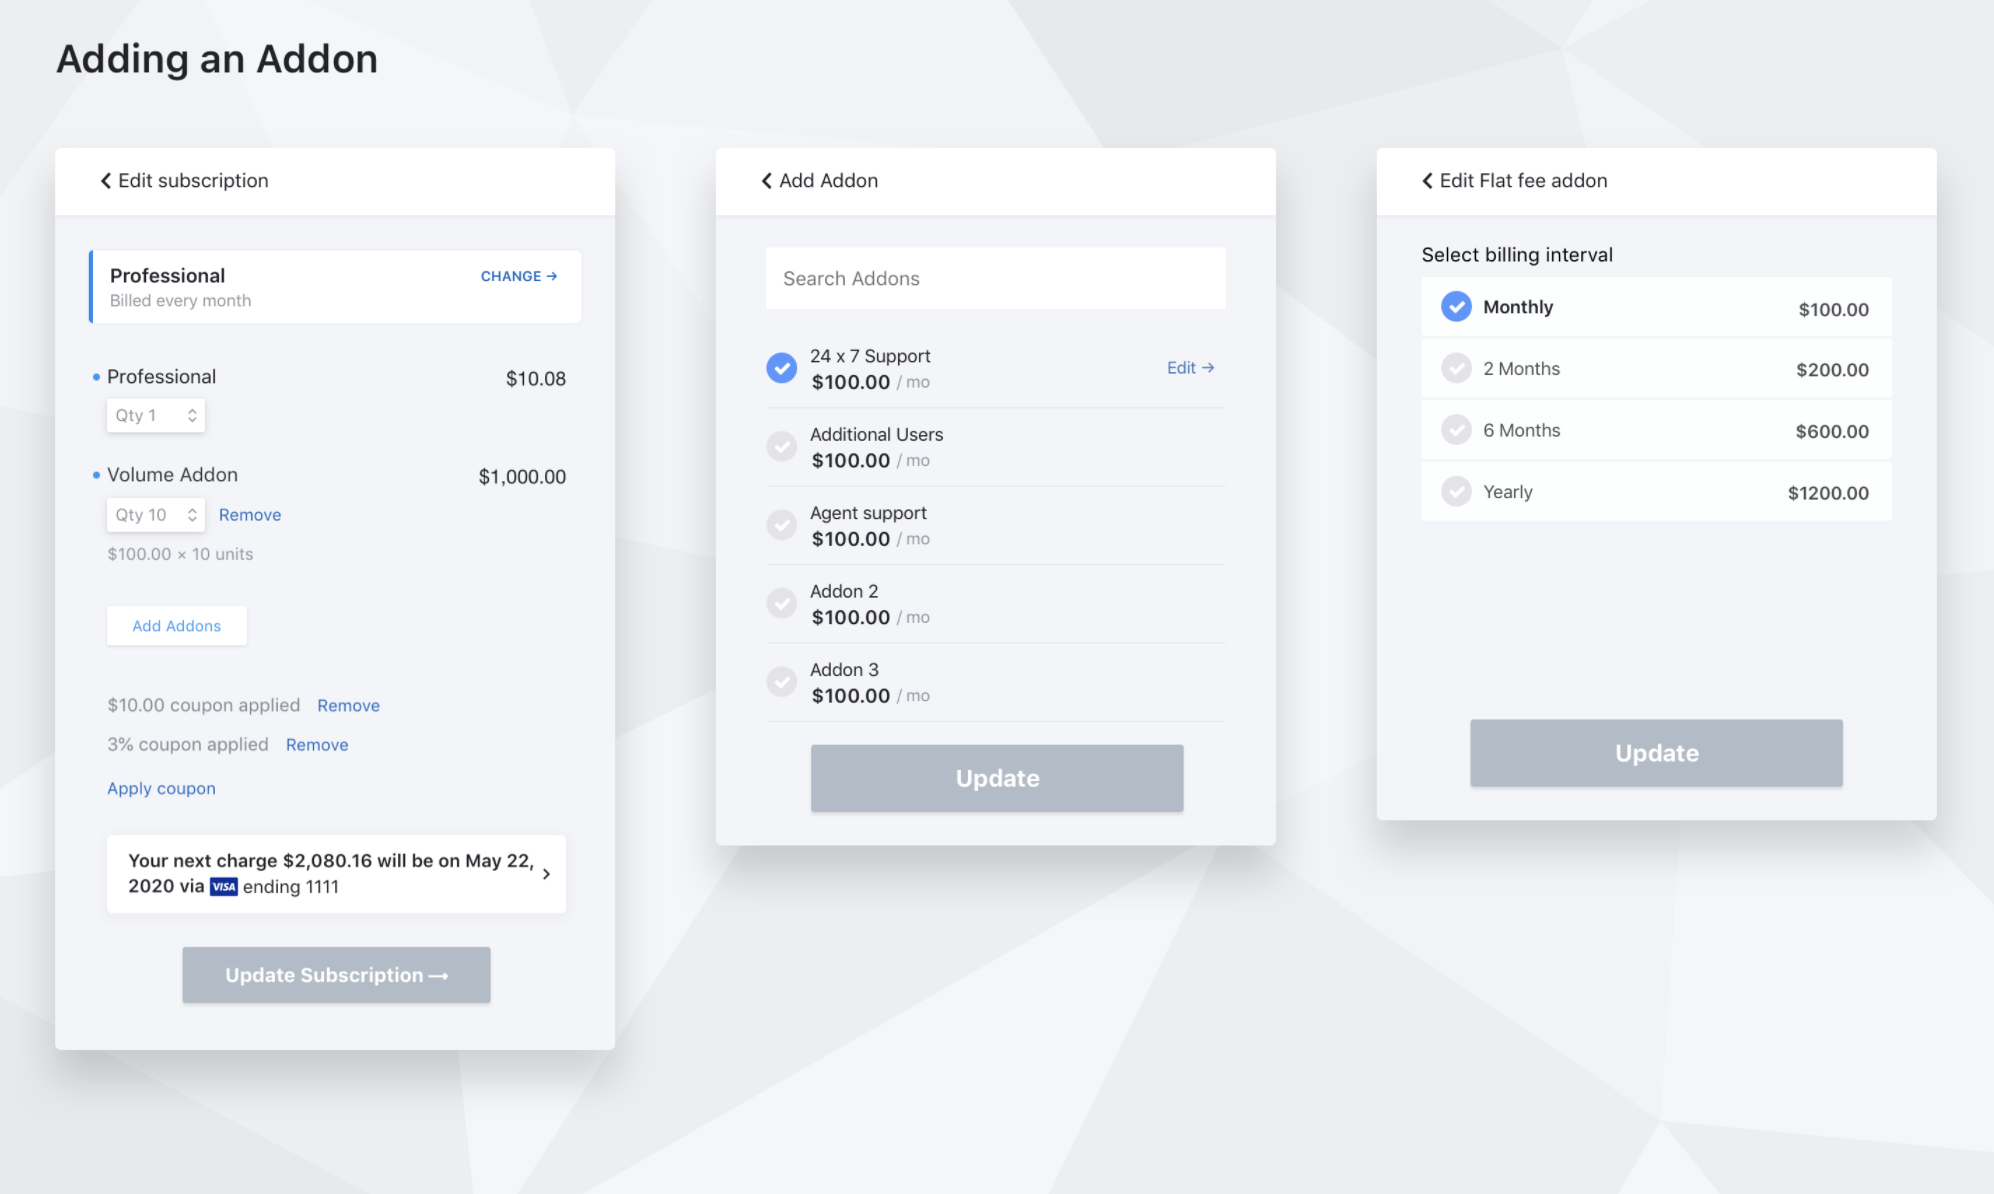
| Allow customers to add addons | Turn on this option to let customers add addons. You can allow non-recurring addons, recurring addons, or both. |
Recommended addons mapped to a plan are shown with a "recommended" tag.
Allow customers to remove addons Select to let customers remove the addons added to their subscription. You can select to allow non-recurring or recurring addons or both.
Allow customers to change addon quantity Enable to let customers change the quantity of each addon added to their subscription. You can select to allow non-recurring or recurring addons or both.
Allow customers to add/remove coupons Enable to let customers add coupons or remove added coupons.
Sample of change subscription in Self-Serve Portal:
Sample of adding an addon in Self-Serve Portal:
Note
Plan descriptions may not appear in the Self-Serve Portal or widgets in the following scenarios:
- Multiple items are applied to the subscription, such as a plan and an addon.
- The pricing model of the plan is set to tiered.
- Tax is applied to the subscription.
This is expected behavior.
Note
For addons and charges to appear in the Self-Serve Portal, you must enable the option Display in Self-Serve Portal while creating addons and charges.
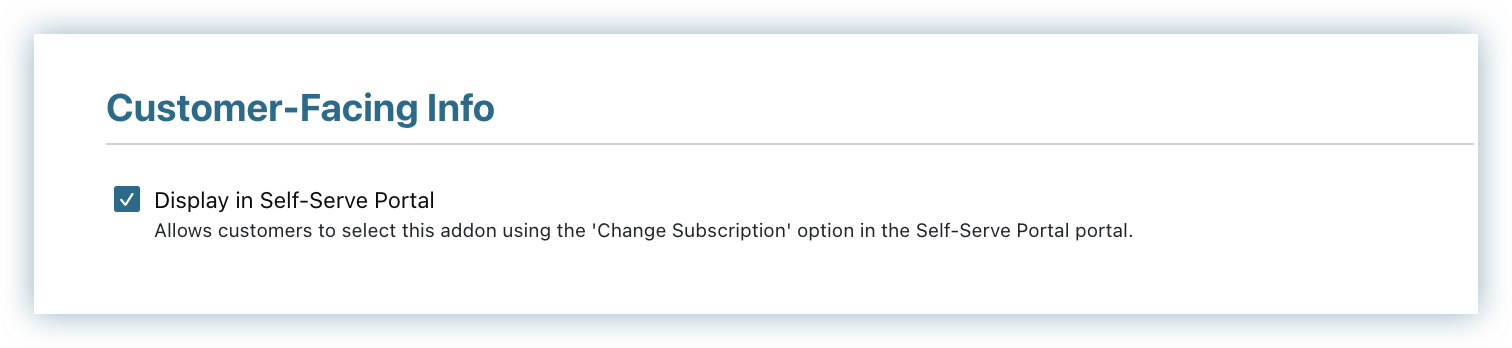
If not enabled already, you can use the Edit action to enable it.
To enable it, click Product catalog > Addon (or) Charge and select the addon or charge which needs to be displayed in the portal. Under the Customer-Facing Info section, enable Display in Self-Serve Portal.
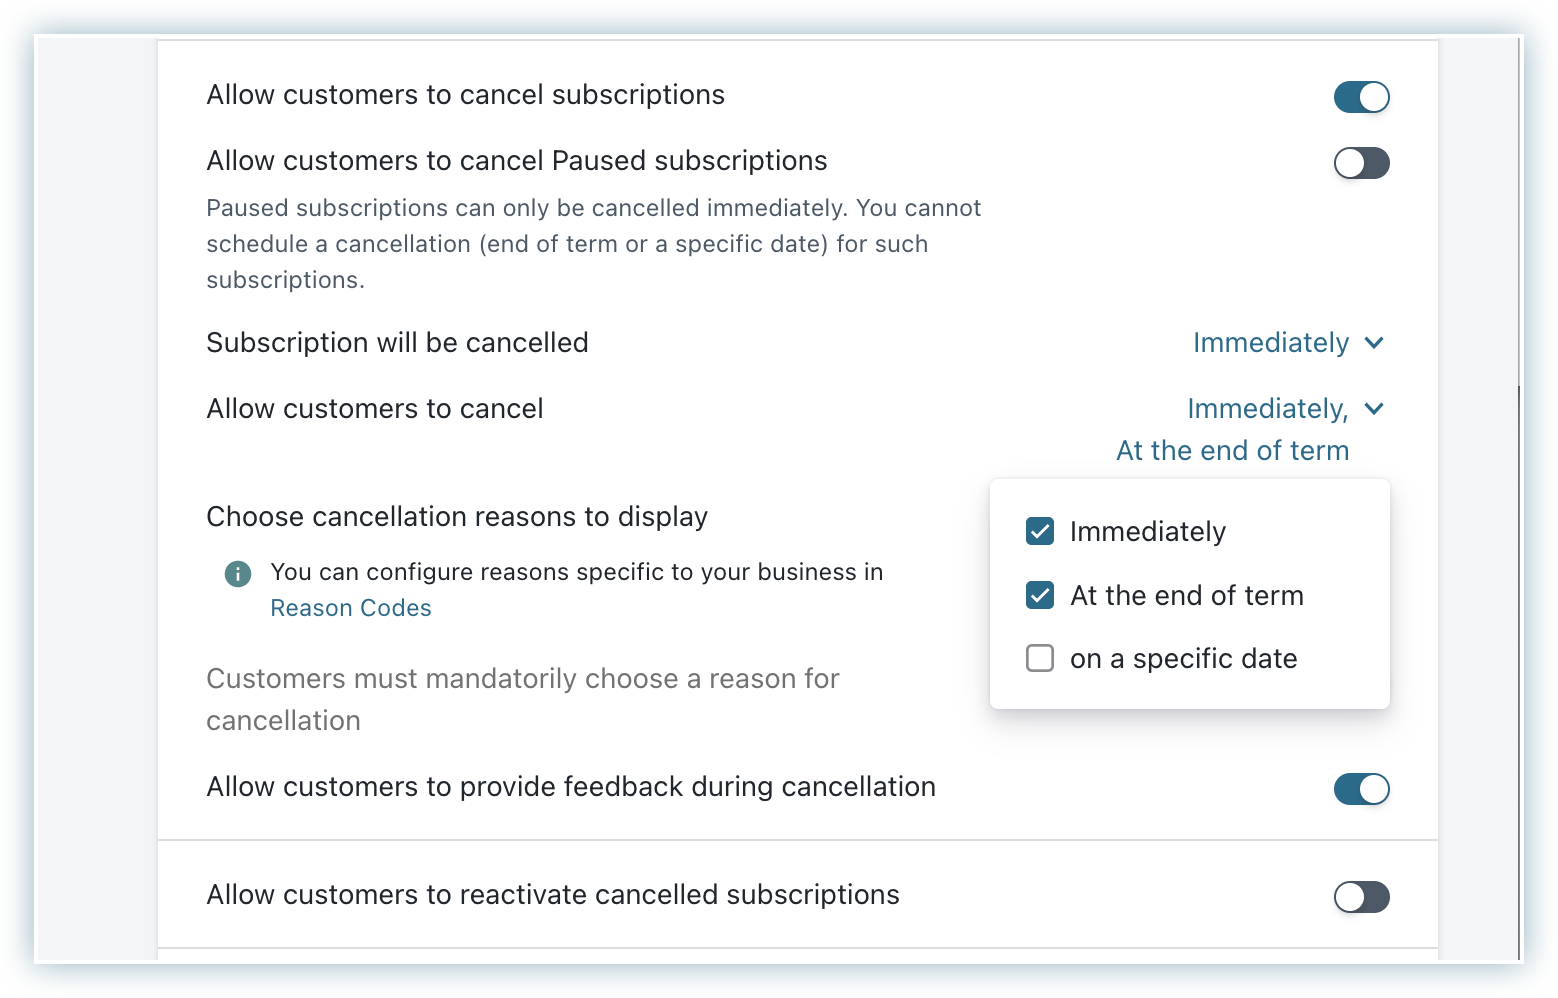
Allow customers to cancel subscription: Enable to let customers cancel their subscription using the Self-Serve Portal. On enabling, you can choose to control the behavior of cancel subscription using the following sub-settings:
-
When the subscription will get cancelled - Immediately/At the end of the term/Allow customers to choose
-
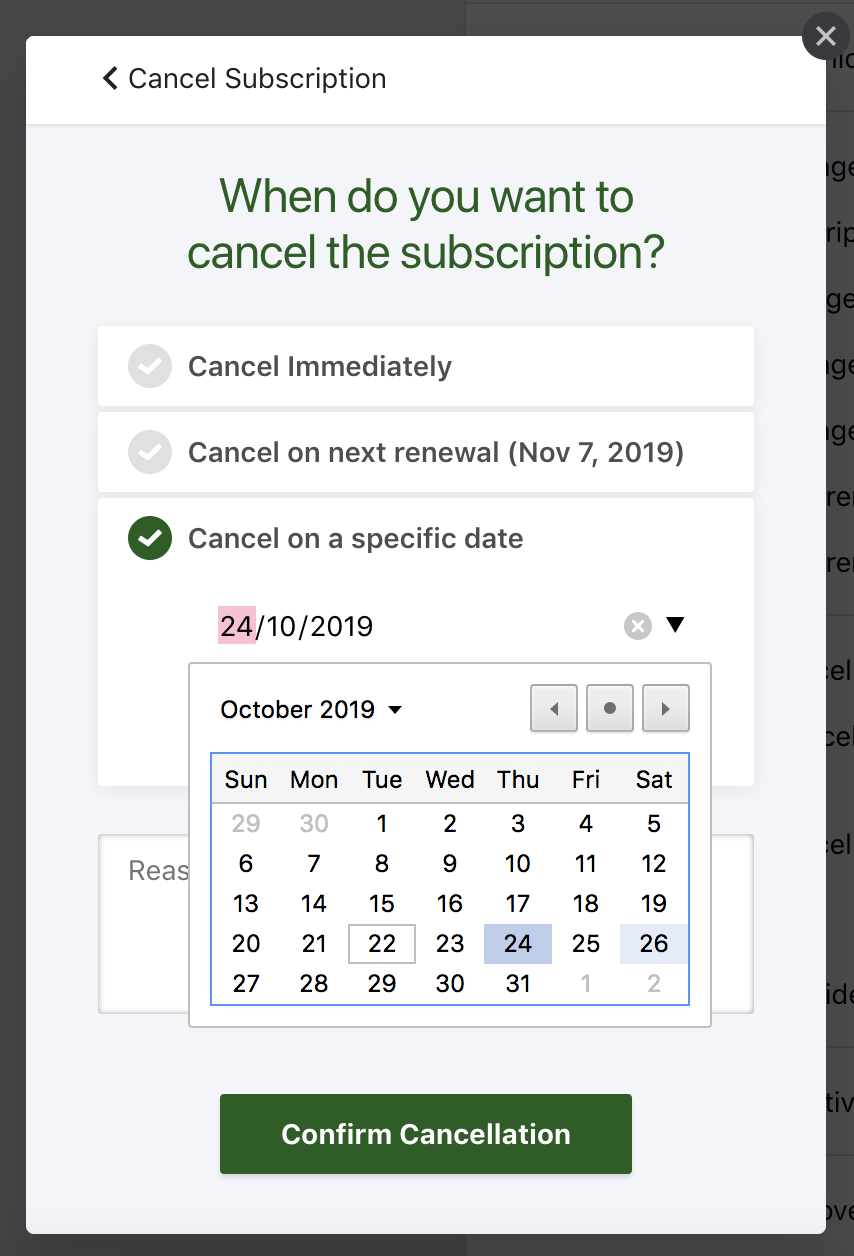
When you select Allow Customers to choose, you can also specify when customers can cancel their subscriptions - Immediately/At the end of term/On a specific date. By choosing "On a specific date", customers can schedule the cancellation to happen on a particular date within the subscription period.
-
Allow customers to provide feedback during cancellation: Enable to collect feedback from customers while cancelling.
-
Allow customers to reactivate cancelled subscriptions: Enable to let customers reactivate their subscription. Learn more.
-
Allow customers to remove scheduled changes: Enable to let customers cancel any changes they have scheduled, such as a subscription pause.
-
Allow customers to remove scheduled cancellation: Enable to let customers remove any subscription cancellations they have scheduled.
-
Allow customers to remove their primary payment method: Enable to let customers remove their primary payment method.
- Allow customers to pause subscriptions: Enable to let customers pause their subscriptions from the Self-Serve Portal. For this setting to work, pause subscription must be enabled for your site.
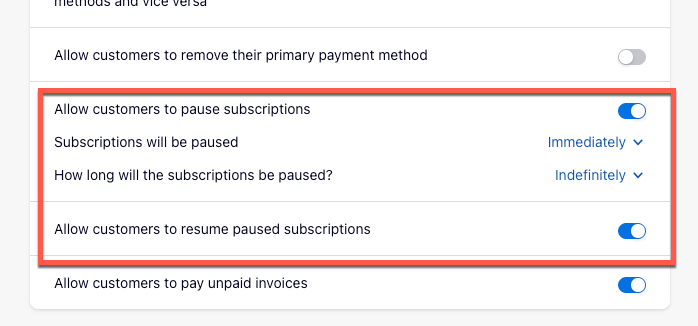
When this setting is turned on, two sub-settings appear:
| Sub-setting | Functionality |
|---|---|
| Subscriptions will be paused | Determines when the pause takes effect. Choose either:
|
| How long will the subscriptions be paused? | Determines the pause duration applied to the subscription. Choose one of:
|
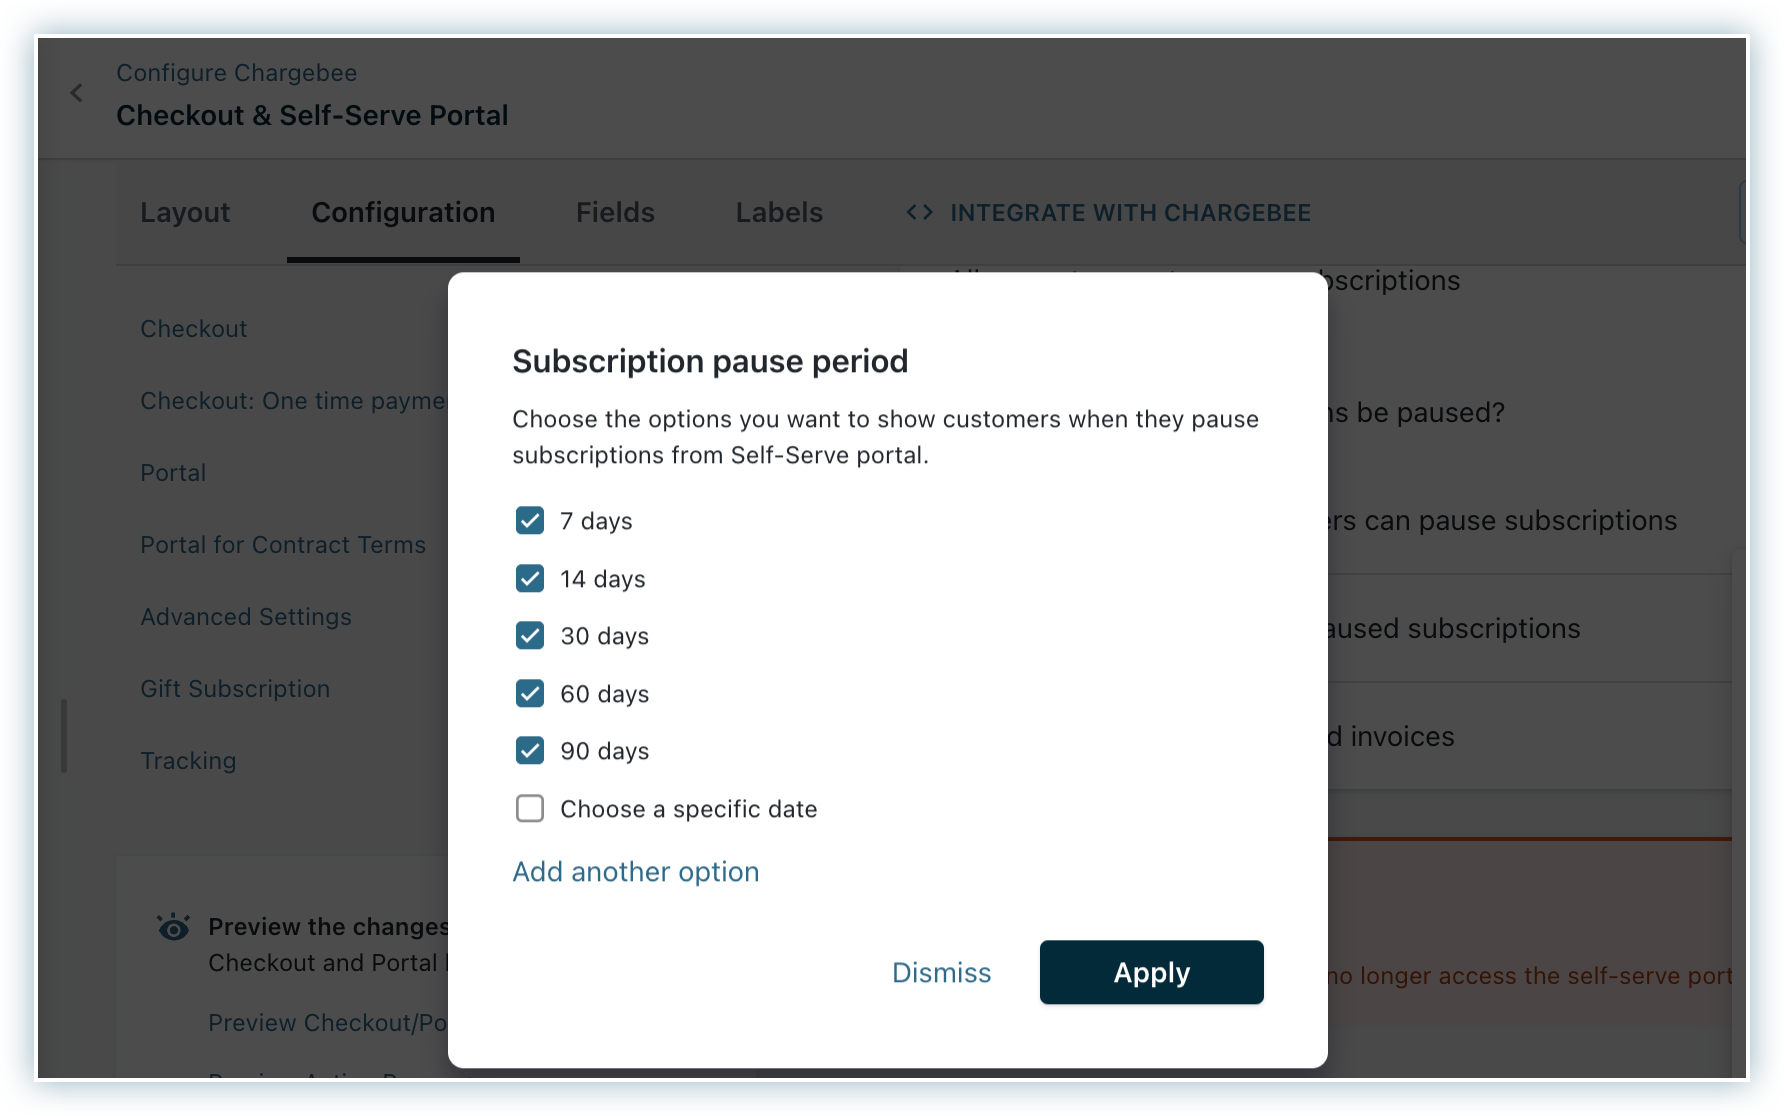
When Allow customers to choose the duration is selected, configure the Maximum no. of days customers can pause subscriptions setting. Clicking the value opens a panel with two configurations:
- Pause Period: Set the upper bound (in days) for how long a customer can pause a subscription. Any interval you offer must be within this limit.
- Pause Intervals: Choose the duration options the customer sees in the Self-Serve Portal when pausing a subscription. Click Manage to open the Subscription pause period modal:
- The available intervals are displayed. Uncheck any you don't want to offer.
- Click Add another option to add a custom interval (in days), then click Add. The custom interval must not exceed the Pause Period maximum.
- Click Apply to save your selections.
-
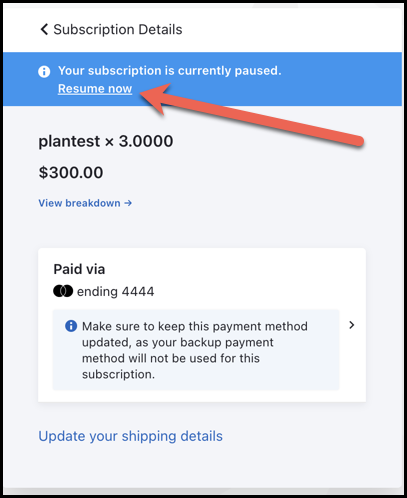
Allow customers to resume paused subscriptions: Enable to let customers resume a paused subscription from the Self-Serve Portal. When enabled, the Subscription Details page in the portal displays a
Your subscription is currently paused.banner with a Resume now action on paused subscriptions. Resumption is always immediate—scheduling a resumption on a specific date is not supported in the portal. To schedule a resumption on a specific date/time, use the Chargebee UI or the Resume Subscription API.This setting is independent of Allow customers to pause subscriptions. You can let customers resume their subscriptions even if you do not allow them to pause subscriptions from the portal (for example, if pauses are only initiated by your support team).
3DS support for self-serve portal
Chargebee's In-app Customer Portal supports 3DS transactions. Complete our SCA checklist for handling seamless 3DS payments via Chargebee's Customer Portal.
Since no payment is involved during portal actions such as Update Payment Method and Add Payment Method, we will trigger a minimum amount of 3DS authorization during those operations. The amount deducted for authorization would be voided automatically.
If there is any immediate charge involved during actions such as Change Subscription and Resume Subscription, 3DS verification will be triggered accordingly.
Access the self-serve portal
Provided access to the self-serve portal is enabled Via Chargebee Login, customers can access the portal using the following URL format: https://{your-Chargebee-subdomain}.chargebeeportal.com.
For example, if your Chargebee site URL is https://acme-test.chargebee.com, the customer portal URL will be https://acme-test.chargebeeportal.com.
To locate this URL in Chargebee Billing:
- Go to Settings > Configure Chargebee > Checkout and Self-Serve Portal.
- Select INTERGRATE WITH CHARGEBEE from the top navigation bar.
- In the modal that appears, scroll to the bottom to find Portal Link.
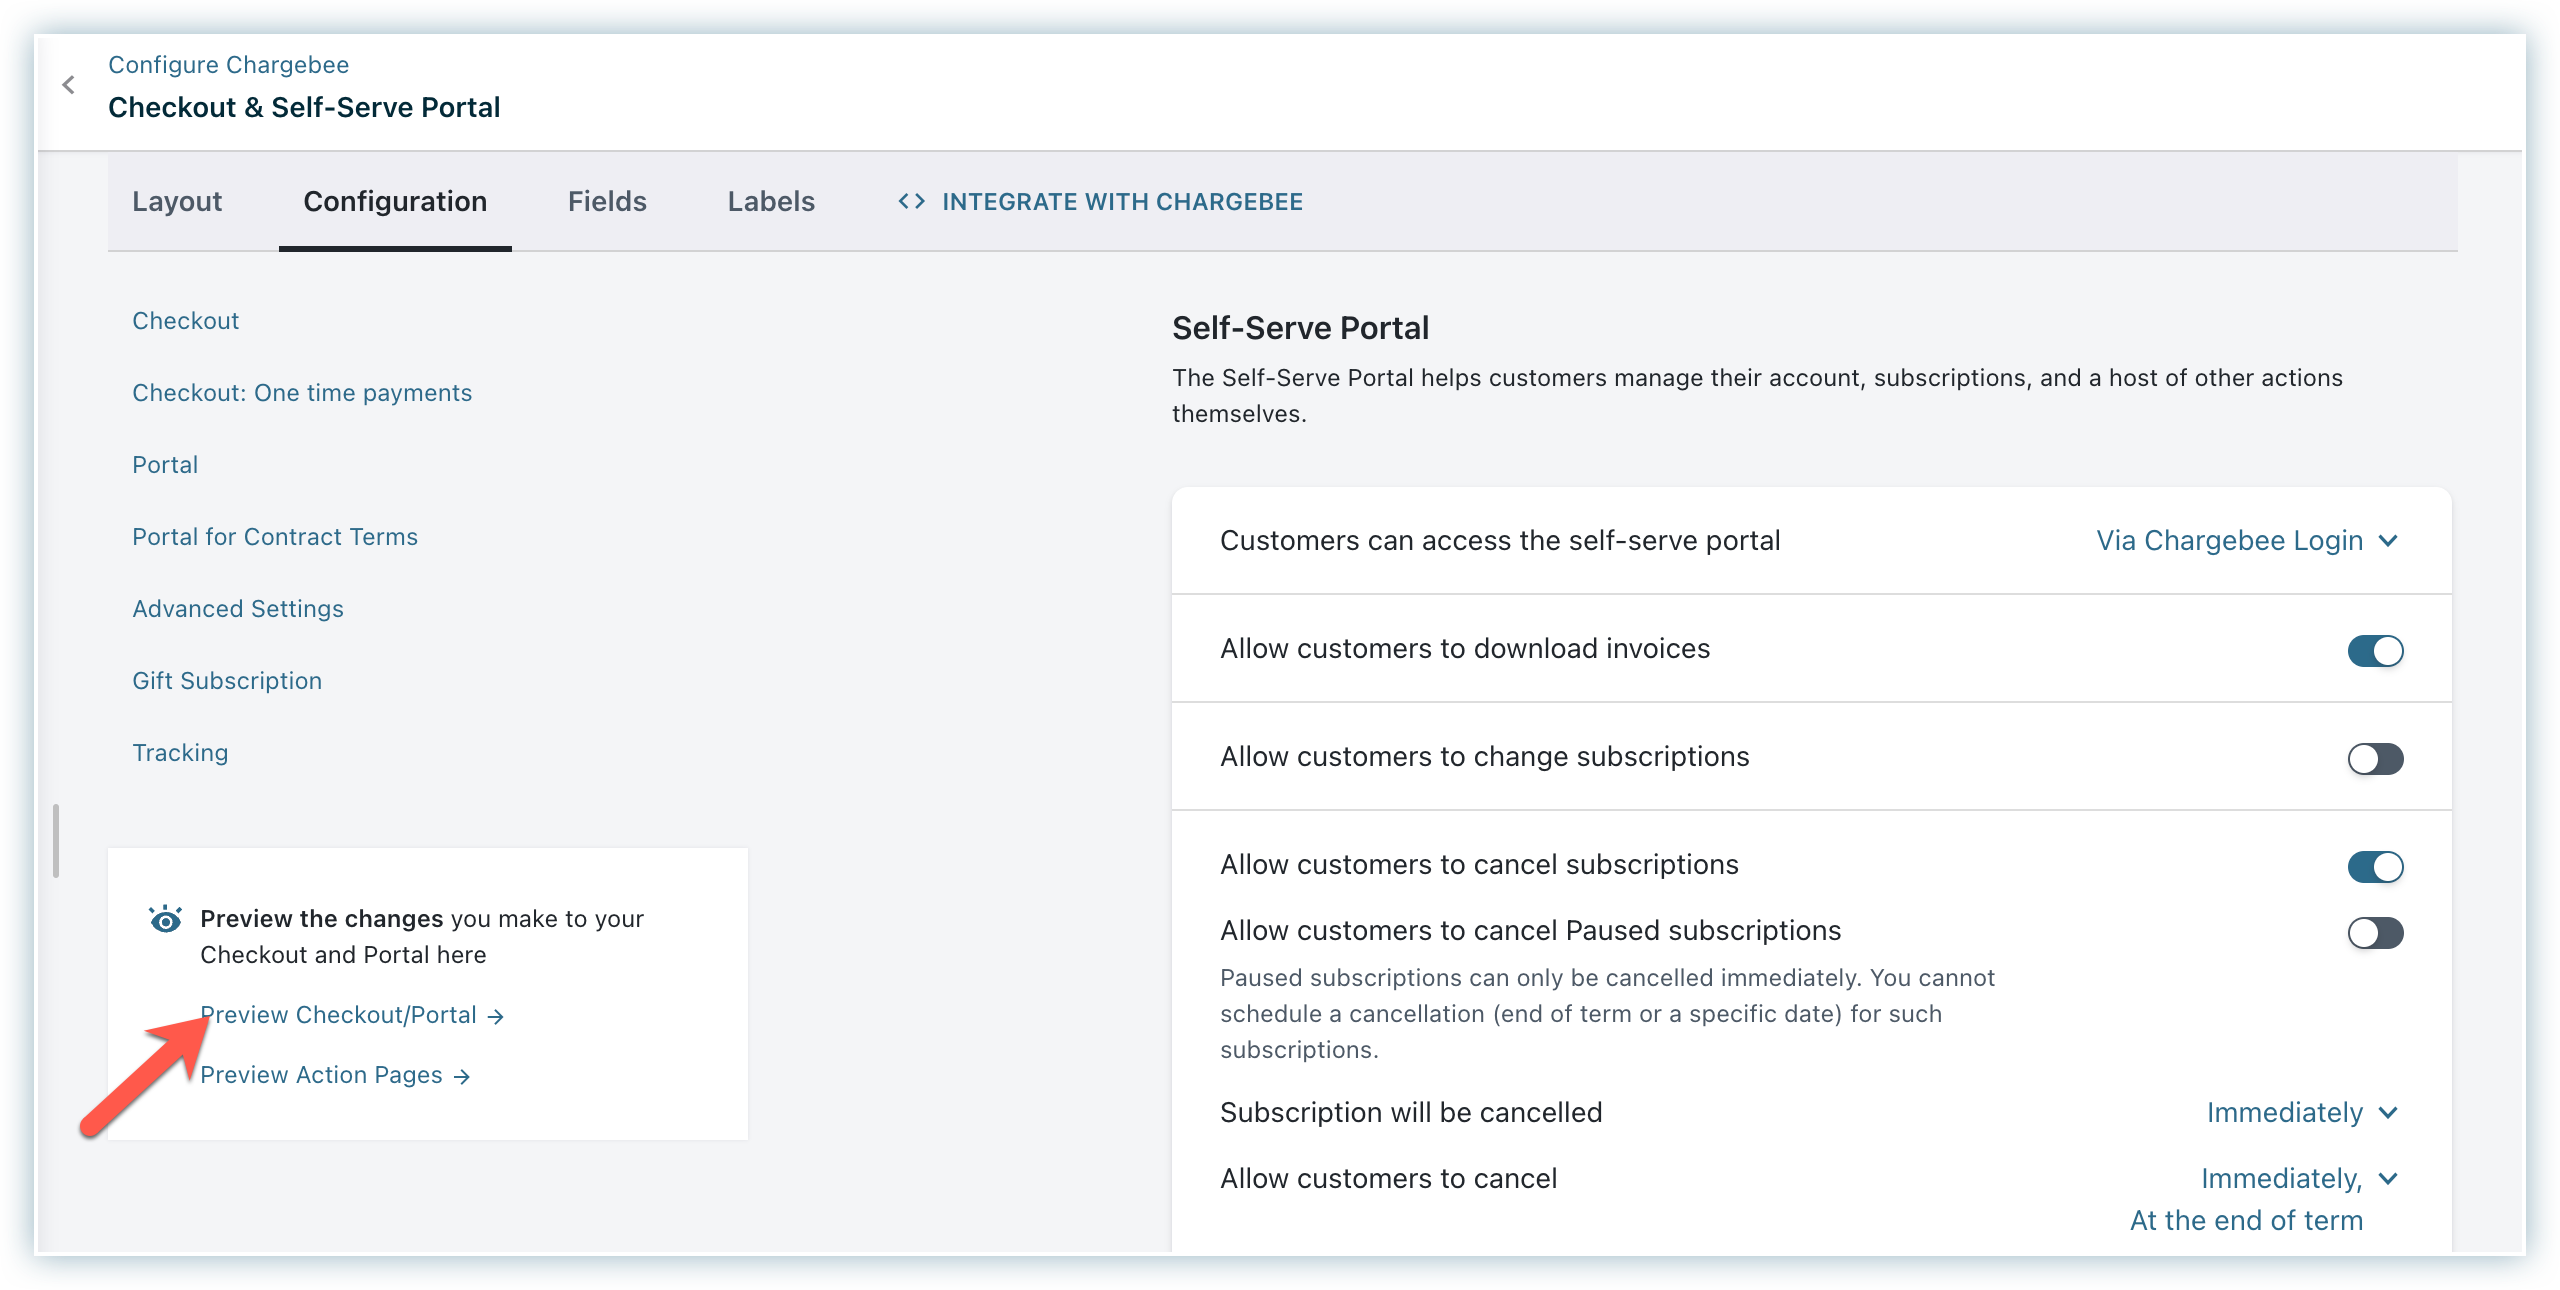
Preview the self-serve portal
To preview the Self-Serve Portal, click Preview Checkout/Portal in the Checkout and Self Serve Portal settings page.
Testing the Self-Serve Portal Flow on the Test Site
To test the self-serve portal flow for a customer record on the test site, follow these steps:
- Navigate to Configuration and click Preview Checkout/Portal.
- Select a test email address from the dropdown in the top-right corner.
- Use
123456as the password. - Proceed to test the flow.
Note
The preview checkout in the live site uses the configuration from the test site's checkout.
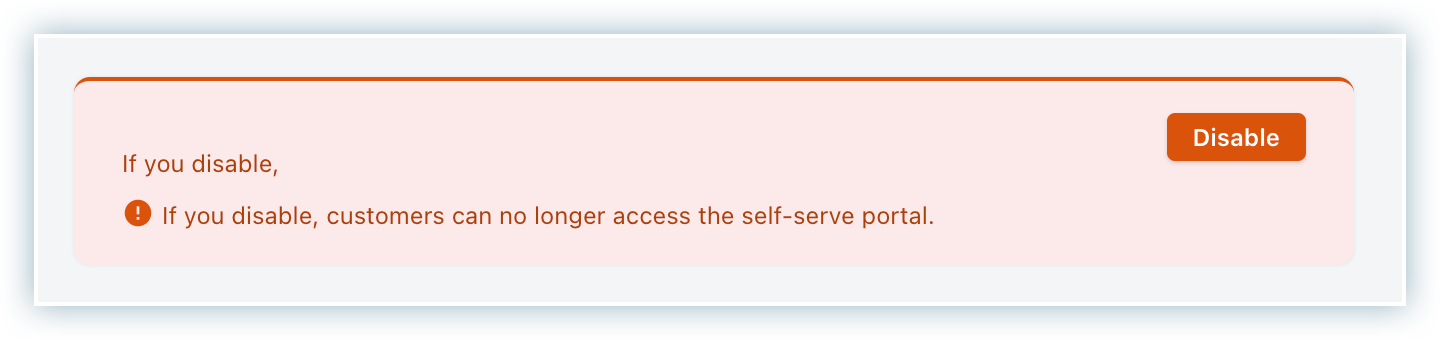
Disable the self-serve portal
Click the Disable button under the Portal settings to disable it. Disabling the Self-Serve Portal renders it inaccessible to customers.
Articles & FAQs
Show more
Was this article helpful?