Docschargebeedocs

HomeBillingPaymentsRevRecGrowthReveal
Support

Product Updates


  • Release Notes

Getting Started


  • Overview
  • Chargebee Billing Data Centers
  • Object Relationship Model
  • Understanding Sites
  • Chargebee Tech Glossary
  • Articles and FAQ

Implementing Chargebee


  • Implementation Guide
  • Go-live Checklist
  • Articles and FAQ

AI in Chargebee


  • Chargebee Agents
  • Chargebee Copilot
  • Chargebee MCP Server (Model Context Protocol)

Developer Resources


  • Developer Resources Overview
  • Articles and FAQ

Product Catalog


  • Product Catalog Overview
  • Coupons
  • Articles and FAQ

Subscriptions


  • Working with Subscriptions
  • Billing
  • Orders
  • Articles and FAQ

Customers


  • Managing Customers
  • Account Hierarchy
  • Email Notifications
  • Branding
  • Configure Multiple Languages
  • Articles and FAQ

Entitlements


  • Entitlements Overview
  • Features Overview
  • Feature Management
  • Managing Product Entitlements
  • Subscription Entitlements
  • Customer Entitlements
  • Grandfathering Entitlements
  • Articles and FAQ

Usage Based Billing


  • Understanding Usages
  • Setting up Usage Based Billing
  • Metered Billing
  • Articles and FAQ

Chargebee CPQ


  • Chargebee CPQ
  • Chargebee CPQ for Salesforce
  • Chargebee CPQ for HubSpot

Invoices, Credit Notes, and Quotes


  • Invoices
  • Credit Notes
  • Quotes [Legacy]
  • Transactions
  • Articles and FAQ

Taxes


  • Overview
  • Configuring Taxes
  • Country-specific Taxes
  • Articles and FAQ

Hosted Capabilities


  • Overview
  • Hosted Checkout
  • Hosted Self-Serve Portal
  • Hosted Pages Features
  • Additional Hosted Pages
  • Payment Components
  • Pricing Table
  • Managing Payments with Chargebee.js
  • Mobile-Optimized Hosted Pages
  • Articles and FAQ

Site Configuration


  • Users & Roles
  • Custom Fields & Metadata
  • Approvals
  • Mandatory Fields
  • File Attachments & Comments
  • Advanced Filter Options
  • Multicurrency Pricing
  • Multi-decimal Support
  • Configuring Reason Codes
  • Events and Webhooks
  • API Keys
  • Time Zone
  • Time Machine
  • Transfer Configurations
  • Articles and FAQ

Multi Business Entity


  • Multi Business Entity Overview
  • Customer Transfer Overview
  • Articles and FAQ

Mobile Subscriptions


  • Overview
  • Omnichannel Subscriptions
  • Omnichannel One-Time Orders
  • Mobile Subscriptions (Legacy)

Reports and Analytics


  • RevenueStory
  • Home Dashboard
  • Frequently Asked Questions
  • FAQs for Classic Reports Sunset
  • Articles and FAQ

Integrations


  • Sales
  • Customer Support and Success
  • Finance
  • Tax
  • Marketing
  • Stitch
  • Collaboration
  • Contract Management
  • Ecommerce Management
  • Articles and FAQ

Data Privacy & Security


  • Two Factor Authentication
  • SAML Single Sign-On
  • System for Cross-Domain Identity Management (SCIM)
  • EU-GDPR
  • Consent Management
  • Personal Data Management
  • Compliance Certificates
  • HIPAA Guidelines
  • PCI Recommendations and Integration Types
  • Articles and FAQ

Data Operations


  • Bulk Operations
  • Migration
  • Articles and FAQ
  1. Billing
  2. Data Operations
  3. Automatic Export Set Up In Chargebee
  1. Billing
  2. Data Operations
  3. Automatic Export Set Up In Chargebee

Set up Automatic Exports in Chargebee

Automatic export configuration

To enable Automatic Export on your Chargebee site, follow these steps:

  1. Log in to your Chargebee account.

  2. Navigate to Settings > Import & Export Data > Automatic Exports.
    Note: If this feature does not appear on your site, your site may not be compatible.
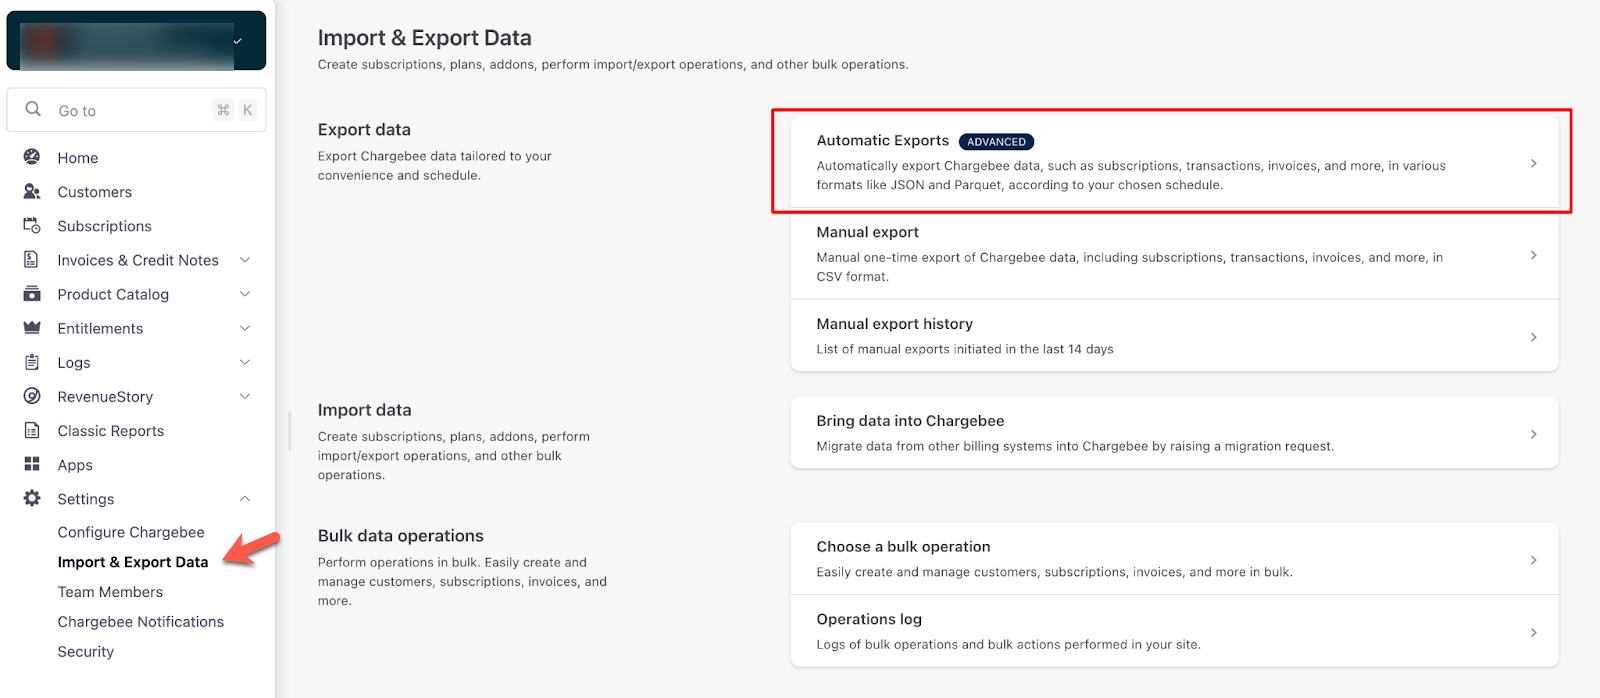
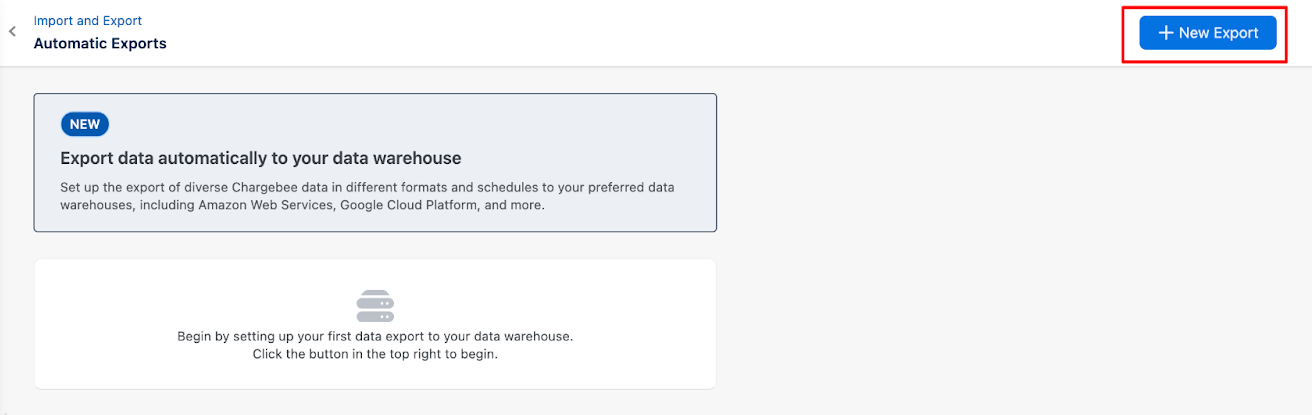
  3. Click + New Export.

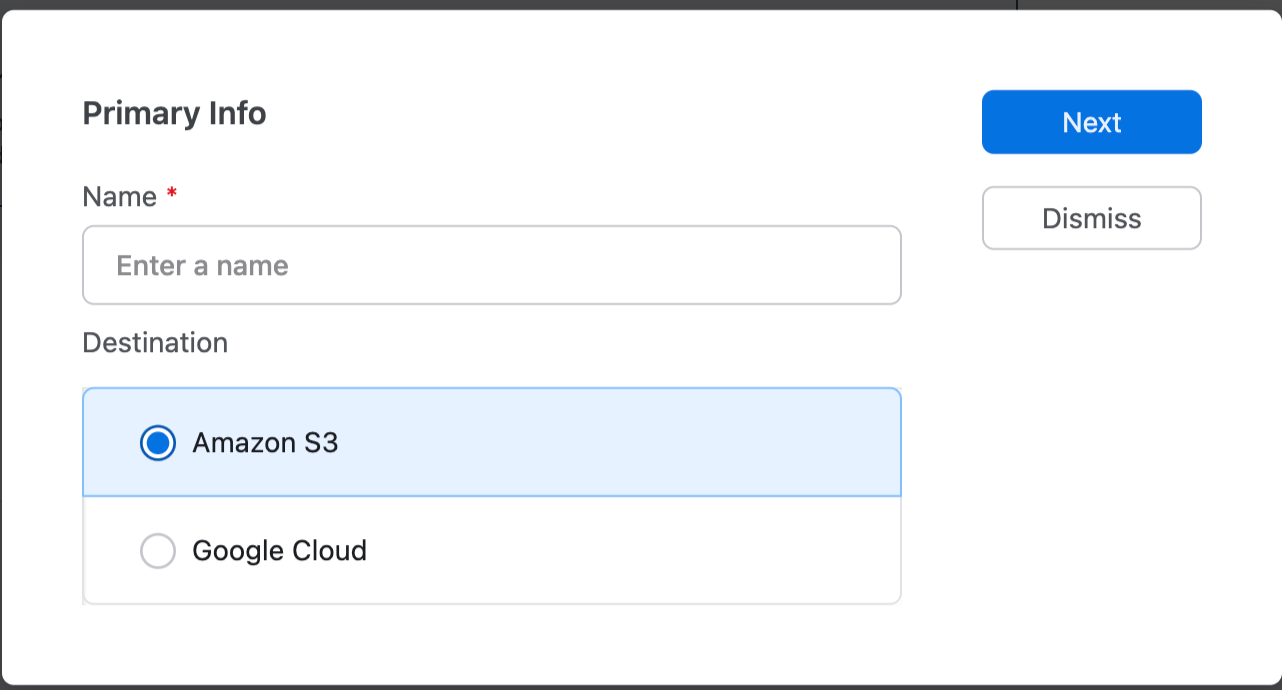
  4. Enter the Name of the export, choose the Destination, and click Next.

    • If you select the Destination as Amazon S3,

      1. Enter the Amazon S3 Bucket URI. 

      2. Enter the ARN.

      3. Select your AWS Region.

      4. Click Connect.

        Note: Complete these steps to get your S3 bucket URI, IAM Role ARN, and AWS region values. Copy and paste the value of Custom Trust Policy in the JSON editor as mentioned in step 4 during the IAM role creation in Amazon S3.

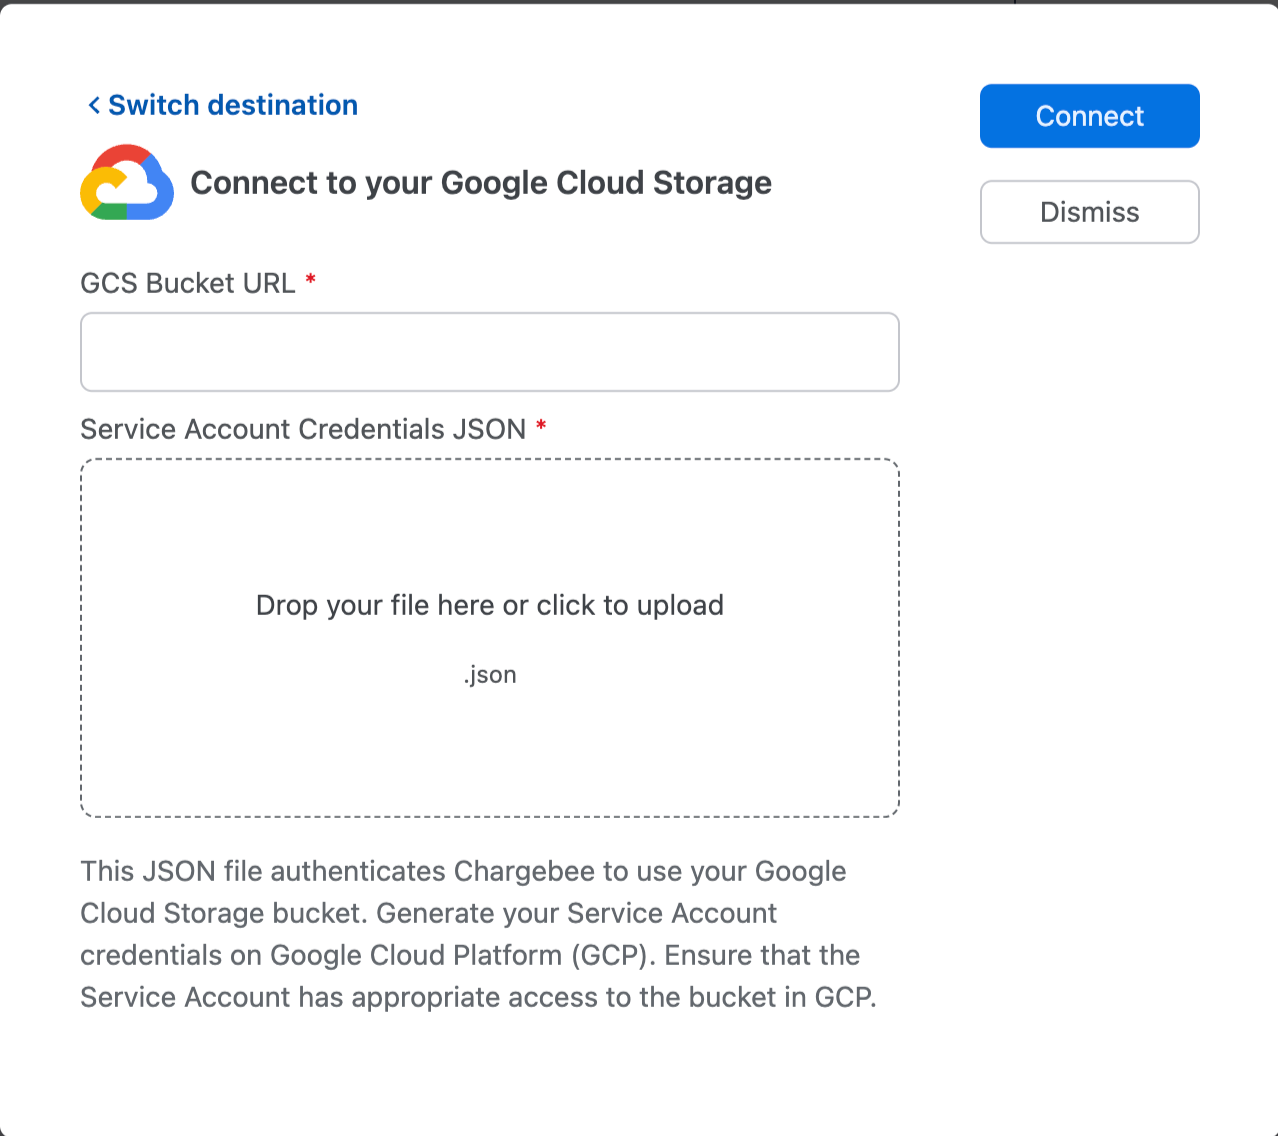
    • If you select Google Cloud as the destination:

      1. Enter the GCS Bucket URL.

      2. Upload the Service Account Credentials JSON file.

        Note: Complete these steps to get your GCS Bucket URL and Service Account Credentials JSON file.

  5. Click Connect. You will be redirected to the Export Configurations page, where you can setup the desired configuration.

Read More

  • Delta Lake
  • Incremental Sync

Was this article helpful?