Quantity Restrictions
The interaction between you and your customers in the ever-evolving commerce landscape shapes business practices. The metadata-based quantity restrictions give you control over subscription management. This approach provides precision, enabling you to fine-tune and personalize how customers adjust product quantities. By leveraging metadata, you can balance flexibility and constraints seamlessly.
Chargebee allows you to set restrictions on the quantity of your plans or add-ons. You can enable or disable product-level quantity restrictions across all products through a single setting.
Learn more about meta configurations.
Prerequisites
The following settings must be enabled to apply product-level quantity restrictions:
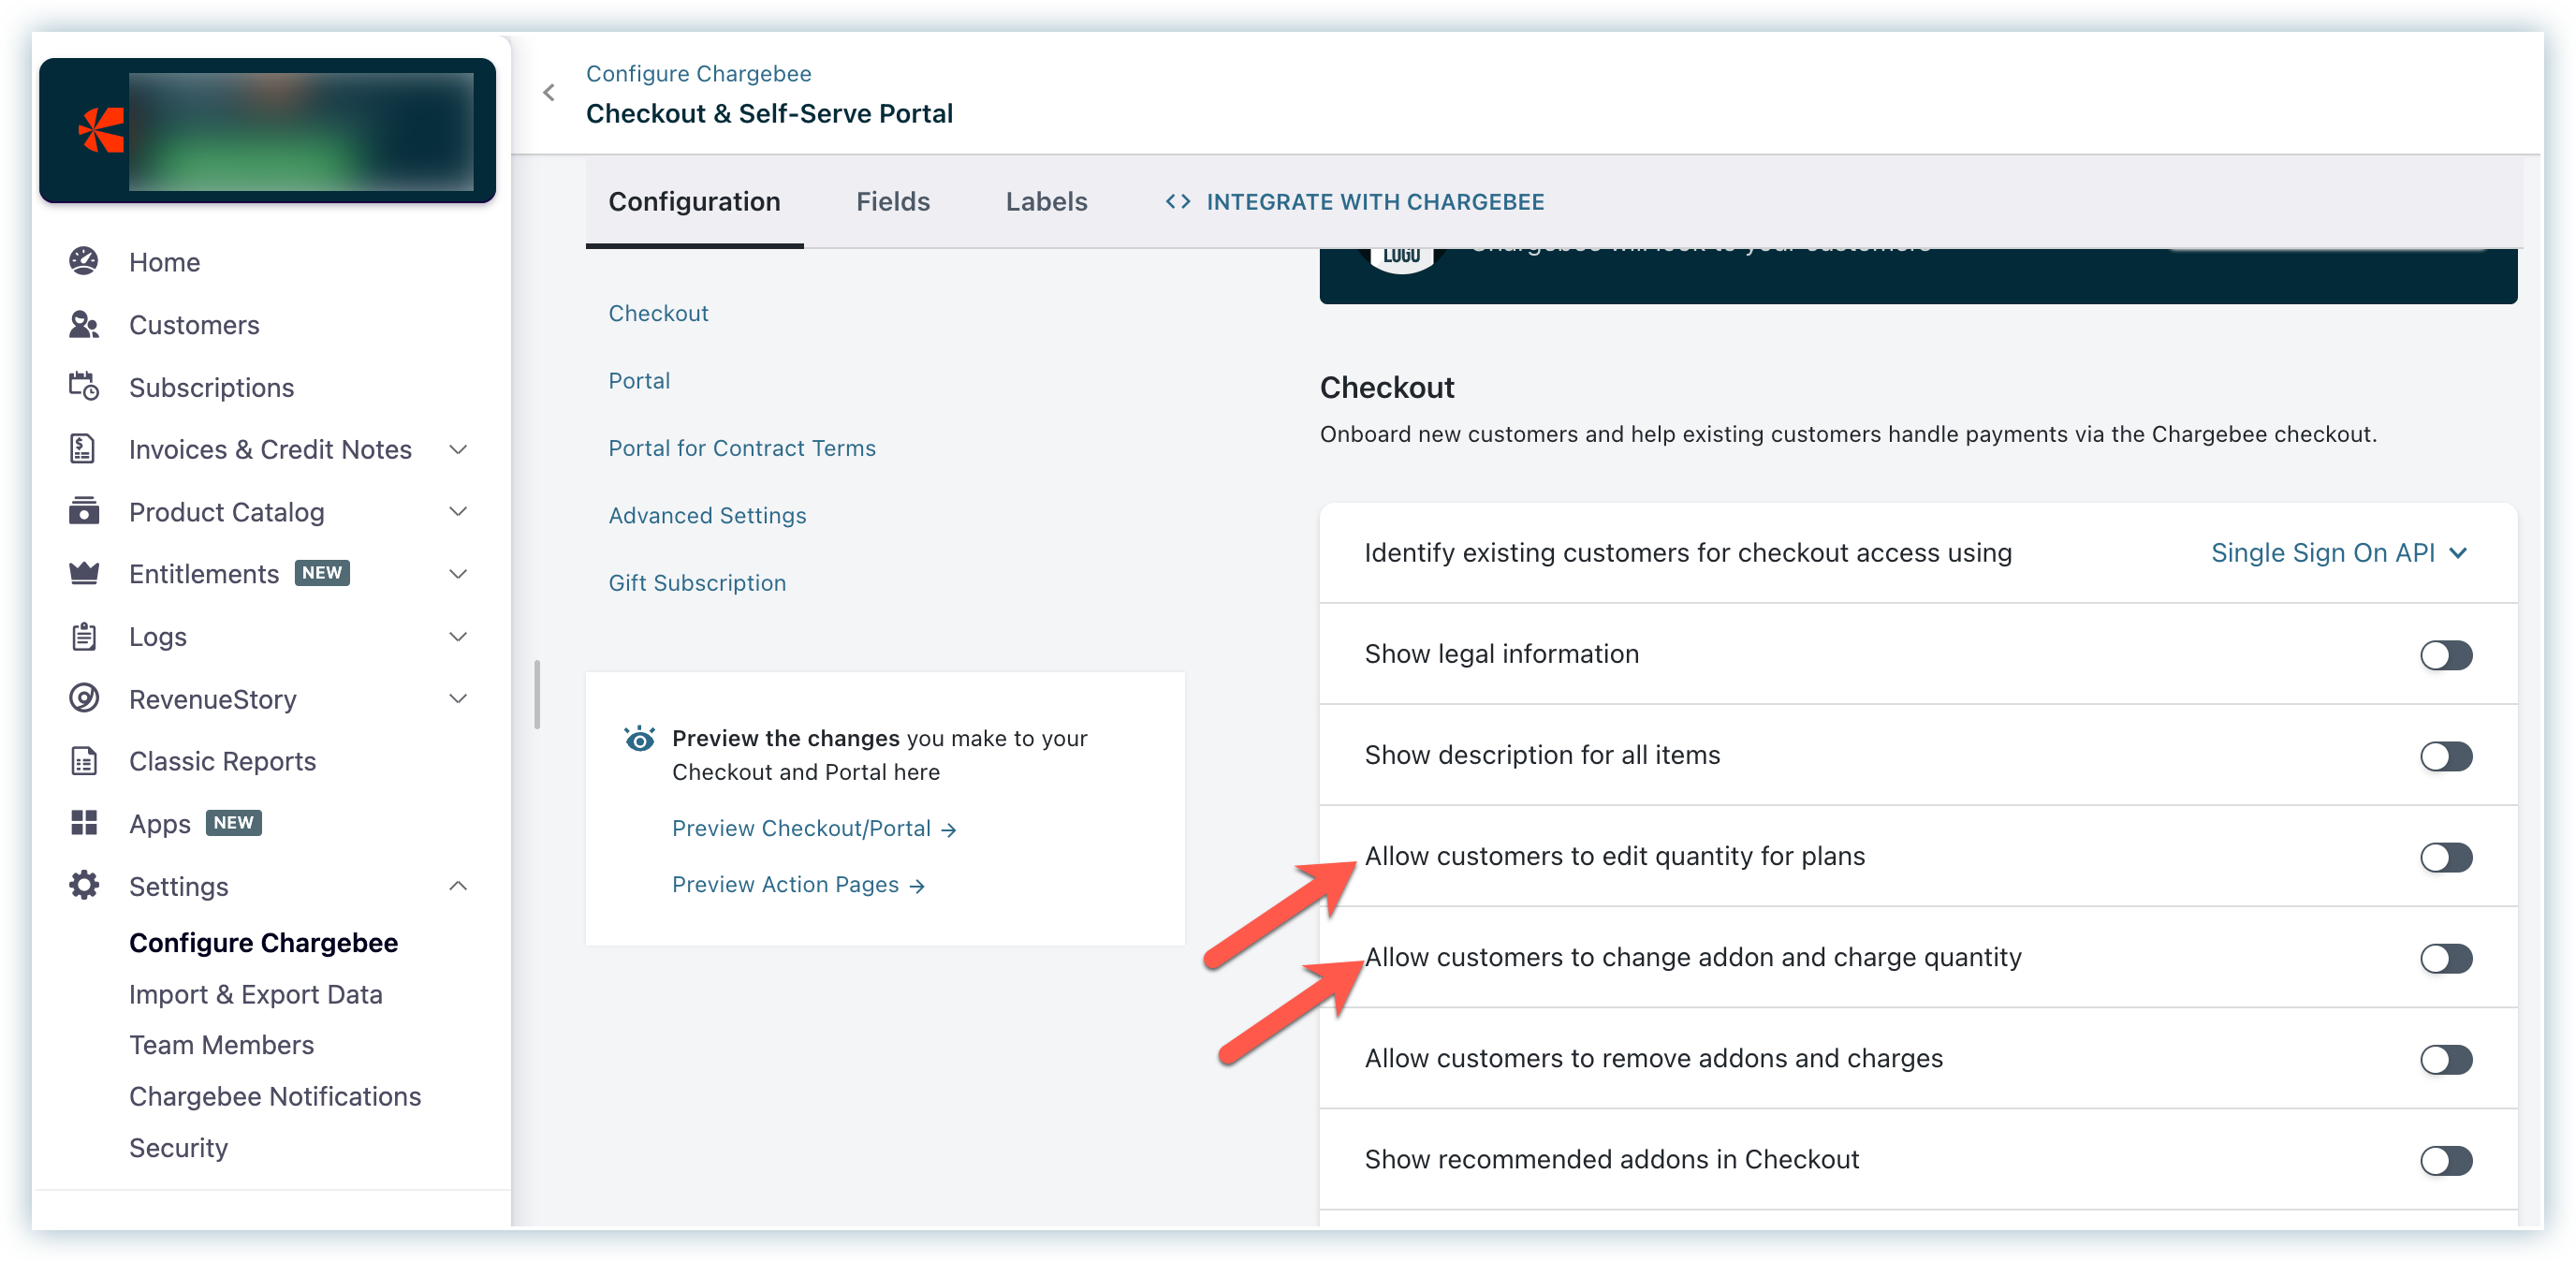
Navigate to Settings > Configure Chargebee > Checkout & Self-Serve Portal > Configuration > Checkout:
- Allow customers to edit quantity for plans.
- Allow customers to change add-on and charge quantity.
Enabling quantity restrictions
Enabling this option allows Chargebee to read the configuration and set the quantity based on it.
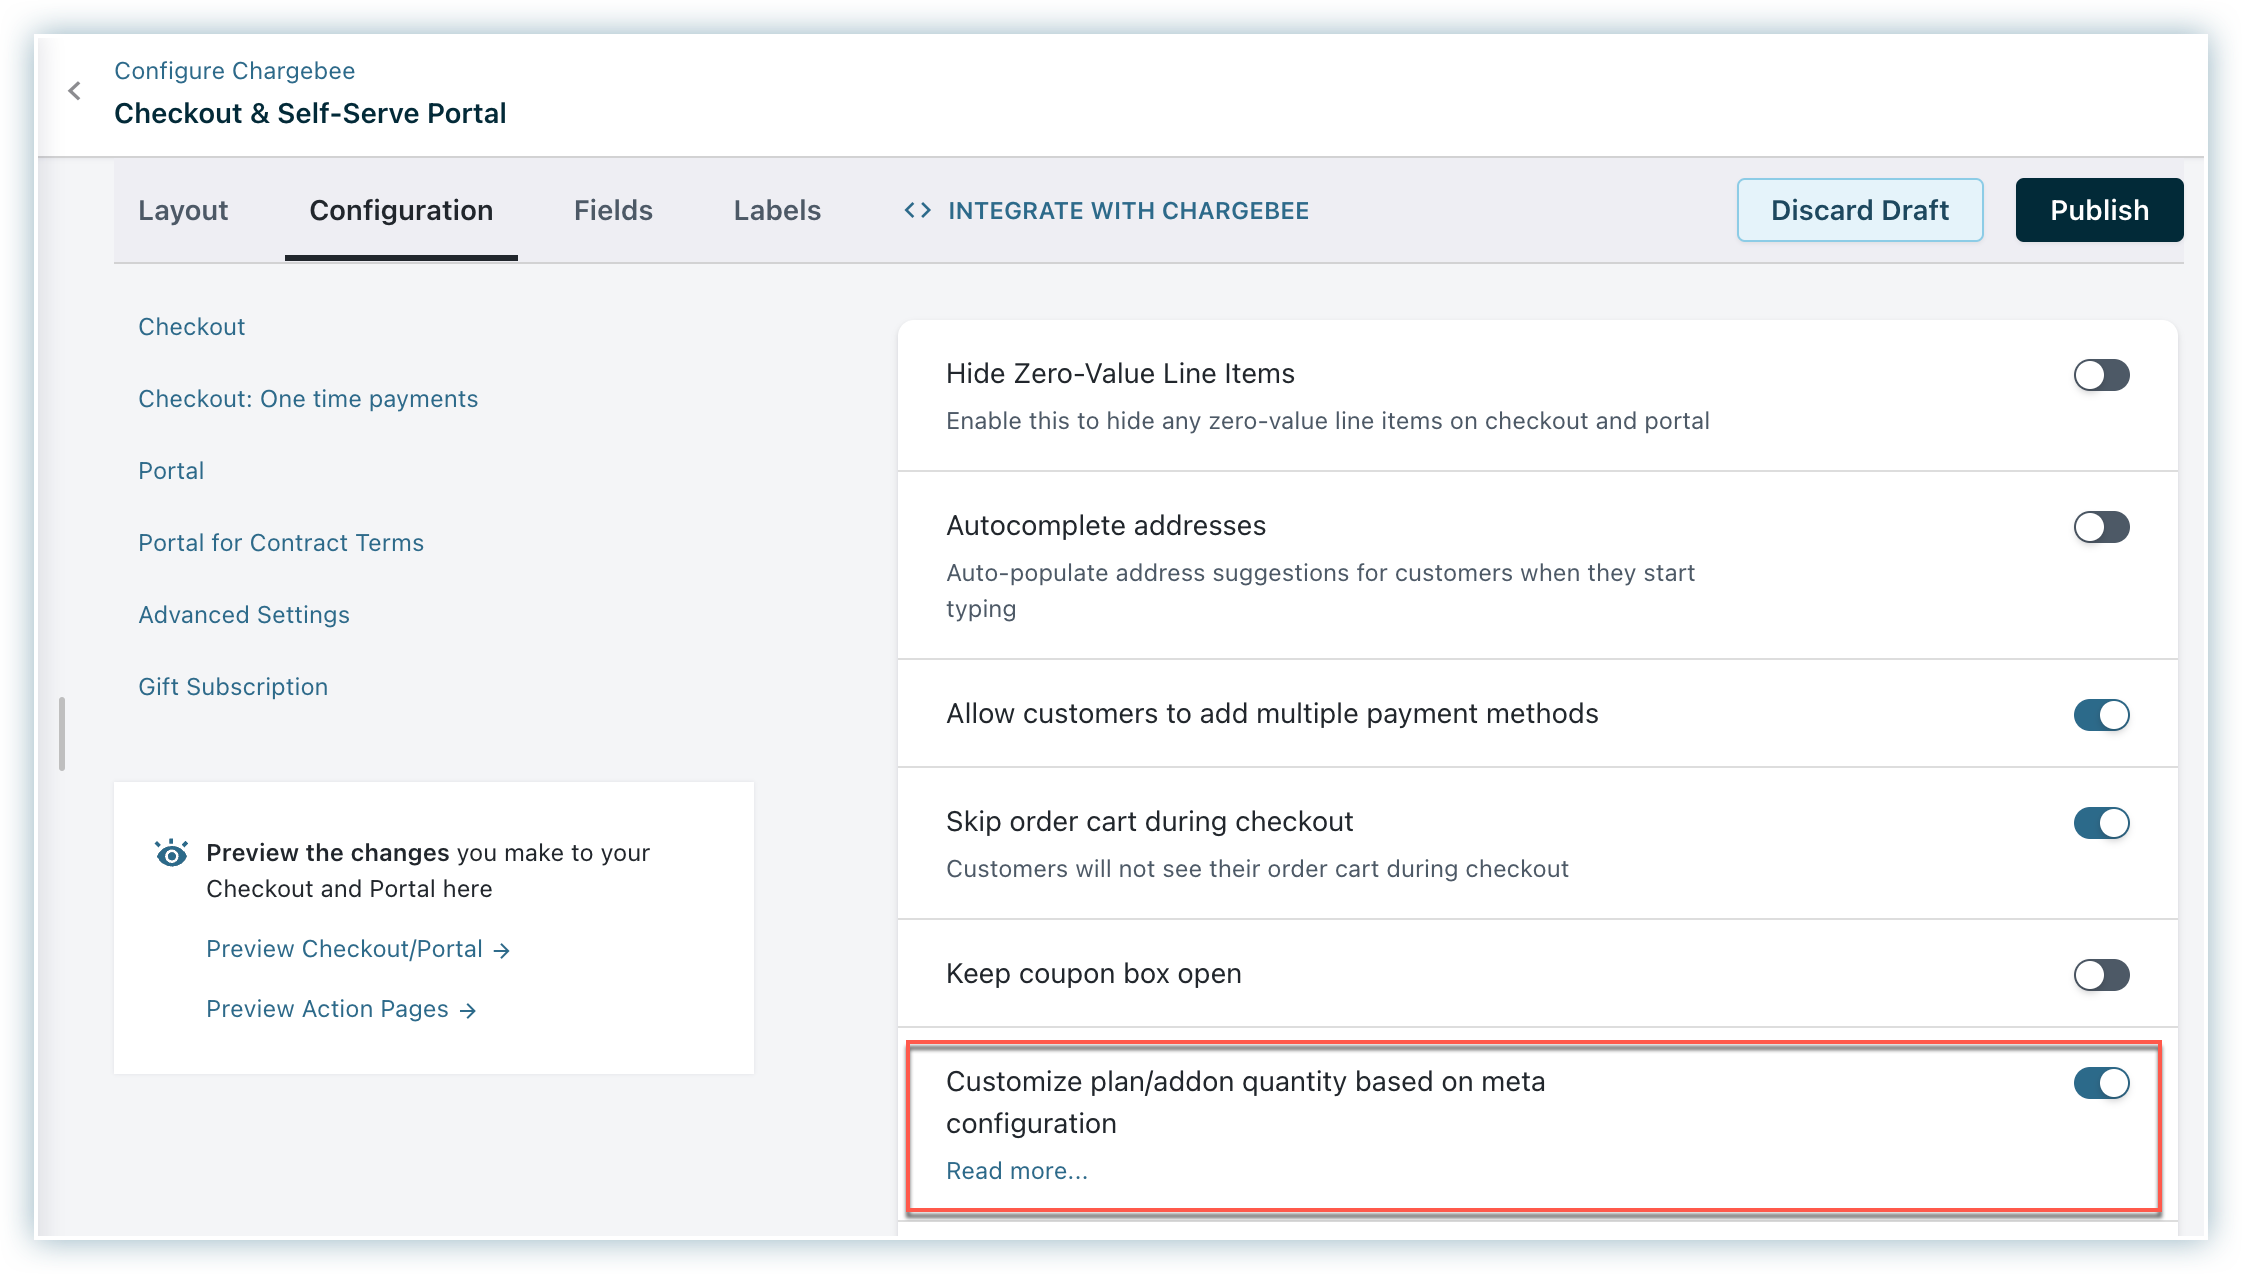
Customize plan or add-on quantity based on meta configuration on your Chargebee site:
Navigate to Settings > Configure Chargebee > Checkout & Self-Serve Portal > Advanced settings and enable Customize plan/addon quantity based on meta configuration.
Set up metadata for your item price
Once you have enabled Customize plan/addon quantity based on meta configuration, follow these steps:
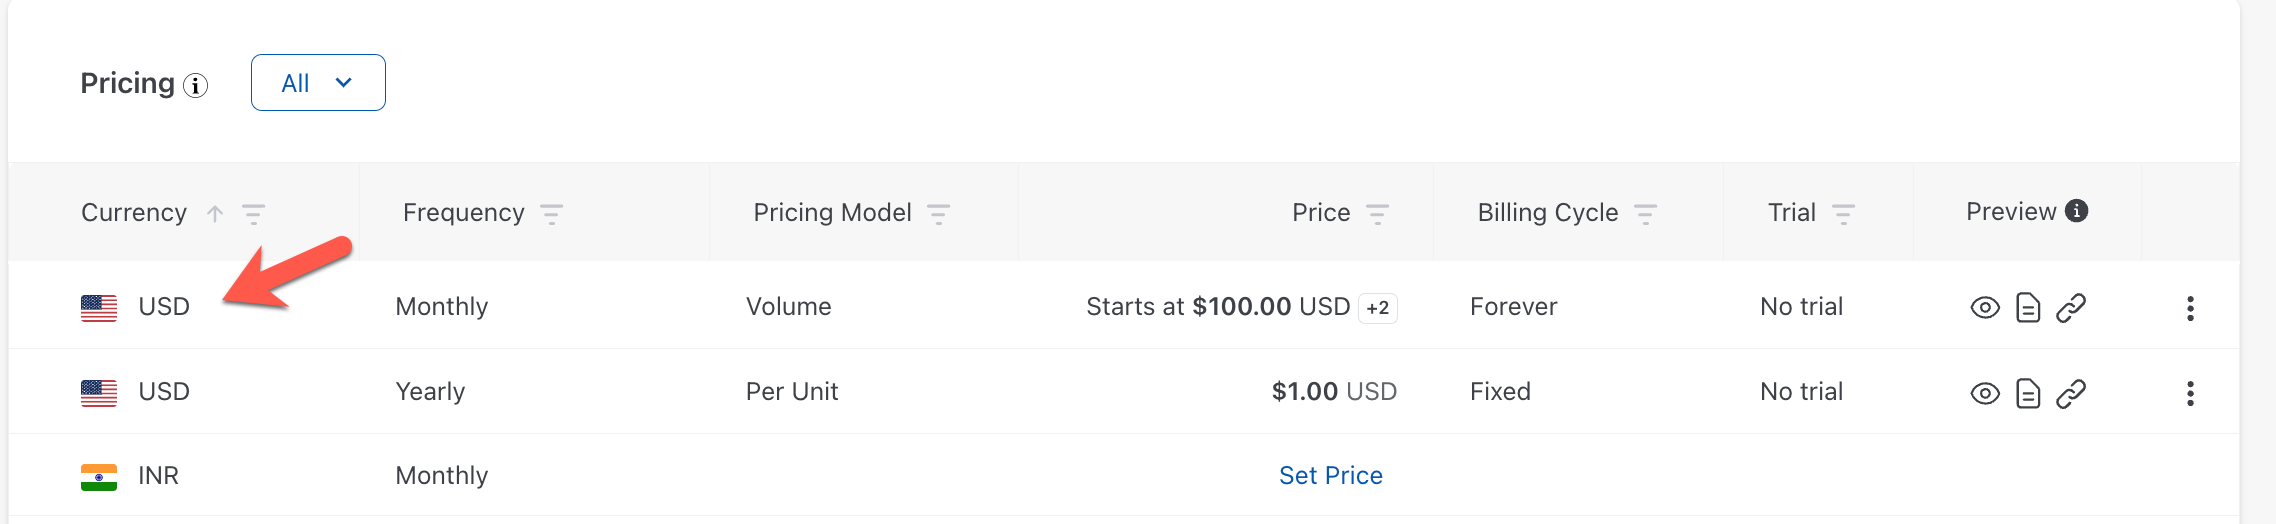
- Navigate to Product Catalog > Plans.
- Under the Pricing list, select the corresponding item price. The JSON metadata set at the item price level will be considered, not at the item level.
- Click Add for JSON metadata.
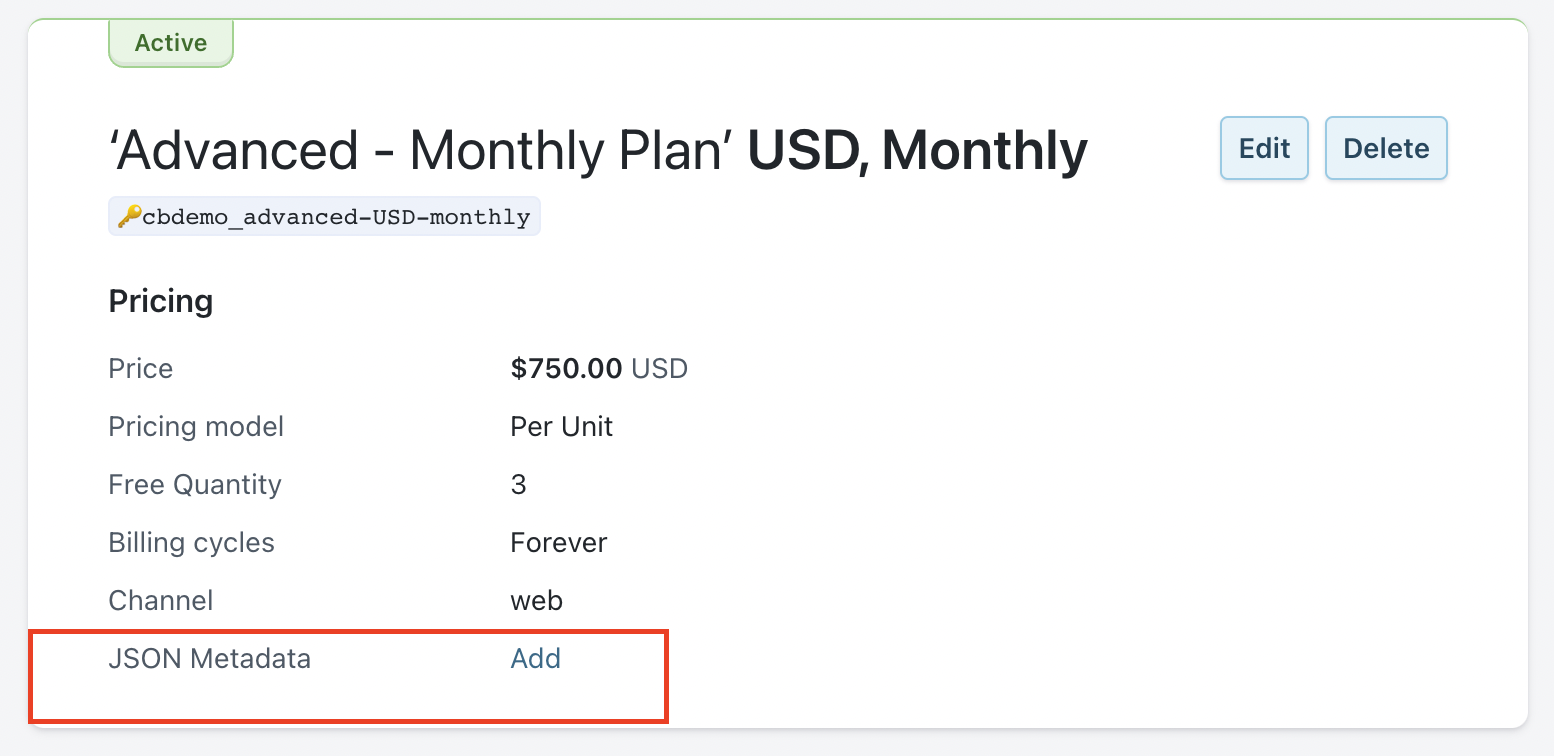
- On the Add JSON Metadata page, add the necessary code to restrict the quantity.
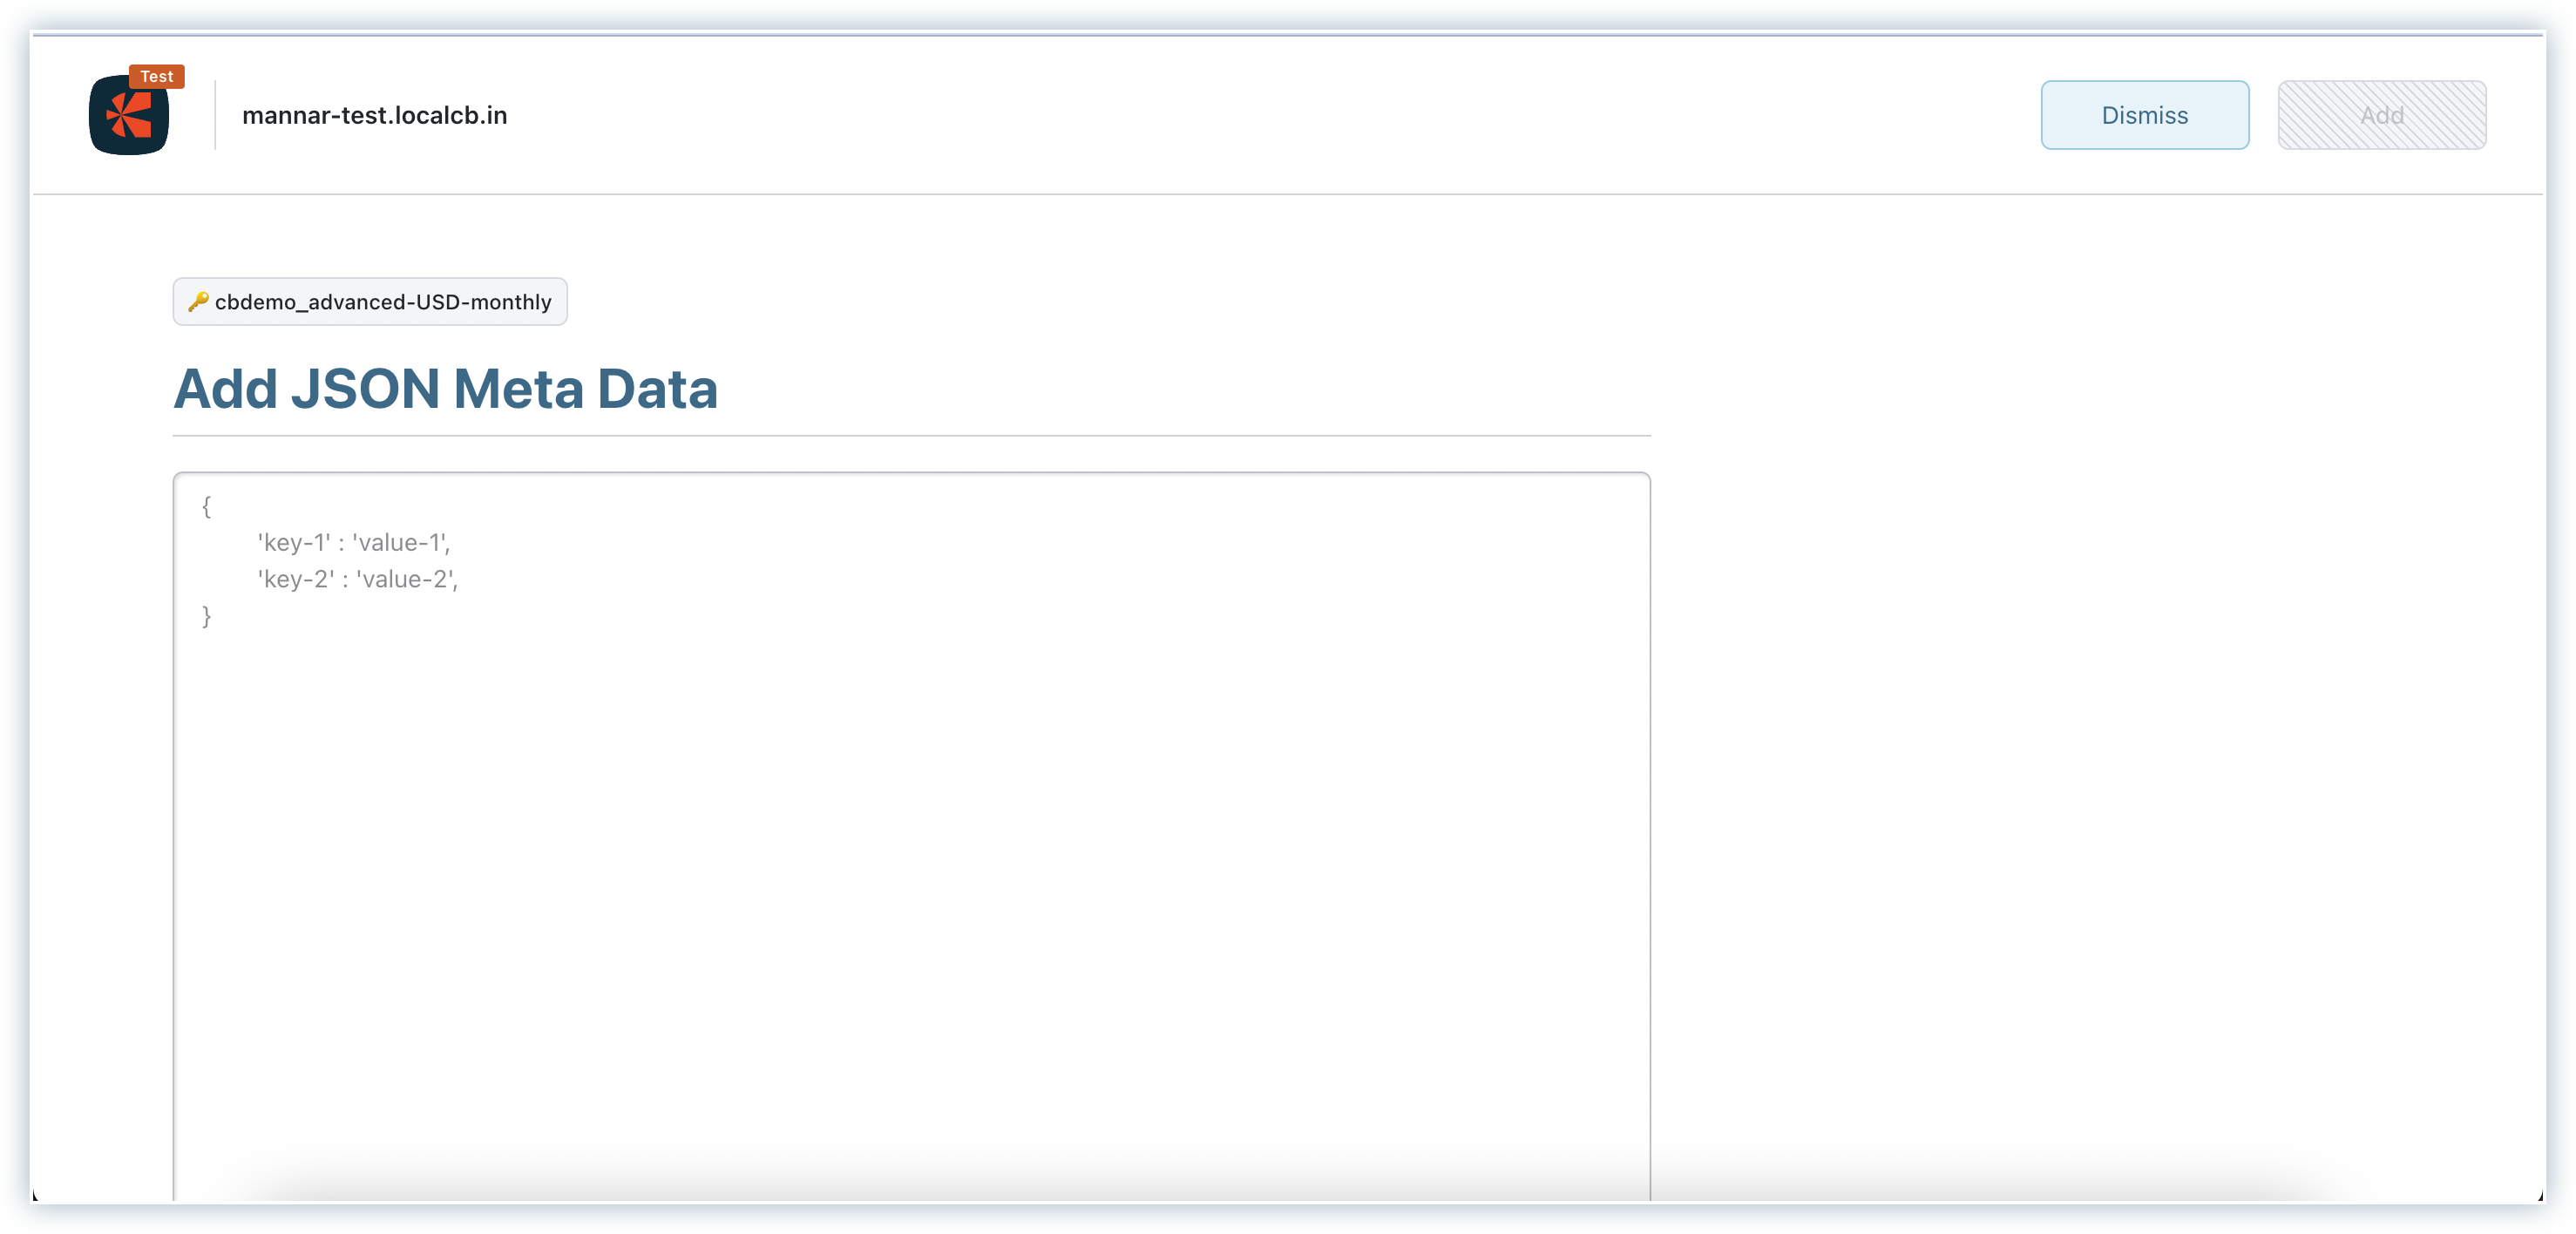
- Click Add once done.
Configure the checkout to allow only specific quantities
To configure the checkout to allow only specific quantities, enter the values you want to allow in the checkout and set the type as fixed.
Sample JSON:
{
  "quantity_meta": {
    "type": "fixed",
    "values": [5, 6, 7, 8, 9, 10]
  }
}
Sample checkout screen:
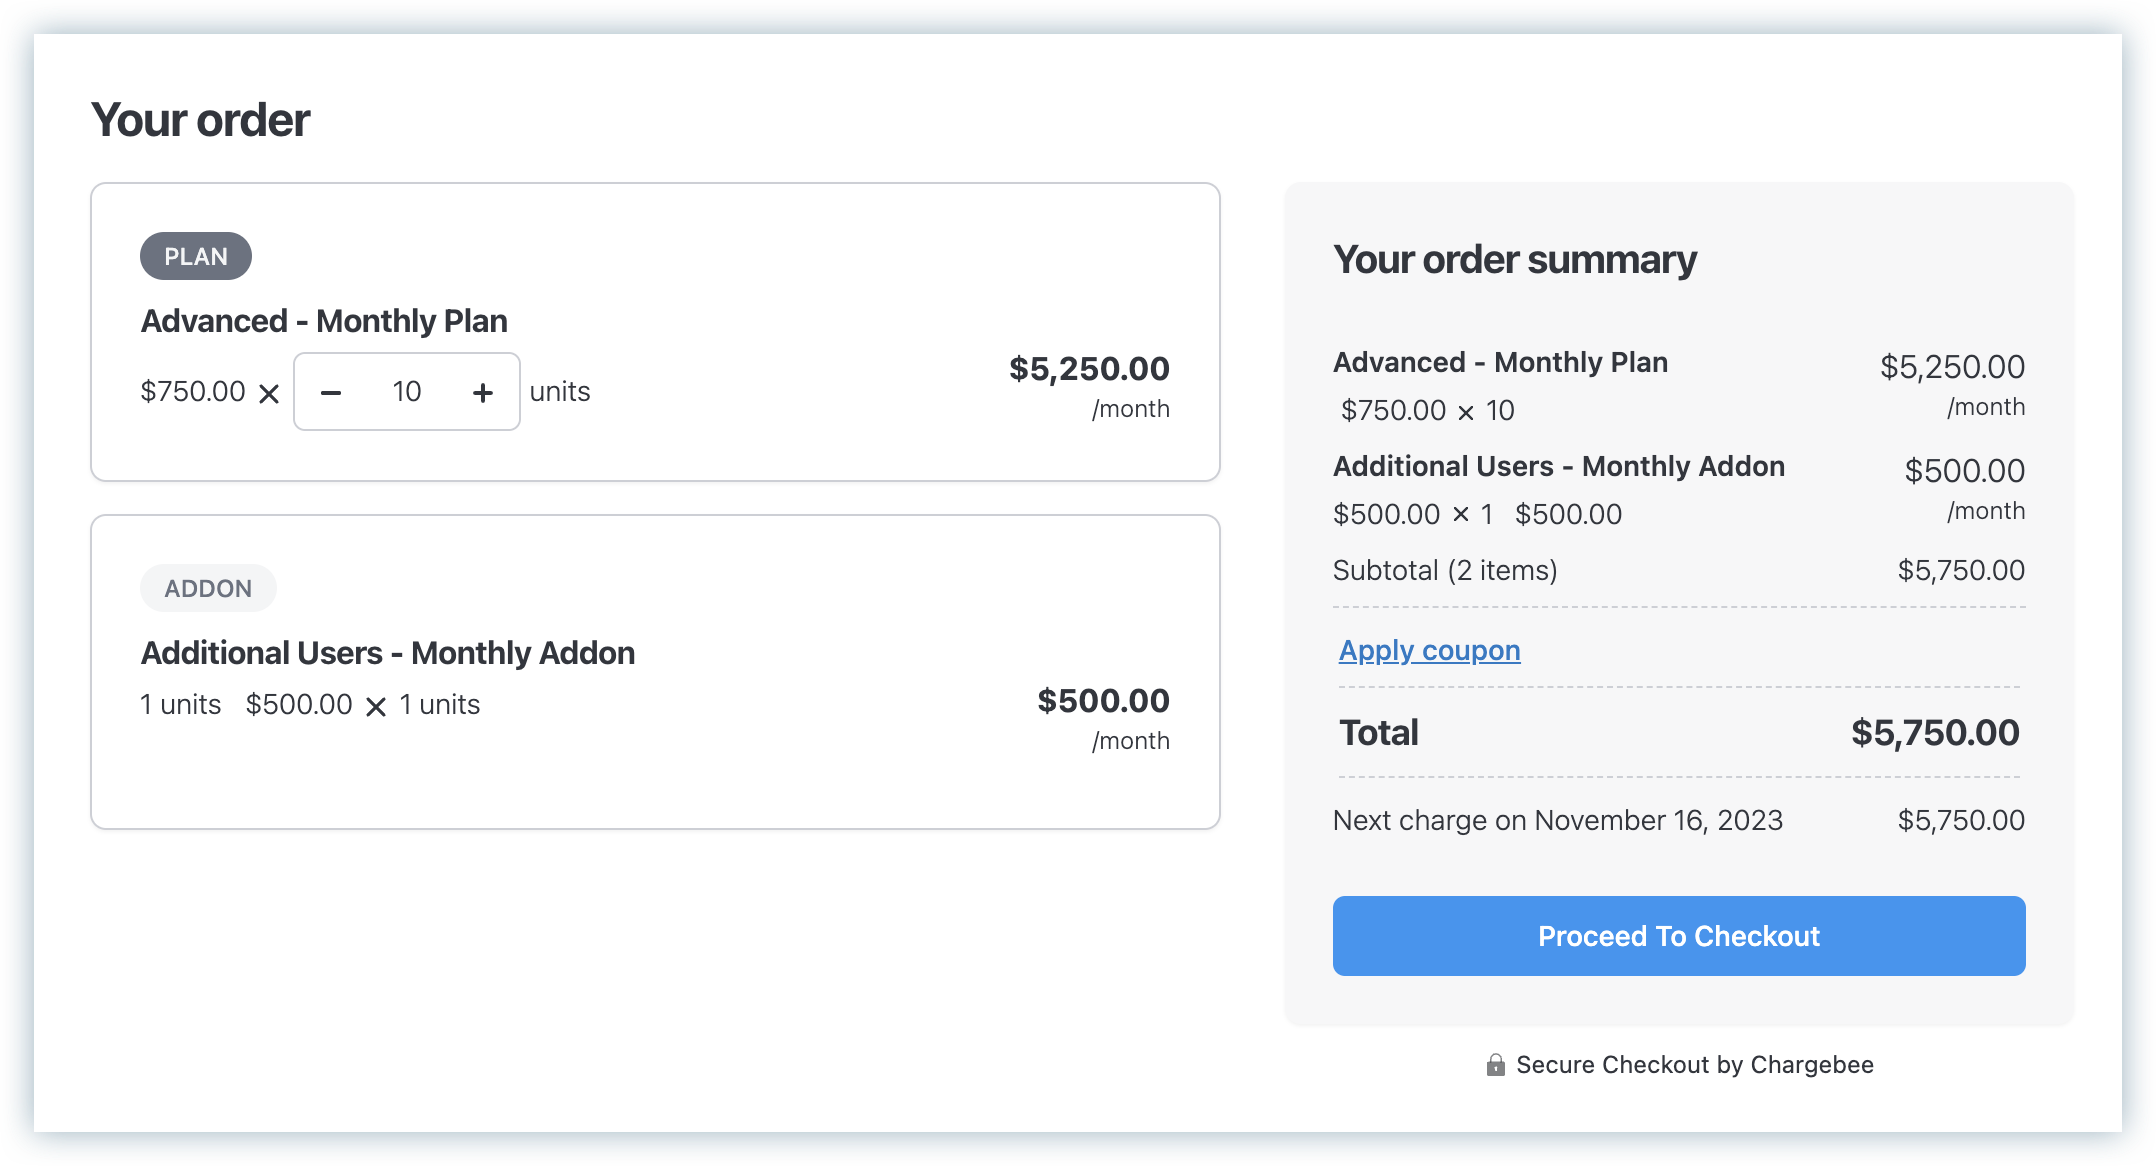
Configure limited quantity range in checkout
To allow a quantity limited to a specific range in your checkout, provide the min (minimum), max (maximum), and step values along with the type as range.
Sample JSON:
{
  "quantity_meta": {
    "type": "range",
    "min": 10,
    "max": 100,
    "step": 10
  }
}
Each time your customer increases the quantity, it will increment by the step value configured in the JSON.
Enter a valid quantity meta and click Add to save the metadata.
Note
min, max, and step must be of type Number.
Edit the metadata
To edit the metadata:
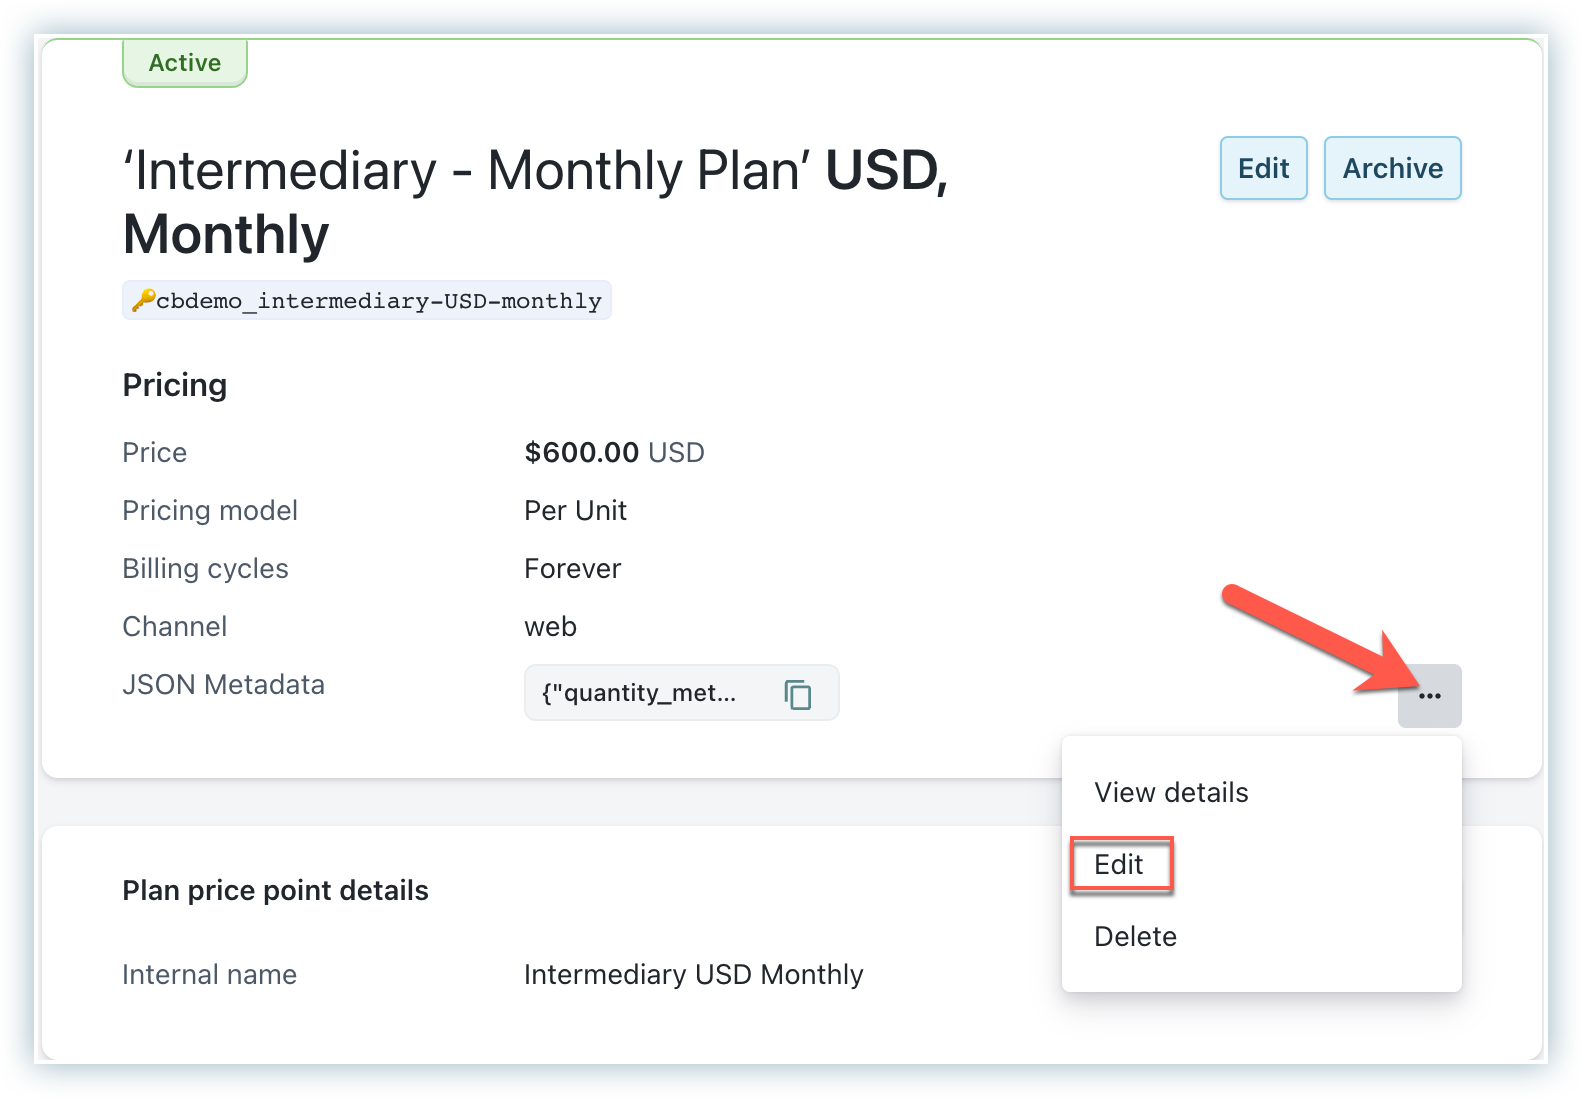
- Navigate to Product Catalog > Plans.
- Select the plan, then the item price, and click the ellipsis menu.
- Select the Edit option and make the necessary changes.
- Click Update once done.
Once these quantity restrictions are added, you can open the checkout for the corresponding item price to test your changes.
Changes in checkout based on quantity meta
The following metadata types are supported for quantity restrictions:
- Fixed
- Range
Checkout changes based on the metadata type in the JSON for an item price. Let's see the changes in checkout for each metadata type.
Changes in checkout when quantity meta is of type fixed
When the quantity meta is of type fixed, the checkout process undergoes the following changes:
- Quantity restriction: Restrict quantities to a set of numbers listed in the checkout for selection.
- Dropdown display: The dropdown will list valid quantity values configured in the JSON metadata within the product card's specific plan, addon, or charge section.
- Invalid quantity handling: If you create a hosted page with a quantity not present in the values array, the quantity will reset to the least or minimum value (not necessarily the first value).
- Configuration setting: These checks on quantity will occur when the Customize plan/addon quantity based on meta configuration setting is enabled.
Changes in checkout when quantity meta is of type range
When the quantity meta is of type range, the checkout process is adjusted as follows:
- Quantity restriction: Set the quantity directly from the checkout page to restrict quantities to a range of numbers.
- Stepper display: The quantity is displayed with a stepper, allowing customers to increment or decrement the quantity as needed.
- Invalid quantity handling: If an invalid quantity is passed via API or Plan URL, the value will reset to the minimum configured value within the defined range.
- Step increment: Each time a customer increments or decrements the quantity via the stepper, it is increased or decreased by the step value you set.
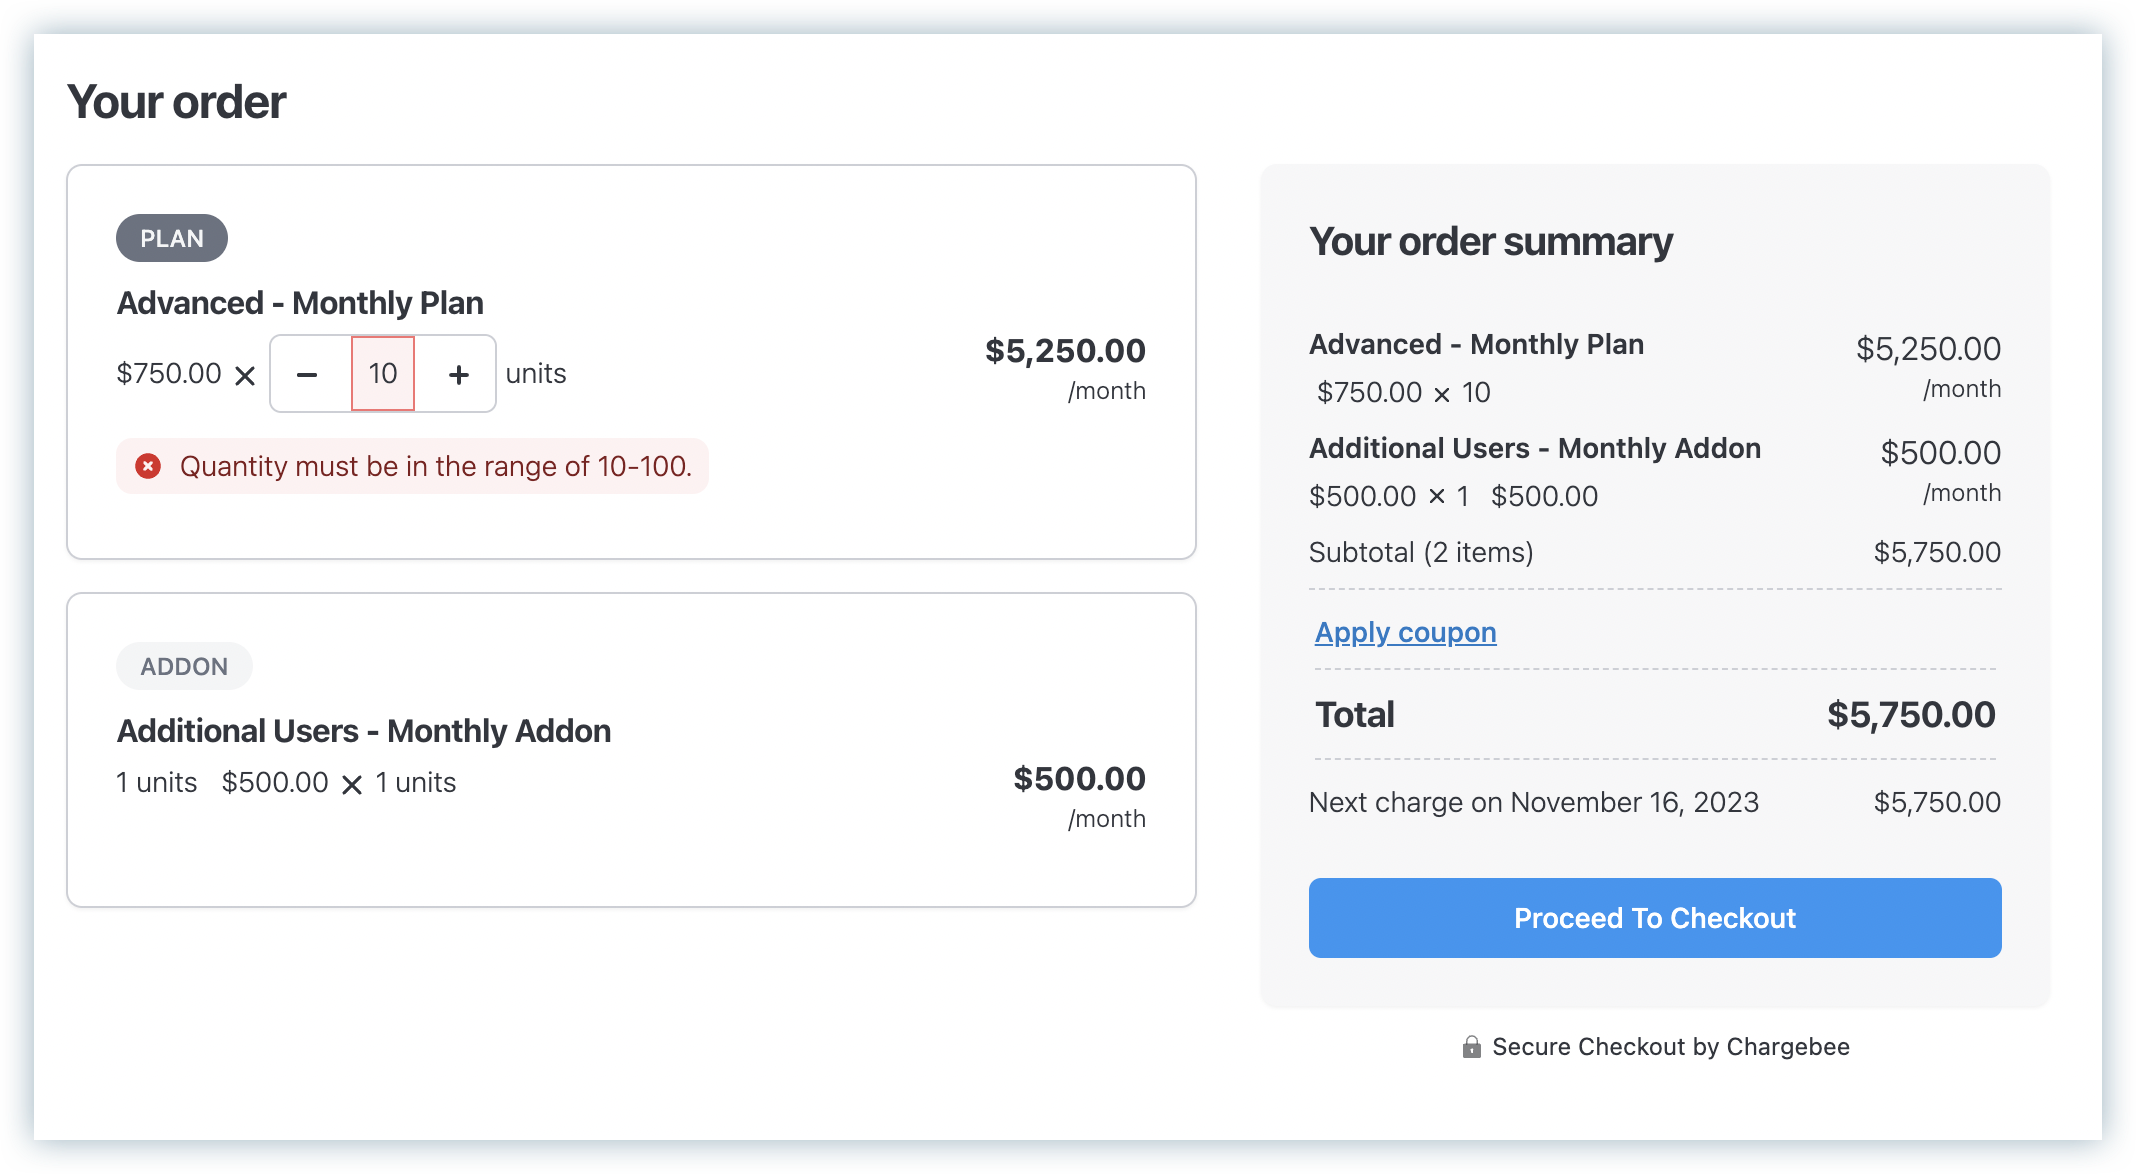
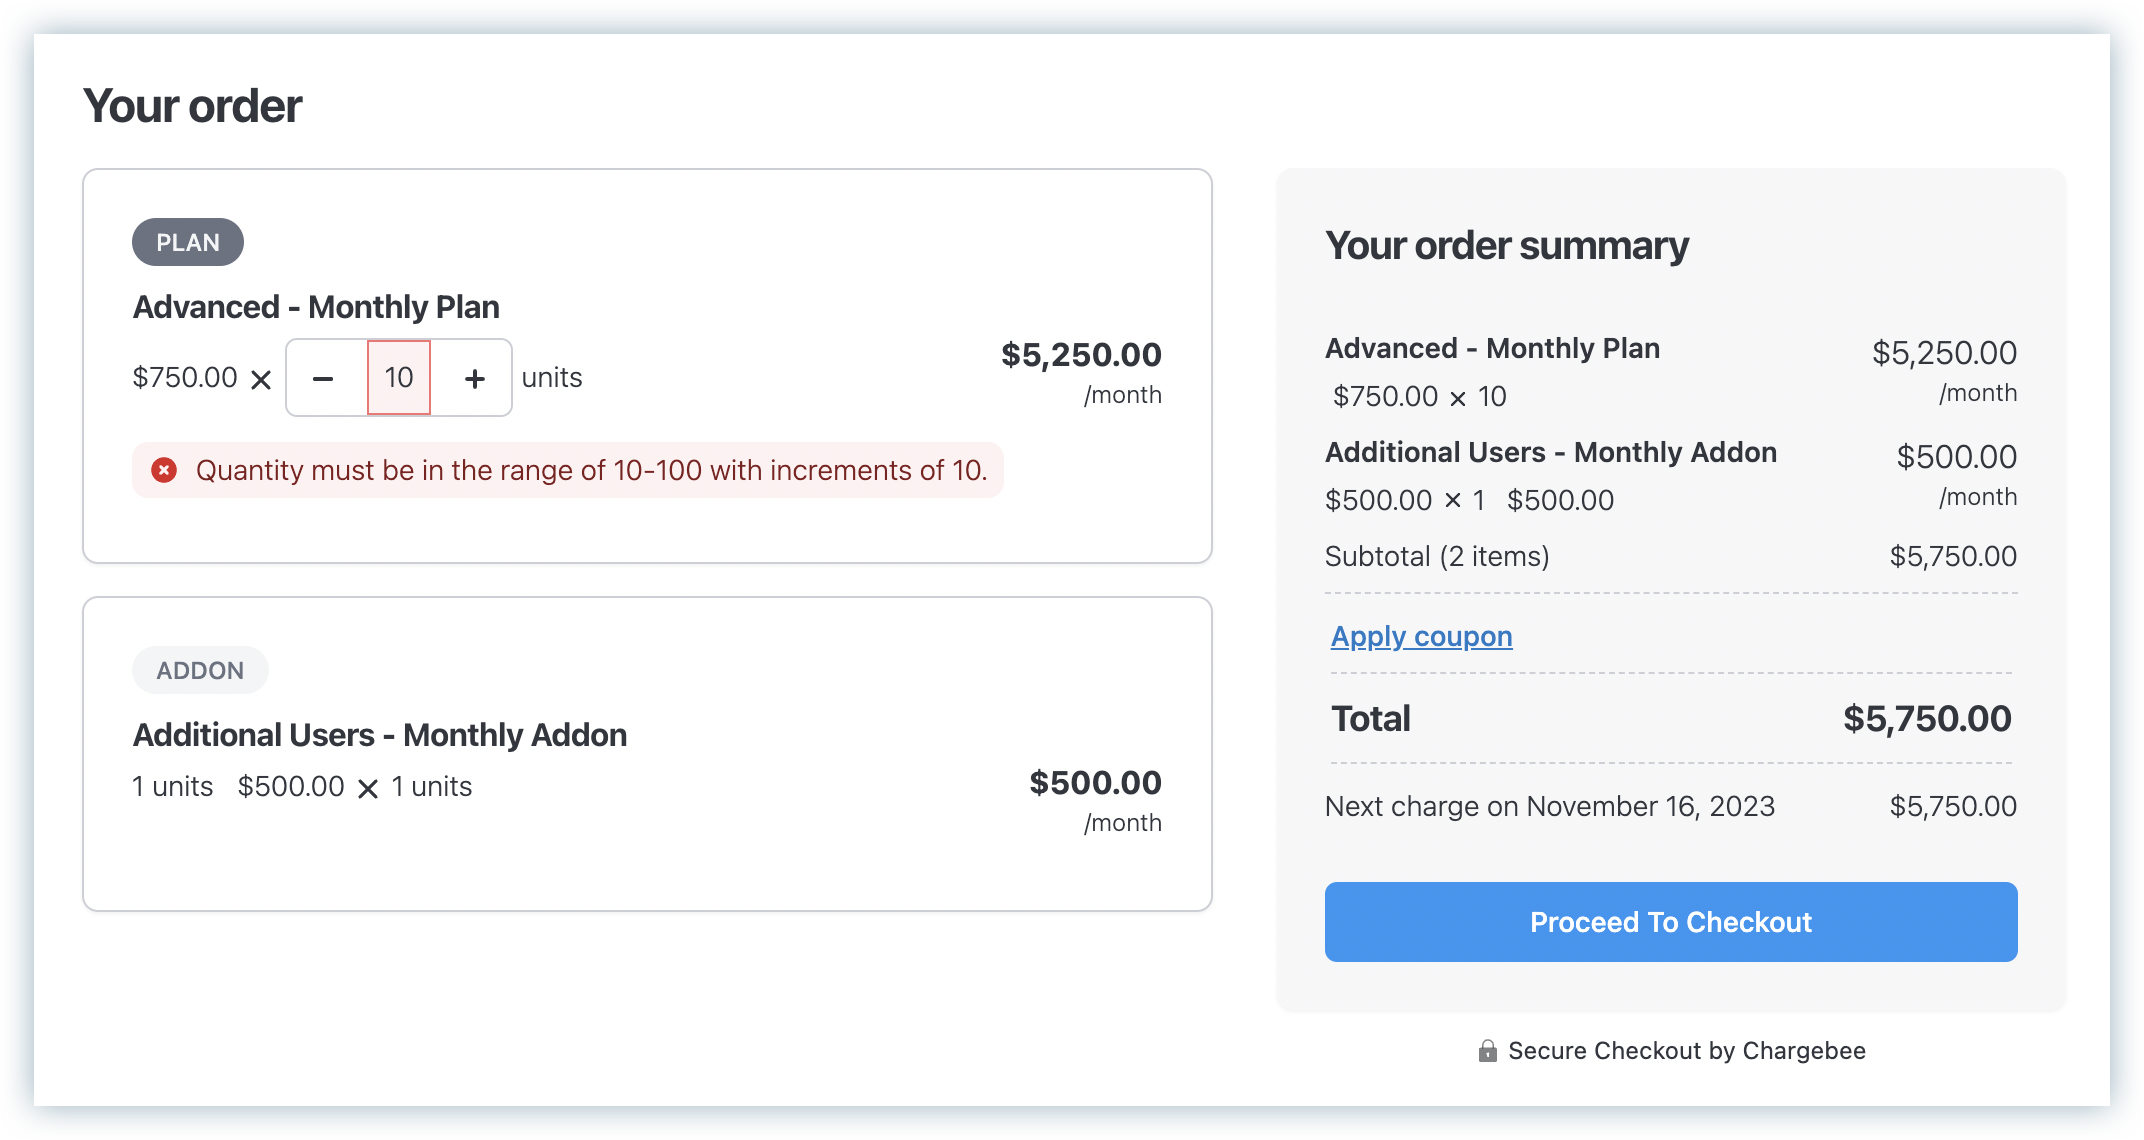
- Custom error display: If a customer enters an invalid value in the quantity text box, a custom error message will guide them. The error message can be customized. Learn more about working with labels to add a custom error.
Sample error screens:
When the Quantity Meta is of type range, the Checkout process is adjusted as follows:
-
Quantity Restriction: You can set the quantity directly from the Checkout page to restrict the quantities to a range of numbers.
-
Stepper Display: The quantity is displayed with a stepper, allowing customers to increment or decrement the quantity as needed.
-
Invalid Quantity Handling: The value will be reset to the minimum configured value within the defined range if an invalid quantity is passed via API or Plan URL,
-
Step Increment: Each time a customer increments or decrements the quantity via the stepper, it is increased or decreased by the step value you set.
-
Custom Error Display: If a customer enters an invalid value in the quantity text box, a custom error message will be displayed to guide them. The error message can be customized. Learn more about working with labels to add a custom error.
Sample Error Screens
Was this article helpful?