Configuring Guest Approvers
You can now designate guest approvers, individuals or groups who are not Chargebee app users, to participate in approval workflows using a secure, email-based experience. Guest approvers can approve or reject requests via a pre-authenticated link without logging in to Chargebee. This document explains how to enable, create, update, and delete guest approvers in your Chargebee Billing site.
How to enable the guest approvers feature on your site
To enable the guest approvers feature on your site:
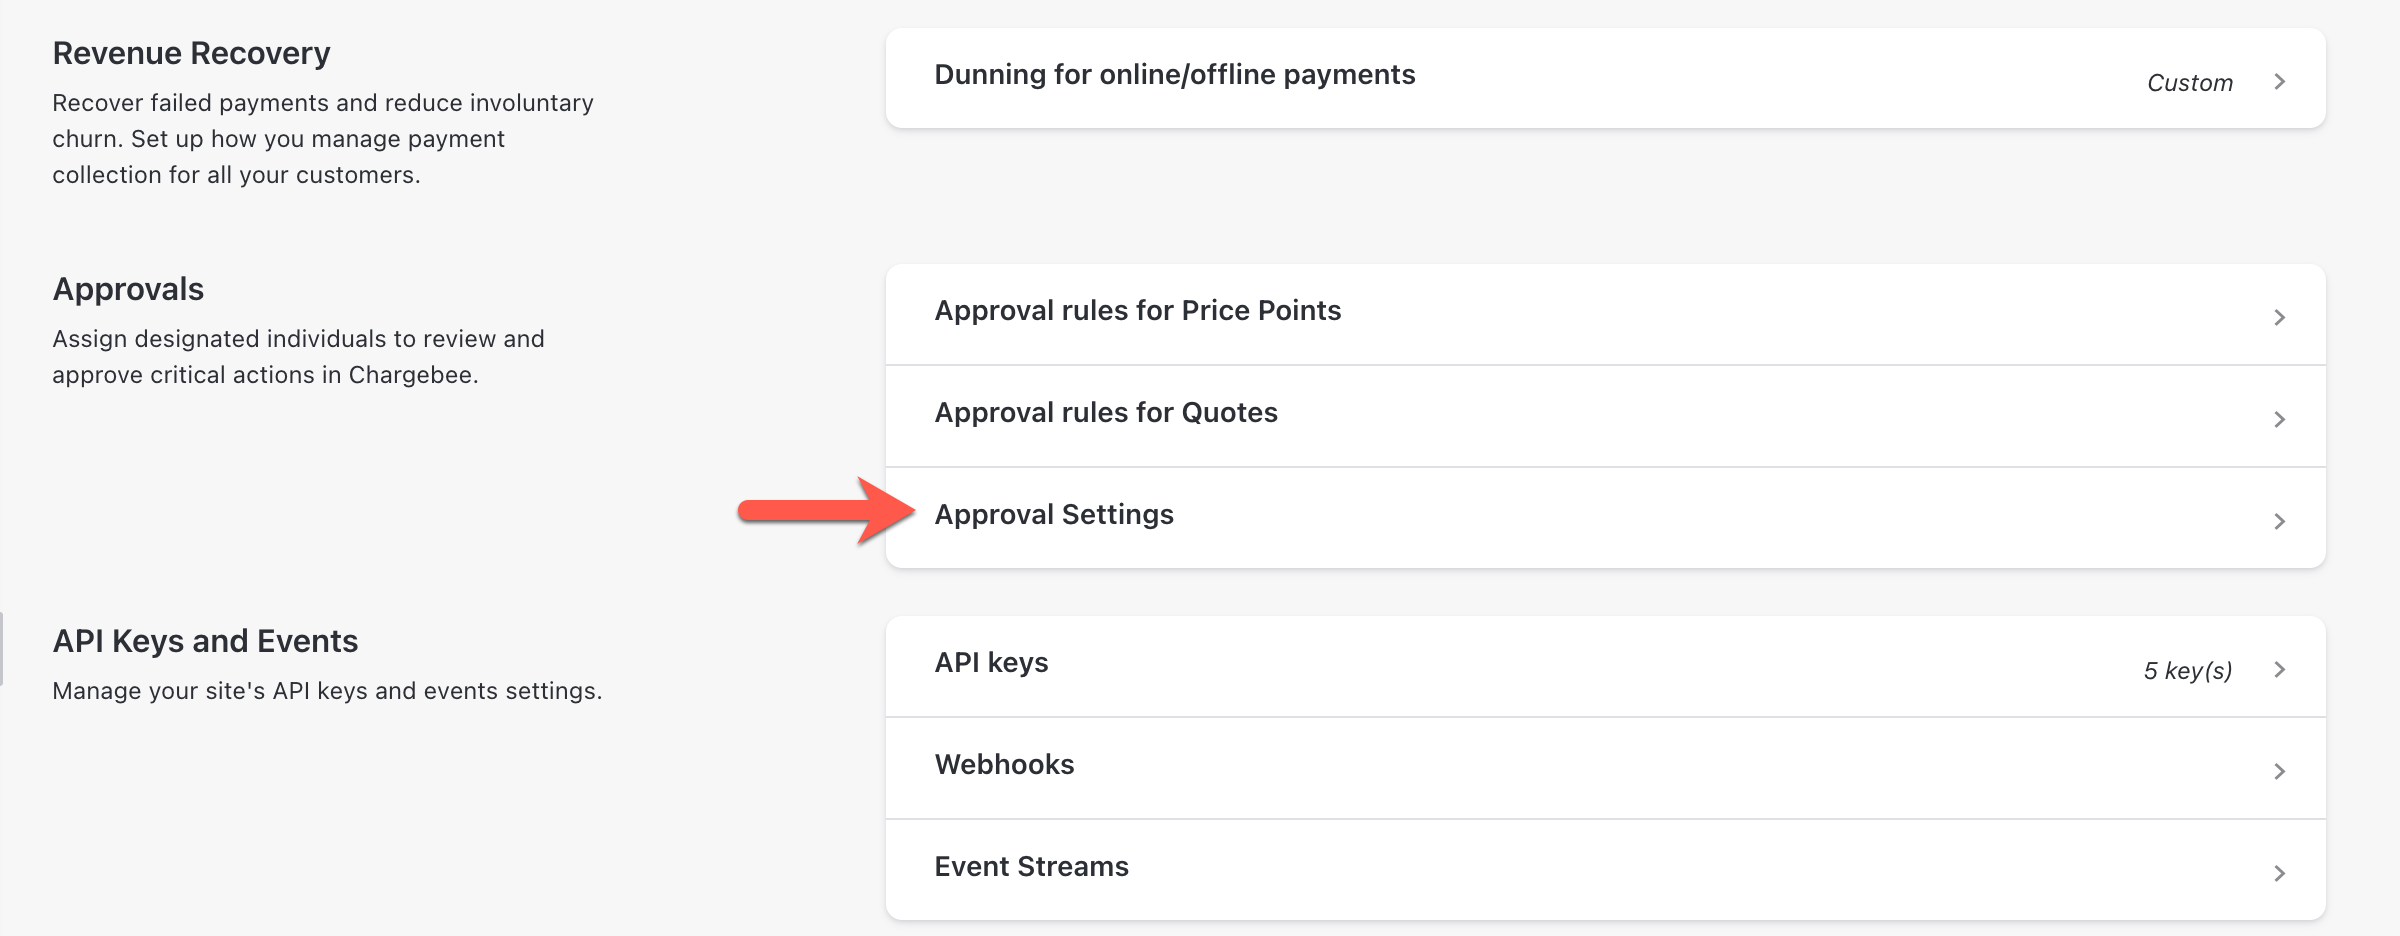
- Log in to the Chargebee Billing Site.
- Navigate to Settings > Configure Chargebee.
- On the Configure Chargebee page, click on Approval Settings.
- Enable Allow Guest Approvers using the toggle button.
- Enable Require Approval Access Code to approve requests using the toggle button. This will add a validation step before review. The approver has to use an access code to view the approval form. This is an optional feature to configure.
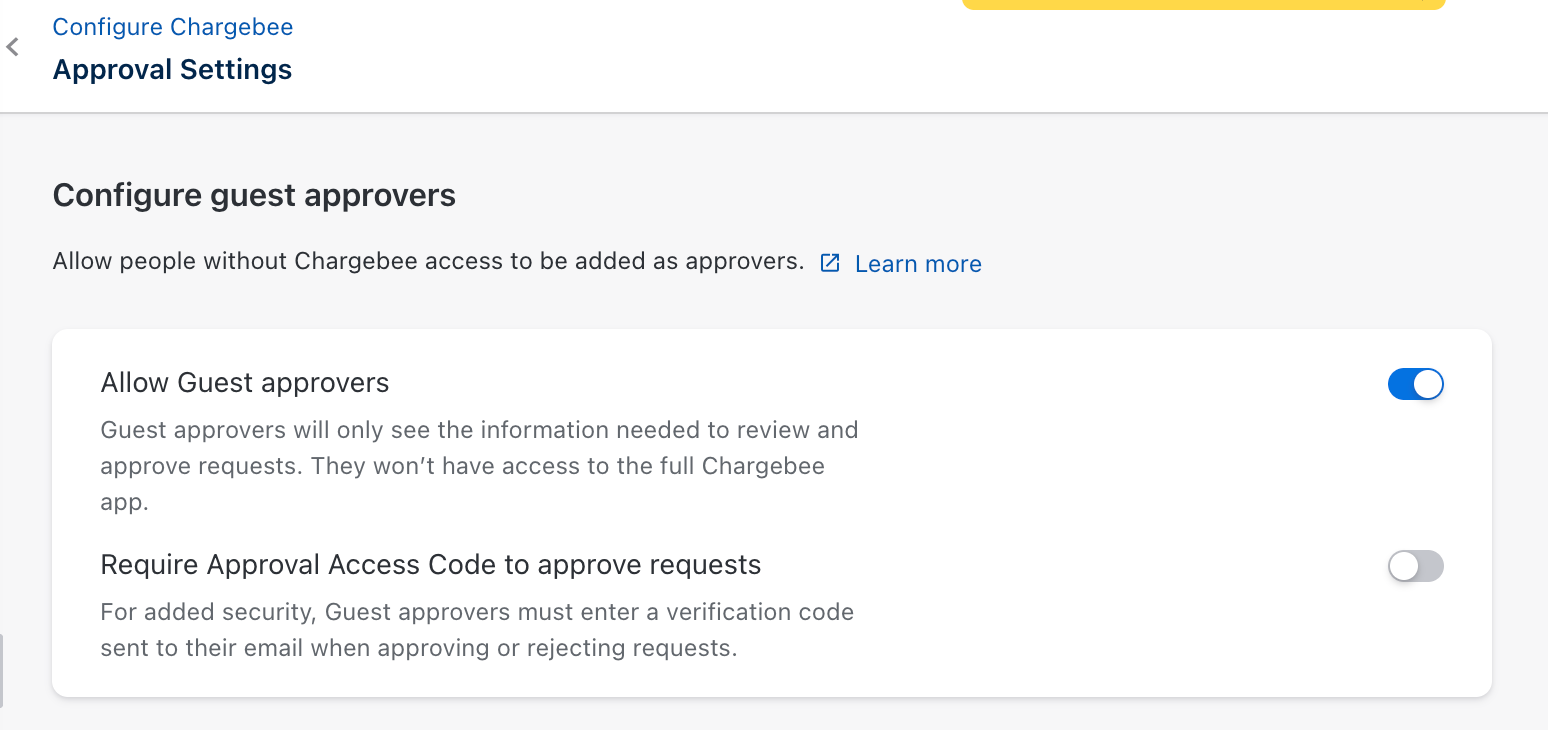
- Click on Apply > Confirm to save the changes.
How to create and assign guest approvers as rule approvers
To create and assign guest approvers as rule approvers:
- Log in to the Chargebee Billing Site.
- Navigate to Settings > Configure Chargebee > Approval Rules for Quotes or Approval Rules for Price Points.
- Enter the rule details to add a new rule or edit an existing one.
- Create and add a guest approver using either of the methods:
- Click Add Approver on the create or edit rule page.
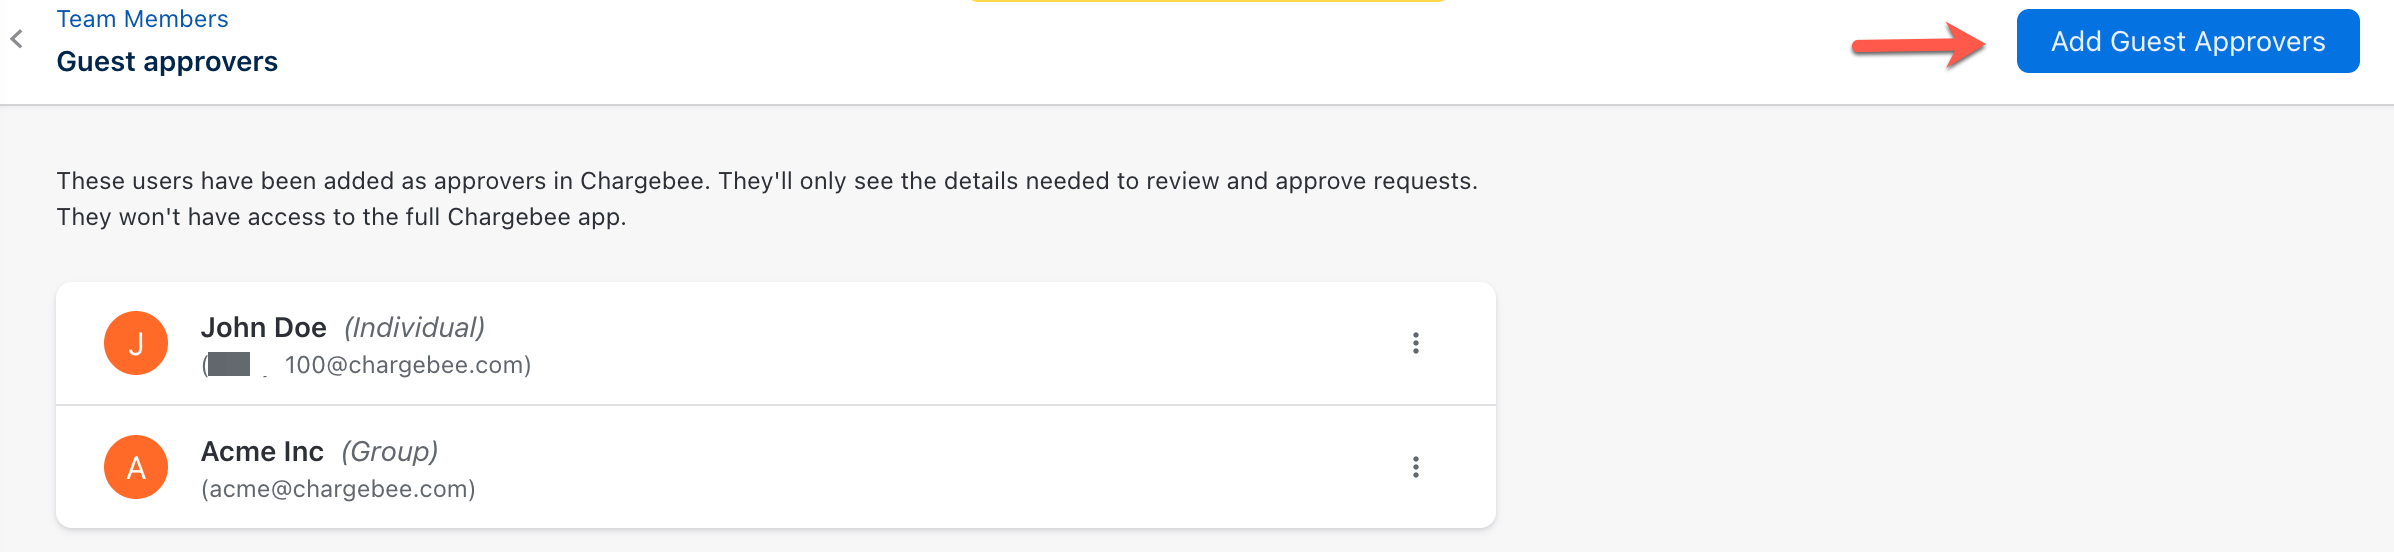
- Or click Add Guest Approver by navigating to Settings > Configure Chargebee > Team Members > Manage Guest Approvers.
- Click Update Approvers to add selected approvers.
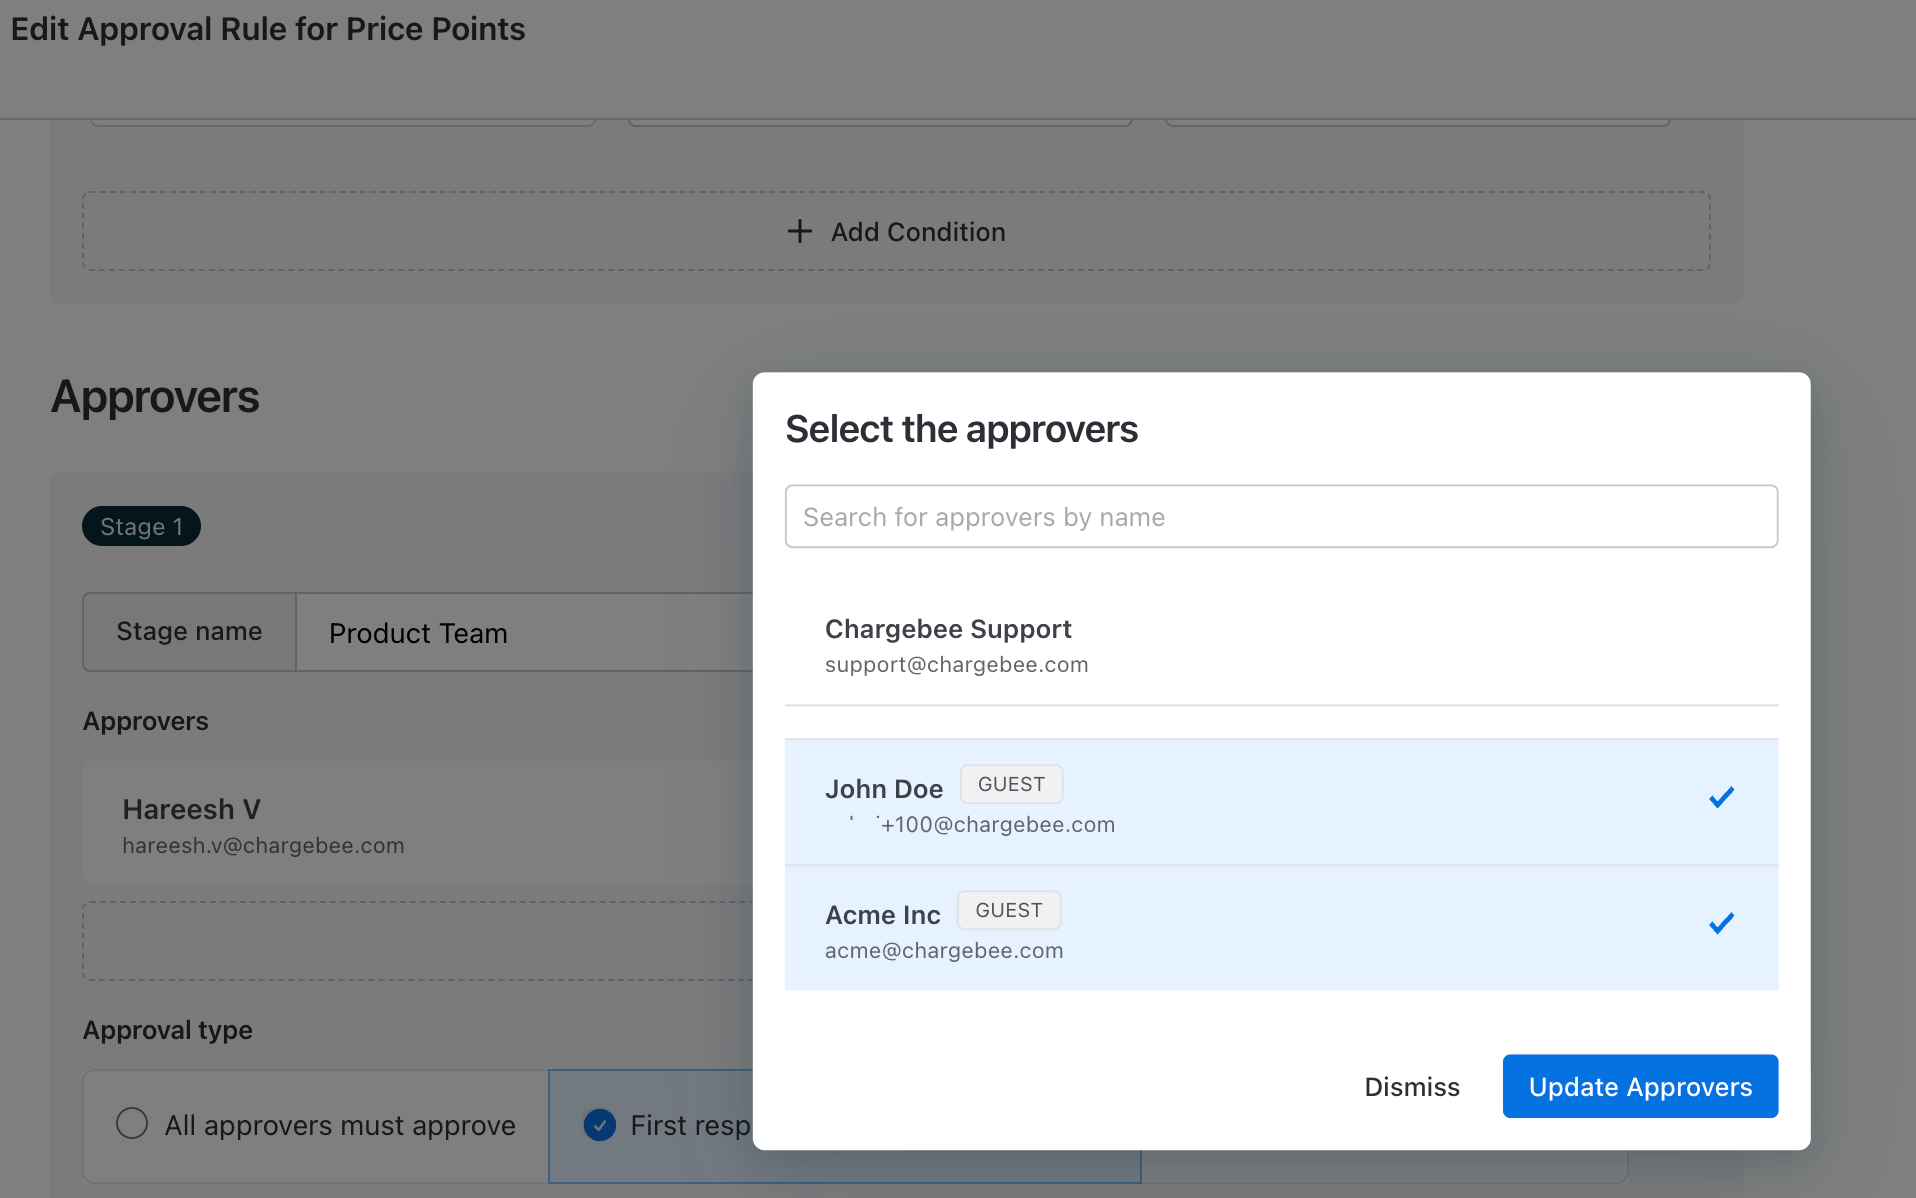
- Click Create or Update.
- Click Create Rule or Update Rule to confirm creation or update of the approval rule.
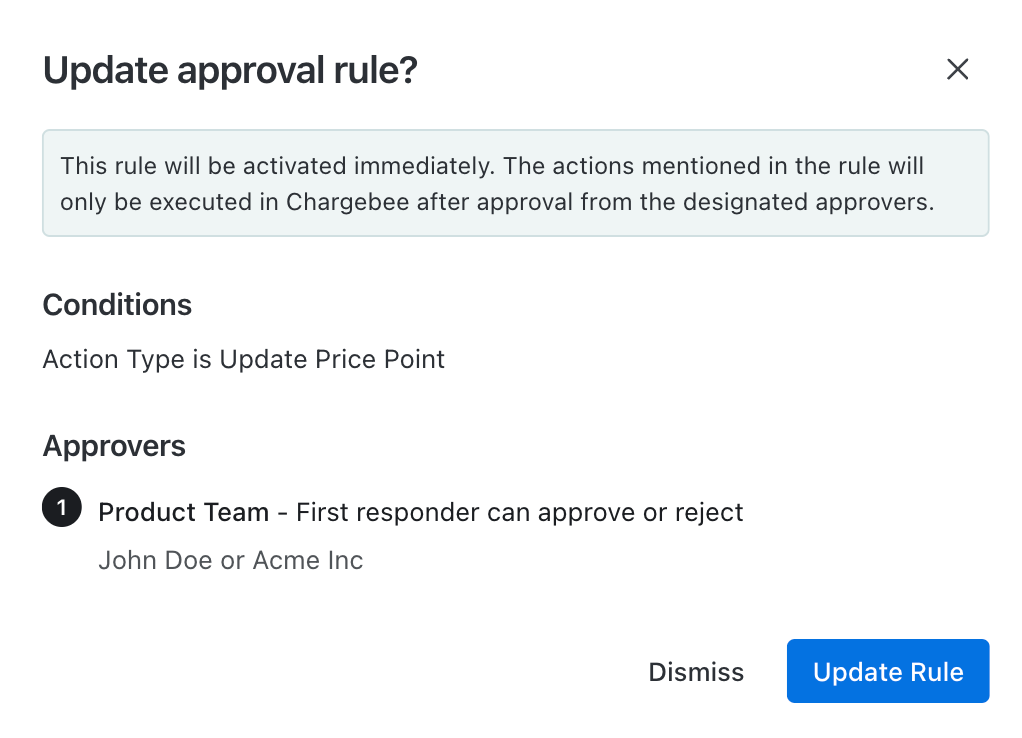
- Once the rule is successfully created or updated, an email notification is sent to the guest approver.

- Guest approvers can now review and act on approval requests.
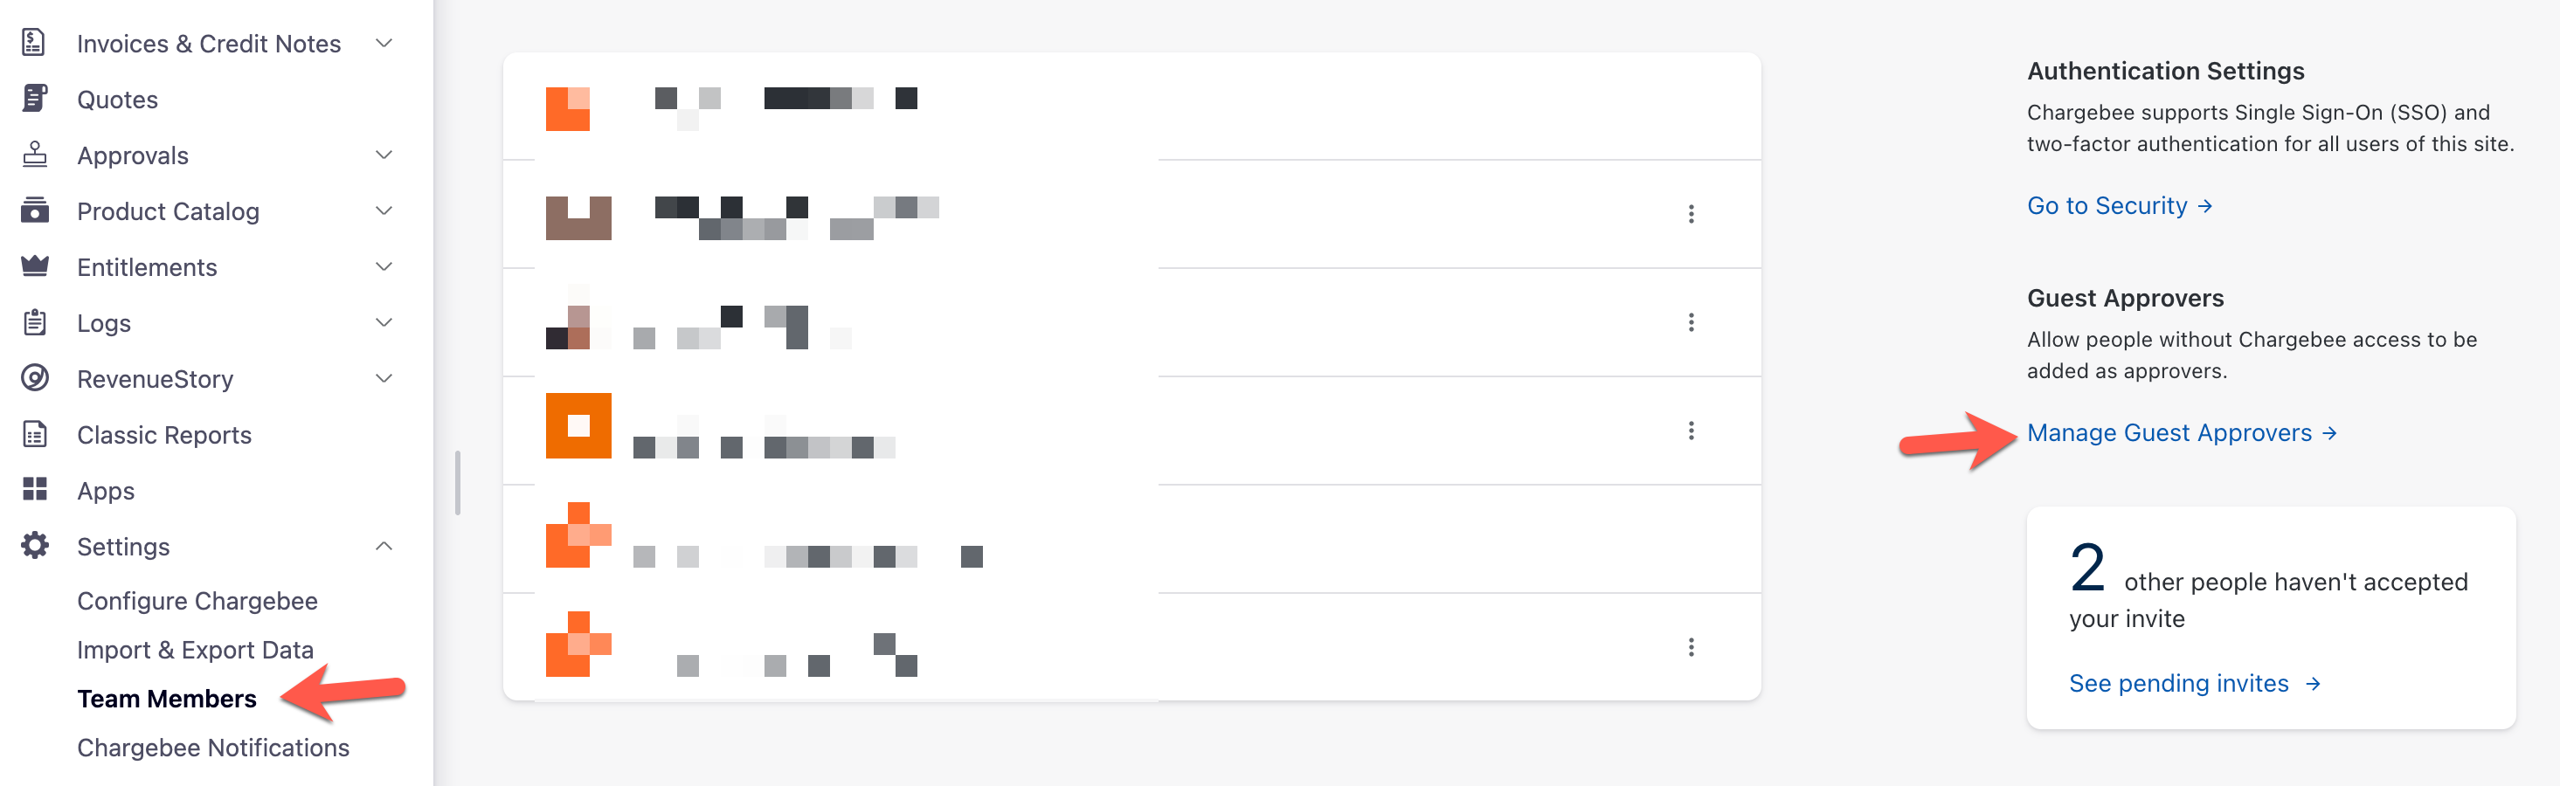
How to manage guest approvers
To modify, delete, or provide Chargebee access to a guest approver, follow these steps:
- Log in to the Chargebee Billing Site.
- Navigate to Settings > Configure Chargebee > Team Members.
- On the Team Members page, click Manage Guest Approvers.
- Click the options menu (three dots) next to the user's name to edit, delete, or provide Chargebee access to the guest approver:
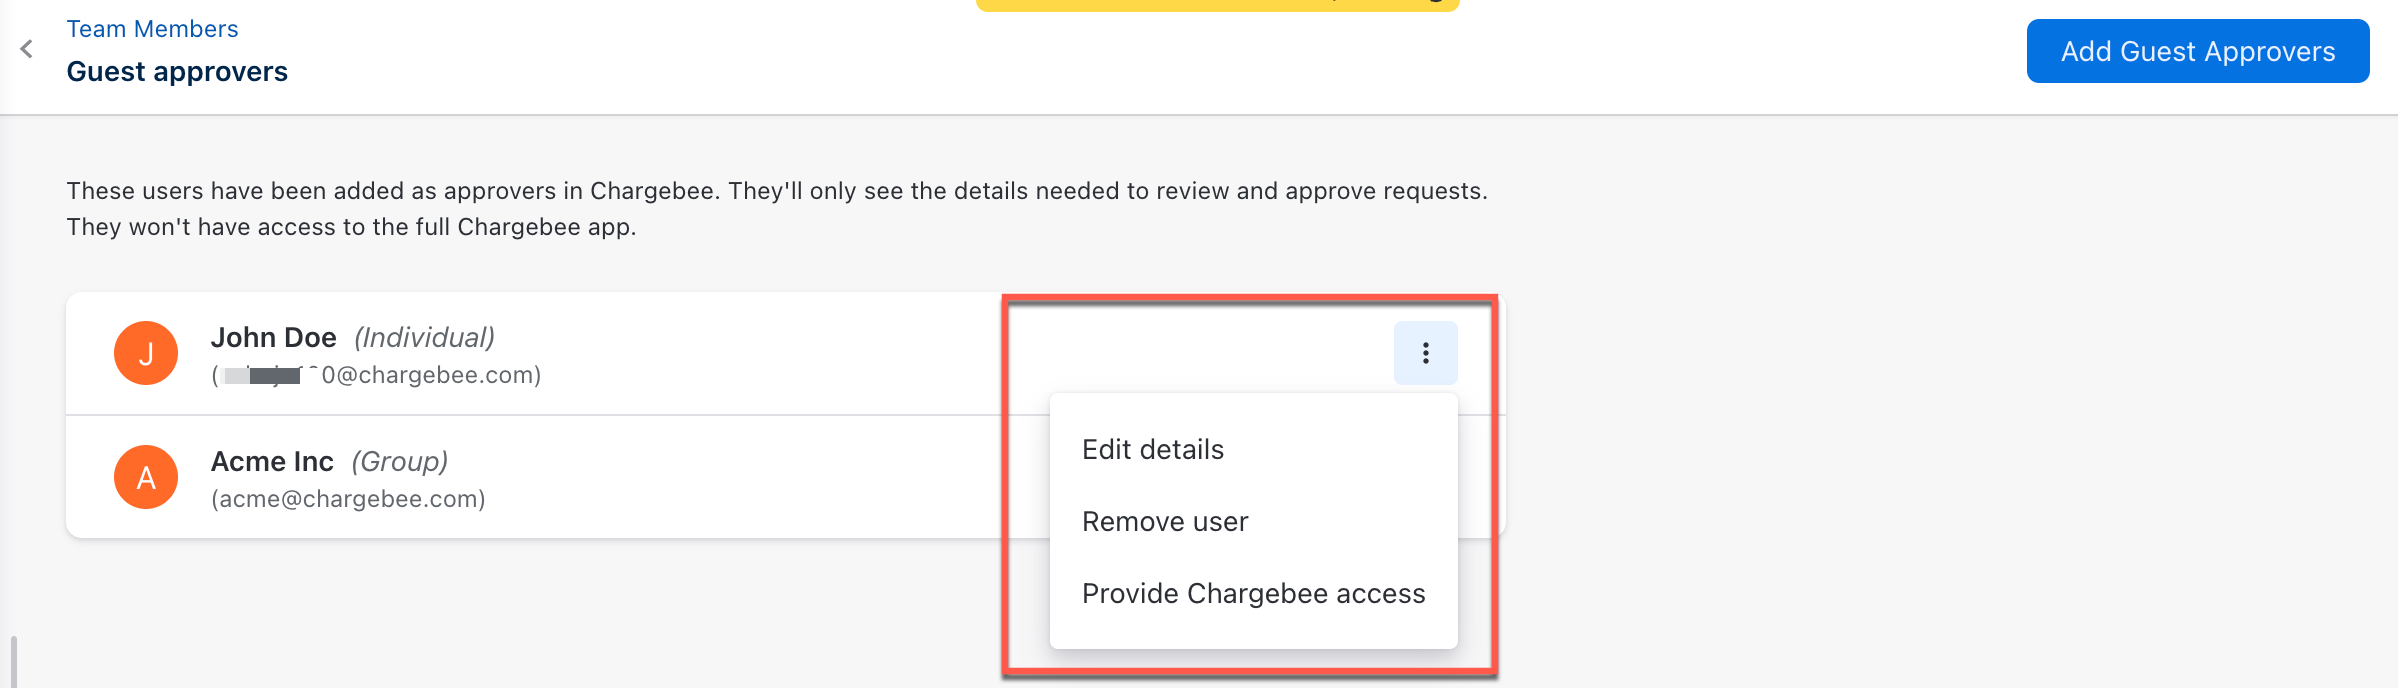
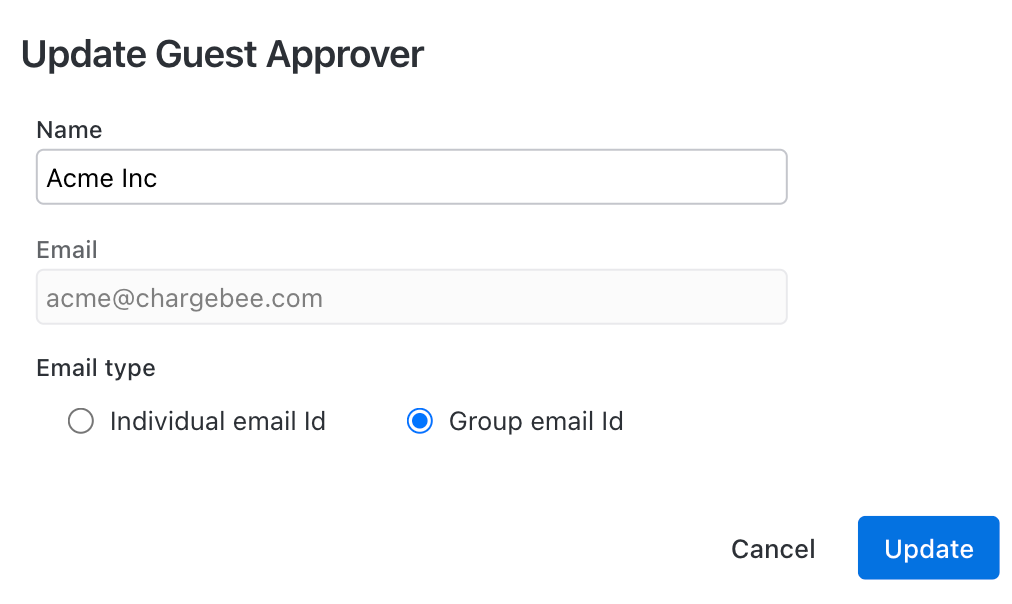
- Select Edit Details from the drop-down menu to modify the guest approver details. Click Update. You can change the Name and Email type, but not the email address.
- Select Remove user from the drop-down menu to delete the guest approver.
- Select Provide Chargebee Access from the drop-down menu to send the Chargebee site's user access invitation to the guest approver. Learn more about the Chargebee users and their access roles.
Was this article helpful?