Calendar Billing Configuration
Overview
Easily configure calendar billing on your Chargebee site according to your business needs. Click here to learn more about this feature, the various settings, and use cases.
The following options are available for the configuration of Calendar Billing based on your business type:
- SaaS: This includes your digital product offerings that do not require shipping.
- Site-wide configuration: Settings apply to all plans offered to your customers.
- Plan-specific configuration: Settings will apply to selected plans only.
- E-Commerce: This includes your physical product offerings that require shipping.
- Site-wide configuration: Settings apply to all plans offered to your customers.
- Plan-specific configuration: Settings will apply to selected plans only.
Note
Any changes made as part of the new calendar billing configuration will override any previous billing settings that are currently active on your Chargebee site.
Configuring Calendar Billing
Follow these steps to enable Calendar Billing on your Chargebee site:
-
Log in to your Chargebee Billing site.
-
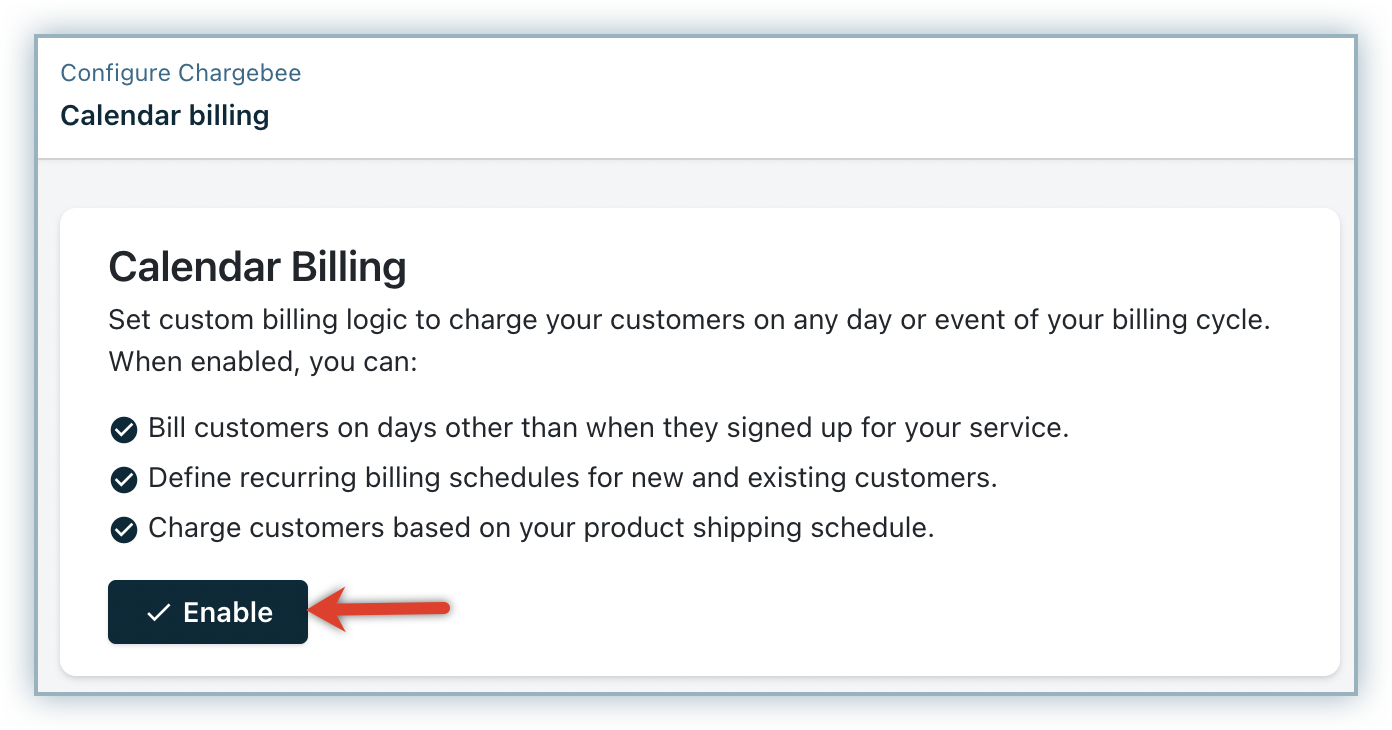
Click Settings > Configure Chargebee > Billing LogIQ > Billing & Invoices > Calendar Billing, and click Enable.
-
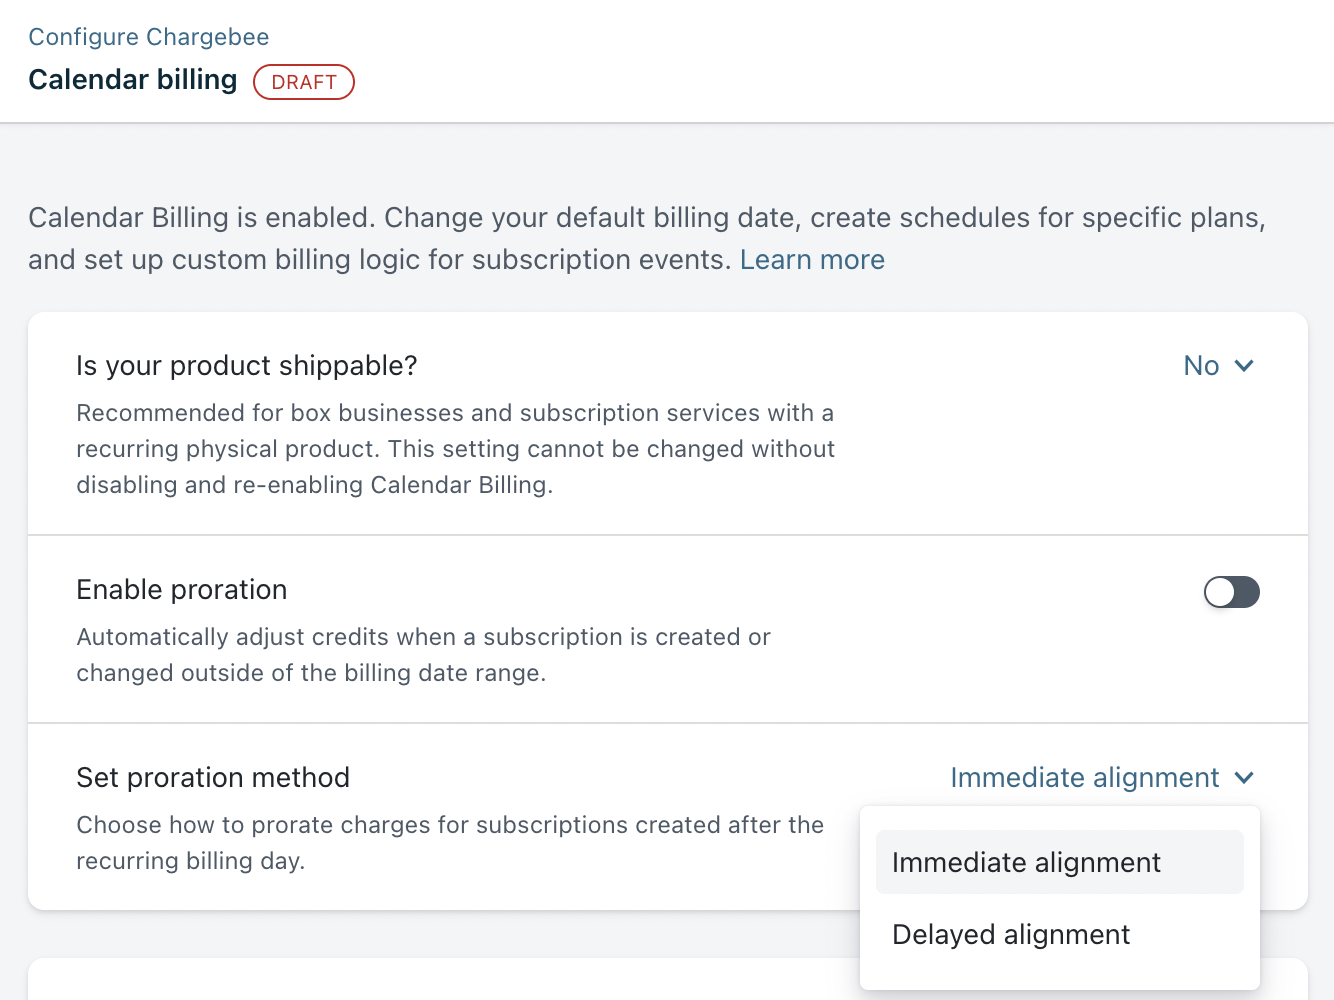
On the Calendar Billing configuration page, select if your products are shippable under Is your product shippable setting by clicking the drop-down to select Yes or No. We recommend configuring this carefully. Once you select an option in this setting, you cannot change it even by disabling and re-enabling the calendar billing settings.
-
Enable the toggle On under Enable next renewal date at subscription creation option if you want to allow users to modify the next renewal date field while creating subscription records.
-
Enable the toggle On under Enable Proration option if you want to adjust credits when a subscription is created or changed outside of the billing date range. Learn more about proration.
-
In the Set proration method, select your preferred proration option from the drop-down list. You can select from the following options:
- Immediate Alignment
- Delayed Alignment
Learn more about proration alignment.
-
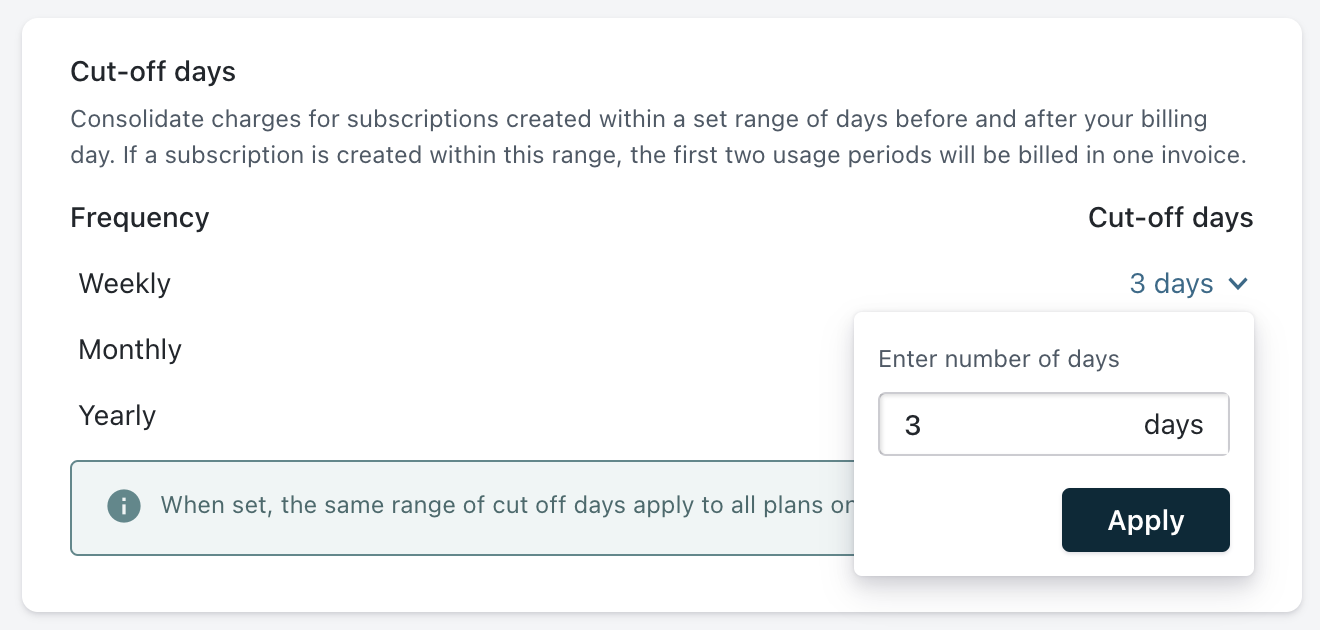
Under Cut-off days specify the number of days during which a single invoice is generated between two billing periods for Weekly, Monthly, and Yearly billing frequency. Learn more about cut-off days.
-
Click Apply > Confirm to save your updates.
You can continue to configure site-wide billing or plan-specific billing based on your billing preferences and product offerings.
Configuring Site-Wide Billing
To configure site-wide billing that applies to all plans and addons in your Chargebee site, follow these steps:
-
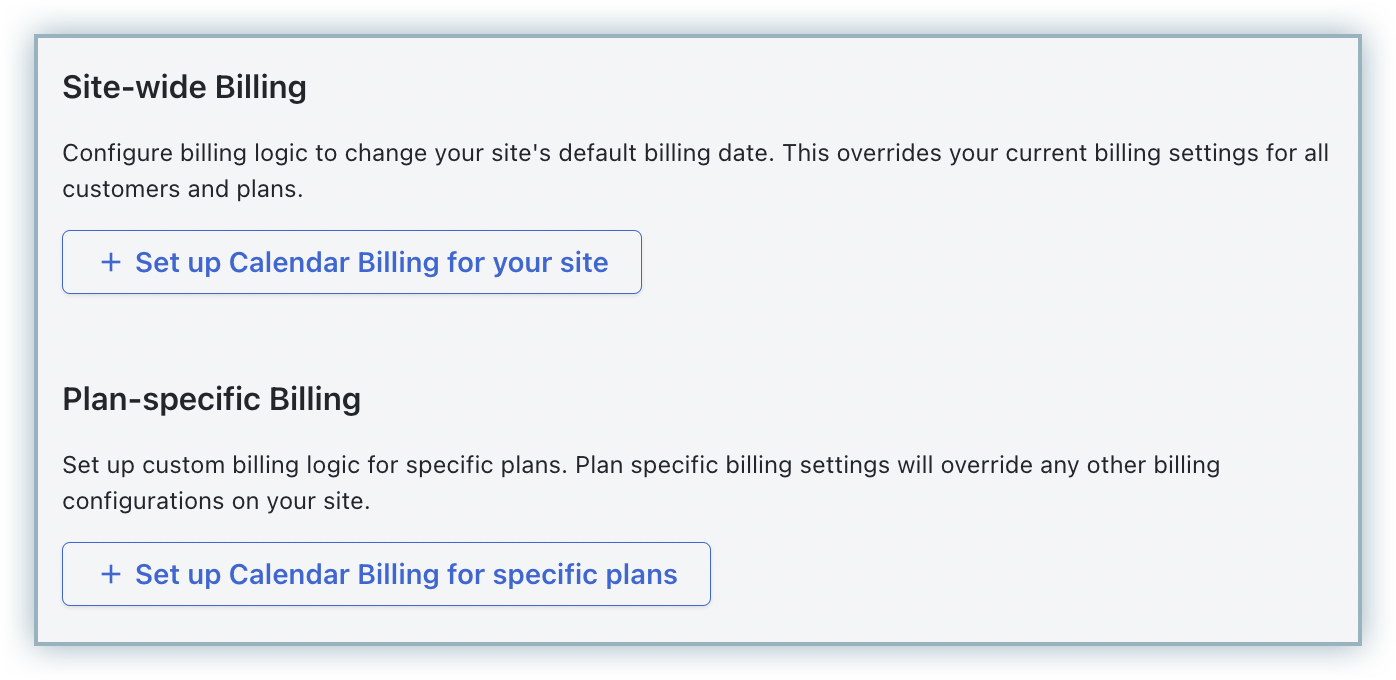
On the Calendar Billing configuration page, click Set up Calendar Billing for your site > Add a site-wide billing frequency.
-
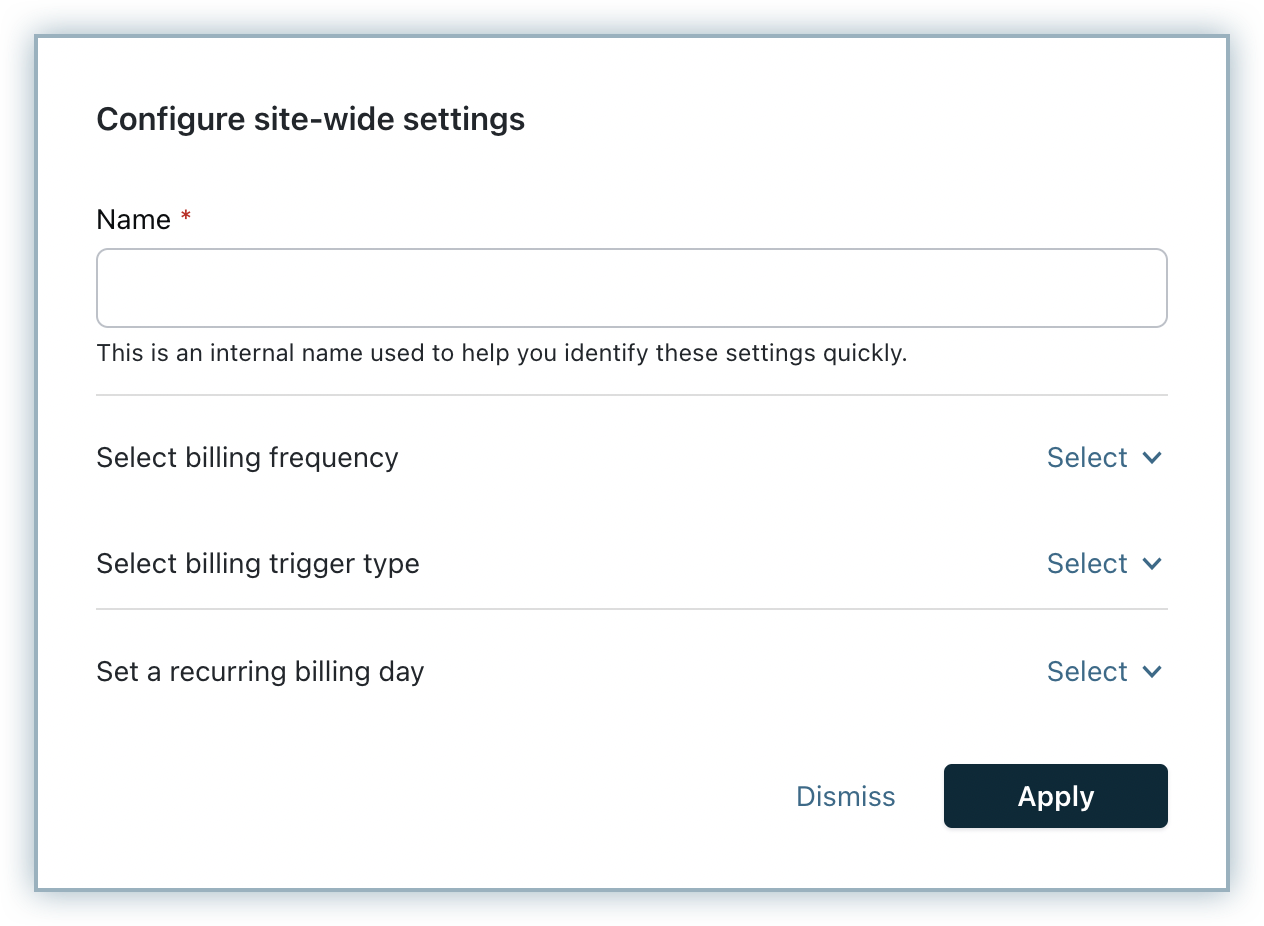
On the Configure site-wide settings pop-up, specify the following details:
-
Name: Enter a name for the calendar billing site-wide setting that will be used internally within the Chargebee site.
-
Select billing frequency: Select from the applicable billing frequency that is configured on your Chargebee site.
Note: Calendar billing is not supported for plans with billing frequency in Days.
-
Select billing trigger type: Select from the following billing trigger types from the drop-down list:
- Standard: Select this option to configure the site-wide settings and have them applied to subscription creation, activation, change, and renewal.
- Advanced: Select this option to configure the site-wide settings and have them applied to specific subscription events as follows:
- Apply these calendar billing settings when: You can select to apply the calendar billing settings specifically on subscription creation, activation, change, renewal, or any combination of them.
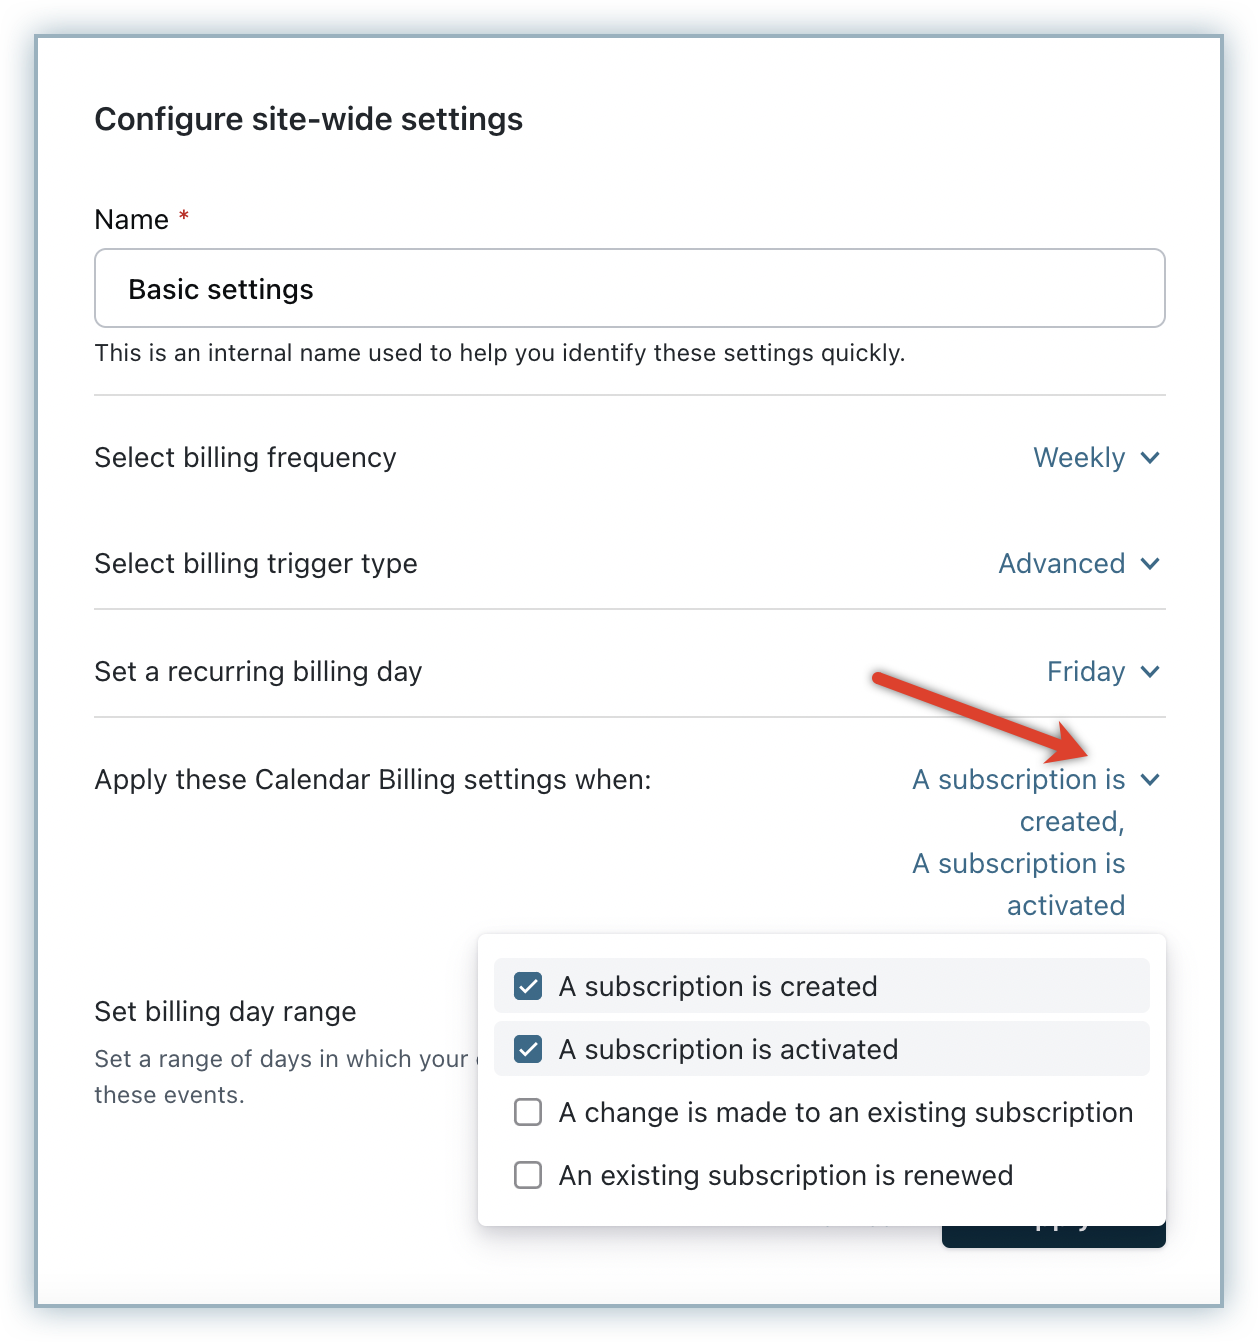
- Set billing date range: You can additionally set a range of days in which your customers will be billed for the events you select in the previous step.
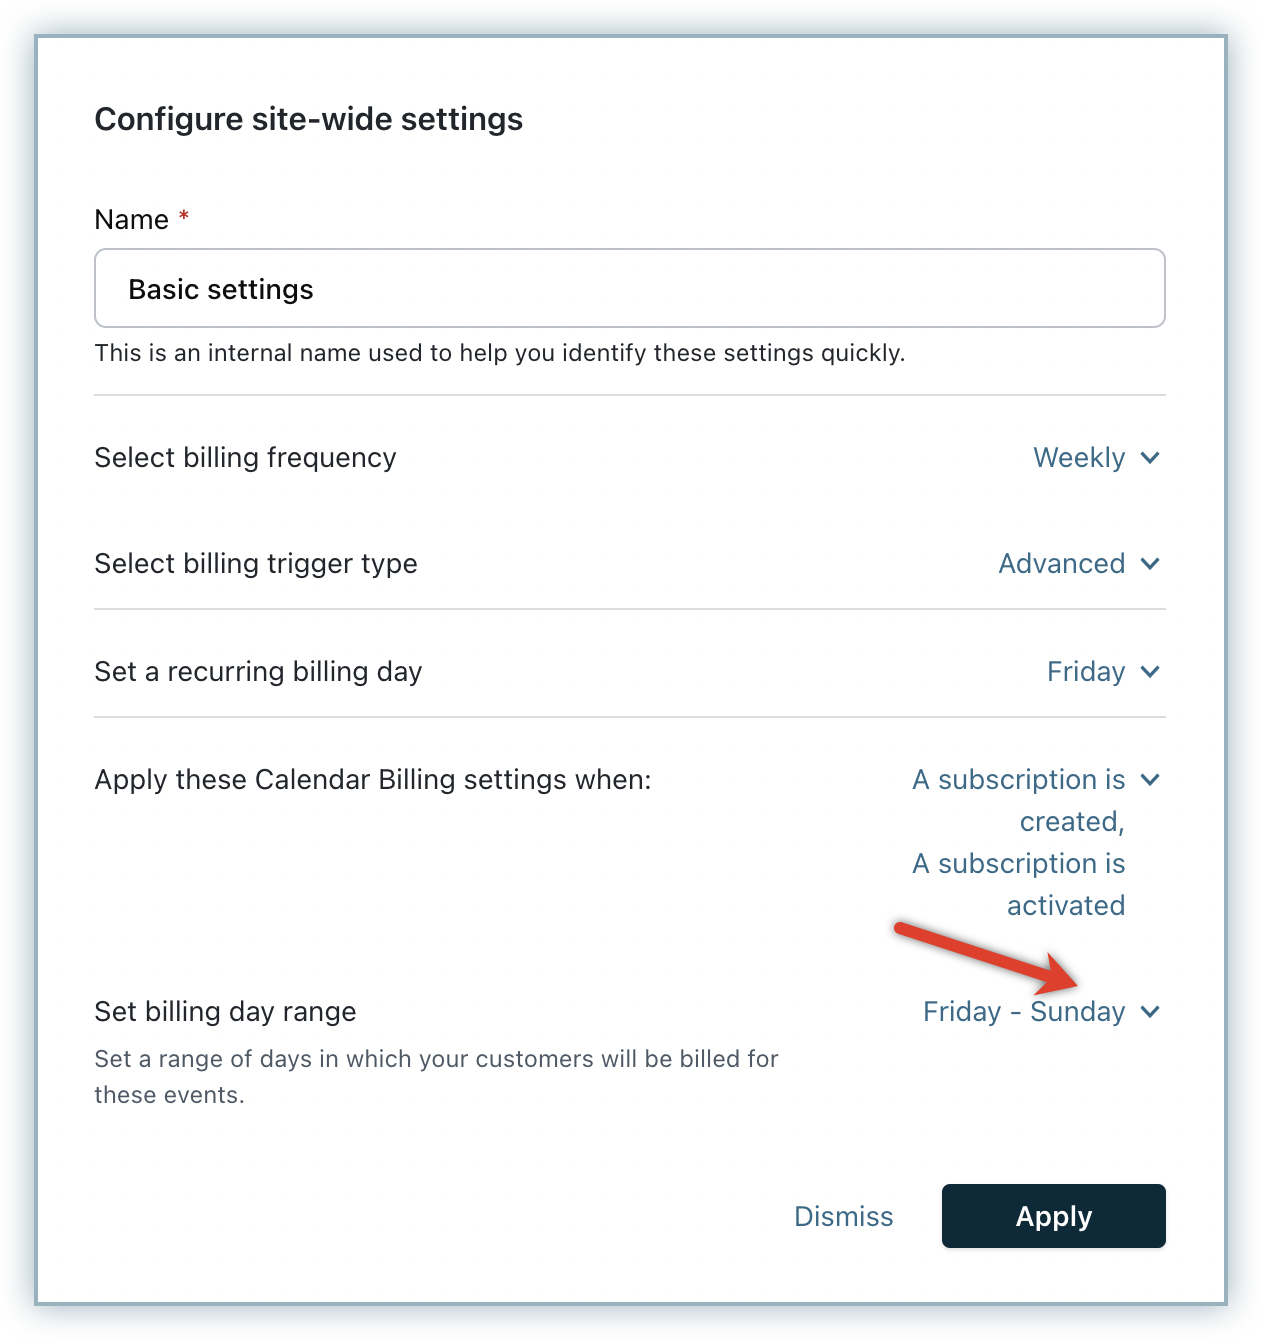
- Apply these calendar billing settings when: You can select to apply the calendar billing settings specifically on subscription creation, activation, change, renewal, or any combination of them.
-
Set a recurring billing day: You can select from the following options in the drop-down:
- Select a day/date: Select a recurring billing day or date from the drop-down list to determine when the customer will be billed every subsequent week, month, or year.
- Not set: Select this option to set the billing day by calling an API.
- Auto set: Select this option to align with the corresponding subscription's first purchase, applicable only for the associated customer.
-
-
Click Add a site-wide billing frequency to configure calendar billing settings for other billing frequencies set up on your Chargebee site.
-
Once you're done, click Apply > Confirm to save your updates.
You have successfully configured site-wide calendar billing settings.
Configuring Plan-Specific Billing
To configure calendar billing settings to specific plans on your Chargebee site, follow these steps:
-
On the Calendar Billing configuration page, click Set up Calendar Billing for specific plans > Add a plan-specific billing frequency.
-
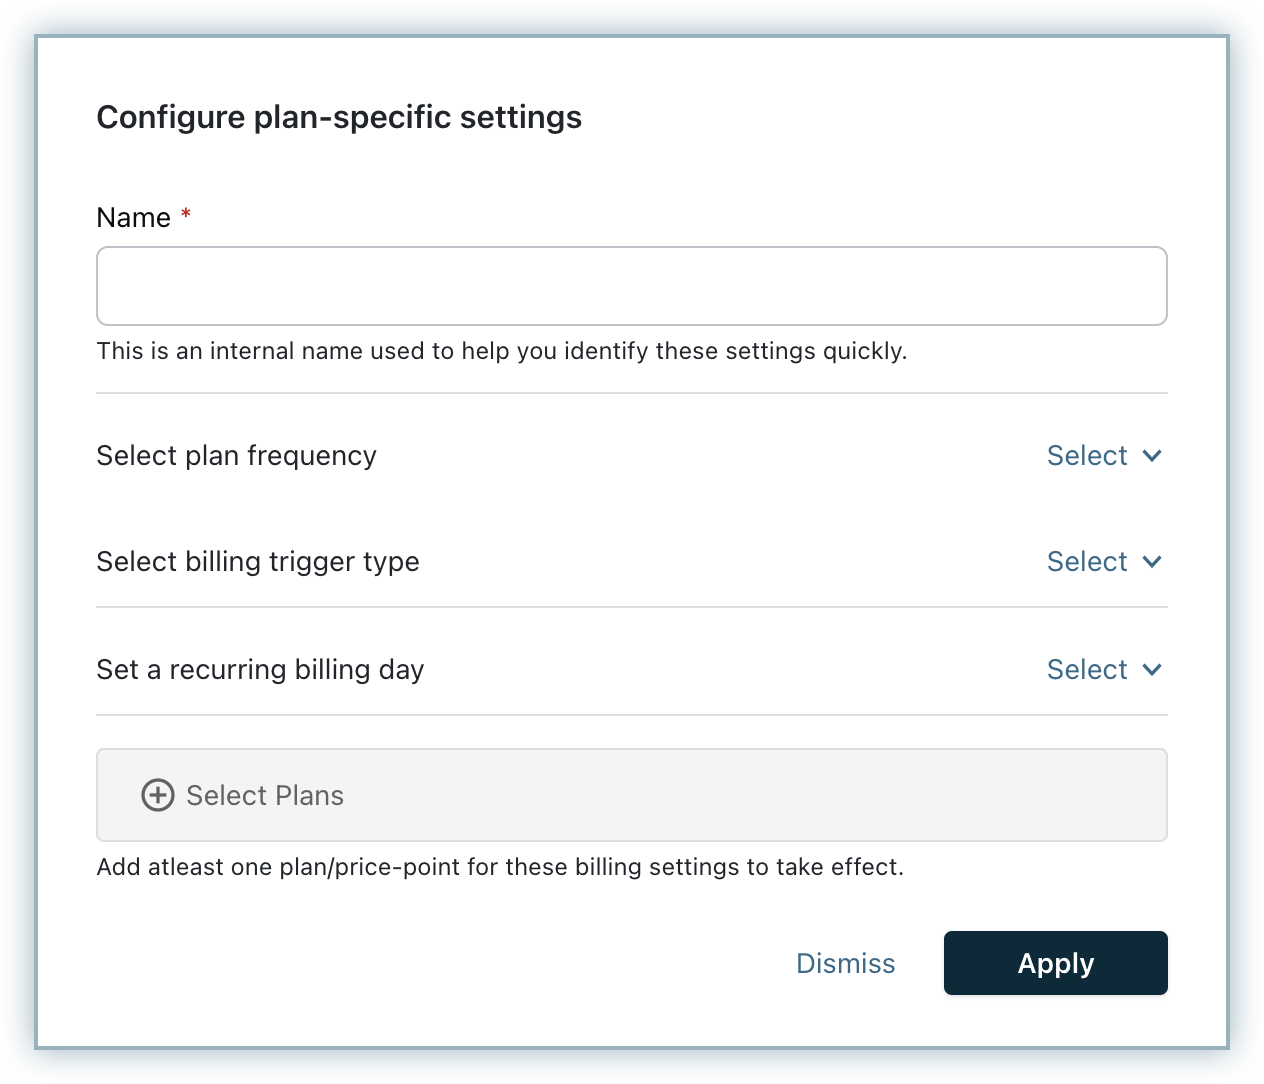
On the Configure plan-specific settings pop-up, specify the following details:
-
Name: Enter a name for the calendar billing plan-specific setting that will be used internally within the Chargebee site.
-
Select plan frequency: Select from the applicable billing frequency that is configured for the plan.
Note: Calendar billing is not supported for plans with billing frequency in Days.
-
Select billing trigger type: Select from the following billing trigger types from the drop-down list:
- Standard: Select this option to configure the settings and have them applied to subscription creation, activation, change, and renewal for the plan.
- Advanced: Select this option to configure the settings and have them applied to specific subscription events for the plan as follows:
- Apply these calendar billing settings when: You can select to apply the calendar billing settings specifically on subscription creation, activation, change, renewal, or any combination of them for the associated plan.
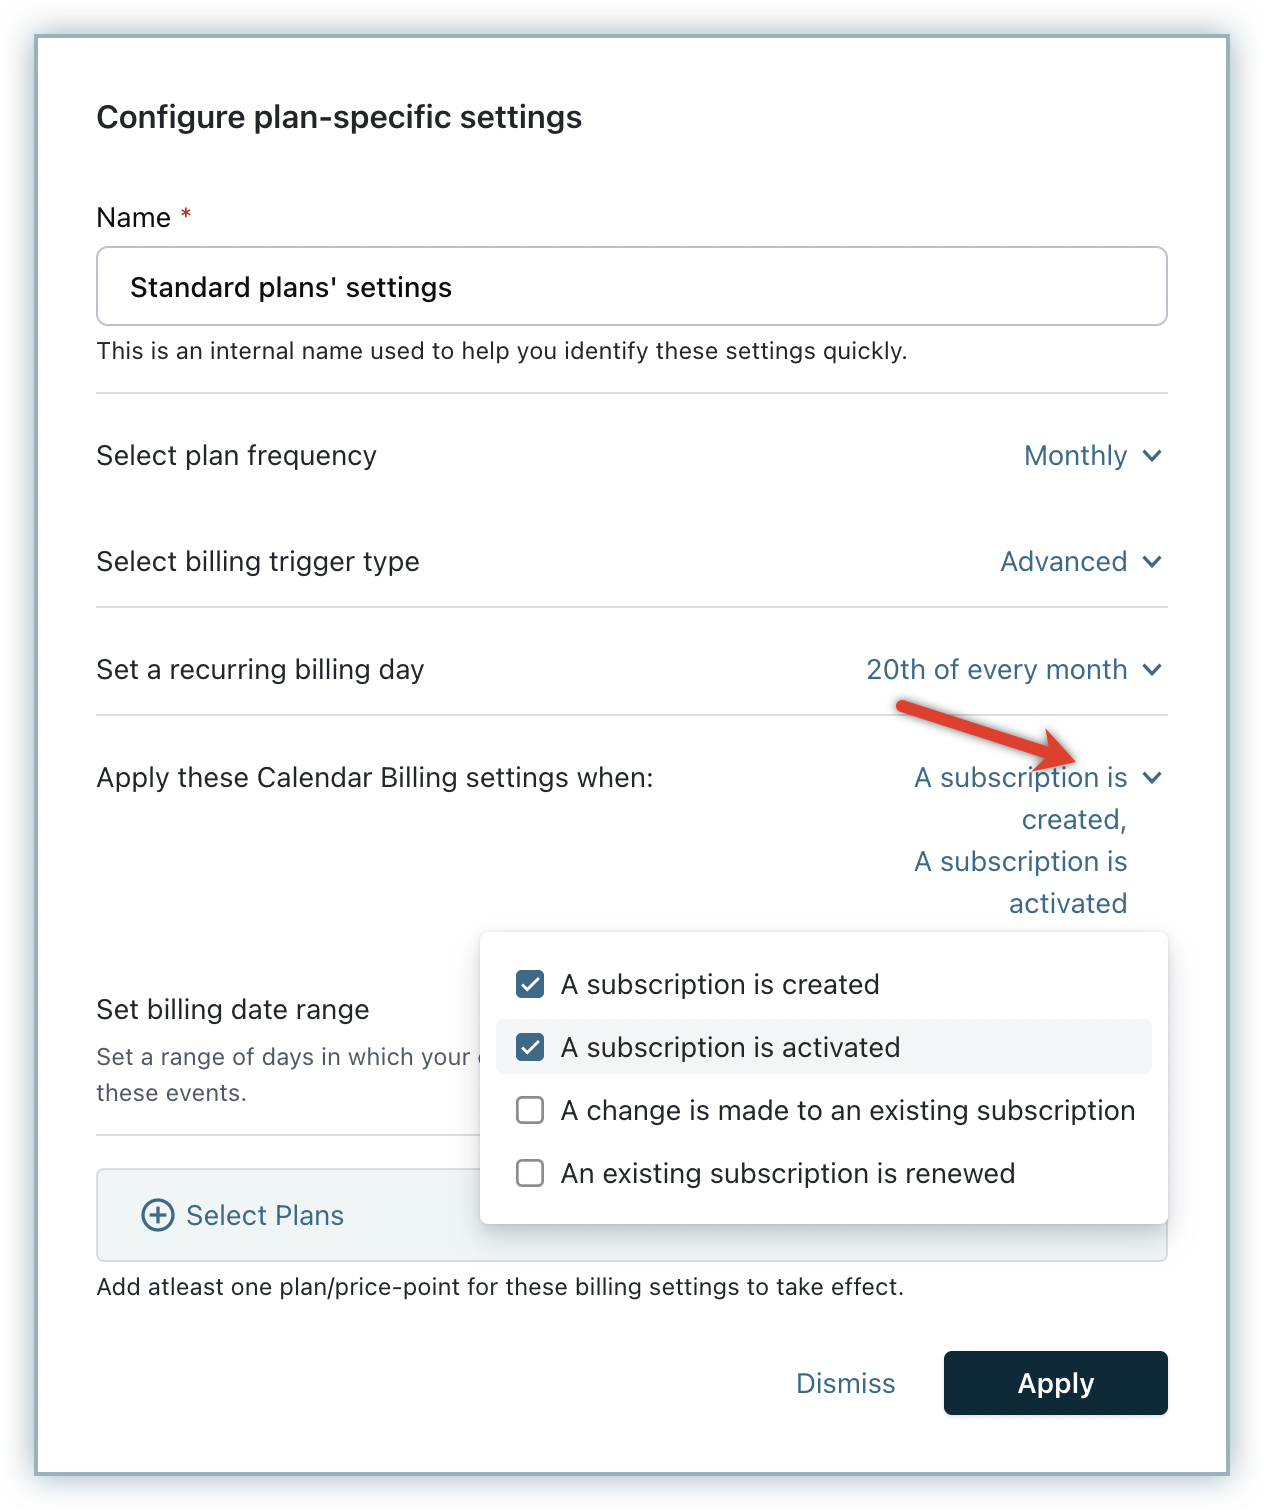
- Set billing date range: You can additionally set a range of days in which your customers will be billed for the events you select in the previous step.
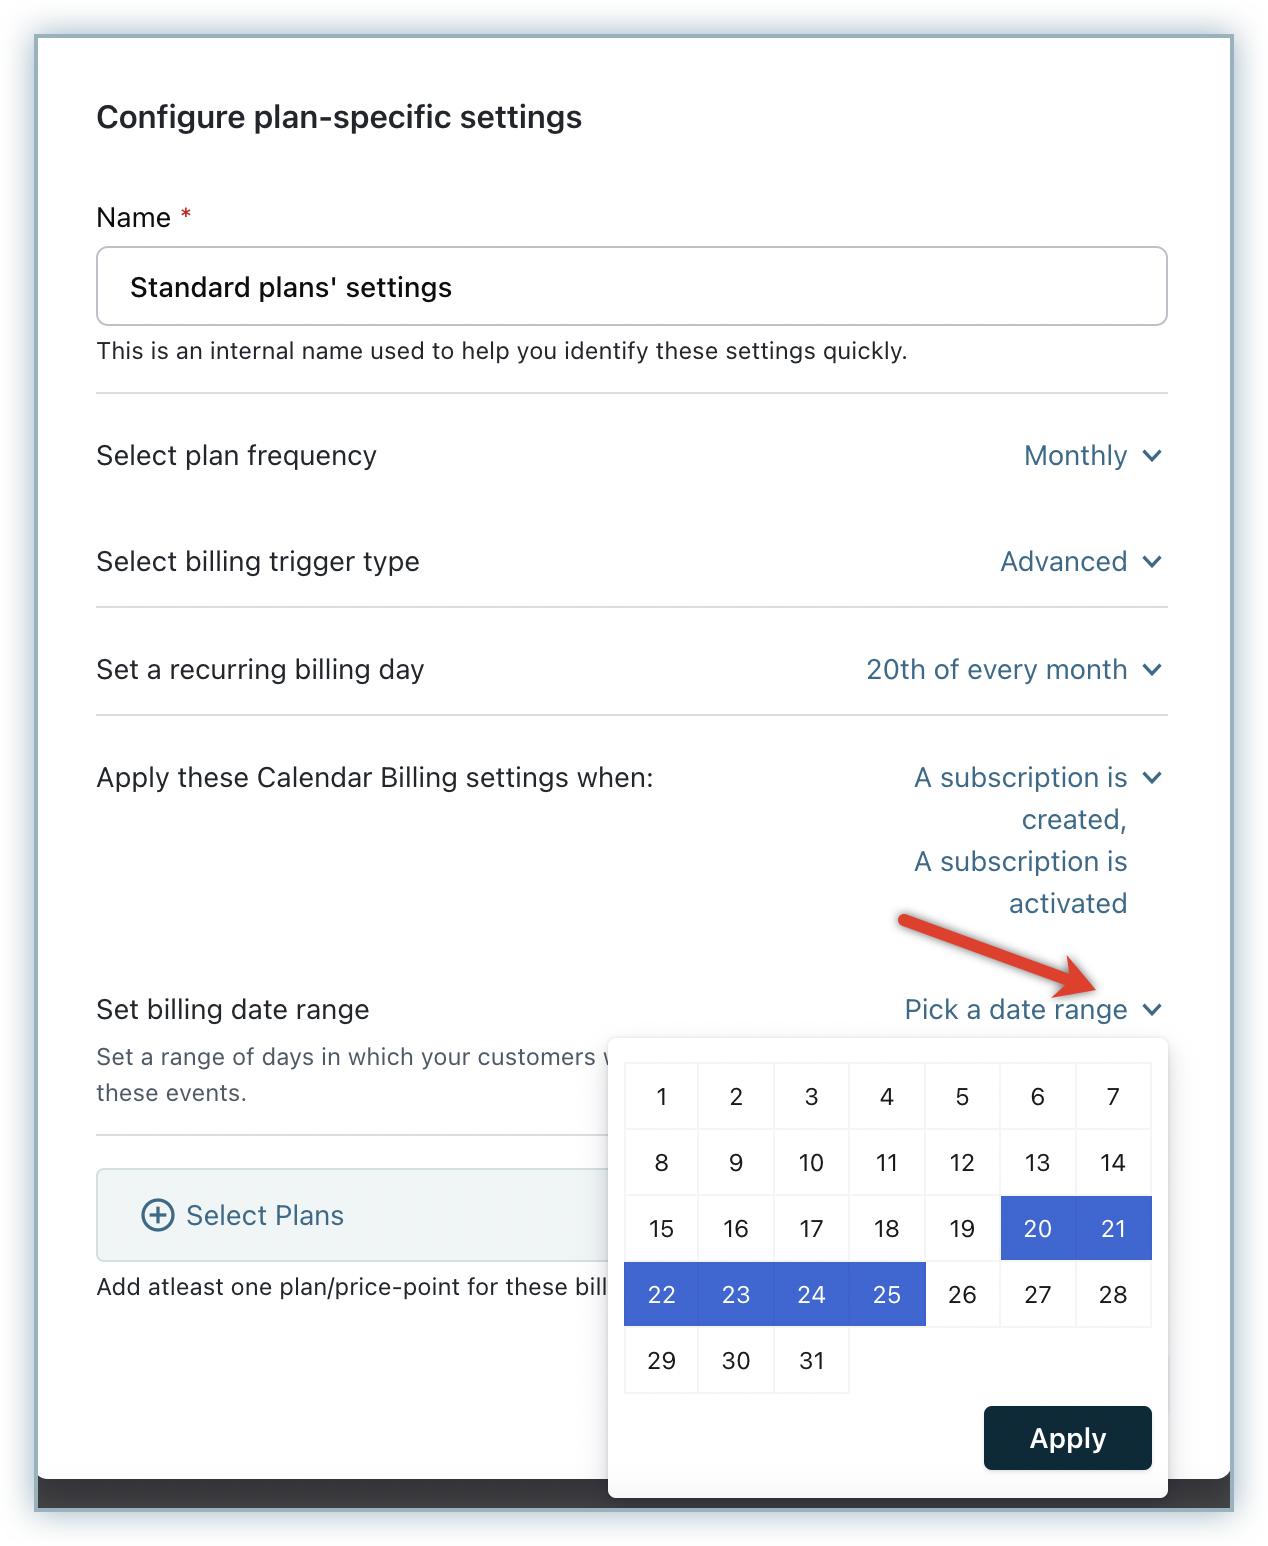
- Apply these calendar billing settings when: You can select to apply the calendar billing settings specifically on subscription creation, activation, change, renewal, or any combination of them for the associated plan.
- Set a recurring billing day: You can select from the following options in the drop-down:
- Select a day/date: Select a recurring billing day or date from the drop-down list to determine when the customer will be billed every subsequent week, month, or year.
- Not set: Select this option to set the billing day by calling an API.
- Auto set: Select this option to align with the corresponding subscription's first purchase, applicable only for the associated customer.
- Click Select Plans to add specific plans/plan price points and click Add plans.
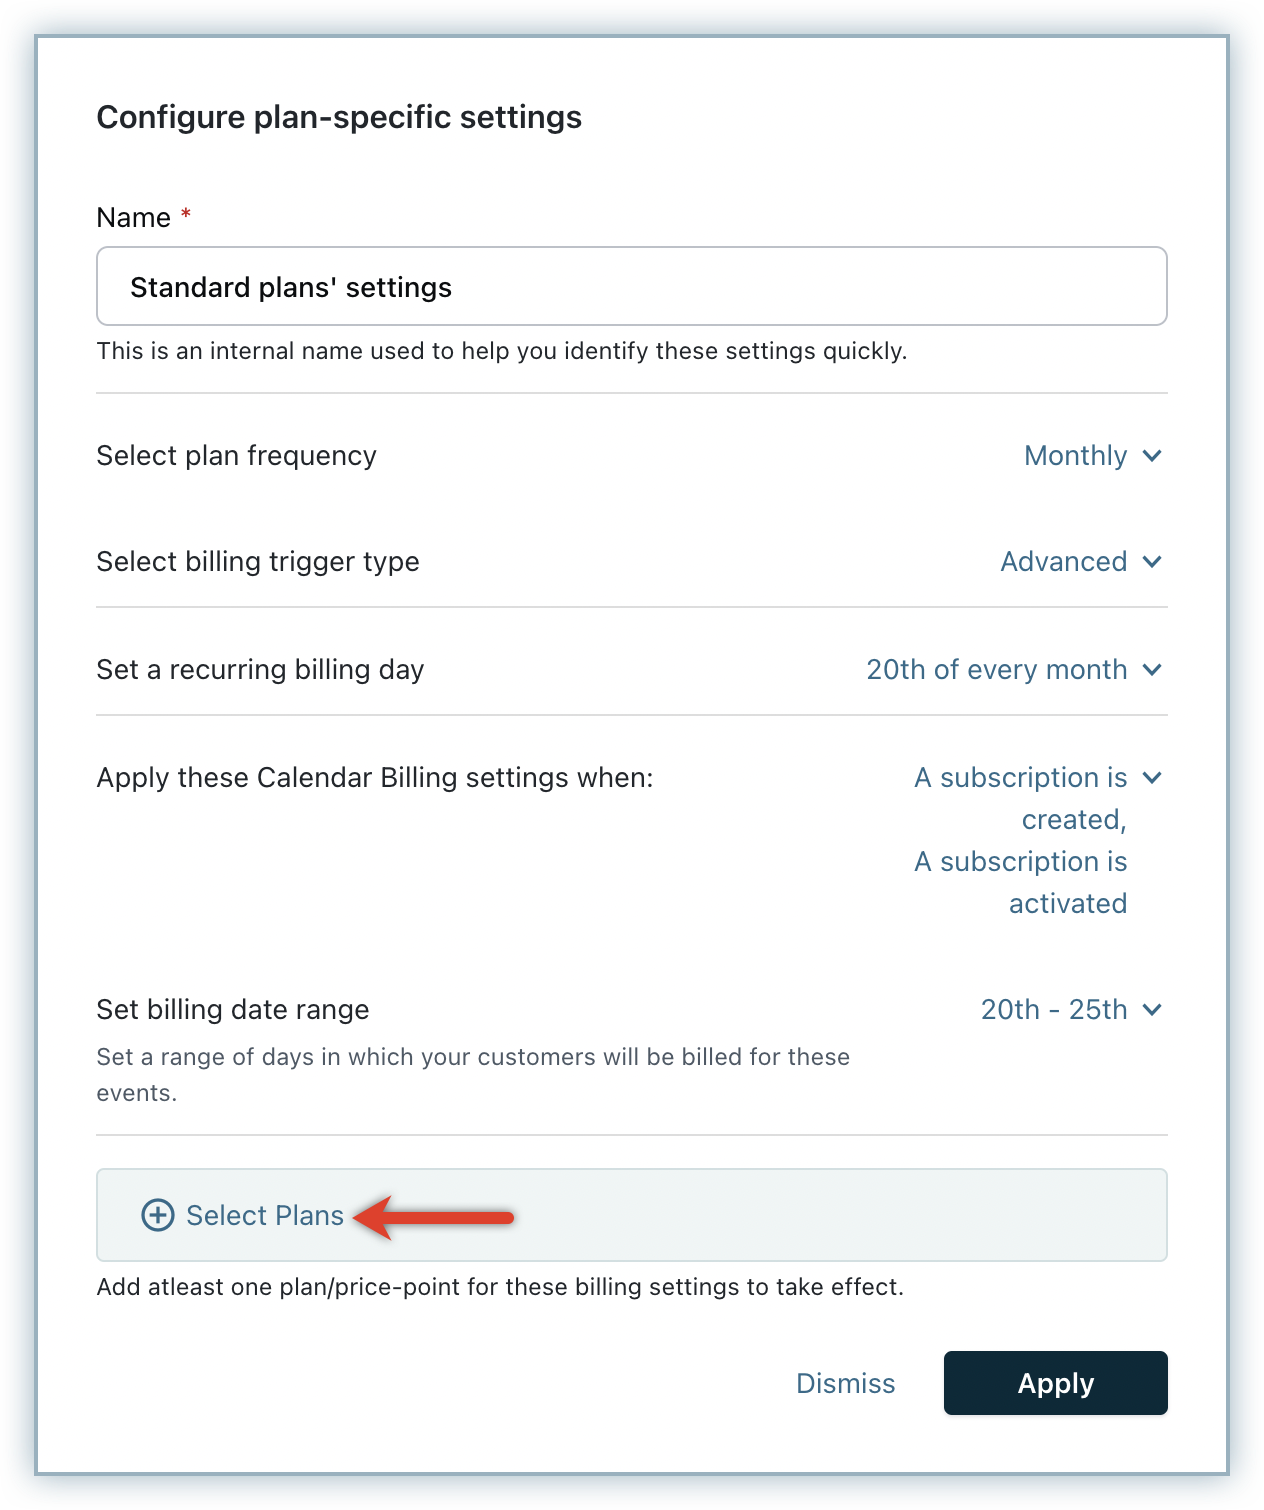

- Click Apply.
-
-
Click Add a plan-specific billing frequency to configure settings for more plans.
-
Once you're done, click Apply > Confirm to save your updates.
You have successfully configured plan-specific calendar billing settings.
Articles & FAQs
Show more
Was this article helpful?