Managing Customers
In Chargebee we use customers to hold all the details of a subscriber. The customer acts as the main object to store and manage the subscribers' billing and contact information, card details, and payment mode.
Creating a new customer
You can create a customer record in three ways:
- From Chargebee Billing
- From the API
- From Chargebee Checkout
Create a customer record from Chargebee Billing
To create a customer record from Chargebee Billing:
- Sign in to Chargebee Billing.
- In the left navigation pane, select Customers.
- Select Create Customer.
- Enter the required details, and then select Create.
You can also create a customer record when you create a new subscription.
Create a customer record from Chargebee Checkout
To create a customer record from Chargebee Checkout:
- Create a checkout session for your customer.
- Show your customer the checkout page.
- When your customer completes checkout, Chargebee creates the customer record automatically.
Create a customer record from the API
Use the Create a customer API to create a customer record.
Accessing customer information in Chargebee
You can access your customer details from the Customers tab.
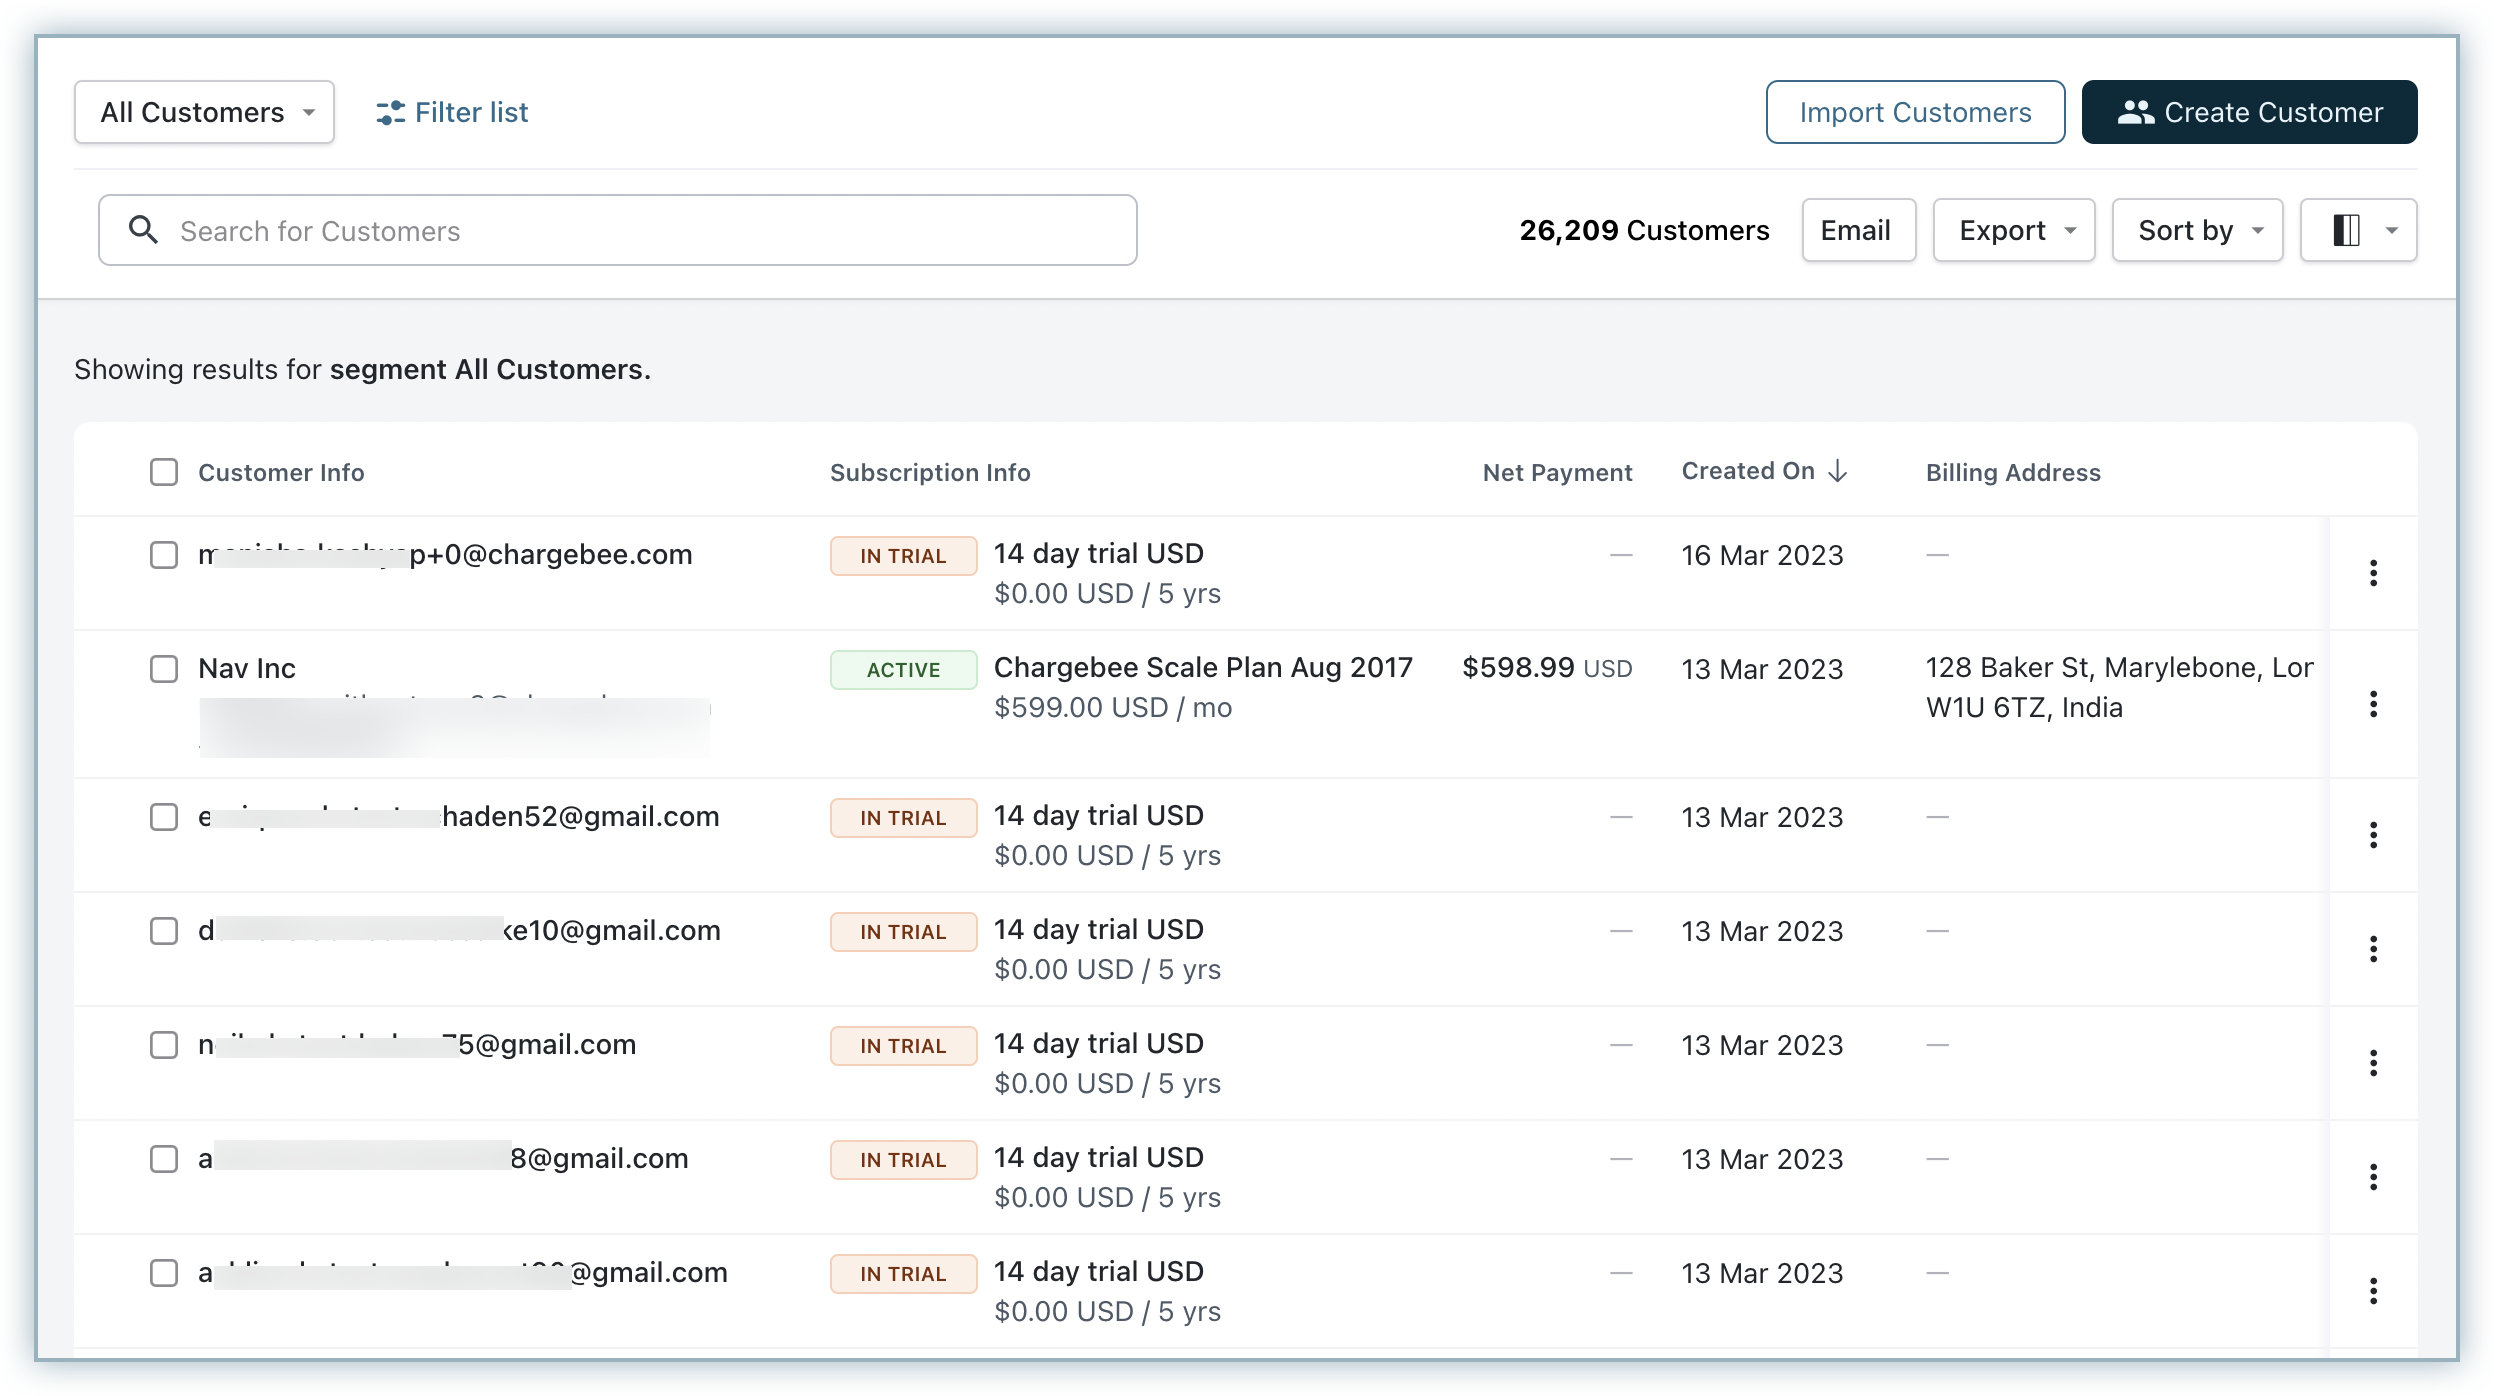
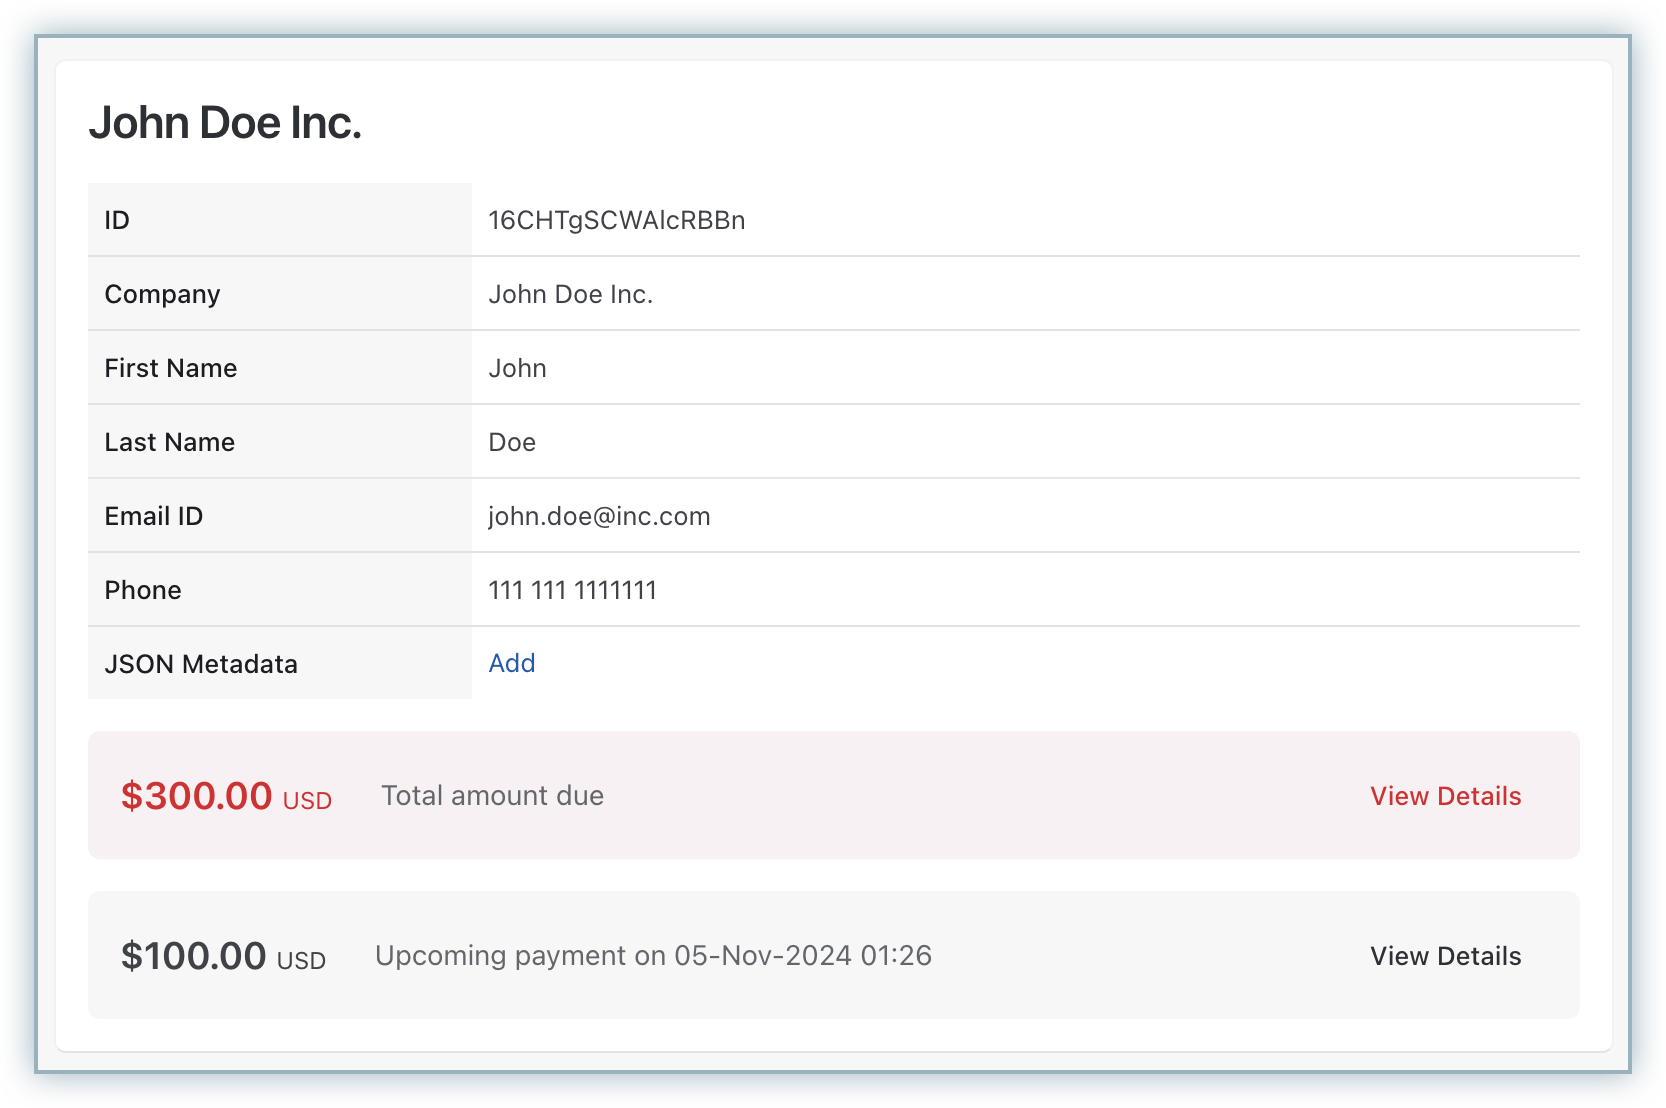
Click the Name of a customer to open the Customer details page, which shows all information related to the customer, such as subscriptions, billing info, payment methods, and more.
The hero card displays the most relevant information about the customer, such as their name, primary email address, and phone number.
Note
If the customer uses the Self-Serve Portal with Chargebee Login, they must sign in with the primary email address.
You can also perform other operations, such as Send Email and Export, from the index page above.
- Send Email: Send emails to all your customers at once by clicking the more icon next to the search bar, then clicking Email Customers. You can use common templates and mail merge tags below the email body to personalize emails.
- Export: Export all customers in your current site as a ZIP file by clicking the more icon next to the search bar, then clicking Export Customers CSV.
- Bulk Action: Perform bulk actions such as Delete or Change auto collection settings for one or more customer records. Select records and click the respective buttons to perform these actions. Bulk Actions can only be performed by admins.
- Search: Search for a customer using the search bar on the left.
- Customize Columns: Customize columns to show the details you want to see.
- Sort: Sort customers based on your selected choice.
The Net Payment column on the customer's index page is populated only for Active subscriptions with currency matching the base currency of your site.
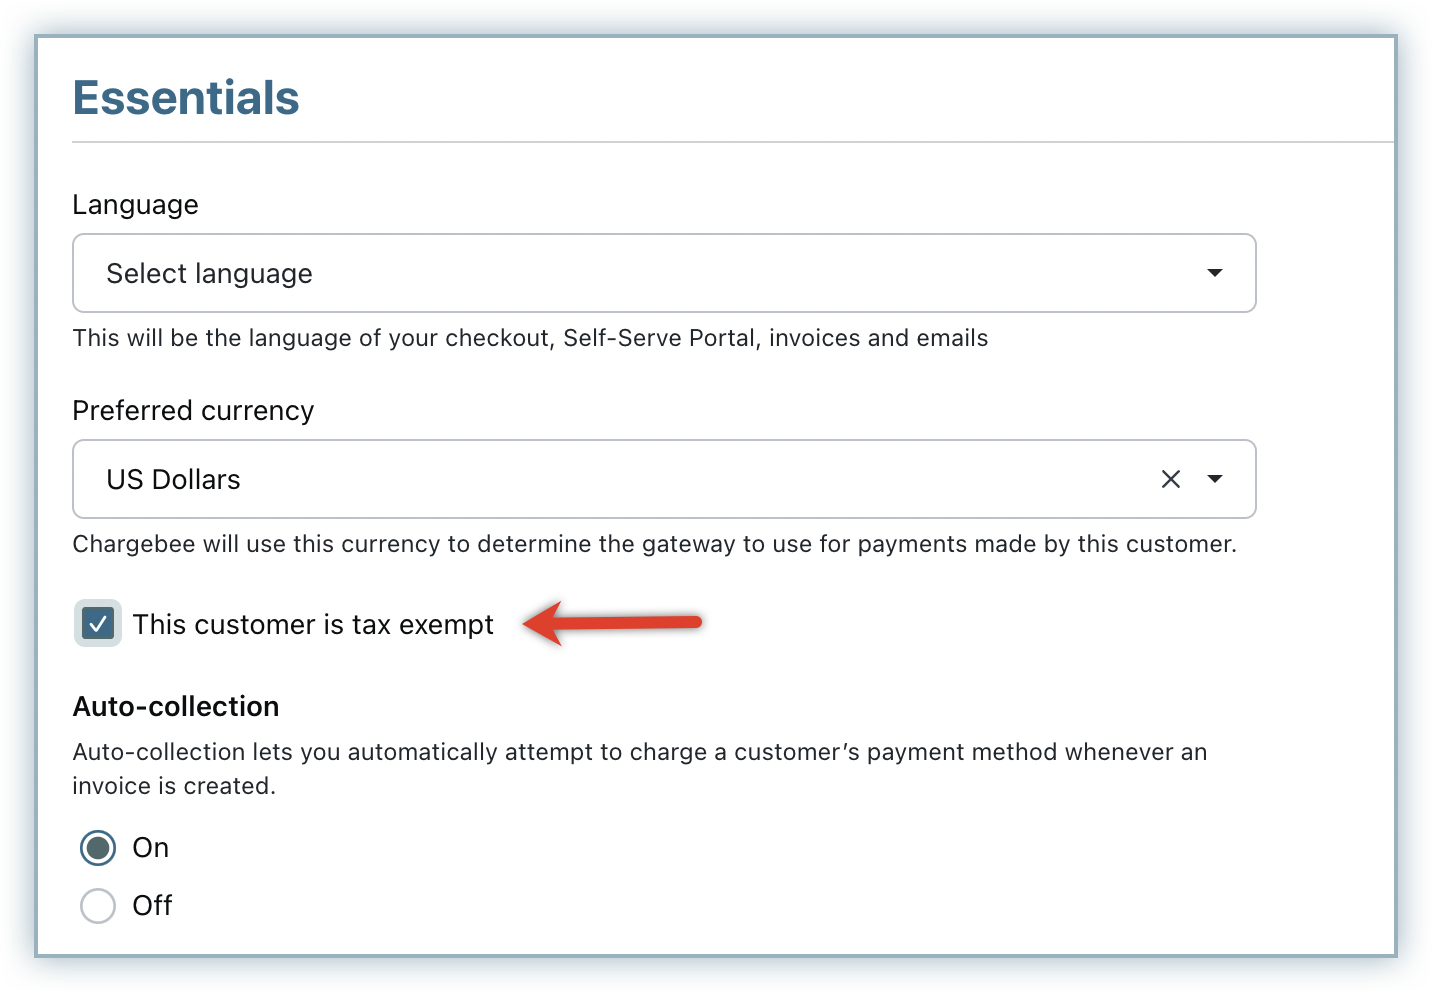
Exempting a Customer from Tax Payment
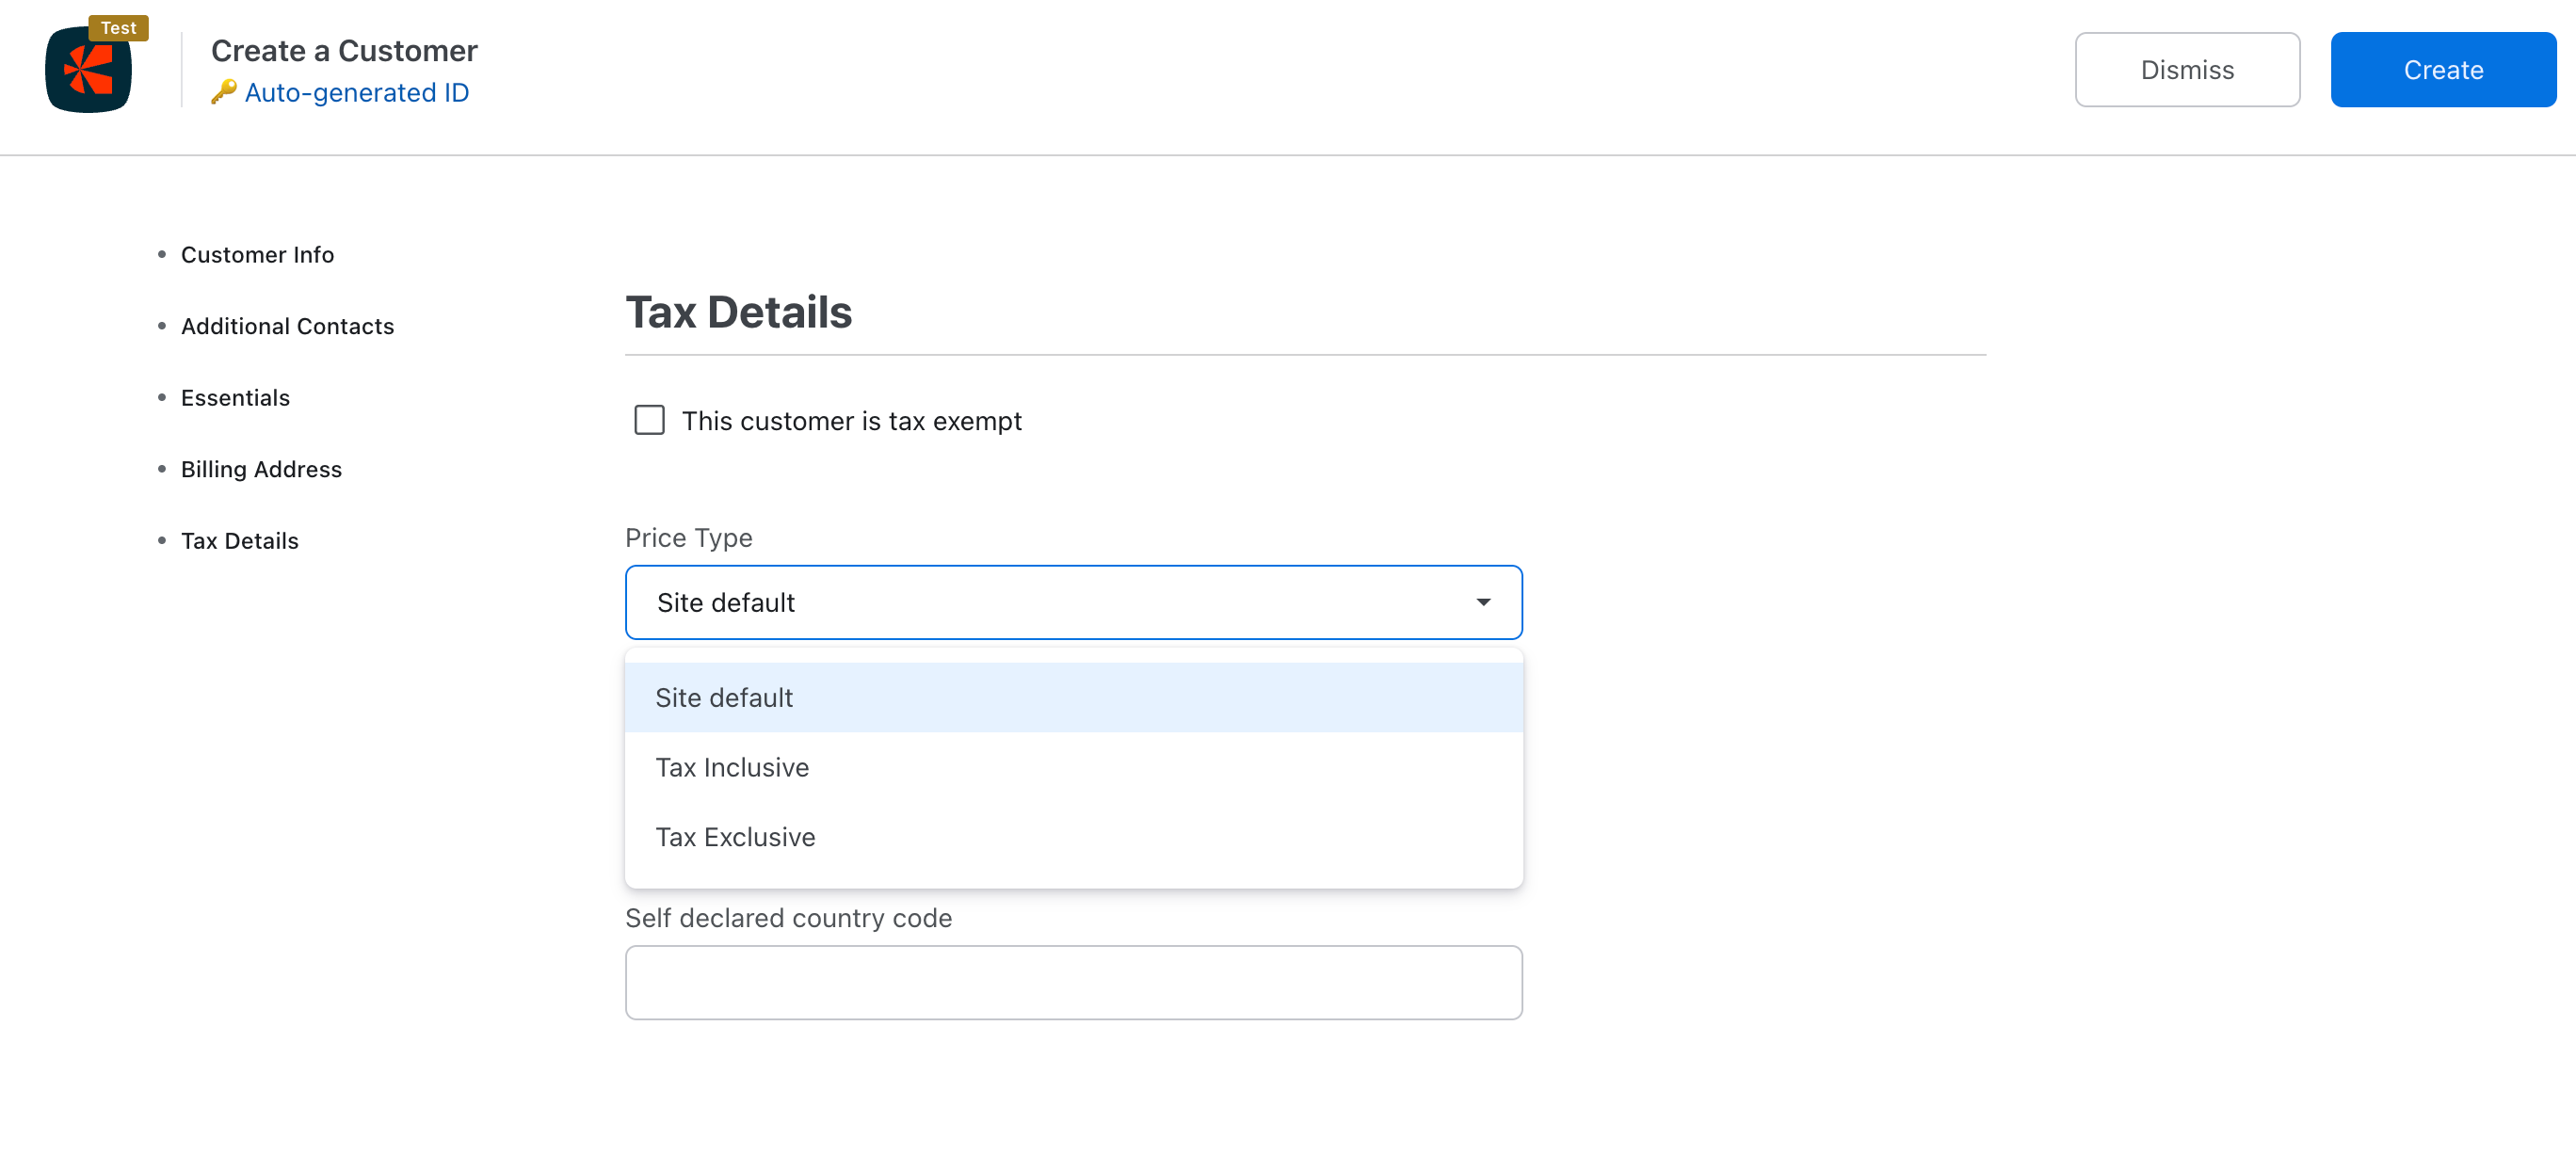
You can exempt a customer from paying taxes by selecting the This customer is tax exempt checkbox.
When metered billing is enabled in your Chargebee site, and you have configured to auto-close pending invoices and allowed overriding via Chargebee interface, you can select Do not auto-close invoices.
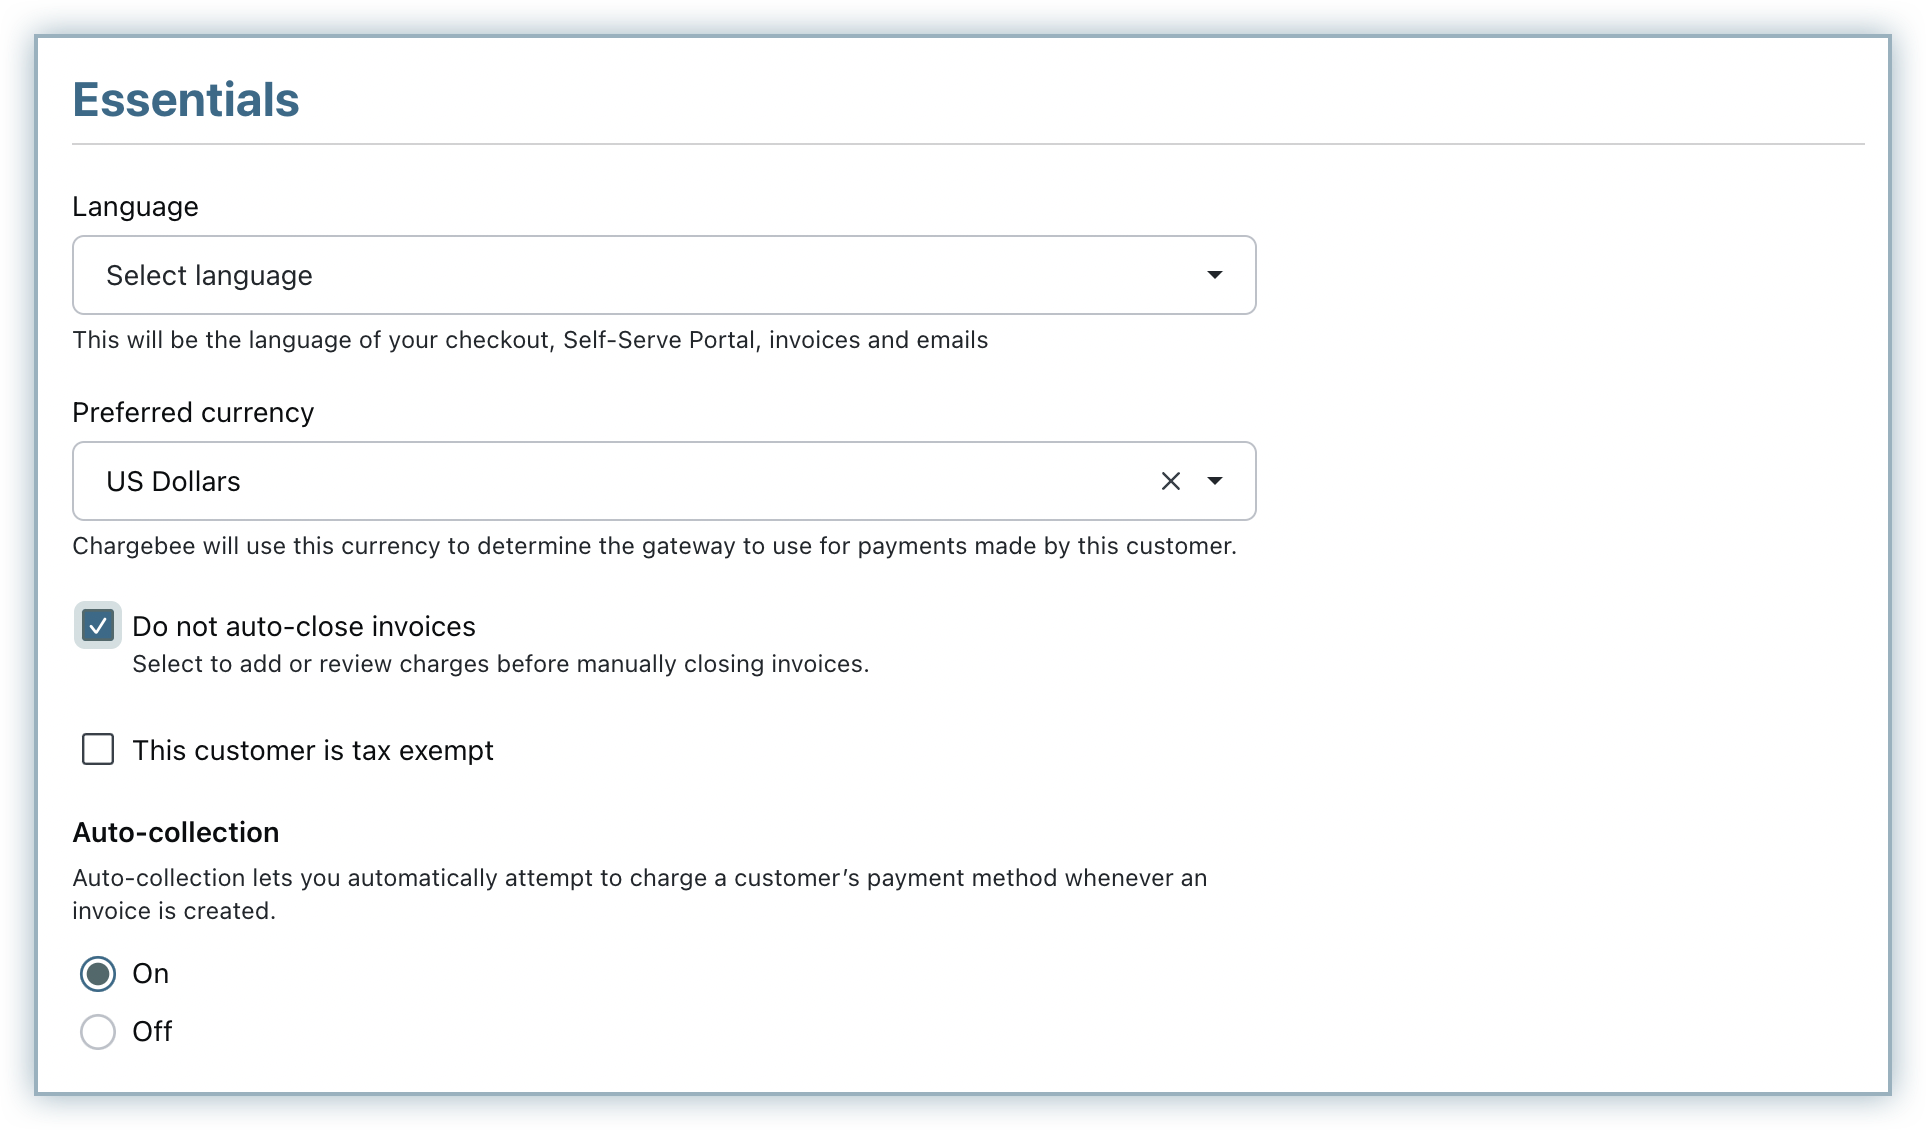
You can add/review usage, manually close the invoices and send them to customers.
Similarly, when Consolidated Invoicing is enabled in your Chargebee site, you can override the global setting for this customer record using the drop-down.
Setting Up Price Type
Chargebee's pricing flexibility is evolving to meet the diverse needs of merchants worldwide. Previously, Chargebee allowed the price type configuration at the site level for each currency. However, we're introducing enhanced flexibility in price type configuration for subscriptions. Whether you're selling to B2B and B2C customers with varying tax preferences or transitioning between tax-inclusive and tax-exclusive pricing models, Chargebee now offers the flexibility you need to optimize your subscription pricing.
Setting Up Price Type Configurations via the Chargebee App To set up price type configuration in Chargebee, you can now utilize the newly introduced Price Type field within the customer details page. This field allows you to specify the price type for individual customers based on their pricing preferences. When populating the field, you should ensure that the values are entered exactly as follows:
- Tax Inclusive – Select this option if you want the pricing for a customer to include taxes. This setting overrides both currency-level and region-based pricing configurations. Merchants typically use Tax Inclusive pricing for B2C customers or to maintain consistent pricing for existing customers. When this option is applied, tax calculations ensure that the total price remains unchanged.
- Tax Exclusive – Choose this option if you want taxes to be added on top of the base price for a customer. This setting also overrides the default tax configuration at the currency and region level. Merchants often apply Tax Exclusive pricing for B2B customers or new customers to ensure tax amounts are calculated separately from the base price.
- Site Default – Use this option to apply the tax settings defined at the site level for tax calculations. If selected, the pricing type follows the existing configuration set at the site level, without overriding currency or region-based rules.
Setting Up Price Type Configurations via the Chargebee API To set up price type configurations via the Chargebee API, you can leverage the Create a Customer API or Update a Customer API. Specifically, you can utilize the following fields:
-
tax_providers_fields[provider_name][0] Value = all
-
tax_providers_fields[field_id][0] Value = priceType
-
tax_providers_fields[field_value][0] Value = tax_inclusive or tax_exclusive or site_default or blank (case insensitive)
Note
To enable this feature, request access. You can access the same fields available in the Chargebee user interface on the customer creation/edit page under tax details. The price type configuration is for calculation purposes only. The invoice will continue to display pricing based on the configuration at the regional level. For inclusive price types, the total amount remains consistent regardless of tax rates. For example, if a plan is priced at $100 with a tax-inclusive price type, the total amount payable by the customer will be $100, whether the tax rate is 10% or 20%. Even if the customer is eligible for reverse charges, the payable amount will still be $100, and the invoice will be tagged accordingly. If the price type configuration is set at the customer level, it will take priority over the price type setup at the currency level for that customer.
Customer Level Price Type Override
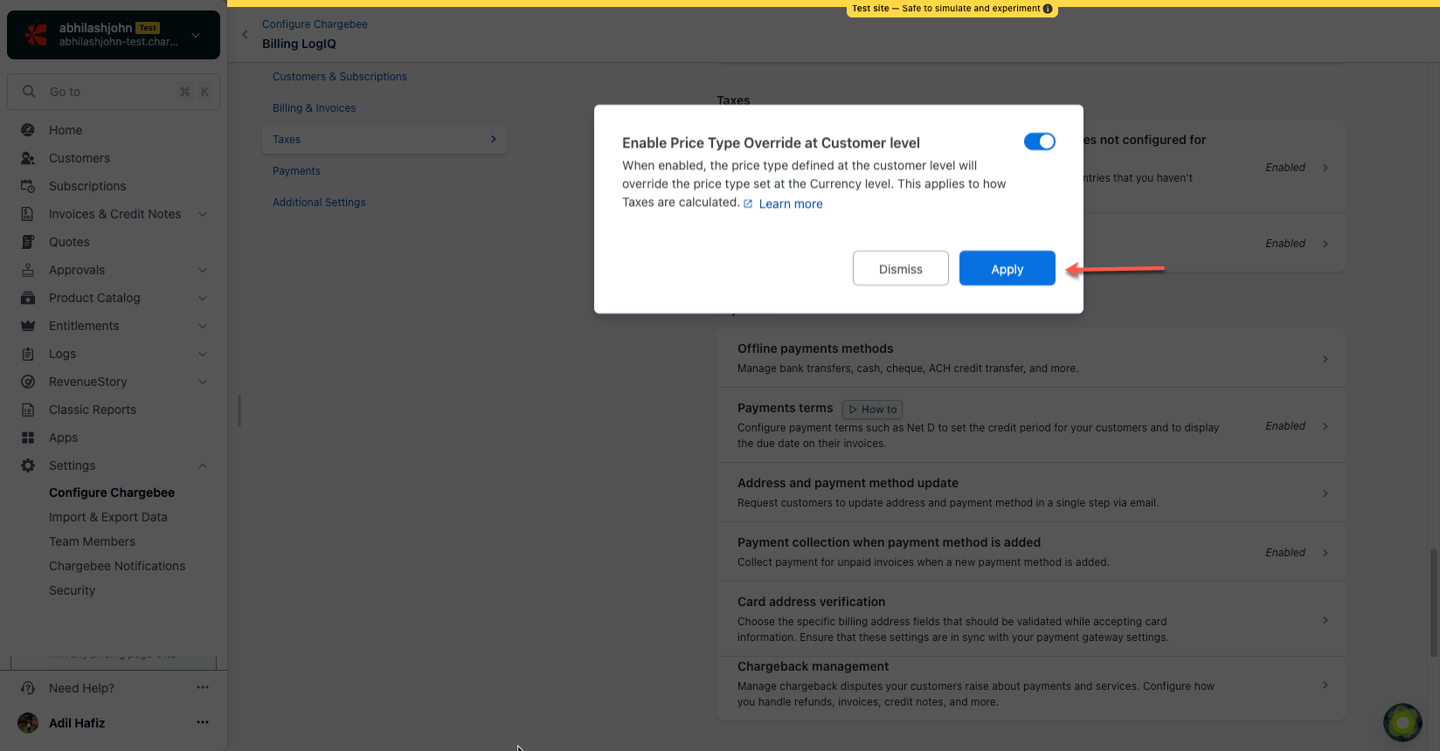
You can now override the Price Type setting for individual customers directly from the Chargebee Billing interface. This setting allows you to define whether prices for a specific customer are tax inclusive or tax exclusive, independent of global configuration.
How to Enable Price Type Override at the Customer Level
-
Log in to your Chargebee Billing account.
-
Navigate to Settings > Configure Chargebee.
-
Click Billing LogiQ
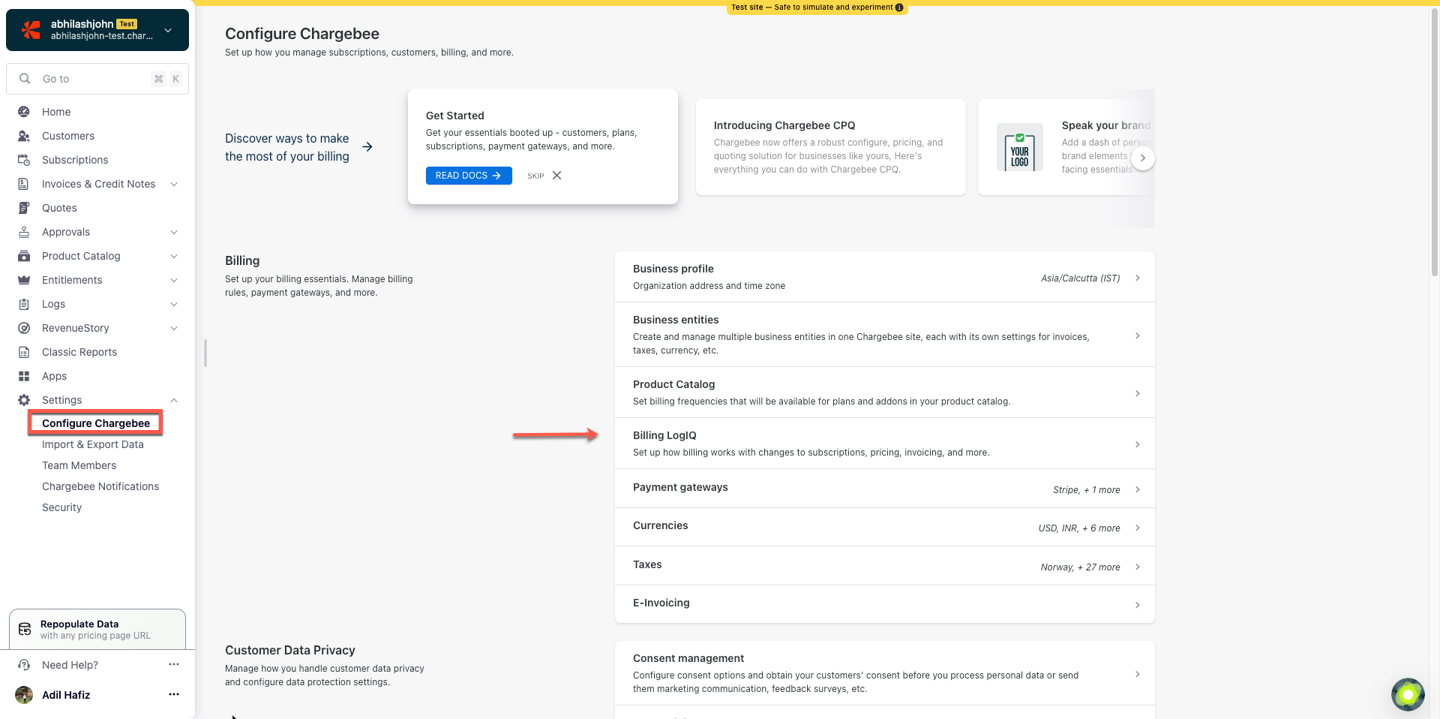
- Under Taxes, click Price Type Override at Customer Level.
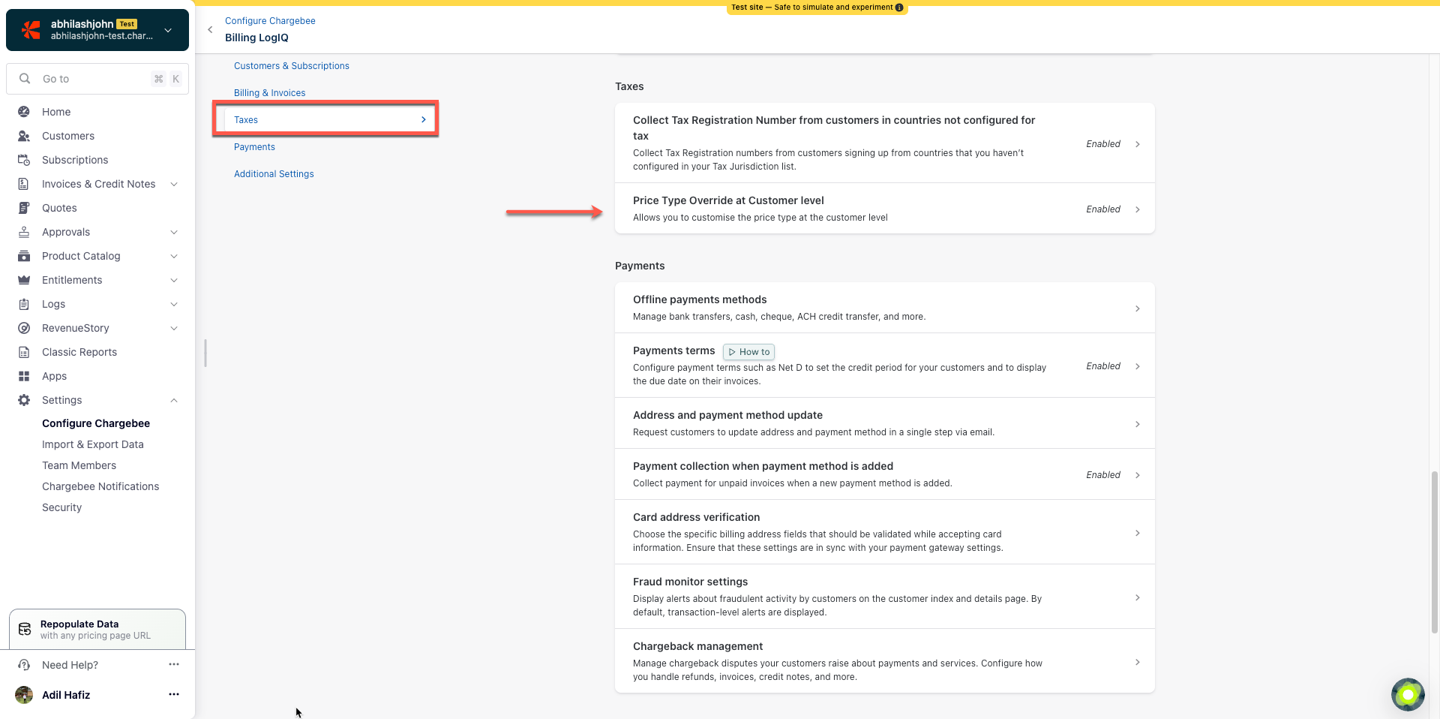
- Toggle the Enable Price Type Override at Customer Level option, and click Apply to save changes.
Note
-
This setting applies only to customers for whom you explicitly set a different Price Type.
-
Global Price Type configurations remain unchanged for all other customers.
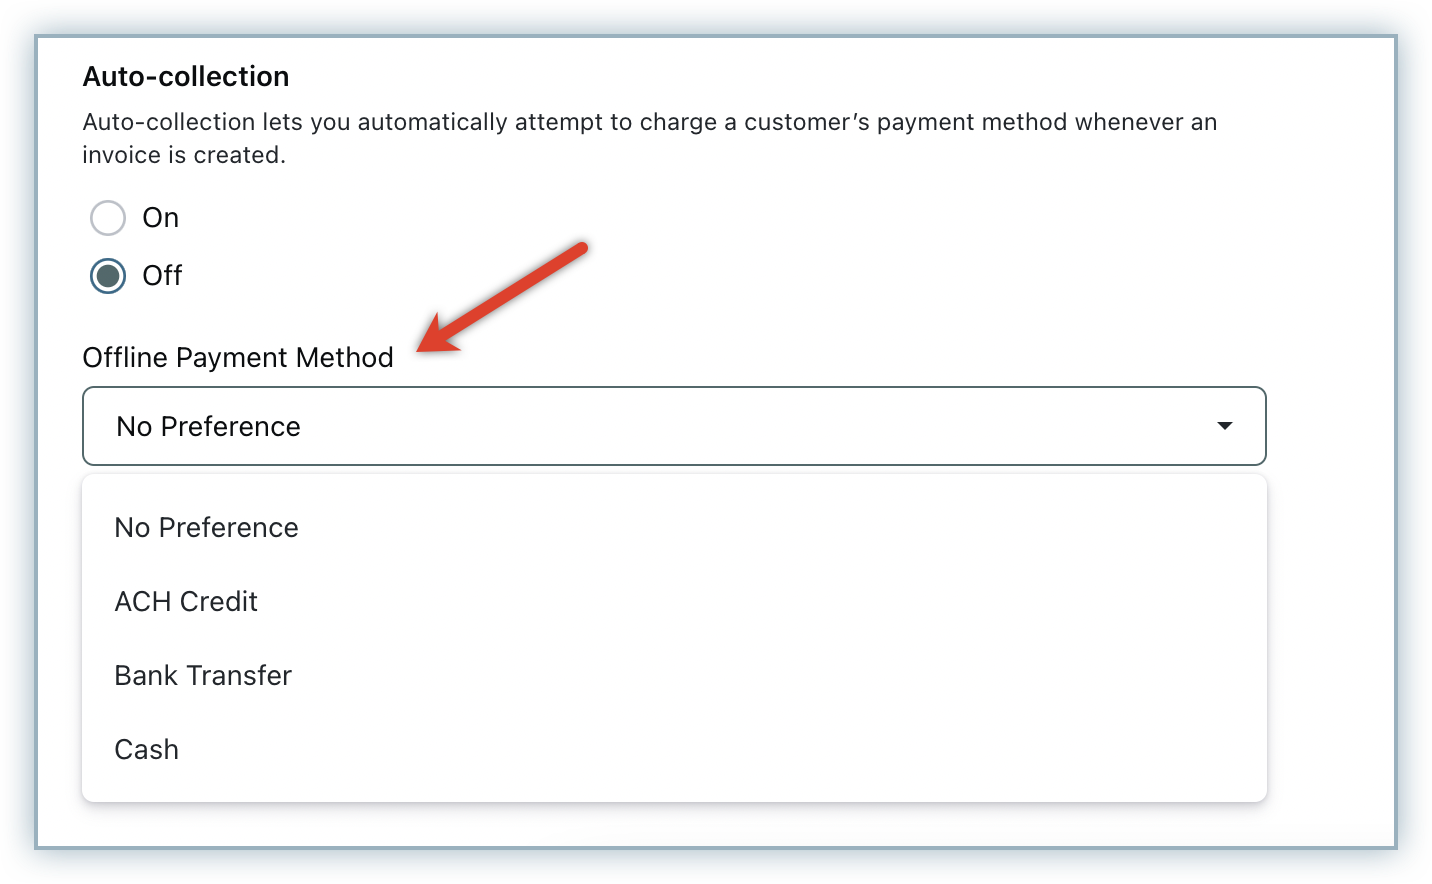
Paying via bank account
If you want a customer to pay directly from their bank account or use another offline payment method, you can select your preferred Offline Method when creating or editing the customer record. This option is available for both new and existing customers.
The dropdown will appear only if you have configured offline payment methods.
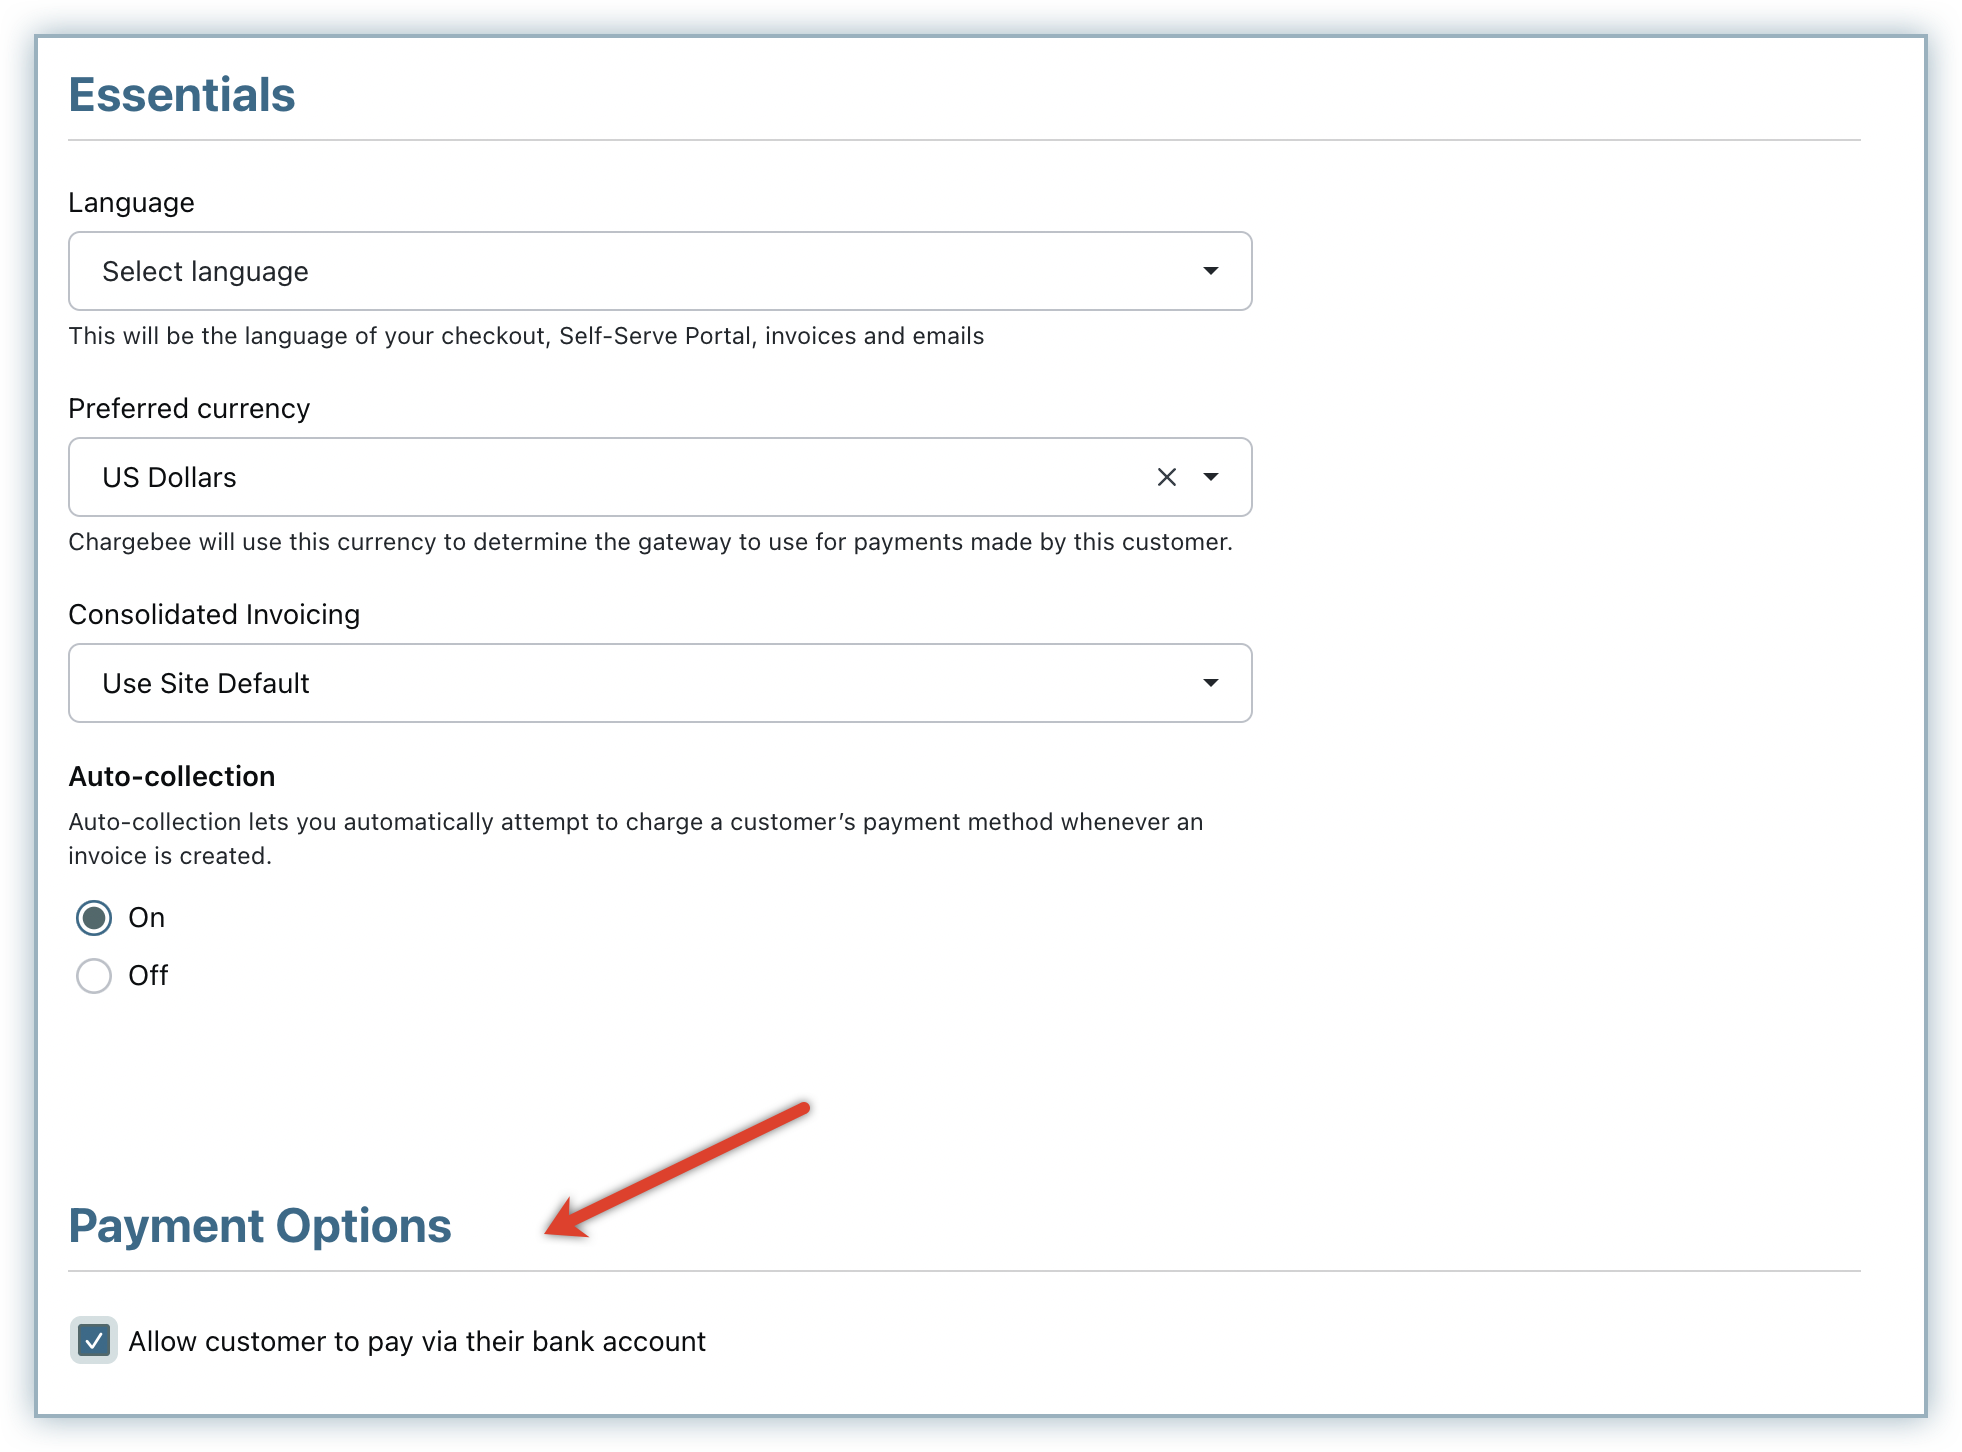
For new customers:
In the Chargebee user interface, click Customers > Create Customer. The Payment Method dropdown appears on the create customer page, as shown below:
For existing customers:
In the Chargebee user interface, go to the customer for whom you want to enable bank payment and click Edit Customer in the Action pane. Then, select the required option.
Subscriptions
You can create a subscription for either an existing customer or a new customer. When you create a new subscription, Chargebee automatically creates a customer object as well.
To create a subscription for an existing customer, use the web interface or the API.
To create a new subscription for a customer in the Chargebee user interface, go to the customer's profile and click Create New Subscription:
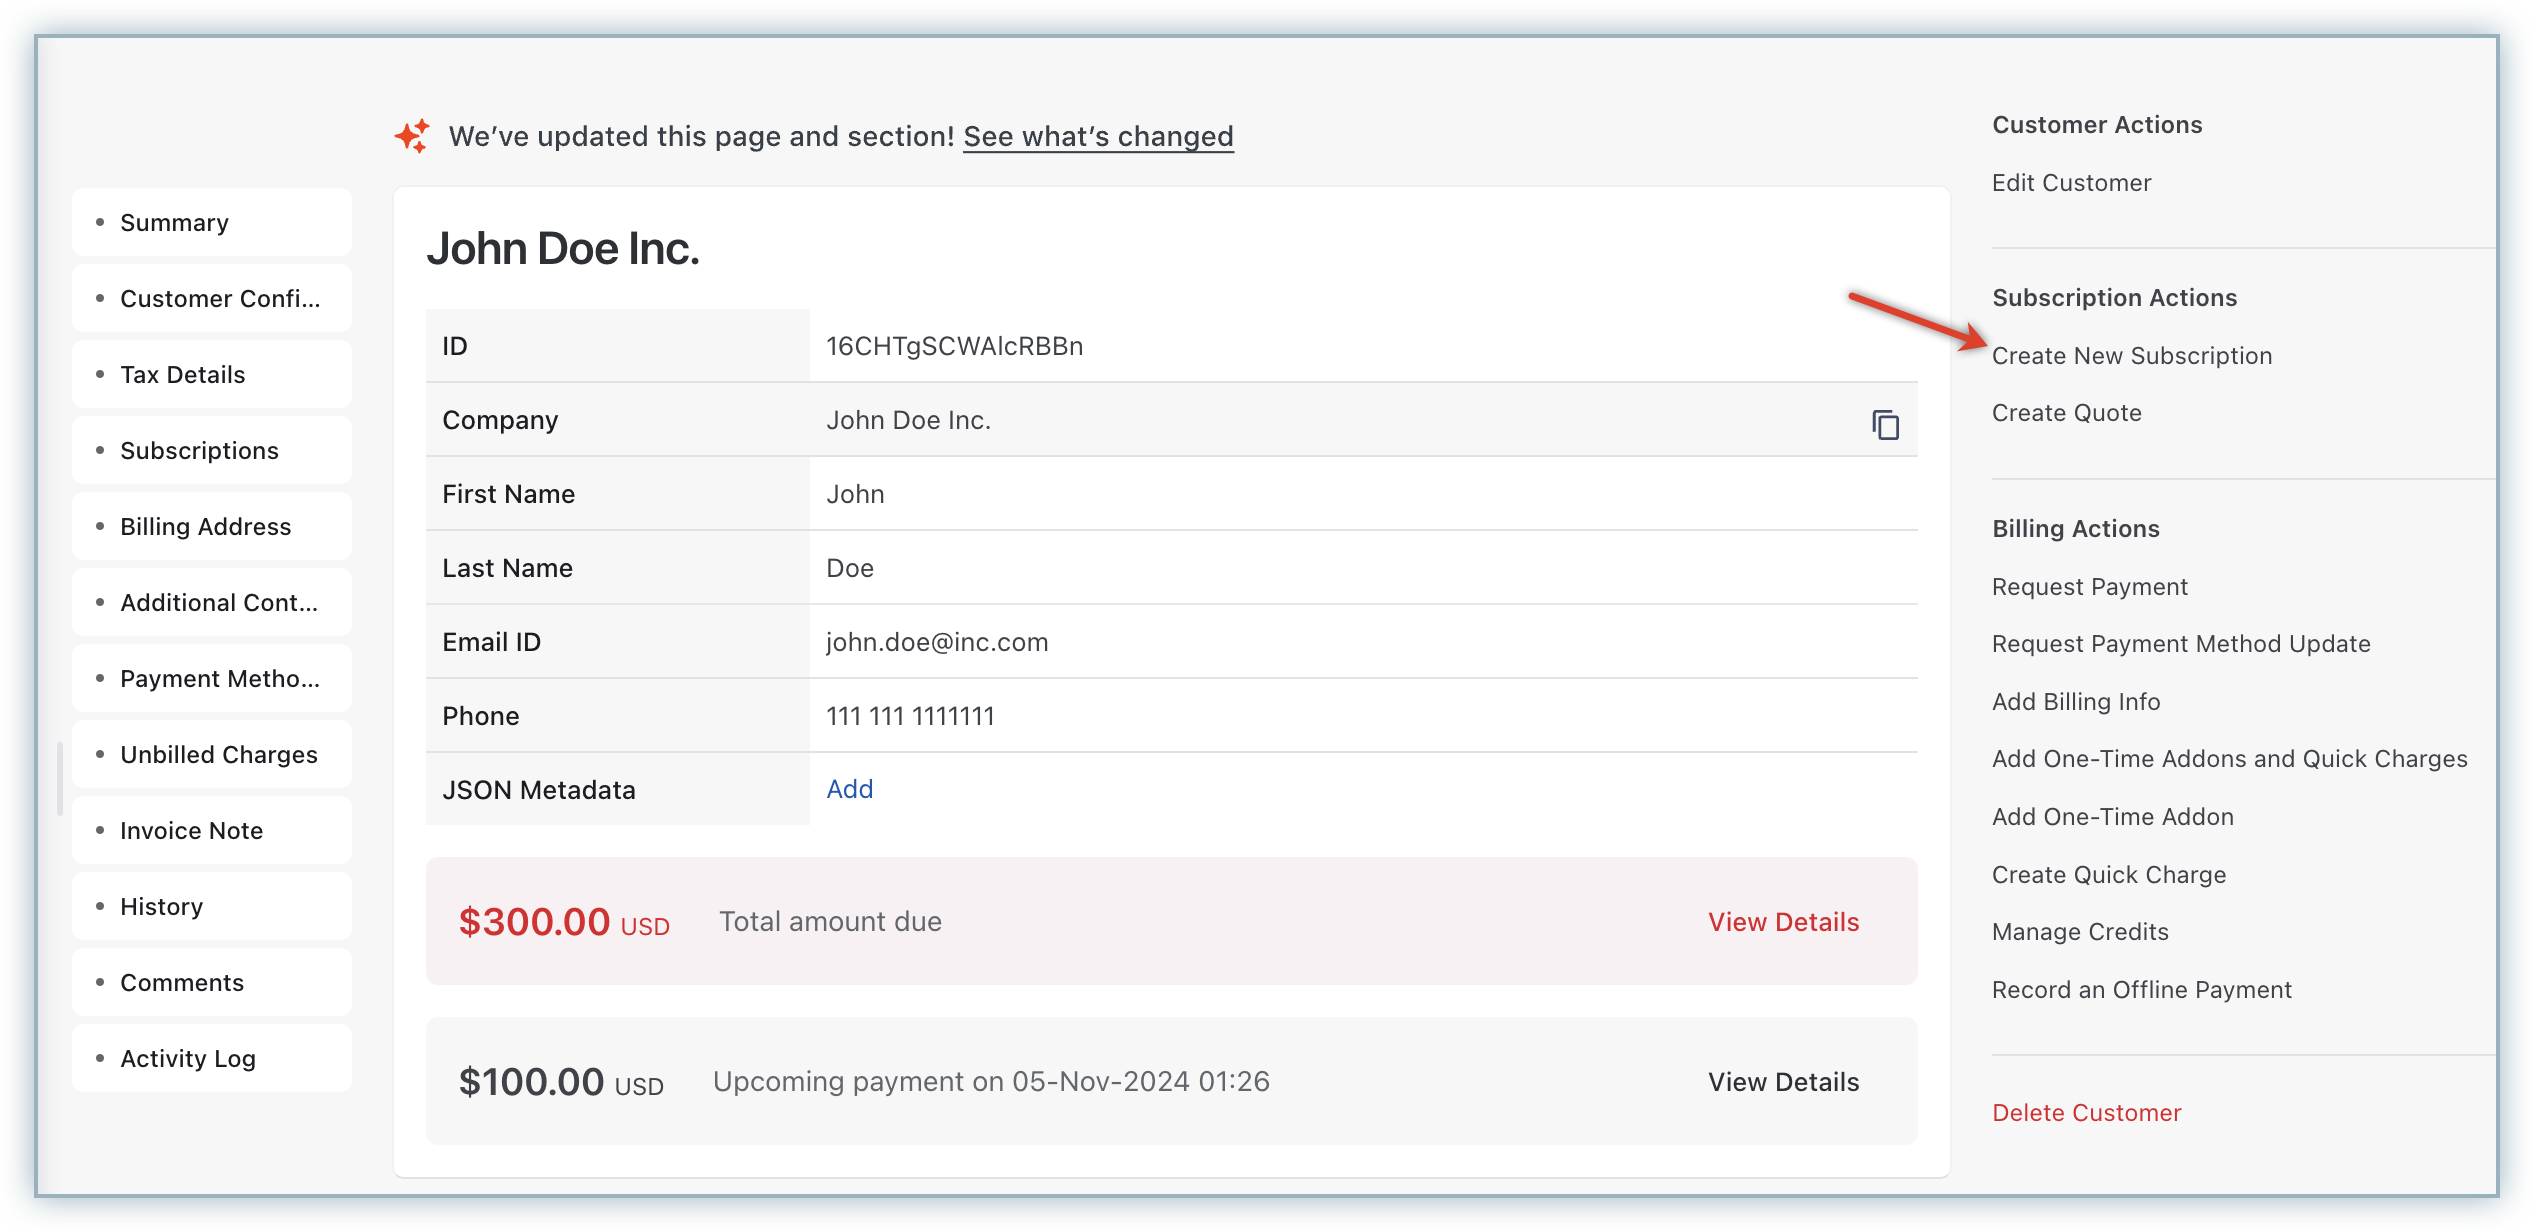
For more details, see subscriptions.
See also
Use Quotes in Chargebee to send a pricing quote to your customers before signing them up.
Custom Fields
In addition to the default fields for the customer object, you can create custom fields to track extra customer information.
Customer Payment Method Details
Chargebee supports multiple payment methods per customer. Once you add a payment method for a customer, Chargebee will try that method each time a charge needs to be collected.
If you add more than one payment method for a customer, you can mark one as primary and another as backup. This helps ensure you don't lose revenue if a payment method fails.
You can add, update, or remove payment methods for a customer using the web interface, Chargebee's API, or hosted pages. See the documentation for more information.
Excess Payments
If you collect payment from a customer in advance, or if a customer makes a single payment for multiple invoices, use the Record an offline payment option:

The recorded payment will be automatically applied to future invoices. You can also manually apply it to existing Not Paid or Payment Due invoices.
Auto Collection Status
The Auto collection status determines whether subscriptions linked to a customer are charged automatically using the card on file. If Auto collection is Off, subscriptions will not be charged automatically, even if a card is present. If Auto collection is On, Chargebee will attempt to charge the card.
Note
-
When a subscription moves from TRIAL to ACTIVE state with auto collection ON and no card on file, it will be cancelled. However, if the subscription's value is $0, it will not be cancelled even though the Auto collection is "On" and no card on file because there is no attempt to collect charges.
-
If you've enabled the Payment Terms option for your invoices, and you've turned Auto collection "Off" for a customer, the invoice will be marked as Posted. An email notification will be sent to them, and once the customer is close to the due date, the invoice status will change to Payment Due.
Customer Billing Address
A customer's billing address can be captured during sign up, whether or not a card is present. If enabled, the billing address information must be provided by the customer during sign up.
For merchants in the EU who have enabled EU VAT, taxes are applied based on the billing country specified during sign up. When creating subscriptions, you must explicitly provide the billing country so the system can determine whether tax needs to be applied.
If you create subscriptions without passing the billing country, EU VAT will not be applied.
Billing address for customers with a card
The customer's billing information is linked to their credit card for online subscriptions.
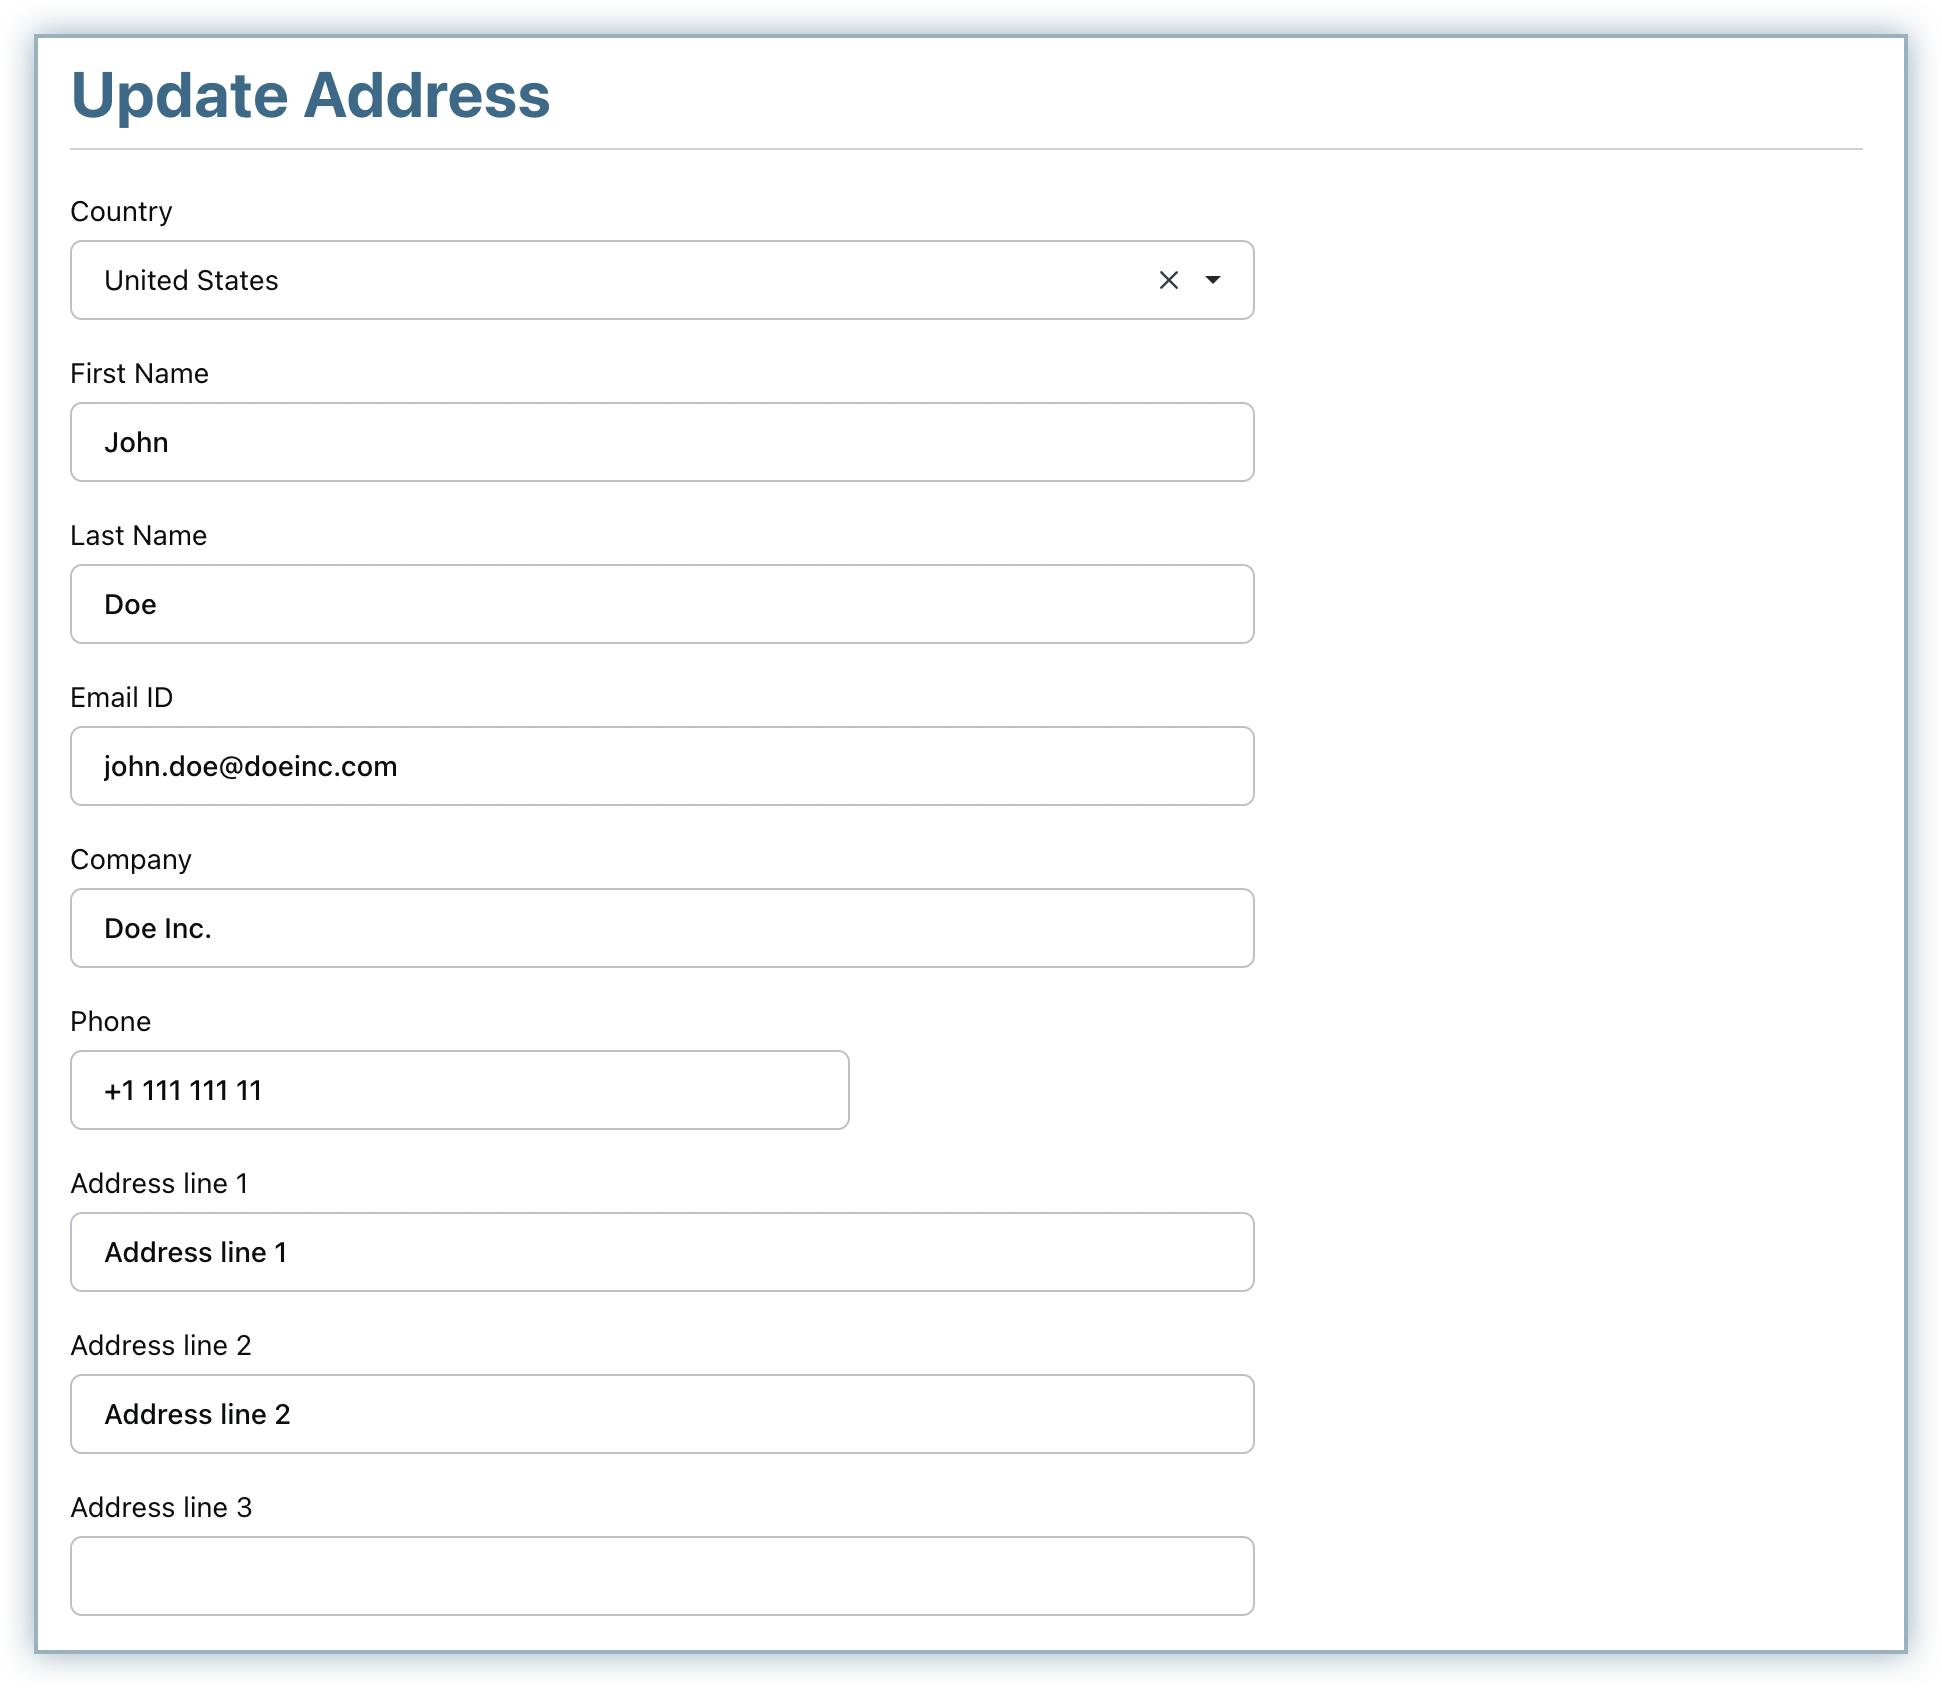
When a subscription is created with a card on file, the billing address captured along with the card details is not automatically used as the customer's billing address. If needed, you can update the customer's billing information using the Update Billing Info option available in the Actions panel.
Note
When you update only the billing information for a customer, the credit card billing info will not be updated. Similarly, when you update the card's billing info while updating card details, the customer's billing info is not automatically updated.
For customers with a card, you do not need to update the billing address separately.
Billing address for offline customers
Offline customers are subscribers who do not have a card on file and have an offline subscription.
For offline subscriptions, billing information can also be collected during sign up. If you have selected fields for validation, these fields will be automatically displayed when creating the offline subscription through the Chargebee user interface.
When creating offline subscriptions using the API, you can include additional attributes for billing_address using the customer object.
For offline subscriptions, you can update the billing information within the subscription through the web interface or the update billing info for customer API.
Add Contact
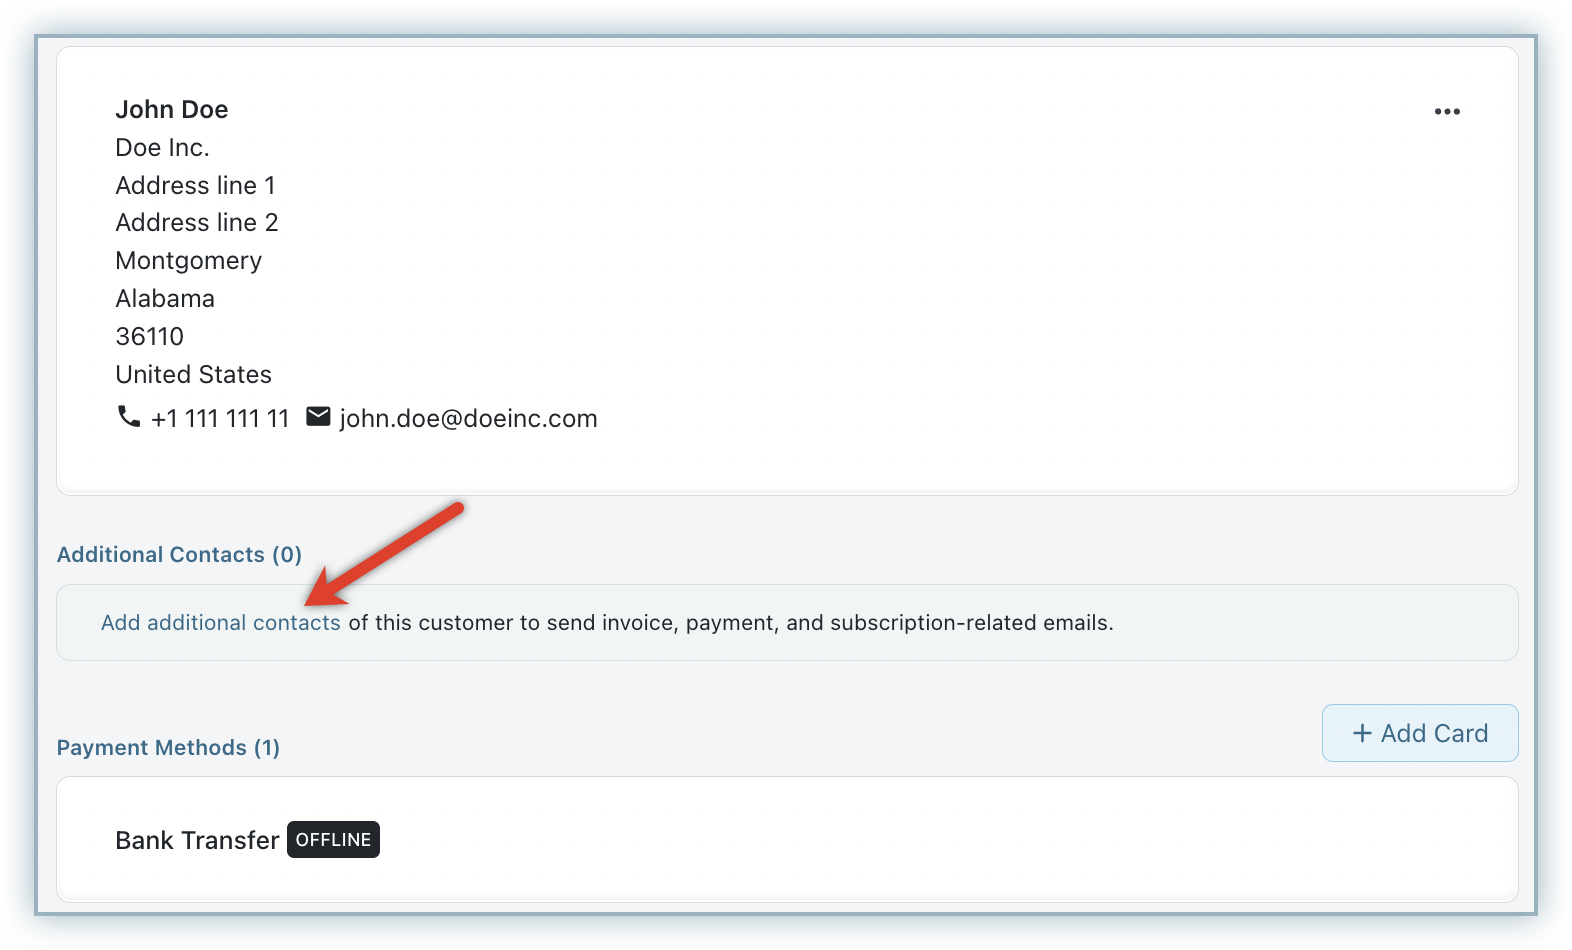
If your customer wants their team or an alternative point of contact to receive emails related to billing such as invoices, payment success notifications, etc., you can configure Chargebee to send them emails using the Add additional contacts option. For example, if your customer would like their accounts team to receive a copy of the invoice, you could add the accountant's email or the team's email as an additional contact and link it to the respective customer. You can add up to a maximum of ten contacts.
Note
You can also have the email addresses added here be validated for duplicates. Contact support to enable this. Once enabled, this feature will prevent Chargebee users from adding an email address that is already present either as a Contact or as the primary email address of the customer. However, also note that duplicate email addresses are still allowed across individual customer records in Chargebee.
To link an additional contact, go to customer's details page and click Add additional contacts:
The form for adding contacts appears, as shown below:
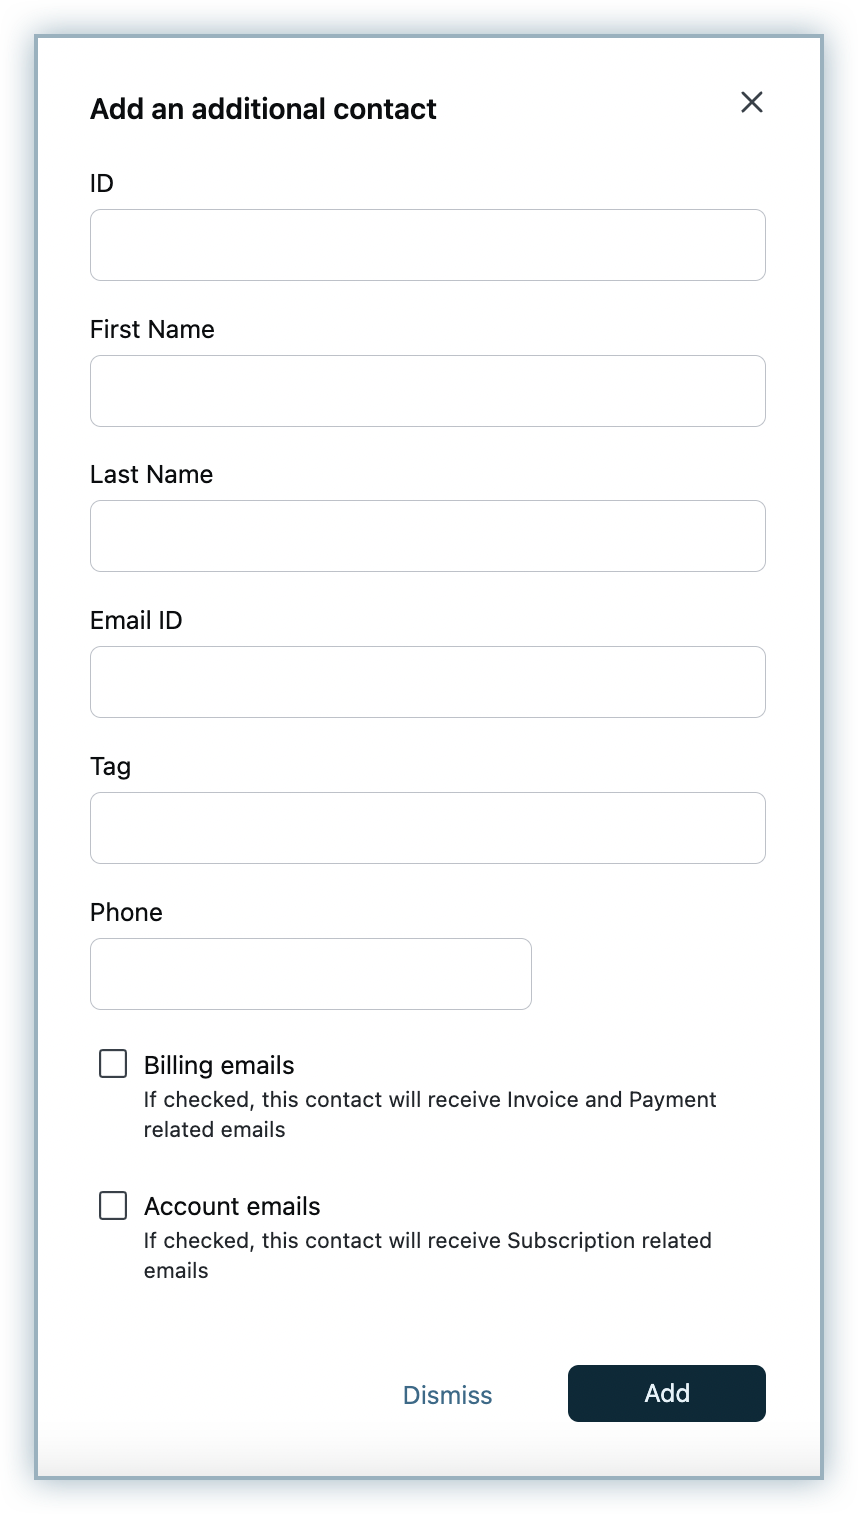
Fill in the Id - this will be the reference ID used by Chargebee API to identify the contact.
Fill in the name, email address, and phone number. Use the Tag field to add a tag for your reference.
Emails
The emails that can be sent to this additional contact are categorized into two groups:
Billing Emails
Enable this option if you want your team to receive the following emails:
- Invoice Receipt
- Payment Succeeded
- Payment Failed
- Payment Refunded
- Payment Initiated
- Refund Initiated
- Card Expiring
- Card Expired
Account Emails
Enable this option if you want your team to receive the following emails:
- Subscription Created
- Subscription Started
- Subscription Trial Ending
- Subscription Renewal
- Subscription Activation
- Subscription Changed
- Subscription Cancellation
- Shipping Address Updated
Click Add to save.
The contacts added using this option will appear under a new section, Additional Contacts, as shown below:
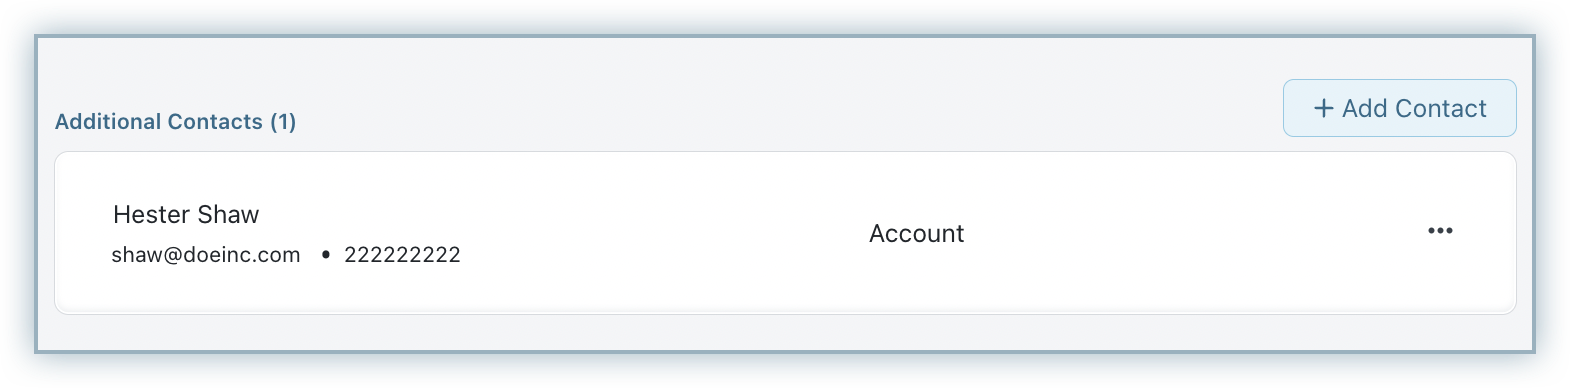
This section also provides the options to add, edit, remove contacts, or disable email notifications for them.
Note
This option is available for users assigned the role of Customer Support (Settings > Team Members), or a role with more access than that of Customer Support.
Deleting a Customer
If you wish to delete a customer record in Chargebee, open the specific customer's details page and click the Delete Customer option available on the Actions panel.
This operation is irreversible - all data related to the customer, such as Subscriptions and Invoices, will be deleted.
The numbers in the following reports will get modified when a Customer is deleted:
- Payments
- New Revenue
- Signups
- Activations
- Cancellations
- Refunds
Note
- The option to delete a Customer is available only for the role Admin.
- Card information of the customer will be removed from the gateway via a delete request.
You can also delete a Customer using the Delete a Customer API.
Note: The Delete Customer action or API call is unavailable for the customer records linked to gift subscriptions (i.e. those of gifters and the recipients).
See also
Clear Personal Data
For eligible customer records, a special action called Clear Personal Data is available on the action pane (provided Personal Data Management is configured). Based on certain site configurations, this action clears the personally identifiable information in the customer record to help protect customer data privacy.
Clear Personal Data is different from Delete Customer. The fine points of difference are noted in a question in this FAQ.
See also
FAQs
1. Can I recover a customer record that was accidentally deleted?
Deleted customer records cannot be restored from the Chargebee interface. To avoid data loss, consider these alternatives before deleting:
- Cancel the subscription instead: Canceling subscription retains the customer record and its history for accounting and compliance purposes.
- Clear personal data instead: If privacy is the concern, clear personal data to remove PII without deleting the record entirely.
- Export before deleting: Always export customer data as a backup before performing a delete.
If a customer was deleted by mistake and the data is critical, contact Chargebee Support. In some cases, data recovery may be possible through internal processes.
Articles & FAQs
Show more
Was this article helpful?