Multi Business Entity for Sage Intacct
In today's dynamic business landscape, enterprises often operate across multiple entities, each with unique financial intricacies. Sage Intacct's Multi-Business Entity feature empowers you to navigate this complexity effortlessly, allowing you to efficiently manage the financials of various entities under a single, unified platform.
Users with the multi-business entity feature enabled can access global sites and select entities to connect with Sage Intacct.
You can choose to connect either at the site level or the entity level.
You can link multiple business entities simultaneously at the site level, all sharing the same configuration.
You can link each business entity separately at the entity level, which will have a distinct configuration from the site level.
Once you establish connections at the site level, connecting at the business entity level is not possible.
Step 1: Connecting Chargebee to Sage Intacct
Connecting at Site Level
-
Log in to your Chargebee site.
-
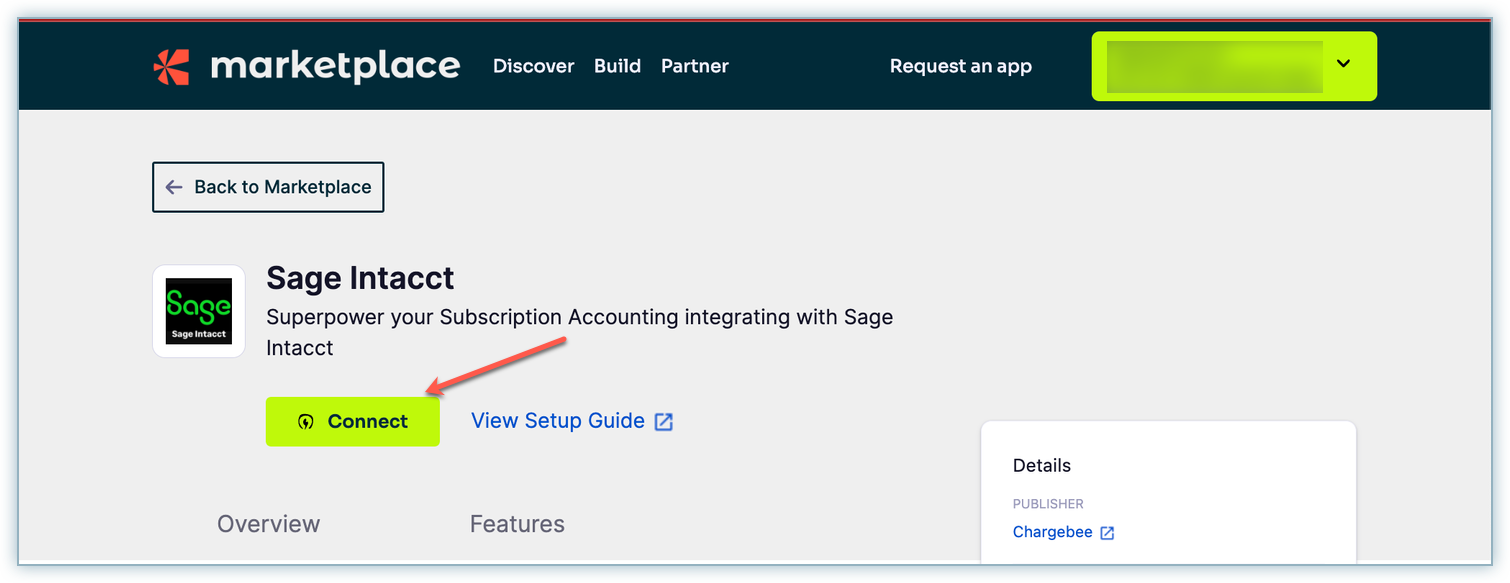
You can connect to the Sage Intacct application listed on Chargebee's app marketplace by selecting Apps > Marketplace > Sage Intacct.
Connecting at Entity Level
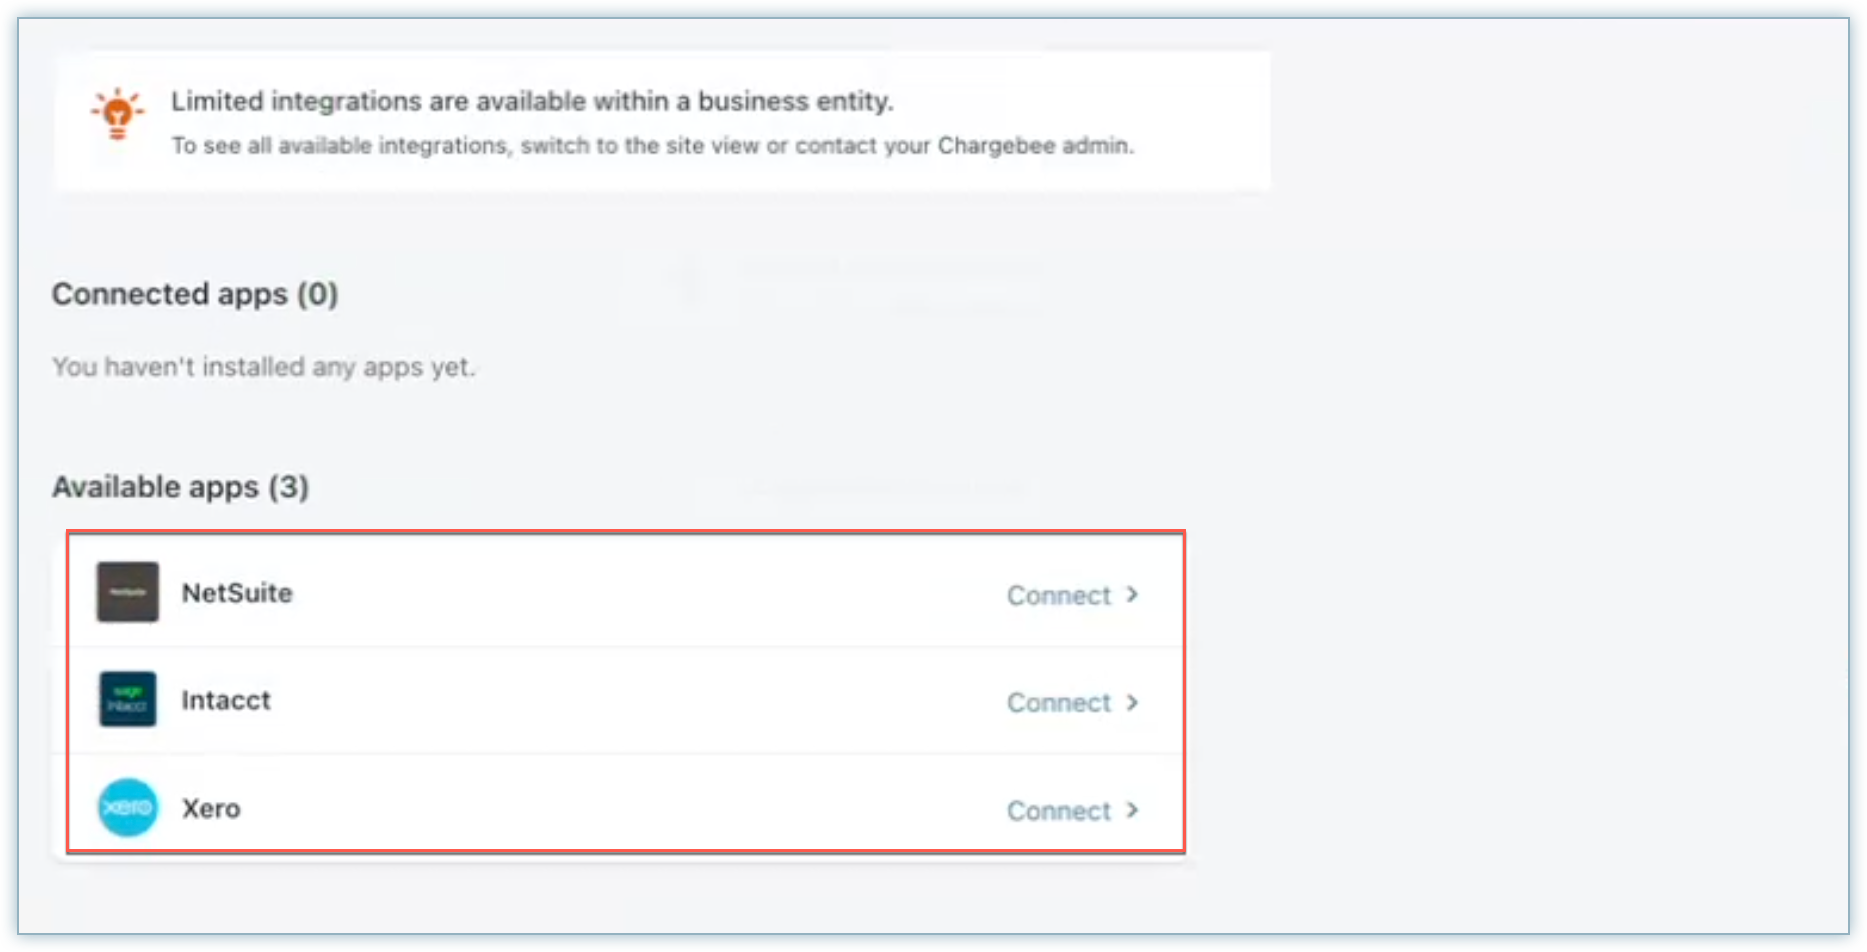
When you choose the entity-level view, the apps page exclusively displays apps that you can connect to at the business entity level. Regardless of any existing connections at the site level, a complete configuration will occur from the beginning at the business entity level.
The following screenshot displays the apps available to be connected at the entity level.
Note:
- Only one accounting integration app can be connected at the entity level.
- To ensure that auto-sync works as expected, ensure that at least one business entity is linked at the site level before establishing connections at the entity level.
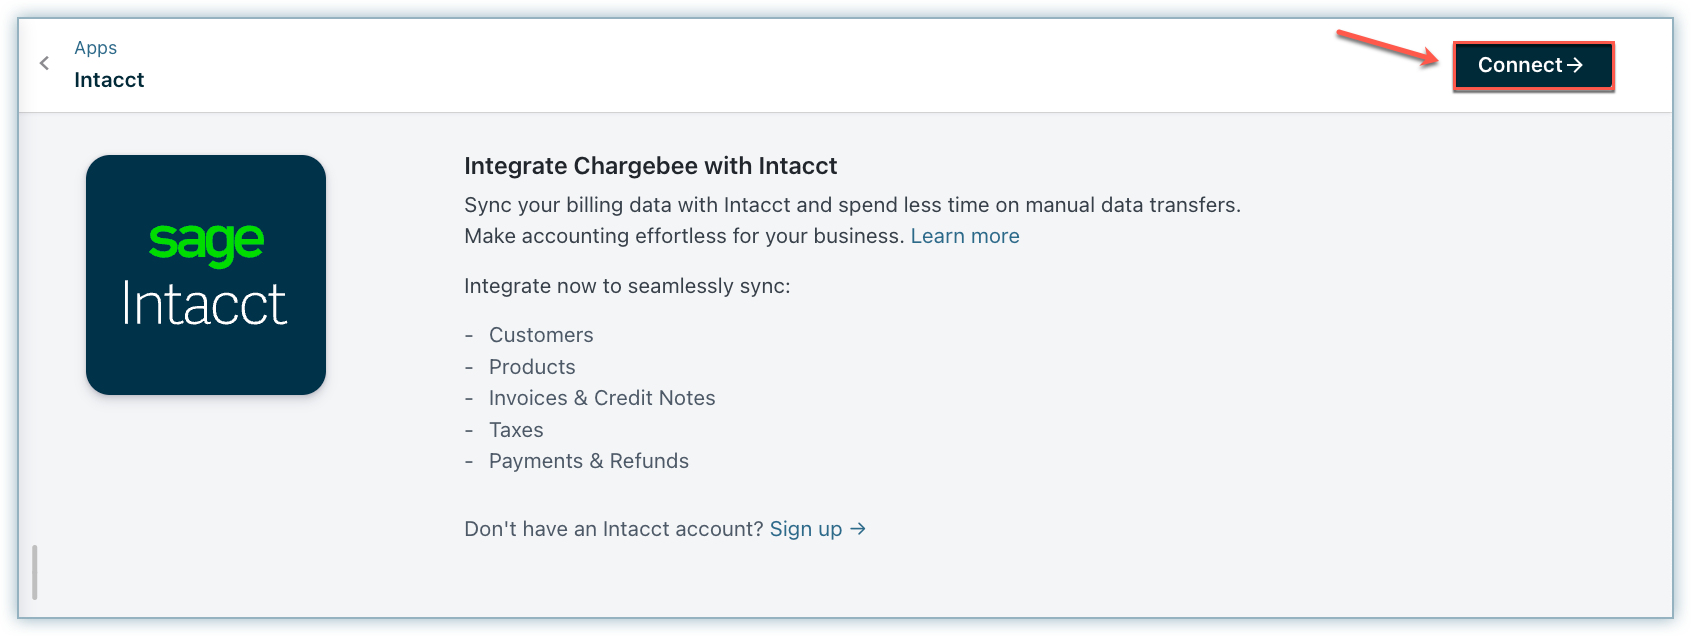
Click Connect to integrate Chargebee with Intacct.
Enter the Intacct login credentials in the pop-up connect box.
You can connect your Chargebee site with Intacct either using Chargebee's license or using your own web services developer license, as required. If you already have a developer license with Intacct, select the Use developer license option and enter the required details.
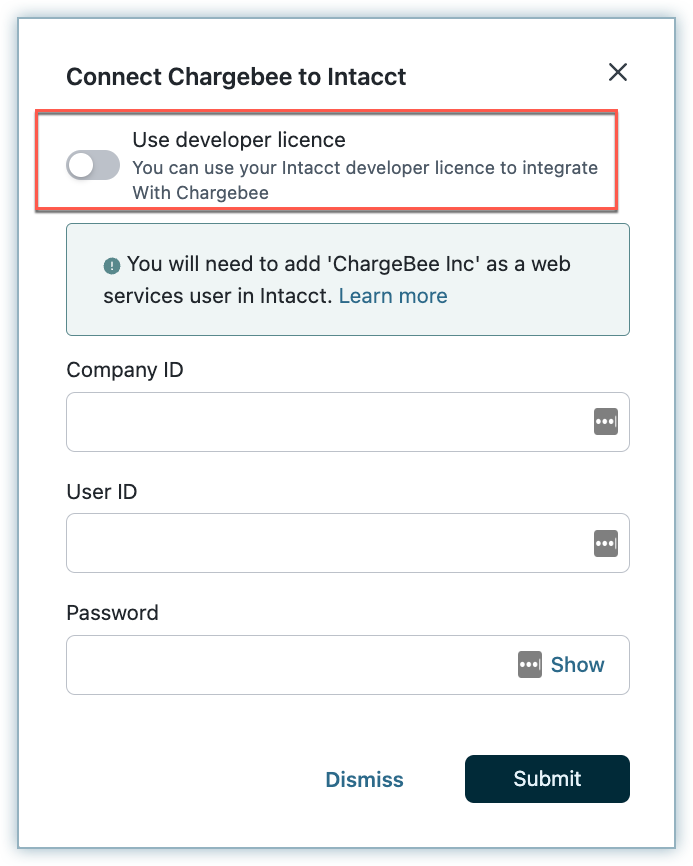
Once you have entered the credentials click Submit.
Step 2: Select Chargebee Entities
When a multi-business entity is enabled, and if you are connected at the site level with multiple business entities, you will see the following screen with the list of business entities available within your Chargebee site. Select the Chargebee business entities that you want to connect with and click Proceed.
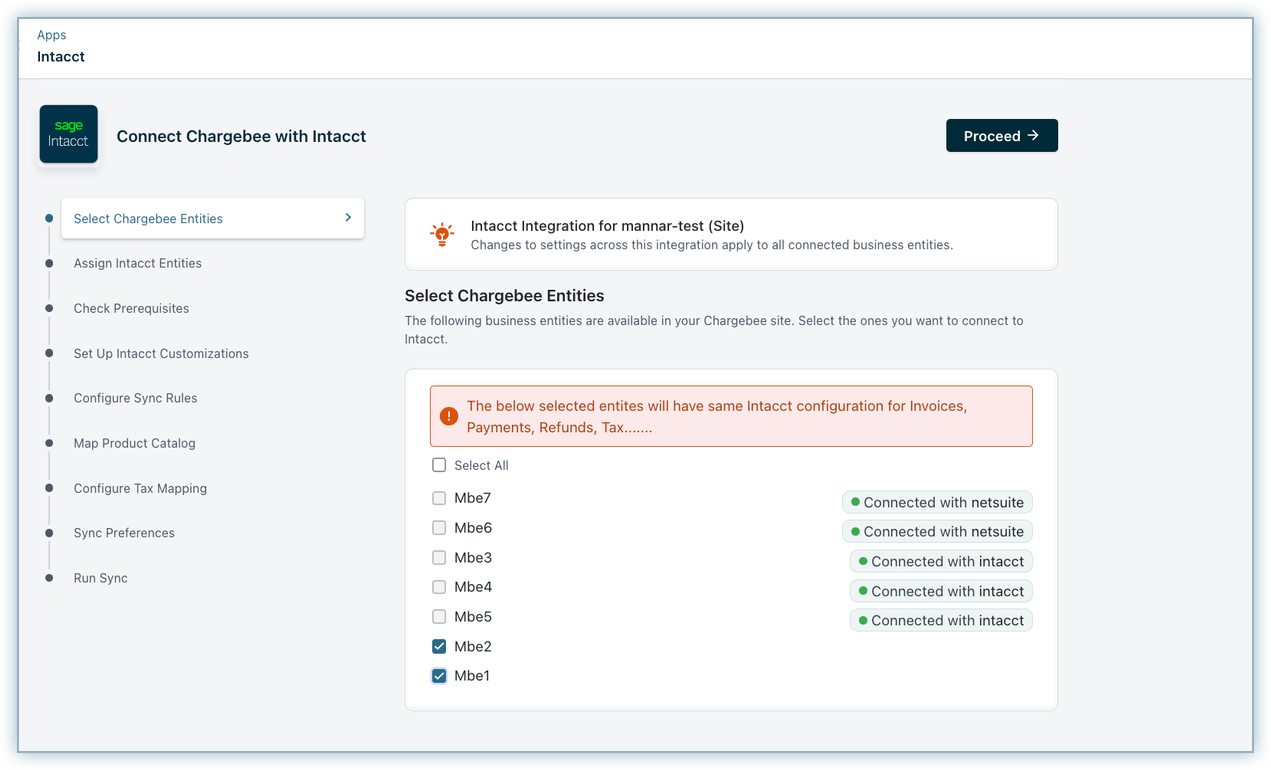
Note:
- If you are connected at the entity level then you will not see this step.
- The greyed-out entities are connected with other Accounting integrations and are not available for selection.
- All connected business entities share configurations.
Step 3: Assign Intacct Entities
The selected business entities from the previous step will be displayed as shown here. The drop-down allows you to choose the list of Intacct entities for mapping.
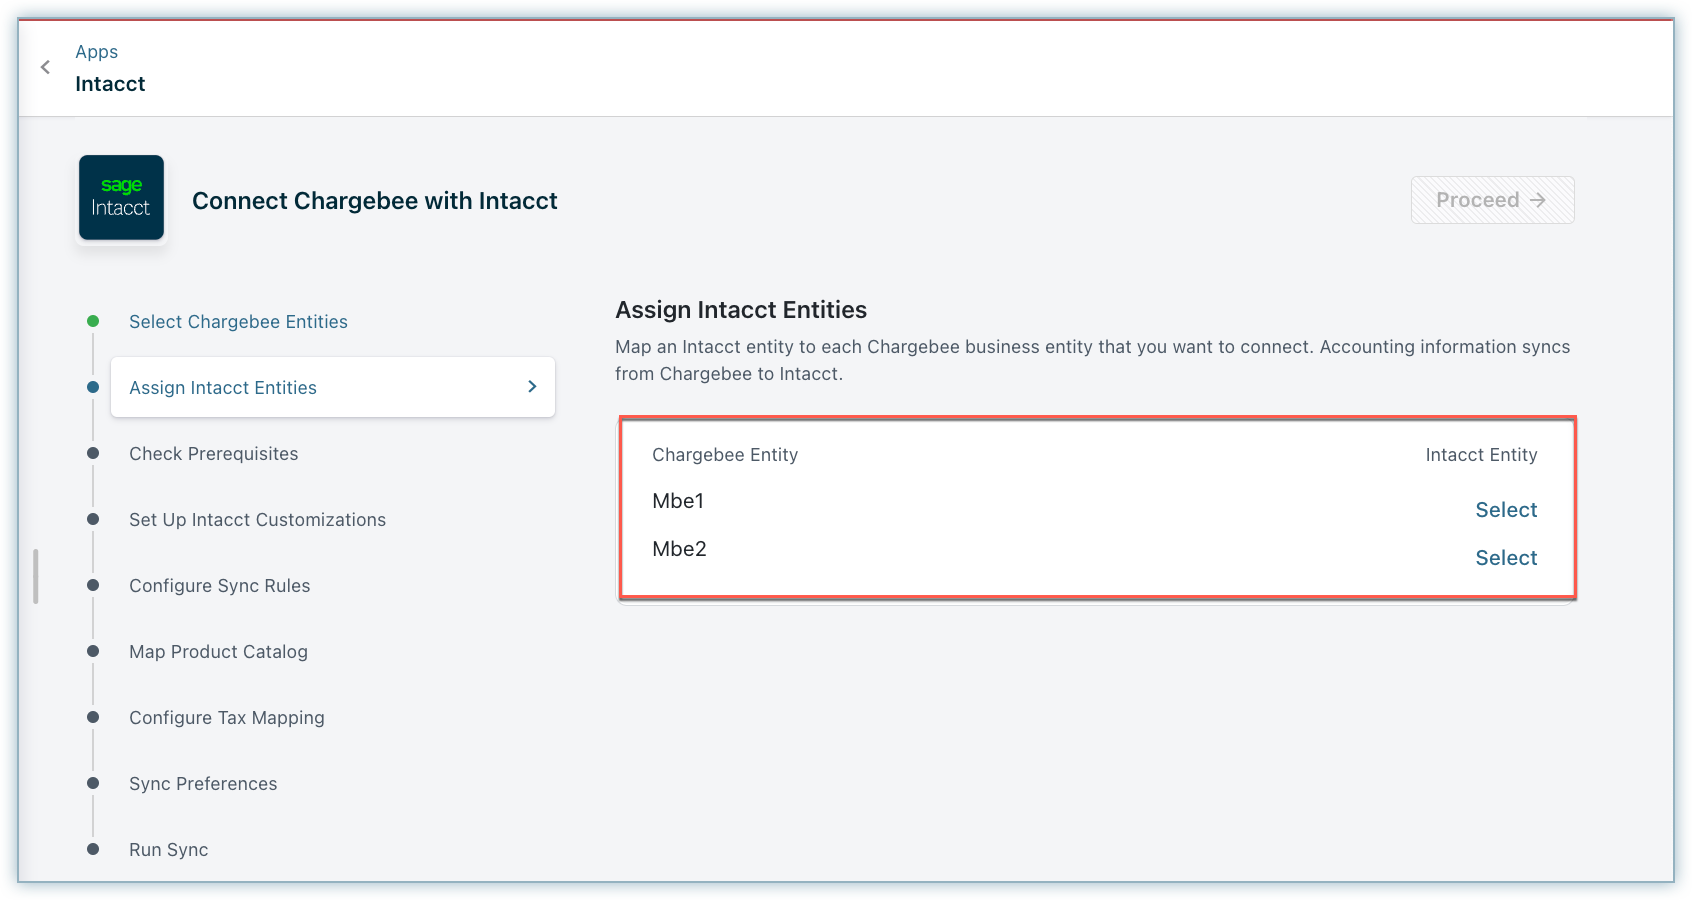
Note:
If you are connected at the entity level view, you can only assign one Intacct Subsidiary.
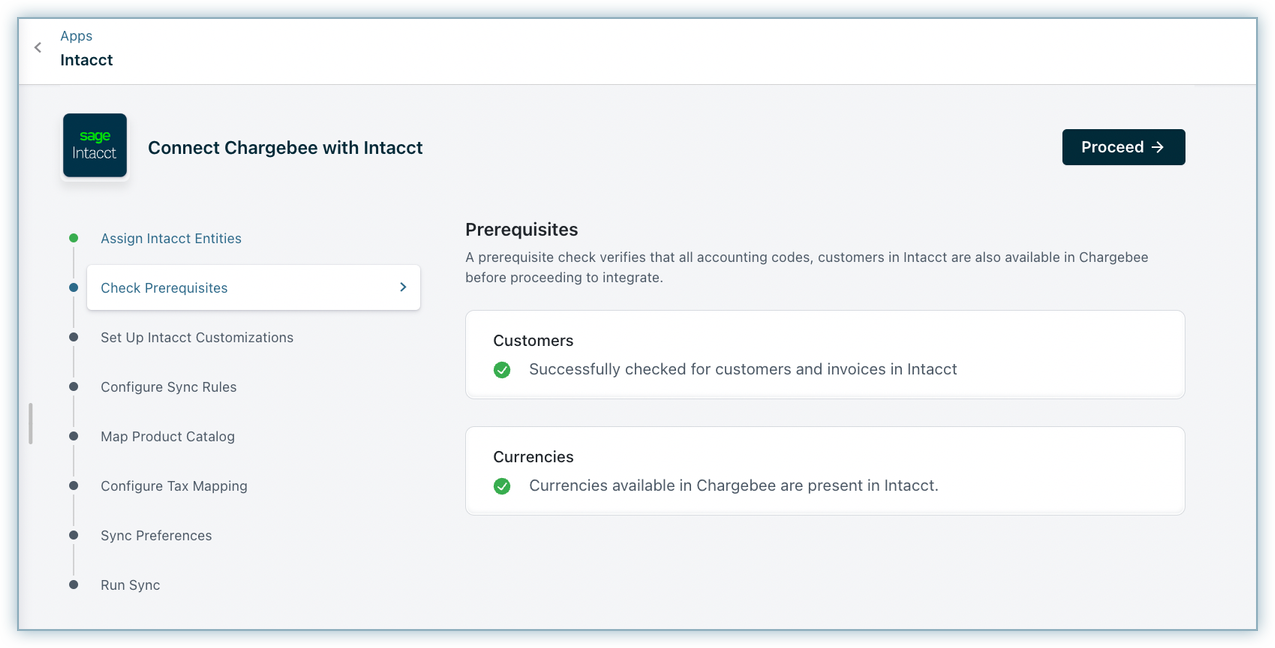
Step 4: Check Prerequisites
Chargebee performs a list of checks in Intacct. This prerequisite check verifies if the accounting codes, customers, and their currencies in Intacct are available in Chargebee before proceeding with the integration.
-
Customer duplicate check: If invoices from Chargebee are already available in Sage Intacct, the customer records will be moved as well. To prevent duplicates, you can map the customer records between both systems. To do this, download the list of customers as a CSV file, map the customers, and upload the updated sheet using Record Mapping after setup.
-
Currency check: The currencies present in Chargebee should be present in Intacct. Chargebee does not compare the currencies via API. You need to manually compare and add the currencies in Intacct.
If customer data already exists in Intacct, an error message will be displayed. In such cases, you can contact our support team.
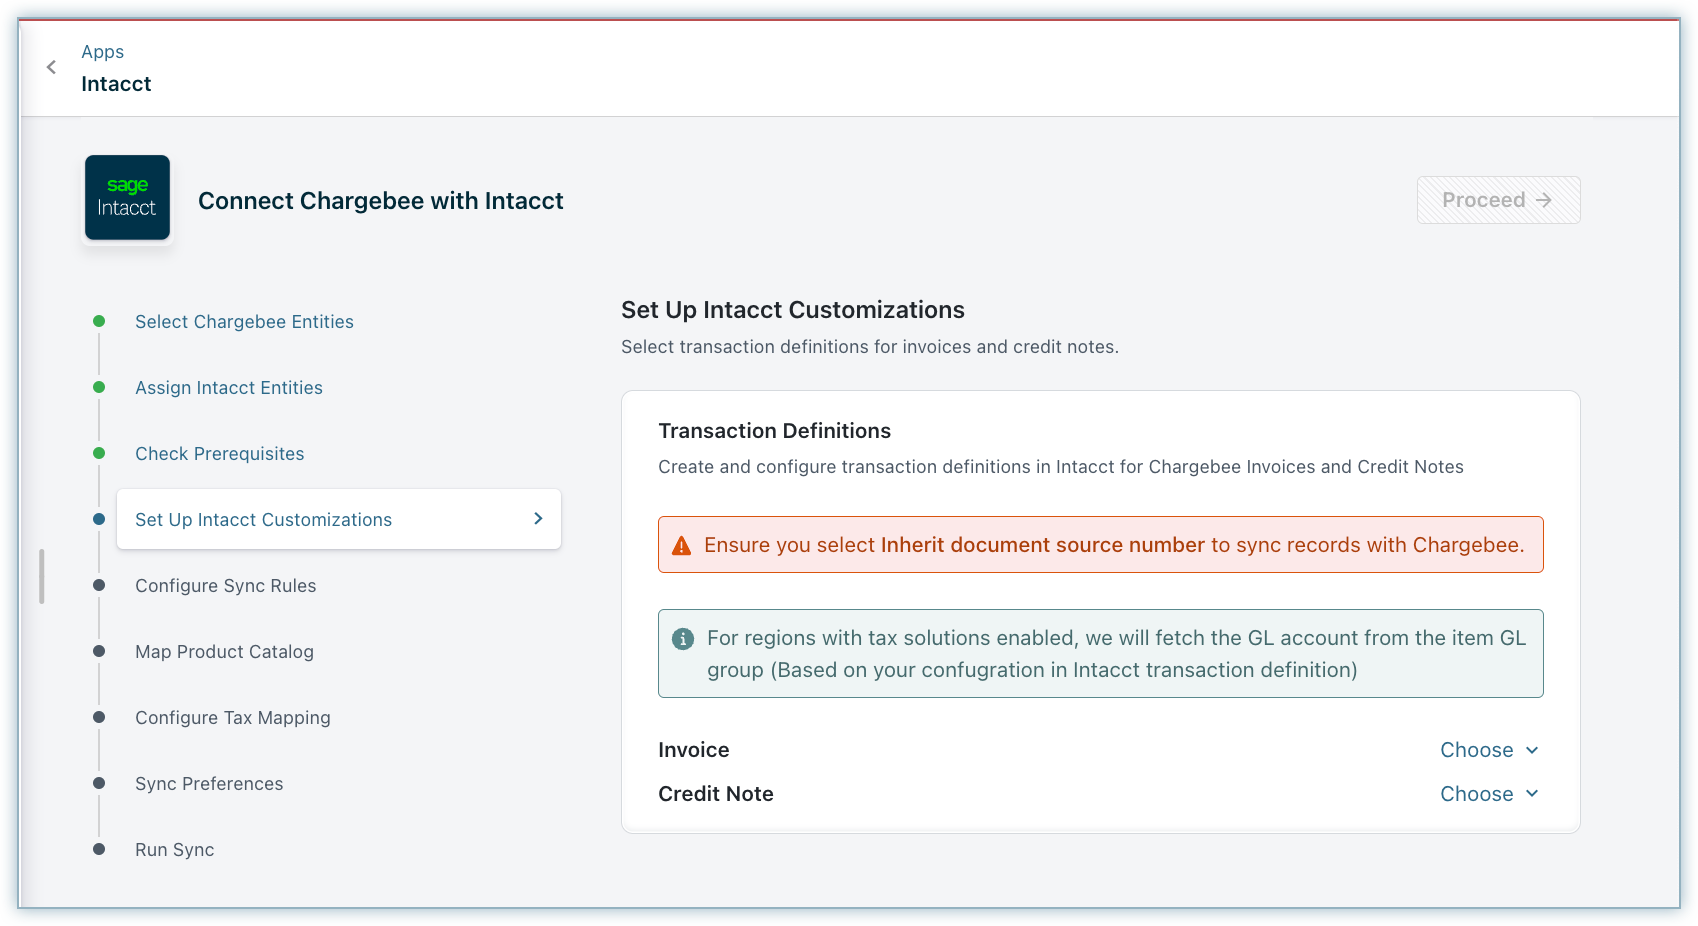
Step 5: Set Up Intacct Customizations
In Sage Intacct, it's possible to activate the tax solutions addon for designated regions. This addon ensures that accounts receivable invoices are generated for those regions. Additionally, within Intacct, you have the capability to establish and customize transaction definitions for both Chargebee invoices and credit notes.
Tax Solutions
It helps generate Accounts Receivable invoices for regions using the tax solutions add-on available in Intacct. You can activate Intacct's Tax Solution by toggling the Tax Solutions button.
Note:
Tax Solutions setting will be displayed only if the user account has Tax Solutions access.
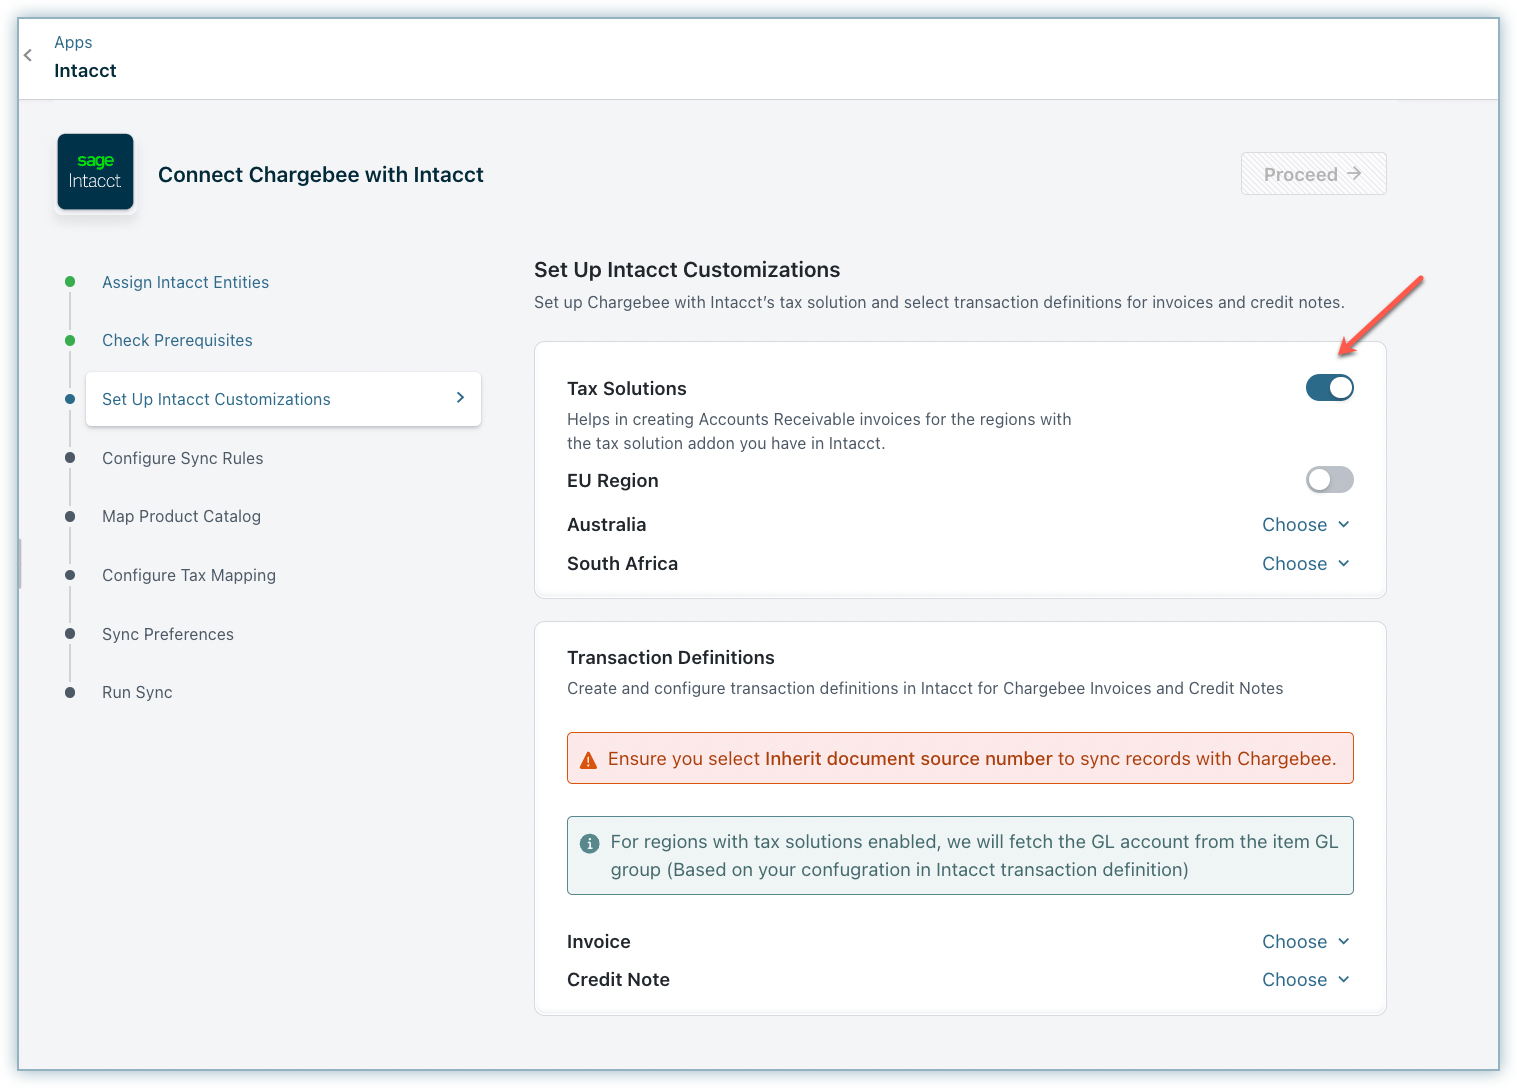
Transactions Definitions
You can map Transaction Definitions in Intacct for Chargebee invoices and credit notes from the drop-down. Click Proceed after selecting all the required fields.
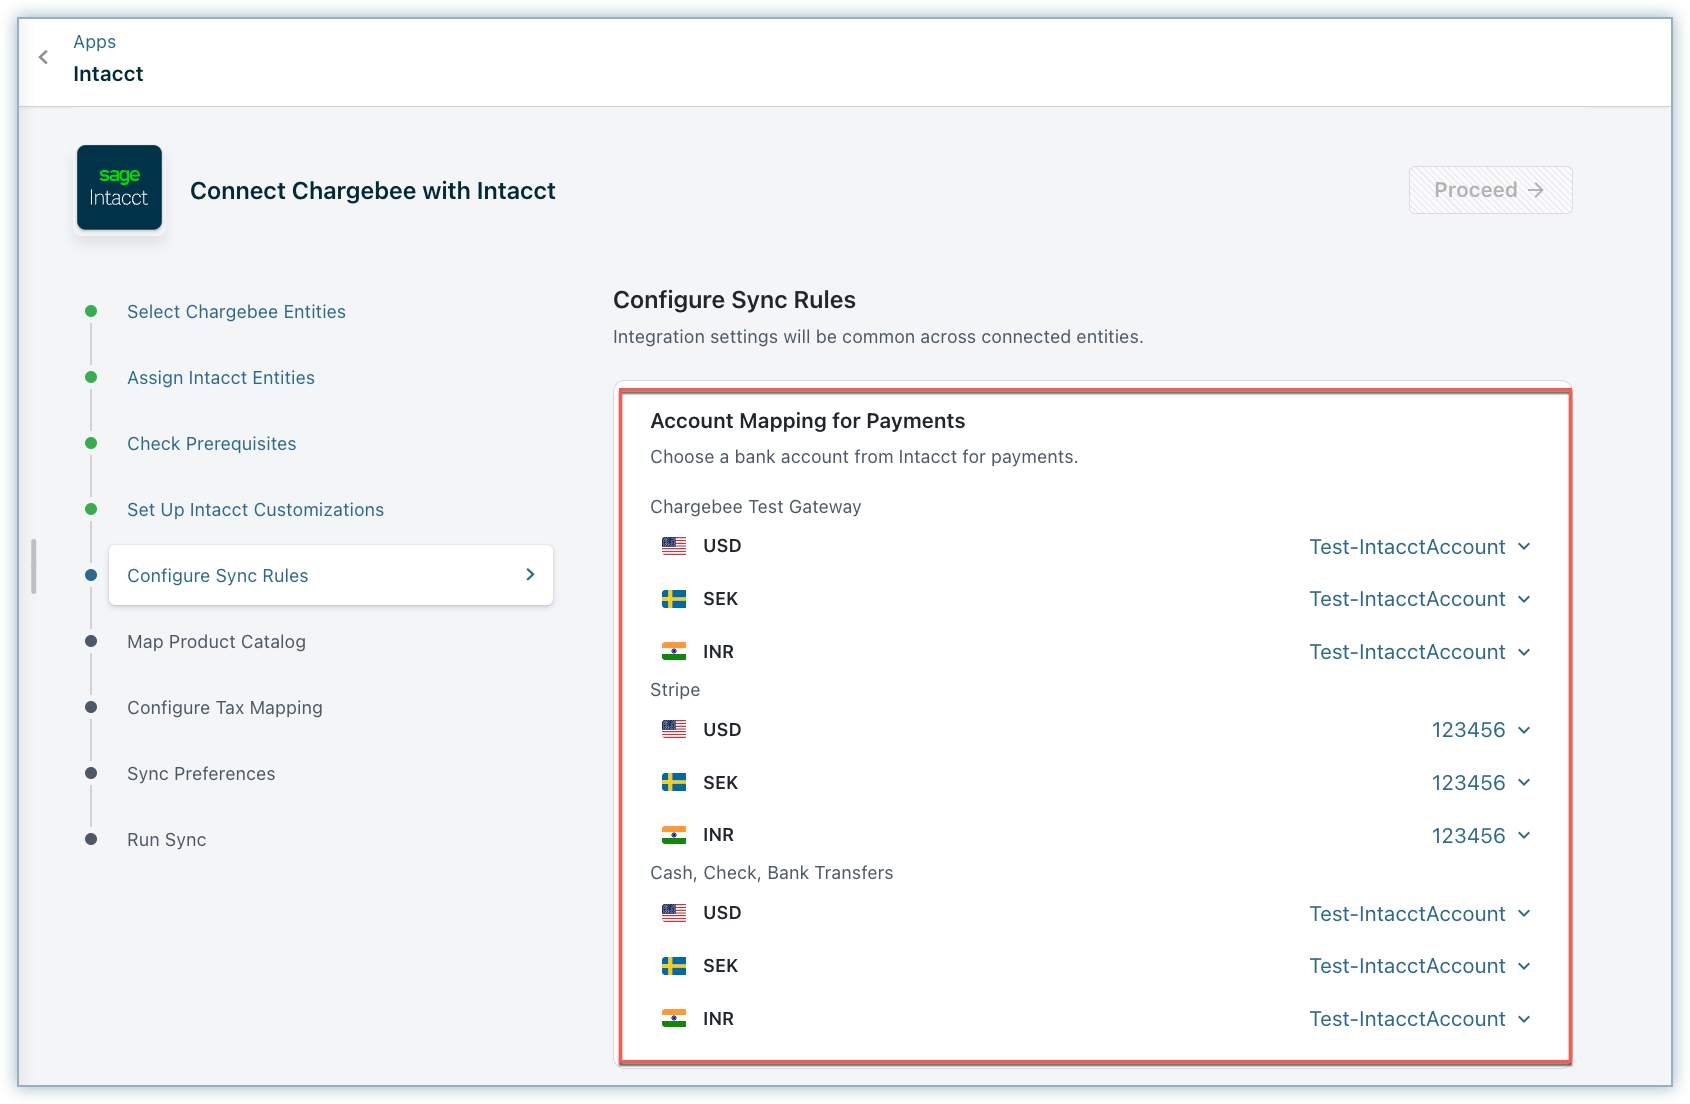
Step 6: Configure Sync Rules
To ensure that all connected entities share common integration settings, you need to perform account mapping for payments, invoice line items, and refunds at the site level.
Account Mapping for Payments
Payment transactions recorded in Chargebee can be mapped to payment accounts in Intacct. For reconciliation purposes, you can select a clearing or undeposited funds account. If you have multiple currencies, payment gateways, or payment methods enabled, you can choose specific payments or checking accounts.
Refund Mapping
Refunds are created as vendor payments in Intacct. You can configure the following for mapping refunds:
- Check Number: The check number is a reference number. When there is a refund, the number you provide here is automatically incremented.
- Vendor ID: Enter a vendor ID for the refund.
- Refund Clearing Account: Select a clearing or temporary account to map refund transactions.
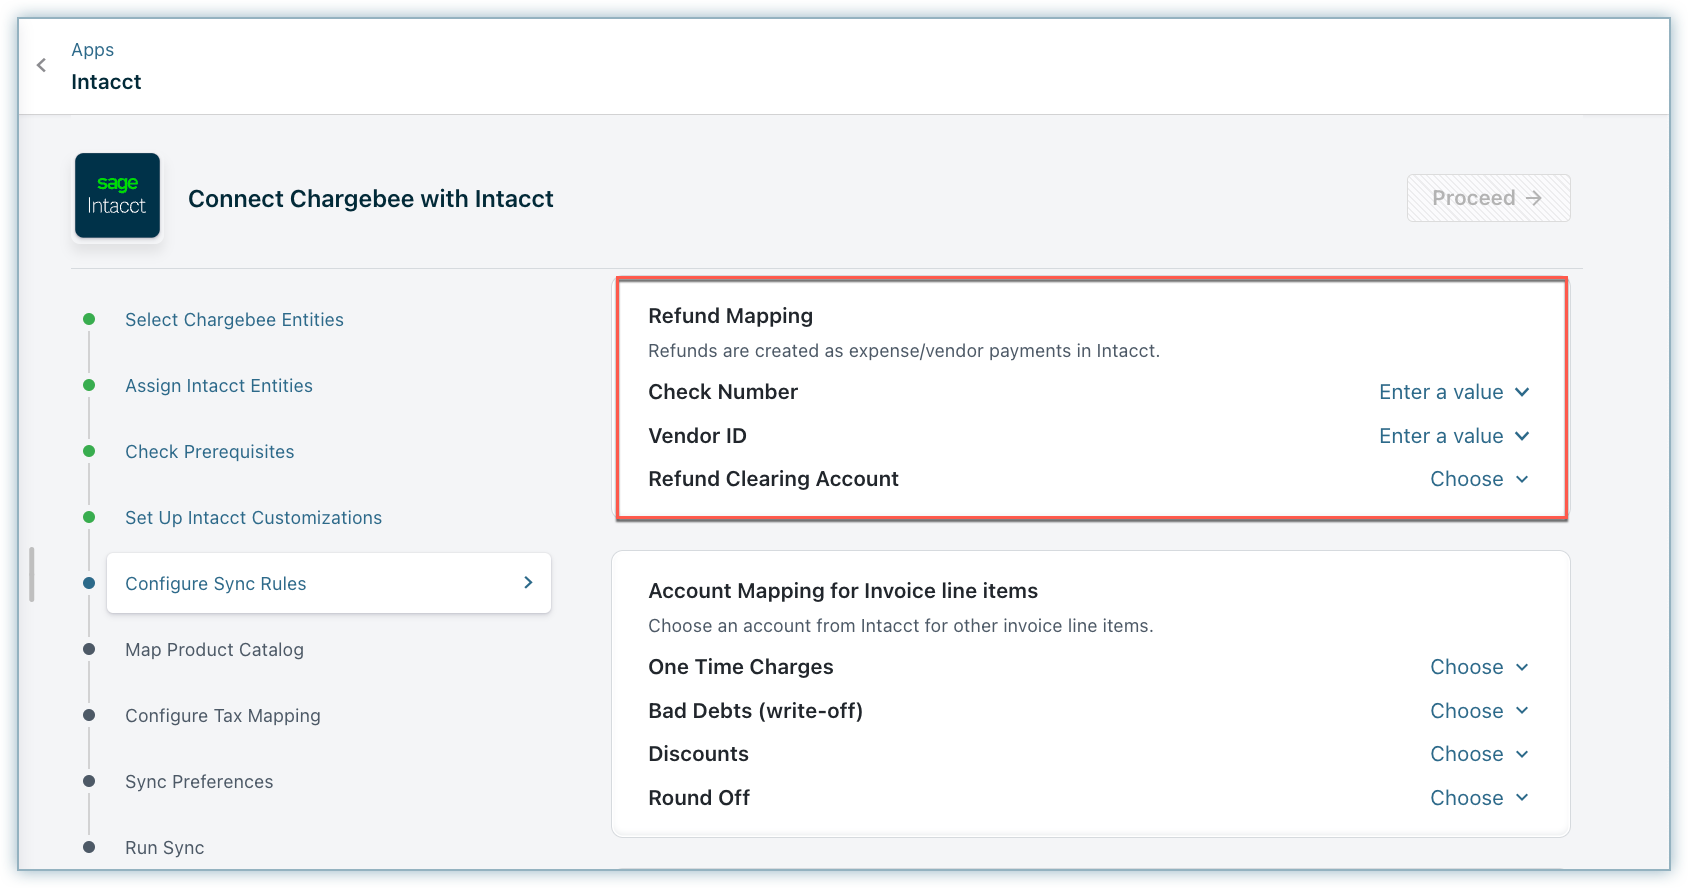
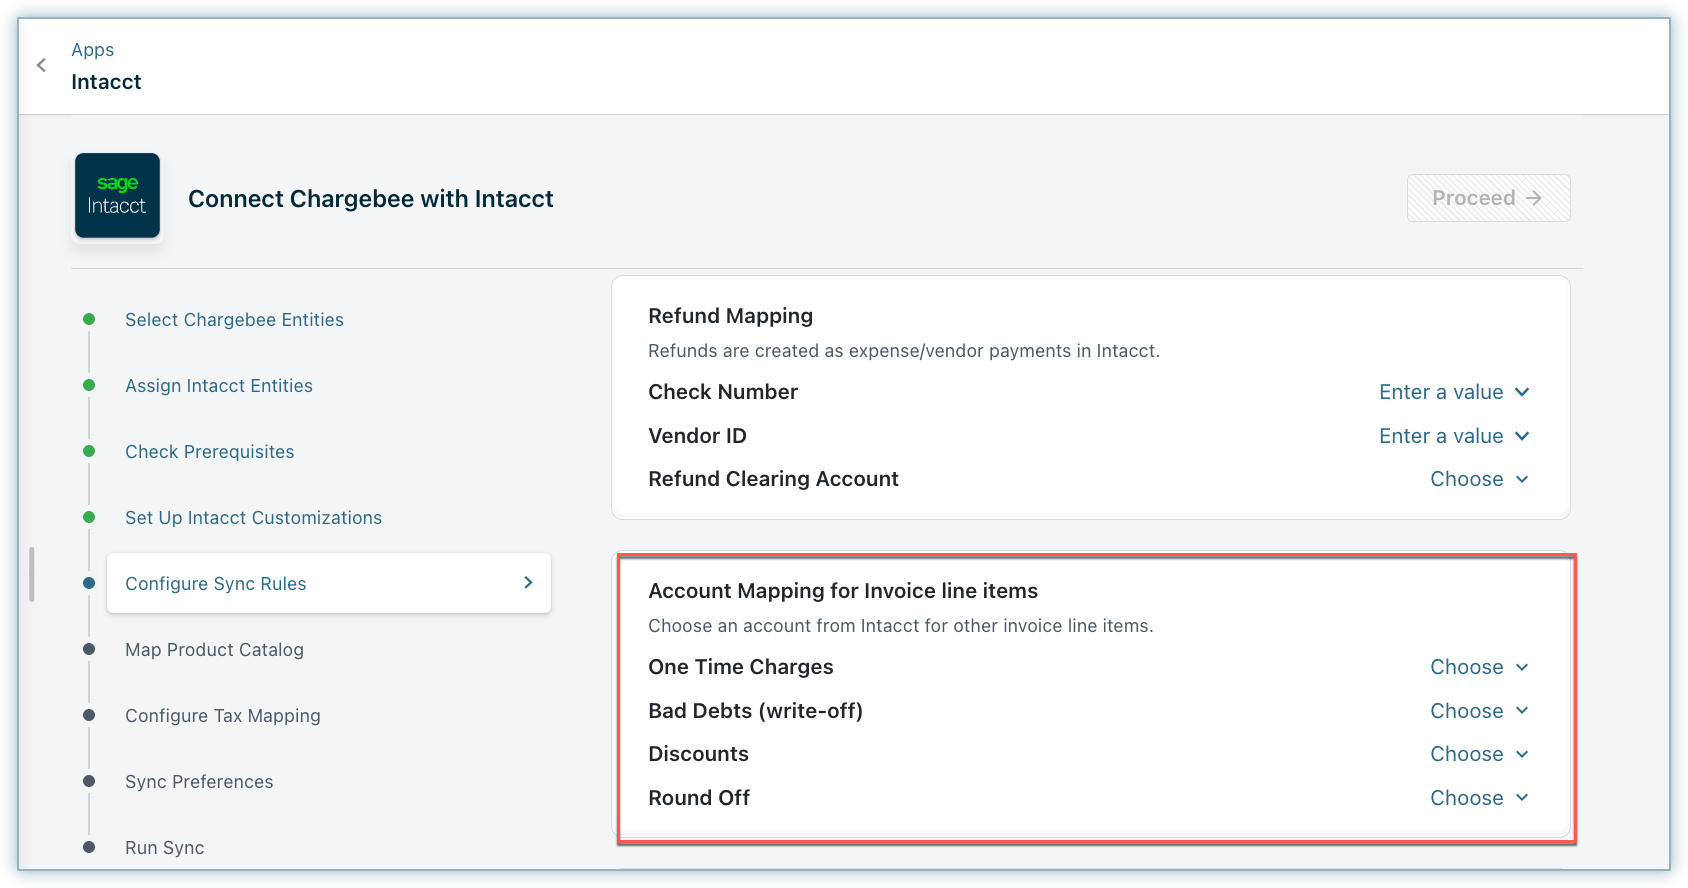
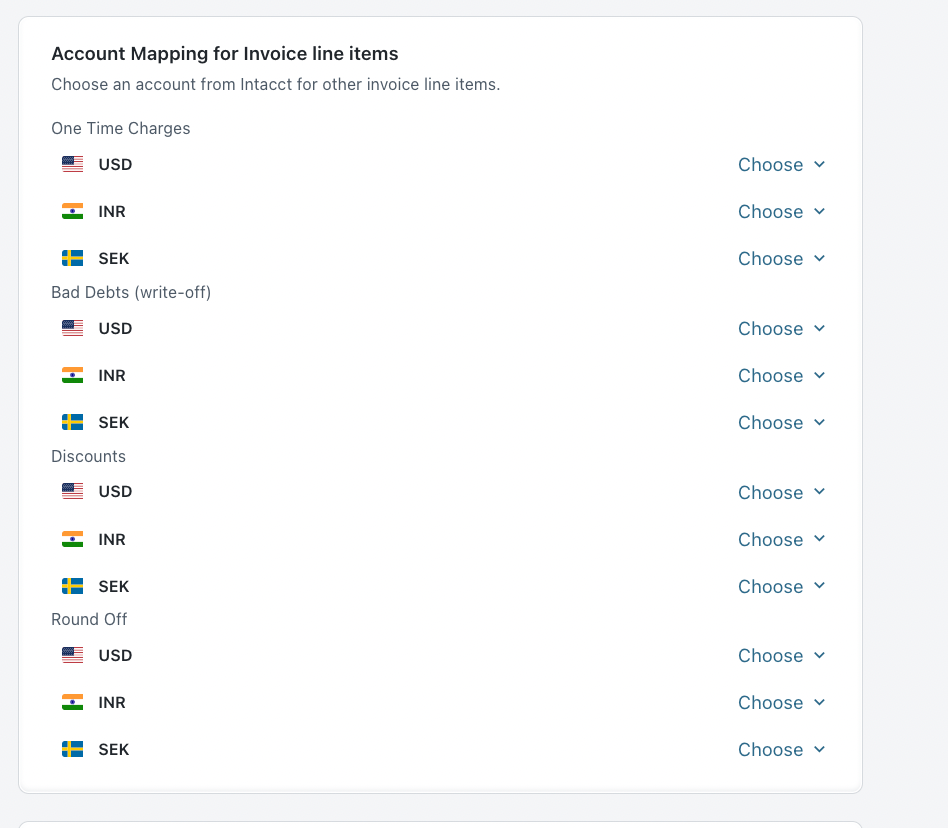
Account Mapping for Invoice Line Items
- One-time charges: One-time or Adhoc charges created in Chargebee can be mapped to a GL Account in Intacct.
- Bad debts (write-offs): You can choose where Bad Debts should be mapped in Intacct.
- Discounts: Select an Account to map Discounts/Cost of Goods (COGs) in Intacct.
- Round-offs: If the invoice total calculation between Chargebee and Intacct differs, Chargebee will add a round-off item automatically. You can select an account to map these round-off line items.
You need to select the invoice line items in the item GL group only if the feature multi-entity with a different base currency is enabled.
Note:
Account mapping for invoice line items can also be configured for each currency level, depending on the backend setting. Please contact support to enable this feature.
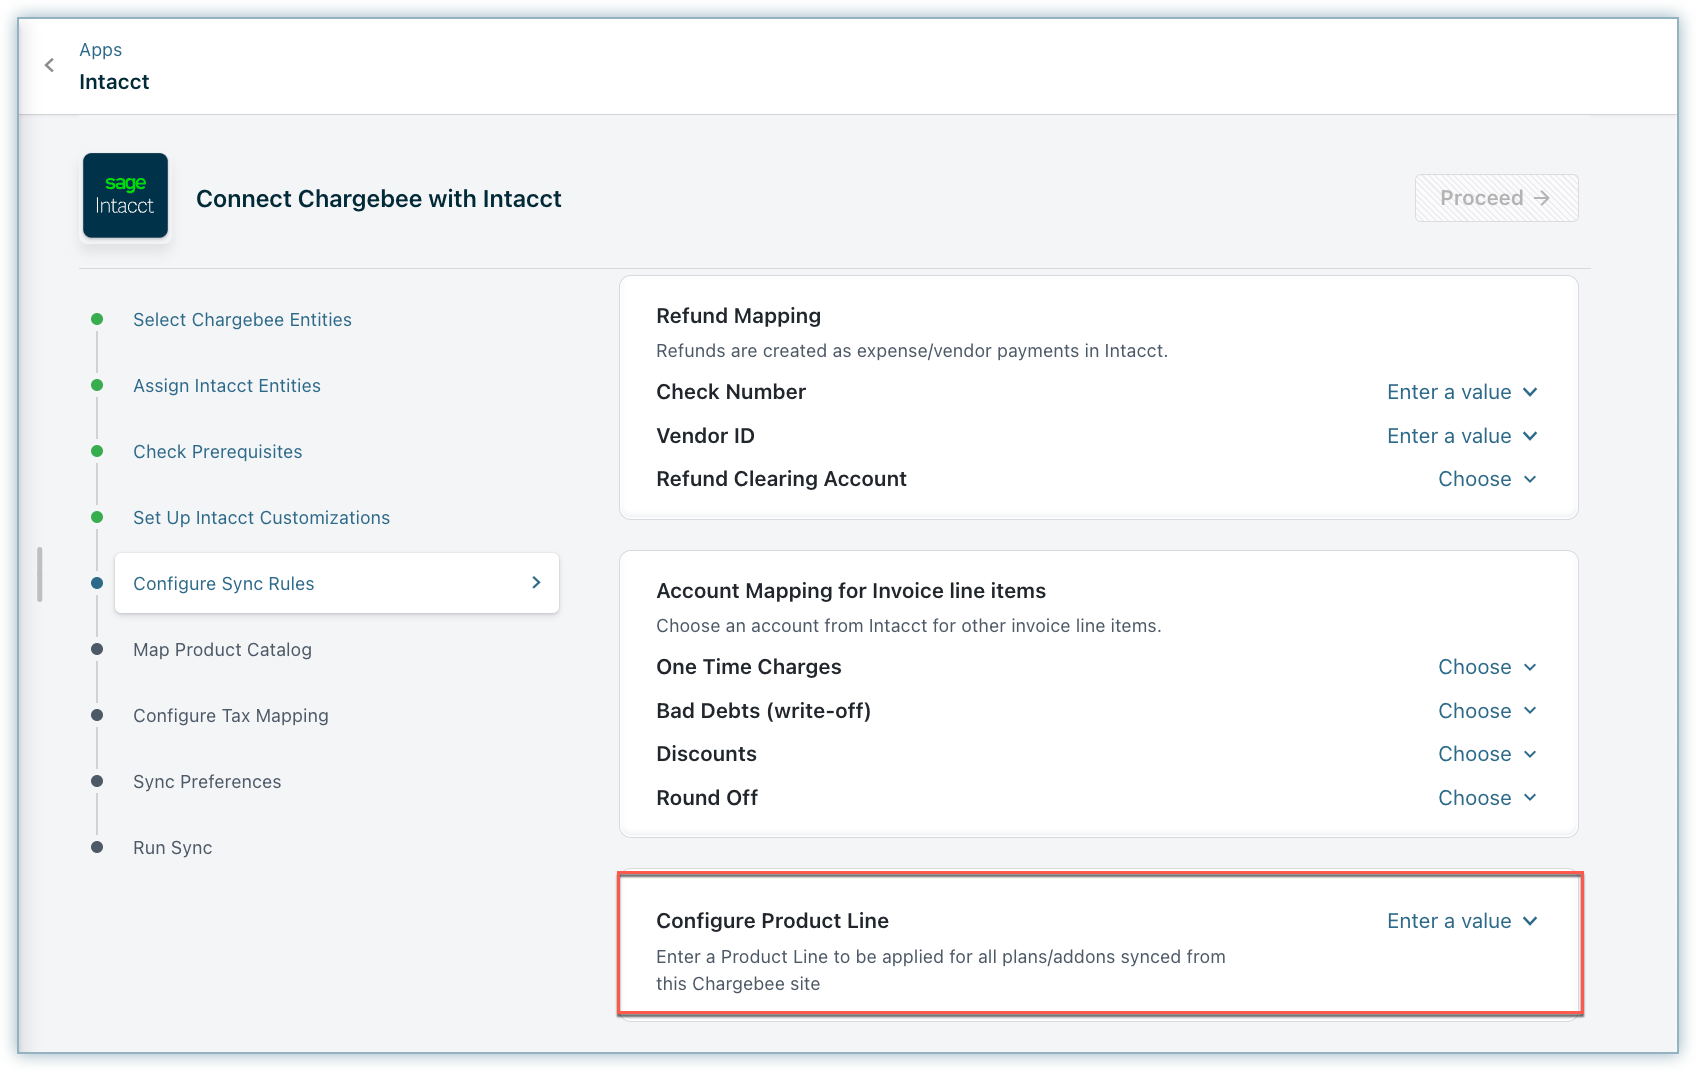
Configure Product Line
If you have multiple Chargebee sites you can configure product line per Chargebee site.
Revenue Recognition Rule Mapping
You can choose a Revenue Recognition template for the invoice line items if necessary.
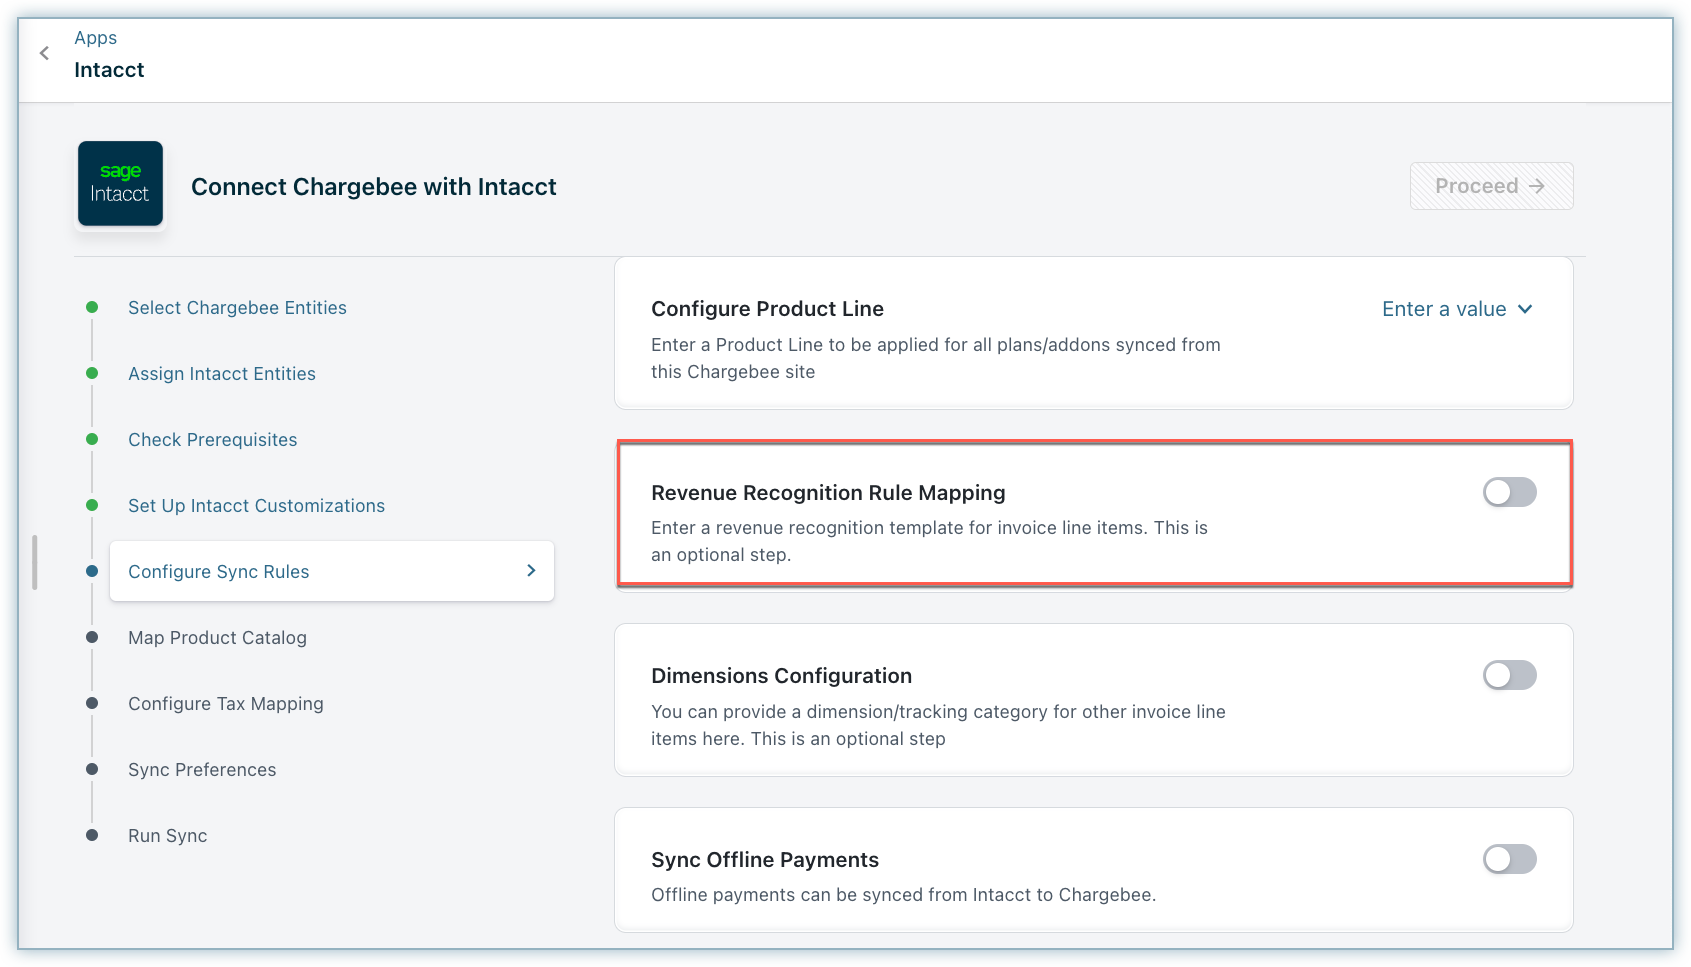
This is a screenshot of Revenue Recognition Rule mapping when enabled.

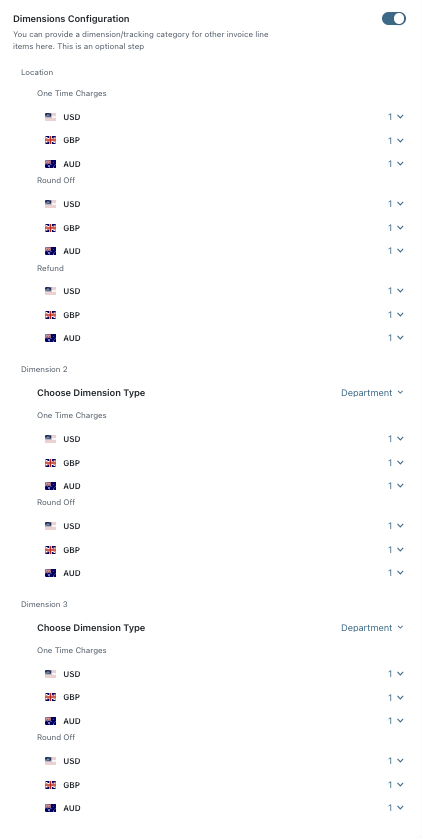
Dimensions Configuration
You can configure the dimensions for invoice line items within the Dimensions Configuration.
- Location
- One Time Charges
- Setup Fee
- Round Off
- Refund
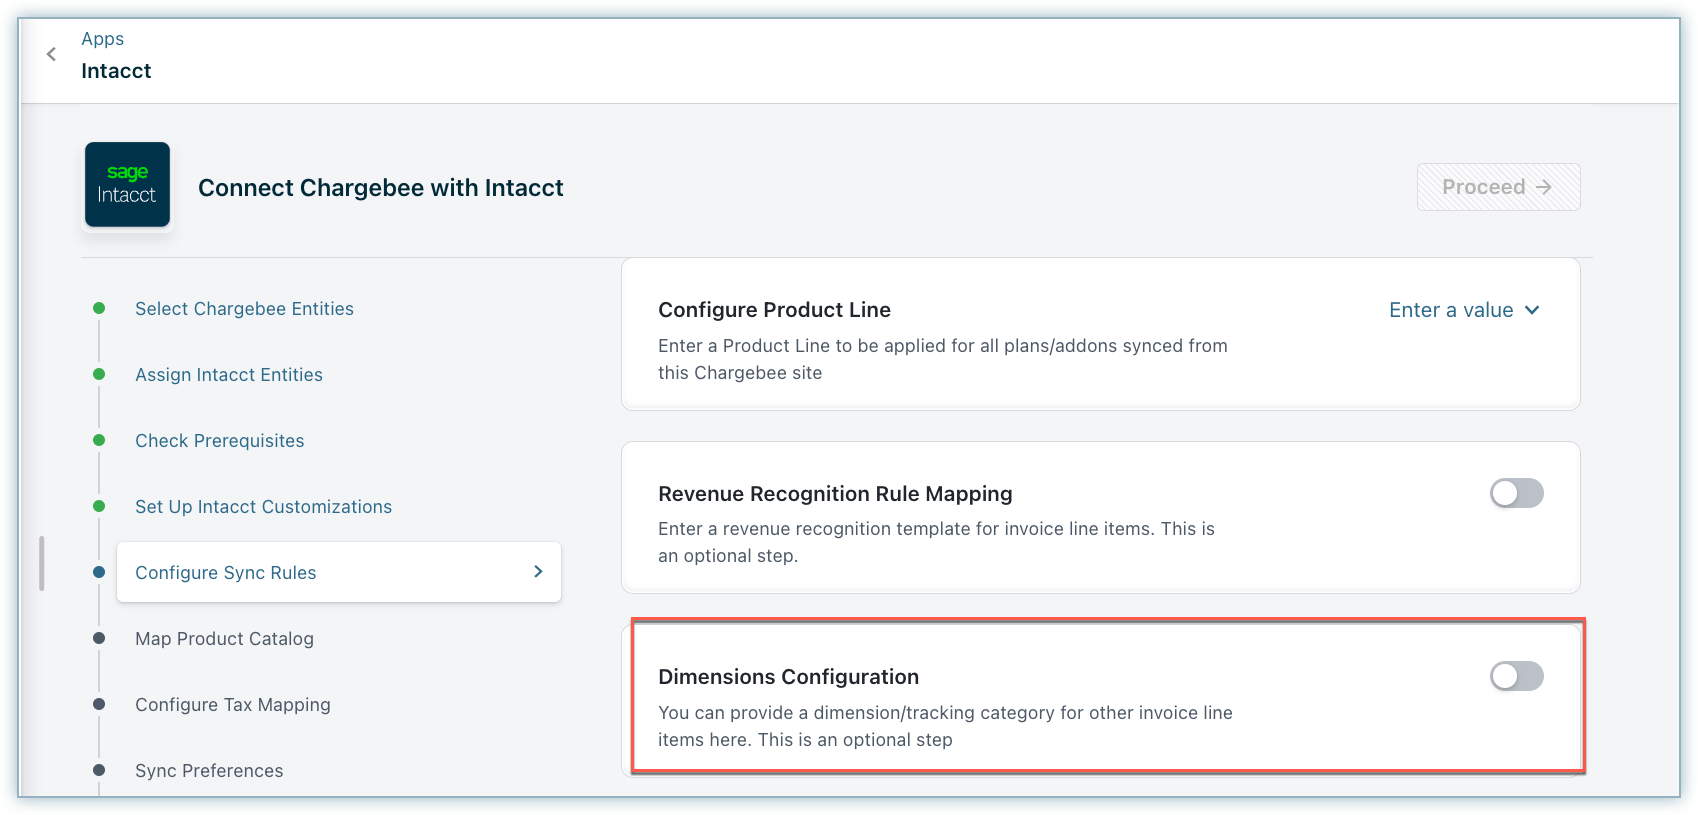
This is a screenshot of Dimensions Configuration when enabled.

Note:
Dimensions can be configured for each currency through a backend setting. If you need mapping at the currency level, please contact eap@chargebee.com.
Note:
- Location is a mandatory field in the dimension configuration if the Multi-entity support with different base currencies feature is enabled
- Dimensions Configuration at each currency level is available when a backend option is enabled, which is required for using Intacct's multi-base currency feature.
- If you need to manage multiple currencies in Chargebee and multiple base currencies in Intacct, please contact support to enable this feature.
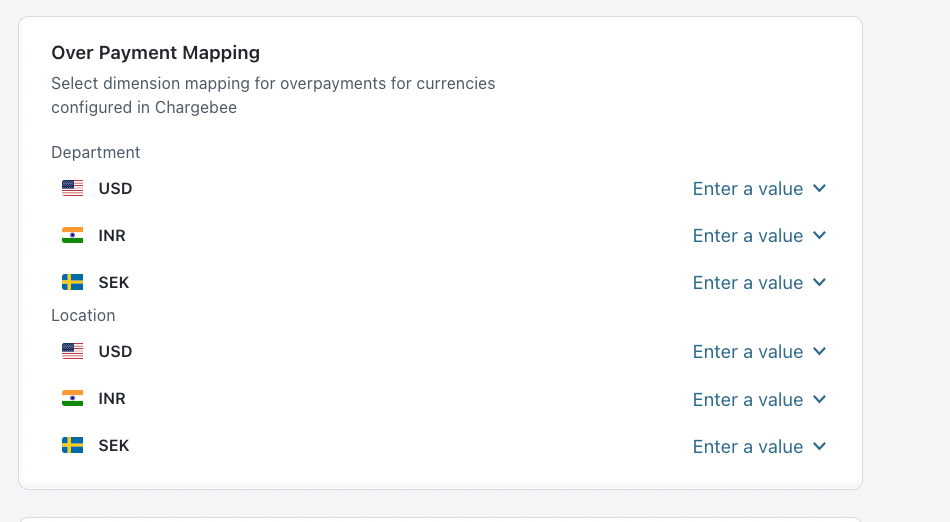
Over Payment Mapping
When excess payments are added in Chargebee, they are synced to Intacct as overpayments. When the top level is chosen, Intacct mandates the inclusion of the Overpayment Location ID and, optionally, the Overpayment Department ID.
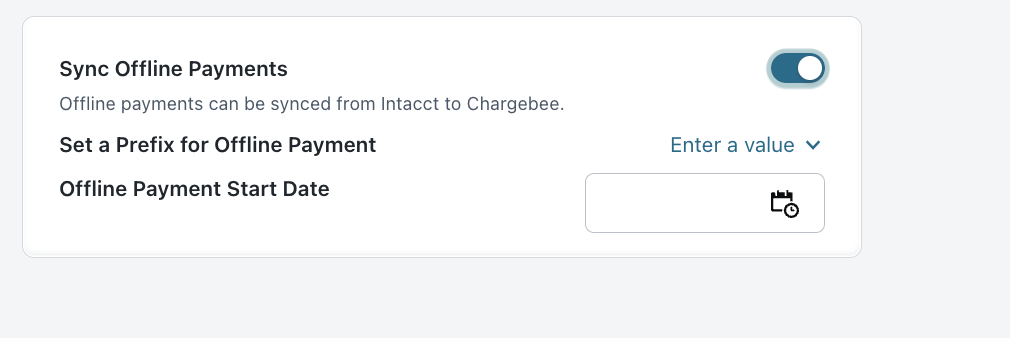
Sync Offline payments
When offline payments are reconciled against payment_due invoices in Intacct, invoices get updated as paid in Intacct. These payments can be synced back to close payment_due invoices in Chargebee. You can choose to enable this option using the toggle button.

This is a screenshot of Sync Offline Payments when enabled.
Step 7: Map Product Catalog
Within Chargebee, you can configure items at the site level, meaning that different accounting attributes such as accounting code, SKU, tracking category, and more, cannot vary for each business entity. To enable distinct accounting fields for each business entity, use product catalog mapping, which allows you to assign the necessary data at the business entity level according to your specific requirements.
Note:
The Map Product Catalog feature is deprecated for test sites, and the product catalog step will no longer be available except for sites using Multi Business Entity with Product Catalog. Deprecation for all live sites is also planned. New users should configure price points for the plan, addon, and charge under Accounting Details.
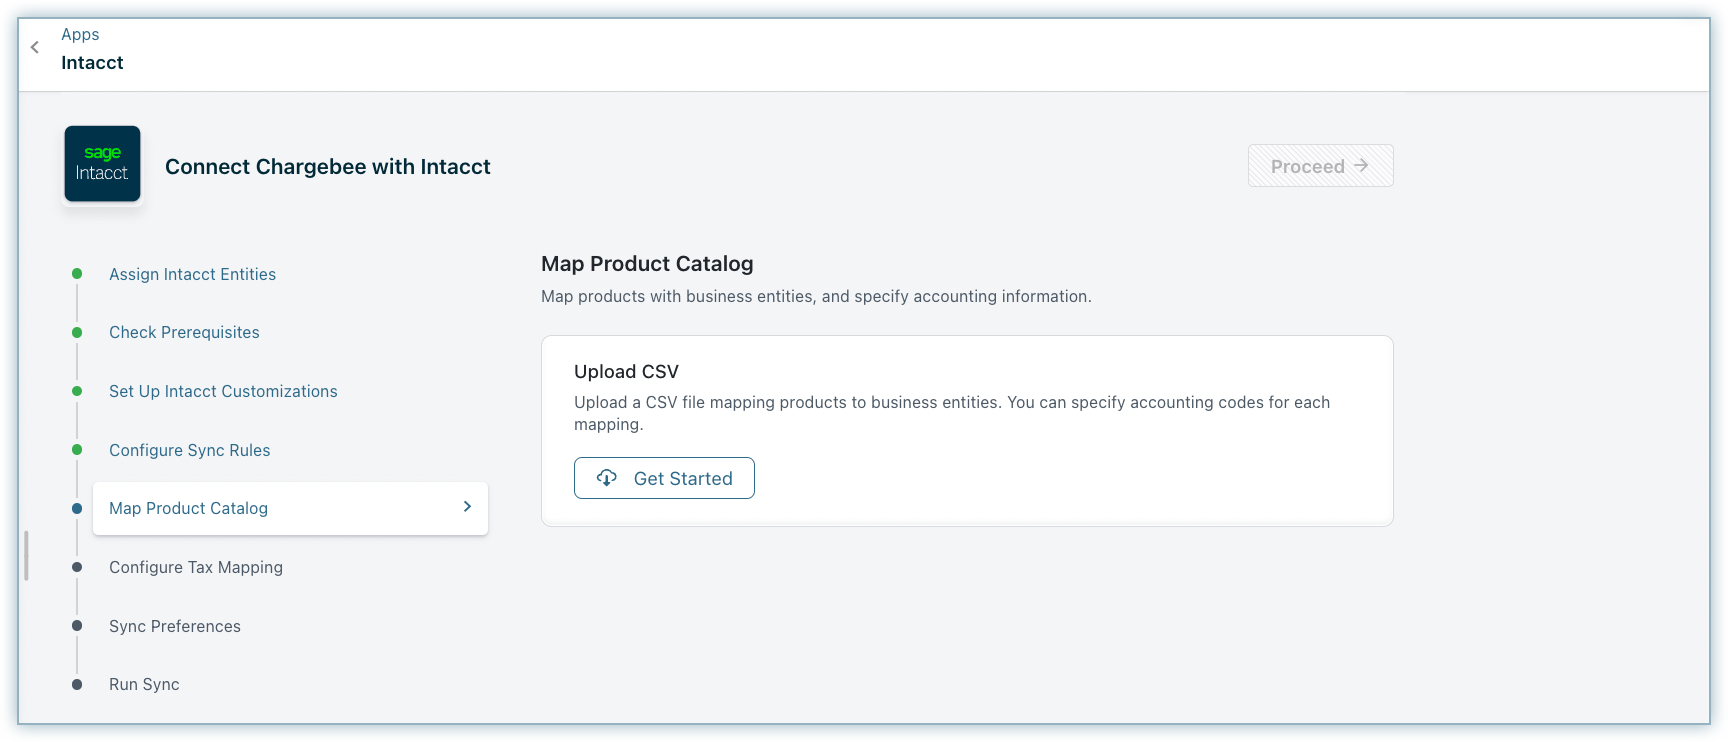
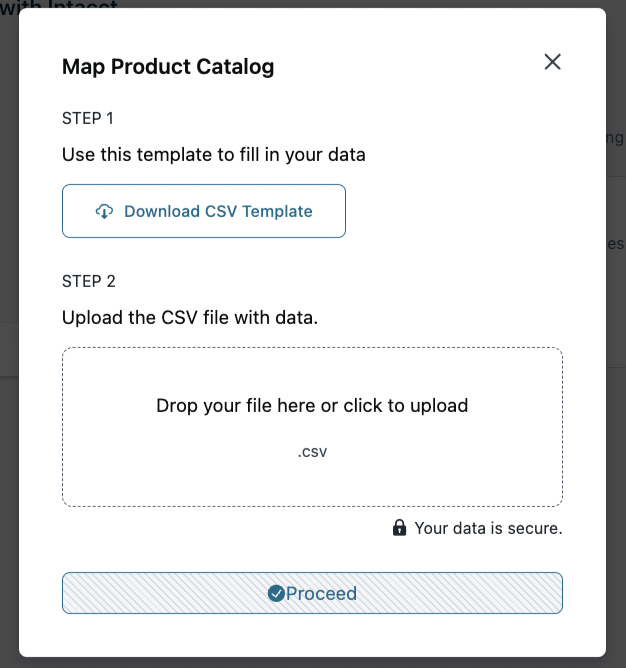
You have the option to upload a CSV file containing mapping details between products and business entities. Within these mappings, you can specify accounting codes for each entry. Follow these steps to upload the CSV file.
- Download the sample CSV template.
The downloaded CSV file contains the following fields:
| CSV Field Name | Description | Additional Info |
|---|---|---|
| PRODUCT_ID | Unique identifier for Chargebee's item prices. | |
| PRODUCT_NAME | Name of the Item price in Chargebee's Product catalog. | |
| SKU | SKU of the product | |
| ACC_CODE | Accounting code associated with the item | |
| ACCOUNTING_FIELD1 | Revenue Recognition | If you've configured Revenue Recognition templates in Intacct, enter the relevant template ID here. |
| ACCOUNTING_FIELD2 | Location | If you've classified Dimensions for your products in Intacct, and would like to sync data specific to it, enter the information here |
| ACCOUNTING_FIELD3 | Dimension3 | |
| ACCOUNTING_FIELD4 | Dimension4 | |
| BE_NAME | Name of the business entity | This will be displayed in case of site level view. In the case of the Entity Level view only the respective BE will be displayed |
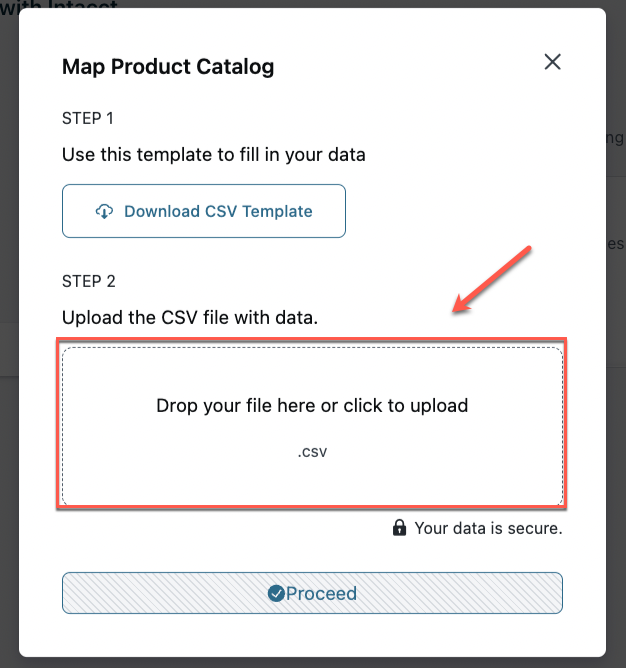
- Populate the file with the required data and upload it using the option provided here.
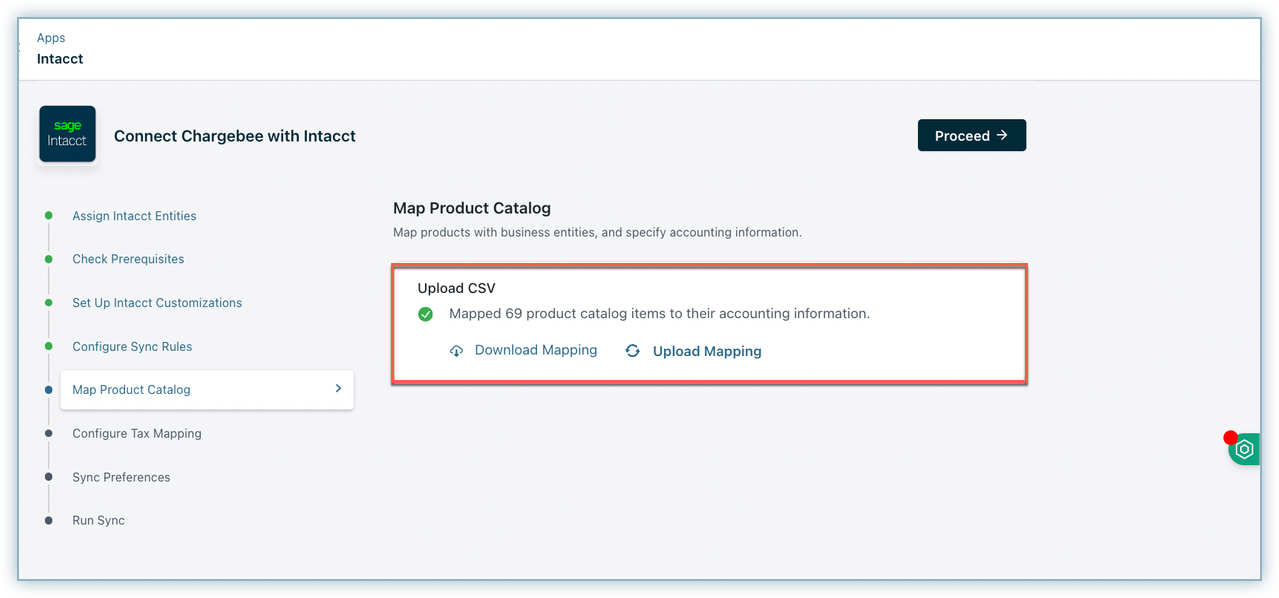
- Once you have uploaded the file click Proceed. Once the Upload is successful the following screen appears.
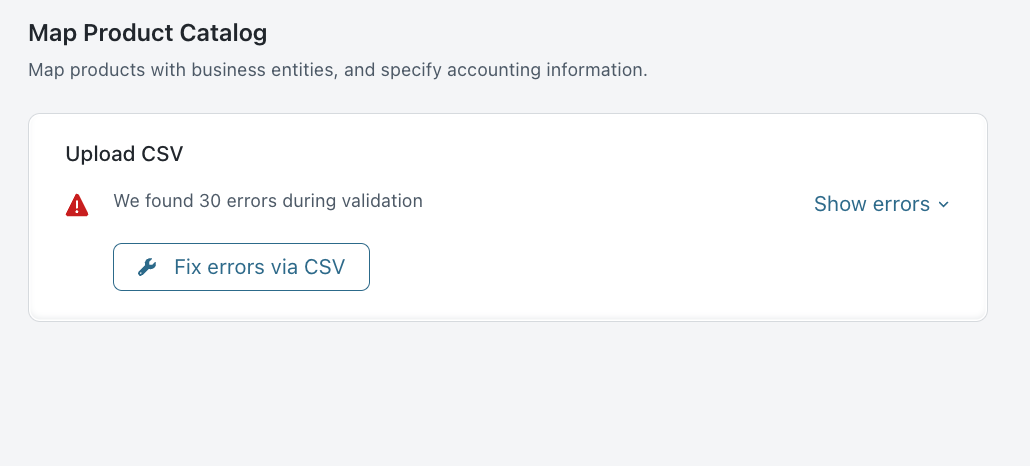
If you perform any validations, you will receive an error, as shown below. This error can be fixed by re-uploading the file with the correct mapping.
Note:
- Once Product Catalog Mapping is done, configurations on the item prices details page will no longer apply.
- We generate multiple items to accommodate various account codes and tracking category settings, which might lead to conflicts requiring the setting up of prefixes at each business entity level. For assistance, please contact eap@chargebee.com.
- If you prefer not to create multiple items and instead use a single item for all business entities, ensure that the SKU remains consistent and upload the CSV file accordingly.
- To streamline the process and save time, we pre-fill the CSV file with information from the UI filled on the item prices page's accounting details tab. Even if there are no changes, the CSV file needs to be re-uploaded initially.
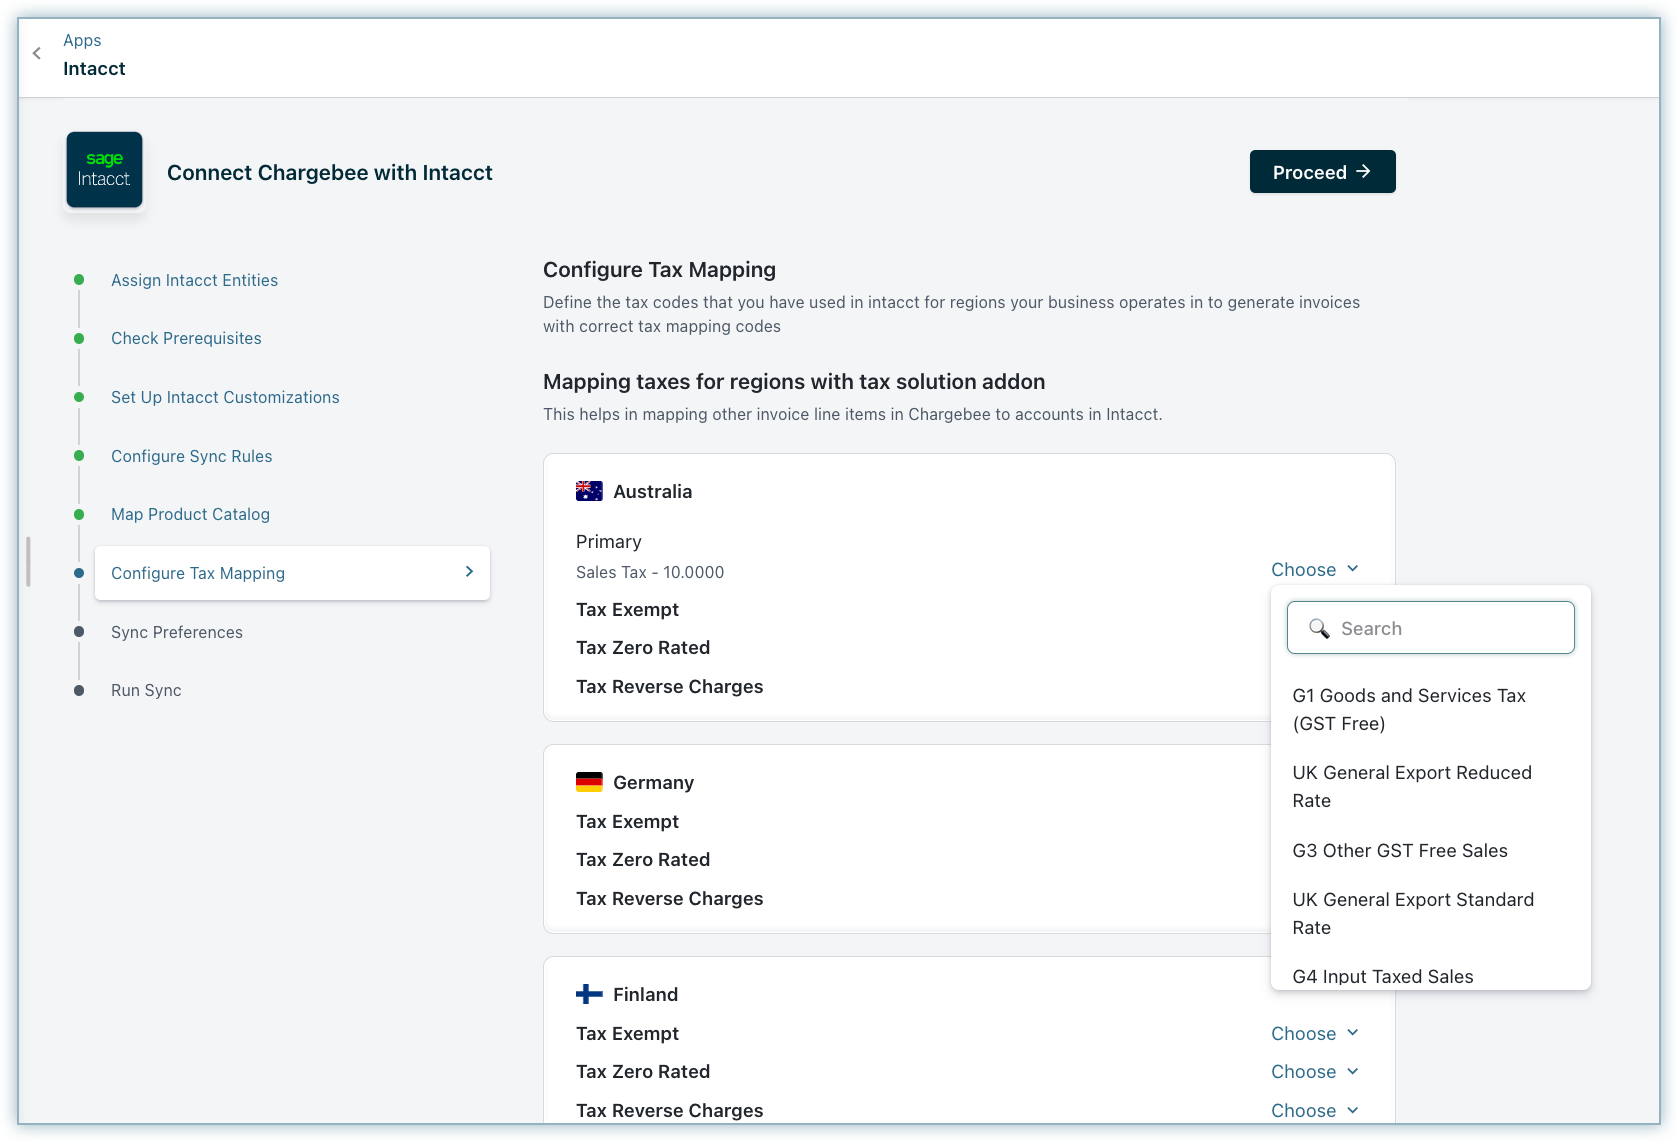
Step 8: Configure Tax Mapping
You can add taxes as sub-totals in Intacct for accounting or ERP modules. For example, if you are remitting sales tax in New York (which is based in the US), you can create a sub-total item for each tax jurisdiction within that region.
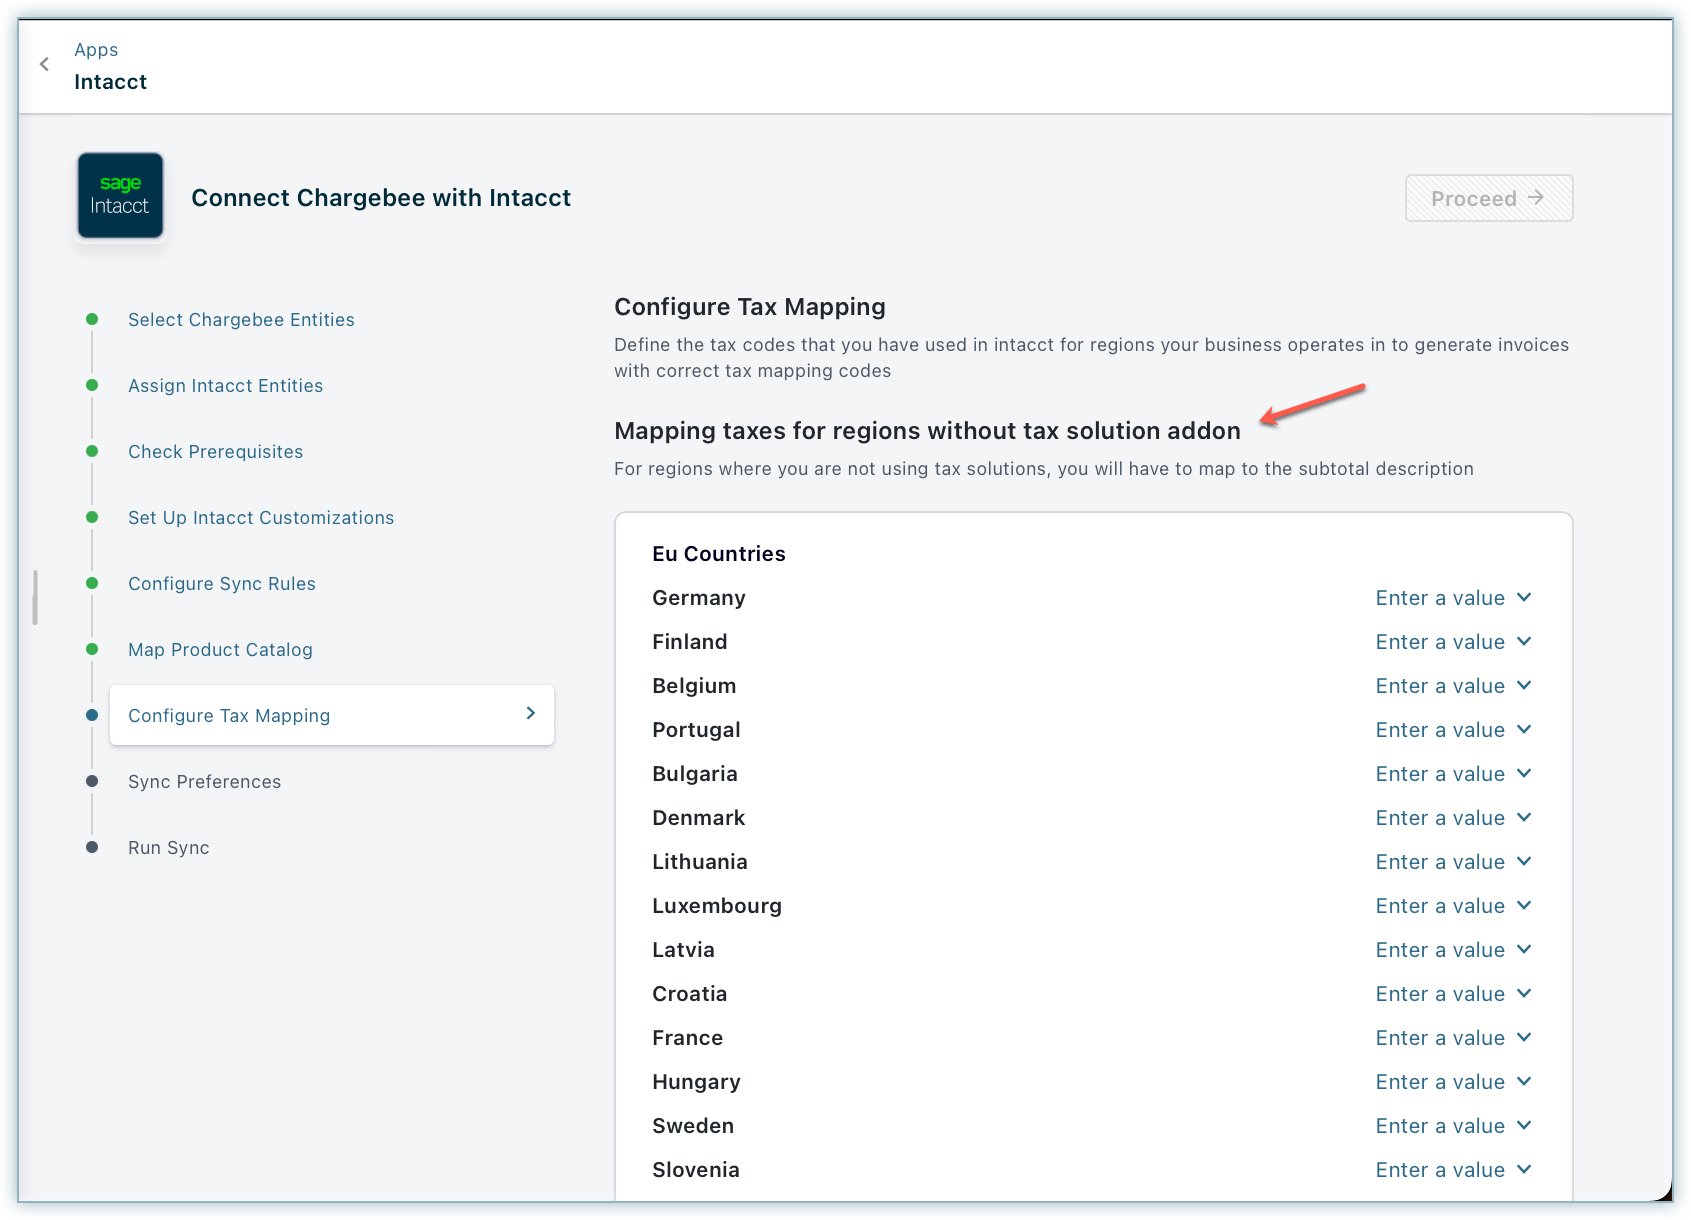
- For the sales invoice, the subtotal description is mapped for countries that have tax solutions disabled.
- Tax details from Chargebee will be mapped as AR invoices with taxes for countries that have tax solutions enabled.
You can map the subtotal description for regions without tax solutions as shown here.
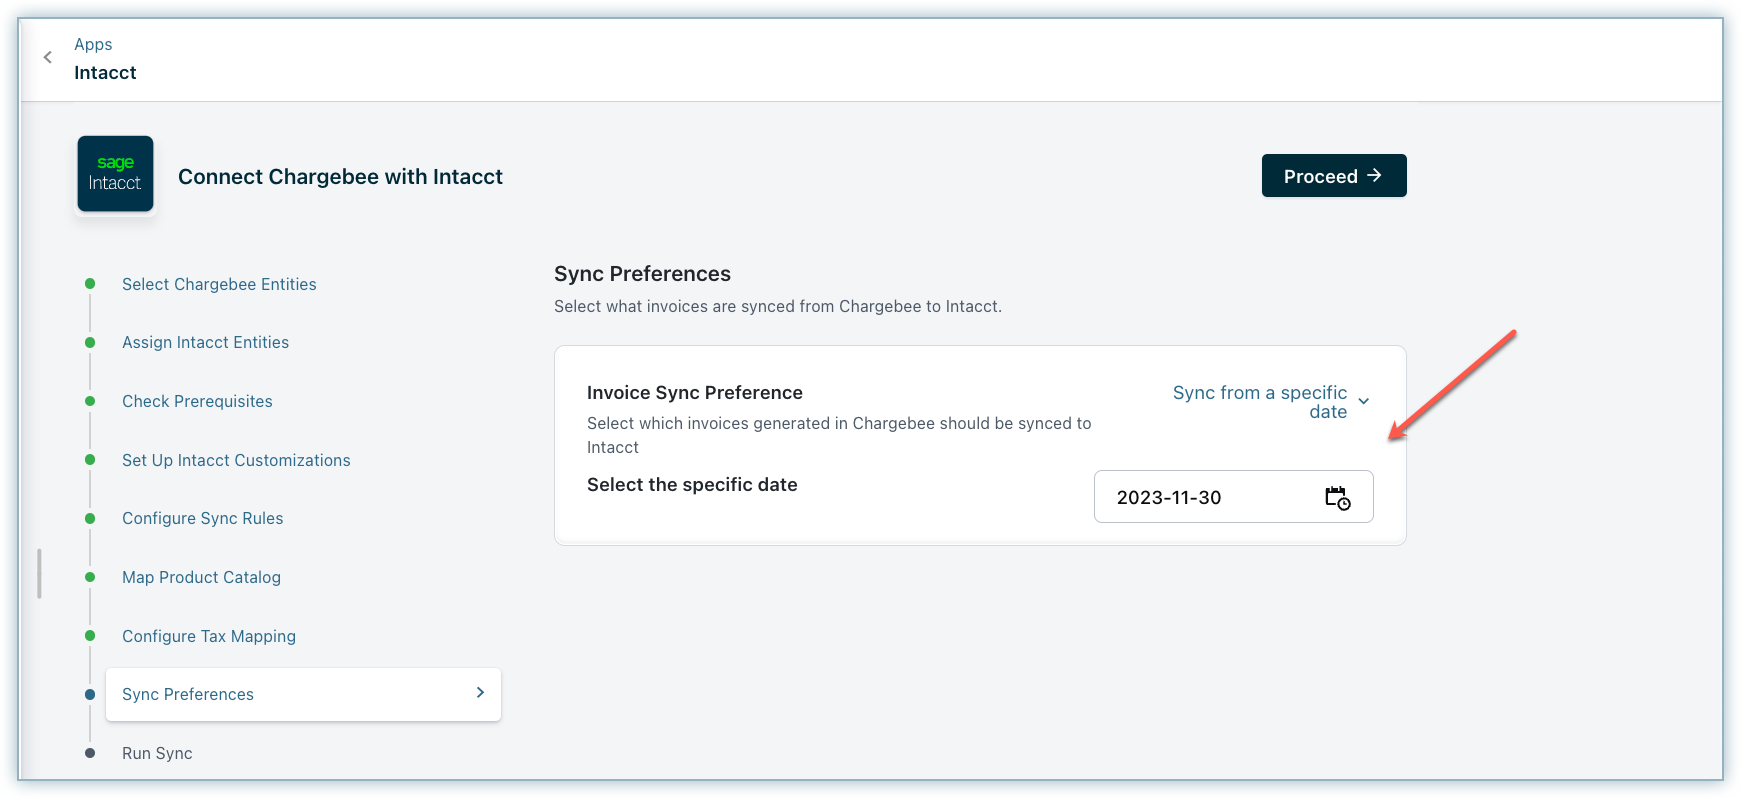
Step 9: Sync Preferences
You can select a specific date from the drop-down menu to sync invoices from Chargebee to Intacct.
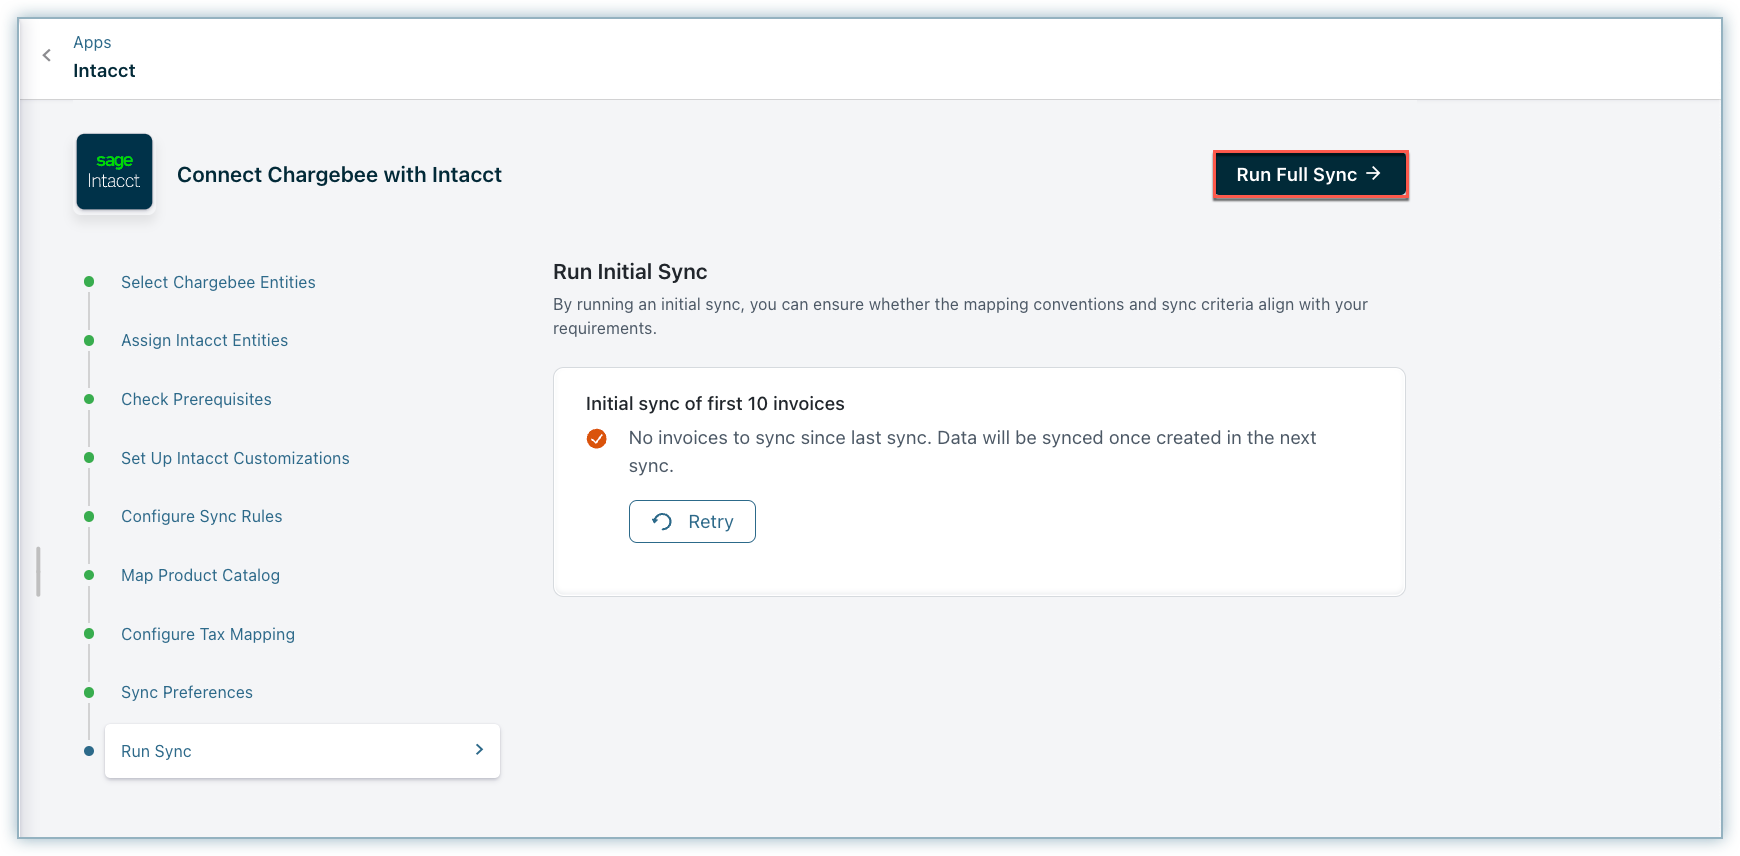
Step 10 : Run Sync
- Once the configuration is complete, to begin the sync click Run Initial Sync.
- Chargebee will sync the first 10 invoices, to ensure that mapping, conventions, and sync criteria align with your requirements.
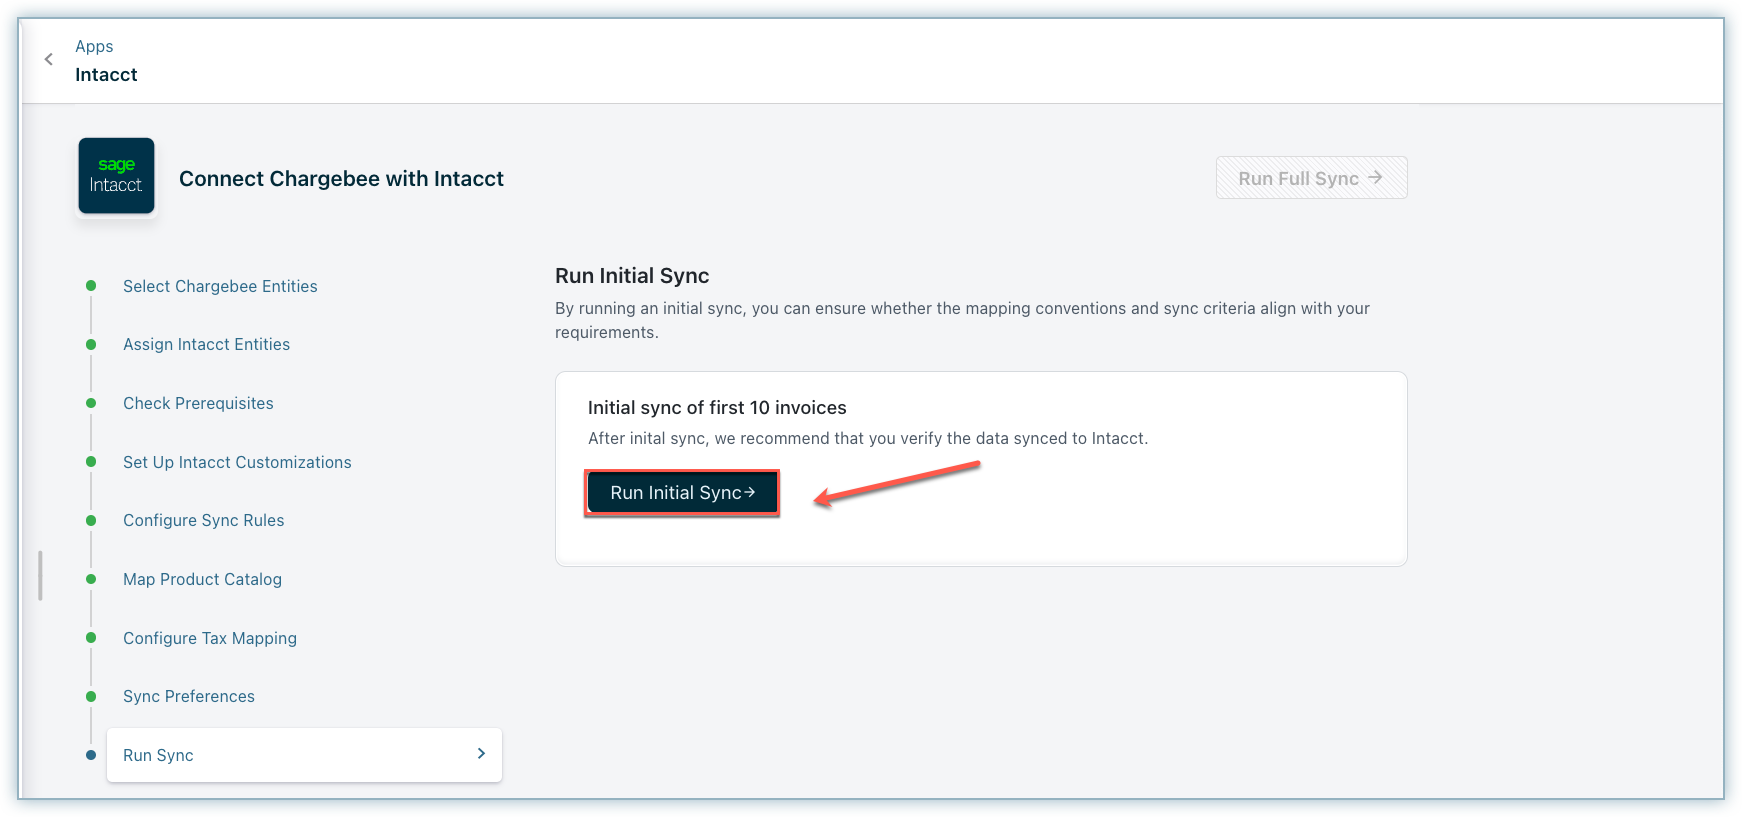
We recommend that you review these invoices in Intacct. If the sync works as expected, you can click the Run Full sync.
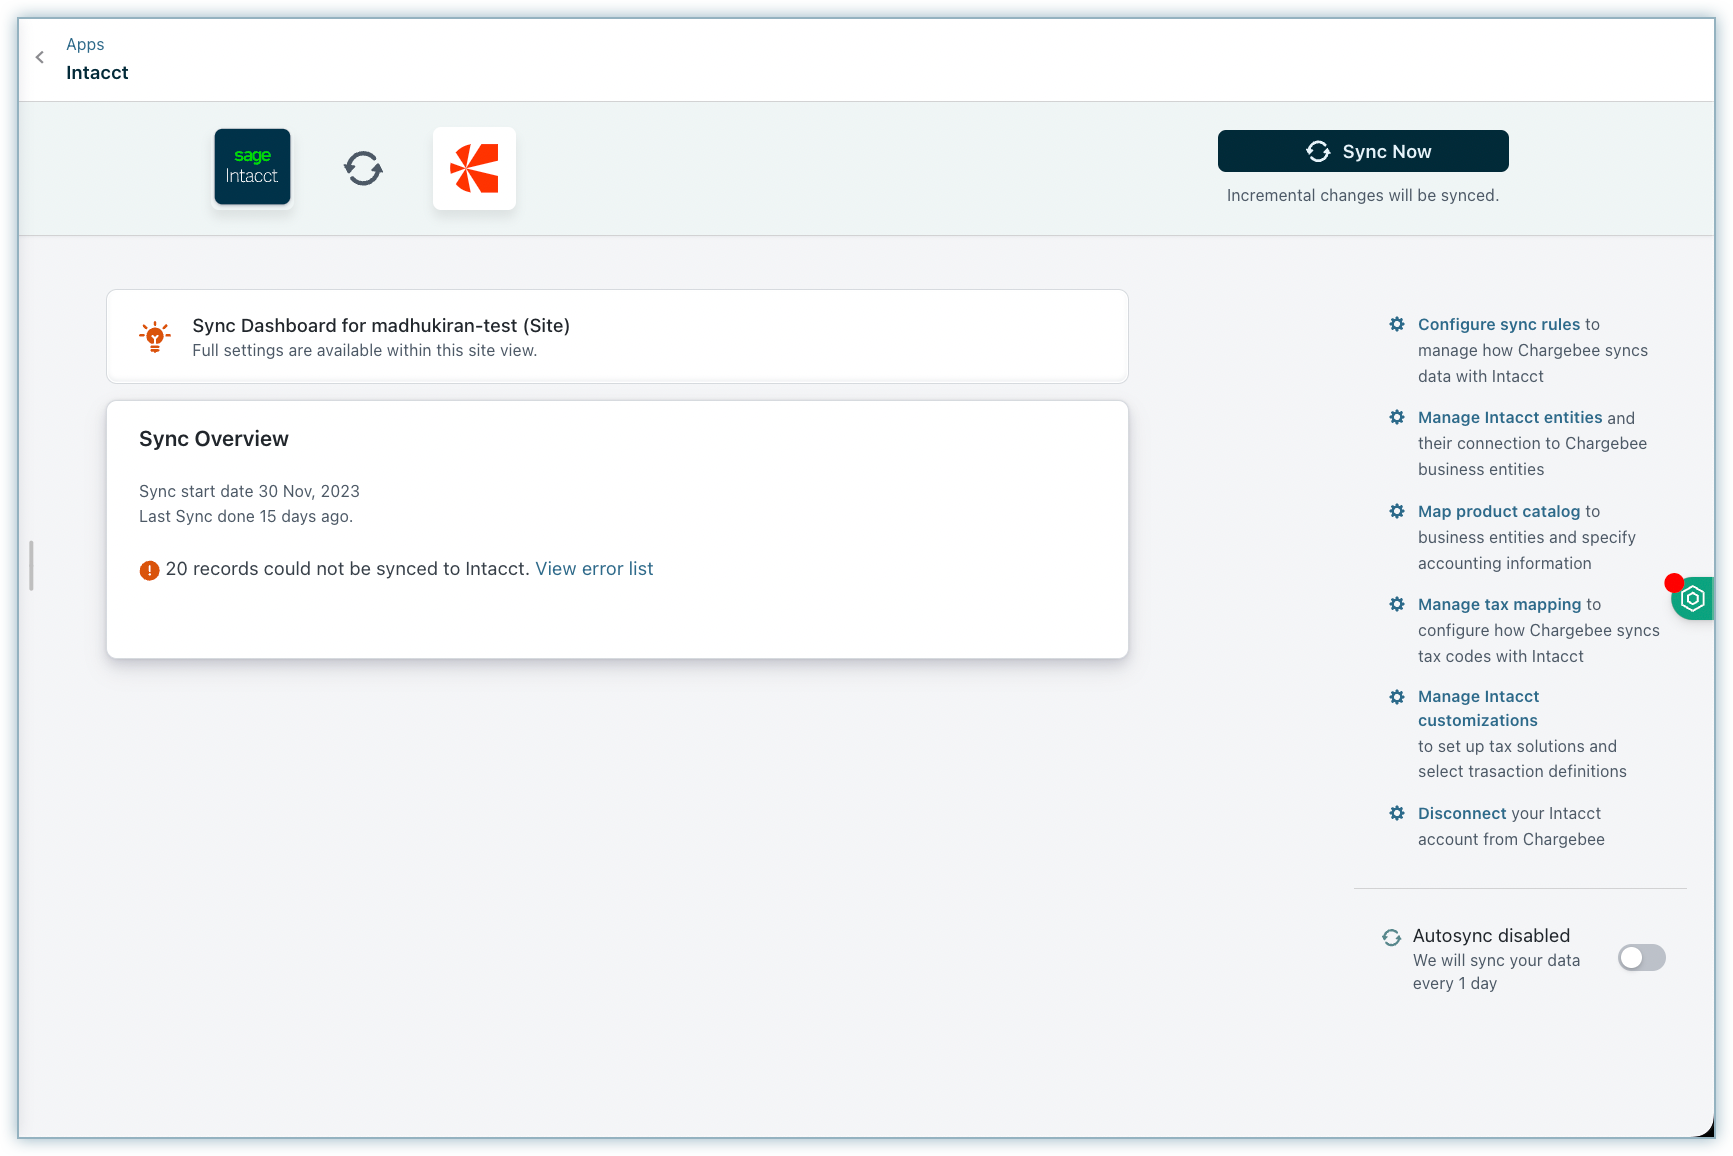
The Intacct setup is now complete. If you are connected at the site level the following screen will be displayed after the setup is complete.
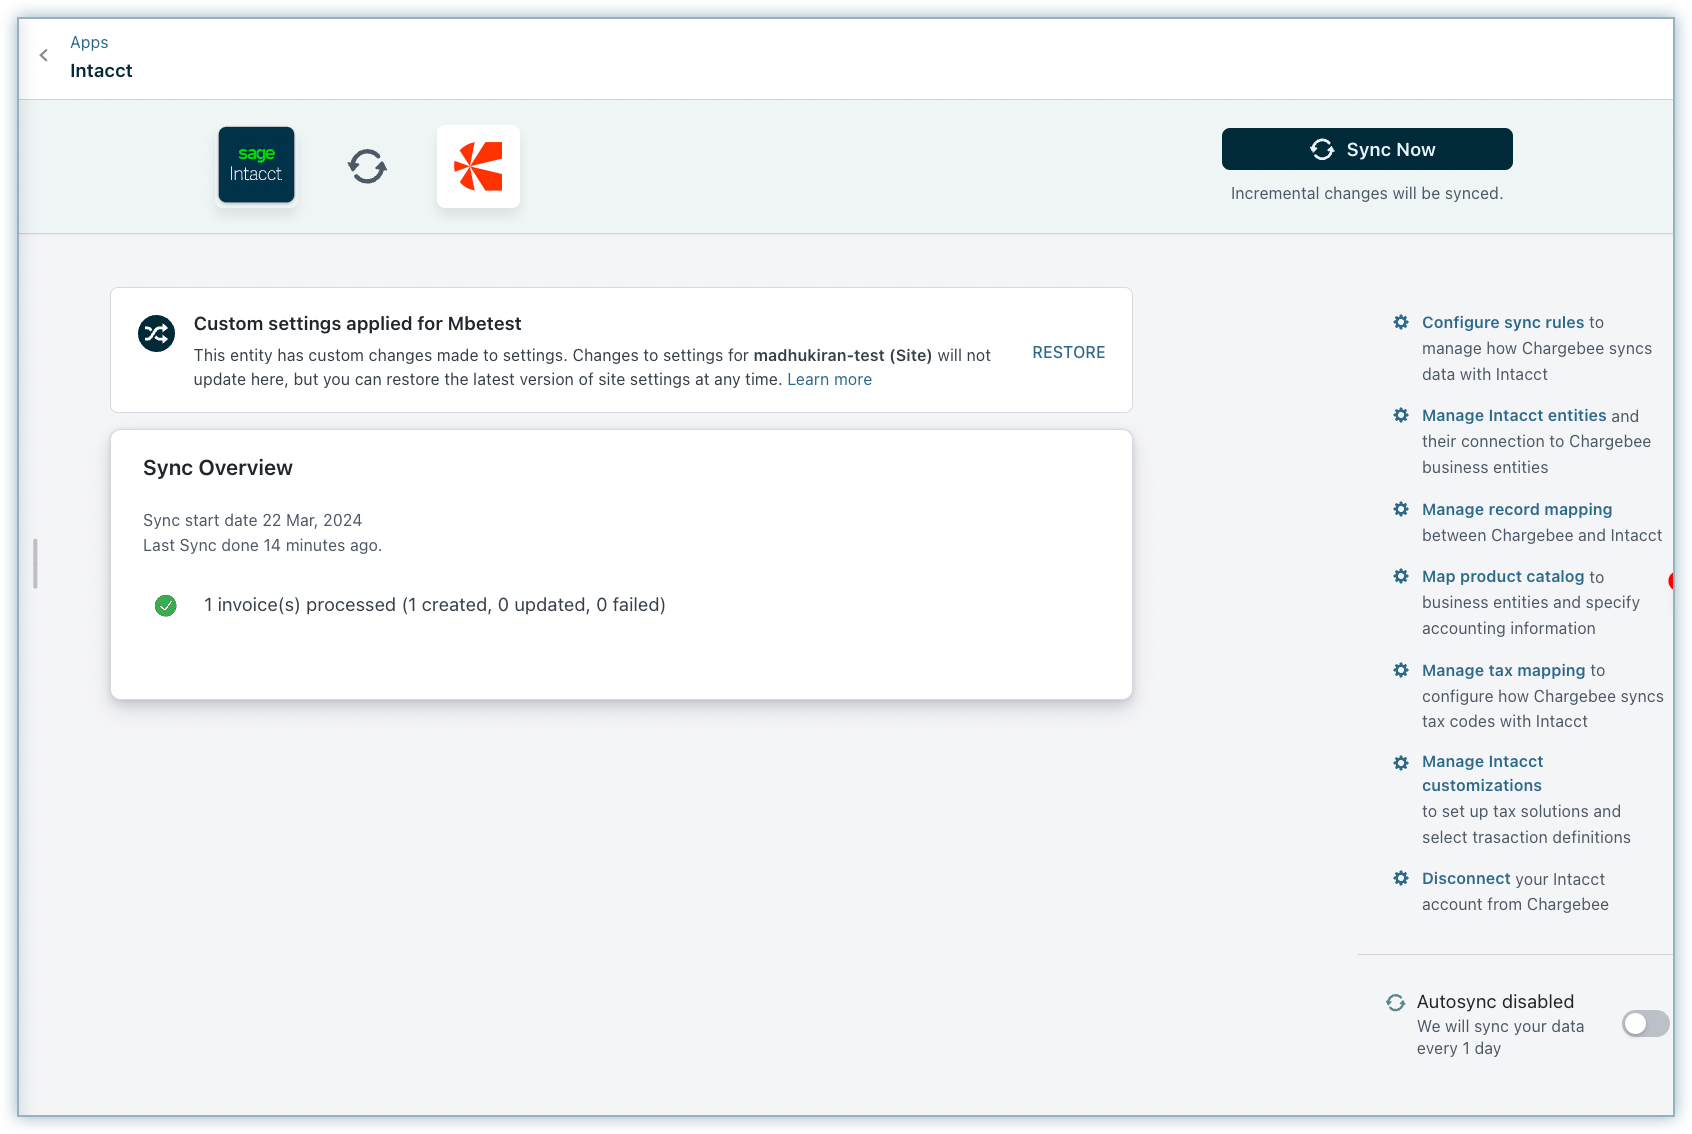
If connected are connected at the entity level the following screen will be displayed after the setup is completed.
Enable/Disable Auto Sync
After setting up the integration, you can configure the daily schedule to sync all the information to Intacct automatically. Invoices and related information will be synced once every 24 hours. You can choose to disable auto-sync if required.
Note:
You must enable auto-sync at the site level. Only then will entity-level auto sync be honored.
Sync Now
For on-demand sync, you can sync data from Chargebee to Intacct immediately.
Configure Sync Rules
You can edit the configurations or GL Account mapping provided during the setup process.
Manage Intacct Entities
For any new business entities created in Chargebee, you need to add mapping for the business entity at the site level if this business entity needs to share configurations. Connect it independently if you prefer to have different site settings for that business entity
Manage Record Mapping
You can add/update the mappings for the Chargebee records such as Invoices, Customers, Credit notes, and Transactions.
Manage Tax Mapping
You can modify the tax sub-totals provided during the setup process. If you have added tax regions in your Chargebee settings, you can provide new tax sub-totals in this section.
Manage Preferences
You can enable the Tax solutions for the countries that do not have it enabled previously using Manage Preferences.
Map Product Catalog
You can add or manage product catalog.
Disconnect
On disconnecting at the site level it'll disconnect all the entities, Disconnecting at the entity level will only disconnect at a specific entity.
Articles & FAQs
Was this article helpful?