Migration Steps for Multi-Business Entity Salesforce
Follow these instructions to successfully migrate to Multi-Business Entity in Salesforce.
-
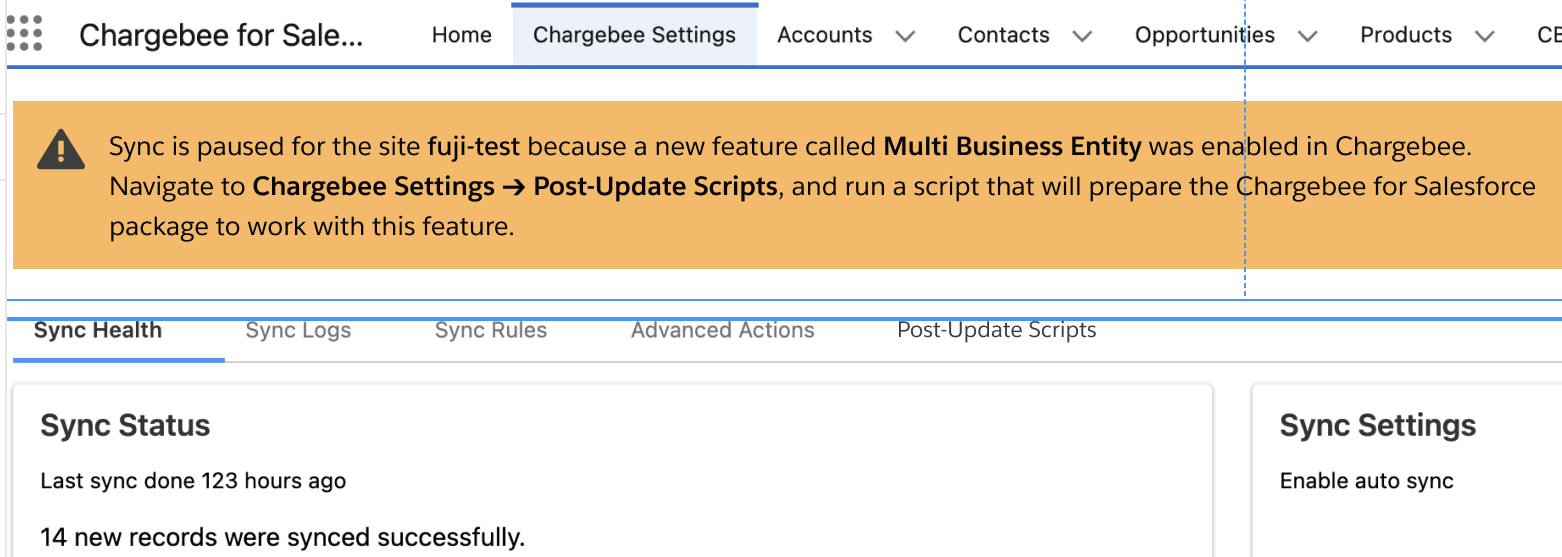
Login to the Salesforce organization and navigate to Chargebee Settings.
-
Next, the sync runs after MBE is enabled in Chargebee a. This ensures the latest Chargebee settings are synced to Salesforce. Salesforce will identify that MBE has been enabled in Chargebee but not in Salesforce. Salesforce identifies that we need a migration for Multi Business Entity.
b.This option is selected by default. Customer records are synced to Pipedrive even if they do not have subscriptions attached. Salesforce starts showing a message in all the screens stating "Sync is paused for the site fuji-test(site domain name) because a new feature called Multi Business Entity was enabled in Chargebee. Navigate to Chargebee Settings ➔ Post-Update Scripts, and run a script that will prepare the Chargebee for Salesforce package to work with this feature.
-
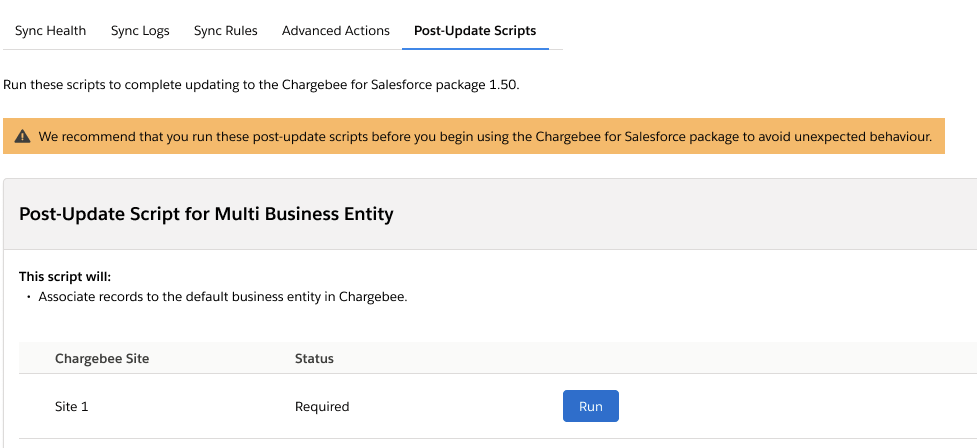
Go to the Chargebee Settings screen > Post-Update Scripts tab
-
Click the Run button associated with the site where Multi-Entity is enabled. This will initiate the MBE migration from Chargebee to Salesforce.
-
This process of migration will update all business entity lookups in various existing Salesforce objects such as CB_Subscription_c, Accounts, CB_CreditNotes_c, CB_Invoices_c, CB_Quotes_c, Sync_Error_Log__c.
-
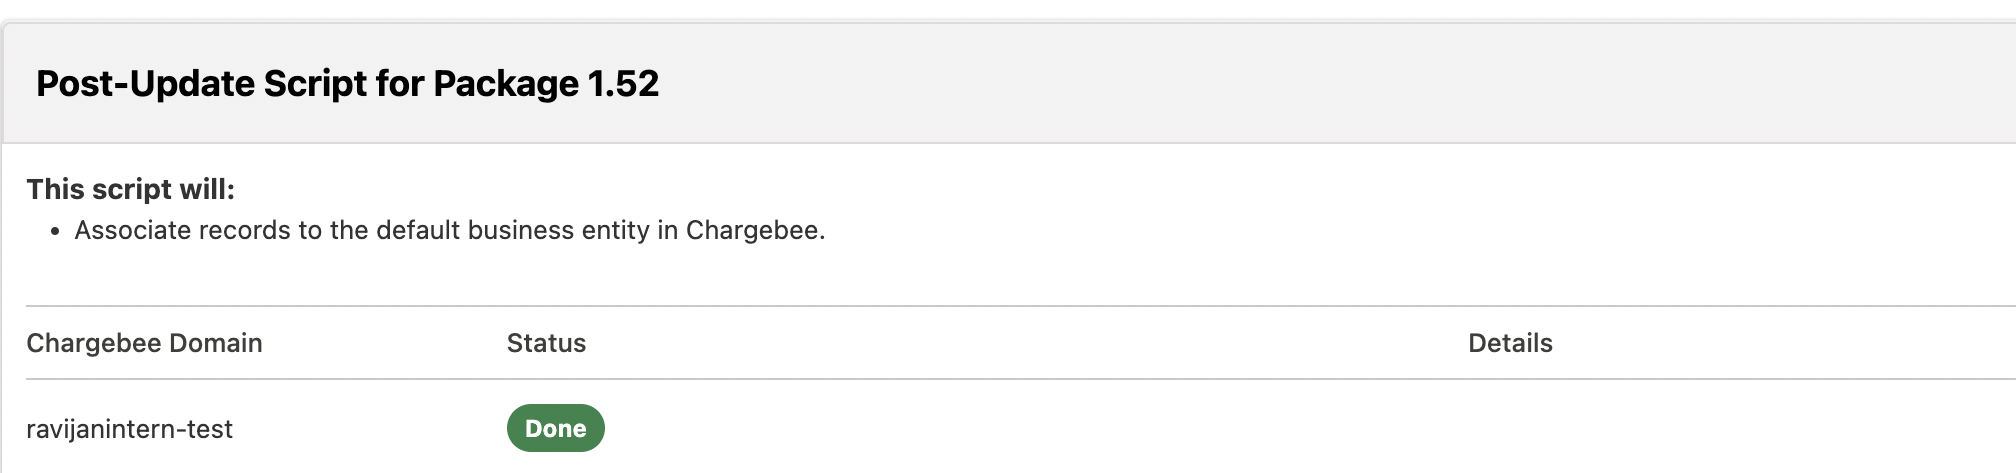
In Chargebee Settings > Post-Update Scripts tab, wait for the status to update to Done. This indicates the migration of the first/default business entity is complete.
-
Once the migration is completed in Salesforce, the next business entity can be created in Chargebee.
-
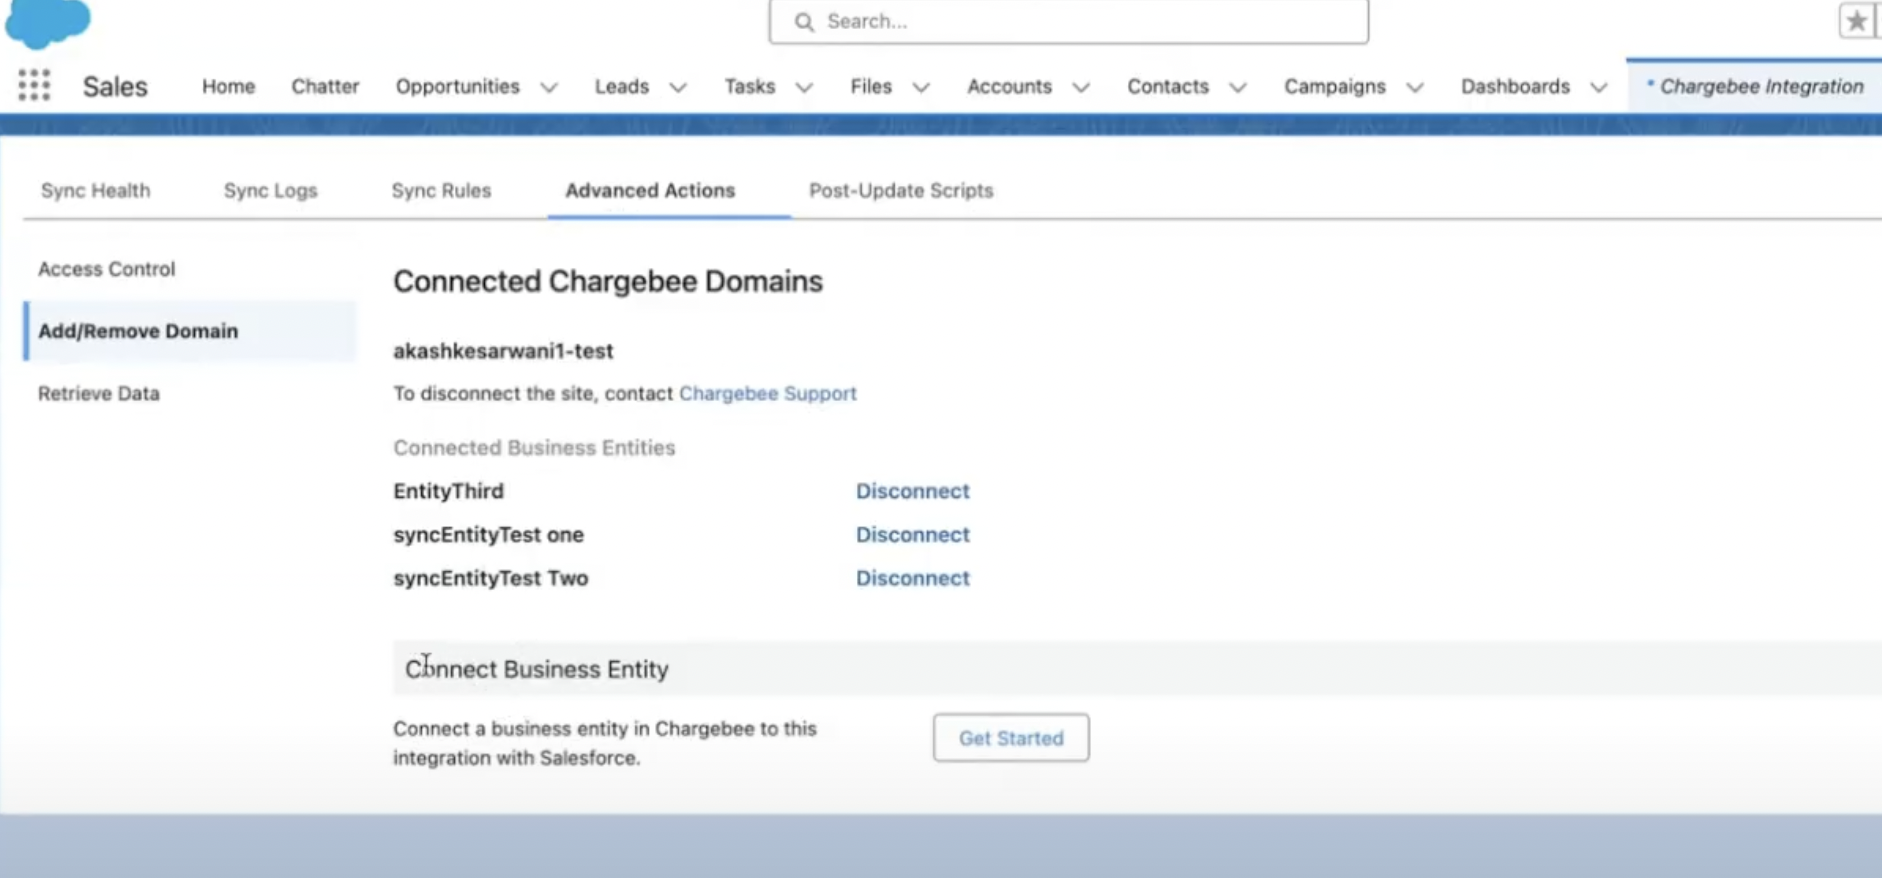
Navigate to Chargebee Settings > Advanced Actions tab to migrate the new business entity created in Step #7 to Salesforce.
-
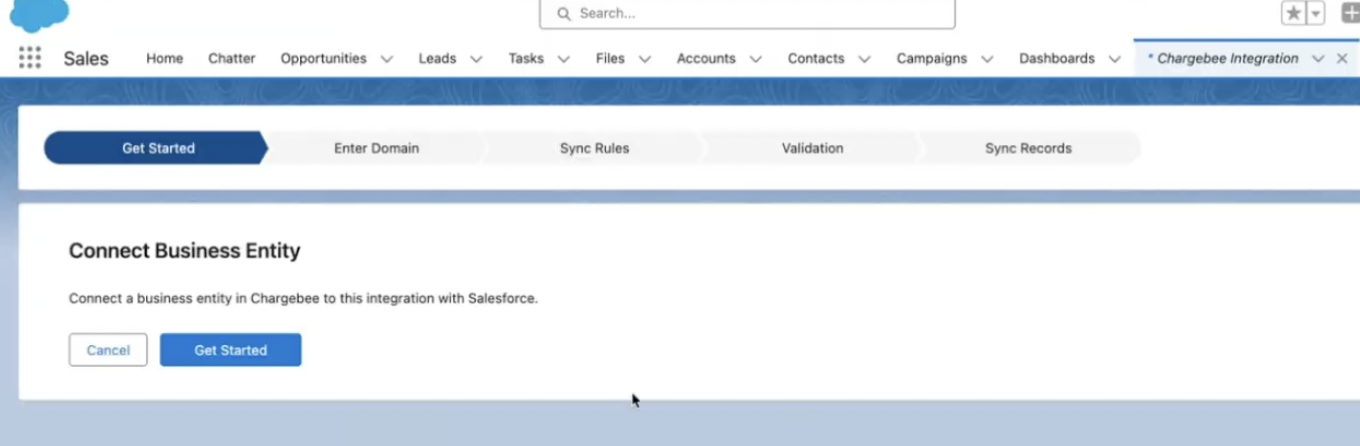
Click Add/Remove Domain option on the left navigation. It will show Connect Business Entity > Connect a business entity in Chargebee to Salesforce.
-
Next, click the Get Started button.
-
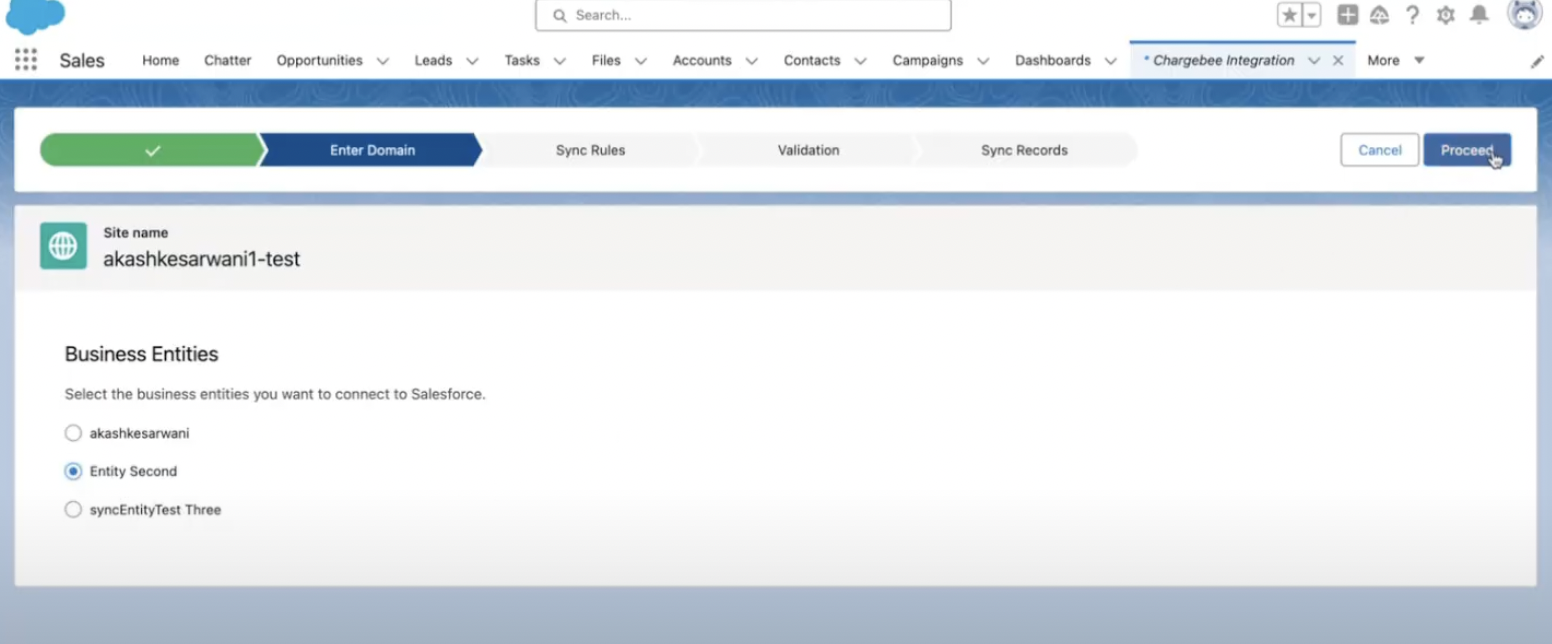
It will list all Business Entities created in Chargebee and not integrated into the Salesforce organization. Select the Business Entity in Chargebee that needs to be synced to Salesforce and click Proceed.
-
Next few steps will be similar to setting up a new Salesforce Integration with Chargebee.
-
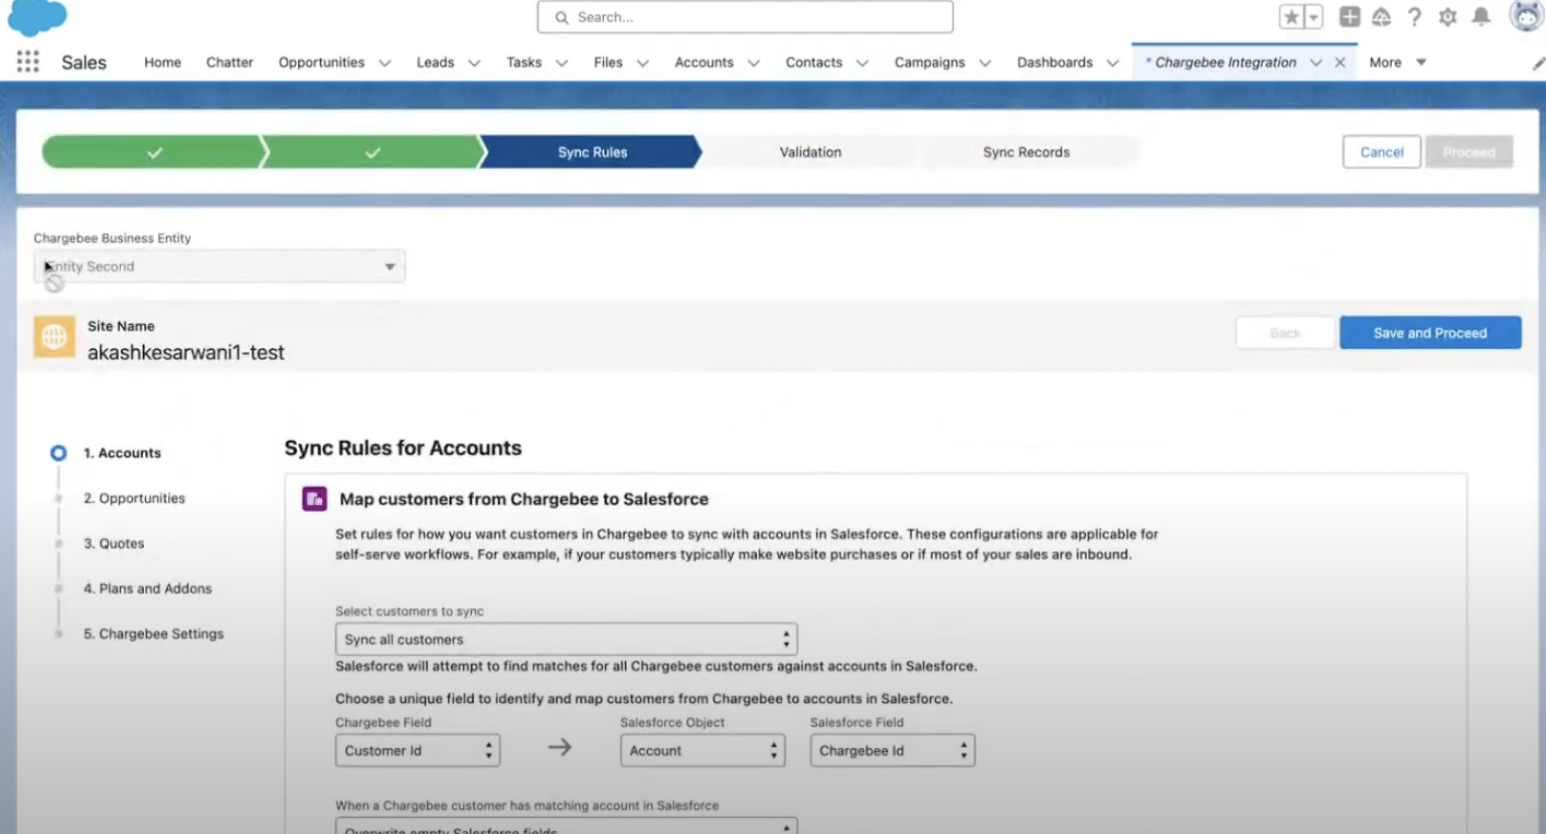
View the Sync Rules of Chargebee Settings / Integration. Select the appropriate settings and click Save and Proceed for all 5 steps.
-
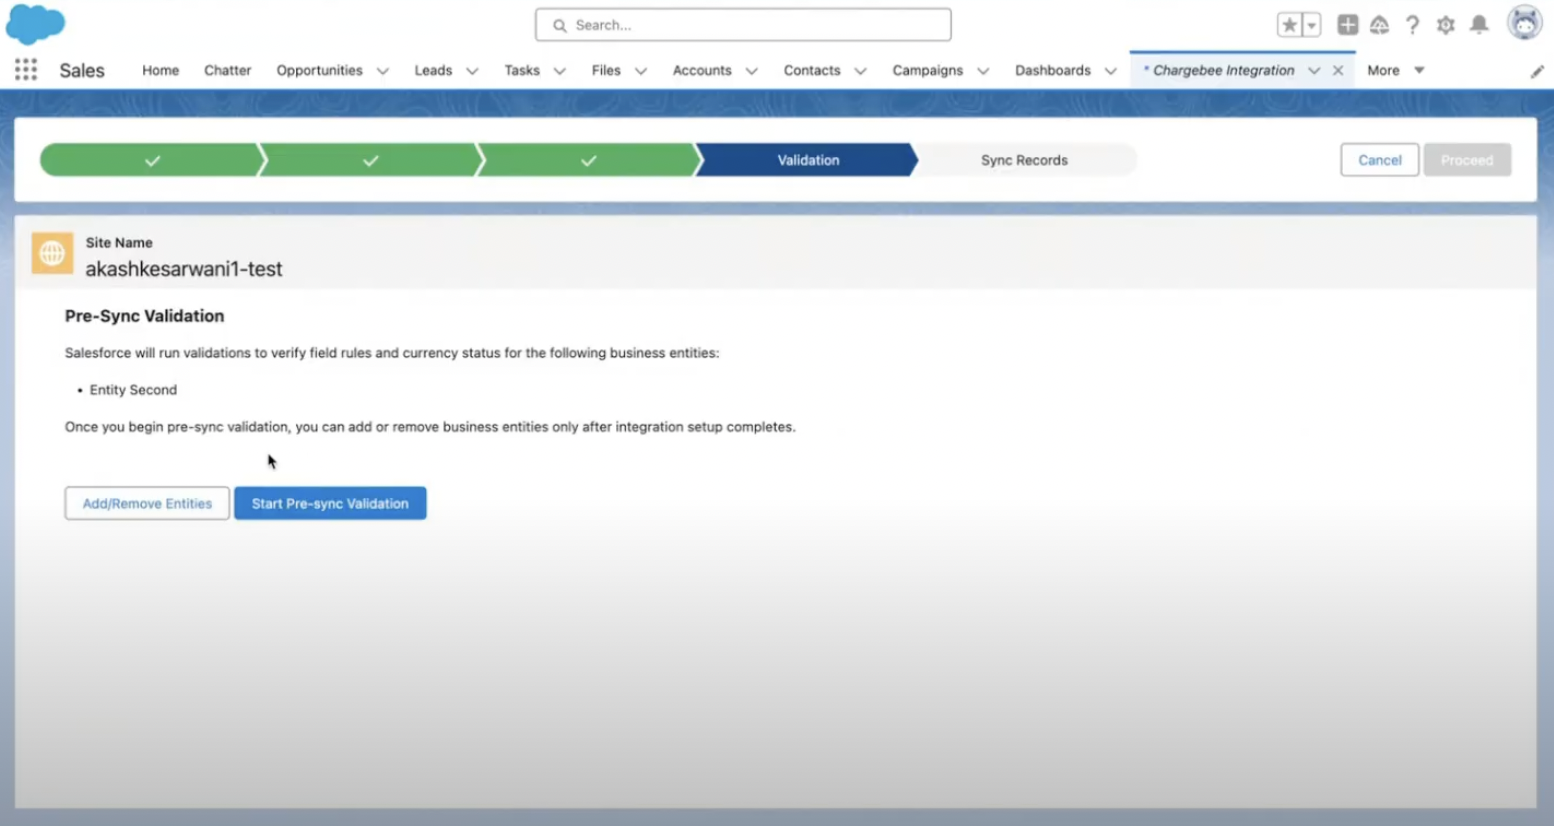
Next, in the Validation step, click Start Pre-sync Validation.
-
Once the Pre-Sync Validation is complete, click Proceed.

-
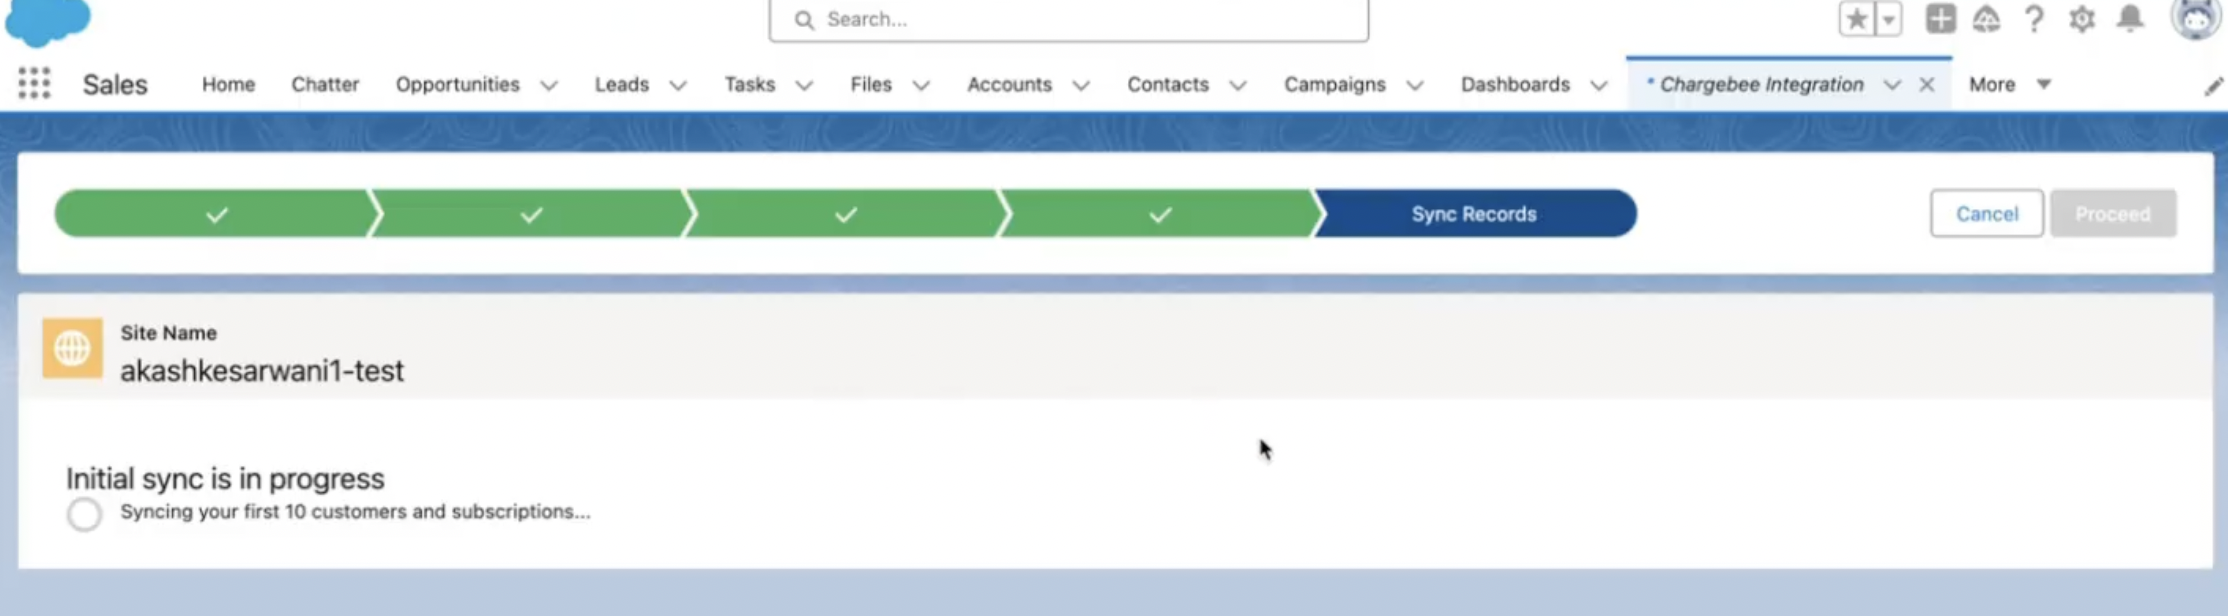
Next, it will initiate the Initial Sync and display a message Initial Sync is in progress.
-
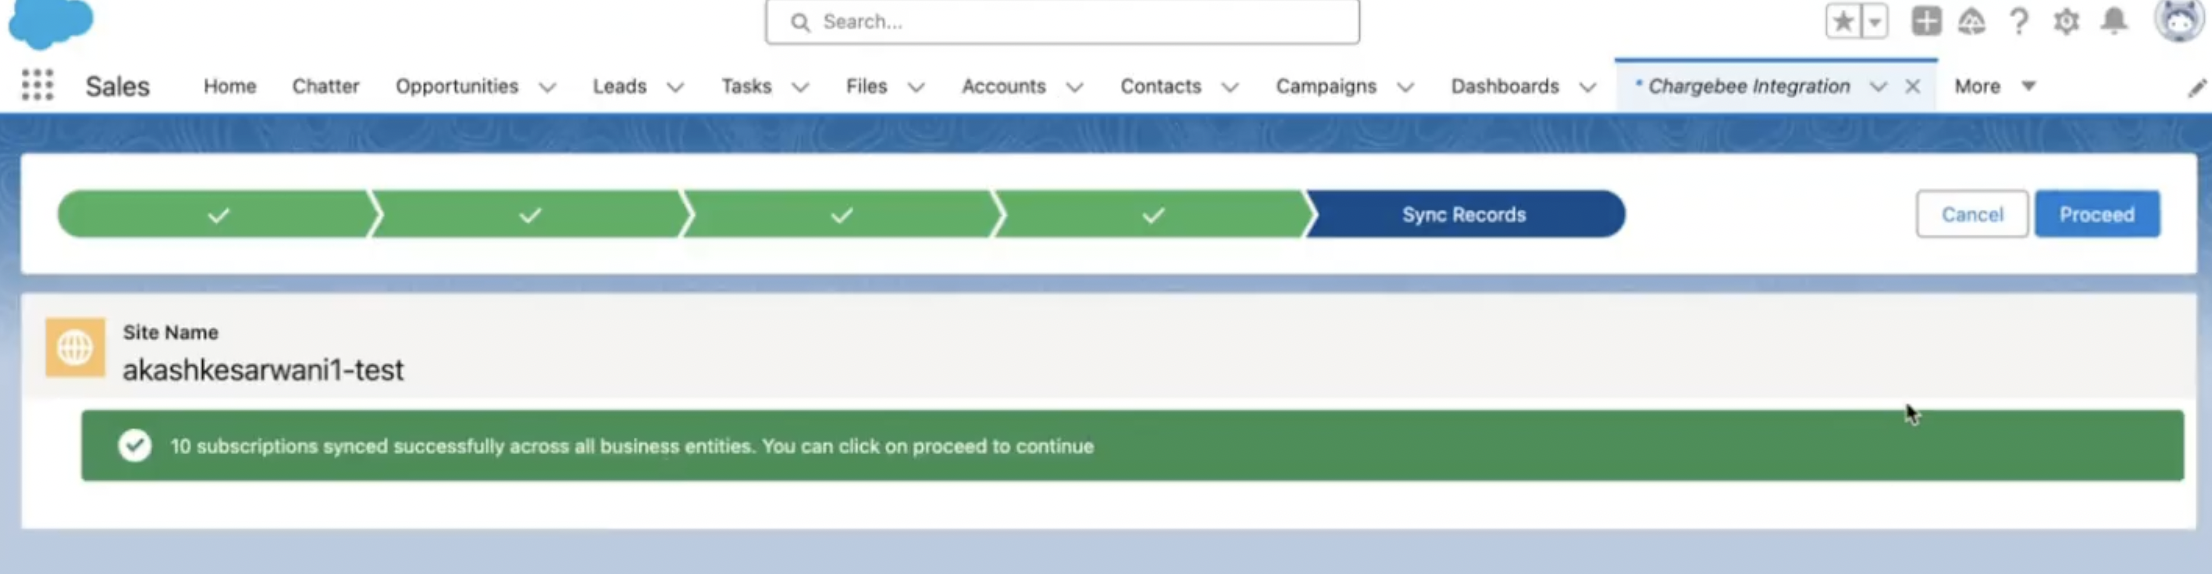
On completion, it shows a success message. Click Proceed.
-
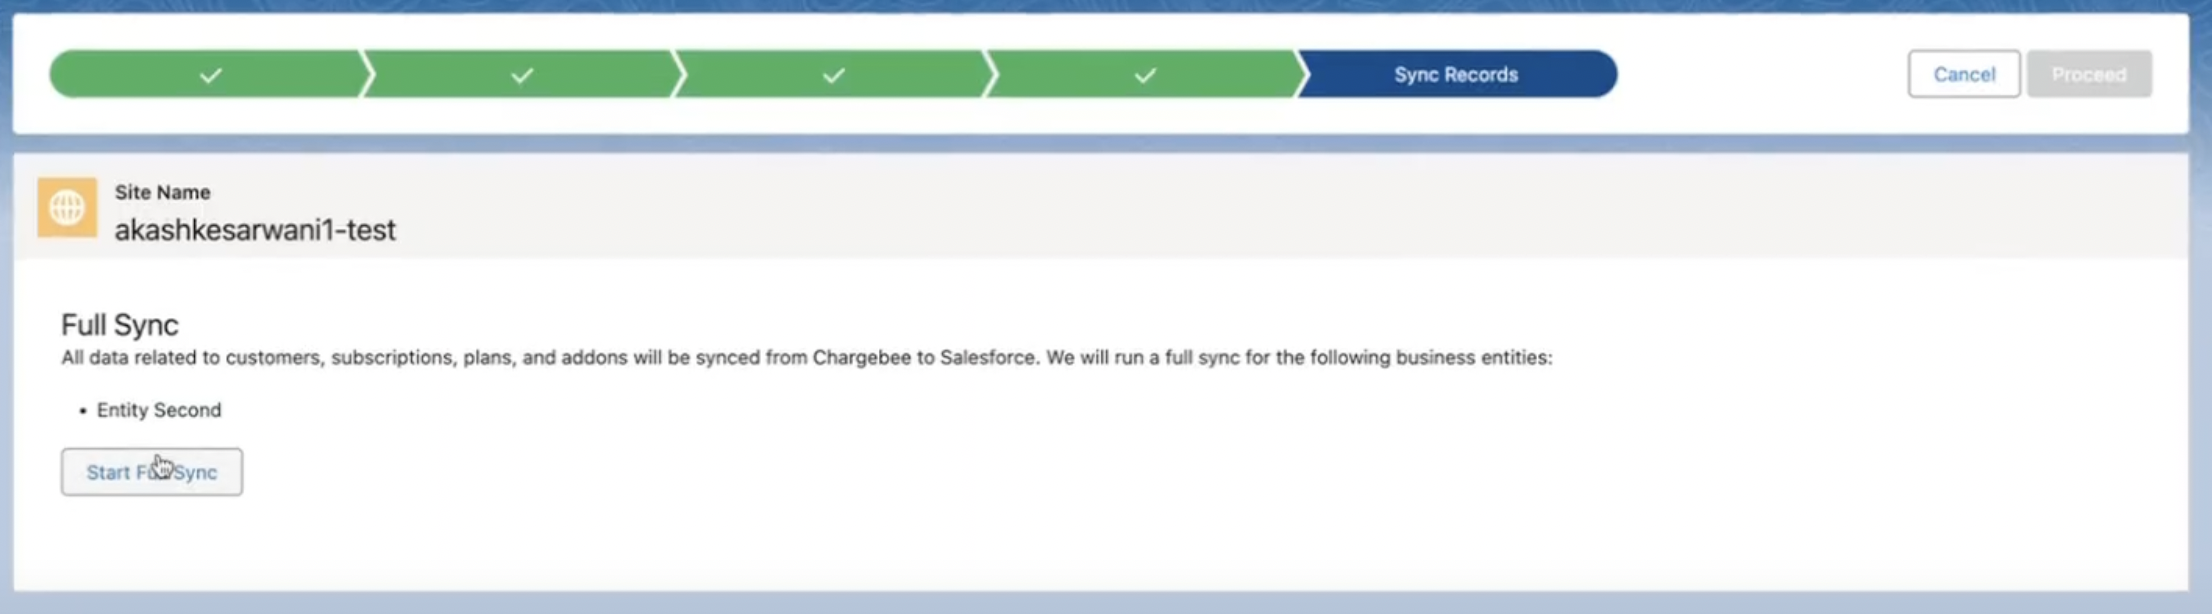
Click Start Full Sync to initiate a complete sync.
-
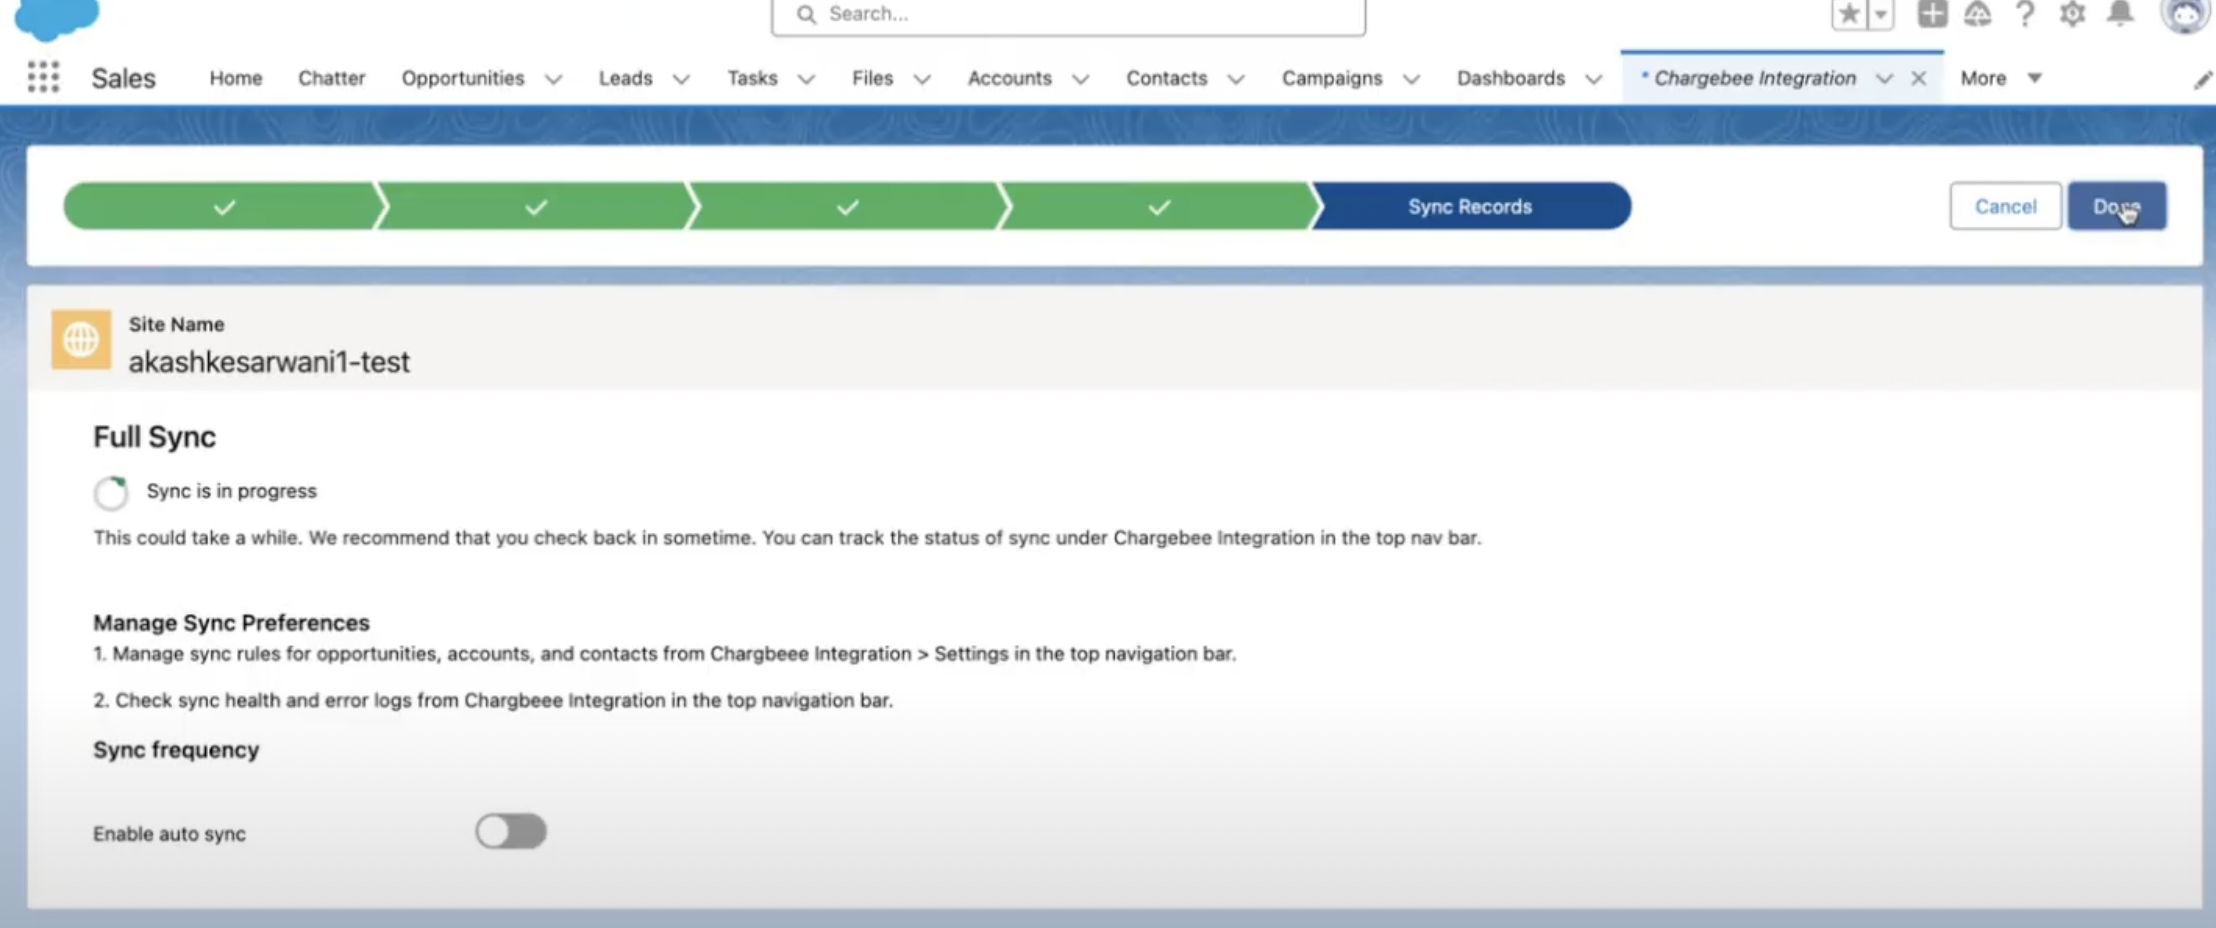
Click Done, while it runs in the background.
-
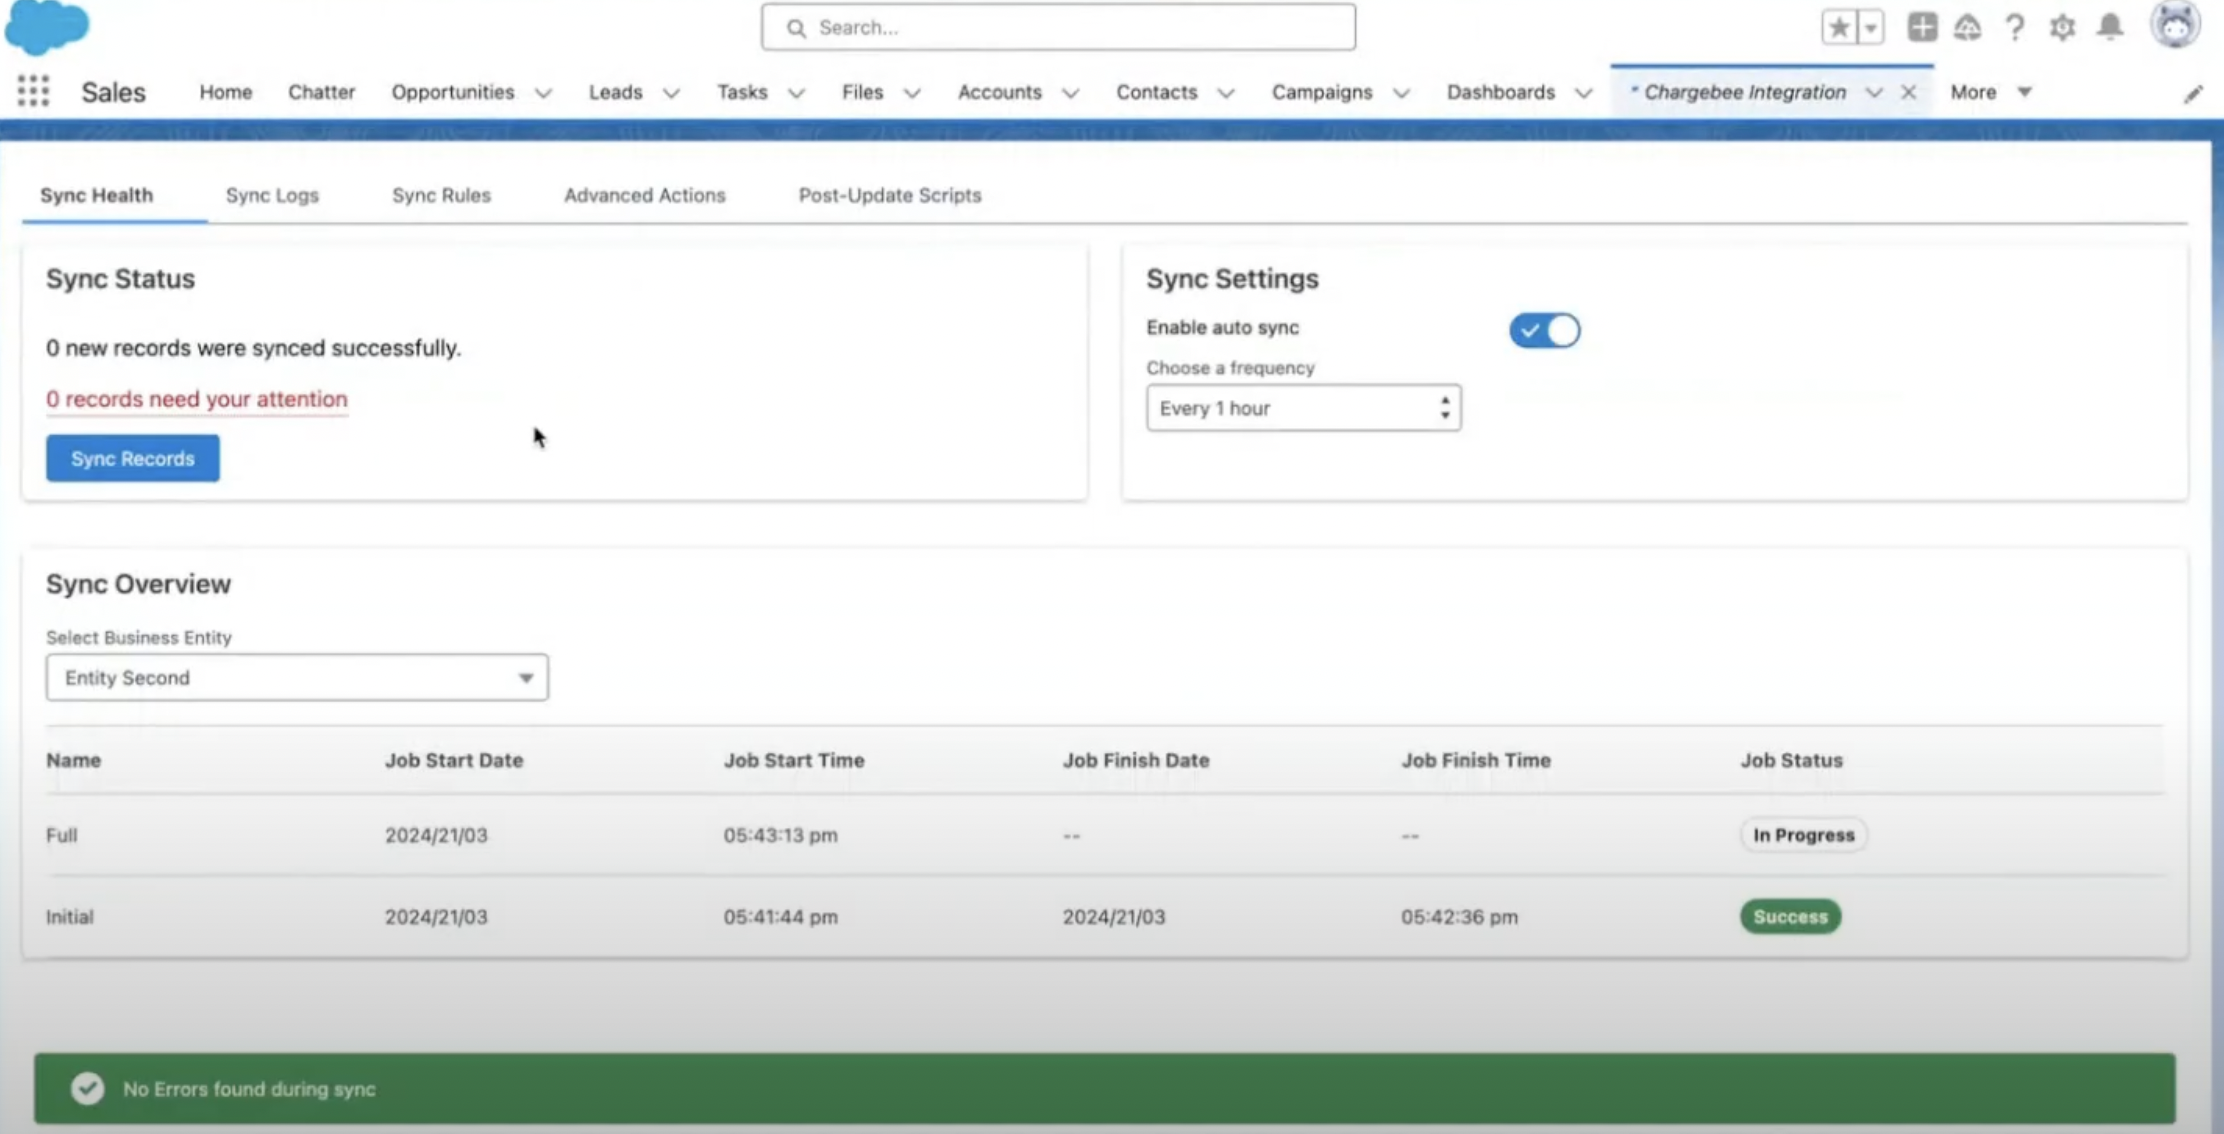
It redirects to the Dashboard > Sync Overview, upon selecting the latest business entity, it shows various syncs that have completed or are in-progress.
-
Once the sync is completed, this concludes syncing of the next business entity.
-
Repeat steps 7 to 20 for every new business entity that needs to be created / connected and migrated to Salesforce.
Was this article helpful?