Plans
Overview
Products and services can be effectively managed in Chargebee using the Product Catalog. Product Families, Plans, Addons, Charges, Coupons, and Coupon Sets form a Product Catalog. You can create plans in Chargebee, with each plan corresponding to a specific set of product or service features that your customers subscribe to.
Your customers sign up for plans through subscriptions. A single customer can have multiple subscriptions associated with a single plan or multiple subscriptions with multiple plans, where each subscription has only one plan associated. However, there can be multiple addons and charges.
Scenario: Acme Inc. is a business that sells online storage solutions. While some users intend to use the service for personal purposes, others may be business users. Acme could create a Home Plan that provides basic features and a higher-priced Professional Plan for advanced features.
In addition to creating plans, you can define multiple price points for each plan for various currencies and billing frequencies. In the above example, Acme can create multiple price points for the Home Plan, such as Home Plan Monthly USD, Home Plan Yearly USD, Home Plan Monthly INR, Home Plan Yearly INR, and so on.
You can use price points to control the plan's availability in currencies based on the geographies and the billing frequencies in which you are selling products and services.
Configuring Product Catalog Settings
After configuring your organization and currency settings, it is important that you define billing frequency at a site level, based on your business needs. To configure billing frequency, follow these step:
-
Click Settings > Configure Chargebee > Billing > Product Catalog.
-
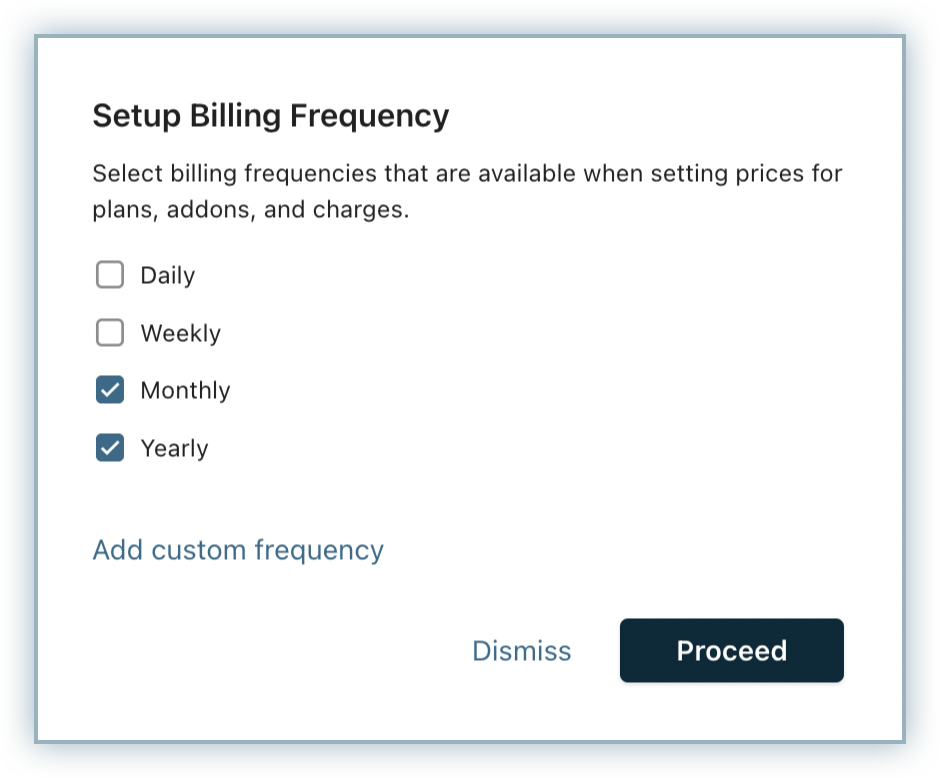
In the Product Catalog Settings page, click Manage under Setup Billing Frequency.
-
All billing frequencies are selected by default. Select your preferred billing frequencies, which will allow you to create Plans and Addons accordingly. Options include Daily, Weekly, Monthly, and Yearly. Additionally, you can define custom frequencies, such as Quarterly or Bi-Annually.
-
Click Apply.
Note
You can create plans and addons only for the billing frequencies that are defined under the Essential Settings.
Creating a Plan
To create a new plan in your Chargebee site, follow these step:
-
Click Product Catalog > Plans > + Create Plan.
-
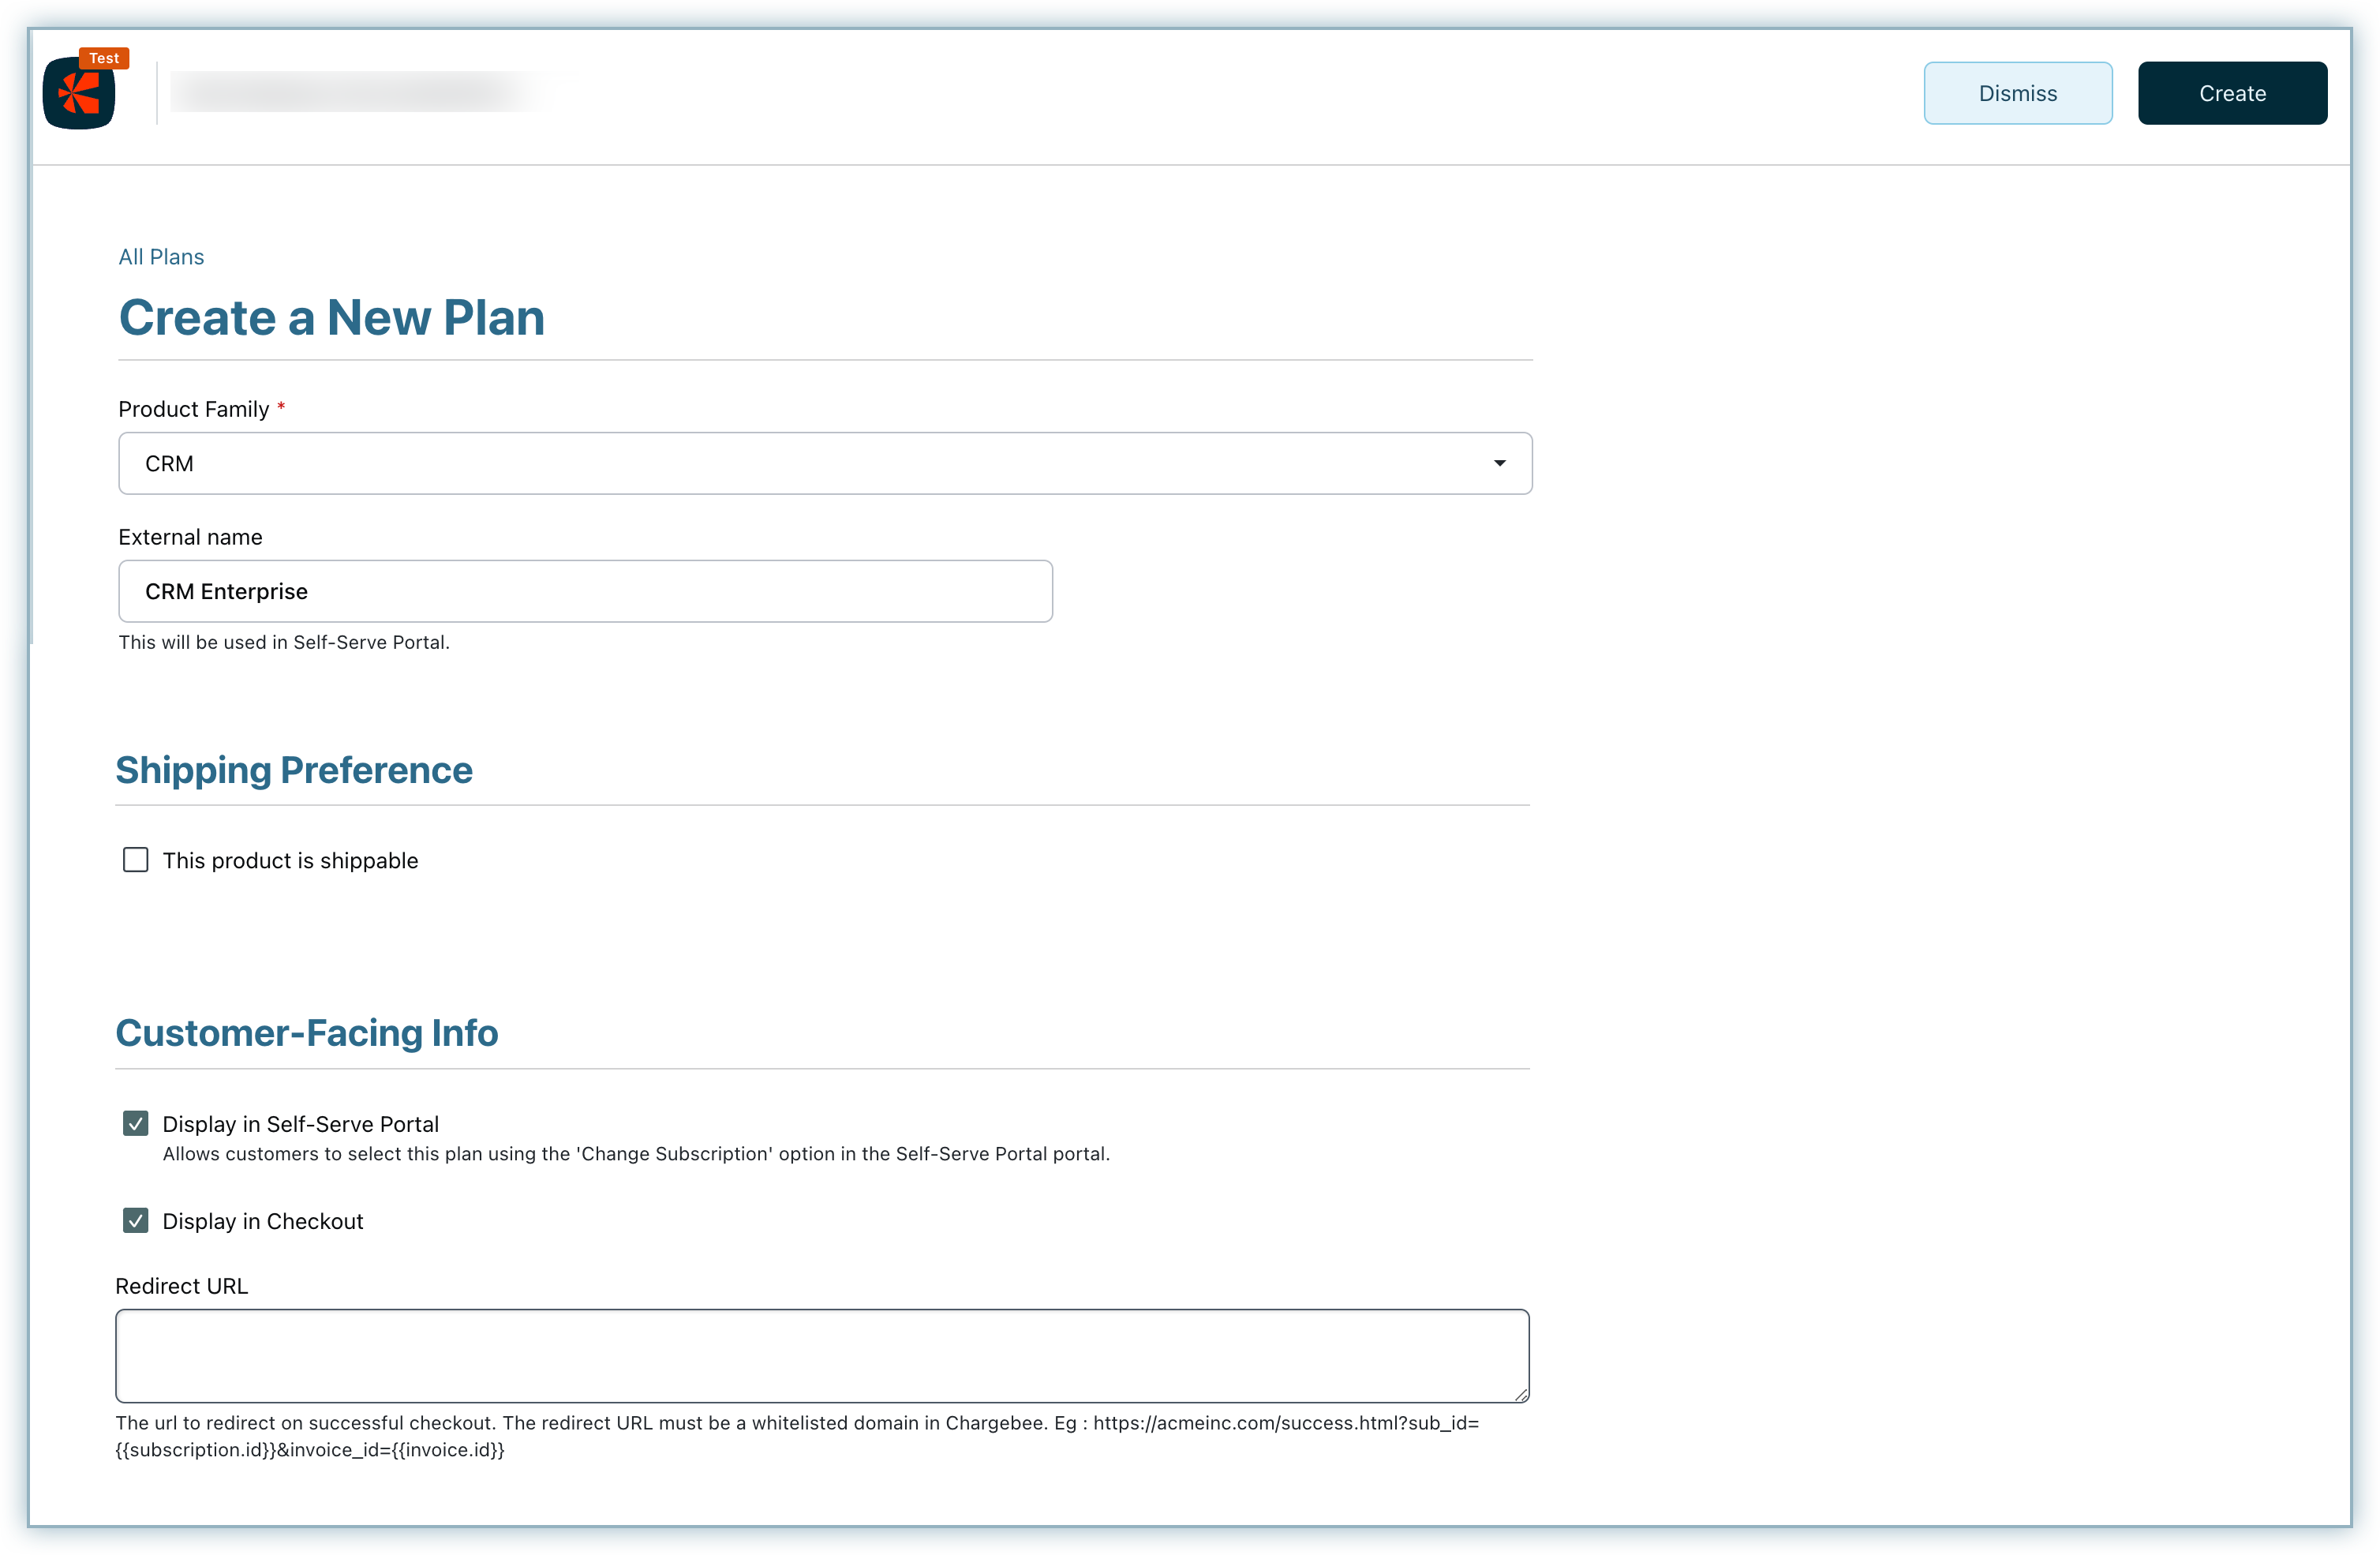
In the Create a New Plan page, click the Product Family dropdown and select the product family to which you want to associate the plan.
-
Specify an Internal Name for the plan that helps you to identify the plan internally. It is the name used to refer to the plan on your Chargebee site.
-
You can add a Description to include additional details about the plan.
-
The Plan ID is generated based on the Internal Name that you specify. You can modify this id as required. A plan Id is the unique identifier of the Plan and when a Subscription is created or updated via the API from your application or website.
-
Select This plan is metered if you are using the Metered Billing feature in Chargebee to add usage-based charges to subscriptions of this plan. Invoices created for this plan are in a draft state. You can add usage to the subscriptions before closing the invoices. You can additionally override the site settings that you have configured for how you would like Chargebee to process the usage data that you share for this plan. You can select your preferred option to be either the sum of all usage data or the most recent usage data.
-
Under Customer-Facing Info, you can do the following:
- Enable the Display in Self-Serve Portal checkbox to make this plan available in the customer portal. The Self-Serve Portal can be used by your customers to make changes to their subscription.
- Enable the Display in Checkout checkbox to make this plan available in . When this setting is enabled, your customers can subscribe to this plan using Checkout.
- Enable the Display prices as percentages checkbox to convert unit prices to percentages on the quote and invoice PDFs.
- You can specify a Redirect URL for this plan. Chargebee redirects your customers to this URL (say your website or any other page that you specify) once they complete the checkout successfully.
-
Click Create.
See also
- Custom Fields for more information on creating custom fields for plans and addons.
- Bulk Operations for more information on importing sizable volumes of your plans, addons, price points, and other subscription data into Chargebee.
Defining Price Points for Plan
After creating plans, you can start adding multiple price points for each plan. Your customers can choose a relevant price point for the plan based on their needs.
Using price points, you can:
- Create variations of the same plan for different currency and billing frequency combinations.
- Avoid creating or cloning the same plan for multiple currencies and billing frequencies, create price points instead.
- Maintain a clean and sleek product catalog and avoid clutter.
To define a price point for a plan, follow these steps:
-
Click Product Catalog > Plans. Select the plan for which you are creating the price points.
-
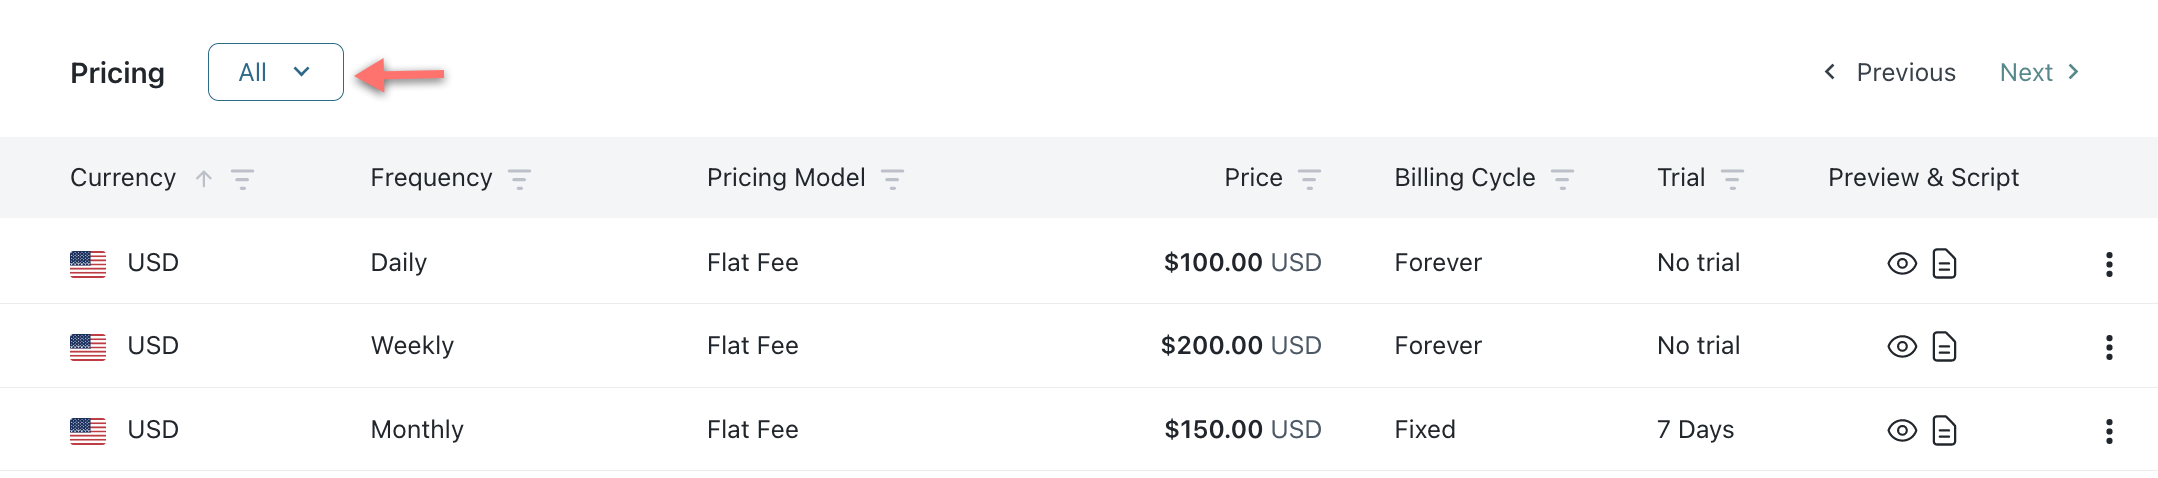
On the details page, the Pricing section displays all the billing frequencies you have added for your site for every configured currency. You can filter for All, Active, and Archived prices using the drop-down. You can also filter columns such as Currency, Frequency, Pricing Model, Price, Billing Cycle, and Trial. Only the Currency column can be sorted. The Preview and Script column helps you preview the pricing details.
-
Go to the billing frequency for the currency that you want to add for this plan, and click Set Price.
-
In the Create a Price Point page, you can modify the basic attributes of the plan's price point such as:
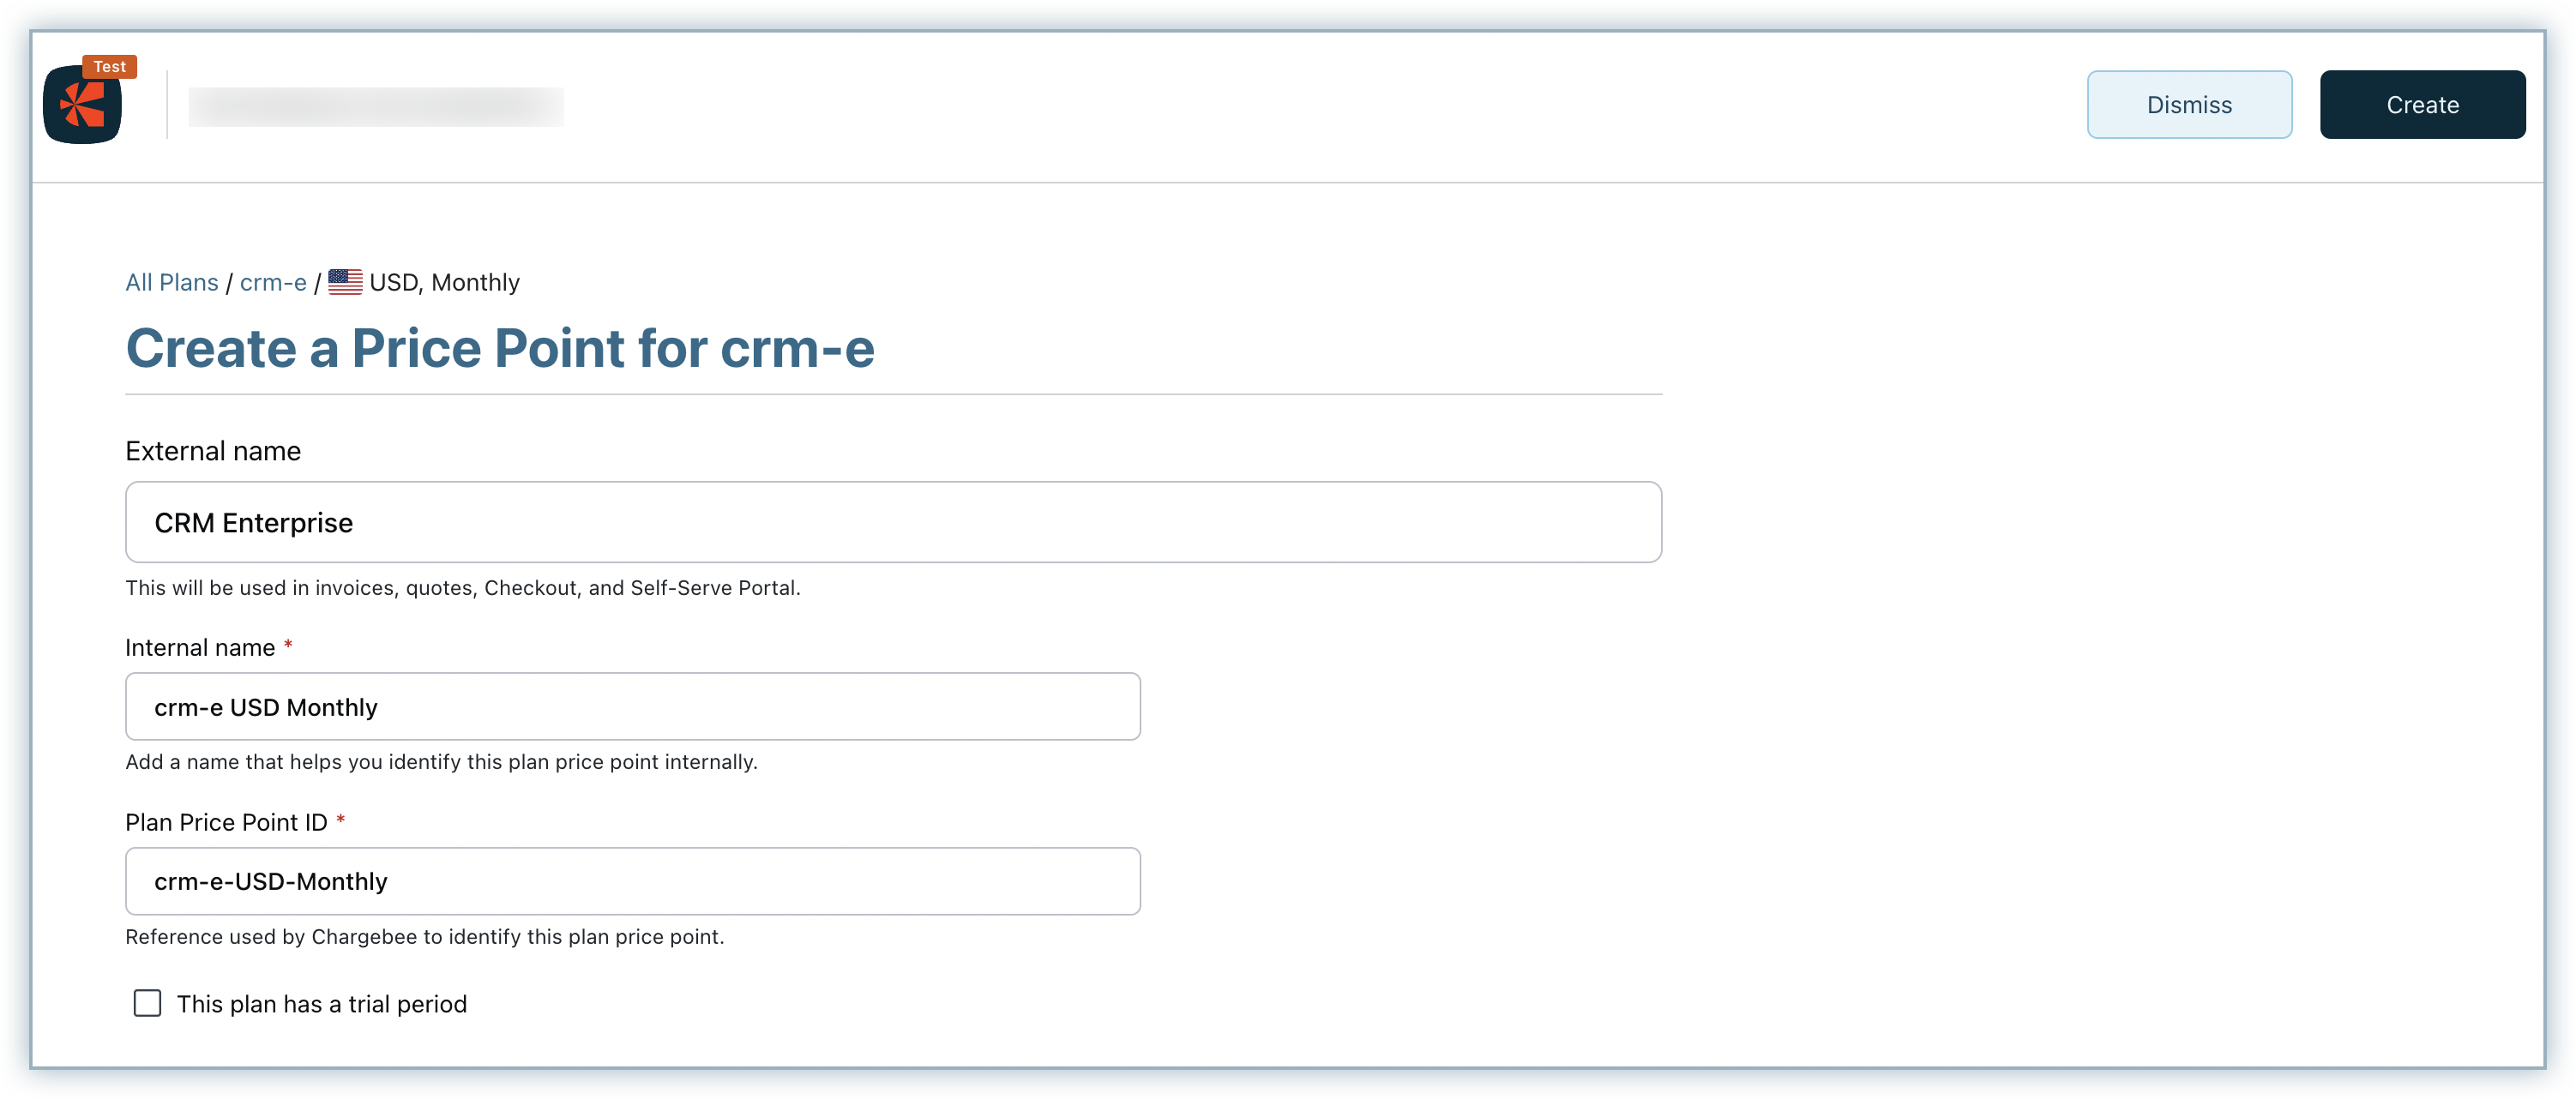
- External Name: Specify an external name for this price point. This name is used on all customer-facing resources such as invoices, quotes, checkout, and the Self-serve Portal.
- Internal Name: The internal name is used to refer to the plan price point on your Chargebee site.
- Plan Price Point ID: The Plan Price Point ID is generated based on the Internal Name you specify. You can edit this field. This ID uniquely identifies the plan price point. When you create or update a subscription via the API, use this ID to refer to the plan price point.
- Select the This plan has a trial period checkbox, and enter the duration a subscription can be in trial mode. Depending on your payment gateway, after the trial period ends, the initial charge may go through. Read more about trial periods.
-
In the Pricing section, you can configure the pricing attributes of the plan's price point such as:
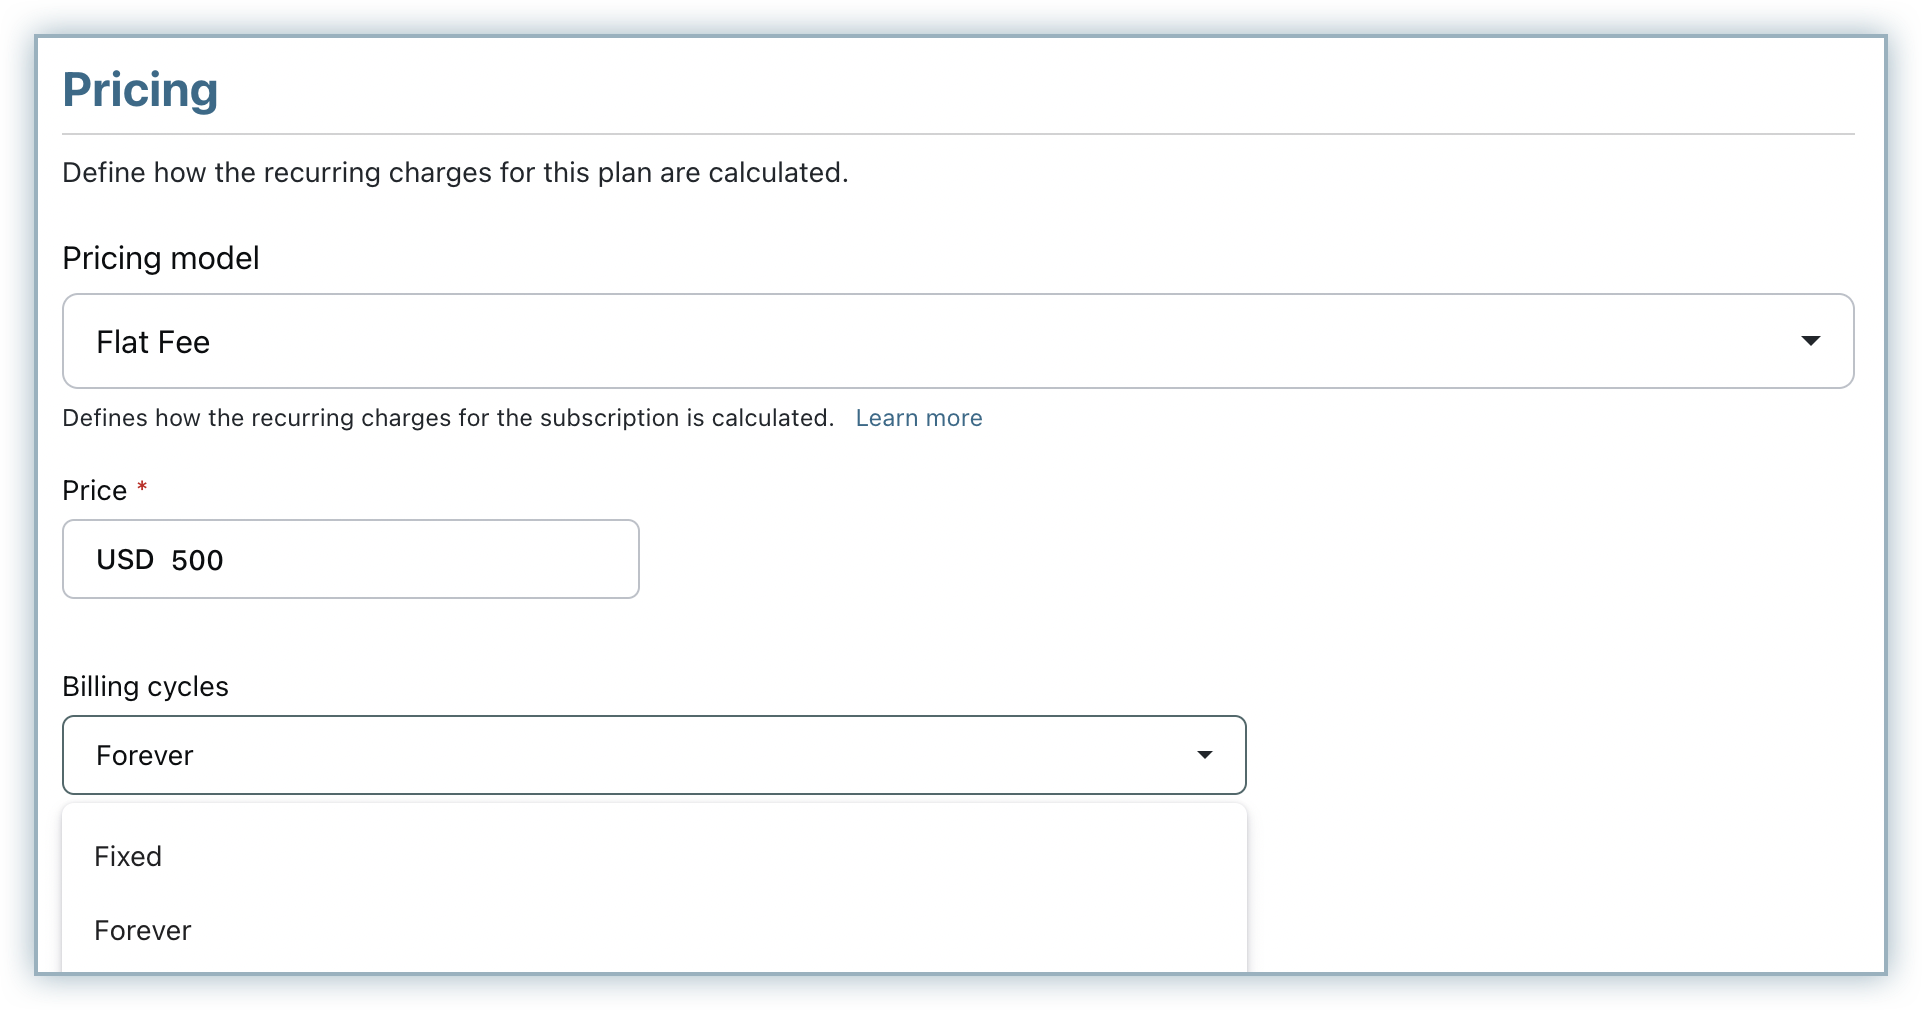
- Pricing Model: Choose your preferred pricing model for charging your customers for this plan.
- Price: Based on the pricing model you choose, specify the price for the plan's price point.
- Free Quantity: This option is only available when you specify the pricing model for the price point as Per Unit. Free quantity is the number of goods you want to give your customers at no extra charge. You or your customer can specify the total quantity of goods at the time of purchase.
Example: If a customer signs up for a special discounted plan that offers 10 GB of data at no charge:
- Price: $2 per GB
- Free Quantity: 10 GB
- Subscribed Quantity: 100 GB
- Quantity Chargeable: 90 GB
- Charged Amount: $2 x 90 = $180 So, this customer will only be charged for 90 GB of storage space. If the free quantity is more than the subscribed quantity, the plan is considered a free plan, and the buyer will not be charged for their subscription. For the above example, if the subscribed quantity was 10 GB, it would be a free subscription.
- Billing Cycles: Define the number of billing cycles that determine how many times the subscription is renewed automatically. You can select from the following options:
- Fixed number of billing cycles and specify the number. The number set should include the first billing cycle.
- Forever to allow the subscription to renew indefinitely.
-
Under Customer facing info, you can do the following:
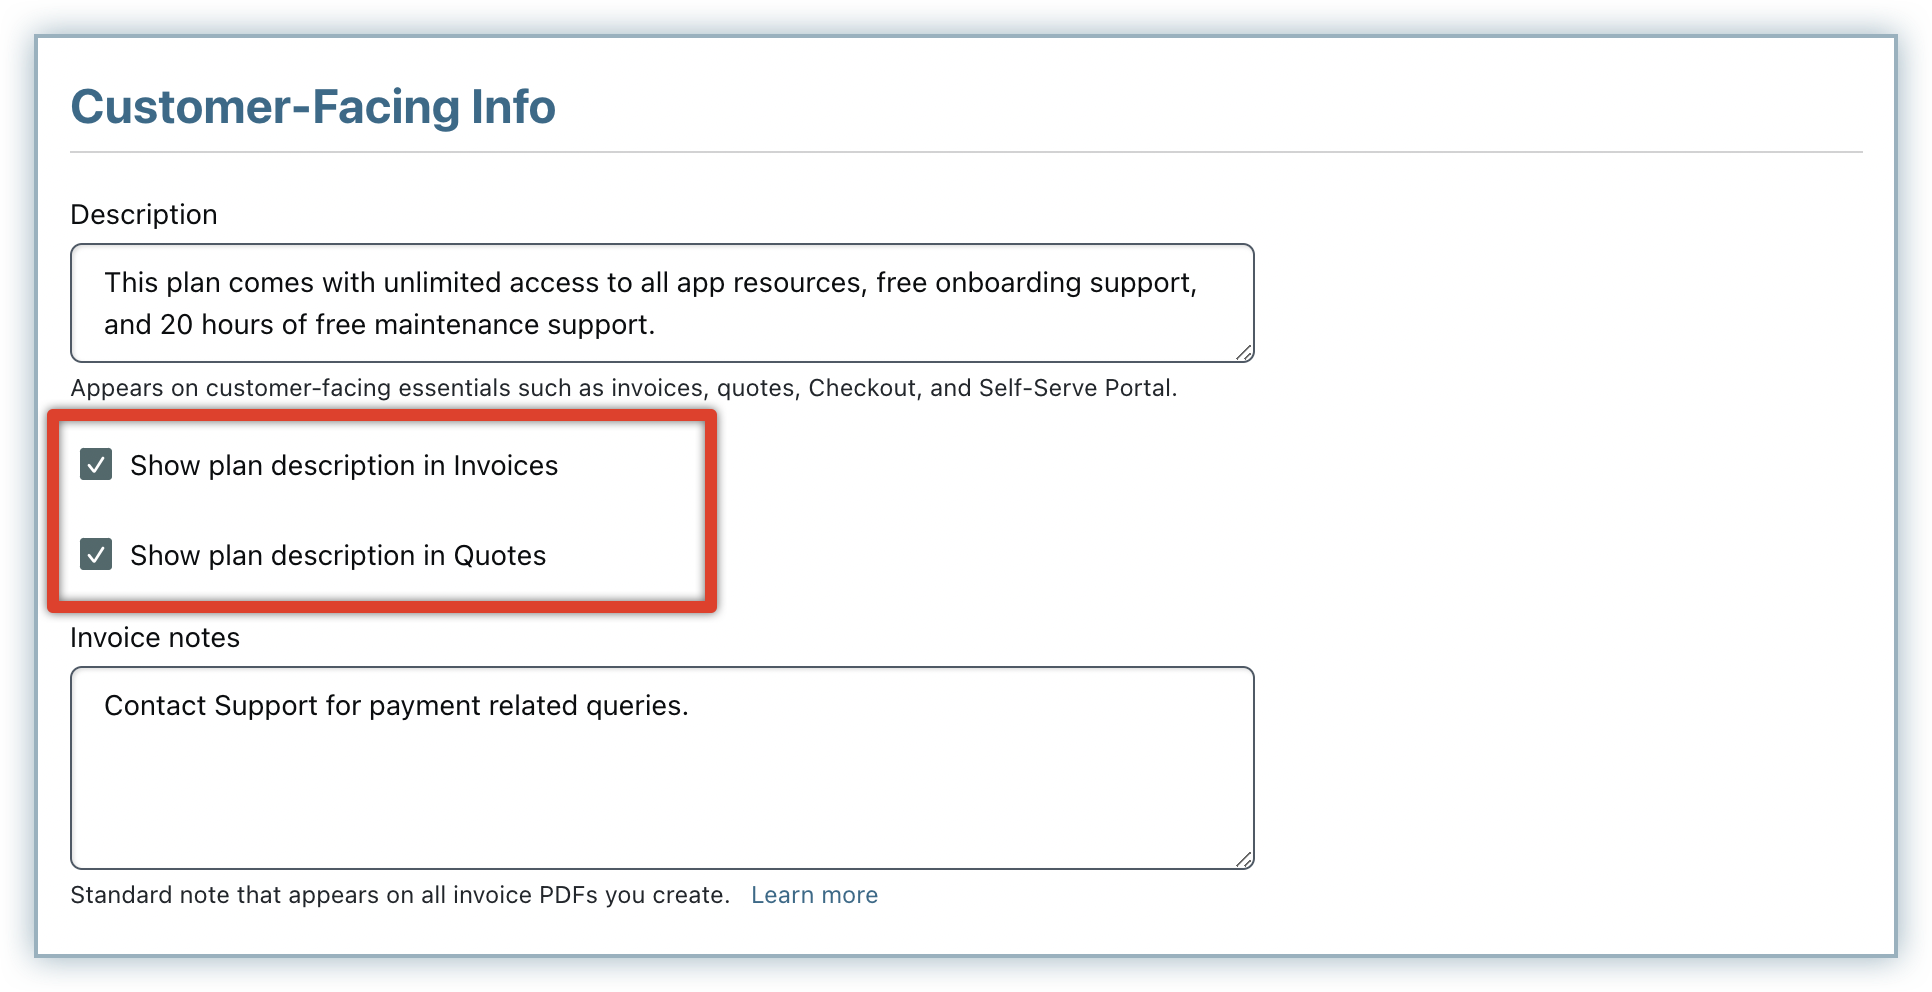
- Add a description to the price point which gets displayed on all customer-facing resources such as Invoices, Quotes, Checkout, and Self-serve Portal.
- Enable the Show Plan Description in Invoices and Show Plan Description in Quotes options, if you want the PDF format of the invoices and quotes that are generated for subscriptions of this plan to display the plan description in the respective line item. By displaying plan description, your customers can get more clarity on their subscriptions at a glance.
- Additionally, specify Invoice notes that will appear in all the invoice PDFs that are generated for this plan's price point.
-
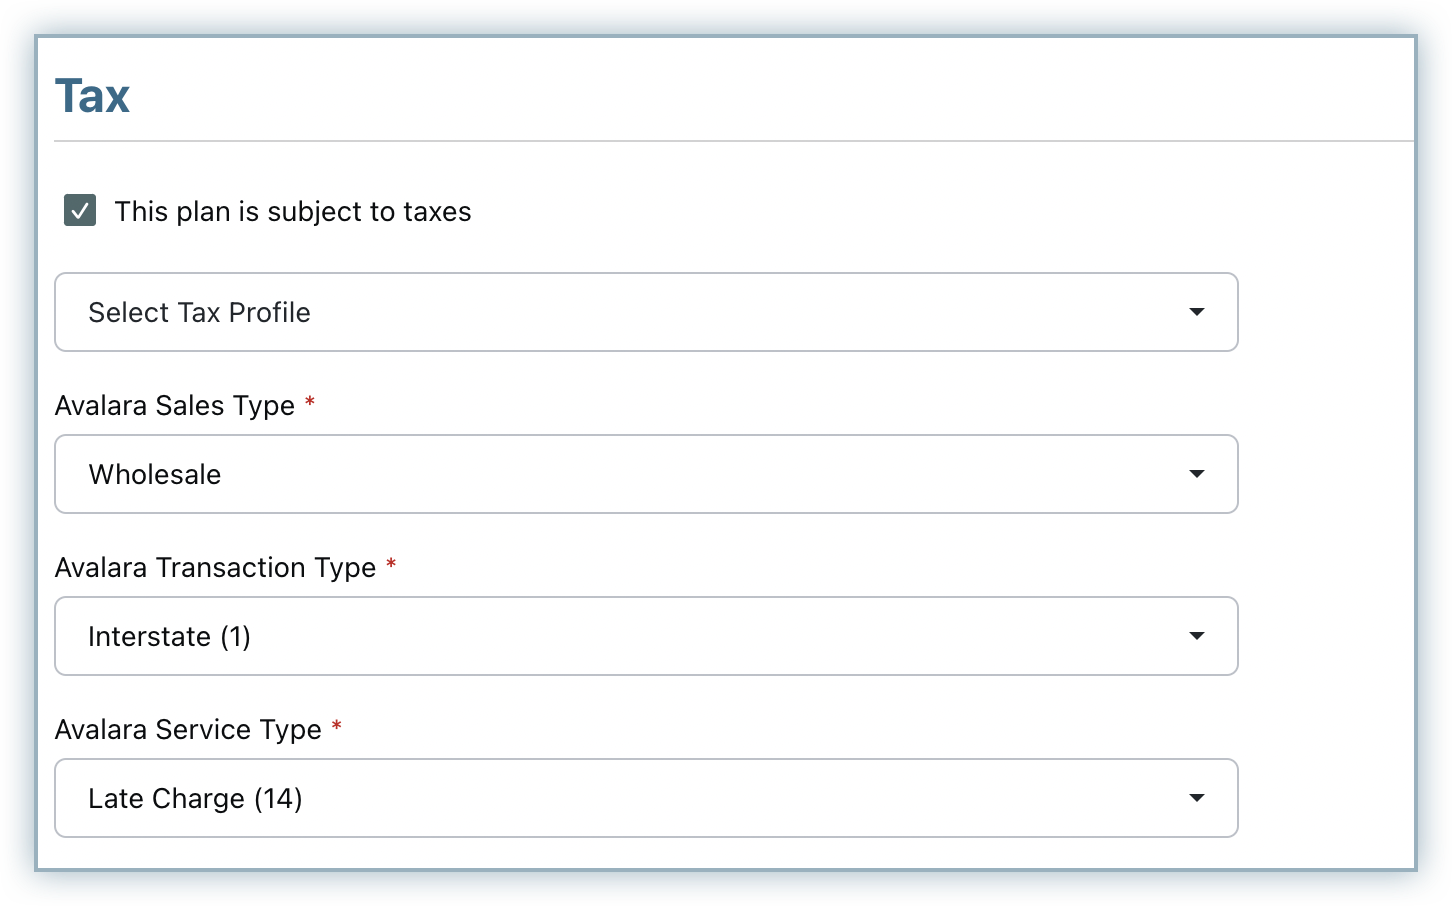
Taxes: If Taxes have been configured, you can choose to exempt a plan price point from taxes by unchecking This plan price point is subject to taxes. If you are choosing to keep the plan taxable, choose a tax profile for it. This would determine — during invoicing — what taxes are applied to the price of the plan.
-
Accounting Information: The Accounting Information section helps Chargebee sync up with any accounting applications that you integrate with, like Xero and QuickBooks. Each of the accounting fields captures information that helps track product-specific sales/revenue from an accounting perspective.

- SKU: Store Keeping Unit (SKU) is a name used to identify a product or service in inventory management or accounting systems. You can use this as an alternative name for your plan, and it will be used as the Product Name in the accounting system.
- Accounting Code: This field captures your accounting system's General Ledger Account code or name. When product information is synced to the accounting system, the product-specific information will be synced with this account as captured here. This is a mandatory field. You cannot proceed with accounting integration if this field is left blank.
- Accounting Category: The Accounting Category captures product-specific additional metadata or categorization for reporting purposes in the accounting systems (such as regions you are selling to or branches you are selling from). It should be entered in the specific format. For example: "Region: Northern"
-
Click Create.
You can define multiple price points for each plan with different billing frequencies across all currencies.
Note
You cannot assign multiple price points to the same billing frequency within a single plan.
See also
Define Features and map them to your plans using Product Entitlements to control which features are accessible to your customers based on the plan they subscribe to.
Note
- For invoices generated for existing plans without the Show Plan Description in Invoices option enabled, the PDF does not display the plan description. You can edit the plan to enable this option. After you enable the setting, the invoice PDFs that are generated or regenerated will display the plan description.
- If you want to include the plan description for a previously generated invoice, you can:
- Edit the plan to enable the option.
- Void the older invoice and regenerate a new invoice PDF with the plan description displayed. See these FAQs on scenarios when an invoice can be regenerated.
- A credit note (PDF) generated from an invoice with the plan description will also display the plan description, whether or not the Show Plan Description in Invoices option is enabled for the plan at the time of credit note creation.
- In the case of Advance Invoicing, the plan description is displayed only once in the invoice PDF.
Pricing Models
The price of the plan is set according to the pricing model you choose for the plan. The pricing model can be one of the following:
- Flat Fee: For plans with a fixed recurring charge. There is no quantity associated with these plans.
- Per Unit: Sell services billed based on the quantity signed up for. For example, you may offer a SaaS product for $29 per user per month. The quantity here is the number of users. The customer can specify the plan quantity during sign-up through the hosted pages or, if you are using the API, use the Create Subscription API call.
- Tiered: In tiered pricing, per-unit prices are assigned to quantity-based ranges (tiers). When calculating the total price, quantities are purchased from successive tiers, starting from the lowest.
- Volume: The price is quantity-based, but the per-unit price depends on the range within which the total quantity falls. In this model, you define the quantity ranges and the per-unit price for each.
- Stairstep: Stairstep pricing defines quantity tiers, but for each tier, a flat price is assigned instead of a per-unit price.
- Package: Package pricing allows you to charge per block of units or usage by defining a package size.
Plan Actions
Edit Plan
This action allows you to change the plan configuration. The 'Plan Id' and 'This is a gift plan' fields for a plan cannot be changed once the plan has been created.
Delete Plan
- You can only delete a plan if it has no price points defined.
- When you delete a plan, it is completely removed from Chargebee and no longer appears in the list of plans.
- After a plan is deleted, its name and ID can be reused.
Archive Plan
- If a plan has subscriptions linked to it, you cannot delete it, but you can archive it instead. This prevents the plan from being used for new subscriptions.
- When you archive a plan, all associated price points are archived automatically. Similarly, when you activate an archived plan, all associated price points are activated automatically.
- Any existing subscriptions to the plan are not affected after archiving; they continue to renew as usual.
- The name or ID of the plan cannot be reused when the plan is archived.
Plan Price Point Actions
Edit Price Point
This action allows you to change the price point configuration. The 'Plan Price Point ID' and the 'Pricing Model' for a price point cannot be changed once the price point has been defined. Editing a price point differs based on whether subscriptions are created for the price point or not.
- If there are no subscriptions attached to the plan price point, you can change every attribute except the 'Price Point ID'.
- If subscriptions are attached to the price point, you can change everything except the following:
- Plan ID
- This is a gift plan
- Free Quantity
Change Price
When a price point has subscriptions attached to it, you can change the price, though only when the pricing model is flat or per unit.
To change the price of a price point, follow these steps:
- Click Product Catalog > Plans > [Plan Name] > [Price Point] > Edit Price.
- Enter the new price of the plan under the Pricing section.
- Click Update.
The new price is applied to all new subscriptions to the plan. Existing subscriptions are not affected and continue to be renewed at the old price.
Was this article helpful?