Configuring Checkout
Chargebee provides configuration capabilities to build the checkout based on your business requirements. The following instructions will help you create a checkout and configure various settings as per your business needs.
To access the configuration
- Sign in to the Chargebee site, go to Settings > Configure Chargebee > Checkout and Self-Serve Portal.
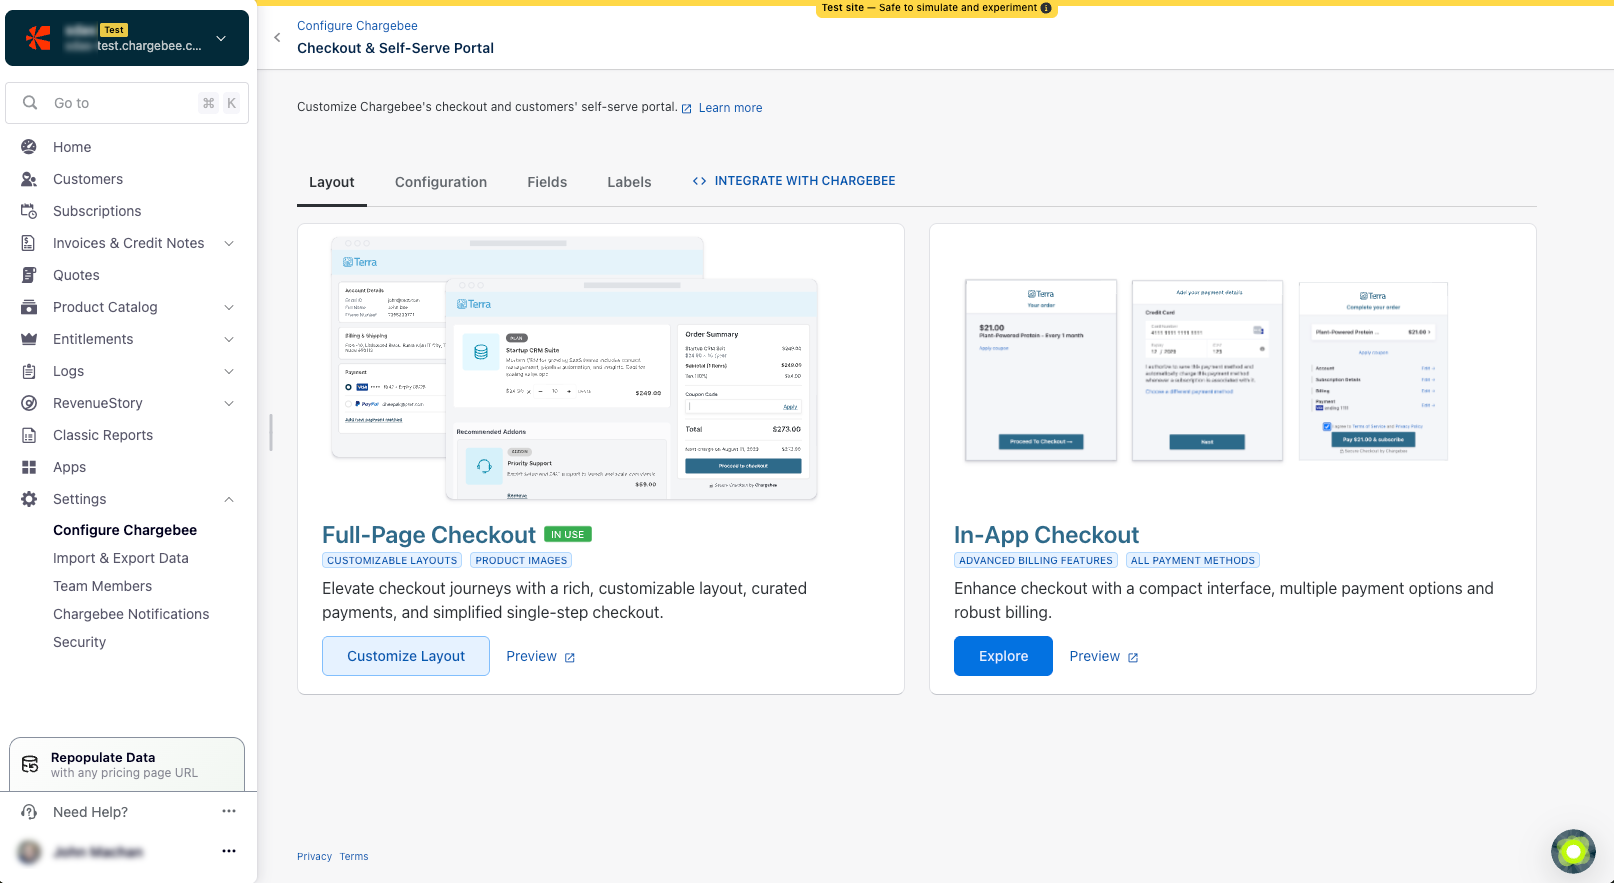
Layout tab
This is the first tab that appears when you access the configuration. You can choose the type of checkout you want to create for your customers. The options available are the in-app and full-page layout. You can also use the layout API parameter to override the default settings. For more information, see API docs for hosted pages.
- Click the Explore button and click Use Layout. You can select only one layout at a time.

- Click Publish.
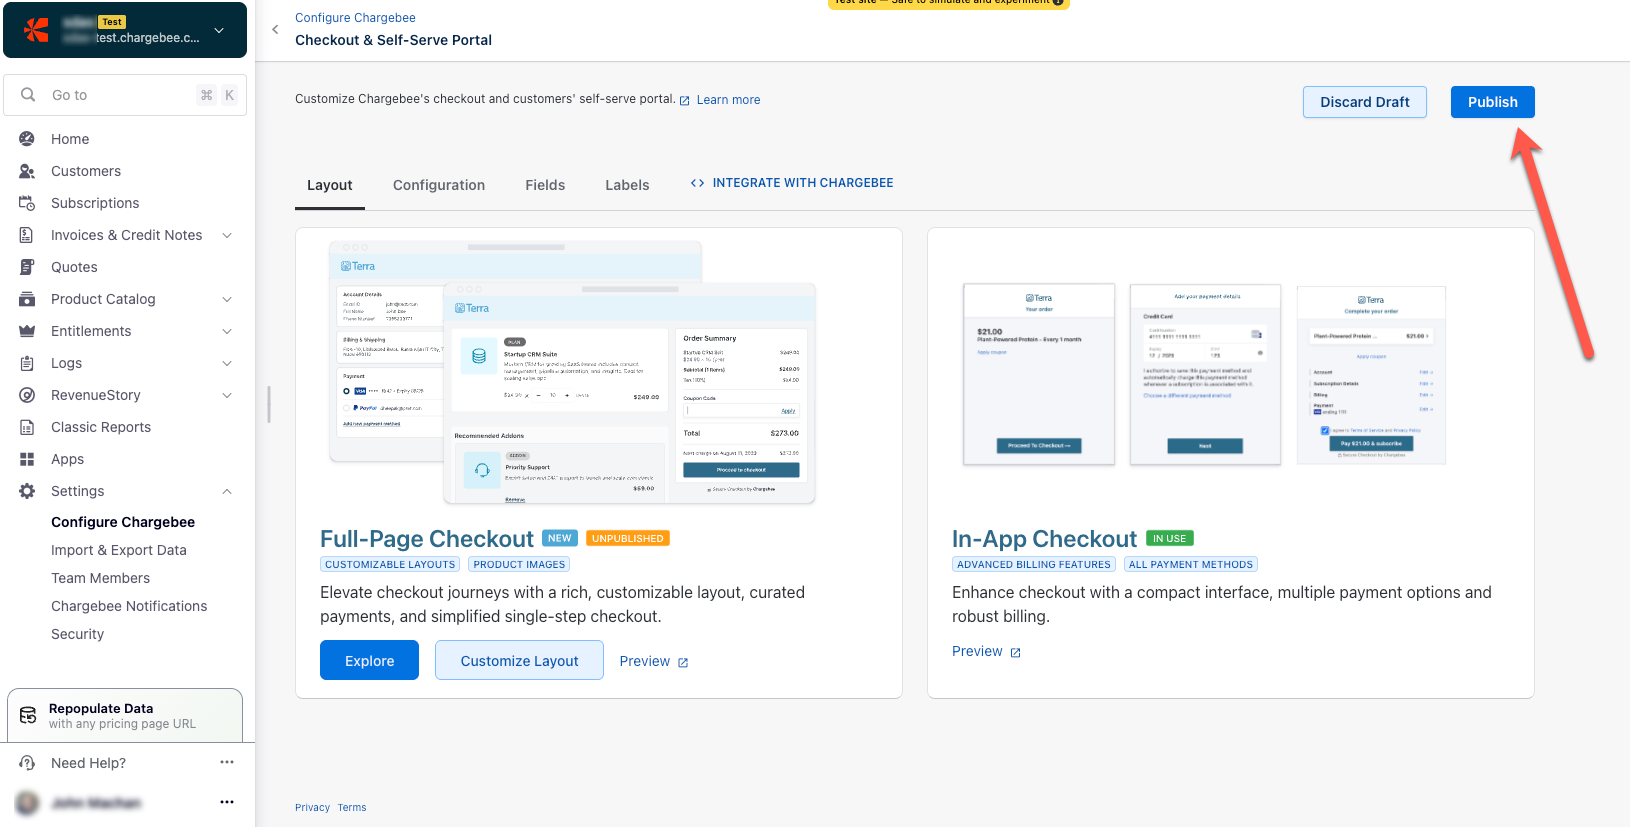
- A confirmation window appears. Click Publish again. The selected layout is set to In Use, as shown in the screenshot below.
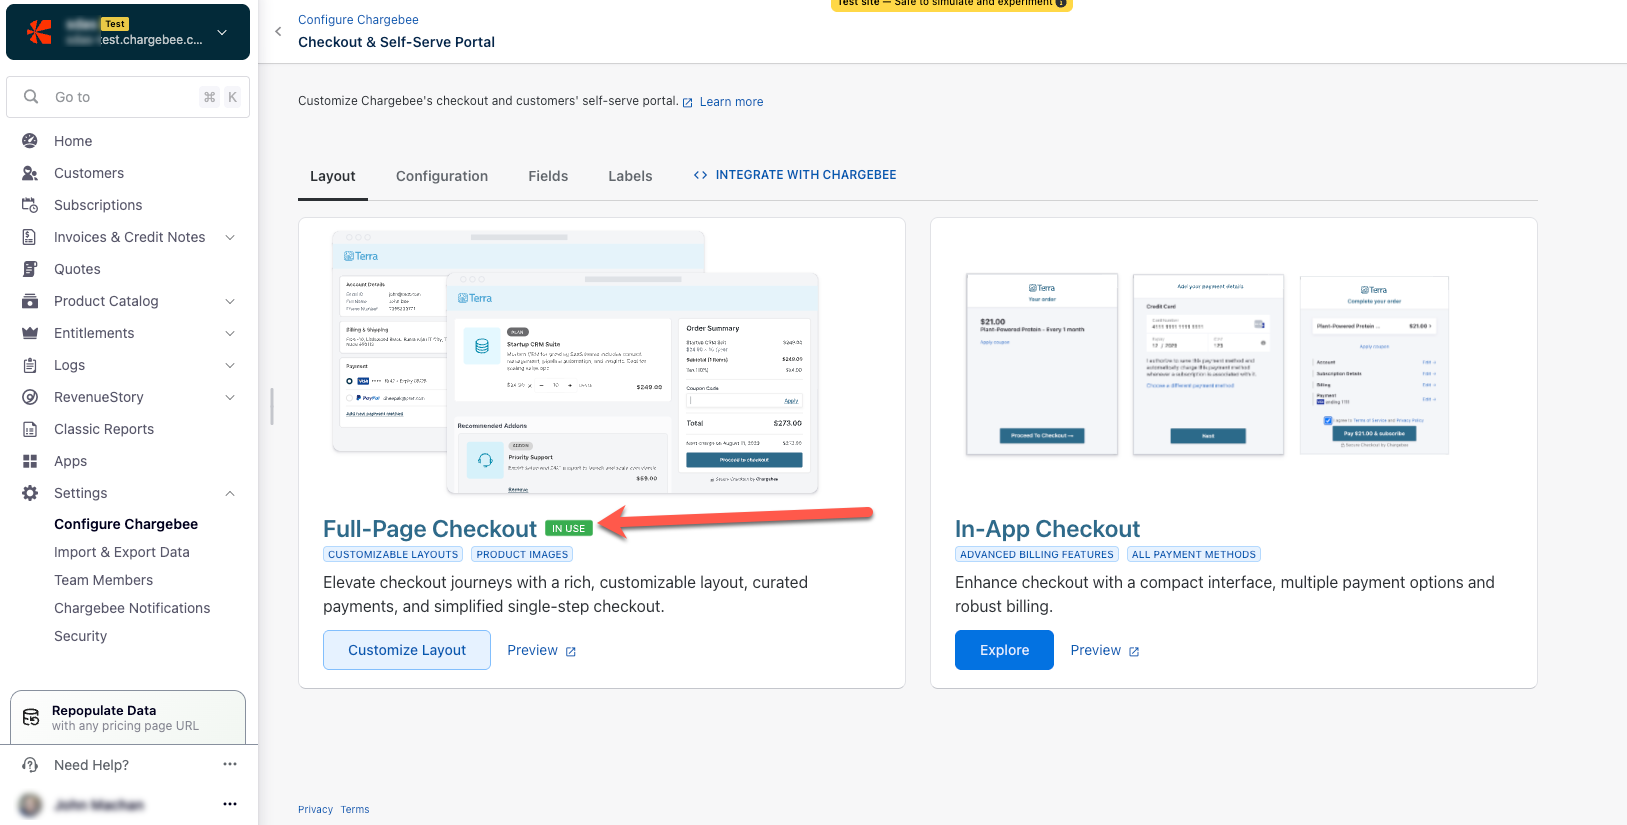
- Click Preview to view how the checkout and self-serve portal will look for your customers.
See also
Configuration tab
The configuration tab allows you to configure various settings on your checkout page.
To configure any settings from the list
- Turn on the toggle for the respective settings.
- Click Publish to apply the settings for the checkout page.
See also
Add product images to your product catalog items to display them on the checkout pages.
Checkout
The following options are available for Checkout:
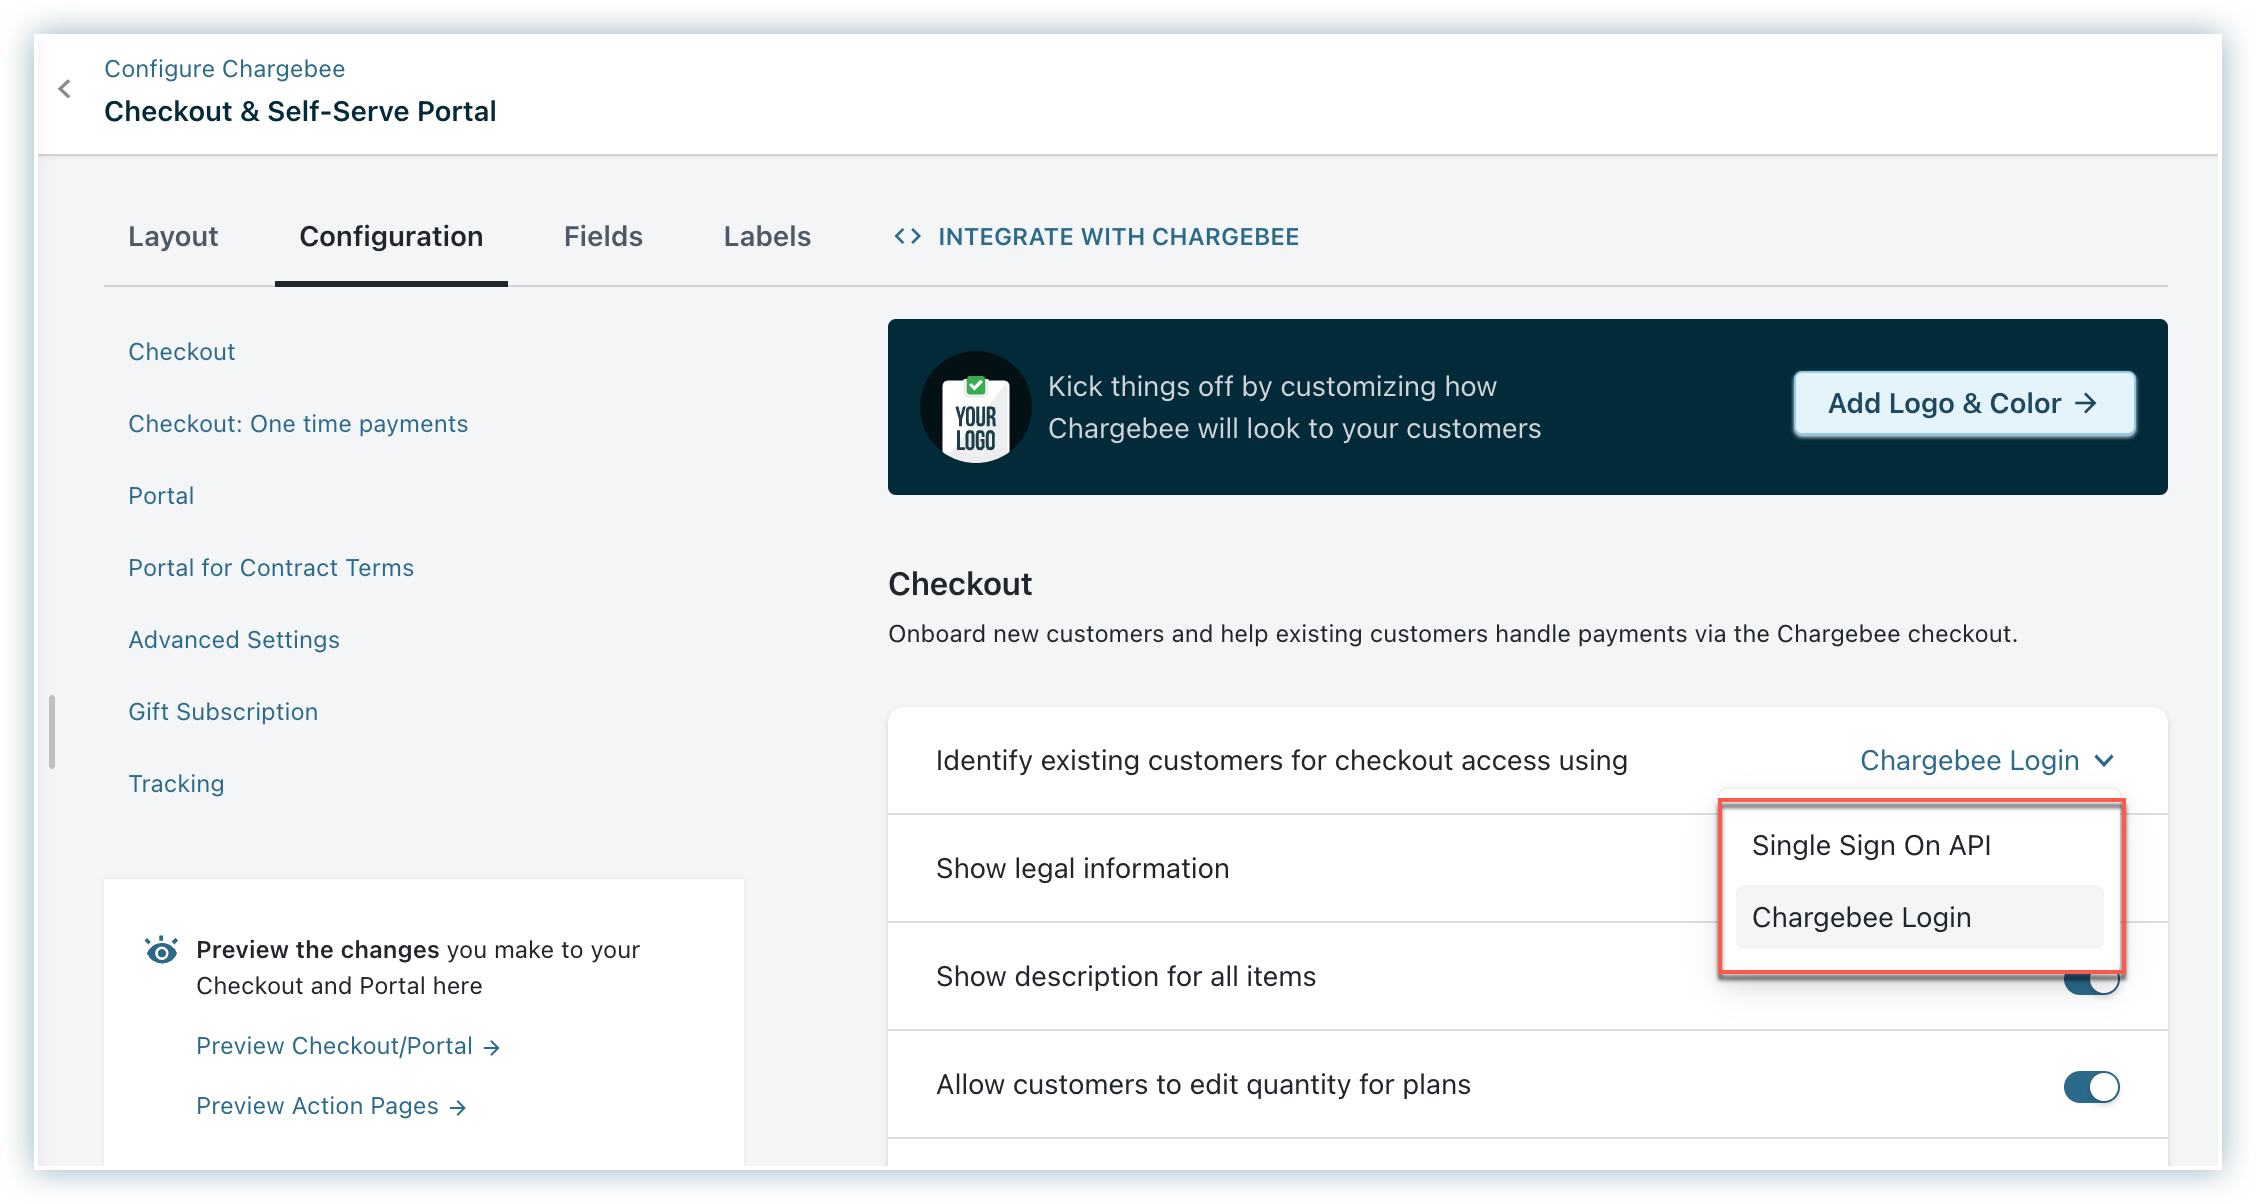
Identify existing customers for checkout access using
Select how you want your existing customers to gain access to Checkout:
Via Chargebee Login
Users log in by entering their email address, after which they receive a one-time password (OTP) via email. Upon their first login, users are prompted to set up a password for future access.
Single Sign On API
Recommended if you manage user authentication in your application. After users sign in to your application, create checkout sessions for them dynamically. This approach enhances the customer experience by eliminating the need for users to sign in again after logging into your application or website.
Show legal information
Refer to the Legal Agreements documentation for more details.
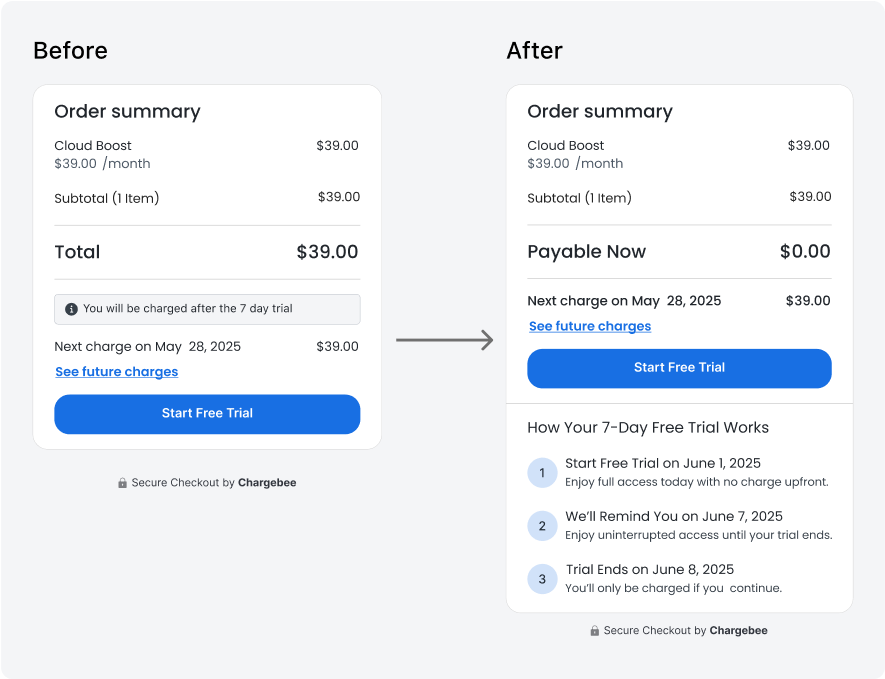
Enable optimized trial sign-up
When you enable optimized trial sign-up feature, Checkout for trial plans highlights key information to help customers clearly understand:
- The number of days in the free trial.
- That no payment is charged today.
- The date when the first payment is due.
- If configured, the date when the trial end reminder email is sent.
Enable this feature to build trust, reduce friction, and improve trial conversion rates.
The screenshot below shows how Checkout for trial sign-ups looks after enabling the optimized trial sign-up experience.
Customize labels for optimized trial sign-up
You can customize the labels for the trial information displayed on Checkout. Refer to the field customization documentation for more details.
Collect shipping address only for shippable products
Enable this setting to collect shipping addresses only when shippable products are present in the cart. When enabled, Checkout dynamically determines whether to collect the shipping address based on the presence of shippable items in the cart. This prevents customers from being prompted for shipping addresses when purchasing non-shippable products.
Show description for all items
Enable this setting to display plan price, addon price, and charge price descriptions on Checkout. Define the descriptions under the Customer-Facing Info section for plan prices, addon prices, and charge prices.
Note
When the cart contains a single line item, its description is always displayed on Checkout, regardless of whether this setting is enabled.
Allow customers to edit quantity for plans
Enable this setting to allow your customers to edit the quantity of products added during checkout.
Allow customers to change addon and charge quantity
Enable this setting to allow your customers to edit the addon and charge quantity.
Allow customers to remove addons and charges
Enable this setting to allow your customers to delete addons. However, you cannot remove charges.
Note
- You can only access quantity-based addons.
- Customers cannot edit/remove mandatory addons if they are integrated via drop-in script.
Show recommended addons in Checkout
Enable this setting in Chargebee to display recommended addons as a separate section on the checkout page. Customers can click Add to include the recommended addon in their subscription.
Allow customers to add/remove coupons
Enable this setting in Chargebee to allow your customers to add/remove coupons. For more information, see creating coupons and deleting coupons.
Allow customers to add multiple coupons
Enable this setting in Chargebee to allow your customers to add multiple coupons for a product.
Allow customers to access checkout via API only
Enabling this option will disable all drop-in script links. If you have used a drop-in script for your site, we recommend you streamline your API workflow first and then enable this setting. On enabling this option, the Grab code link next to your plan will be disabled, and the drop-in scripts will stop functioning instantly. To use the drop-in script again, disable this setting.
Allow customers to have multiple subscriptions
Enable this setting to allow your customers to create multiple subscriptions using the same payment details.
Cancel URL
You can use this setting to configure the URL on your website or application to which Chargebee will redirect customers if they choose to cancel the checkout action. Any cancel URL passed via API will override this URL.
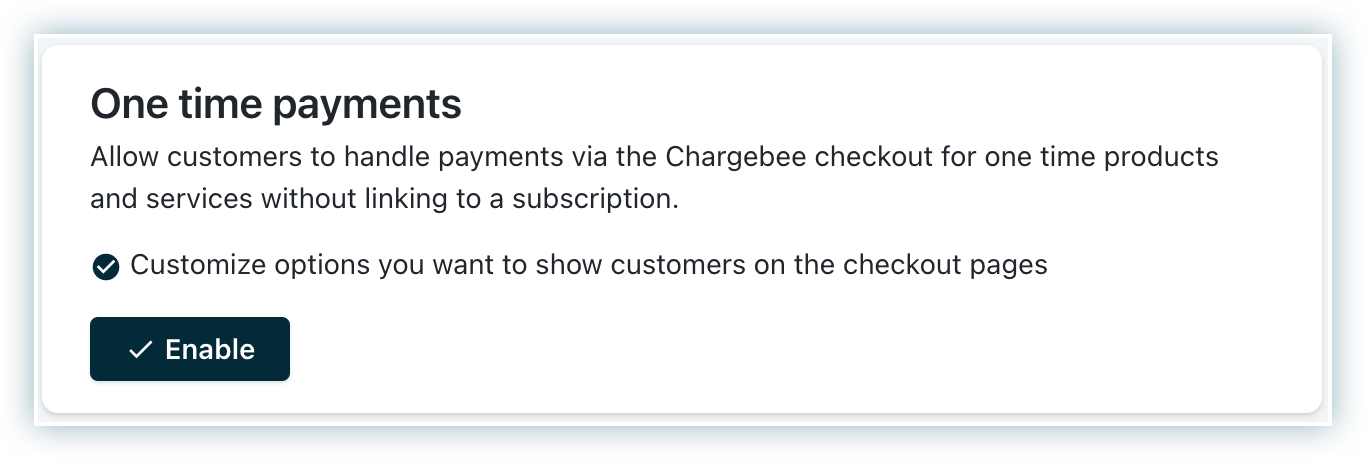
Checkout: One-time payments
This setting allows you to create a checkout page to handle payments for one-time products and services without linking them to a subscription.
To create a one-time checkout page
-
Click Enable.
-
The following settings are available to configure a one-time payment checkout page. Click Disable to deactivate the one-time payment checkout page settings, as shown in the screenshot below.
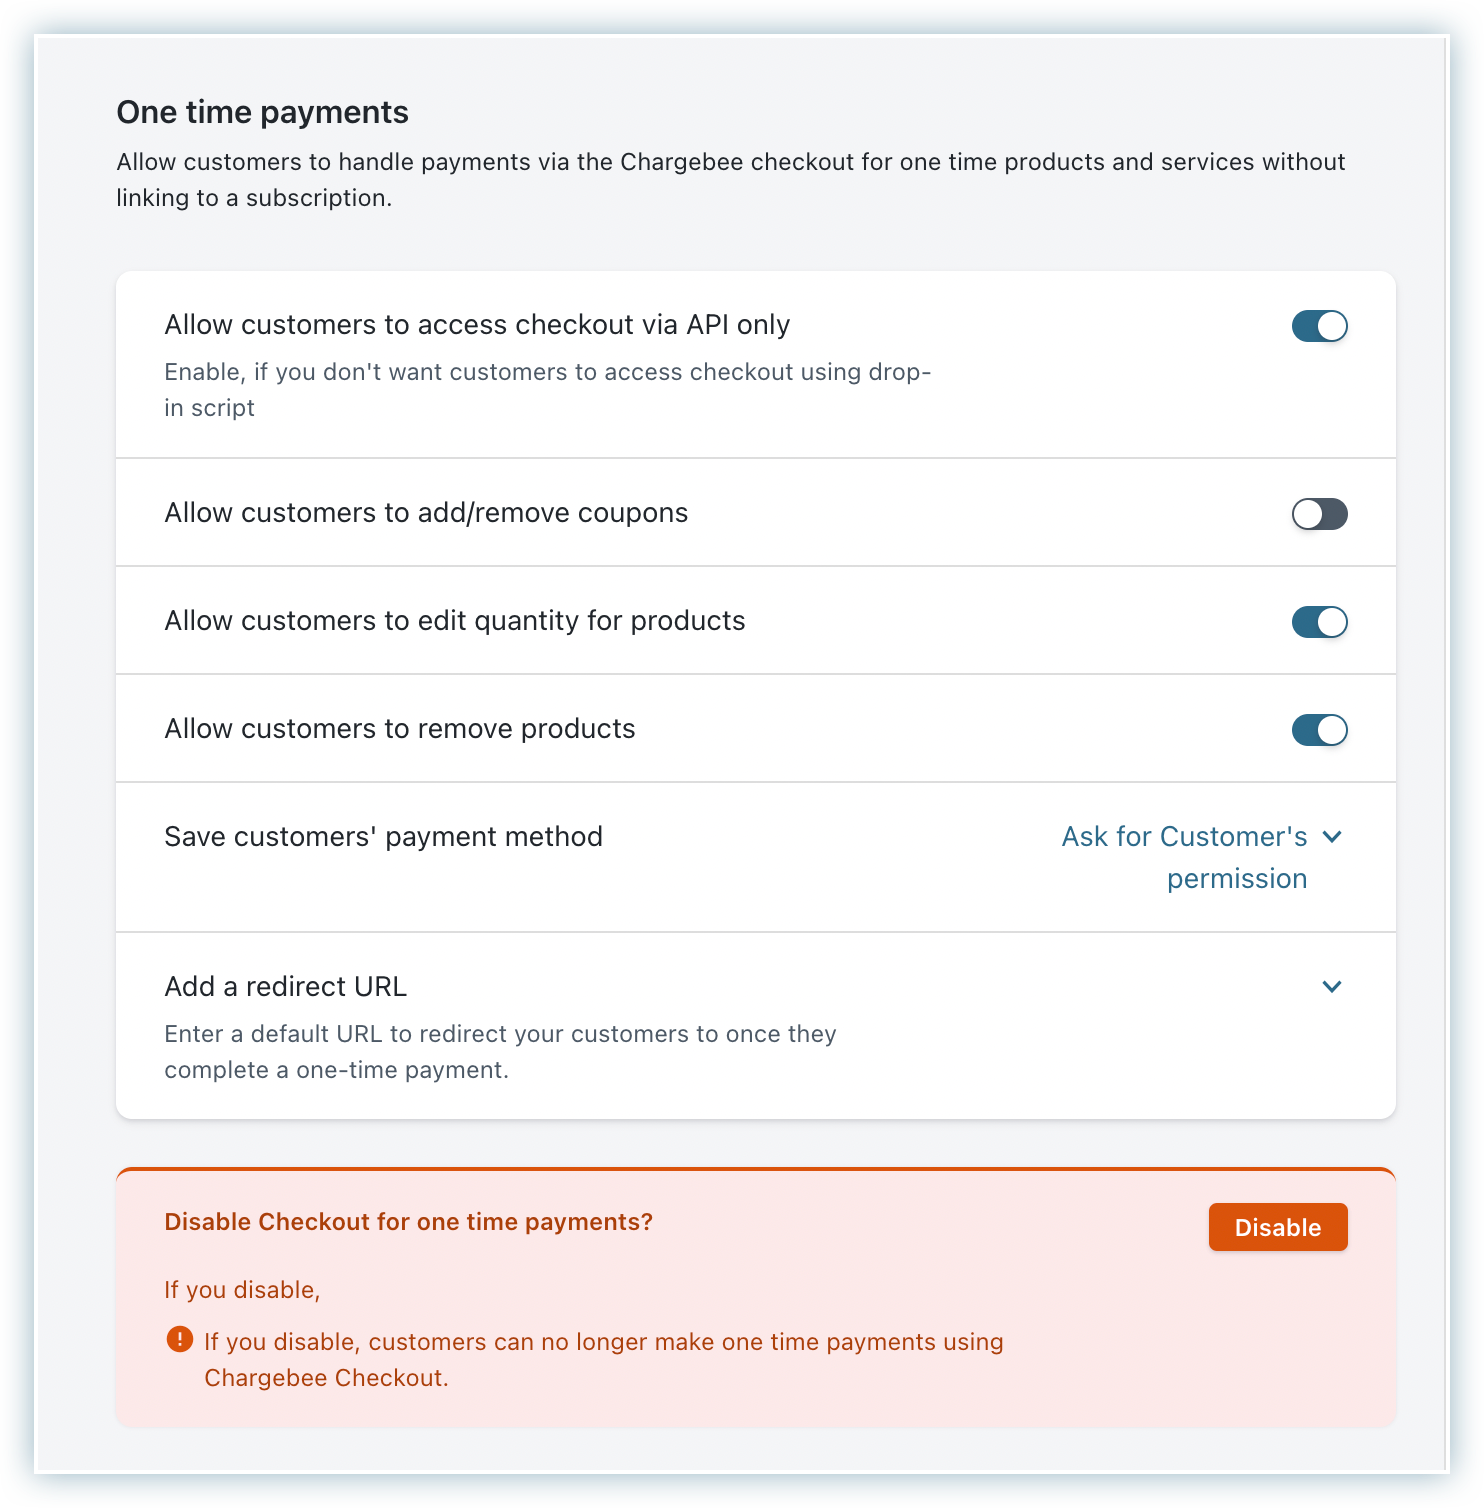
Allow customers to access checkout via API only
Enabling this option will disable all drop-in script links. If you have used a drop-in script for your site, we recommend you streamline your API workflow first and then enable this setting.
On enabling this option, the Grab code link next to your plan will be disabled, and the drop-in scripts will stop functioning instantly. To use the drop-in script again, disable this setting.
Allow customers to add/remove coupons
Enable this setting in Chargebee to allow your customers to add/remove coupons. For more information, see creating coupons and deleting coupons.
Allow customers to remove products
Enable this setting to remove plans, addons, and charges from the cart during checkout.
Save customers' payment method
Enable this setting to ask customers for permission to save their payment method during checkout. The available options are: Never, Always, Ask for customer's permission.
Add a redirect URL
You can use this setting to add a URL where the customer can navigate once they complete a one-time payment. The customer will be redirected to the URL after successful checkout.
Advanced settings
Chargebee also allows you to configure certain advanced settings to make the checkout experience effortless for your customers. You can configure the following advanced settings while creating a checkout.

Autocomplete addresses
Chargebee uses Google Autocomplete to suggest addresses as your customer starts to type in. By enabling this option, your customers can easily choose their address from the suggestions. Address autocomplete also works for the self-serve portal when the customer wants to add/edit billing or shipping addresses.
Custom domain
Address autocomplete is enabled by default only on the Chargebee domain. If you use a custom domain and want to use Address Autocomplete, contact Chargebee Support and provide the Google Maps API key for the Place Autocomplete JavaScript API in a secure document. If the API key is expired or invalid, contact Support again to update the API key.
Allow customers to add multiple payment methods
This setting will allow your customers to integrate add multiple cards. Using this method, you can accept payments via credit, debit, and prepaid cards from your customers. To use this payment method, you should have an integration with a payment gateway supported by Chargebee and a merchant account in place. For more information see, and merchant account to process online payments.
Skip order cart during checkout
Enable this setting to hide the order screen. The customers will not see their order cart during checkout.
Keep coupon box open
Enable this option to display the coupon box during checkout. Disabling this option will show the Apply coupon link in the checkout. Customers can apply coupons by clicking the link.
Add domains
When you use Chargebee.js on your frontend, you must allowlist your domain(s) for the following features to work:
- Accessing sensitive information such as subscription and invoice details via Chargebee.js callbacks.
- Redirecting users to your domain after a successful Checkout session using a plan-specific redirect URL. (Widely known domains are exempt from this requirement.)
- Integrating any of the following with Checkout:
To allowlist your domain(s), follow these steps:
- Go to Settings > Configure Chargebee > Checkout & Self-Serve Portal > Advanced Settings > Add domains.
- Select Add domain names or Edit domain names.
- In the text box, enter a comma-separated list of your domain URLs.
- Select Apply to save the changes as a draft.
- Select Publish to apply the changes.
Note
- Each URL must include the scheme (such as
https) and the domain name (such asexample.com). - You can use the wildcard character
*in domain names. - The text box accepts up to 500 characters.
Examples
Here are examples of valid entries in the Add domains text box:
- Single domain:
https://foo.com - Multiple domains:
https://foo.com, https://foobar.com - All subdomains of a domain:
https://*.foo.com - All subdomains of a domain plus another domain:
https://*.foo.com, https://foobar.com
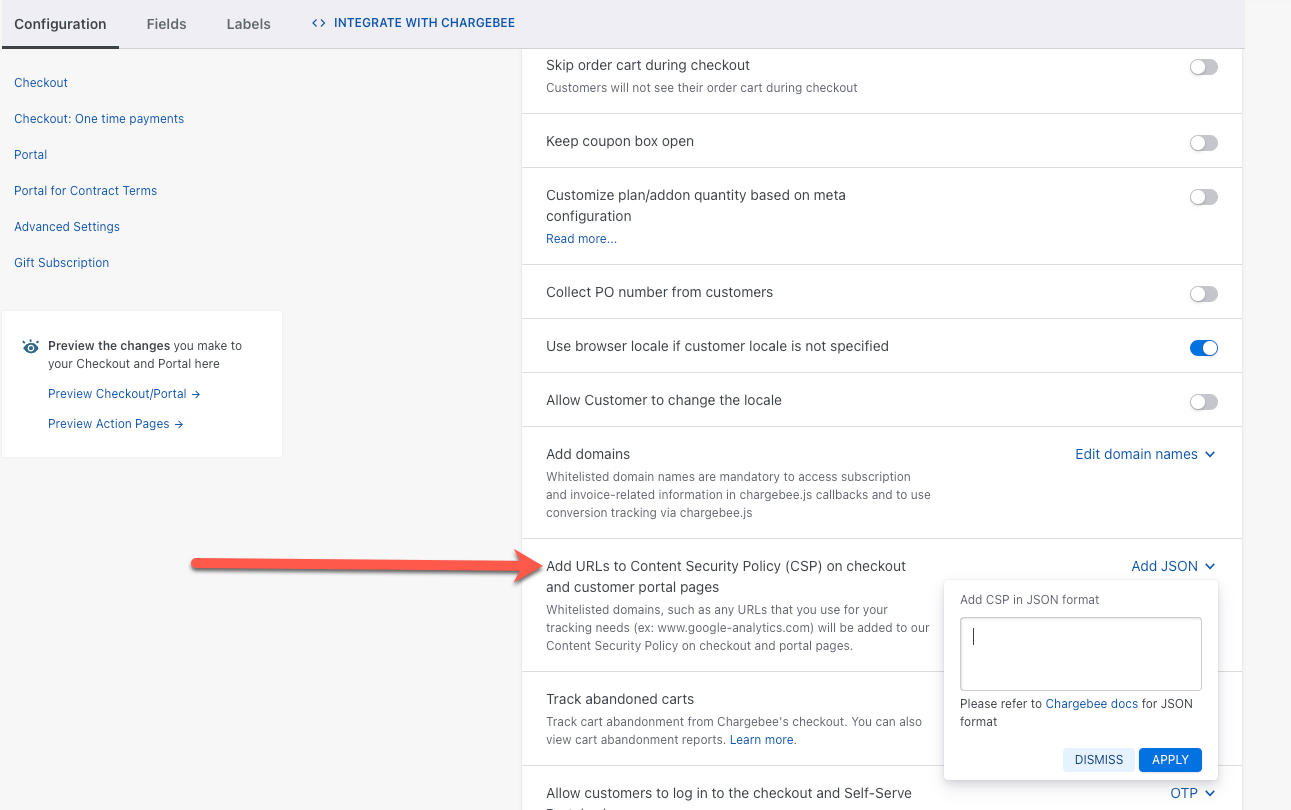
Add URLs to Content Security Policy (CSP) on checkout and customer portal pages
To ensure PCI DSS v4.0.1 compliance and safeguard your customers, Chargebee implements an allowlist/strict Content Security Policy (CSP) across Checkout, Portal, other payment pages, and all iframes loaded by Chargebee.js such as Payment Components and Card Components.
If you're using Google Tag Manager (GTM) integration to deploy scripts or other assets on these pages, you must explicitly allowlist them by uploading a JSON configuration in Chargebee Billing. Without this step, the assets will be blocked.
Follow these steps to allowlist scripts and other assets on Chargebee hosted pages using Content Security Policy (CSP):
Note
The CSP changes take effect immediately for Checkout, Portal, and other payment pages. However, it can take up to 7 days to apply on other components loaded by Chargebee.js, such as Payment Components and Card Components.
-
Go to Configuration > Advanced Settings > Add URLs to Content Security Policy (CSP) on checkout and customer portal pages, and select Add JSON.
-
In the Add CSP in JSON format field, paste the copied JSON. The minified version of the configuration JSON must not exceed 5000 characters.
-
Select Apply.
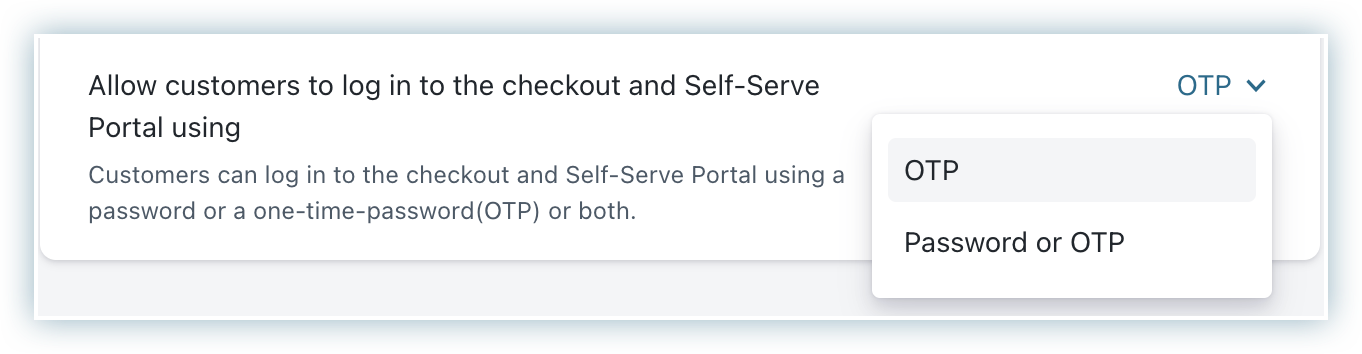
Allow customers to log in to the checkout and self-serve Portal
Chargebee allows your customers to sign in to their self-serve portal using a password or a one-time password (OTP). This depends on the configuration set up in your Chargebee account.
Note
This applies only to users who do not have single sign-on set up.
OTP: A one-time password is sent to the customer's email address. The customer must enter the OTP to sign in to the self-serve portal.
Password or OTP: Customers can choose to authenticate using either a password or an OTP. If a password is set, customers are prompted for it first. They can choose to sign in using an OTP by clicking the Login via one-time password link.
For more information, see setting or changing your password.
Was this article helpful?