Getting Started with Chargebee: The Startup Handbook
Click to Read
"It's never been easier to start a company. It's never been harder to build one.", says Naval Ravikant, a serial entrepreneur and VC. If you ask anyone who has built a startup or ever been a part of the process, they will agree. Building a startup is one rewarding but challenging ride.
You've got 99 problems — from customer acquisition to retention to building a team. Fortunately, billing and subscription management won't be one anymore. But before we get into details, welcome to the Chargebee family. We are thrilled to have you onboard! 😁
If you are wondering what to expect with Chargebee, here is something: If there ever was a magical train leaving to the world of subscription success, Chargebee's solution is your ticket to platform 9 ¾. With it, your developers won't need to spend hours writing custom code for every billing need, your support team can say goodbye to the endless sheets of customer data, and your marketing and sales team can experiment all they want. Tl;dr your teams will be able to cut through the noise and get laser-focused on what really matters — your product.
As a billing solution sits right at the heart of your business' finances, it's only natural for you to have a host of questions as you integrate one. This handbook shares everything you need to know about Chargebee: what makes it different from a payment gateway, its features and capabilities, how it works, and how you can get up and running with it... today.
Chargebee Vs. Payment Gateways: Differences Not to Miss
A payment gateway provides you with the bare minimum subscription billing features and lets you raise basic recurring invoices. It has limited capabilities and even more limited expertise when it comes to helping your subscription business. This means that as your business grows and your billing needs increase, you will need more people to maintain this system and keep your billing process going. Back to square one, right?
In most cases, this humans-in-the-loop system can stunt your speed so much that you will end up building an in-house billing solution all over — an expensive and not-fun task when you would rather be talking to your customers.
Moreover, it makes growth a liability. Yes! You heard that right. The more customers you have, the more payment methods, currencies, and taxes you will have to deal with. Your development team will constantly be torn between creating these new billing features and developing your actual product, thus sidelining the real focus.
Another big way in which Chargebee differentiates itself is the very approach of the solution. A payment gateway is fundamentally built to enable the flow of payments... gateway, that is! This means that while a payment gateway is definitely "the" tool to process payments, it's not dedicated to subscription management and will probably never be. On the other hand, Chargebee is a specialized subscription service with ever-expanding capabilities to keep you updated with what's buzzing and needed.
You can very well use a plank of wood to cross a stream. After all, it floats, right! But you would not trust that plank with crossing a sea, would you? You need a yacht to do the job and do it well.
Now let's get to setting up your Chargebee account. Here is how you can get started with it and create a seamless and effective recurring billing system that complements your business model.
Understanding Your Chargebee Dashboard
Sites and what they mean:
After you have created an account on Chargebee, you will be guided to set up a 'Site' by adding your domain and company name. A Site is the heart of your Chargebee account — it is where you can exercise your superpowers and specify how you want your customers to be billed, charged and communicated with. It holds all your customer information, your complete product catalog (plans, addons, and coupons), subscriptions, reports, and all product configurations.
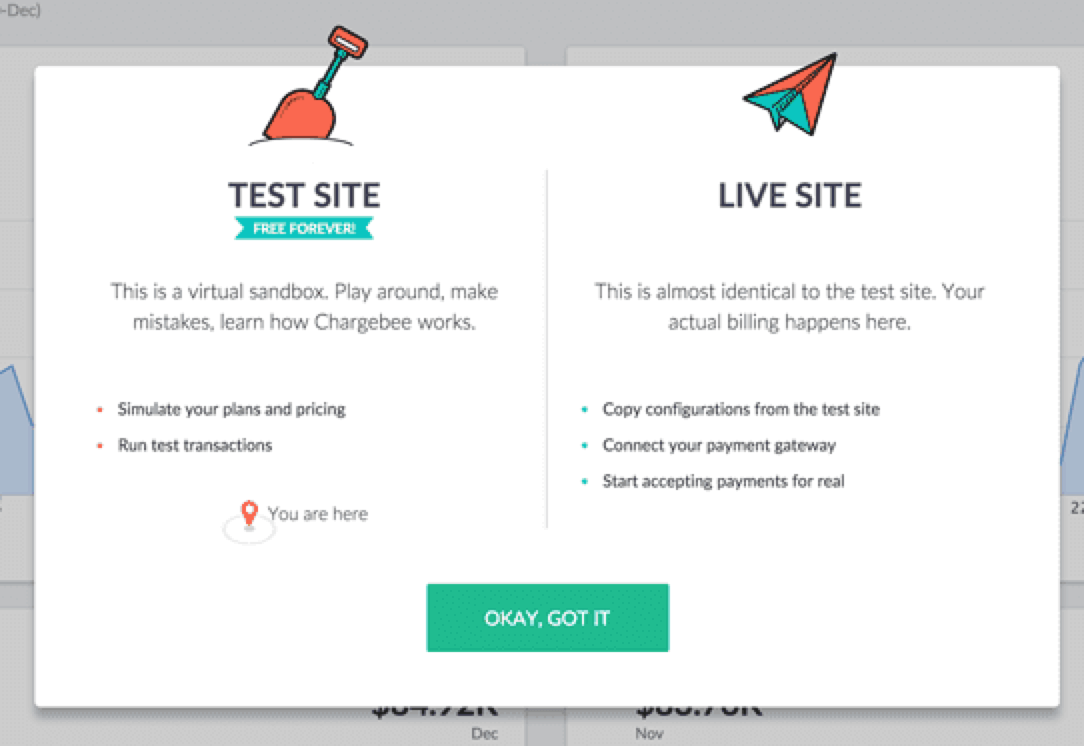
There are two types of sites on Chargebee: Test Site and Live Site.
Setting up the Test Site:
A Test Site is exactly what it sounds like: a place for you to test your billing configurations, play around with the features, and tinker with things without thinking twice. You can use it to create sample Plans, Addons, Coupons, and more.
Since billing changes have an immediate impact on your customers, it's a no-brainer to test out all your configurations before rolling them out. Chargebee's Test Site, also called a sandbox environment, helps you do just that.
The Test Site also provides a test payment gateway and test credit cards that you can use to carry out sample transactions and simulate a customer buying and lifecycle experience.
Pro tip
Model your own billing workflow on your Test Site and run a few test transactions using the test payment gateway. This will help you ensure that everything is working perfectly before you switch to the Live Site. Read more about the test payment gateway here.
Managing your Test Site data:
The Test Site is here to stay. What we mean by that is while you will be using the Live Site to do the actual work, you would need to come back to the Test Site every time you want to test a new feature or configuration before setting it live.
So, once you are done experimenting with the various configurations and likely have lots of sample data in the test site, it is a great practice to clear this data before moving on.
You can do a complete or partial deletion of this data and add new information in its place. Just go to "Settings" → Click "Configure Chargebee" → Select "Delete or Repopulate Test site data". Remember, these changes CANNOT be undone.
Setting up the Live Site:
Your Live Site is the real Chargebee environment where you can configure a payment gateway and start accepting real payments from your customers.
Enabling a Live Site:
When you first sign up on Chargebee, your Live Site is disabled by default. Once you are ready to start billing your customers, you can enable your live site in a single step: Click on the "Go Live" button located on the top right of your Chargebee dashboard.
Note
Chargebee allows you to assign different access roles to users based on their role in your organization. This helps you control data security and maintain a robust system. Know more about how you can manage all users and their roles here.
Once you go live, your Test Site still remains available for you to test out any other possible configurations based on your billing needs.
Integrating with Chargebee: Plug and Play, and API
The next big step is to integrate Chargebee with your product and website. You can choose how you want to do it — using Chargebee's web interface, API, or webhooks. You can also collect subscription information from your customers via hosted payment pages and customer portals. Here's how each of the integration options works.
Plug and play with Chargebee:
Web interface: If you're looking for a quick, hassle-free way to start billing with Chargebee, you can use the Chargebee application interface to do everything directly using your dashboard. Here's how you use it:
Log in with your credentials.
Set up your products and related settings.
Start billing!
Chargebee's checkout (Hosted payment pages): Don't have much development support? No problem! You can use Chargebee's checkout, which is not only ready to be used but also fully customizable to suit your needs. Moreover, it is PCI-compliant, so you have nothing to worry about. Learn more here.
Self-serve customer portal: Giving your customers the freedom to manage their subscription can make them happy while also reducing the load on your customer support team. Win-win, right? Similar to hosted pages and checkout, Chargebee's customer portal is also ready to be used and hence requires no development effort. More on this here.
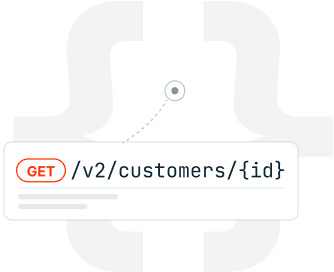
Using API to integrate:
Chargebee offers HTTP-based API which follows the essence of REST*. In less technical terms, you can easily use this API to enable your application to talk with our system. You can then use this data to automate your workflows.
Here are some resources that will come in handy while you work with our API integration. Need more information? You can take a look at the client libraries too.
Using webhooks to integrate:
Webhooks are essential to staying updated with real-time events across the apps you use. Your developers can set up webhooks that can be used to notify your application of events that take place in Chargebee.
You can use these events to stay updated on your KPIs. For example, every time a user signs up for a subscription, renews a subscription, or pays, the webhook will notify you via a message. Check out how to configure them here.
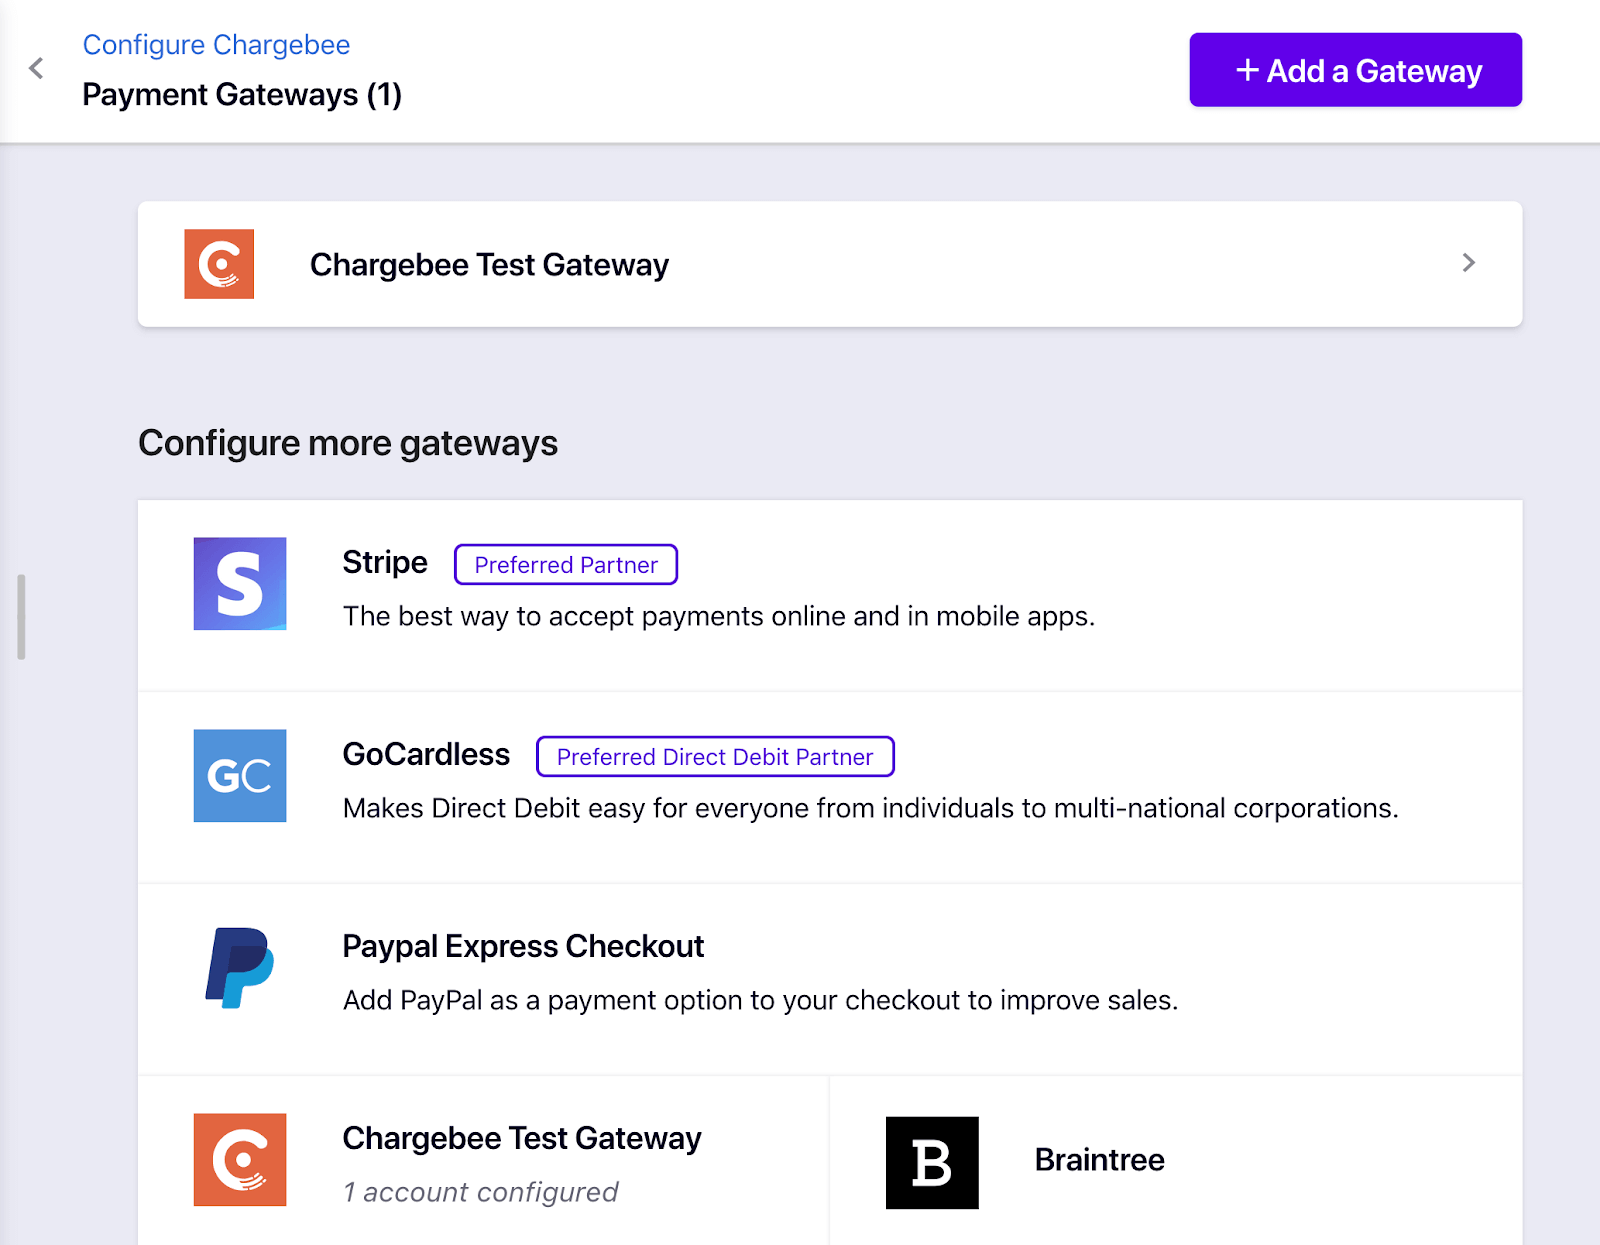
Payment Gateways and Methods:
Configuring a payment gateway:
Your payment gateway builds the foundation of how you collect your payments and more importantly, how you let your customers pay. It is a huge part of the checkout experience, which is why picking the right one is extremely important.
Before we jump into the types of payment gateways available, let's delve into how you can configure your payment gateway. Chargebee lets you choose from a variety of payment gateways. Here is how you can configure it:
We know that no two businesses have the exact same needs and concerns while picking a payment gateway, but there are some top-level questions that stay common across organizations. This exhaustive Gateway Evaluator answers these top questions and lets you compare payment gateways to find the one for you.
One, two, or ten: How many payment methods to pick
Your startup might be fairly new right now, operating in one location with users that use just one payment method. But as you grow and expand your user base and location, your users would ask for (or at least appreciate) options on how they can pay.
It might seem a little daunting, but trust us, it isn't. With Chargebee, you can configure multiple payment methods per customer based on user demographics, your business model, and more.
In addition to creating a delightful experience, having multiple payment options also increases revenue assurance. So that the next time a payment method fails for a user, you will have another one to fall back on. Check out the host of payment methods you can choose from:
In case you need an in-depth overview of each of these payment methods, check out this help document. It details out how you can set up multiple payment methods for one customer, assign payment methods, and do much more.
Note
With credit cards, you also have the option of choosing between payment gateways and merchant services. Check out this blog and infographic to understand more about them.
Going Live with Chargebee:
So you have tinkered with the test site, have set up some of your billing systems, picked a payment gateway, and are now ready to start billing your users. How do you cross over?
You can do so by "going live" on Chargebee. Here is a comprehensive Go-Live checklist to make sure that all your configurations are in place and you don't miss out on anything important.
1. Set up the product catalog and pricing details:
Let's take an example to understand this. In the offline world, a customer journey involves going to the shop, picking a good, and paying for it. In order to serve the customer, the shopkeeper needs to know the quantity-price-quality relationship. Ex: 1 lt. of fat-free milk is for 1$. He uses this model to serve any customer who asks for fat-free milk.
Similarly, Chargebee needs to know your pricing, plans, etc. to bill and service users. The product catalog on your dashboard is where you can model all of your subscription plans, addons, and coupons. Here is what all of them mean:
Plans: A plan defines how you offer your product to a user. It spells out what you are offering, how long you are offering it for, and how much it is priced at. Plans are the foundation of a pricing model and setting up your business Plans is ideally one of the first few things you should do on Chargebee.
Plans are created in correspondence to a specific product or service that you offer. This means that you would need to create a plan for each product or service you'd have. It contains information such as the price, plan's currency, pricing model, billing interval, etc.
Each plan can only have one currency in Chargebee. However, you can support multiple currencies by creating separate plans for each currency.
Addons: An addon defines a service or item that's being offered in addition to the plan. You can choose to make an addon recommended or mandatory and whether it is one-time or recurring. Ex: For a dog spa plan, an addon could be one that offers your dog a toy every time he visits.
Coupons: Coupons let you offer discounts on your plans and addons. You can control settings like coupon value, validity, and maximum redemptions using Chargebee.
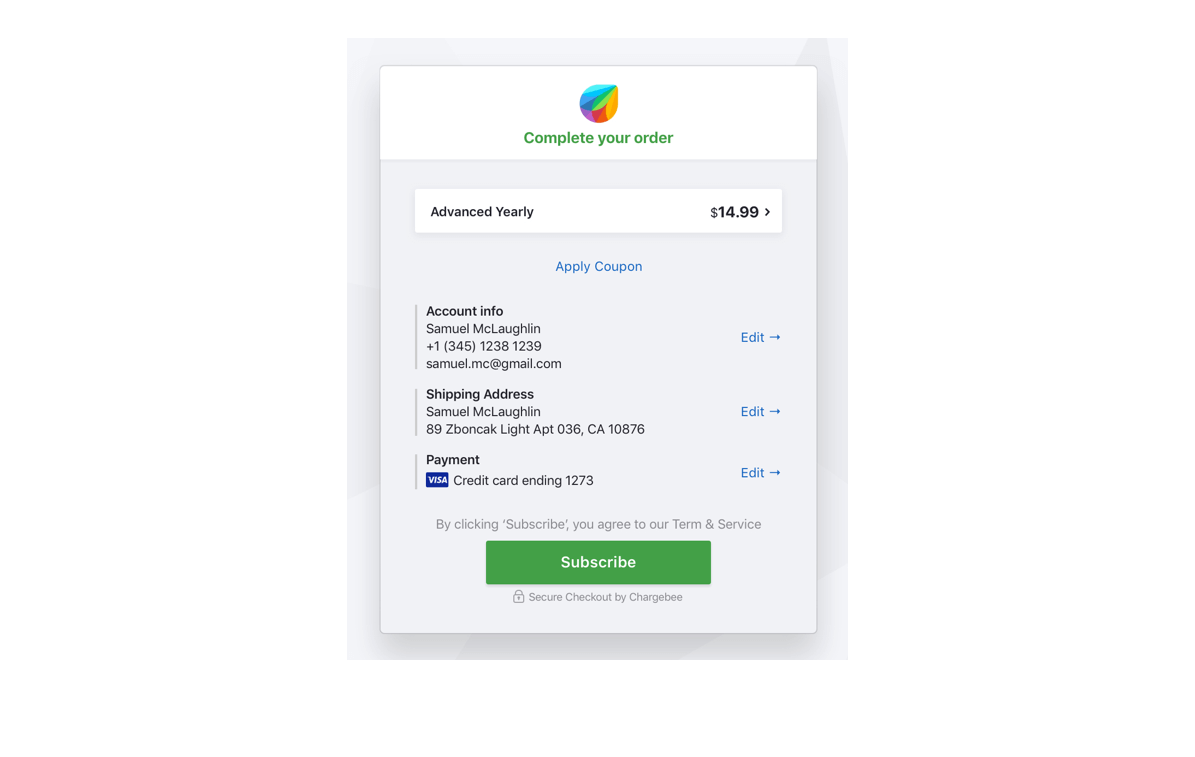
2. Configure checkout:
Great features and convincing pricing is only half the battle. Your checkout experience is the other half.
Properly configuring your checkout page lets you ensure a smooth buying experience for your users. Moreover, Chargebee's checkout pages are PCI-compliant, which puts users' data security concerns to rest.
You have a couple of options to configure checkout. The first is Chargebee's checkout that requires no development effort and the second is using an API. However, we highly recommend that you leverage Chargebee's in-app checkout over building your own form. Here are some solid reasons why.
Chargebee's checkout: Chargebee checkout is user-friendly, secure and easy to use. It has helped startups increase checkout conversion and reduce abandoned carts, simply because it lets customers enter payment information without having to leave the website.
Once enabled, every new customer receives this checkout by default while existing/returning users can use it by auto-filling account information, including account and payment information.
Checkout via API: If you are keen on having granular control over the checkout, you can opt for checkout via API. However, this will need you to have good coding knowledge and development support. You should choose this option if you have a user authentication system at your end.
Here is the complete API integration documentation to help your development team configure checkout and other integrations.
3. Configure the customer portal:
The customer portal provides your users with a self-serve option — allowing them to manage their account details without external intervention, manage their subscriptions and plans, and update their billing details.
It not only provides a smooth customer experience but also reduces the constant dependence on your support team. Learn more about how to configure your customer portal here.
4. Set up invoices:
As the volume of your subscribers increases, invoicing can snowball into an all-consuming task, eating away hours of manual processing. With Chargebee you can automate the entire invoicing process right from sending the first invoice on sign-up, to all the subsequent payments made.
And you don't need to worry about ugly invoices. Chargebee lets you customize them using your company design language. Learn everything about invoice operations and customization here.
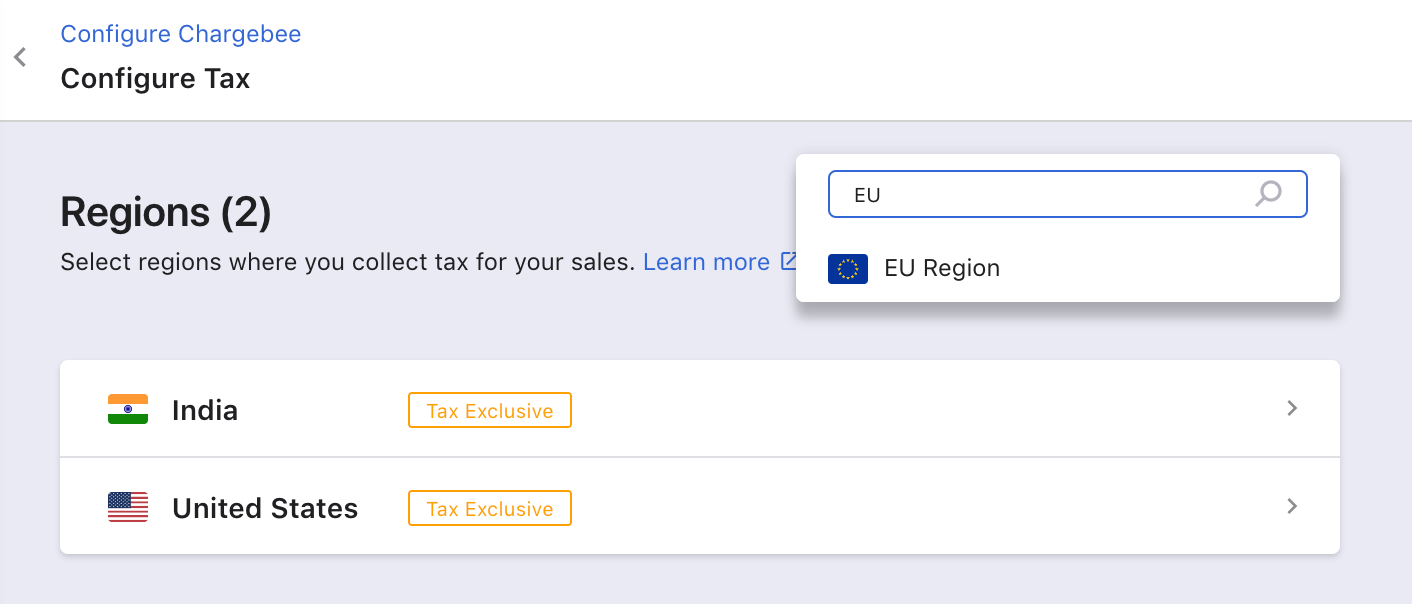
5. Set up taxes:
If you want to levy taxes on your invoices, you can do so by configuring them on Chargebee. Even if you operate in multiple countries, you can easily configure taxes according to the different regions. Here is a step-by-step process for setting up taxes.
6. Set up transactional emails:
By the nature of the recurring business, your relationship with users also ends up becoming recurring in nature — where your company is constantly tested and evaluated. To retain this relationship, you need to keep your customers engaged, informed, and happy.
Email notifications help you manage this communication in an automated yet personalized way. You can set up event-based emails to go out every time a new user signs up, renews, cancel, and so on.
Just like the invoices, you can customize the style, template, and the content you want to use in these emails. Here's more on configuring your transactional emails.
7. Set up dunning:
Customers canceling their subscription is a reality. While some might not have a need or want for your product, sometimes cancellation can happen because of payment issues.
A transaction might fail due to insufficient funds, expired cards, or connectivity issues. In order to avoid this involuntary churn and ensure revenue recovery, you can set up dunning — the process of automating transaction attempts over a period of time. Find out how to set up dunning here.
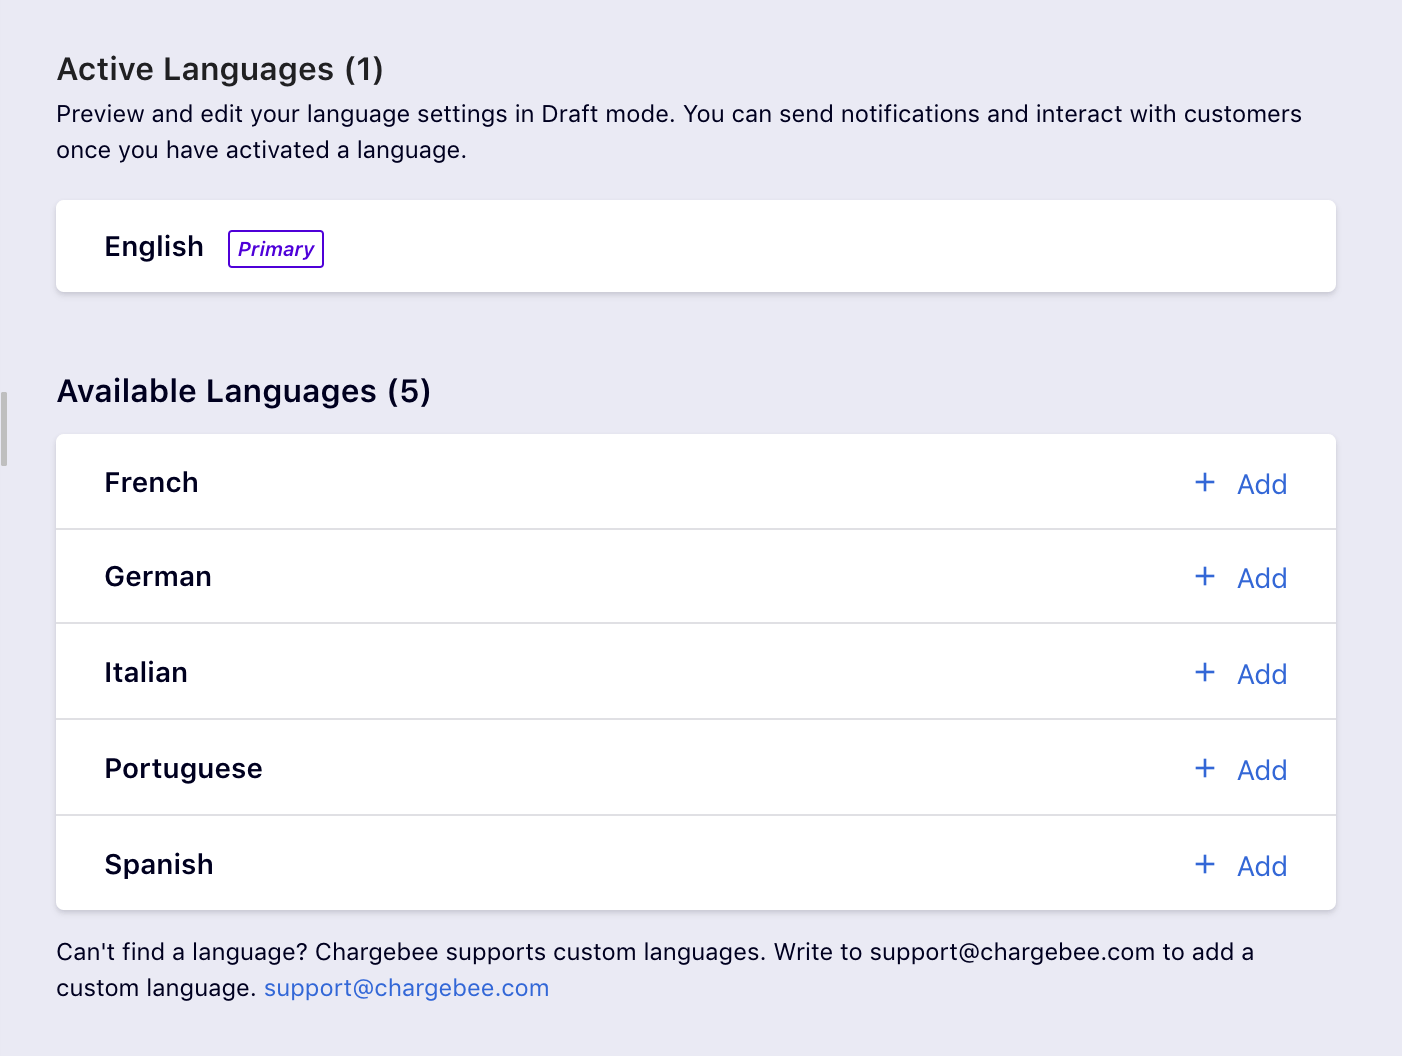
8. Set up languages:
If you have a global business, there are high chances that some of your customers may not be well-versed with English. Your communication, in such a case, should ideally be in their language.
Chargebee lets you choose multiple languages for your customer communication like invoices, emails, etc. Learn how to enable languages here.
9. Copy test site configurations:
Once you have created your product catalog (plans, addons, and coupons) on the test site and made other configuration changes there, you can easily copy these settings to the live site (and vice versa).
To do this:
Go to your live site → Select "Settings" → Click on "Configure Chargebee" → Scroll down to the bottom of the page → Click on the "GET STARTED" button under "Copy configurations from test site to live site"
If you want to copy your settings from the live site to the test site, go to the Test Site and follow the same steps as above.
Note
Not all configuration changes made on the test site can be copied to the live site. Check out this list to see the limitations here.
10. Fire up test transactions:
Running transactions on your TEST site: While you are still on the test site, it is wise to run some test transactions before you start billing your customers on the live site.
Running transactions on your LIVE site: Before you start billing real customers, do test out a bunch of small-value transactions with real cards in your LIVE site. Here are some sample tests you could run:
Test your checkout flow: Create a new subscription using a plan with an amount and 0 trial days to ensure the card is charged immediately.
After you create and charge a subscription successfully, try to add a charge immediately after 20 minutes, to confirm if recurring charges are successful.
Cancel an order/subscription
Issue a partial refund
Issue a full refund
In addition to things to do on Chargebee, there are some things you need to do externally to ensure everything works well. Here is a checklist detailing out the tasks to be done outside of Chargebee.
Migrating Subscription Data to Chargebee:
If you already have your subscription data on another system and want to move it to Chargebee, our team can help you in making a smooth and quick migration. Plus your first migration is completely free of cost.
You can place a migration request by following these steps: Navigate to "Settings" → Go to "Import & Export Data" → "Raise a Migration Request" → "Request Migration".
Once you have raised a request, our migration team will work closely with you. They will get back to you with details on how to send your subscription data, the data format to use, and more.
Getting in Touch with the Support Team at Chargebee:
Whether you need help in getting started with Chargebee, have a question about how a feature works, or just need some expert tips on how to set up your workflows... we are here to help you. Here are some resources that you can refer to.
1.Knowledge base: If you have a question about the product, chances are it is already answered here. The knowledge base houses an exhaustive set of how-to articles, FAQs, and step-by-step tutorials on figuring almost everything on Chargebee.
2.Community forum: Our community forum is where you can have a conversation with the fellow Chargebee customers who are dealing with similar challenges like you. You can ask them for suggestions, tips and tricks, etc. as well as offer to help someone out by sharing a solution to their problem.
You'll find a wide array of topics in discussion. You can search through them for information or start a new thread. If you are curious about an upcoming feature or have a feature suggestion, you can also post it here and our team will get back to you.
3.Talk to our support team: At Chargebee, we have a global support team dedicated to helping you whenever you need anything. If you feel stuck at any point, you can get in touch with us and we would be glad to help you. You can either write to us at support@chargebee.com or raise a support ticket with your questions.
And there! You now know everything you need to get started with Chargebee for your business. All that's left is for you to press the pedal and launch into action.
P.S. If you have any questions or need any help in setting up your account, just write to us at support@chargebee.com and let us know. We will get right back to you.
Hustle. Don't hassle!
Simplify your billing and subscription management with Chargebee and join over 10,000 global businesses.