Docs
Google Tag Manager (GTM) helps you centrally manage the analytics and measurement tags on your sites using a web-based UI, reducing the coding effort required to deploy tag configurations.
If you manage Google Analytics (GA) tags via GTM, then this page will help you setup Chargebee checkout and portal tracking in GA via GTM.
Please note that in-app layout of Checkout functionality does not inherently include a built-in integration with Google Analytics (GA) or Google Tag Manager (GTM). Instead, we leverage Chargebee.js to facilitate this capability.
Chargebee.js offers two primary functionalities to support analytics integration within the Checkout process:
To harness analytics capabilities within our in-app layout of Checkout, developers can leverage Chargebee.js to create a seamless and tailored analytics experience for their applications.
Prior to setting up GTM tracking on your website, you must have your Google Analytics (GA) account and property set up and configured.
Browser tracking blockers
Ad-blockers or privacy-enablement software installed on your customers' browser can prevent tracking data from being sent.
Initialize and install GTM on your website: do this by performing steps 1 and 2 of this guide by Google.
Considerations before you install GTM , if you are setting up GTM for the first time.
Note
GTM integration is for recording customer interactions with Chargebee checkout and portal. Backend operations such as subscription renewals do not trigger any events to GTM.
You may integrate Chargebee with GTM via drop-in script or API.
Enable the data-cb-gtm-enabled attribute to true when invoking Chargebee.js in the page headers of your site.
<script src="https://js.chargebee.com/v2/chargebee.js"
data-cb-site="you-chargebee-subdomain" data-cb-gtm-enabled="true">
</script>
Replace your-chargebee-subdomain in the code snippets on this page with your Chargebee site subdomain names.
Eg. If your Chargebee site is bigshopper-test.chargebee.com, then replace your-chargebee-subdomain with bigshopper-test.
Pass the enableGTMTracking parameter as true when initializing the Chargebee instance.
var chargebeeInstance = Chargebee.init({
    site: "your-chargebee-subdomain",
    enableGTMTracking: true
});
This subsection explains how to configure GTM so that events are tracked at GA properly. This does not include any transaction or product data. To also track transaction and product information, include the steps in the next subsection as well.
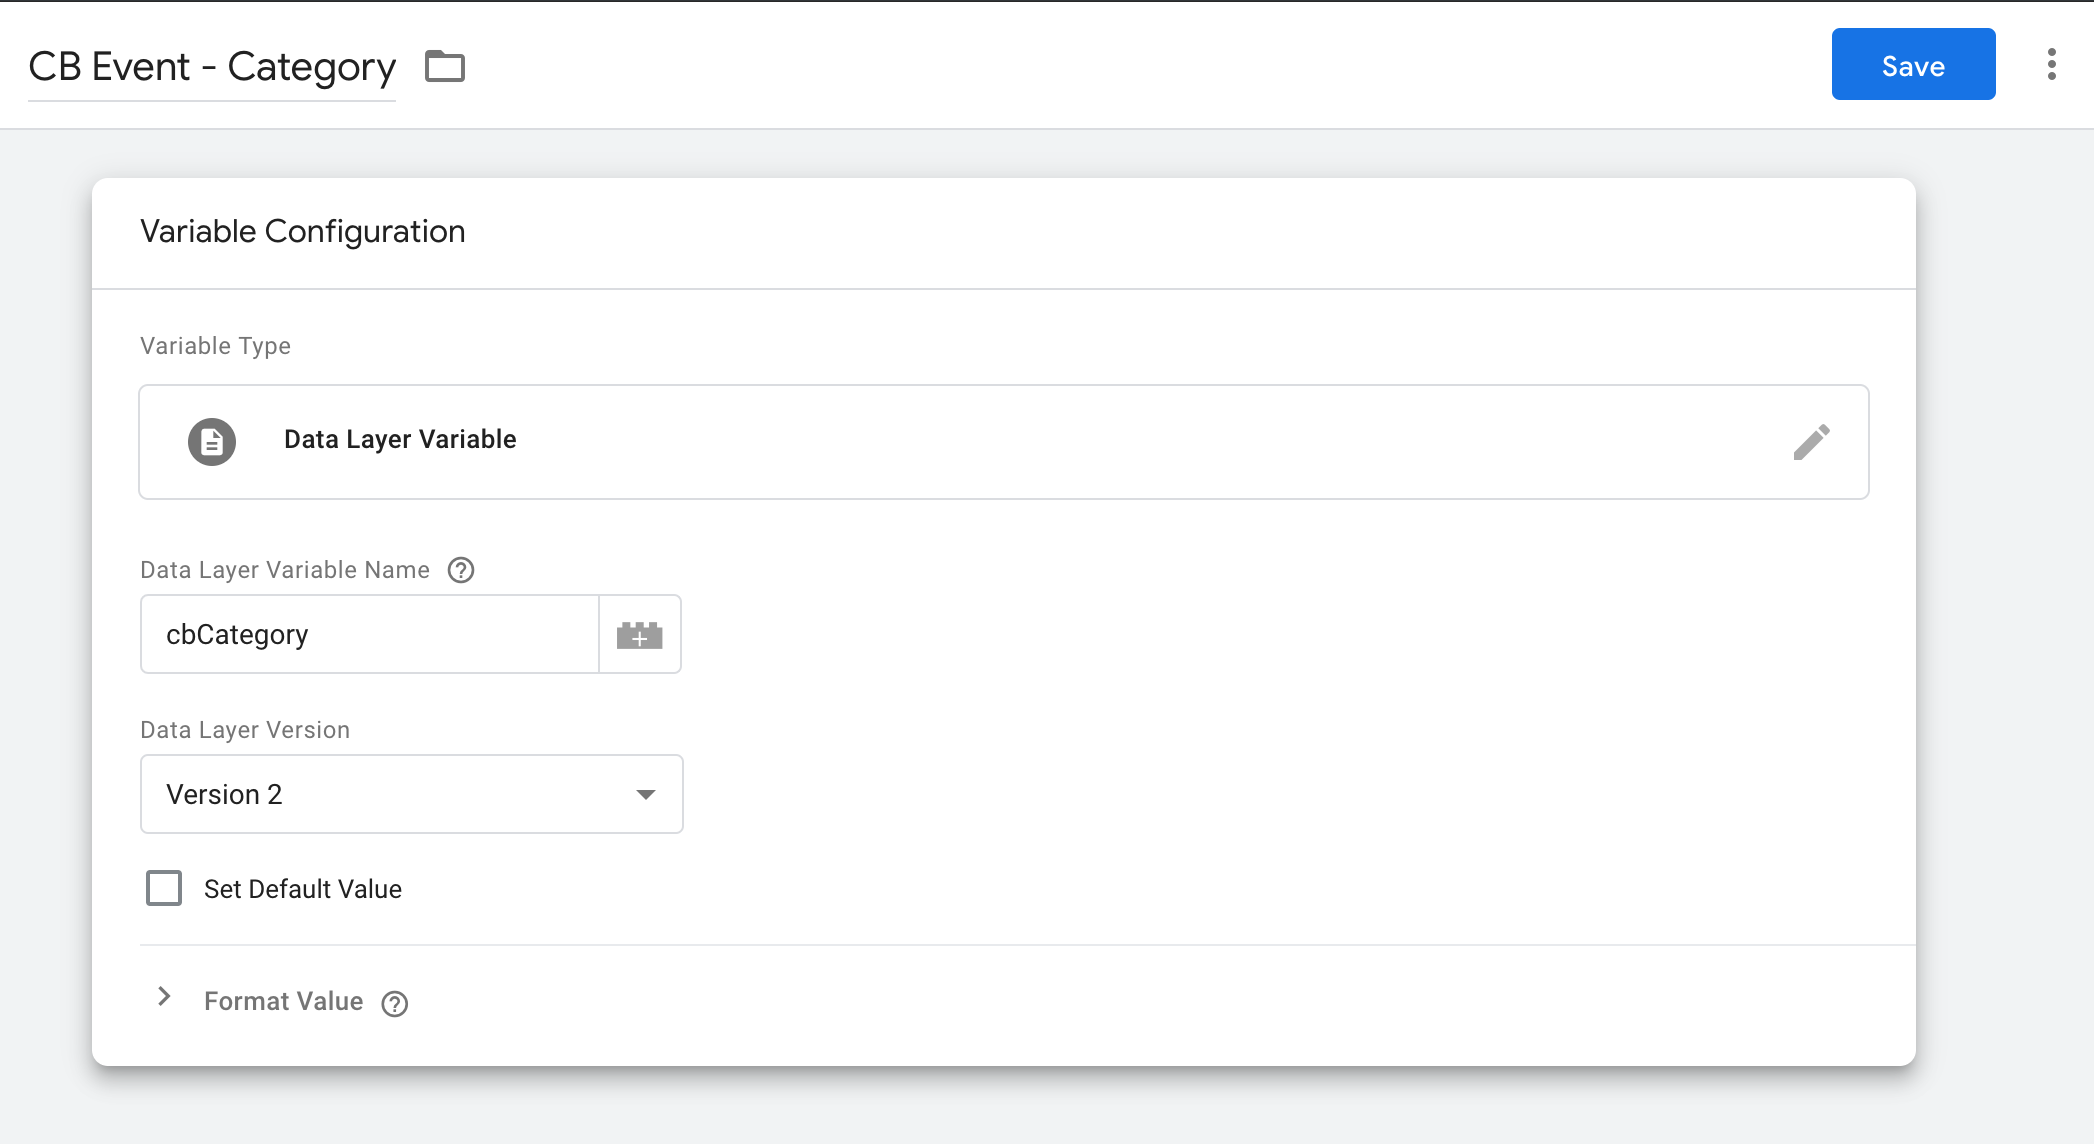
1. Data layer variables
cbAction.
Perform the above steps again to create yet another data layer variable. This time, enter the Data Layer Variable Name as cbCategory and name the variable, say CB Event - Category.
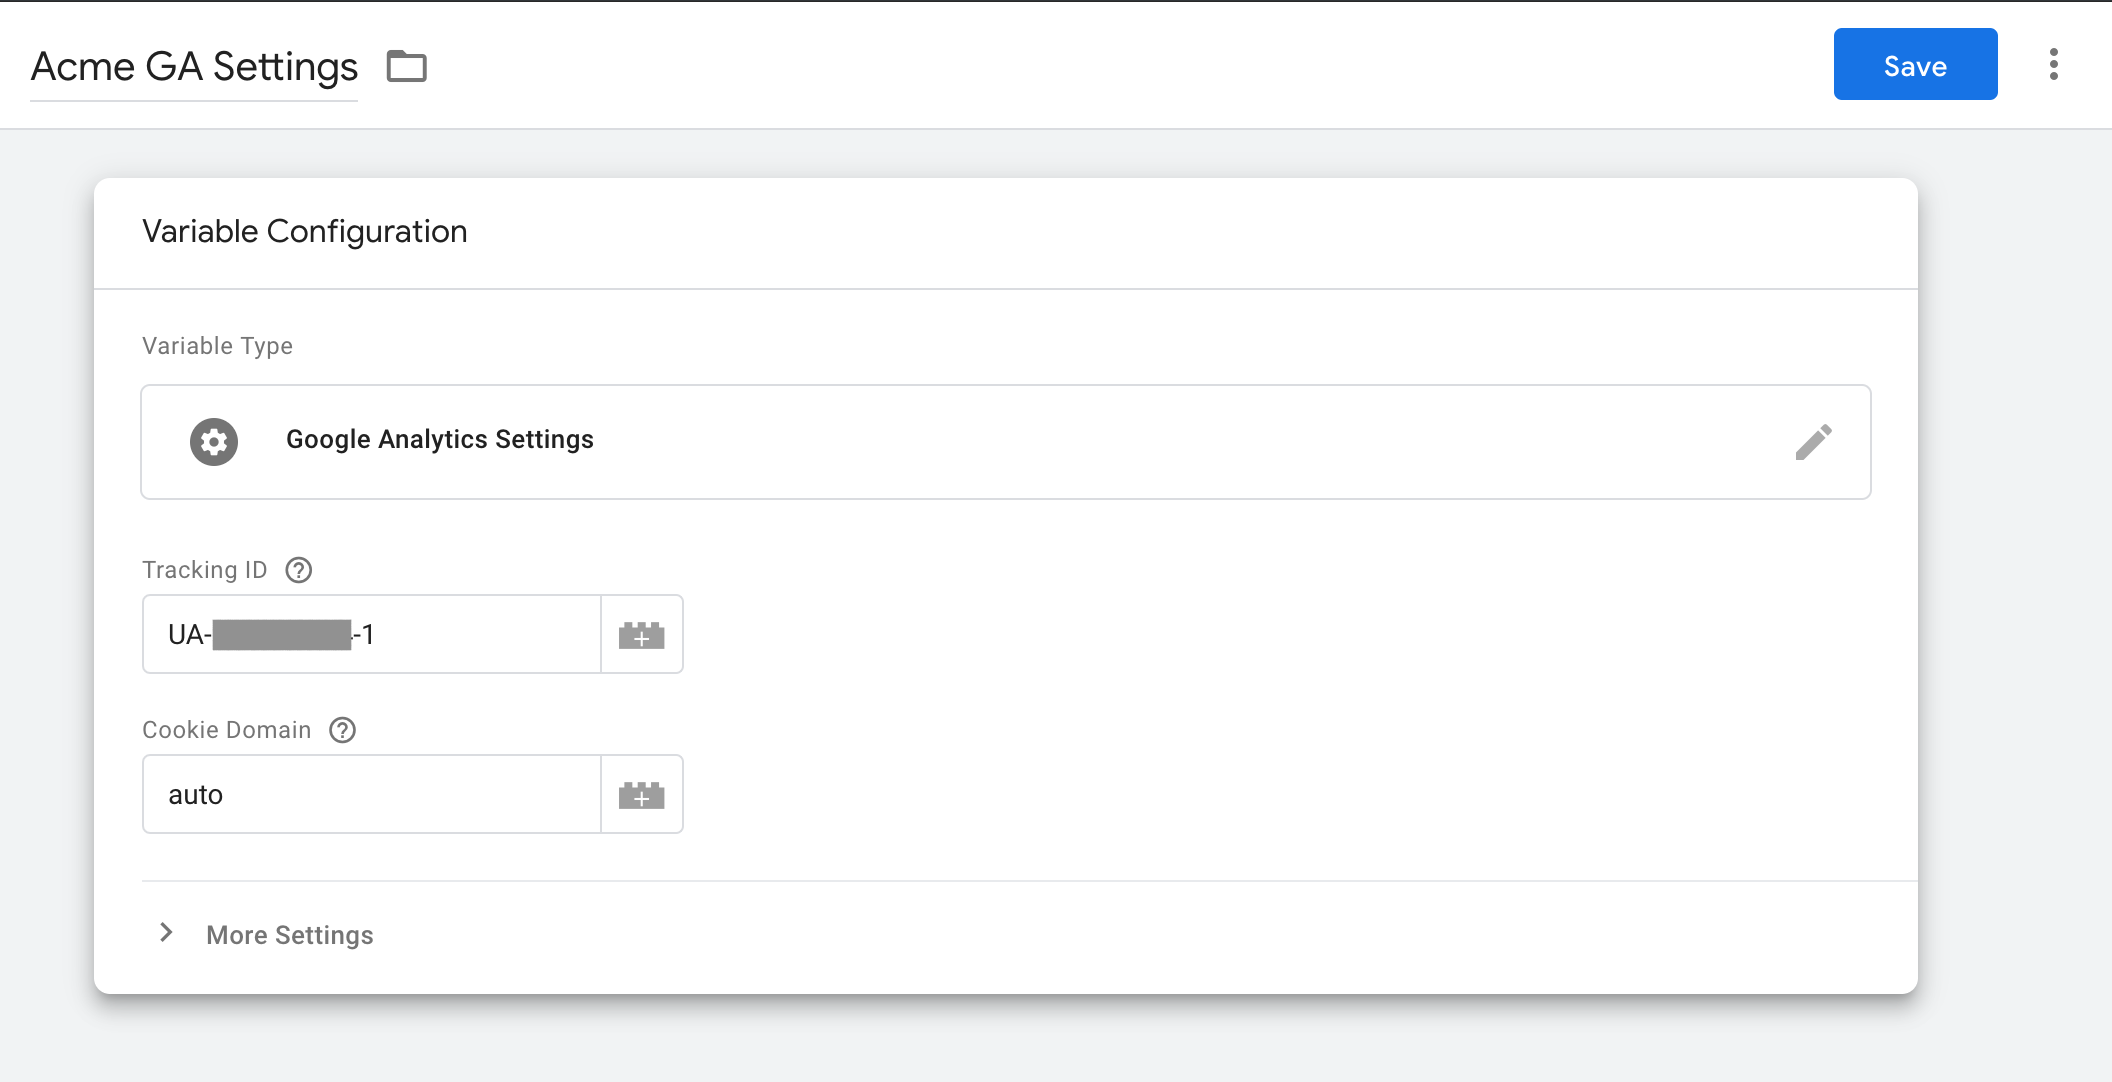
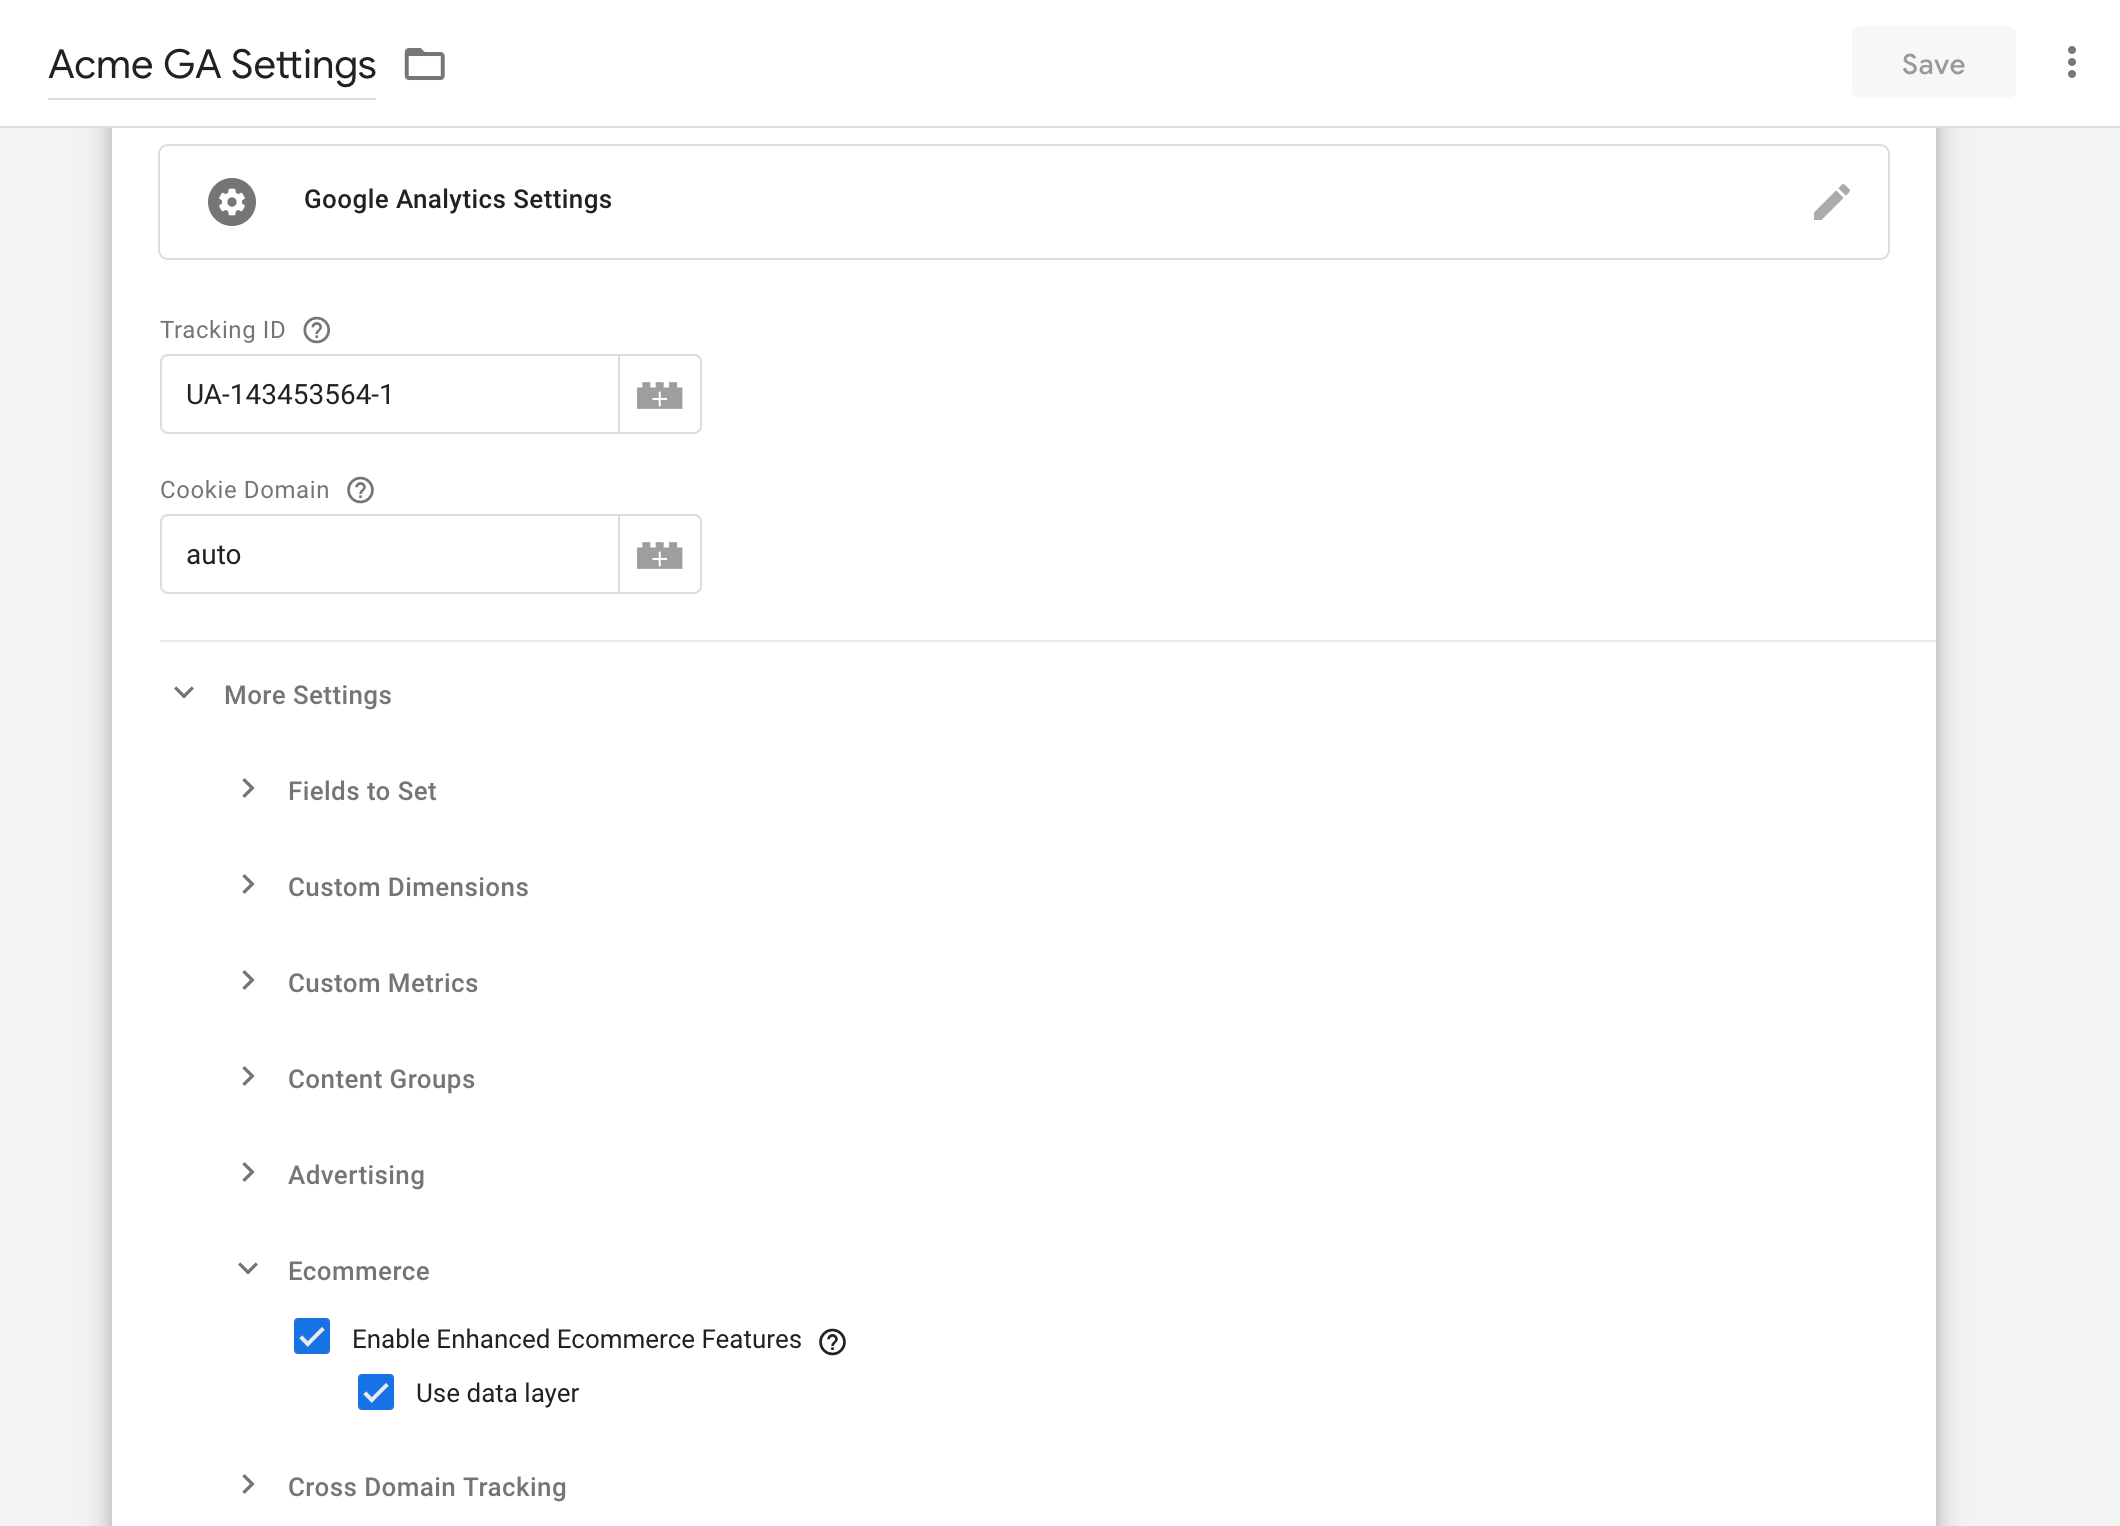
2. Google Analytics Settings variable
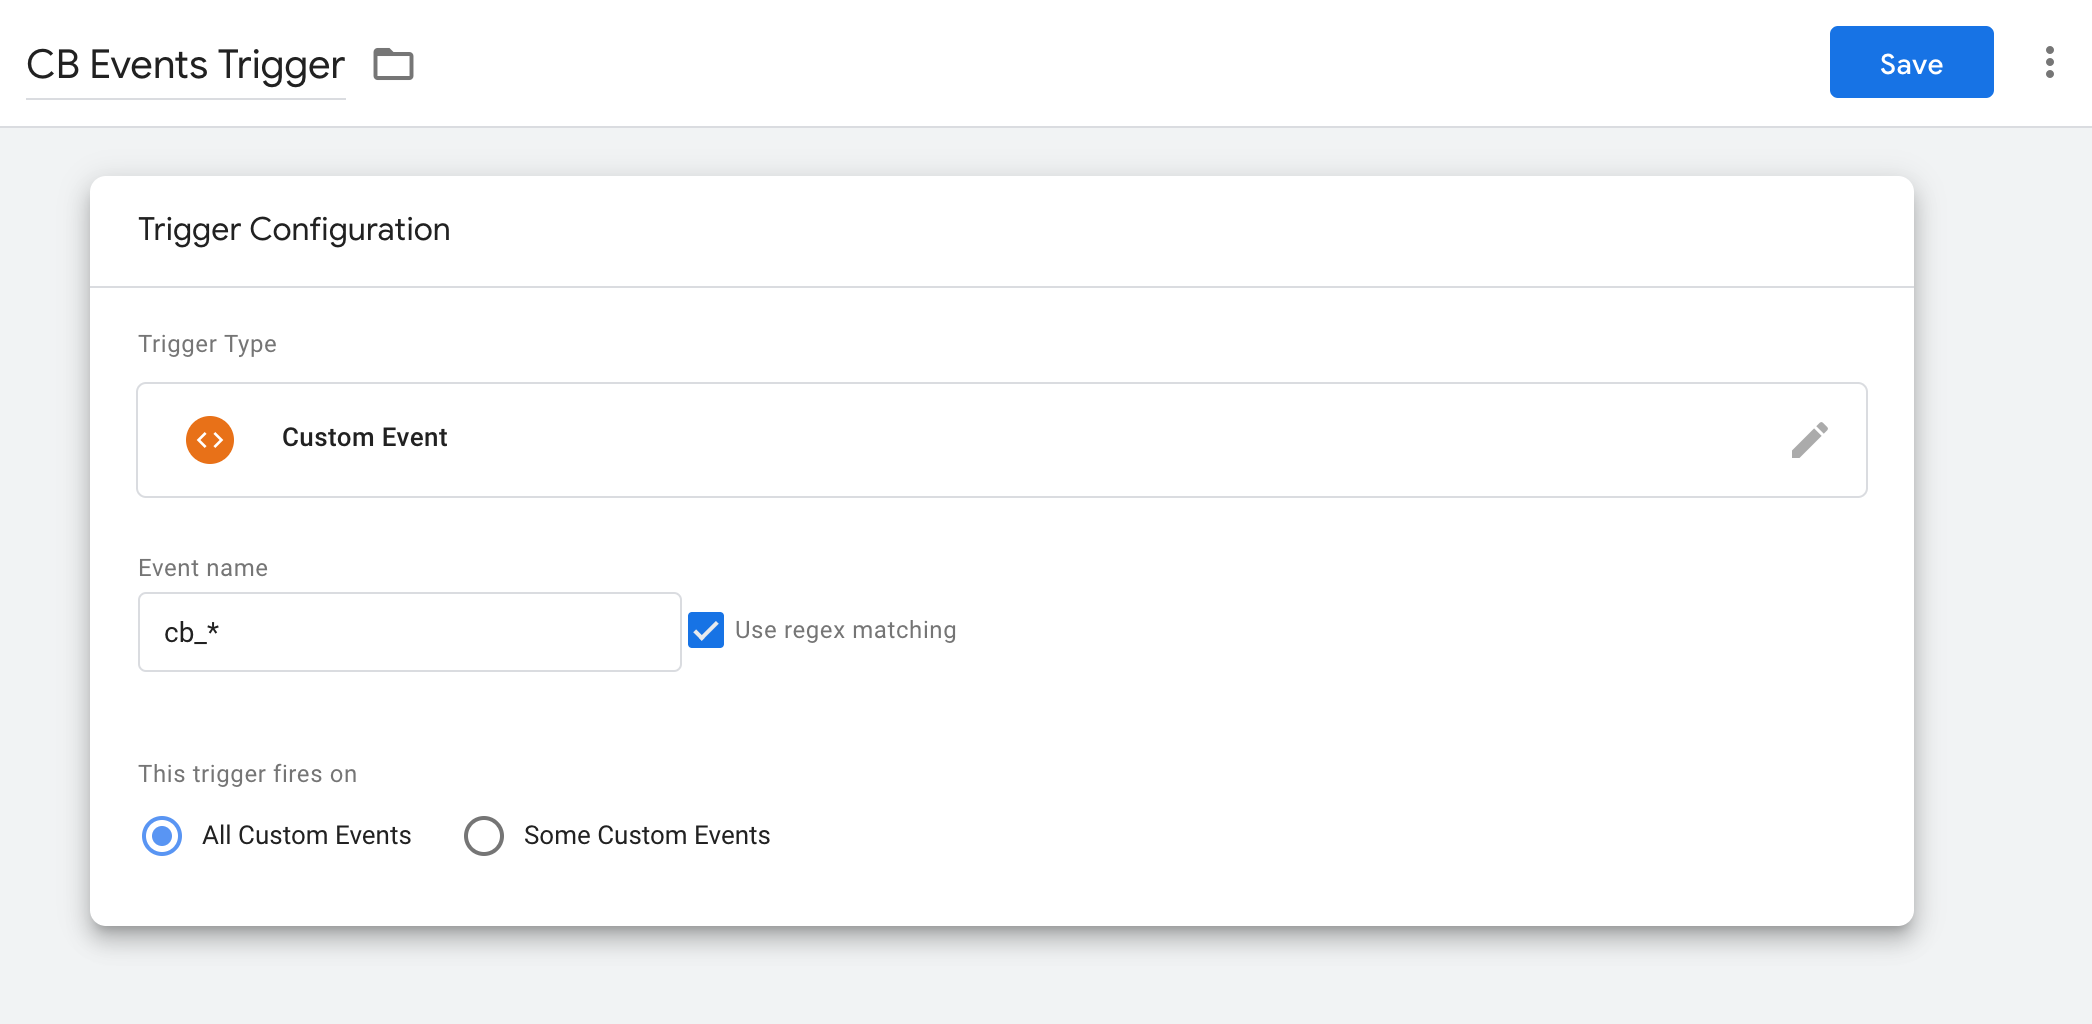
3. Custom event trigger
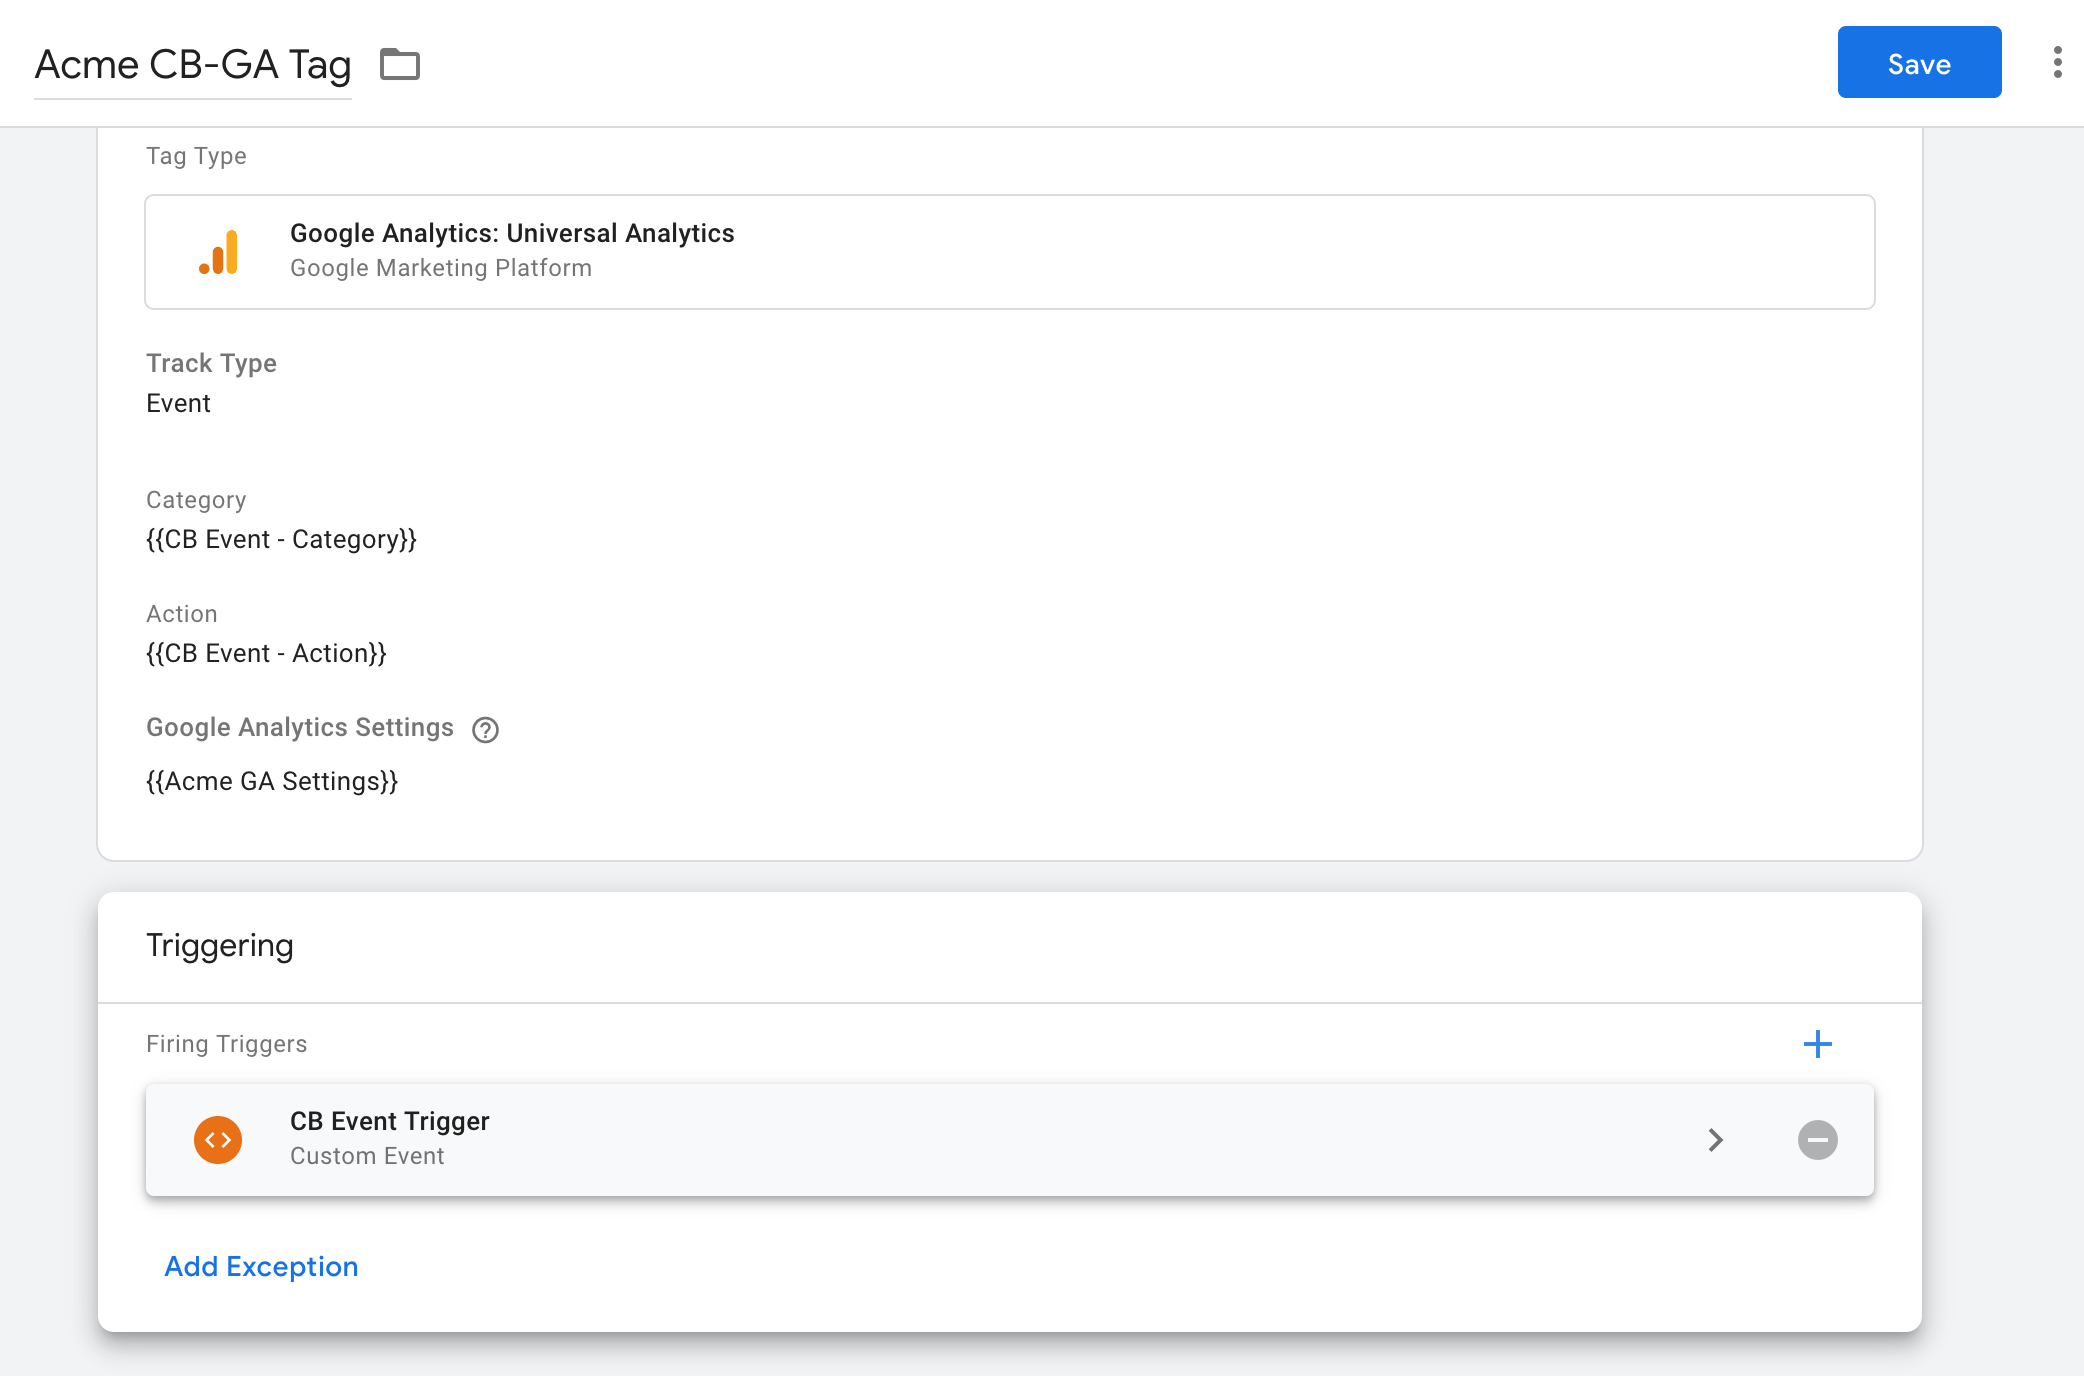
4. Google Analytics tag
Section A covered the basic setup for tracking non-ecommerce GA events. This section helps you perform additional GTM configuration required for tracking ecommerce events.
Prerequisite
Ensure that you perform step 2 of the prerequisites also for GA ecommerce events to work.
1. Update GA settings variable
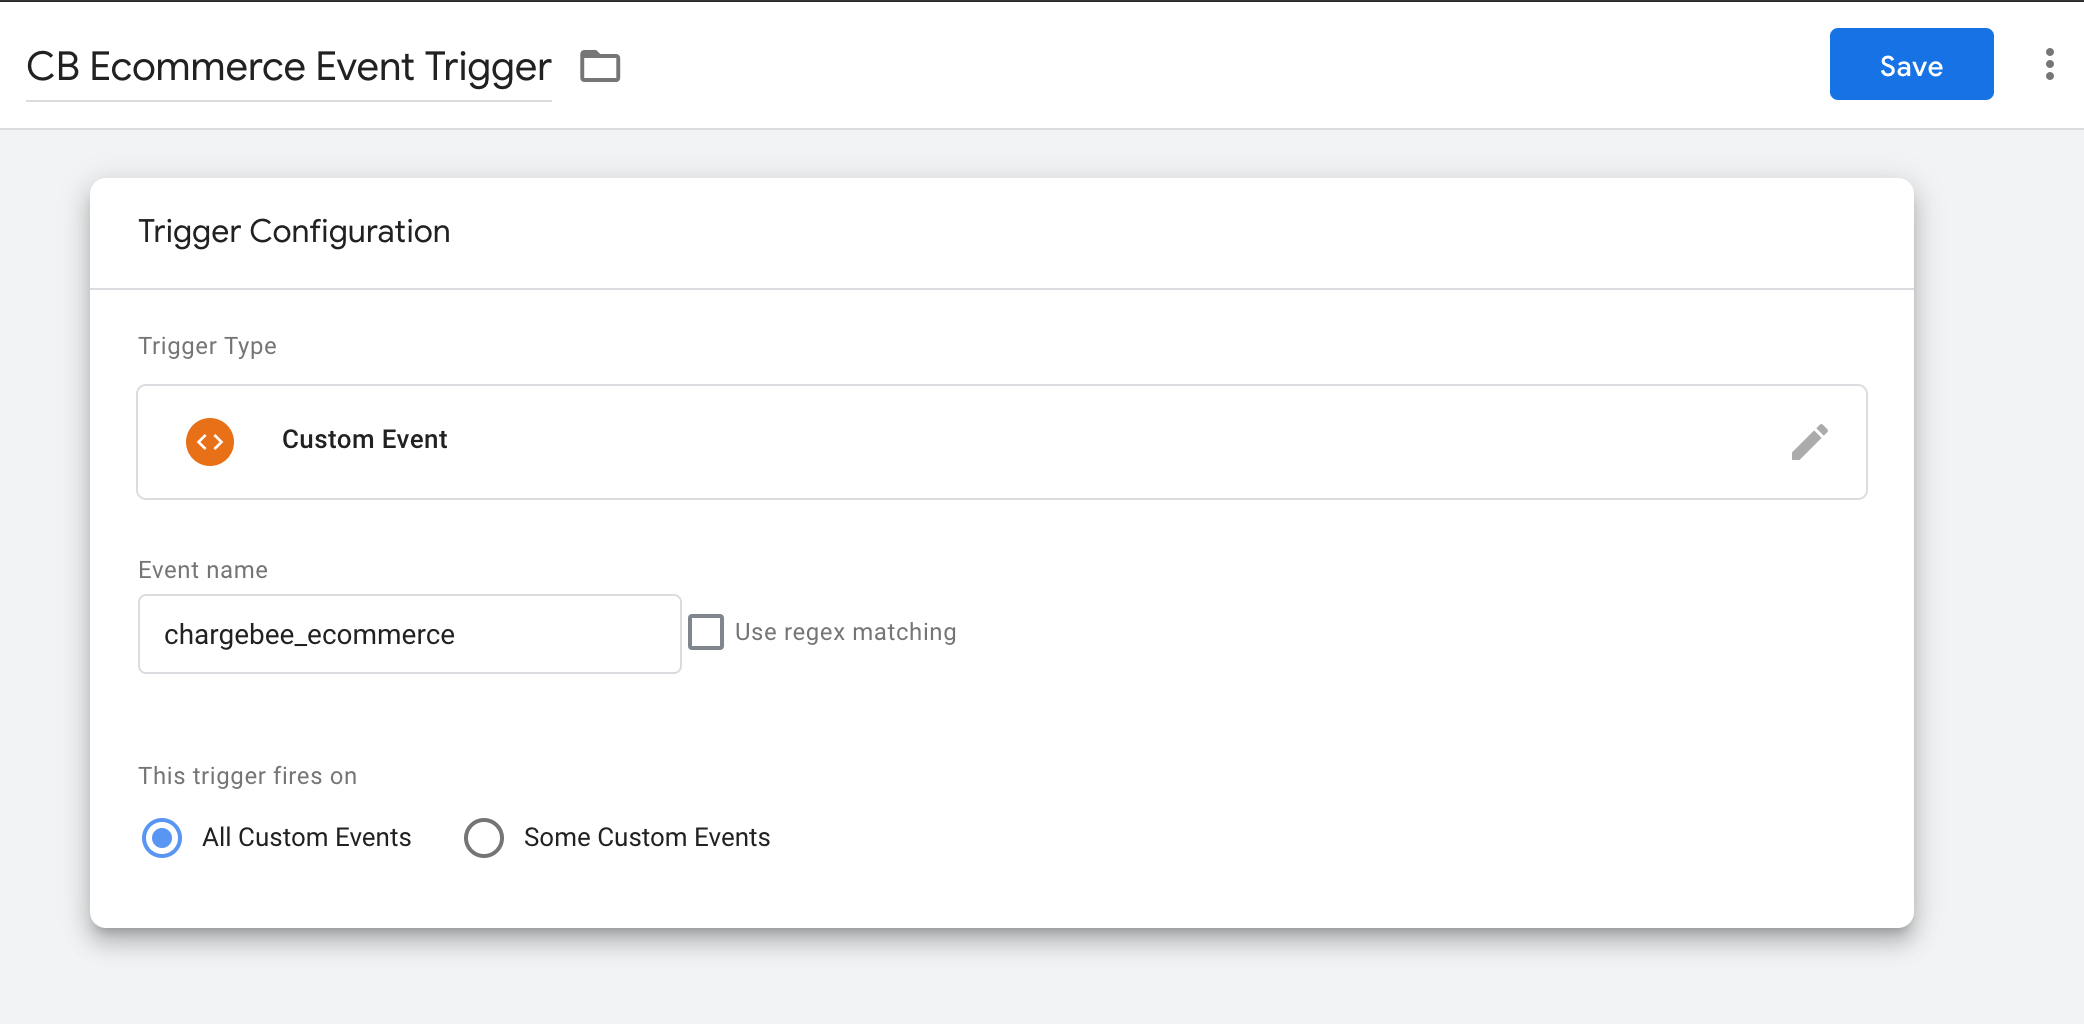
2. Custom event trigger
3. Google Analytics tag
ecommerce.purchase.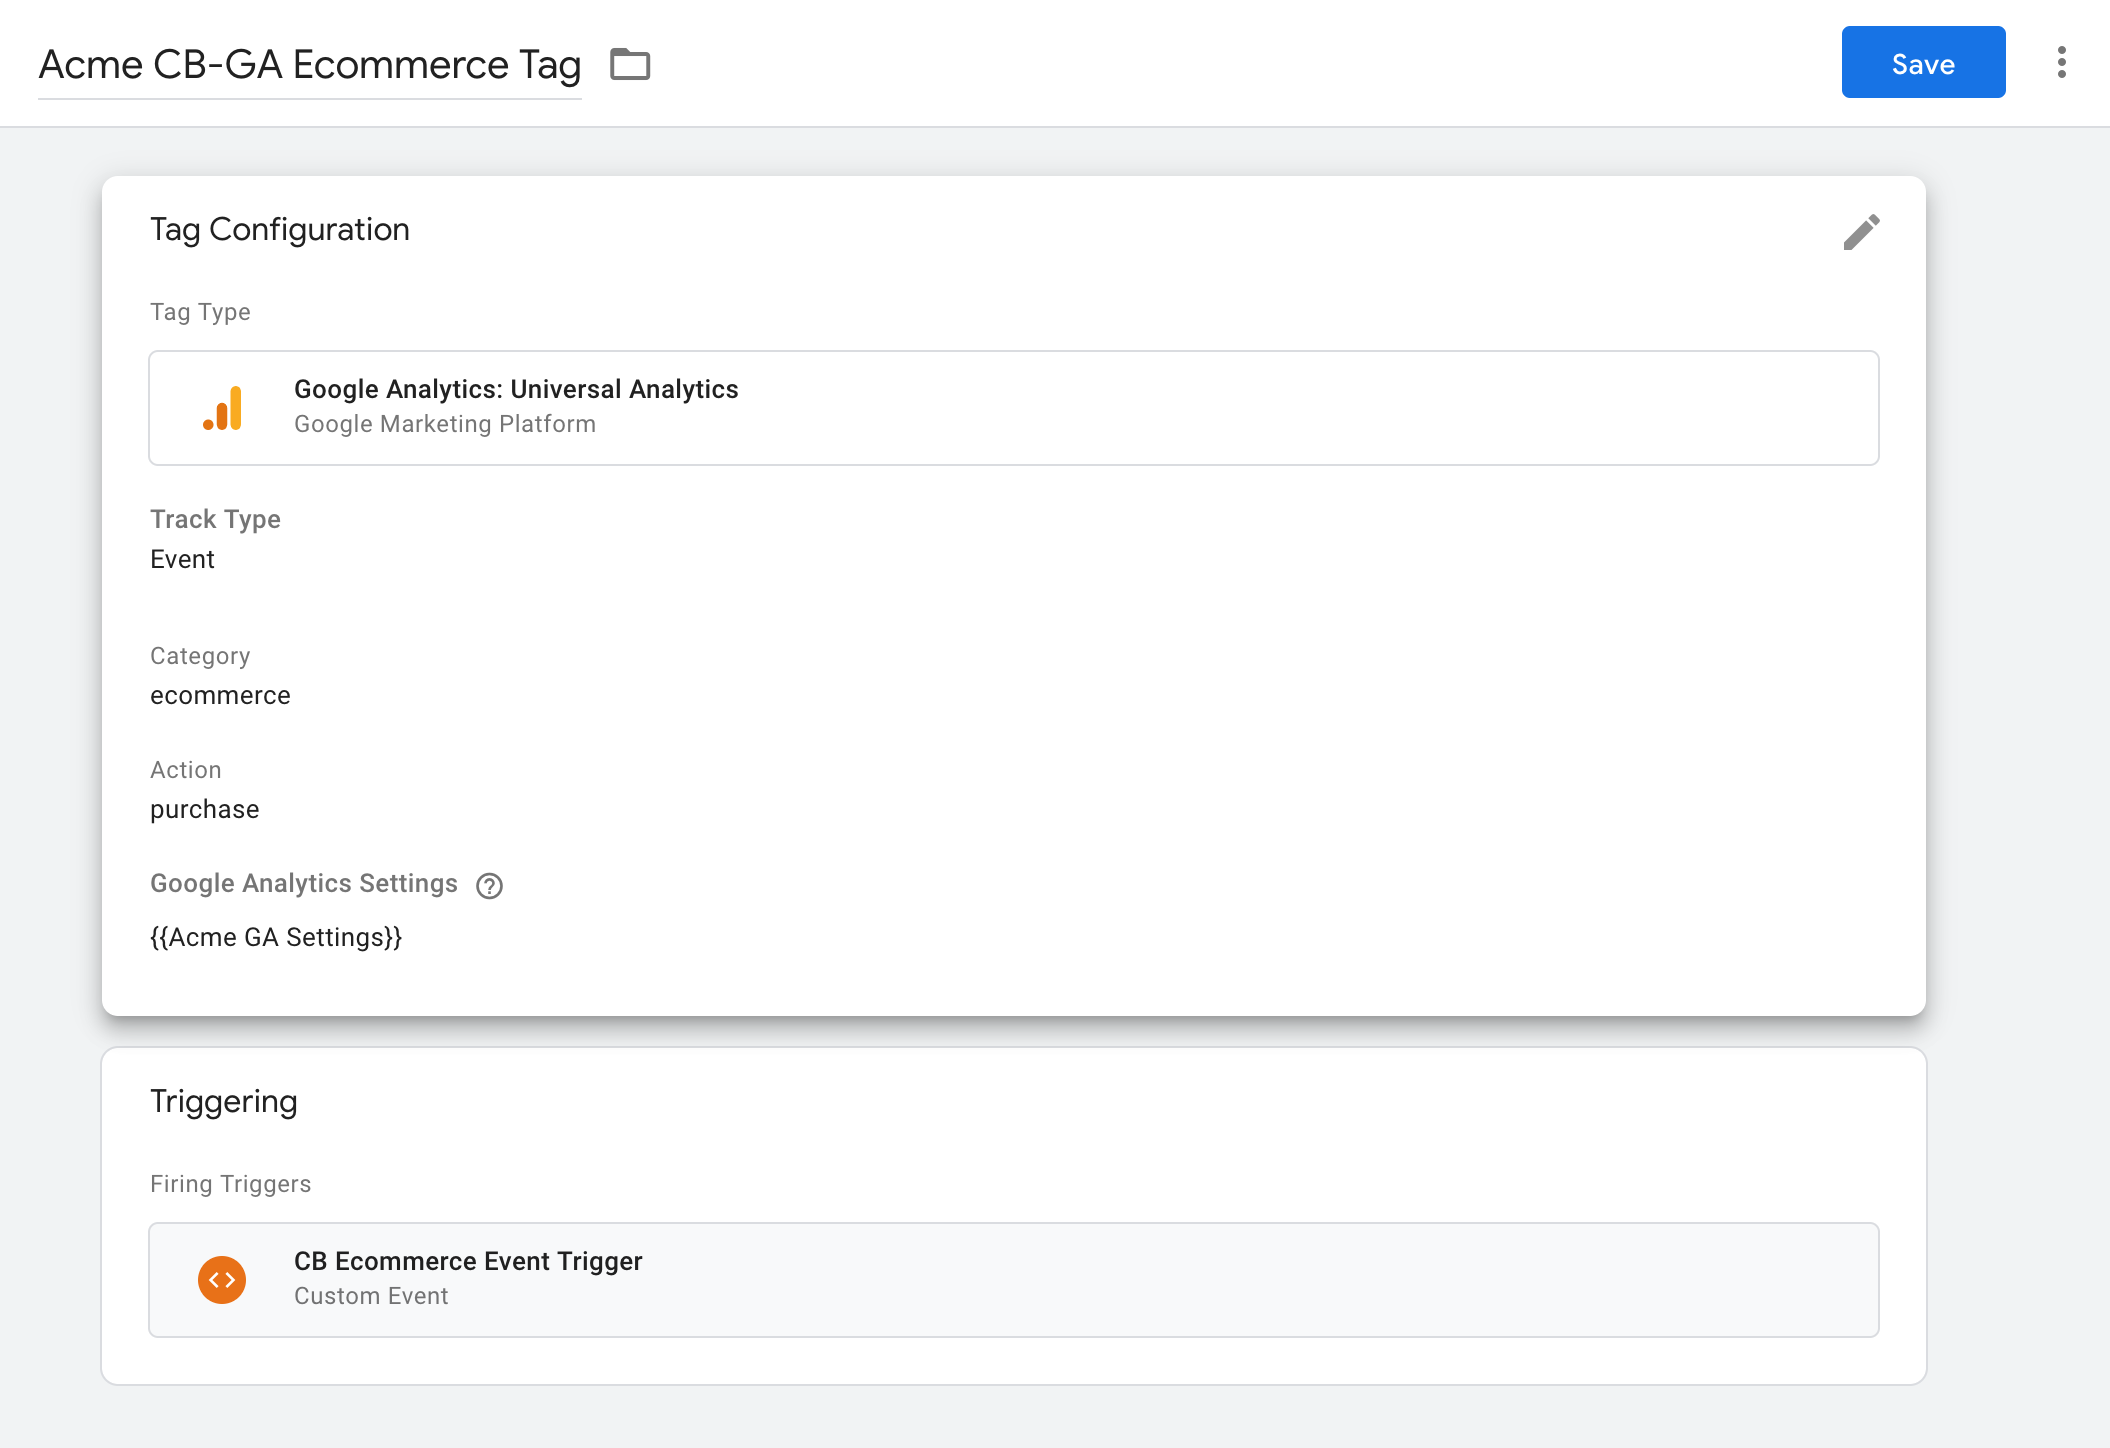
Whenever you make changes to the GTM configuration, ensure that you reload your site, ignoring cached content (i.e. hard refresh). The keyboard shortcuts are:
Mac: ⌘ + Shift + R
Windows/Linux: Ctrl + F5 or Ctrl + Shift + R
You can test your GA tag by checking real-time reports. Also, remember that it takes 24-48 hours to process non-real-time reports. See, checking your tag setup in Google Analytics .
The video below shows how to track purchase events by creating goals in GA.
The table below lists the events fired when the GTM integration is enabled.
| Event Category | Event Action | Triggered When |
|---|---|---|
| ecommerce (Note: Only triggered for in-app checkout and not for in-app portal) |
begin_checkout | The first screen of checkout appears showing the cart. |
| purchase | A successful paid checkout happens and a subscription is created or changed. This event has additional parameters as part of it. Note: This event is only sent when the domain where the checkout is invoked has been allow-listed. If not whitelisted, then the generate_lead event is sent in lieu of purchase. |
|
| engagement | generate_lead | A subscription has been created with a trial period and no payment has been made. Additionally, this event is triggered in lieu of the purchase event if the domain where the checkout is invoked has not been allow-listed. |
| cb-checkout | cart_screen | The first screen of checkout appears showing the cart. |
| add_account_info | The screen for entering the account details of the customer appears. | |
| add_billing_address | The screen for entering the billing address appears. | |
| edit_shipping_address | The shipping address entry screen appears. Also when the edit screen for shipping address appears. | |
| add_payment_method | The screen for entering the payment method details appears. | |
| add_subscription_cf_info | The screen for entering any custom fields is shown. | |
| review_screen | The summary screen for the sign-up is shown. | |
| edit_order_screen | When the order is edited. | |
| edit_account_info | When the account information edit screen is shown. | |
| edit_subscription_cf_info | When the custom field edit screen is displayed. | |
| edit_payment_method | When the payment method edit screen appears. | |
| thankyou_screen | When the final screen appears that prompts the user to close the window or redirects them to the redirect URL. Learn more about redirect URL while creating plans | |
| cb-portal | login | Login screen appears. |
| home | Manage Subscriptions screen appears. | |
| sub_details | Subscription details page is displayed. | |
| portal_edit_shipping_address | Edit shipping address screen is displayed. | |
| portal_choose_payment_method | Choose payment method screen is displayed. | |
| portal_add_payment_method | Add a payment method screen is displayed. | |
| portal_view_payment_method | A particular payment method is viewed. | |
| portal_payment_methods | The payment method lists screen is viewed. | |
| portal_edit_subscription_cf | Custom field edit screen is displayed. | |
| edit_subscription | The change subscription screen is displayed. | |
| add_addons | The screen for adding addons to a subscription is displayed. | |
| estimate_display_screen | The new order estimate screen is displayed. | |
| account_details | The details of the customer account are displayed. | |
| portal_edit_account | The edit account screen is displayed. | |
| portal_address | The billing/shipping address screen is displayed. | |
| portal_edit_billing_address | The billing address edit screen is displayed. | |
| portal_edit_shipping_address | The shipping address edit screen is displayed. | |
| sub_cancel | The subscription cancel screen is displayed. |
This table lists the additional parameters passed as part of the purchase event.
| Parameter | Description | |
|---|---|---|
| transaction_id | The unique id generated by Chargebee for the checkout or portal session. | |
| value | The invoice total. This is the invoiced amount after discounts and taxes. | |
| currency | The currency code (ISO 4217 format) for the invoice. | |
| tax | Total tax amount for this invoice. | |
| items | Array of products (plan and addons) ordered via Checkout. | |
Each array element for items is composed of the following:
| Parameter | Description |
|---|---|
| id | The id of the plan or addon. |
| name | Name of the plan or addon. |
| list_name | Always set to Chargebee checkout. |
| category | Either plan or addon depending on the product type. |
| price | The value depends on the pricing model of the plan/addon. Here's how: For per unit pricing model: the unit price of the plan or addon is set as the parameter value. For flat fee: the catalog price for the plan or addon is set here. For volume: the unit price of the tier the quantity falls under is set. For tiered and stairstep: the average unit price of the plan or addon, determined as (catalog price ÷ quantity) is set. |
| quantity | The quantity of the product purchased. It is set to 1 when the pricing model is a flat fee. |
